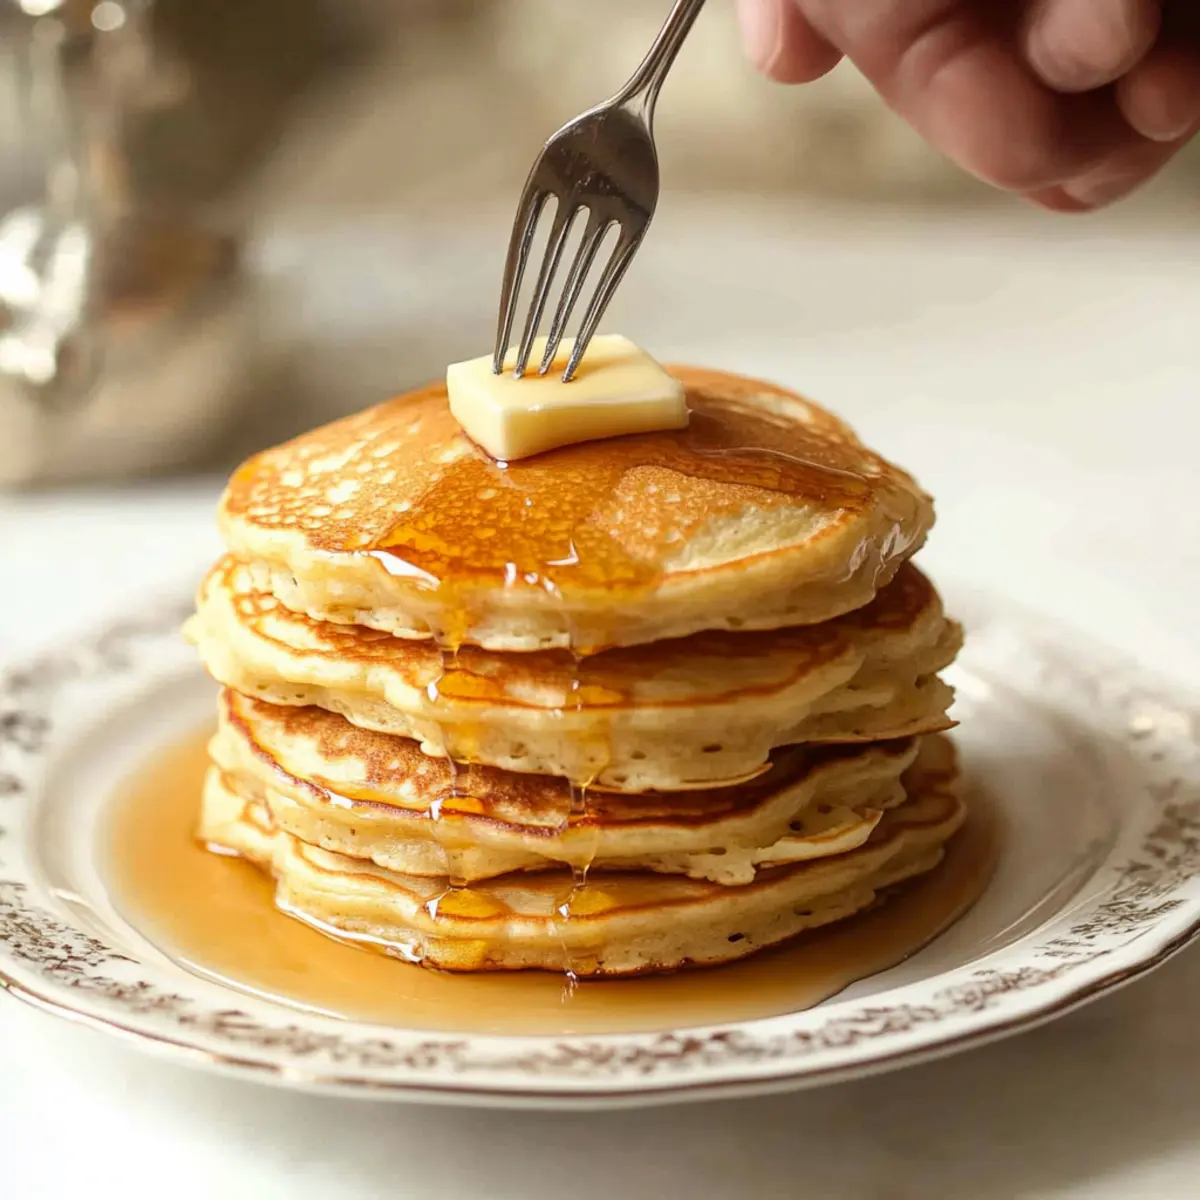
As I flipped the last pancake, the kitchen filled with an aroma that felt like a warm embrace, taking me back to my childhood breakfasts. These Fluffy Old Fashioned Buttermilk Pancakes promise to transform your mornings with their tender, airy texture and rich buttery flavor that’s simply irresistible. Ditch the boxed mixes and savor the satisfaction of crafting this homemade delight from scratch. Not only are these pancakes quick to whip up, but they make for an impressive centerpiece at your family’s cozy weekend brunch. Imagine drizzling warm maple syrup over a stack of golden delights, an experience that’s as heartwarming as it is delicious. Ready to uncover the secret to pancake perfection? Let’s dive in!
Why Are These Pancakes So Special?
Homemade Delicacy: There’s something magical about pancakes made from scratch that store-bought mixes simply can’t match. Airy Texture: Whipping egg whites ensures these pancakes are extraordinarily light and fluffy, creating a delightful bite. Versatile Variations: Feel free to customize your pancakes with blueberries or flavored extracts for a twist on the classic. Time-Saving Wonder: Whip these up in under 30 minutes, making them a perfect option for busy mornings. Crowd Favorite: These pancakes are guaranteed to impress guests or loved ones, turning any breakfast into a celebration! Plus, don’t forget to check out our Serving Suggestions for the ultimate pancake experience!
Fluffy Old Fashioned Buttermilk Pancake Ingredients
• Gather these essentials for pancake success!
For the Batter
- 2 large eggs (separated) – Separating the egg whites is key to achieving that fluffy texture.
- 2 ¼ cups buttermilk – This is essential for moist, tender pancakes; do not substitute with regular milk!
- ¼ cup unsalted butter (melted) – Adds richness; be sure it’s slightly cooled for the best results.
- 2 teaspoons vanilla extract – Use pure extract for a depth of flavor that elevates the dish.
- ¼ cup granulated sugar – Adjust to your sweetness preference; it balances the flavorful richness.
- 2 ¼ cups all-purpose flour – Forms the base of your pancakes; stick with all-purpose for that fluffy goodness.
- 2 teaspoons baking powder – Freshness matters here; it provides the lift these pancakes need.
- 1 teaspoon baking soda – Works in tandem with buttermilk for super fluffy pancakes.
- 1 teaspoon salt – A small amount enhances all the flavors in these delightful pancakes.
Treat yourself to the best fluffy Old Fashioned Buttermilk Pancakes, and let the comforting warmth of homemade breakfast become a cherished ritual!
Step‑by‑Step Instructions for Fluffy Old Fashioned Buttermilk Pancakes
Step 1: Separate Eggs
Begin by separating the egg yolks from the whites, placing the yolks in a large mixing bowl and the whites in a separate clean bowl. This step is crucial for achieving fluffy Old Fashioned Buttermilk Pancakes, so take care to avoid any yolk in the egg whites, ensuring they whip up perfectly.
Step 2: Combine Wet Ingredients
In the bowl with the egg yolks, whisk together the buttermilk, melted butter, and vanilla extract. Mix these ingredients thoroughly until they’re well blended and smooth. This mixture will be the base for your batter, making your pancakes rich and flavorful.
Step 3: Mix Dry Ingredients
In another bowl, combine the all-purpose flour, granulated sugar, baking powder, baking soda, and salt. Whisk these dry ingredients together until they are evenly mixed. This step ensures that the leavening agents are well distributed, which is key for the fluffy texture of the pancakes.
Step 4: Incorporate Dry into Wet
Gradually add the dry mixture to the wet ingredients, stirring gently until just combined. Be careful not to overmix; small lumps are perfectly fine. This gentle folding method will keep your batter light and is essential for producing fluffy Old Fashioned Buttermilk Pancakes.
Step 5: Whip Egg Whites
In the bowl with the egg whites, use a hand mixer to beat them until soft peaks form, which should take about 4-5 minutes. This incorporation of air is vital for the fluffiness, so ensure you achieve that perfect peak before moving on to the next step.
Step 6: Fold Egg Whites
Gently fold the whipped egg whites into the pancake batter, taking care not to overmix. This method adds volume and airiness to your batter, giving those pancakes their signature fluffy texture. The goal is to incorporate them fully while maintaining as much air as possible.
Step 7: Rest the Batter
Allow the batter to sit for 10-15 minutes at room temperature. This resting period is essential for thickening the batter, resulting in even fluffier Fluffy Old Fashioned Buttermilk Pancakes. While you wait, you can prepare your cooking surface.
Step 8: Cook Pancakes
Heat a nonstick skillet or griddle over medium heat and add a drizzle of oil to coat. Once hot, pour 1/3 cup of batter for each pancake onto the skillet. Cook until bubbles form on the surface, then flip to achieve a golden brown color on both sides, around 2-3 minutes per side.
Step 9: Serve
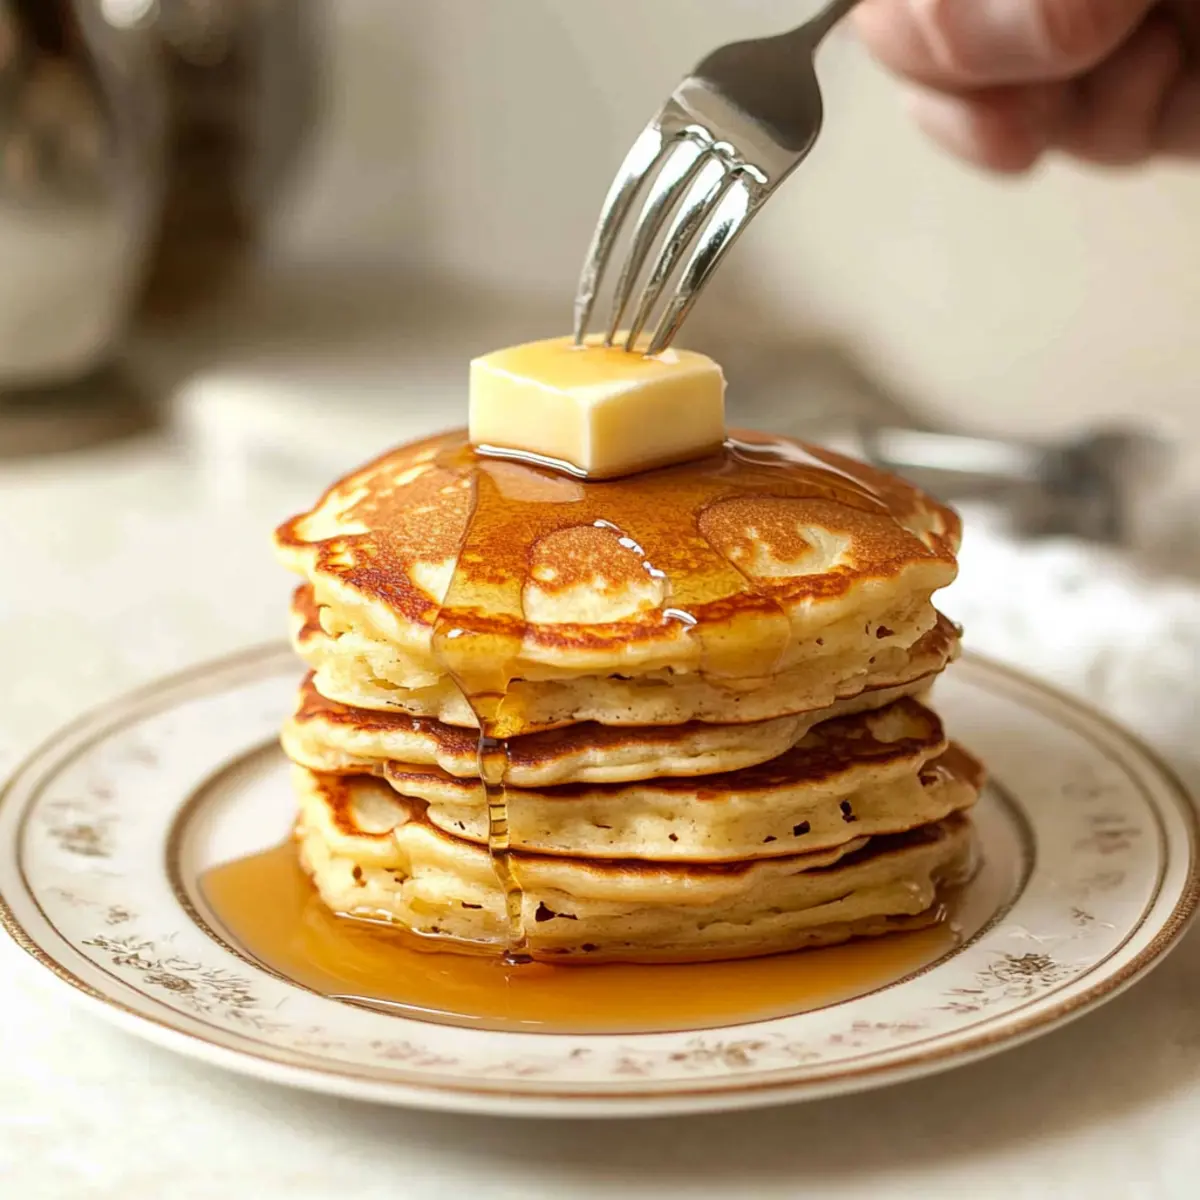
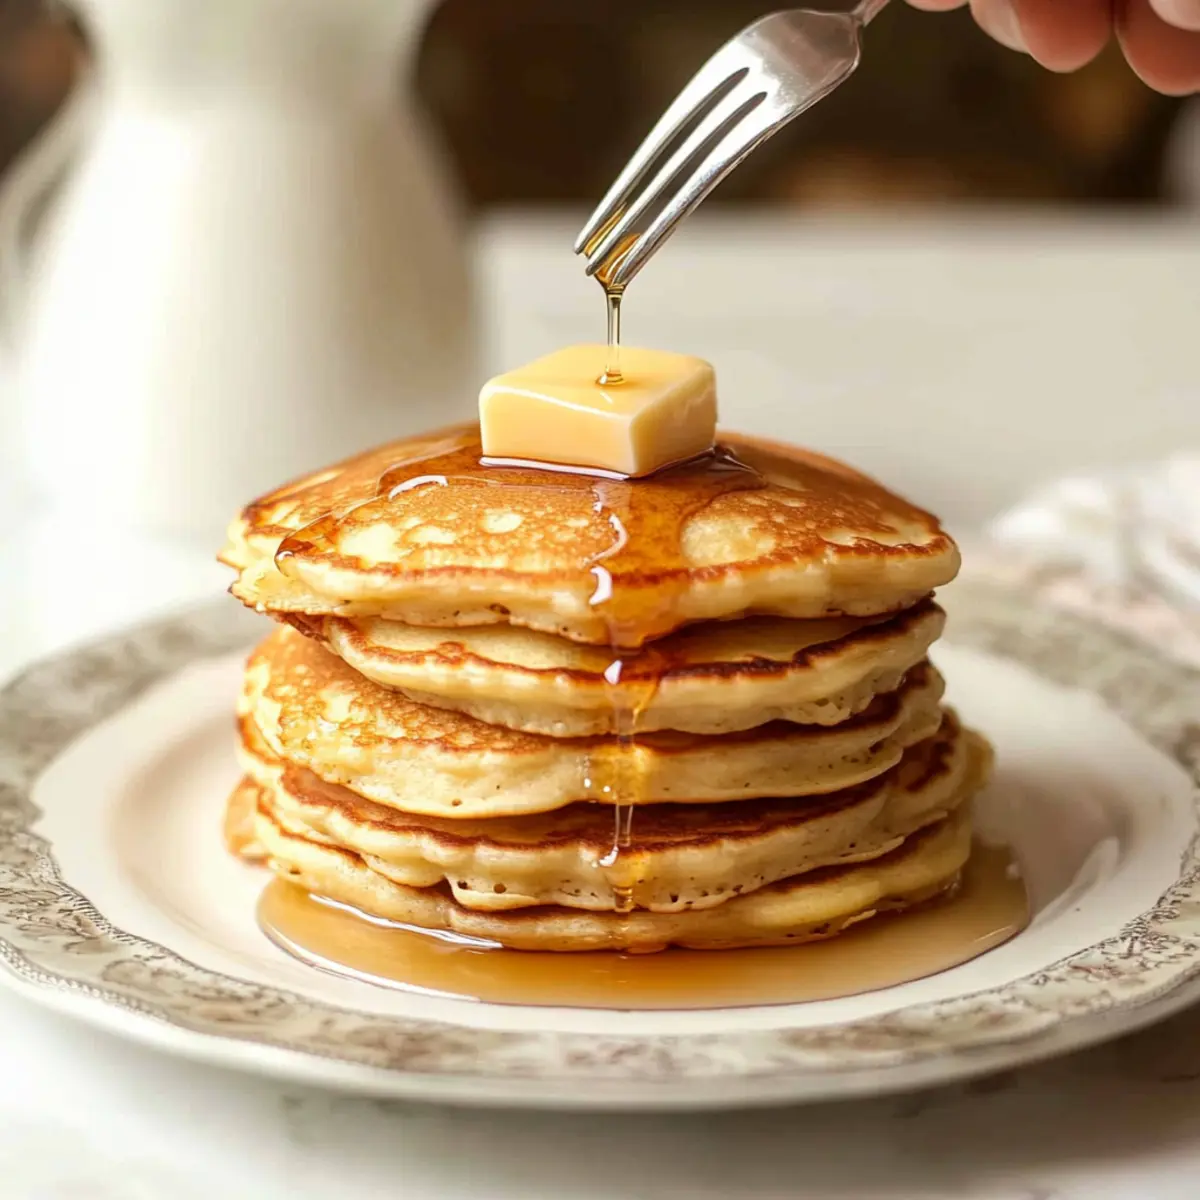
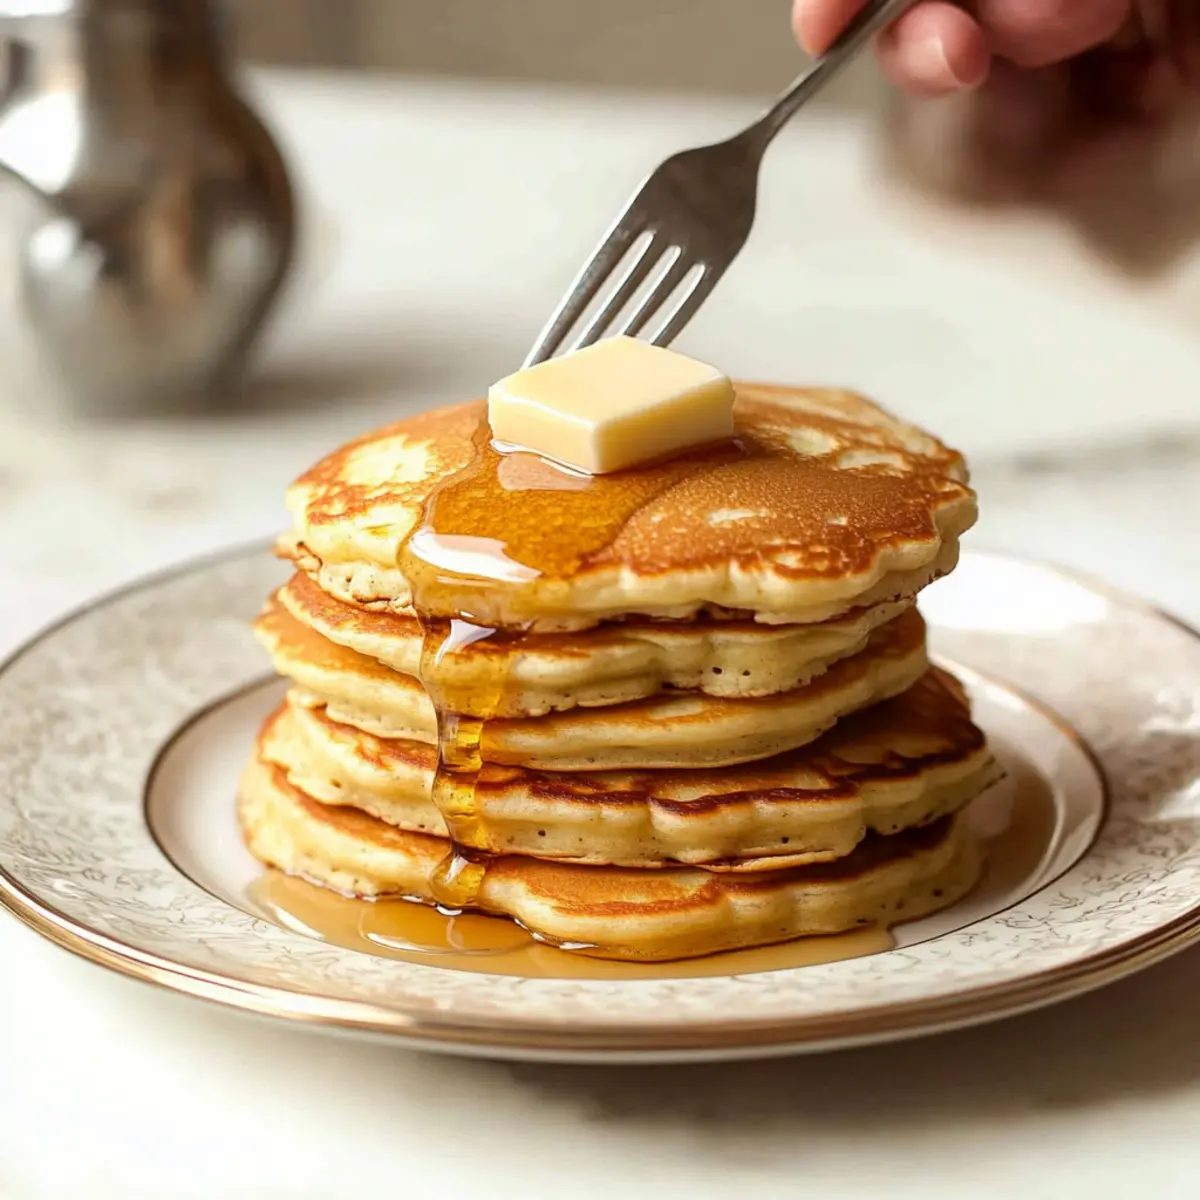
Once cooked, stack your pancakes high and serve warm, generously topped with butter and maple syrup. Feel free to add any of your favorite toppings like fresh fruit or whipped cream for a delightful breakfast treat that everyone will love.
What to Serve with Fluffy Old Fashioned Buttermilk Pancakes
Imagine the perfect breakfast spread that elevates your pancake experience to new heights, where every bite is a comforting delight.
- Fresh Berries: Add a burst of flavor with strawberries, blueberries, or raspberries; their sweetness pairs perfectly with buttermilk’s tang.
- Whipped Cream: Light and airy, this topping adds a touch of indulgence and creaminess, enhancing the overall pancake experience.
- Crispy Bacon: The salty crunch of crispy bacon balances the sweetness of the pancakes, creating a delightful contrast.
- Maple Syrup: A classic choice, rich maple syrup clings to pancakes, offering warmth and depth to each fluffy stack.
- Nut Butter: Spread creamy almond or peanut butter for a nutritious twist that adds healthy fats and satisfying protein.
- Eggs Any Style: Serve alongside scrambled or poached eggs for a complete breakfast; their savory notes complement sweet pancakes beautifully.
- Fruit Compote: Drizzle homemade or store-bought fruit compote for an extra layer of flavor, transforming breakfast into a gourmet experience.
- Iced Coffee or Tea: Enjoy a refreshing cold brew or herbal iced tea alongside your pancakes; the chill adds contrast to the warm meal.
- Chocolate Chips: Fold chocolate chips into the batter or sprinkle on top for a sweet, decadent twist that kids will love!
Expert Tips for Fluffy Old Fashioned Buttermilk Pancakes
- Real Buttermilk Matters: Using authentic buttermilk enhances flavor and texture; avoid substitutions for the best results.
- Perfectly Whipped Whites: Beat your egg whites to soft peaks; this is crucial for achieving that delightful fluffiness in your pancakes.
- Don’t Overmix: When combining wet and dry ingredients, mix until just combined. Overmixing will lead to dense pancakes instead of fluffy ones.
- Rest is Key: Allowing the batter to sit for 10-15 minutes thickens it, ensuring extra airy and fluffy Old Fashioned Buttermilk Pancakes.
- Watch the Heat: Cook pancakes on medium heat for even cooking; too high can burn the outside while leaving the inside gooey.
Make Ahead Options
These Fluffy Old Fashioned Buttermilk Pancakes are perfect for meal prep enthusiasts looking to save time on busy mornings! You can prepare the batter up to 24 hours in advance; simply mix the wet and dry ingredients separately, then combine them—just don’t fold in the whipped egg whites until you’re ready to cook. To maintain their airy texture, refrigerate the batter in an airtight container. When it’s time to serve, gently fold in the whipped egg whites and let the batter rest for 10-15 minutes before cooking. With these make-ahead options, you’ll enjoy delicious pancakes with minimal effort, turning breakfast into a delightful experience!
Variations for Old Fashioned Buttermilk Pancakes
Feel free to let your creativity shine as you customize these delicious pancakes to suit your taste buds!
- Blueberry Delight: Fold in fresh or frozen blueberries before cooking for a burst of fruity flavor in each fluffy bite.
- Whole Wheat Twist: Swap half of the all-purpose flour with whole wheat flour for a heartier texture while keeping them light.
- Almond Essence: Substituting liquid vanilla for almond extract gives a nutty undertone that pairs beautifully with maple syrup.
- Cinnamon Spice: Add a teaspoon of ground cinnamon to the dry ingredients for some added warmth and comforting spice.
- Chocolate Chip Medley: Mix in chocolate chips for a decadent treat that’s perfect for special mornings. Imagine waking up to sweet, melty pockets of chocolate!
- Zesty Lemon: Incorporate lemon zest into the batter for a refreshing citrus twist—perfect for brightening your breakfast.
- Savory Spin: For a twist on the classic, try adding chopped herbs and cheese for fluffy pancakes ideal for brunch or as a side dish.
- Spicy Kick: For those who love heat, sprinkle in some cayenne or chopped jalapeños to the batter for a unique spicy pancake experience.
Each variation opens new doors to deliciousness, so don’t hesitate to explore and discover your favorite combination! And while you’re considering what to create next, check out our Serving Suggestions for ideas on how to complement these delightful pancakes!
How to Store and Freeze Fluffy Old Fashioned Buttermilk Pancakes
Fridge: Store leftover pancakes in an airtight container for up to 4-5 days. When ready to eat, simply reheat in a skillet over low heat or in the microwave for a quick breakfast.
Freezer: For longer storage, freeze pancakes separated by parchment paper in a freezer-safe bag for up to 2 months. This prevents sticking and makes it easy to grab just what you need.
Reheating: To reheat, use a toaster, toaster oven, or microwave. If using a microwave, add a damp paper towel to prevent drying out. Enjoy your homemade fluffy Old Fashioned Buttermilk Pancakes anytime!
Room Temperature: Avoid leaving pancakes at room temperature for more than 2 hours to ensure safety and quality.
Fluffy Old Fashioned Buttermilk Pancakes Recipe FAQs
How can I tell if my buttermilk is still good to use?
Absolutely! Check for any off smells, discoloration, or clumps. Fresh buttermilk should have a slightly tangy aroma and a smooth texture. If you notice any dark spots or it doesn’t smell right, it’s best to discard it for the sake of the pancakes!
What’s the best way to store leftover pancakes?
Very! Store any leftover pancakes in an airtight container in the refrigerator for up to 4-5 days. For the best texture, take them out and reheat them in a skillet over low heat to maintain their fluffiness.
Can I freeze Fluffy Old Fashioned Buttermilk Pancakes?
Of course! To freeze, stack your pancakes with parchment paper between each one to prevent sticking. Place them in a freezer-safe bag or container, and they can last up to 2 months. When you’re ready to enjoy them, simply reheat in the toaster or microwave, adding a damp paper towel if microwaving to keep them moist.
Why did my pancakes turn out dense instead of fluffy?
It happens to the best of us! The most common reasons include overmixing the batter or not whipping the egg whites to the right consistency. Remember, you want to mix until just combined—small lumps are perfectly fine. Also, make sure to beat the egg whites until soft peaks form; this step is crucial for achieving that delightful fluffy texture.
Can I make these pancakes dairy-free or gluten-free?
Absolutely! For a dairy-free option, you can substitute buttermilk with almond milk mixed with a tablespoon of vinegar or lemon juice to mimic the acidity. For gluten-free pancakes, use a gluten-free all-purpose flour blend. Just ensure any substitute mirrors the texture and flavor profile for the best results.
Can I give leftover pancakes to my dog?
While it may be tempting, it’s best to avoid giving pancakes to your dog, mainly due to the ingredients like sugar and butter that aren’t ideal for them. If you want to share a treat, consider making them a simple pancake with just plain flour and water for occasional special spoils.
Fluffy Old Fashioned Buttermilk Pancakes for Cozy Mornings
Ingredients
Equipment
Method
- Separate the egg yolks from the whites, placing the yolks in a large mixing bowl and the whites in a separate clean bowl.
- In the bowl with the egg yolks, whisk together the buttermilk, melted butter, and vanilla extract until well blended.
- In another bowl, combine the all-purpose flour, granulated sugar, baking powder, baking soda, and salt, and whisk together.
- Gradually add the dry mixture to the wet ingredients, stirring gently until just combined.
- In the bowl with the egg whites, beat them with a hand mixer until soft peaks form, about 4-5 minutes.
- Gently fold the whipped egg whites into the pancake batter.
- Allow the batter to sit for 10-15 minutes at room temperature.
- Heat a nonstick skillet or griddle over medium heat and add a drizzle of oil. Pour 1/3 cup of batter onto the skillet for each pancake.
- Cook until bubbles form on the surface, then flip to achieve a golden brown color on both sides, about 2-3 minutes per side.
- Stack pancakes and serve warm, topped with butter and maple syrup.