Get my cookbooks

Cozy Up with Pumpkin Spice Latte Cake: A Fall Delight

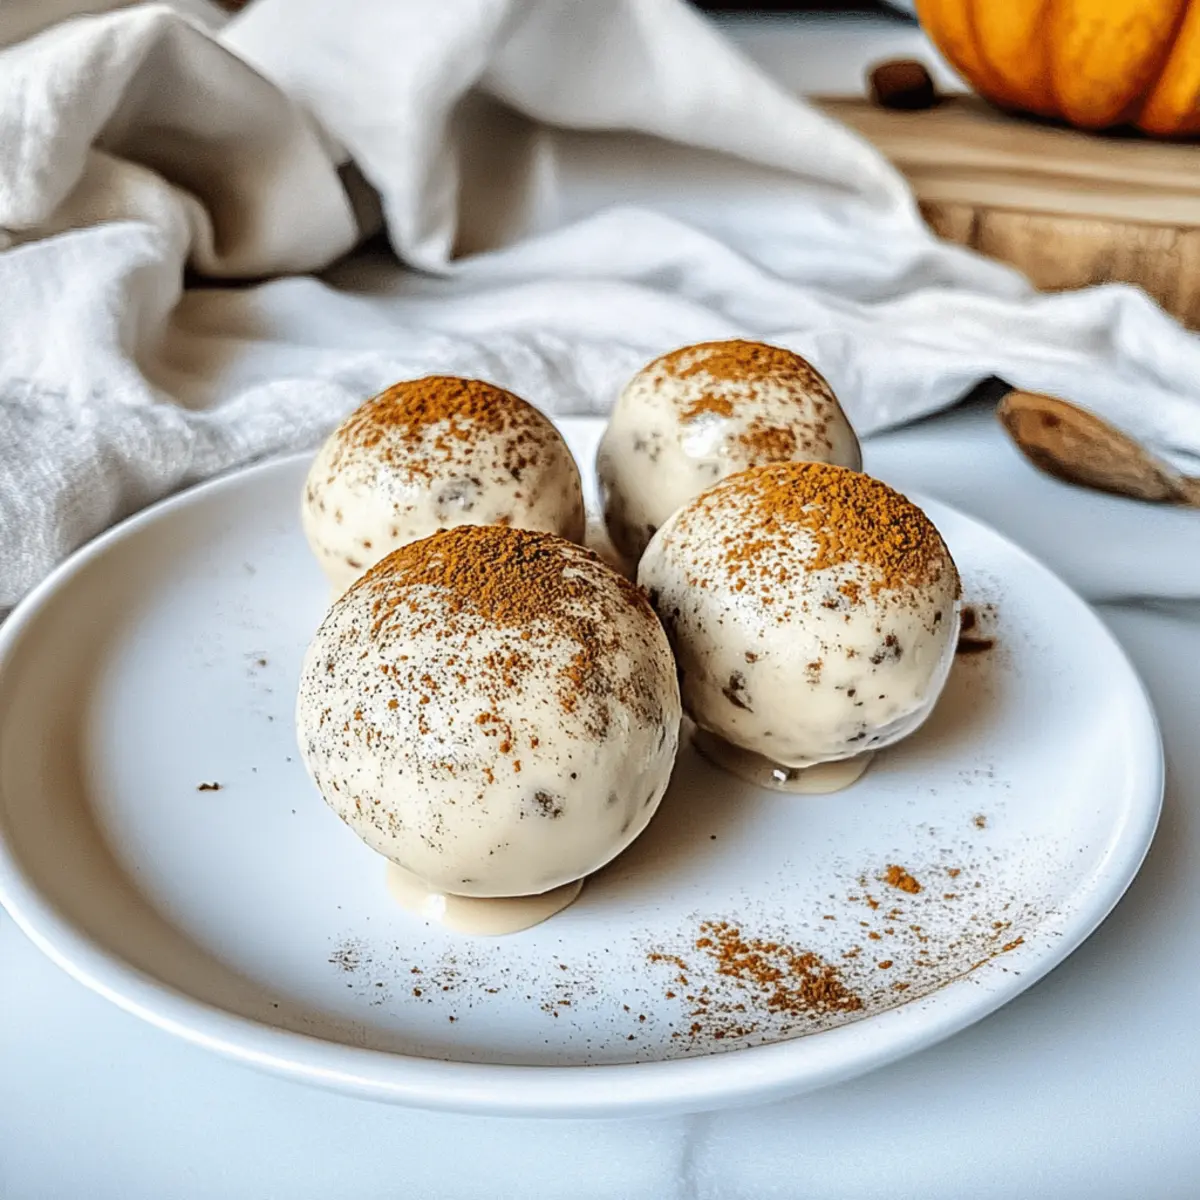
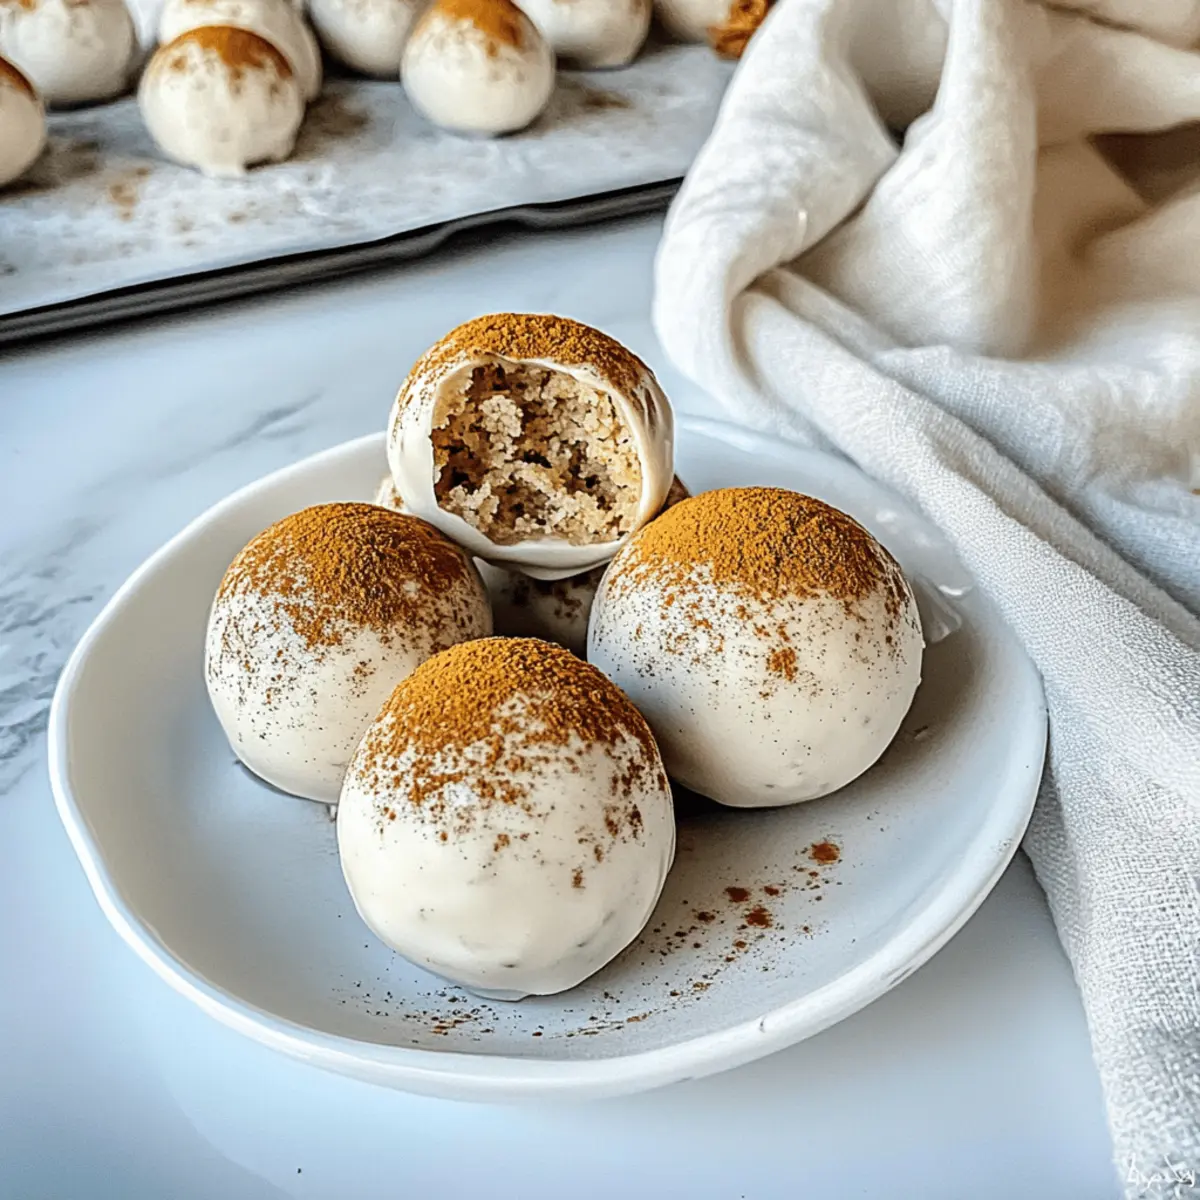
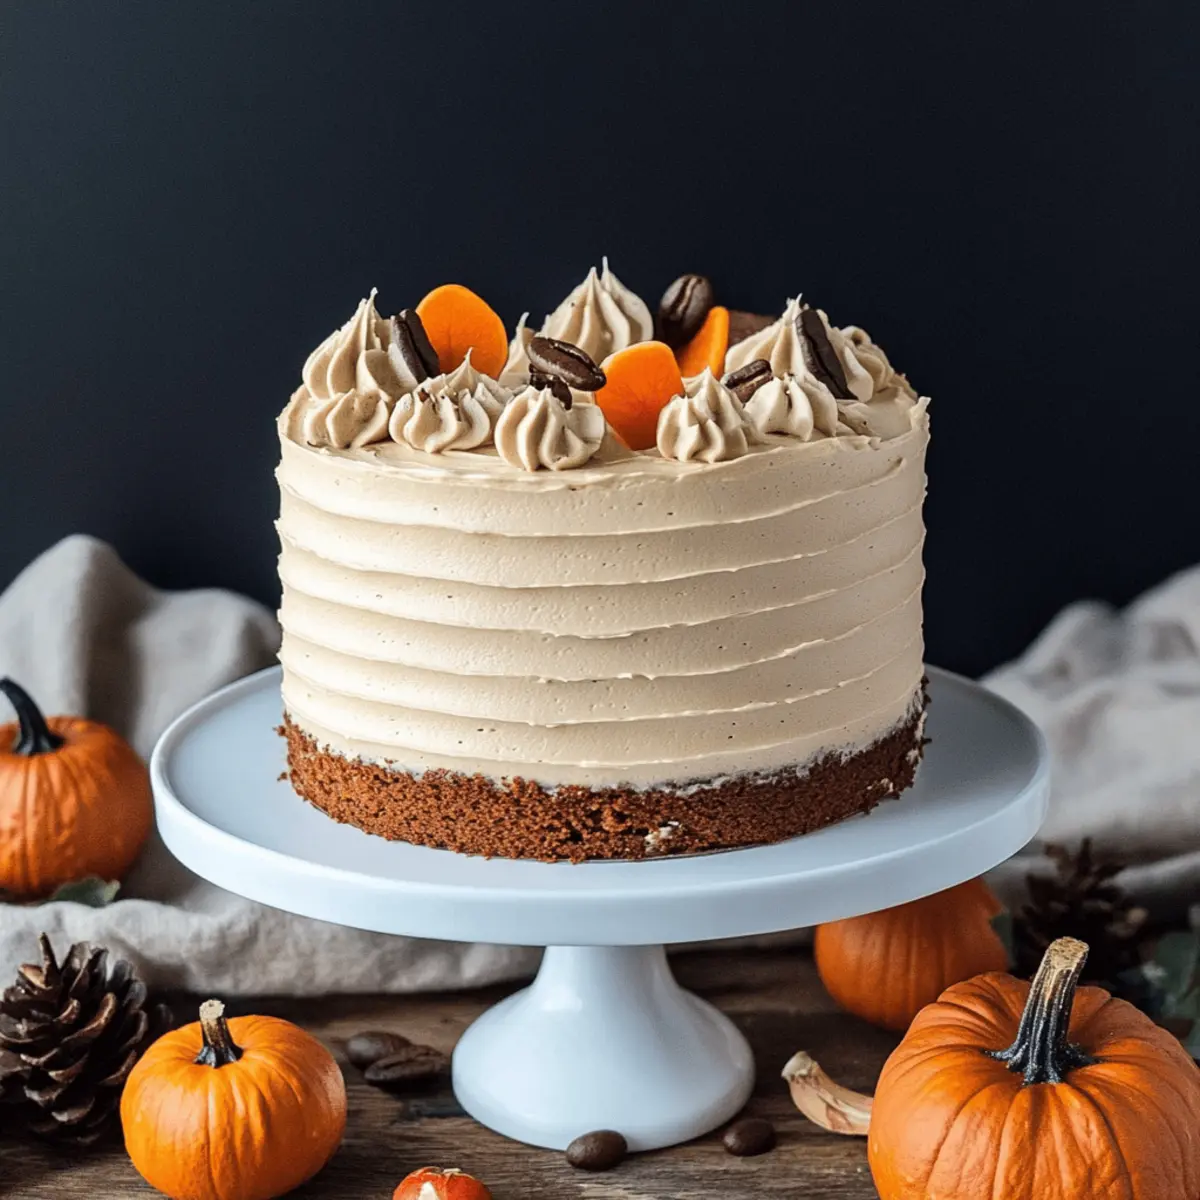
As I poured that first sip of rich espresso into the pumpkin-laden batter, a warm wave of autumn nostalgia washed over me. This Pumpkin Spice Latte Cake is more than just a dessert; it’s a heartfelt celebration of fall that will elevate any gathering. With its moist, tender crumb infused with signature pumpkin spice and slathered in luscious espresso buttercream, this cake offers the perfect combination of cozy comfort and indulgent delight. It’s a quick and impressive treat, allowing you to create memories without spending hours in the kitchen. Ready to turn your kitchen into a fall haven? Let’s dive into the sweet aromas and flavors that await you with every layered slice!

Why is Pumpkin Spice Cake a Must-Try?

Comforting, Cozy Flavors: Each bite of this Pumpkin Spice Latte Cake delivers the nostalgic taste of fall, making it a seasonal favorite that evokes warm memories.

Easy Preparation: This cake requires just a few essential ingredients and straightforward steps, so you can whip it up without any fuss.

Versatile Options: Whether you prefer a cream cheese frosting or want to experiment with variations like nutty pecans, the possibilities are endless!

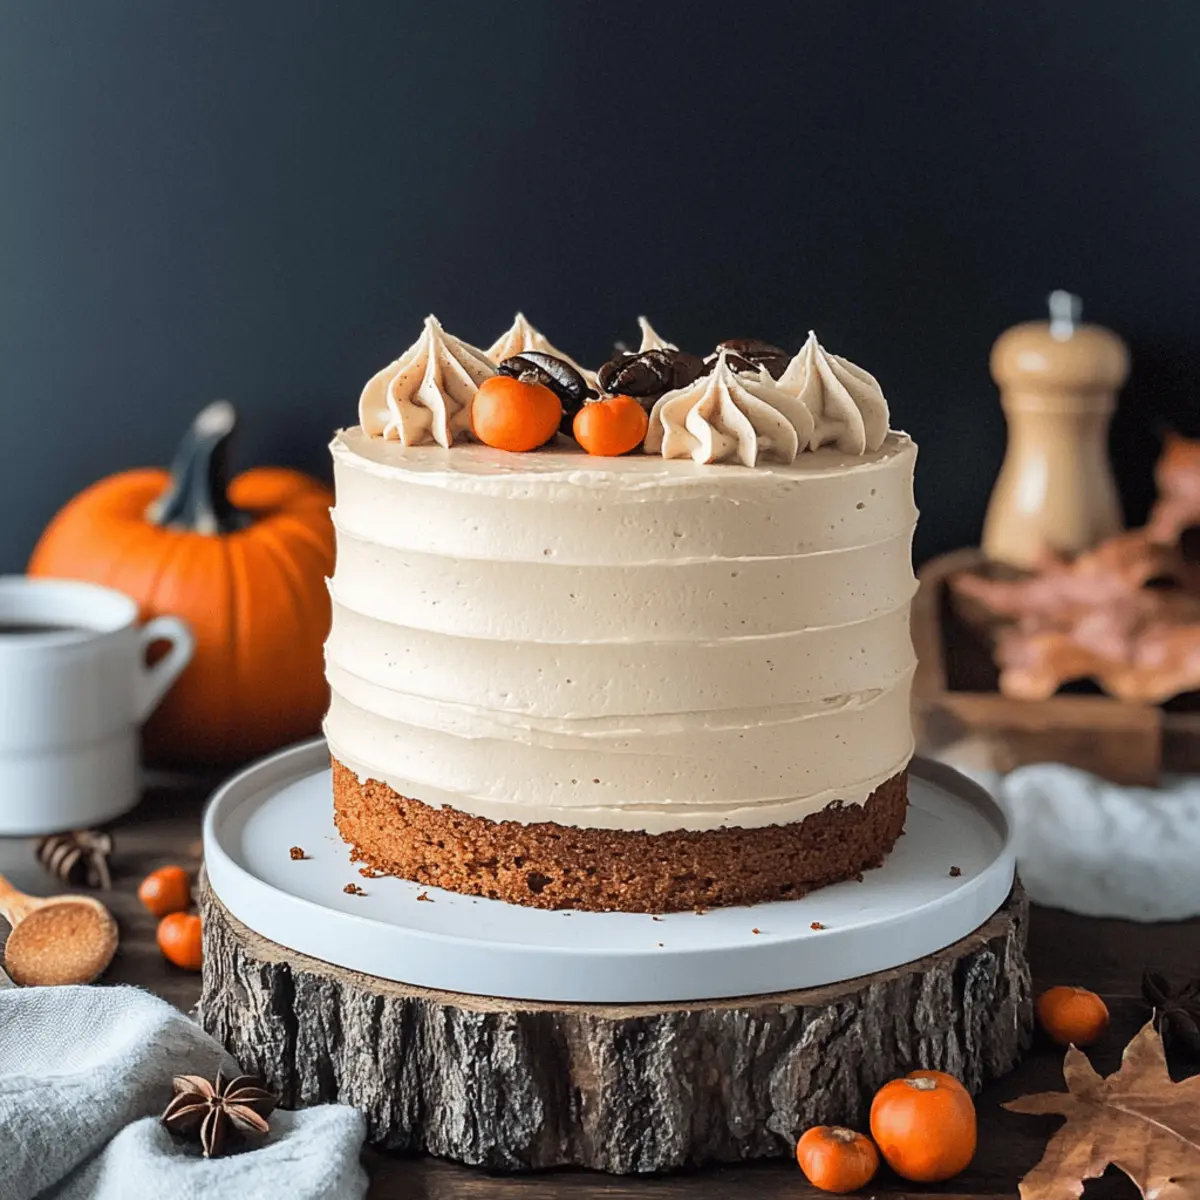
Perfect for Gatherings: Its visually stunning layers and delightful flavor make it an ideal centerpiece for any autumn gathering. Plus, why not pair it with a dollop of whipped cream and a sprinkle of cinnamon for that wow factor?

For more seasonal inspiration, check out our delightful Easter Poke Cake or indulge in the flavors of our Strawberry Cheesecake Dump.

Pumpkin Spice Latte Cake Ingredients

• Here’s what you’ll need to create this delicious fall-inspired treat!

For the Cake

  • All-purpose flour – Provides the structure and base for the cake; consider using cake flour for a lighter texture.
  • Baking powder – Acts as a leavening agent to help the cake rise; make sure it’s fresh for best results.
  • Pumpkin pie spice – Infuses the cake with warm fall flavors; you can substitute it with a mix of cinnamon, nutmeg, and ginger if needed.
  • Salt – Enhances all the flavors in the cake; it’s essential to balance the sweetness.
  • Unsalted butter – Adds moisture and richness; for a dairy-free option, margarine works well.
  • Vegetable oil – Helps retain moisture without altering the cake’s flavor; melted coconut oil is a good substitute.
  • Granulated sugar/light-brown sugar – Sweetens the cake and adds moisture; consider coconut sugar for a lower glycemic option.
  • Pumpkin puree – The star of this Pumpkin Spice Latte Cake; ensure it’s pure pumpkin, not spiced pie filling.
  • Eggs – Provide binding and stability; using room temperature eggs yields better results.

For the Espresso Buttercream

  • Egg whites – Key for achieving the right consistency in your buttercream; make sure they are yolk-free to form stiff peaks.
  • Instant espresso powder – Boosts the coffee flavor in the buttercream; substitute strong brewed coffee if necessary.
  • Granulated sugar – Sweetens the buttercream; it should dissolve easily when whisked over a hot water bath.
  • Unsalted butter – Adds creaminess and structure to your buttercream; ensure it’s at room temperature for smooth mixing.

Step‑by‑Step Instructions for Pumpkin Spice Latte Cake

Step 1: Prepare Cake Pans
Preheat your oven to 350°F (175°C) and grease two 6-inch cake pans with baking spray or softened butter. Make sure to dust them lightly with flour, tapping out any excess. This will prevent the cakes from sticking. Set the prepared pans aside while you gather and mix the dry ingredients for the delicious Pumpkin Spice Latte Cake.

Step 2: Mix Dry Ingredients
In a large mixing bowl, whisk together the all-purpose flour, baking powder, pumpkin pie spice, and salt until evenly combined. This step is crucial for ensuring that the leavening agent is well-distributed, which helps your cake rise beautifully. The aromatic spices will invoke that lovely fall scent, making your kitchen feel cozy and inviting as you prepare your pumpkin spice latte cake.

Step 3: Combine Wet Ingredients
In another bowl, mix together the granulated sugar, light-brown sugar, melted unsalted butter, vegetable oil, pumpkin puree, and eggs. Use a whisk or an electric mixer to blend until the mixture is smooth and well-combined. The combination of these ingredients creates a moist batter that forms the base of your Pumpkin Spice Latte Cake, reflecting the classic flavors of fall.

Step 4: Combine Mixtures
Gradually add the dry ingredient mixture to the wet ingredients, mixing gently until just combined. Be careful not to overmix; it’s okay if a few flour streaks remain. Overmixing can result in a dense texture. Your batter should be thick and aromatic, ready to be divided into the prepared cake pans for baking.

Step 5: Bake the Cake
Divide the batter evenly between the two prepared cake pans. Bake in the preheated oven for 35-40 minutes, or until a toothpick inserted into the center comes out clean or with a few moist crumbs attached. This is the moment you can savor the delicious scents wafting through your kitchen as your Pumpkin Spice Latte Cake rises to perfection.

Step 6: Cool the Cake Layers
Once baked, remove the cake pans from the oven and let them cool in the pans for about 10 minutes. Carefully transfer the cakes to wire racks to cool completely. This cooling stage is important to avoid melting your espresso buttercream when you layer it on. Enjoy watching the cakes settle and become perfectly moist.

Step 7: Make Espresso Buttercream
To prepare the espresso buttercream, whisk the egg whites and sugar together in a bowl over a hot water bath until the sugar dissolves. Once the mixture is warm to the touch, remove it from heat and whip until stiff peaks form. Gradually mix in the room temperature unsalted butter and instant espresso powder until the buttercream is light, fluffy, and smooth, perfect for layering on your Pumpkin Spice Latte Cake.

Step 8: Assemble the Cake
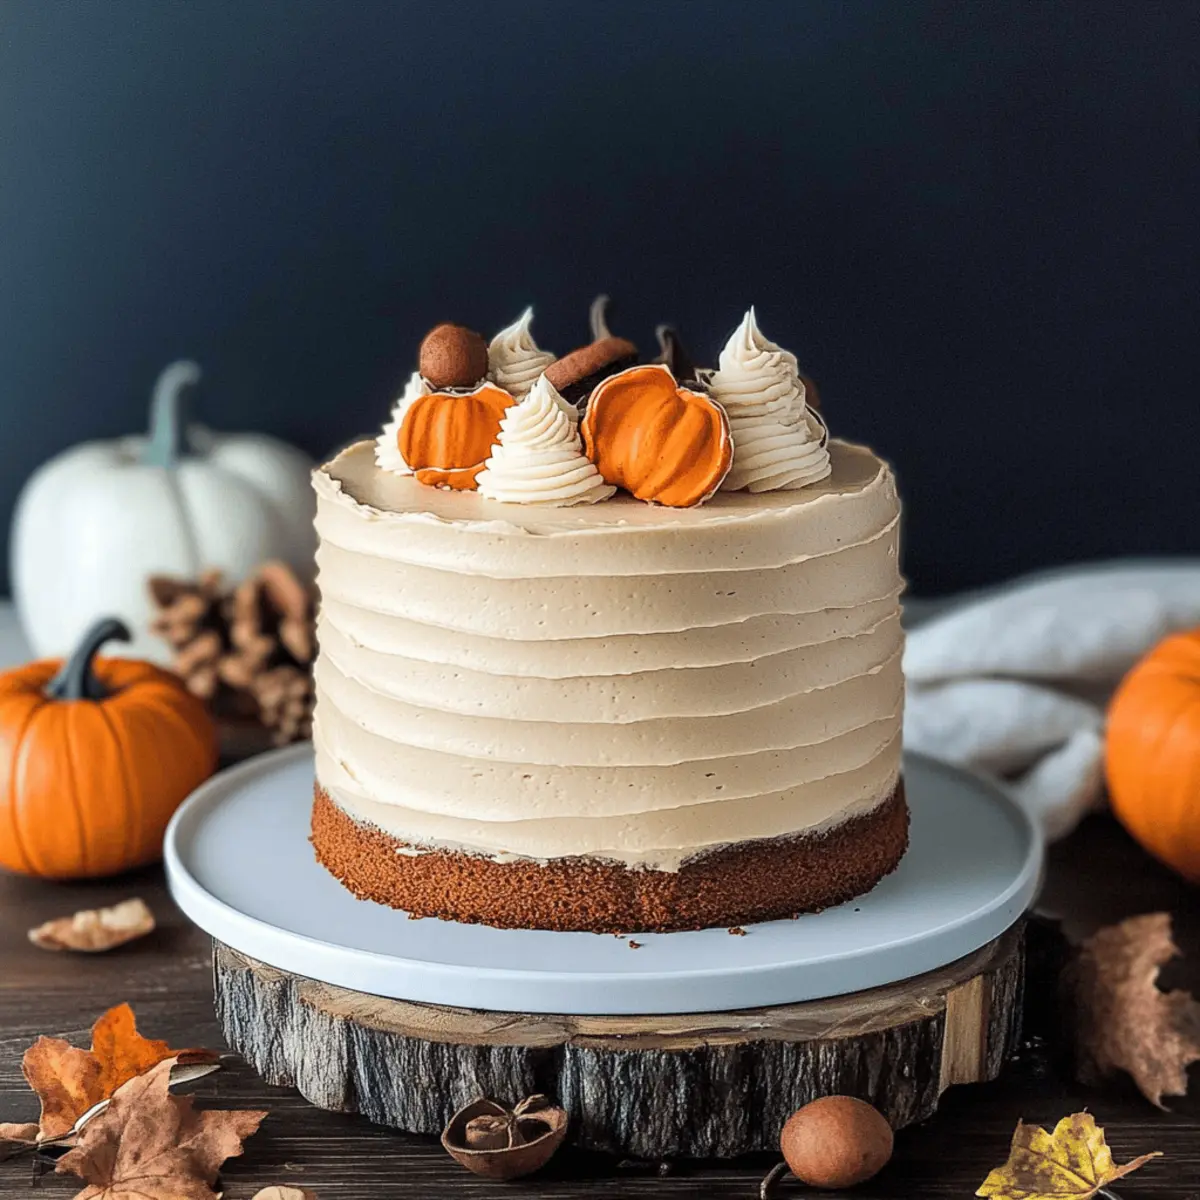
To assemble, carefully cut each cooled cake layer in half horizontally, creating four even layers. Stack two layers on a serving platter, spreading a layer of espresso buttercream between them. Crumb coat the entire cake with a thin layer of buttercream to seal in crumbs, then apply a thicker layer on top and around the sides. Finish with decorative swirls of buttercream, showcasing the delightful Pumpkin Spice Latte Cake you’ve just crafted.

Pumpkin Spice Latte Cake Variations

Feel free to get creative and customize this delightful cake to fit your taste and dietary needs!

  • Dairy-Free: Substitute unsalted butter with a dairy-free margarine and use coconut cream for the buttercream for a rich, creamy texture.

  • Gluten-Free: Swap all-purpose flour with a gluten-free blend that’s designed for baking to still enjoy every irresistible bite without gluten.

  • Nutty Twist: Add chopped pecans or walnuts to the batter for extra crunch and a nutty flavor that perfectly complements the pumpkin spices.

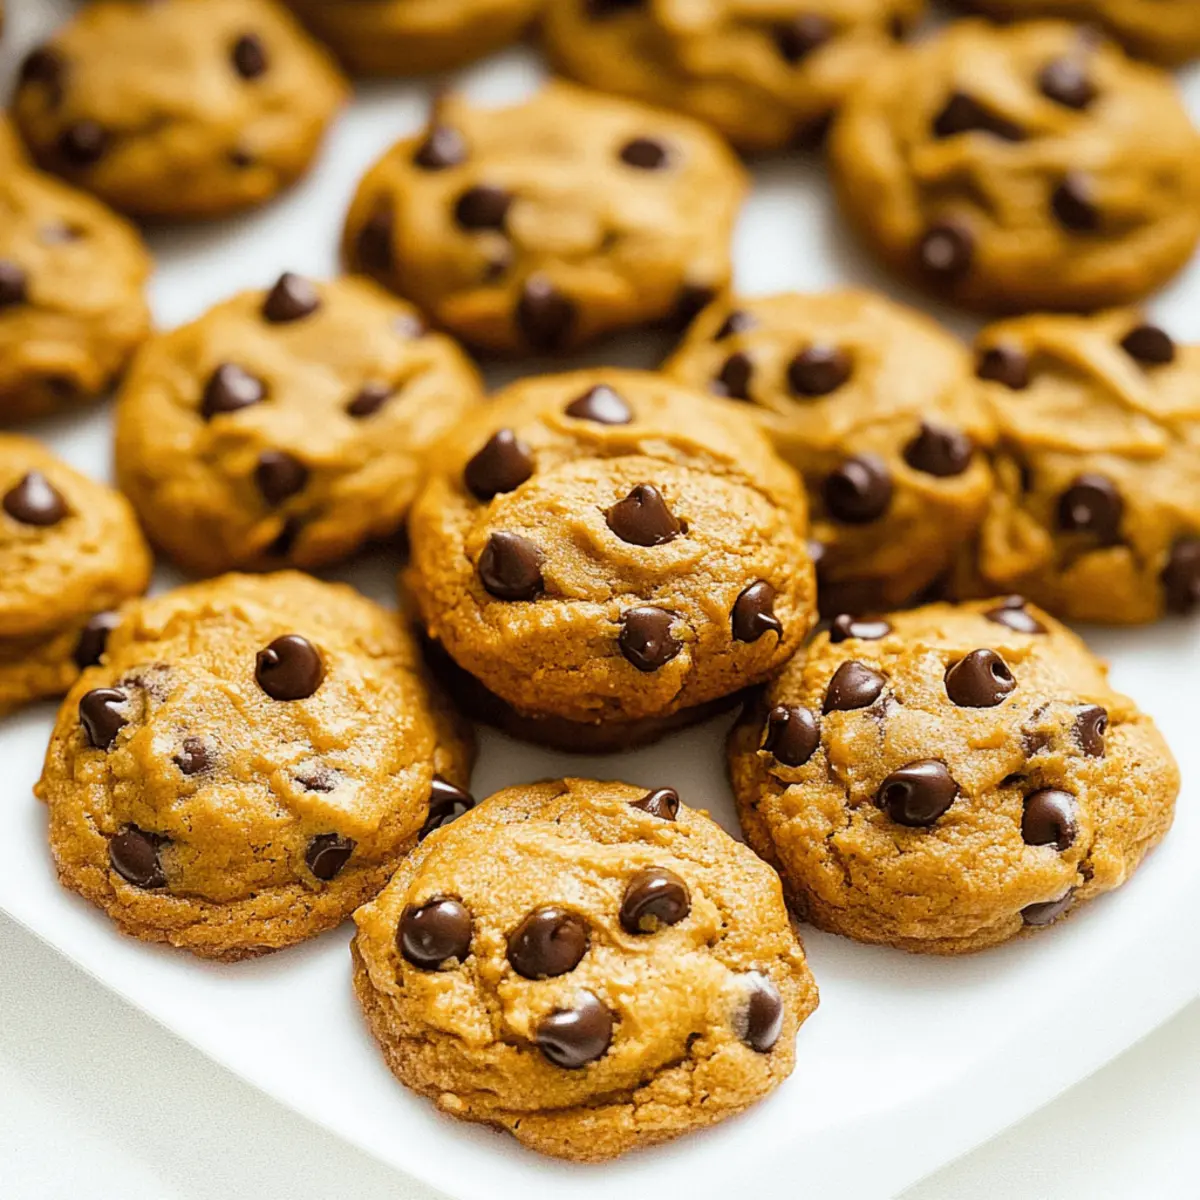
  • Chocolate Lover’s Delight: Mix in chocolate chips into the batter or use a chocolate ganache instead of espresso buttercream for a dreamy chocolate-pumpkin fusion.

  • Vegan Version: Replace eggs with flax eggs (1 tablespoon flaxseed meal + 3 tablespoons water per egg) and use almond milk with coconut oil for a luscious texture in both cake and frosting.

  • More Spice: Boost the flavor profile by adding a dash of cayenne or ground cloves to the batter for a warm kick that dances on your palate, enhancing that fall warmth.

  • Sheet Cake Style: For larger gatherings, double the recipe and bake in a 9×13 inch pan for a delightful sheet cake that can be easily sliced and served.

  • Matcha Buttercream: Infuse your buttercream with matcha powder instead of espresso for a refreshing, earthy flavor contrast that brightens the cake beautifully.

Explore these variations and let the spirit of fall inspire your baking journey! If you’re feeling adventurous, pairing your cake with a cup of the Joumou Haitian Pumpkin Soup can create a cozy autumn meal that’s simply delightful!

Make Ahead Options

These Pumpkin Spice Latte Cake layers are perfect for meal prep enthusiasts! You can bake the cake layers up to 3 days in advance; simply let them cool completely, then wrap tightly in plastic wrap and refrigerate to maintain moisture. For the espresso buttercream, prepare it up to 24 hours ahead of time, keeping it in an airtight container in the fridge. When you’re ready to assemble, allow the buttercream to come to room temperature and rewhip if necessary to restore its fluffy texture. This way, you’ll enjoy a delicious cake that’s just as fresh and delightful with minimal effort on the day of serving!

How to Store and Freeze Pumpkin Spice Latte Cake

Room Temperature: Store leftover cake in an airtight container at room temperature for up to 3 days to maintain its moisture and flavor.

Fridge: If you prefer, refrigerate the cake—this keeps it fresh for up to a week. Just ensure it’s well wrapped to prevent it from drying out.

Freezer: This Pumpkin Spice Latte Cake can be frozen! Wrap individual slices tightly in plastic wrap and place them in a freezer-safe bag or container. It will keep for up to 3 months.

Reheating: To enjoy, thaw slices in the fridge overnight, or microwave gently for a few seconds until warmed through for that fresh-baked taste.

What to Serve with Pumpkin Spice Latte Cake

As the warm scents of cinnamon and pumpkin fill your kitchen, it’s time to consider the perfect accompaniments to this cozy cake.

  • Whipped Cream: A dollop of freshly whipped cream adds a light, airy touch and balances the rich flavors of the cake.
  • Spiced Chai Latte: Pair the cake with a delicious spiced chai for a comforting beverage that complements the pumpkin spice perfectly.
  • Apple Crisp: The tartness of a warm apple crisp introduces a delightful contrast, making for a classic autumn dessert duo.
  • Creamy Mashed Potatoes: If you’re embracing a savory dinner first, creamy mashed potatoes can serve as a hearty side, enriching your meal experience.
  • Roasted Brussels Sprouts: The natural sweetness and slight nutty flavor of roasted Brussels sprouts enhance the cozy feeling of the season.
  • Maple Glazed Pecans: Add a crunchy texture with sweet, maple glazed pecans. Their nutty flavor pairs beautifully with pumpkin spice.
  • Salted Caramel Sauce: Drizzling warm salted caramel over each slice elevates the indulgence and introduces an irresistible sweetness.
  • Hot Chocolate: Cozy up with a cup of hot chocolate—its creamy richness complements the espresso buttercream perfectly.
  • Cinnamon Iced Coffee: A refreshing iced coffee, lightly sweetened and dusted with cinnamon, cools down the palate and enhances the autumn vibes.

Expert Tips for Perfect Pumpkin Spice Latte Cake

  • Room Temperature Ingredients: Ensure your eggs and butter are at room temperature. This helps the batter mix more evenly, resulting in a better cake texture.

  • Avoid Overmixing: When combining your wet and dry ingredients, mix just until combined. Overmixing can lead to a dense cake.

  • Don’t Skip the Cooling: Allow the cake layers to cool completely before frosting. This prevents the buttercream from melting and ensures neat layers.

  • Grease-Free Tools: Make sure your mixer bowl and beaters are grease-free when whipping egg whites for the buttercream. This is key for achieving stable peaks.

  • Test for Doneness: Use a toothpick to check for doneness; it should come out clean or with a few moist crumbs. This prevents over-baking your Pumpkin Spice Latte Cake.

  • Chill If Necessary: If your espresso buttercream is too soft, chill it slightly and then rewhip. This elevates the consistency for perfect decorating.

Pumpkin Spice Latte Cake Recipe FAQs

How do I choose the right pumpkin puree for this recipe?
Absolutely! Look for 100% pure pumpkin puree, which is the main flavor component in this Pumpkin Spice Latte Cake. Avoid pumpkin pie filling, as it contains added sugars and spices that can alter the taste and texture of your cake.

What is the best way to store leftover Pumpkin Spice Latte Cake?
To keep your Pumpkin Spice Latte Cake fresh, store it in an airtight container at room temperature for up to 3 days. If you want to extend its shelf life, you can refrigerate it for up to a week, just be sure to wrap it well to prevent it from drying out.

Can I freeze Pumpkin Spice Latte Cake?
Definitely! To freeze, wrap individual slices tightly in plastic wrap, then place them in a freezer-safe bag or container. They will stay fresh for up to 3 months. When you’re ready to enjoy, simply thaw the slices in the refrigerator overnight, or microwave them gently for a few seconds until warmed through.

My buttercream turned out curdled, what should I do?
Not to worry! If your espresso buttercream appears curdled, just continue mixing it until it becomes smooth again. If it’s too soft, chill it in the fridge for about 15-20 minutes, then rewhip. This should help achieve that lovely creamy consistency you want.

Can I make this cake dairy-free?
Very! You can make the Pumpkin Spice Latte Cake dairy-free by substituting unsalted butter with margarine and using non-dairy milk for any liquid in the buttercream if needed. Just ensure that the sugars break down properly when mixed to keep the texture intact.

Is it safe for pets?
No, it’s best to keep this cake away from pets. Ingredients like chocolate (often found in espresso products) can be toxic to dogs and some other pets. Always check for pet-safe alternatives within treats made specifically for them.

Pumpkin Spice Latte Cake

Cozy Up with Pumpkin Spice Latte Cake: A Fall Delight

This Pumpkin Spice Latte Cake delivers comforting fall flavors, perfect for gatherings.
Prep Time 30 minutes
Cook Time 40 minutes
Cooling Time 10 minutes
Total Time 1 hour 20 minutes
Servings: 8 slices
Course: Dessert
Cuisine: American
Calories: 450

Ingredients
  

For the Cake
  • 2 cups all-purpose flour consider using cake flour for a lighter texture
  • 2 teaspoons baking powder make sure it's fresh for best results
  • 2 teaspoons pumpkin pie spice substitute with cinnamon, nutmeg, and ginger if needed
  • 1 teaspoon salt essential to balance the sweetness
  • 1 cup unsalted butter for a dairy-free option, margarine works well
  • 1/2 cup vegetable oil melted coconut oil is a good substitute
  • 1 cup granulated sugar consider coconut sugar for a lower glycemic option
  • 1 cup pumpkin puree ensure it's pure pumpkin, not pie filling
  • 4 large eggs using room temperature eggs yields better results
For the Espresso Buttercream
  • 3 large egg whites ensure they are yolk-free
  • 1 cup granulated sugar should dissolve easily when whisked
  • 1 cup unsalted butter ensure it’s at room temperature
  • 2 tablespoons instant espresso powder substitute with strong brewed coffee if necessary

Equipment

  • Oven
  • Mixing bowls
  • whisk
  • Electric mixer
  • 6-inch cake pans
  • Wire racks

Method
 

Preparing the Cake
  1. Preheat your oven to 350°F (175°C) and grease two 6-inch cake pans with baking spray or softened butter. Dust them lightly with flour.
  2. In a large mixing bowl, whisk together the flour, baking powder, pumpkin pie spice, and salt until evenly combined.
  3. In another bowl, mix together the granulated sugar, light-brown sugar, melted unsalted butter, vegetable oil, pumpkin puree, and eggs. Blend until smooth.
  4. Gradually add the dry mixture to the wet ingredients, mixing gently until just combined.
  5. Divide the batter evenly between the two prepared pans and bake for 35-40 minutes until a toothpick comes out clean.
  6. Once baked, let the cakes cool in the pans for about 10 minutes then transfer them to wire racks to cool completely.
Making the Espresso Buttercream
  1. Whisk the egg whites and sugar together in a bowl over a hot water bath until the sugar dissolves. Whip until stiff peaks form.
  2. Gradually mix in the room temperature unsalted butter and instant espresso powder until the buttercream is light and fluffy.
Assembling the Cake
  1. Cut each cooled cake layer in half horizontally, creating four layers. Stack two layers on a serving platter with buttercream in between.
  2. Crumb coat the entire cake with a thin layer of buttercream, then apply a thicker layer on top and around the sides.
  3. Finish with decorative swirls of buttercream.

Nutrition

Serving: 1sliceCalories: 450kcalCarbohydrates: 55gProtein: 6gFat: 22gSaturated Fat: 13gPolyunsaturated Fat: 1gMonounsaturated Fat: 7gCholesterol: 110mgSodium: 200mgPotassium: 200mgFiber: 2gSugar: 30gVitamin A: 580IUVitamin C: 1mgCalcium: 50mgIron: 1.5mg

Notes

Ensure room temperature for eggs and butter. Avoid overmixing, and cool layers completely before frosting.

Tried this recipe?

Let us know how it was!

Moist Pumpkin Gingerbread Muffins for Cozy Holiday Mornings

As I settled down with my first mug of spicy chai, the inviting scent of holiday baking enveloped my kitchen, instantly whisking me away to cozy gatherings filled with laughter and warmth. That’s when I first whipped up these delightful pumpkin gingerbread muffins. This simple recipe combines the moistness of pumpkin with the warm, spiced notes of gingerbread, creating a treat that’s perfect for the festive season. Not only are they a breeze to make, but they also disappear quickly at brunches, making them a reliable crowd-pleaser. Whether enjoyed fresh from the oven or as a sweet breakfast on busy mornings, these muffins bring joy and comfort to any table. Are you ready to elevate your holiday baking game? Let’s dive in!

Why are Pumpkin Gingerbread Muffins a Must-Try?

Irresistible Flavor: The blend of pumpkin and aromatic spices creates a rich, warm flavor that captures the spirit of the season. Easy to Make: You’ll love how simple the preparation is—just mix, bake, and enjoy! Perfect for Sharing: These muffins are a delightful treat that quickly disappears at gatherings, making them an instant crowd favorite. Versatile Ingredient Swaps: Feel free to experiment with additions like nuts or chocolate chips for a unique twist. Comforting Aroma: Baking these muffins fills your home with a cozy fragrance, evoking warm holiday memories. Enjoy them warm with butter or as part of a festive brunch!

Pumpkin Gingerbread Muffin Ingredients

For the Muffins

  • All-Purpose Flour – Provides structure; substitute whole wheat flour for a denser texture.
  • White Whole Wheat Flour – Adds nutrition without compromising flavor; use more all-purpose flour if unavailable.
  • Baking Soda – Acts as a leavening agent for rise; ensure it is fresh for best results.
  • Kosher Salt – Enhances flavor balance; use regular salt, but adjust quantity.
  • Ground Ginger – Adds distinct spiciness; fresh ginger can be used, but adjust the amount.
  • Ground Cinnamon – Provides warmth and sweetness; can substitute with pumpkin pie spice.
  • Ground Nutmeg – Adds depth of flavor; freshly grated nutmeg gives the best taste.
  • Ground Cloves – Contributes spice complexity; omit for a milder flavor or use less.
  • Pumpkin Purée – Adds moisture and flavor; use canned, but ensure it’s not pumpkin pie filling.
  • Pure Maple Syrup – Sweetens naturally; honey or agave syrup may substitute.
  • Unsulphured Molasses – Adds richness and depth; avoid blackstrap molasses to prevent bitterness.
  • Unsalted Butter – Provides moisture and flavor; coconut or vegetable oil may substitute.
  • Large Eggs – Binds the ingredients together; vegan option: flax eggs or applesauce.
  • Coarse Sparkling Sugar (Turbinado Sugar) – Sprinkles on top for crunch; optional, regular sugar can be used.

Step‑by‑Step Instructions for Pumpkin Gingerbread Muffins

Step 1: Preheat the Oven
Begin by preheating your oven to 375°F (190°C). While the oven warms up, prepare a muffin pan by spritzing it with nonstick spray or lining it with paper liners. This ensures your pumpkin gingerbread muffins emerge easily after baking, allowing you to enjoy them without any hassle.

Step 2: Mix Dry Ingredients
In a medium-sized bowl, whisk together the all-purpose flour, white whole wheat flour, baking soda, kosher salt, ground ginger, ground cinnamon, ground nutmeg, and ground cloves. Keep whisking until well blended, creating a fragrant spice mix that will bring warmth and flavor to your pumpkin gingerbread muffins.

Step 3: Combine Wet Ingredients
In a large mixing bowl, combine the pumpkin purée, pure maple syrup, unsulphured molasses, melted unsalted butter, and large eggs. Use a whisk or a paddle attachment on a stand mixer to beat the mixture until everything is smoothly incorporated. This mixture will form the moist base of your muffins, packed with delightful flavors.

Step 4: Incorporate the Dry Ingredients
Gently fold the dry ingredients into the wet mixture with a spatula, being careful not to overmix. Stop as soon as you no longer see dry flour. The key to tender pumpkin gingerbread muffins is maintaining a light touch, leading to a beautifully moist texture once they are baked.

Step 5: Fill the Muffin Cups
Spoon the batter into the prepared muffin pan, filling each cup about ¾ full. This helps the muffins to rise perfectly without spilling over. For an additional touch of sweetness and crunch, sprinkle coarse sparkling sugar on top of the batter before baking.

Step 6: Bake Until Perfect
Place the muffin pan in the preheated oven and bake for 20-22 minutes. Check for doneness by pressing lightly on the tops; they should spring back, indicating they are ready. Alternatively, insert a toothpick into the center—if it comes out clean or with a few crumbs, your pumpkin gingerbread muffins are finished baking.

Step 7: Cool and Serve
Allow the muffins to cool in the pan for about 5 minutes. This makes for easier removal. Then, transfer them to a wire rack to cool completely. These moist pumpkin gingerbread muffins are best enjoyed warm, making a perfect addition to your holiday mornings or cozy gatherings.

Expert Tips for Pumpkin Gingerbread Muffins

  • Don’t Overmix: Gentle folding keeps the muffins tender. Overmixing can lead to a tough texture, so stop mixing as soon as ingredients blend.
  • Check Freshness: Use fresh baking soda for optimal rise; expired leavening agents can leave your muffins dense instead of moist.
  • Proper Cooling: Allow muffins to cool for 5 minutes in the pan before transferring them. This prevents them from becoming soggy on the bottoms.
  • Storage Solution: For maximum freshness, store your pumpkin gingerbread muffins in an airtight container at room temperature; they last up to 5 days!
  • Flavor Enhancement: Allow muffins to rest for a day, as they improve in flavor and moisture, making them even more delightful.

How to Store and Freeze Pumpkin Gingerbread Muffins

  • Room Temperature: Store in an airtight container for up to 5 days to keep them fresh and moist. Make sure the lid is tight to avoid drying out.
  • Fridge: If you prefer a cooler option, these muffins can be kept in the refrigerator for about a week. Be sure to place them in an airtight container to maintain their texture.
  • Freezer: For longer storage, freeze the pumpkin gingerbread muffins in a freezer-safe container for up to 3 months. Wrap each muffin individually in plastic wrap for best results.
  • Reheating: When ready to enjoy, simply microwave for 15-20 seconds or let them thaw at room temperature for a few hours—then enjoy the comforting warmth!

Make Ahead Options

These Pumpkin Gingerbread Muffins are perfect for meal prep enthusiasts looking to save time during the busy holiday season! You can prepare the dry ingredients (flours, baking soda, spices, and salt) up to 3 days in advance; just store them in an airtight container at room temperature to preserve freshness. You can also mix the wet ingredients (pumpkin purée, maple syrup, molasses, melted butter, and eggs) and refrigerate them overnight. When you’re ready to bake, simply combine the wet and dry ingredients, fill the muffin cups, and bake as directed. This approach ensures your muffins are just as delicious while saving you precious time on hectic mornings!

Variations & Substitutions for Pumpkin Gingerbread Muffins

Feel free to explore and customize your pumpkin gingerbread muffins for a unique twist that suits your taste!

  • Nutty Delight: Add 1 cup of chopped nuts, like walnuts or pecans, for a crunchy texture that complements the moist muffin.
  • Chocolate Lover’s Twist: Fold in ¾ cup of chocolate chips into the batter for a decadent treat that chocolate enthusiasts will adore. The contrasting flavors of sweet chocolate and spiced pumpkin are truly tempting!
  • Fruit Fusion: Mix in ½ cup of dried cranberries or raisins for a touch of natural sweetness. The addition of dried fruit not only enhances the flavor but also adds a chewy texture.
  • Spice Mix-Up: Swap the individual spices for 2 tablespoons of pumpkin pie spice, simplifying the process without sacrificing flavor; this is a time-saver in busy holiday kitchens!
  • Zesty Boost: Incorporate the zest of one orange to brighten the flavors, making each bite refreshing and exciting—a perfect pairing for your holiday gatherings.
  • Coconut Cream: For a tropical flair, replace half the butter with coconut oil and sprinkle shredded coconut into the batter; you’ll love the unexpected tropical twist!
  • Vegan Version: Substitute the eggs with ¼ cup of applesauce and the butter with coconut oil. This creates a delicious vegan option without compromising on taste. You can still enjoy moistness in every muffin.
  • Spicy Kick: Add a dash of cayenne pepper for a hint of heat to balance the sweetness—just a pinch can elevate your muffins to the next level!

For even more delightful variations that incorporate vibrant flavors, check out my Joumou Haitian Pumpkin recipe, where pumpkin takes center stage in a different and captivating way. You’ll discover endless possibilities to enjoy this versatile ingredient!

What to Serve with Pumpkin Gingerbread Muffins

Imagine treating your loved ones to a cozy holiday breakfast that captures the spirit of the season.

  • Spiced Chai Latte: The warm and comforting flavors of spiced chai blend beautifully with the gingerbread notes in the muffins. Enjoying them together transforms your morning into a festive indulgence.
  • Creamy Mashed Potatoes: For a unique twist, pair these muffins with fluffy mashed potatoes. The savory texture provides a delightful contrast to the sweet spiced muffins.
  • Fresh Fruit Salad: A vibrant mix of fresh fruits adds a refreshing brightness, balancing the rich flavors of the pumpkin gingerbread muffins. Add a squeeze of lime for extra zest!
  • Cinnamon Honey Butter: Slathering these muffins with this creamy, spiced butter elevates them to brunch perfection. The honey sweetness complements the gingerbread while adding a luscious texture.
  • Pumpkin Soup: Embrace the autumn vibes with a bowl of warm pumpkin soup. Its creamy consistency and warm spices make a delightful pairing that perfectly captures the season.
  • Maple Glazed Carrots: The sweetness of maple-glazed carrots harmonizes with the muffins’ flavor profile, creating a deliciously cohesive meal. The tender texture also makes for a beautiful contrast.
  • Mulled Wine: For an adult twist, serve these muffins with a cup of mulled wine. The aromatic spices in both the drink and muffins will transport you to a cozy holiday gathering.
  • Muffin Parfait: Layer crumbled muffins with Greek yogurt and fresh berries for a fun dessert. The combination of textures and flavors adds fun to any table setting.

Pumpkin Gingerbread Muffins Recipe FAQs

How do I choose the right pumpkin purée?
Absolutely! When selecting pumpkin purée, make sure you are picking pure pumpkin and not pumpkin pie filling, which contains added sugars and spices. Look at the label carefully; it should just list “pumpkin.” Canned purée works beautifully, but if you’re feeling adventurous, you can roast and blend your own pumpkin for a fresh, homemade touch!

How should I store pumpkin gingerbread muffins?
For peak freshness, store your pumpkin gingerbread muffins in an airtight container at room temperature for up to 5 days. If you prefer, you can also refrigerate them, but ensure they’re still in an airtight container to keep them from drying out. I often choose room temperature storage for that delightful, just-baked taste!

Can I freeze my pumpkin gingerbread muffins?
Yes, you can! To freeze, wrap each individual muffin in plastic wrap, and then place them in a freezer-safe container. This way, they stay fresh for up to 3 months. When you’re ready to eat, just microwave them for 15-20 seconds or let them thaw at room temperature for a delightful return to their original moist state!

What should I do if my muffins are too dense?
If your muffins turn out too dense, it might be due to overmixing the batter or using old baking soda that didn’t provide enough lift. Next time, mix just until combined and make sure your baking soda is fresh. If you notice your muffins have dark spots, it could also be an indication of overbaking, which can dry them out—keep an eye on them as they bake!

Are pumpkin gingerbread muffins safe for pets?
Very! While pumpkin itself can be a healthy treat for dogs, it’s crucial to ensure your muffins don’t contain ingredients harmful to pets, such as chocolate or xylitol. It’s safest to enjoy your muffins as a delightful snack for yourself while sharing plain pumpkin purée with your furry friends. Always remember to consult your vet for any dietary questions related to your pets!

Pumpkin gingerbread muffins

Moist Pumpkin Gingerbread Muffins for Cozy Holiday Mornings

These pumpkin gingerbread muffins are moist and filled with warm spices, perfect for cozy holiday mornings.
Prep Time 15 minutes
Cook Time 22 minutes
Cooling Time 5 minutes
Total Time 42 minutes
Servings: 12 muffins
Course: Breakfast
Cuisine: American
Calories: 200

Ingredients
  

For the Muffins
  • 2 cups All-Purpose Flour Substitute whole wheat flour for denser texture.
  • 1 cup White Whole Wheat Flour Use more all-purpose flour if unavailable.
  • 1 teaspoon Baking Soda Ensure it's fresh for best results.
  • 1/2 teaspoon Kosher Salt Adjust quantity if using regular salt.
  • 1 teaspoon Ground Ginger Fresh ginger can be used, but adjust the amount.
  • 1 teaspoon Ground Cinnamon Can substitute with pumpkin pie spice.
  • 1/2 teaspoon Ground Nutmeg Freshly grated gives the best taste.
  • 1/4 teaspoon Ground Cloves Omit for milder flavor or use less.
  • 1 cup Pumpkin Purée Use canned, not pumpkin pie filling.
  • 1/2 cup Pure Maple Syrup Honey or agave syrup may substitute.
  • 1/4 cup Unsulphured Molasses Avoid blackstrap to prevent bitterness.
  • 1/2 cup Unsalted Butter Coconut or vegetable oil may substitute.
  • 2 Large Eggs Vegan option: flax eggs or applesauce.
  • 2 tablespoons Coarse Sparkling Sugar (Turbinado Sugar) Optional for crunch; regular sugar can be used.

Equipment

  • muffin pan
  • Mixing bowls
  • whisk
  • spatula

Method
 

Step-by-Step Instructions for Pumpkin Gingerbread Muffins
  1. Preheat your oven to 375°F (190°C) and prepare a muffin pan with nonstick spray or liners.
  2. Whisk together all-purpose flour, white whole wheat flour, baking soda, kosher salt, ground ginger, ground cinnamon, ground nutmeg, and ground cloves.
  3. Combine pumpkin purée, pure maple syrup, unsulphured molasses, melted unsalted butter, and large eggs in a large mixing bowl.
  4. Gently fold the dry ingredients into the wet mixture, being careful not to overmix.
  5. Spoon the batter into the prepared muffin pan, filling each cup about ¾ full and topping with coarse sparkling sugar if desired.
  6. Bake for 20-22 minutes, checking for doneness by pressing lightly or using a toothpick.
  7. Cool in the pan for 5 minutes before transferring to a wire rack.

Nutrition

Serving: 1muffinCalories: 200kcalCarbohydrates: 30gProtein: 3gFat: 8gSaturated Fat: 4gPolyunsaturated Fat: 0.5gMonounsaturated Fat: 2.5gCholesterol: 30mgSodium: 150mgPotassium: 150mgFiber: 2gSugar: 10gVitamin A: 500IUVitamin C: 1mgCalcium: 20mgIron: 1mg

Notes

Muffins are best enjoyed warm and can be stored in an airtight container for up to 5 days.

Tried this recipe?

Let us know how it was!

Mouthwatering Pork Tenderloin with Dijon Sauce Made Easy

As the rich aroma of garlic and seared pork fills the kitchen, I can’t help but feel a wave of anticipation. This Best-Ever Pork Tenderloin with Dijon Sauce isn’t just a dish; it’s my go-to recipe for elevating any meal—perfect for those cozy weeknights or spontaneous dinner parties. With its tender, juicy cuts and a creamy, tangy sauce that’s ready in just 30 minutes, this gourmet-inspired meal will have your friends and family swooning. Not only does it promise a flavorful dining experience, but it also looks impressive on the table, making it a true crowd-pleaser. Who wouldn’t want to wow their loved ones without spending hours in the kitchen? Ready to dive into the deliciousness that awaits?

Why is Pork Tenderloin a Winner?

Easy to Prepare: This Pork Tenderloin with Dijon Sauce combines gourmet flavors with minimal effort, letting you impress guests without sacrificing time.

Moist and Flavorful: Thanks to the careful searing and marination, every bite of pork is juicy and infused with a delightful tang from the Dijon mustard.

Versatile Serving Options: Serve it alongside vibrant roasted vegetables or creamy mashed potatoes for a meal that’s both colorful and comforting.

Perfect for Any Occasion: From weeknight dinners to elegant dinner parties, this dish is a showstopper that fits all settings, just like my Savory Brown Sugar Pork Chops.

Family-Friendly Meal: Everyone at the table will appreciate the rich, creamy sauce, making it a recipe the whole family can enjoy, not to mention the perfect pairing with my Baked Salmon Sauce. Transition your mealtime routine with this simple yet elegant dish that quickly becomes a favorite!

Pork Tenderloin with Dijon Sauce Ingredients

Discover the simplicity behind this gourmet dish with these key ingredients.

For the Pork

  • Pork Tenderloin – The tender and juicy star of the show, ensuring a flavorful and satisfying experience.
  • Salt & Pepper – Essential seasonings that enhance the natural flavors of the pork.
  • Olive Oil – Provides richness and aids in achieving a beautiful golden sear on the tenderloin.

For the Dijon Cream Sauce

  • Dijon Mustard – Delivers a tangy kick that perfectly complements the pork; don’t skip this key ingredient!
  • Garlic – Infuses the sauce with aromatic goodness; use fresh garlic for the best flavor.
  • Chicken Broth – Forms the base of the sauce, adding depth and moisture; vegetable broth is a great alternative.
  • Heavy Cream – Creates a rich and creamy texture for the sauce; swap with a lighter option if desired.

With these delightful ingredients, your Pork Tenderloin with Dijon Sauce will shine on any dining table!

Step‑by‑Step Instructions for Pork Tenderloin with Dijon Sauce

Step 1: Preheat the Oven
Begin by preheating your oven to 400°F (200°C). While the oven heats, grab a baking dish and coat it with nonstick spray to ensure easy cleanup later. This sets the stage for our juicy Pork Tenderloin with Dijon Sauce, allowing the tenderloin to roast perfectly as we prepare it.

Step 2: Prepare the Pork
Pat the pork tenderloin dry with paper towels, allowing the seasoning to adhere better. Generously rub the meat with salt, pepper, and Dijon mustard, ensuring an even coating for maximum flavor. This step is crucial for enhancing the rich taste of the pork and prepares it for a delightful cooking experience.

Step 3: Sear the Pork
Heat a skillet over medium-high heat and add a drizzle of olive oil. Once the oil shimmers, carefully place the seasoned pork tenderloin in the skillet. Sear each side for about 3-4 minutes until you achieve a golden, caramelized crust. This process locks in the moisture and amps up the flavor profile of your dish.

Step 4: Roast in the Oven
After searing, transfer the skillet (if oven-safe) or the pork to the prepared baking dish. Roast in the preheated oven for 15-20 minutes, or until the internal temperature reaches 145°F (63°C) when tested with a meat thermometer. This ensures a perfectly cooked Pork Tenderloin with Dijon Sauce that’s tender and juicy.

Step 5: Make the Dijon Sauce
Once the pork is done and resting, return the skillet to medium heat on the stovetop. Add minced garlic and sauté for about 1 minute until fragrant, making sure not to burn it. Next, pour in the chicken broth, scraping up any browned bits for extra flavor. Stir in heavy cream and a touch more Dijon mustard, letting it thicken for a couple of minutes.

Step 6: Serve the Pork
Allow the pork to rest for at least 10 minutes before slicing it into medallions. Drizzle the creamy Dijon sauce generously over the sliced pork, ensuring each piece is coated in that luscious flavor. Serving this Pork Tenderloin with Dijon Sauce creates an inviting and impressive plate that’s sure to delight your guests!

How to Store and Freeze Pork Tenderloin with Dijon Sauce

Fridge: Store leftover Pork Tenderloin with Dijon Sauce in an airtight container for up to 3 days to maintain its flavors and moisture.

Freezer: For longer storage, freeze the pork without the sauce in a freezer-safe container for up to 3 months. To reheat, thaw overnight in the fridge.

Reheating: When ready to enjoy your leftovers, gently reheat the pork in a skillet over low heat or in the microwave, adding a splash of broth or water to keep it moist.

Sauce Storage: The Dijon cream sauce can be refrigerated separately for up to 3 days. Reheat gently on the stovetop before serving.

Expert Tips for Pork Tenderloin with Dijon Sauce

  • Marinate for Flavor: Marinating the pork in Dijon mustard helps enhance flavor and tenderness. For best results, let it sit for at least an hour, or overnight if possible.

  • Searing is Key: Don’t rush the searing process! Taking 3-4 minutes per side ensures moisture is locked in, preventing dryness in your pork tenderloin.

  • Rest the Meat: Allow the cooked pork to rest for at least 10 minutes before slicing. This resting period keeps the juices inside, ensuring every bite is moist and flavorful.

  • Check Temperature: Use a meat thermometer to ensure the pork reaches 145°F (63°C). Overcooking can lead to dryness, so keep a close eye!

  • Embellish the Sauce: Feel free to add fresh herbs or a splash of white wine to your Dijon sauce for added depth and flavor. Experimenting will make your pork tenderloin with Dijon sauce even more delightful!

Pork Tenderloin with Dijon Sauce Variations

Feel free to get creative and customize your dish in delightful ways that excite your palate!

  • Herb-Infused: Add fresh herbs like thyme or rosemary to your marinade for an aromatic twist. The herbs bring an earthy layer that pairs beautifully with the sauce.

  • Spicy Kick: For those who enjoy a bit of heat, add a pinch of cayenne pepper or red pepper flakes to the sauce. It will elevate the flavor profile and give your meal that extra zing!

  • Mustard Swap: If you’re feeling adventurous, try substituting Dijon mustard with whole grain mustard or spicy brown mustard. Each variant can transform the sauce’s flavor and add delightful texture.

  • Cream Alternative: Swap out heavy cream for coconut cream for a dairy-free version. This change adds a light and tropical twist that elevates the dish in an unexpected way.

  • Sweet Balance: Incorporate a splash of honey or maple syrup into the sauce for a sweet element that balances the tanginess of the mustard, reminiscent of my Honeybun Carrot Cake.

  • Sautéed Veggies: Toss in some sautéed mushrooms or spinach right into the sauce just before serving. They not only amp up the nutrition but add lovely texture to your dish.

  • Unique Sides: Pair your pork with a side of roasted sweet potatoes or a creamy polenta to change up your typical serving suggestions. This will create a colorful and delicious plate that’s a feast for the eyes!

  • Garnish Game: Top your plated pork with crushed walnuts or toasted almonds for a crunch that contrasts beautifully with the creamy sauce and moist tenderloin.

Make Ahead Options

These Best-Ever Pork Tenderloin with Dijon Cream Sauce are fantastic for meal prep, saving you valuable time on busy weeknights! You can marinate the pork in Dijon mustard and seasonings for up to 24 hours in advance to deepen the flavors. Additionally, the sauce can be prepared and stored in the refrigerator for up to 3 days, which allows for quick assembly. To maintain quality, refrigerate the pork and sauce separately in airtight containers. When you’re ready to serve, simply roast the marinated pork as directed, heat the sauce gently on the stove, and drizzle it over the sliced pork—resulting in a gourmet meal with minimal effort!

What to Serve with Best-Ever Pork Tenderloin with Dijon Cream Sauce

Imagine a vibrant dining table, overflowing with colorful sides that perfectly complement the succulent nature of your dish, inviting every bite to be savored.

  • Creamy Mashed Potatoes: The velvety texture of mashed potatoes contrasts beautifully with the tender pork, soaking up the rich Dijon cream sauce perfectly.
  • Roasted Brussels Sprouts: Their slight bitterness and crispy edges offer a delicious balance to the creamy sauce, adding a crunchy element that elevates the meal.
  • Garlic Green Beans: Crisp-tender green beans sautéed with garlic provide freshness and a pop of color, enhancing the dish with a garden-like brightness.
  • Buttery Corn on the Cob: Sweet corn drizzled with butter adds a nostalgic, summer vibe that pairs wonderfully with the richness of the pork.
  • Crispy Roasted Carrots: The natural sweetness of caramelized carrots provides a delightful contrast to the savory pork, making each bite an adventure for your palate.
  • Light Green Salad: A mixed greens salad with a simple vinaigrette can cleanse the palate, offering a refreshing contrast to the creamy, rich flavors of the dish.
  • Chardonnay: A glass of chilled Chardonnay marries beautifully with the Dijon cream sauce, enhancing the meal’s gourmet feel, perfect for a dinner party.
  • Chocolate Mousse: For dessert, a light chocolate mousse brings a touch of indulgence after a savory meal, creating a beautiful dining experience that ends on a sweet note.

Best-Ever Pork Tenderloin with Dijon Cream Sauce Recipe FAQs

How do I choose the right pork tenderloin?
Absolutely! When selecting a pork tenderloin, look for a piece that is bright pink with a bit of marbling, as this indicates tenderness and flavor. Avoid any cuts that appear dull or have dark spots. A weight of about 1 to 1.5 pounds is ideal for this recipe.

What’s the best way to store leftovers?
Very! Store leftover Pork Tenderloin with Dijon Sauce in an airtight container in the fridge for up to 3 days. It’s essential to let it cool completely before sealing it. Gently reheat in a skillet or microwave, adding a dash of broth to keep it moist.

Can I freeze the pork tenderloin?
Of course! To freeze, wrap the cooked pork tenderloin tightly in plastic wrap or foil, then place it in a freezer-safe container. It can be kept for up to 3 months. When you’re ready to enjoy it again, thaw it overnight in the fridge before reheating.

What do I do if my sauce is too thick?
If your Dijon cream sauce turns out too thick, don’t worry! Simply add a bit of chicken broth or water, a tablespoon at a time, and stir until you reach your desired consistency. It’s all about achieving that perfect creamy texture!

Are there any dietary considerations to keep in mind?
Certainly! This Pork Tenderloin with Dijon Sauce features heavy cream, which may not be suitable for those with lactose intolerance. You can substitute the heavy cream with coconut cream or a dairy-free alternative, ensuring everyone can enjoy this delicious meal.

Can I marinate the pork overnight?
Yes! In fact, I often recommend marinating the pork for up to 24 hours. This not only intensifies the flavors from the Dijon mustard but also results in a more tender cut of meat. Just make sure to refrigerate it during the marination process.

Pork Tenderloin with Dijon Sauce

Mouthwatering Pork Tenderloin with Dijon Sauce Made Easy

This Pork Tenderloin with Dijon Sauce is a quick and impressive dish perfect for any occasion.
Prep Time 10 minutes
Cook Time 30 minutes
Resting Time 10 minutes
Total Time 50 minutes
Servings: 4 servings
Course: Dinner
Cuisine: American
Calories: 350

Ingredients
  

For the Pork
  • 1 pound Pork Tenderloin The tender and juicy star of the show.
  • 1 teaspoon Salt Essential seasoning.
  • 1 teaspoon Pepper Essential seasoning.
  • 2 tablespoons Olive Oil For searing.
For the Dijon Cream Sauce
  • 3 tablespoons Dijon Mustard Key ingredient for tanginess.
  • 2 cloves Garlic Use fresh garlic for best flavor.
  • 1 cup Chicken Broth Provides depth.
  • 1/2 cup Heavy Cream Adds creaminess.

Equipment

  • Skillet
  • baking dish
  • meat thermometer

Method
 

Cooking Instructions
  1. Preheat your oven to 400°F (200°C) and coat a baking dish with nonstick spray.
  2. Pat pork tenderloin dry and rub with salt, pepper, and Dijon mustard.
  3. Heat olive oil in a skillet over medium-high heat and sear each side of the pork for 3-4 minutes.
  4. Transfer the pork to the prepared baking dish and roast for 15-20 minutes until it reaches 145°F (63°C).
  5. In the same skillet, sauté minced garlic, then add chicken broth, scraping browned bits, followed by heavy cream and additional mustard.
  6. Let the pork rest for at least 10 minutes before slicing and serve with the creamy Dijon sauce.

Nutrition

Serving: 1servingCalories: 350kcalCarbohydrates: 8gProtein: 32gFat: 20gSaturated Fat: 10gPolyunsaturated Fat: 1gMonounsaturated Fat: 9gCholesterol: 100mgSodium: 600mgPotassium: 600mgSugar: 2gVitamin A: 500IUVitamin C: 2mgCalcium: 30mgIron: 2mg

Notes

For enhanced flavor, marinate the pork in Dijon mustard for at least an hour before cooking.

Tried this recipe?

Let us know how it was!

Cozy Up with Rotisserie Chicken Gnocchi Soup Tonight

On a rainy evening, I found myself craving something deeply comforting, and then it hit me: creamy rotisserie chicken gnocchi soup would be the perfect remedy! This dish captures the essence of home-cooked warmth with an effortless charm. Just picture tender gnocchi nestled among juicy chunks of rotisserie chicken, all enveloped in a rich, velvety broth. Not only does this recipe come together in a flash, perfect for those busy weeknights when takeout tempts us, but it also offers variations to suit your taste, whether you’re looking for a vegetarian option or a lighter twist. So, who’s ready to embrace a cozy bowl of happiness tonight?

Why Is This Gnocchi Soup Special?

Comforting, Cozy Flavors: Nothing beats wrapping your hands around a warm bowl of this rotisserie chicken gnocchi soup on a chilly night. Easy Prep: With rotisserie chicken, you can whip this meal up in no time—perfect for busy evenings! Customizable Options: Whether you’re in the mood for a hearty vegetarian version or want to keep it light, the recipe adapts beautifully. Creamy Richness: Every spoonful delivers a luxurious, velvety experience that’s truly satisfying. Crowd-Pleaser: Serve this soup at your next family gathering, and watch it disappear fast—it’s sure to become a favorite, just like my cheesy Garlic Chicken Gnocchi or Tuscan Chicken Soup!

Rotisserie Chicken Gnocchi Soup Ingredients

• Dive into the deliciousness with these essential ingredients!

For the Soup Base

  • Butter – Adds richness and flavor; you can substitute with olive oil for a lighter option.
  • Olive Oil – Provides a base for sautéing; any neutral oil works if you prefer.
  • Onion – Develops sweetness and depth of flavor; shallots can be used for a milder taste.
  • Carrots – Offers natural sweetness and a splash of color; parsnips are a great alternative.
  • Celery – Adds a savory note and texture; omit for a smoother soup if desired.
  • Salt – Enhances overall flavor; feel free to adjust based on taste preferences.
  • Pepper – Introduces a mild spice; using freshly ground black pepper delivers the best flavor.
  • Garlic – Adds aromatic depth; you can use garlic powder in a pinch.
  • White Wine – Deglazes the pan and adds acidity; vegetable stock can replace it for a non-alcoholic option.
  • Flour – Thickens the soup; opt for gluten-free flour if necessary.
  • Chicken Stock – The flavorful base of the soup; switch to vegetable broth for a vegetarian option.
  • Half-and-Half – Infuses creaminess; substitute with equal parts whole milk and heavy cream or dairy-free milk with cornstarch.

For the Seasoning

  • Thyme & Italian Seasoning – Flavor enhancers; fresh herbs can easily be swapped in for delightful freshness.

For the Gnocchi & Protein

  • Gnocchi – Acts as the main carbohydrate; small pasta shapes or cauliflower florets serve as great substitutes.
  • Parmesan Cheese – Provides savory depth; nutritional yeast offers a delicious vegan alternative.
  • Shredded Rotisserie Chicken – The main protein source; cooked turkey or canned chickpeas work well for a vegetarian twist.
  • Fresh Spinach – Adds a vibrant color and nutrition; kale can stand in for added heartiness.

Enjoy exploring these ingredients and create your cozy rotisserie chicken gnocchi soup tonight!

Step‑by‑Step Instructions for Rotisserie Chicken Gnocchi Soup

Step 1: Heat the Base
In a large pot, melt 2 tablespoons of butter and 1 tablespoon of olive oil over medium heat. Wait until the butter is fully melted and the foam subsides, indicating it’s ready. The bubbling should appear gentle, which ensures that your base gets a nice flavor without burning.

Step 2: Sauté the Vegetables
Add 1 chopped onion, 2 diced carrots, and 2 stalks of chopped celery to the pot. Season with a pinch of salt and pepper. Sauté for about 5-7 minutes until the vegetables are tender and fragrant, stirring occasionally to prevent browning. This will build a flavorful foundation for your rotisserie chicken gnocchi soup.

Step 3: Add Garlic
Stir in 3 minced garlic cloves and continue to sauté for an additional minute. You’ll know it’s time to move on when the garlic becomes fragrant; be careful not to let it burn, as burnt garlic can turn bitter. This step will infuse your soup with aromatic goodness.

Step 4: Deglaze the Pan
Pour ½ cup of white wine into the pot, stirring to deglaze it. Allow the wine to simmer for 2-3 minutes until it’s mostly evaporated. You should see the pot’s bottom clear of any stuck bits, enhancing the depth of flavor in your soup.

Step 5: Make it Creamy
Sprinkle in ¼ cup of flour and stir for about 1-2 minutes until it’s fully incorporated and lightly golden. This will create a roux that thickens the soup. Keep stirring to avoid lumps, ensuring a silky texture for your rotisserie chicken gnocchi soup.

Step 6: Whisk in the Stock
Gradually add 4 cups of chicken stock while whisking continuously to combine. Bring the mixture to a gentle simmer and let it cook for about 5 minutes until slightly thickened. You will notice it becoming richer and more flavorful, setting the stage for the rest of your ingredients.

Step 7: Add Creaminess and Herbs
Stir in 1 cup of half-and-half, 1 teaspoon of dried thyme, and 1 teaspoon of Italian seasoning. Bring the soup back to a gentle simmer for another 3-4 minutes, allowing the flavors to meld together beautifully. The creamy texture will begin to envelop your delicious broth.

Step 8: Cook the Gnocchi
Add 1 pound of gnocchi to the pot, cooking them for about 3-5 minutes. They are done when they float to the surface, indicating perfect tenderness. Use this time to enjoy the comforting aroma filling your kitchen!

Step 9: Stir in Chicken and Spinach
Mix in 2 cups of shredded rotisserie chicken and 2 cups of fresh spinach, allowing everything to heat through for another 2-3 minutes. You’ll see the vibrant spinach wilt into the soup, adding nutrition and color to your cozy rotisserie chicken gnocchi soup.

Step 10: Final Seasoning Touches
Taste your soup and season with additional salt, pepper, and a pinch of nutmeg if desired. Let it simmer for an extra minute or two, ensuring all flavors are well balanced. This last seasoning step is key to achieving that perfect flavor profile.

Step 11: Serve and Enjoy
For the best texture, serve the rotisserie chicken gnocchi soup immediately or let it sit for 5-10 minutes to thicken gently. Ladle into bowls and maybe even top with fresh Parmesan cheese for a delightful finishing touch. Enjoy your warming creation!

Rotisserie Chicken Gnocchi Soup Variations

Feel free to let your creativity shine and customize this delightful soup to suit your taste!

  • Vegetarian Option: Replace the shredded chicken with canned chickpeas or cooked lentils for a hearty plant-based twist.
  • Gluten-Free: Use gluten-free gnocchi and flour to recreate a delicious and friendly version for those avoiding gluten.
  • Low-Carb: Swap gnocchi for cauliflower florets; steam them before adding for a comforting, lighter version.
  • Creamy Spin: For an ultra-creamy soup, add extra half-and-half or a splash of cream cheese for indulgence in every bite.
  • Flavor Boost: Add a splash of lemon juice or a teaspoon of zest at the end for a burst of freshness—it’s invigorating!
  • Herbaceous Touch: Incorporate fresh herbs like basil or parsley right before serving for an aromatic touch that elevates the dish.
  • Pasta Variety: Instead of gnocchi, try small pasta shapes like orzo or ditalini for a fun and different twist on the classic!
  • Heat it Up: Add a pinch of red pepper flakes for some warmth, or stir in diced jalapeños for a delightful kick!

No matter which variations you choose, this soup is all about bringing comfort and joy to your kitchen. Feeling adventurous? Check out my Creamy Crack Chicken Noodle Soup or whip up a delicious Chilli Chicken Takeout for more flavorful inspiration!

What to Serve with Creamy Rotisserie Chicken Gnocchi Soup

Imagine curling up with a bowl of warm soup, and it beckons for the perfect accompaniments that elevate your dining experience.

  • Garlic Bread: Serve alongside warm, crispy garlic bread to soak up every last drop of soup; it’s a match made in heaven.
  • Mixed Green Salad: A light salad with a tangy vinaigrette adds a fresh crunch, balancing the creaminess of the soup beautifully.
  • Roasted Vegetables: Seasonal roasted veggies bring delightful textures and vibrant colors to your meal, enhancing both flavor and nutrition.
  • Cheesy Biscuit Bombs: Flaky, cheesy biscuits are not just delightful by themselves but perfect for dipping into the creamy broth of the soup.
  • Chardonnay: A chilled glass of Chardonnay complements the dish seamlessly, with its citrus notes brightening the savory flavors of the soup.
  • Apple Crisp: For dessert, warm apple crisp topped with vanilla ice cream provides a sweet finish that rounds out your cozy meal.
  • Herbed Couscous: Fluffy herbed couscous can serve as a delightful base, soaking up the warm broth and making your meal even heartier.
  • Parmesan Crisps: Thin, crispy Parmesan wafers add a gourmet touch, giving a salty crunch that contrasts nicely with the soup’s creamy texture.
  • Sparkling Water: Light and refreshing, sparkling water with a splash of lemon helps cleanse your palate and keeps the meal feeling lively.
  • Chocolate Fondue: End the night on a sweet note by dipping fresh fruit and marshmallows into rich chocolate fondue for a fun dessert experience.

Expert Tips for Rotisserie Chicken Gnocchi Soup

Brown the Veggies: Ensure they’re sautéed until slightly caramelized for a deeper flavor. This adds to the overall richness of the rotisserie chicken gnocchi soup.

Watch the Gnocchi: They cook quickly; keep an eye on them to avoid overcooking. Once they float, your soup is ready to enjoy!

Adjust for Thickness: For a thinner soup, serve right away. If you prefer a heartier consistency, let it rest briefly before serving.

Season to Taste: Always taste and adjust salt and pepper before serving. The balance of flavors is crucial to making this comforting dish shine!

Meal Prep Tips: This soup can be made ahead and stored in the fridge for up to 3 days; just reheat gently when ready to serve.

Make Ahead Options

These Rotisserie Chicken Gnocchi Soup make-ahead options are perfect for busy weeknights! You can prep the soup base (butter, oil, veggies, and seasoning) up to 24 hours in advance. Simply sauté the vegetables and then store the mixture in an airtight container in the refrigerator. The gnocchi and spinach should be added when you’re ready to cook, as they maintain their texture better this way. When it’s time to enjoy your cozy soup, reheat the base over medium heat before whisking in the chicken stock, cream, and cooked gnocchi. Following this method ensures your soup stays just as delicious while saving you precious time!

How to Store and Freeze Rotisserie Chicken Gnocchi Soup

Fridge: Store your soup in an airtight container for up to 3 days. This allows the flavors to meld beautifully, but remember to let it cool before refrigerating.

Freezer: Freeze the soup in a freezer-safe container for up to 3 months. Avoid adding fresh spinach before freezing; instead, stir it in when reheating for optimal texture.

Reheating: Thaw the soup overnight in the fridge. Reheat on the stovetop over medium heat, adding a splash of broth if it thickens too much. Serve hot for a comforting meal!

Storage Tip: If you plan to freeze, consider leaving out the gnocchi as they may become mushy; it’s easy to cook them fresh and add them just before serving.

Rotisserie Chicken Gnocchi Soup Recipe FAQs

What’s the best way to select ripe vegetables for my soup?
Absolutely! When choosing your vegetables, look for vibrant colors and firm textures. For onions, they should be dry and slightly papery on the outside. Carrots should be bright and not wilted, while celery should be crisp without any dark spots. Fresh spinach should be deep green and free of yellowing, ensuring maximum flavor and nutrients!

How can I store leftover rotisserie chicken gnocchi soup?
Very! You can store your delicious soup in an airtight container in the fridge for up to 3 days. Allow it to cool completely before refrigerating to maintain its texture and flavor. When you’re ready to enjoy it again, just reheat gently on the stove and add a splash of broth if it thickened up too much.

Can I freeze rotisserie chicken gnocchi soup, and how should I do it?
Certainly! To freeze your soup, let it cool completely and then transfer it to a freezer-safe container. Leave out the fresh spinach and gnocchi to prevent them from becoming mushy upon thawing. Your soup can be frozen for up to 3 months. When ready to enjoy, thaw it in the fridge overnight, and reheat on the stove over medium heat, adding the gnocchi and spinach just before serving!

What if my soup turns out too thick or too thin?
No worries! If your soup is too thick, you can easily thin it out by adding a little more broth or water while stirring it over low heat until you reach your desired consistency. Conversely, if it’s too thin, let it simmer on the stove for an additional 5-10 minutes to help it thicken. Always remember to taste and adjust the seasonings as necessary!

Are there any dietary considerations I should keep in mind for this recipe?
Great question! This recipe is quite adaptable. If anyone has dairy allergies, you can substitute half-and-half with a dairy-free milk alternative like almond or oat milk, mixing in a bit of cornstarch for thickening. If cooking for vegetarians, simply replace rotisserie chicken with canned chickpeas or tofu. Always double-check the labels for any potential allergens, and feel free to get creative with flavor substitutions based on personal preferences!

Rotisserie Chicken Gnocchi Soup

Cozy Up with Rotisserie Chicken Gnocchi Soup Tonight

This Rotisserie Chicken Gnocchi Soup is a comforting, creamy delight, perfect for chilly evenings.
Prep Time 10 minutes
Cook Time 30 minutes
Total Time 40 minutes
Servings: 6 bowls
Course: Dinner
Cuisine: American
Calories: 350

Ingredients
  

For the Soup Base
  • 2 tablespoons butter Adds richness and flavor; substitute with olive oil for a lighter option.
  • 1 tablespoon olive oil Provides a base for sautéing; any neutral oil works if you prefer.
  • 1 onion Develops sweetness and depth of flavor; shallots can be used for a milder taste.
  • 2 carrots Offers natural sweetness and a splash of color; parsnips are a great alternative.
  • 2 stalks of celery Adds a savory note and texture; omit for a smoother soup if desired.
  • to taste salt Enhances overall flavor; feel free to adjust based on taste preferences.
  • to taste pepper Introduces a mild spice; using freshly ground black pepper delivers the best flavor.
  • 3 garlic cloves Adds aromatic depth; you can use garlic powder in a pinch.
  • ½ cup white wine Deglazes the pan and adds acidity; vegetable stock can replace it for a non-alcoholic option.
  • ¼ cup flour Thickens the soup; opt for gluten-free flour if necessary.
  • 4 cups chicken stock The flavorful base of the soup; switch to vegetable broth for a vegetarian option.
  • 1 cup half-and-half Infuses creaminess; substitute with equal parts whole milk and heavy cream or dairy-free milk with cornstarch.
For the Seasoning
  • 1 teaspoon thyme Flavor enhancer; fresh herbs can easily be swapped in for delightful freshness.
  • 1 teaspoon Italian seasoning Flavor enhancer; fresh herbs can easily be swapped in for delightful freshness.
For the Gnocchi & Protein
  • 1 pound gnocchi Acts as the main carbohydrate; small pasta shapes or cauliflower florets serve as great substitutes.
  • ½ cup Parmesan cheese Provides savory depth; nutritional yeast offers a delicious vegan alternative.
  • 2 cups shredded rotisserie chicken The main protein source; cooked turkey or canned chickpeas work well for a vegetarian twist.
  • 2 cups fresh spinach Adds a vibrant color and nutrition; kale can stand in for added heartiness.

Equipment

  • Large pot

Method
 

Step-by-Step Instructions
  1. In a large pot, melt butter and olive oil over medium heat until the butter is fully melted.
  2. Add chopped onion, diced carrots, and chopped celery. Season with salt and pepper. Sauté for about 5-7 minutes until tender.
  3. Stir in minced garlic and sauté for an additional minute until fragrant.
  4. Pour in white wine, stirring to deglaze the pot, and simmer for 2-3 minutes.
  5. Sprinkle in flour and stir for 1-2 minutes until fully incorporated.
  6. Gradually add chicken stock while whisking, bring to a gentle simmer and cook for about 5 minutes.
  7. Stir in half-and-half, thyme, and Italian seasoning. Simmer for another 3-4 minutes.
  8. Add gnocchi and cook for about 3-5 minutes, until they float to the surface.
  9. Mix in shredded rotisserie chicken and fresh spinach, and heat through for another 2-3 minutes.
  10. Taste and adjust seasoning with salt, pepper, and nutmeg as desired. Let simmer for an extra minute.
  11. Serve the soup immediately or let it rest for 5-10 minutes before serving. Enjoy!

Nutrition

Serving: 1bowlCalories: 350kcalCarbohydrates: 30gProtein: 25gFat: 15gSaturated Fat: 7gPolyunsaturated Fat: 2gMonounsaturated Fat: 8gCholesterol: 50mgSodium: 700mgPotassium: 800mgFiber: 3gSugar: 5gVitamin A: 2500IUVitamin C: 15mgCalcium: 250mgIron: 2mg

Notes

For meal prep, this soup can be made ahead and stored in the fridge for up to 3 days. Thaw overnight in the fridge before reheating over medium heat, adding broth if needed.

Tried this recipe?

Let us know how it was!

Delicious Gochujang Pasta Recipe Ready in 15 Minutes

The moment I first tasted Gochujang Pasta, it was like fireworks igniting my palate! This Spicy Gochujang Pasta recipe beautifully marries the sweet, spicy, and savory notes of Korean Gochujang with the comfort of al dente pasta. What I love most? It comes together in under 15 minutes, making it perfect for busy weeknights or romantic dinners when you want to impress without the stress. Not only is this dish a quick and easy crowd-pleaser, but it also allows for endless customization—swap in your favorite pasta or add fresh veggies for an extra nutritional boost. With its creamy texture and spicy kick, you might be wondering how you ever lived without this fusion delight. Ready to explore the flavors? Let’s dive into this culinary adventure together!

Why Choose Gochujang Pasta?

Fast and Flavorful: In just 15 minutes, this recipe transforms everyday ingredients into an exciting meal that tantalizes your taste buds.

Versatile Base: The pasta can be swapped for any shape you prefer or even Asian noodles for a unique twist.

Customizable Heat: Adjust the spiciness by varying the Gochujang amount, catering to your preferences.

Comforting Creaminess: The rich, velvety sauce envelops each pasta piece, creating a satisfying and indulgent experience.

Healthy Additions: Mix in vibrant vegetables like bell peppers or zucchini for added texture and nutrients, making it as wholesome as it is delicious.

Elevate your dinner game with this easy yet impressive recipe that promises fun flavors and happy faces at the table!

Gochujang Pasta Ingredients

For the Pasta

  • Fusilli Corti Bucati Pasta – 8 oz; provides a delightful twist, but feel free to pick your favorite shape!

For the Sauce

  • Gochujang – 2 tablespoons; the star ingredient that lends its spicy, umami flavor—make sure it’s gluten-free!
  • Garlic – 3 cloves (minced); the aromatic enhancer that takes the dish to another level.
  • Salted Butter – 4 tablespoons; for that creamy richness—unsalted or vegan butter works too!
  • Olive Oil – 2 tablespoons; perfect for sautéing garlic while adding healthy fats.
  • Parmesan/Cheddar Cheese – ½ cup (shredded); adds depth of flavor—swap for nutritional yeast for a vegan option.
  • Heavy Cream – ½ cup; creates a luscious sauce—try almond, coconut, or soy milk for a dairy-free treat.
  • Black Pepper – ½ teaspoon (optional); for a touch of mild heat that complements the sauce.
  • Chopped Parsley – 2 teaspoons (optional garnish); adds freshness and a pop of green to your plate.

Feel free to get creative! This Gochujang pasta recipe is not just quick and easy to prepare but also open to many delightful modifications. Happy cooking!

Step‑by‑Step Instructions for Gochujang Pasta Recipe

Step 1: Boil the Pasta
Begin by bringing a large pot of water to a rolling boil over high heat. Once boiling, add a generous pinch of salt if desired. Carefully add 8 oz of Fusilli Corti Bucati pasta and cook according to the package instructions, usually 7–12 minutes, until al dente, stirring occasionally. Once done, drain the pasta and set it aside.

Step 2: Prepare the Garlic Oil
In a large sauté pan, heat 2 tablespoons of olive oil and 4 tablespoons of salted butter over medium heat. Allow them to melt together, creating a rich base. Once the butter is fully melted, add 3 minced garlic cloves and optional black pepper. Sauté for about 30–60 seconds until the garlic is fragrant but not browned, as burnt garlic can taste bitter.

Step 3: Make the Creamy Sauce
Stir in 2 tablespoons of Gochujang, ½ cup of heavy cream, and ½ cup of shredded Parmesan or Cheddar cheese into the pan. Continuously stir the mixture for 1–2 minutes as it heats up, allowing the cheese to melt and the sauce to thicken slightly. The sauce should take on a creamy consistency with a beautiful reddish hue from the Gochujang.

Step 4: Combine Pasta and Sauce
Add the drained Fusilli pasta to the creamy Gochujang sauce in the sauté pan. Using tongs, gently toss the pasta to thoroughly coat each piece with sauce. Continue to mix for another minute, allowing the pasta to absorb the flavors and ensuring an even distribution of the creamy Gochujang pasta.

Step 5: Serve and Garnish
To serve, plate the Gochujang pasta in individual bowls or a large serving dish. Optionally, sprinkle with chopped parsley for a fresh touch and a pop of color. Enjoy the dish immediately while hot, savoring the delightful balance of spicy, creamy flavors that makes this Gochujang pasta recipe truly special.

Make Ahead Options

These Gochujang Pasta preparations are perfect for busy home cooks looking to save time! You can make the creamy sauce (without the pasta) up to 3 days in advance and store it in an airtight container in the refrigerator. Simply reheat the sauce gently over low heat, stirring occasionally, and then cook your pasta fresh just before serving for the best texture. The Gochujang and cream will keep their flavors, ensuring your dish is just as delicious when you finish it later. For optimal flavor retention, refrigerate the sauce immediately after preparing and avoid letting it sit out. This way, you’ll have a delightful meal ready to go with minimal effort, perfect for those busy weeknights!

Gochujang Pasta Variations & Substitutions

Feel free to explore these delicious twists and substitutions to make this Gochujang pasta truly your own!

  • Gluten-Free: Use gluten-free pasta to keep this dish friendly for those with dietary restrictions. Quinoa or brown rice pasta also works wonderfully!

  • Vegan: Swap heavy cream for coconut milk and omit cheese; nutritional yeast adds a cheesy flavor without the dairy.

  • Spicy Kick: Add crushed red pepper flakes or a dash of sriracha for an extra layer of heat! This is perfect if you love bold flavors that awaken your palate.

  • Veggie Boost: Toss in colorful veggies like spinach, cherry tomatoes, or kale. They add nutrition and vibrancy to your dish, enhancing both flavor and texture.

  • Protein-Packed: Incorporate grilled shrimp, tofu, or shredded chicken for a heartier meal. They not only elevate the dish but also make it more filling.

  • Asian Twist: Replace Fusilli with ramen or soba noodles for a more authentic Asian flavor profile. This gives the pasta a unique, comforting twist.

  • Creaminess Upgrade: Mix in cream cheese or mascarpone for an ultra-rich sauce. This extra layer of indulgence brings a velvety texture that’ll make your taste buds sing!

  • Savory Depth: Add a splash of soy sauce or sesame oil to deepen the umami flavors. These ingredients resonate beautifully with the Gochujang, creating a harmonious blend.

As you dive into this flavorful journey, I encourage you to check out my delicious Cajun Sausage Pasta or my creamy Marry Me Shrimp Pasta for even more inspiration! Happy cooking!

What to Serve with Spicy Gochujang Pasta?

Delight in a meal that beautifully balances bold flavors and comforting sides, elevating your dining experience to new heights.

  • Creamy Coleslaw: This crunchy, tangy salad offers a refreshing contrast to the spicy pasta, enhancing each bite with its crispness.

  • Garlic Breadsticks: Soft, buttery breadsticks brushed with garlic bring an irresistible aroma and texture, perfectly complementing the creamy sauce.

  • Grilled Chicken Skewers: Tender and juicy, these skewers add a savory element that balances the spice of the Gochujang, making for a hearty meal.

  • Steamed Broccoli: Bright green and tender, broccoli provides not only a pop of color but also essential nutrients, pairing well with the creamy pasta.

  • Spicy Kimchi: The fermented tang of kimchi perfectly offsets the richness of the pasta, adding an authentic Korean flair and enhancing flavor complexity.

  • Chilled Cucumber Salad: Crisp cucumbers tossed with a light vinaigrette create an invigorating contrast to the richness of the Gochujang pasta while offering hydration.

  • Sparkling Water: A fizzy drink refreshes your palate in between bites, making every mouthful of your Gochujang pasta even more enjoyable!

Explore these delightful pairings and transform your meal into a feast that will leave everyone craving seconds!

How to Store and Freeze Gochujang Pasta

Fridge: Store leftovers in an airtight container for up to 5 days. Ensure the pasta has cooled completely before sealing to maintain freshness and flavor.

Freezer: For longer storage, freeze the pasta in a freezer-safe container for up to 3 months. Thaw overnight in the fridge before reheating.

Reheating: Gently reheat the Gochujang pasta in a pan over low heat, adding a splash of water or cream to revive its creamy texture. Stir frequently to avoid scorching.

Avoid Separation: When storing, keep the sauce and pasta separate if possible. This helps maintain the creamy consistency when reheated and prevents the sauce from becoming too thick.

Expert Tips for Gochujang Pasta

  • Watch the Garlic: Be careful not to burn the garlic while sautéing, as this can turn bitter. Aim for just a fragrant golden color.

  • Control the Heat: Adjust the amount of Gochujang based on your spice tolerance to ensure a perfect balance tailored to your palate.

  • Choose the Right Pasta: While Fusilli Corti Bucati is delightful, don’t hesitate to experiment with other pasta shapes or even ramen for a unique twist.

  • Add Texture: For extra nutrition, consider mixing in roasted vegetables like bell peppers or zucchini, elevating your Gochujang pasta recipe even further.

  • Store Leftovers Well: If you have any leftovers, store them in an airtight container in the refrigerator for up to five days to maintain flavor and freshness.

Gochujang Pasta Recipe FAQs

How should I choose ripe ingredients for this recipe?
Absolutely! For the best flavor, use fresh garlic cloves that are firm and free of any dark spots or mold. As for the Gochujang, verify that it’s gluten-free if you’re following a gluten-free diet—check the label for the finest quality. When it comes to cheese, select a freshly shredded variety for optimal meltiness and flavor!

What is the best way to store leftovers?
Very simple! After your Gochujang pasta has cooled completely, place it in an airtight container. It can last in the refrigerator for up to 5 days. Just remember to allow it to cool before sealing, as this keeps your pasta fresh and delicious for later enjoyment.

Can I freeze Gochujang pasta?
Yes, you can! To freeze, transfer the cooled pasta to a freezer-safe container or a resealable plastic bag. It can be stored for up to 3 months. I recommend thawing it overnight in the refrigerator before reheating to preserve its creamy texture.

What should I do if my sauce becomes too thick?
If your sauce becomes too thick during cooking or reheating, no worries at all! Just add a splash of water or cream to the pan while gently stirring over low heat until it reaches your desired consistency. This will help revive the creamy texture and keep it deliciously smooth.

Are there any dietary considerations for Gochujang pasta?
Yes! This recipe can easily accommodate various dietary needs. For vegans, simply substitute the heavy cream with almond, coconut, or soy milk and skip the cheese or replace it with nutritional yeast. If you have any allergies, always check the labels on ingredients, especially for the pasta and Gochujang.

Gochujang Pasta Recipe

Delicious Gochujang Pasta Recipe Ready in 15 Minutes

This Gochujang Pasta recipe combines sweet, spicy, and savory flavors in a creamy sauce, perfect for quick weeknight meals.
Prep Time 5 minutes
Cook Time 10 minutes
Total Time 15 minutes
Servings: 4 servings
Course: Pasta
Cuisine: Korean
Calories: 400

Ingredients
  

For the Pasta
  • 8 oz Fusilli Corti Bucati Pasta or your favorite shape
For the Sauce
  • 2 tablespoons Gochujang ensure it's gluten-free
  • 3 cloves Garlic minced
  • 4 tablespoons Salted Butter or unsalted or vegan butter
  • 2 tablespoons Olive Oil for sautéing
  • ½ cup Parmesan/Cheddar Cheese shredded, or nutritional yeast for vegan option
  • ½ cup Heavy Cream or almond/coconut/soy milk for dairy-free
  • ½ teaspoon Black Pepper optional
  • 2 teaspoons Chopped Parsley optional garnish

Equipment

  • Large pot
  • sauté pan
  • Measuring cups
  • Measuring spoons
  • Tongs
  • Cutting board
  • Knife

Method
 

Step-by-Step Instructions
  1. Begin by bringing a large pot of water to a rolling boil over high heat. Once boiling, add a pinch of salt if desired. Carefully add 8 oz of Fusilli Corti Bucati pasta and cook according to the package instructions, usually 7–12 minutes, until al dente. Drain the pasta and set aside.
  2. In a large sauté pan, heat 2 tablespoons of olive oil and 4 tablespoons of salted butter over medium heat. Allow them to melt together. Once the butter is fully melted, add 3 minced garlic cloves and optional black pepper. Sauté for about 30–60 seconds until the garlic is fragrant.
  3. Stir in 2 tablespoons of Gochujang, ½ cup of heavy cream, and ½ cup of shredded cheese into the pan. Continuously stir for 1–2 minutes as it heats up, allowing the cheese to melt and the sauce to thicken slightly.
  4. Add the drained Fusilli pasta to the creamy Gochujang sauce. Using tongs, gently toss the pasta to thoroughly coat each piece. Continue to mix for another minute.
  5. To serve, plate the Gochujang pasta in individual bowls or a large serving dish. Optionally, sprinkle with chopped parsley. Enjoy the dish immediately while hot.

Nutrition

Serving: 1servingCalories: 400kcalCarbohydrates: 50gProtein: 12gFat: 18gSaturated Fat: 10gPolyunsaturated Fat: 2gMonounsaturated Fat: 4gCholesterol: 40mgSodium: 600mgPotassium: 200mgFiber: 2gSugar: 3gVitamin A: 500IUVitamin C: 1mgCalcium: 150mgIron: 2mg

Notes

Feel free to customize with your favorite pasta shape or add fresh vegetables. Store leftovers in an airtight container for up to 5 days.

Tried this recipe?

Let us know how it was!

Gluten-Free English Muffins: Soft, Chewy Breakfast Bliss

A warm kitchen filled with the scent of freshly baked bread is my happy place. Today, I’m thrilled to share a recipe that transforms your breakfast routine: Homemade Gluten-Free English Muffins. These delightful treats boast a soft and chewy texture, perfectly crafted with all the necessary nooks for toasting and slathering with your favorite toppings. What’s more, they are quick to prepare and packed with high protein, making them not only a gluten-free staple but also a nutritious kick-start to your day. Whether you’re a seasoned chef or just starting your culinary journey, these muffins will inspire you to say goodbye to store-bought options. Curious about how easy it is to whip these up? Let’s dive in!

Why are gluten-free muffins so amazing?

Freshly Baked Goodness: The aroma of warm, gluten-free English muffins will fill your kitchen with an irresistible scent, promising delicious breakfast moments.
Simplicity Made Delicious: With straightforward steps, even novice bakers can confidently create a delightful treat.
Protein-Packed: Enjoy all the benefits of a high-protein breakfast without compromising on taste.
Versatile Toppings: Top them with anything from classic butter and jam to savory spreads, making every bite unique!
Freezing Convenience: Make a batch ahead of time and store them for quick, nutritious breakfasts in the future. It’s a perfect way to avoid bland, fast food options!

Gluten-Free English Muffin Ingredients

For the Muffin Base

  • Instant Yeast – Essential for leavening, helping create that fluffy muffin texture; always check for freshness by ensuring it foams.
  • Sugar – Sweetens the mixture and activates the yeast for optimal rise.
  • Warm Milk (¾ cup) – Adds moisture and richness; can substitute with lactose-free or dairy-free options.
  • Warm Water (¾ cup) – Activates the yeast for a perfect dough consistency.
  • Apple Cider Vinegar (2 tsp) – Contributes to a fluffier texture by providing an acidic environment; feel free to swap with white vinegar.
  • Egg (1) – Adds richness; for a vegan version, a flax egg works perfectly as a substitute.
  • Butter (3 tbsp, melted) – Enhances flavor and moisture; substitute with dairy-free butter if desired.
  • Gluten-Free Mulino Caputo Fioreglut Flour (2 ¾ cups) – Delivers elasticity similar to traditional flour; using alternatives may hinder the recipe’s success.
  • Salt (2 tsp) – Elevates flavor significantly in your muffins.

For the Finishing Touch

  • Cornmeal (½ cup) – Sprinkled on baking sheets, it helps achieve that delightful, crispy crust.

Enjoy making these gluten-free English muffins that are not just delicious but a nourishing start to your day!

Step‑by‑Step Instructions for Gluten-Free English Muffins

Step 1: Activate Yeast
In a stand mixer bowl, combine 2 teaspoons of sugar with ¾ cup warm milk and ¾ cup warm water. Sprinkle in 2 teaspoons of instant yeast, then let the mixture sit undisturbed for about 10 minutes, until it becomes foamy. This step is essential for achieving that perfect rise in your gluten-free English muffins.

Step 2: Mix Wet Ingredients
Once the yeast is foamy, add 2 teaspoons of apple cider vinegar, 1 egg, and 3 tablespoons of melted butter into the bowl. Using the paddle attachment of your stand mixer, mix on medium speed until the mixture is well-combined and smooth. This mixture creates the flavorful base for your muffins.

Step 3: Combine with Flour
Gradually incorporate 2 ¾ cups of Gluten-Free Mulino Caputo Fioreglut Flour into the wet mix, adding 2 teaspoons of salt halfway through. Beat the mixture on medium speed for about 3-4 minutes, until the dough is sticky and elastic. It’s important to avoid adding excessive flour, as this can affect the texture of your gluten-free English muffins.

Step 4: First Rise
Transfer the sticky dough to a lightly oiled bowl, covering it with a clean kitchen towel. Allow the dough to rise in a warm, draft-free spot for about 1 hour or until it has doubled in size. This first rise is crucial for developing the airy texture that makes these muffins so delightful.

Step 5: Shape Muffins
After the dough has risen, lightly flour a clean surface and turn the dough out onto it. Gently flatten the dough to about 1 inch thick and use a cookie cutter to cut out rounds. Place the muffins onto parchment-lined baking sheets sprinkled with cornmeal, which adds a crispy touch to the exterior.

Step 6: Second Rise
Cover the shaped muffins with a kitchen towel and allow them to rise for another 30 minutes. This second rise provides the muffins with their light texture and allows for additional expansion. During this time, prepare an evenly heated skillet for cooking.

Step 7: Cooking
Preheat a skillet over medium-low heat and sprinkle the bottom with cornmeal to prevent sticking. Carefully transfer the muffins to the skillet and cook each side for about 5-6 minutes, until they turn golden brown and sound hollow when tapped. This method creates that delightful crust while keeping the inside soft and fluffy.

Step 8: Serving
Once cooked, remove the gluten-free English muffins from the skillet and let them cool slightly. To serve, split each muffin with a fork, toast them if you prefer, and enjoy with your favorite spreads or toppings. The final result will showcase nooks and crannies, ideal for holding butter, jam, or other delicious toppings!

What to Serve with Homemade Gluten-Free English Muffins

Transform breakfast into something special with the perfect accompaniments that complement the soft, chewy delight of your English muffins.

  • Creamy Avocado Spread: Smooth and rich, this spread adds healthy fats and a refreshing taste that enhances your muffins beautifully.
  • Classic Jam or Marmalade: Sweet, fruity preserves bring a burst of flavor and a touch of nostalgia, making every bite pure bliss.
  • Scrambled Eggs: Light and fluffy, they offer a protein-packed side that pairs perfectly with the muffins’ texture.
  • Smoked Salmon Platter: The savory depth of smoked salmon, paired with cream cheese and capers, makes for a gourmet breakfast experience.
  • Fruit Salad: Fresh, vibrant fruits add a sweet and zesty contrast, awakening your palate and balancing the meal. Think of juicy berries, melon, and citrus!
  • Nut Butter Delight: Spread almond or peanut butter for an indulgent yet wholesome option, rich with essential nutrients and flavor.
  • Herbed Cream Cheese: Blend cream cheese with fresh herbs for a sophisticated twist, elevating your muffins from simple to sublime.
  • Fresh Brewed Coffee: Pair your muffins with a cup of your favorite coffee to create the ultimate comforting breakfast experience.
  • Honey Drizzle: A simple drizzle of honey adds a natural sweetness that complements the muffins’ baked goodness perfectly.
  • Chai Tea Latte: Warm and aromatic, this complement is perfect for a cozy morning and enhances the homemade vibe of your breakfast.

How to Store and Freeze Gluten-Free English Muffins

Fridge: Store your gluten-free English muffins in an airtight container for up to 2 days to maintain freshness. To enjoy, simply slice, toast, and add your favorite toppings.

Freezer: For longer storage, freeze the muffins by wrapping each one tightly in plastic wrap and placing them in a freezer-safe bag or container. They can be frozen for up to 3 months; just thaw before toasting for a delightful breakfast treat.

Reheating: When you’re ready to enjoy them, simply toast the muffins straight from the fridge or freezer. This brings back their chewy texture and allows for perfect crispy edges!

Make-Ahead: If you’d like to prep ahead of time, consider making a batch on the weekend to have these delicious gluten-free English muffins ready for busy weekdays!

Make Ahead Options

These homemade gluten-free English muffins are perfect for meal prep and can save you time on busy mornings! You can prepare the dough up to 24 hours in advance. Simply follow the steps to mix the dough, then cover it and refrigerate overnight. This slow rise not only enhances the flavor but also maintains the muffins’ soft texture. When you’re ready to bake, take the dough out of the fridge, allow it to come to room temperature for about 30 minutes, shape the muffins, and let them rise for another 30 minutes before cooking. With this method, you’ll have warm, delicious gluten-free English muffins ready with minimal effort!

Expert Tips for Gluten-Free English Muffins

  • Check Yeast Freshness: Always ensure your yeast is fresh by looking for foam during activation; stale yeast leads to flat muffins.
  • Avoid Excess Flour: Resist the urge to add too much flour to your sticky dough, as this can hinder the gluten-free muffins from rising properly.
  • Warm Rising Environment: Create a warm, draft-free setting for the first rise; this is essential for achieving those light and airy muffins.
  • Use the Right Flour: Stick to Gluten-Free Mulino Caputo Fioreglut Flour; other flours may not yield the desired texture and softness.
  • Cook Slowly: Maintain medium-low heat while cooking; rushing this process can result in raw centers and excessively browned exteriors.

Gluten-Free English Muffins: Customization Delight

Feel free to let your creativity flourish by tailoring these muffins to your taste and dietary needs!

  • Savory Spin: Add herbs like rosemary or thyme to the dough for a flavorful twist that complements cheesy toppings beautifully.
  • Sweeten the Deal: Mix in cinnamon and a touch of honey or maple syrup for a warm, cozy flavor, perfect for breakfast.
  • Nuts & Seeds: Toss in chopped nuts or seeds for added texture and crunch. A sprinkle of sunflower seeds can create a delightful nutty flavor!
  • Spicy Kick: Incorporate a pinch of cayenne pepper or crushed red pepper flakes into the dough to give your muffins a surprising heat.
  • Dairy-Free Delight: Replace butter with coconut oil and use a plant-based milk to ensure these muffins stay dairy-free without sacrificing flavor.
  • Fruit Fusion: Add dried fruits like cranberries or apricots to boost sweetness and provide a chewy contrast to the soft muffins.
  • Breakfast Sandwich Base: Shape into larger rounds to create the perfect base for egg and cheese breakfast sandwiches for a hearty morning meal.
  • Try Different Flours: If you’re adventurous, experiment with a different gluten-free flour blend to see how it influences taste and texture.

With endless possibilities to customize, you’ll never tire of these gluten-free English muffins! If you ever want to explore more creative topping ideas, check out my guide on creative muffin toppings for additional inspiration.

Gluten-Free English Muffins Recipe FAQs

Which type of flour is best for gluten-free muffins?
Absolutely! Using Gluten-Free Mulino Caputo Fioreglut Flour is highly recommended for this recipe. This specific flour has elasticity that closely mimics traditional wheat flour, ensuring your muffins turn out soft and chewy. Alternatives may not produce the same delightful texture, so it’s best to stick with this variety for the best results.

How should I store my gluten-free English muffins?
To keep your muffins fresh, store them in an airtight container at room temperature for up to 2 days. I often keep them on the counter, but if you want to extend their life, consider refrigerating them. Just be sure to toast them to revive the taste and texture when you’re ready to enjoy!

Can I freeze gluten-free English muffins?
Absolutely! For longer storage, wrap each muffin tightly in plastic wrap, then place them in a freezer-safe bag or container. They can be stored in the freezer for up to 3 months. When you want to eat one, simply thaw it at room temperature, then toast to your desired crispiness to bring back that fresh-baked taste.

What can I do if my muffins don’t rise properly?
If you find that your muffins aren’t rising, the most likely culprit is stale yeast. Always ensure your yeast is fresh—check for foaming during the activation step. Also, create a warm environment for rising; sometimes, placing the dough in a slightly heated oven can help. If the dough feels too sticky, avoid adding extra flour, which can inhibit rising.

Are gluten-free muffins suitable for all dietary needs?
Yes! These gluten-free English muffins cater to various dietary needs, including those who are gluten intolerant. You can also make them vegan by substituting the egg with a flax egg (1 tablespoon flaxseed meal mixed with 2.5 tablespoons water). Just remember to check all your ingredient labels for potential allergens.

How can I customize my gluten-free English muffins?
Very! Feel free to experiment with mix-ins like herbs, spices, or even cheese for a savory twist. For sweet versions, consider adding dried fruits or chocolate chips. The toppings are limitless; think about spreading nut butter, cream cheese, or even using them as a base for breakfast sandwiches!

Gluten-Free English Muffins

Gluten-Free English Muffins: Soft, Chewy Breakfast Bliss

Enjoy these Gluten-Free English Muffins that are soft, chewy, and perfect for breakfast.
Prep Time 20 minutes
Cook Time 40 minutes
Rising Time 1 hour 30 minutes
Total Time 2 hours 30 minutes
Servings: 6 muffins
Course: Breakfast
Cuisine: Gluten-Free
Calories: 150

Ingredients
  

Muffin Base
  • 2 tsp Instant Yeast Essential for leavening, check for freshness.
  • 2 tsp Sugar Activates the yeast.
  • ¾ cup Warm Milk Can substitute with lactose-free options.
  • ¾ cup Warm Water Activates the yeast.
  • 2 tsp Apple Cider Vinegar Can substitute with white vinegar.
  • 1 whole Egg For vegan version, use a flax egg.
  • 3 tbsp Butter Melted, can substitute with dairy-free butter.
  • 2 ¾ cups Gluten-Free Mulino Caputo Fioreglut Flour Using alternatives may hinder success.
  • 2 tsp Salt Elevates flavor.
Finishing Touch
  • ½ cup Cornmeal Sprinkled on baking sheets for crisp crust.

Equipment

  • Stand mixer
  • Cookie cutter
  • Skillet
  • Baking Sheets

Method
 

Preparation Steps
  1. In a stand mixer bowl, combine 2 teaspoons of sugar with ¾ cup warm milk and ¾ cup warm water. Sprinkle in 2 teaspoons of instant yeast, then let the mixture sit undisturbed for about 10 minutes, until foamy.
  2. Once the yeast is foamy, add 2 teaspoons of apple cider vinegar, 1 egg, and 3 tablespoons of melted butter. Mix on medium speed until well combined.
  3. Gradually incorporate 2 ¾ cups of Gluten-Free Mulino Caputo Fioreglut Flour and 2 teaspoons of salt halfway through. Beat on medium speed for about 3-4 minutes until the dough is sticky and elastic.
  4. Transfer the sticky dough to a lightly oiled bowl, cover with a kitchen towel, and let it rise in a warm spot for about 1 hour until doubled in size.
  5. After rising, lightly flour a surface and turn the dough out onto it. Flatten to about 1 inch thick and cut out rounds with a cookie cutter.
  6. Place the muffins on parchment-lined baking sheets sprinkled with cornmeal and cover with a kitchen towel for another 30 minutes.
  7. Preheat a skillet over medium-low heat, sprinkle cornmeal, and carefully transfer muffins to the skillet. Cook each side for about 5-6 minutes until golden brown.
  8. Remove muffins from the skillet, let them cool slightly, then split with a fork, toast if preferred, and enjoy with your favorite toppings.

Nutrition

Serving: 1muffinCalories: 150kcalCarbohydrates: 21gProtein: 5gFat: 5gSaturated Fat: 2gMonounsaturated Fat: 3gCholesterol: 30mgSodium: 200mgPotassium: 150mgFiber: 2gSugar: 1gVitamin A: 250IUCalcium: 100mgIron: 1mg

Notes

These gluten-free English muffins can be stored in an airtight container for up to 2 days or frozen for up to 3 months. Reheat by toasting directly from the fridge or freezer.

Tried this recipe?

Let us know how it was!

Pumpkin Balls with Spice Cake Mix – Your Fall Treats Delight

As the leaves begin to change and a crispness fills the air, I find myself craving cozy flavors that remind me of home. That’s when I whip up these delicious Pumpkin Spice Cake Balls, a delightful blend of warm spices and sweet pumpkin, all wrapped in creamy white chocolate. The best part? They’re semi-homemade and incredibly quick to prepare, making them perfect for last-minute gatherings or festive fall celebrations. Whether you’re planning a spooky Halloween soirée or looking to brighten up your Thanksgiving table, these little treats are sure to steal the show! Ready to dive into the world of easy baking and impress your friends with this seasonal treasure? Let’s get started!

Why Are Pumpkin Spice Cake Balls Perfect?

Irresistible Flavor: Each bite offers the warmth of classic pumpkin spices, perfectly complemented by sweet, creamy white chocolate coating.

Semi-Homemade Delight: With the help of a box mix, these treats come together in no time without sacrificing flavor.

No-Bake Convenience: Perfect for those busy hosts, these cake balls can be quickly prepped and are easily made ahead of time.

Festive Appeal: Their eye-catching design makes them an impressive centerpiece for your Halloween parties or Thanksgiving tables!

Craft these delightful bites and make sure to pair them with other festive treats like Honeybun Carrot Cake or Easter Poke Cake for a memorable dessert spread.

Pumpkin Balls with Spice Cake Mix Ingredients

• Discover the perfect blend of flavors in these Pumpkin Balls with Spice Cake Mix!

For the Cake Balls

  • Spice Cake Box Mix – Using a box mix makes the process quick and effortless!
  • Pumpkin Puree – Enhances the cake’s moisture and gives an authentic pumpkin flavor; use 100% pumpkin.
  • Egg – Provides richness and helps bind the ingredients together; opt for large eggs at room temperature.
  • Water – Adds moisture, ensuring your cake balls are not dry and remain delightful.
  • Vegetable Oil – Keeps the cake moist; you can substitute with melted butter for a richer flavor.
  • Canned Cream Cheese Frosting – Acts as a binder, creating the dough-like consistency essential for shaping cake balls.

For Coating

  • White Melting Chips – Provides a creamy, sweet exterior; chocolate-flavored almond bark is a great alternative if you prefer.
  • Pumpkin Pie Spice – Sprinkle on top for an aromatic finish that enhances the overall fall flavor of these treats.

Step‑by‑Step Instructions for Pumpkin Balls with Spice Cake Mix

Step 1: Preheat Oven
Begin by preheating your oven to 350°F (175°C). While it warms up, grease a 9×11 inch baking pan with cooking spray or butter. This step ensures that your cake will have a lovely golden color and won’t stick to the pan, making the process smoother when you’re ready to enjoy your Pumpkin Balls with Spice Cake Mix.

Step 2: Mix Ingredients
In a large mixing bowl, combine the spice cake box mix, pumpkin puree, egg, water, and vegetable oil. Use a whisk or electric mixer to blend these ingredients until smooth and fully combined, which should take about 2-3 minutes. The mixture will become thick and homogeneous, creating a perfect base for your Pumpkin Balls.

Step 3: Bake Cake
Pour the combined batter into your greased baking pan, spreading it evenly. Place it in the preheated oven and bake for approximately 33 minutes, or until a toothpick inserted into the center comes out clean. Once done, remove the pan from the oven and allow it to cool for about 10 minutes before transferring the cake to a wire rack.

Step 4: Crumble Cake
Once your cake is completely cooled, use a fork to crumble it into fine crumbs in a large bowl. This crumbling process should take 5-7 minutes, ensuring that the cake pieces are well broken up. Let the crumbled cake cool for an additional 15 minutes; a cool base is crucial for mixing with the frosting to form your Pumpkin Balls with Spice Cake Mix.

Step 5: Mix with Frosting
Take the room-temperature cream cheese frosting and add it to the crumbled cake. Using your clean hands, combine the mixture until it forms a dough-like consistency. This should take about 2-3 minutes. The frosting acts as the glue, binding everything together to create a rich flavor profile for your Pumpkin Balls.

Step 6: Form Balls
Scoop out portions of the dough with a tablespoon or small ice cream scoop to create uniform balls, each about 1.5 inches in diameter. Roll them smooth between your palms and place them onto a parchment-lined baking sheet. This method ensures even cooking and uniform texture in your delectable Pumpkin Balls with Spice Cake Mix.

Step 7: Chill Dough
Refrigerate the formed cake balls for about 10 minutes. Chilling is key because it allows them to firm up, making them easier to handle when you coat them later. Keep an eye on them as they chill; you want them just firm enough to maintain their shape during the next steps.

Step 8: Melt Coating
In a microwave-safe bowl, melt the white melting chips in 30-second intervals, stirring each time until smooth. This process usually takes about 1-2 minutes total. If the mixture is too thick, add a teaspoon of vegetable oil to thin it, achieving a perfect consistency for coating your Pumpkin Balls.

Step 9: Coat Cake Balls
Once chilled, take each cake ball and dip it into the melted white chocolate, ensuring it’s fully coated. Allow any excess chocolate to drip off before placing them back onto the lined baking sheet. To enhance the fall vibe, sprinkle lightly with pumpkin pie spice while the coating is still wet.

Step 10: Set Coating
Let the coated cake balls dry for about 15 minutes at room temperature, or speed up the process by placing them in the fridge for about 5 minutes. This setting time is essential, as it ensures the chocolate coating hardens properly, locking in all that delicious flavor from your Pumpkin Balls with Spice Cake Mix.

Step 11: Enjoy or Store
Your delightful Pumpkin Balls with Spice Cake Mix are now ready to serve! You can either enjoy them immediately or transfer them to an airtight container for later use. They stay fresh and delicious for several days, or even freeze them for longer storage, ready to delight guests whenever you like.

Make Ahead Options

These Pumpkin Spice Cake Balls are perfect for meal prep, making your busy fall days a little easier! You can prepare the cake mixture and form the balls up to 2 days in advance. Simply follow the first six steps, then refrigerate the uncoated cake balls in an airtight container. When you’re ready to serve, just melt the white chocolate, coat your chilled cake balls, and let them set. This method ensures the cake balls remain just as delicious and fresh, while allowing you to enjoy festive gatherings without the last-minute rush. Trust me, your guests will relish these delightful treats!

What to Serve with Pumpkin Balls with Spice Cake Mix

Fall is here, and it’s time to create the perfect dessert spread that complements the warmth and coziness of this delightful season!

  • Creamy Mashed Potatoes: These rich and velvety mashed potatoes bring a savory contrast, balancing the sweetness of your pumpkin balls beautifully. Imagine that creamy goodness melting in your mouth alongside a sweet treat—pure bliss!

  • Apple Cider Mimosas: A fizzy apple cider mimosa will add a refreshing zing to your dessert table, perfectly capturing the essence of fall festivities. This delightful drink is not only visually stunning but also a fun twist for gatherings!

  • Roasted Brussels Sprouts: The crispy edges and earthy flavor of roasted Brussels sprouts provide a delightful crunch that pairs elegantly with the softness of the pumpkin spice cake balls. Together, they create a delightful balance of textures for your palate.

  • Chilled Pumpkin Soup: Start your meal with a comforting bowl of chilled pumpkin soup, packing all the fall flavors. The creamy base is a lovely way to warm up to your dessert and keep the pumpkin theme vibrant!

  • Spiced Hot Chocolate: Indulge in a mug of spiced hot chocolate, a comforting beverage that echoes the flavors of your cake balls. Adding a touch of cinnamon will elevate the warmth and coziness, making it an ideal pairing.

  • Candied Pecans: Crunchy, caramelized pecans will complement the creamy sweetness of the pumpkin balls while adding texture. Their nutty flavor brings a delightful contrast that keeps your taste buds intrigued.

Craft a delightful meal that reflects the essence of the season with these sweet and savory combinations!

Pumpkin Balls with Spice Cake Mix Variations

Feel free to explore and customize these delightful treats to suit your taste and occasion!

  • Flavor Swap: Replace spice cake mix with chocolate or vanilla flavor for a new twist.
  • Frosting Variation: Use cream cheese, vanilla, or chocolate frosting to create unique flavor profiles.
  • Nutty Touch: Add chopped pecans or walnuts into the mixture for a crunchy texture and nutty flavor.
  • Garnish Fun: Decorate with Halloween-themed sprinkles or edible glitter for a festive touch.
  • Cake Pop Twist: Turn cake balls into cake pops by inserting lollipop sticks before coating in chocolate. They make great handheld desserts!
  • Mini Cheesecake Balls: Swap frosting for cheesecake mixture for a creamy, decadent version that’s irresistibly rich.
  • Spice It Up: Enhance flavor by adding a pinch of nutmeg or cloves to the batter for additional complexity.
  • Freezing Option: You can freeze the cake balls before coating; dip them when you’re ready to serve for a fresh experience!

Pair these mouthwatering pumpkin cake balls with treats like Strawberry Cheesecake Dump or Joumou Haitian Pumpkin for an unforgettable dessert spread that will impress your guests.

Storage Tips for Pumpkin Balls with Spice Cake Mix

  • Room Temperature: Keep your pumpkin balls at room temperature for up to 2 days if you’re planning to enjoy them quickly. Make sure they are in an airtight container to maintain freshness.

  • Fridge: For optimal freshness, store your pumpkin balls in the fridge for up to 1 week. The cream cheese frosting requires refrigeration, so this is essential to keep them delicious!

  • Freezer: You can freeze your pumpkin balls for up to 1 month! Place them in a single layer on a parchment-lined tray, freeze until solid, then transfer to an airtight container.

  • Thawing: To enjoy frozen pumpkin balls, simply remove them from the freezer and thaw in the fridge for a few hours before serving. This keeps them moist and ready for your next gathering!

Expert Tips for Pumpkin Balls with Spice Cake Mix

  • Proper Mixing: Ensure ingredients are mixed thoroughly; this prevents lumps and ensures a smooth batter for your pumpkin balls.

  • Crumble Texture: Crumble the cooled cake into fine, even crumbs to achieve the perfect consistency when mixing with frosting.

  • Chill for Shape: Don’t skip the chilling step! It is crucial for your pumpkin balls to firm up and maintain their shape when coating.

  • Coating Technique: Dip quickly in the melted coating to avoid clumping, and use a fork to lift them out, ensuring an even layer and a gorgeous finish.

  • Storage Tips: Store your pumpkin balls in an airtight container; they’re best enjoyed fresh but can be frozen for up to a month without losing flavor.

Pumpkin Balls with Spice Cake Mix Recipe FAQs

What should I look for in pumpkin puree?
Absolutely! When selecting pumpkin puree, ensure it’s 100% pure pumpkin and not pumpkin pie filling, which contains added sugars and spices. Look for a vibrant orange color and a smooth texture without any dark spots or lumps. This guarantees the best flavor and moistness in your Pumpkin Balls with Spice Cake Mix.

How should I store leftover Pumpkin Balls?
I recommend storing your pumpkin balls in an airtight container. At room temperature, they’ll last for about 2 days. For longer storage, keep them in the fridge, where they’ll stay fresh for up to a week. Just remember that the cream cheese frosting inside requires refrigeration for safety, so it’s best to keep them cool!

Can I freeze Pumpkin Balls with Spice Cake Mix?
Yes, you can freeze these delightful treats for up to 1 month! To do this, place them in a single layer on a parchment-lined baking tray and freeze until solid. Once frozen, transfer them to an airtight container, separating layers with parchment paper. Thaw them in the fridge for a few hours when you’re ready to enjoy them again.

What if my cake balls are too crumbly?
If you find your cake balls are too crumbly when mixing with frosting, don’t worry! This can happen if the cake isn’t crumbled finely enough or if there’s not enough frosting. I suggest adding a bit more cream cheese frosting—start with a tablespoon—and mix thoroughly until you reach the dough-like consistency needed to form your pumpkin balls.

Can I use other cake mixes for this recipe?
Very much so! You can easily swap out the spice cake mix for a vanilla or chocolate cake mix depending on your taste preference. Just remember, using a spice cake will give you that warm, fall flavor that pairs perfectly with pumpkin. The versatility of this recipe allows you to adjust according to your cravings!

Are these suitable for those with allergies?
While they are delicious, be cautious if you or your guests have allergies. The recipe contains eggs, dairy (cream cheese frosting), and potential gluten from the cake mix. If needed, you can substitute the egg with a flax egg for a vegan option, and there are gluten-free cake mixes available that can work perfectly for the Pumpkin Balls with Spice Cake Mix.

Pumpkin Balls with Spice Cake Mix

Pumpkin Balls with Spice Cake Mix – Your Fall Treats Delight

Enjoy Pumpkin Balls with Spice Cake Mix, a semi-homemade treat with cozy fall flavors, perfect for gatherings!
Prep Time 20 minutes
Cook Time 33 minutes
Chilling Time 10 minutes
Total Time 1 hour 3 minutes
Servings: 12 balls
Course: Dessert
Cuisine: American
Calories: 150

Ingredients
  

For the Cake Balls
  • 1 box Spice Cake Box Mix Using a box mix makes the process quick and effortless!
  • 1 cup Pumpkin Puree Use 100% pumpkin for best flavor.
  • 1 Egg Use large eggs at room temperature.
  • 1/2 cup Water Adds moisture to the mixture.
  • 1/4 cup Vegetable Oil Or substitute with melted butter.
  • 1 container Canned Cream Cheese Frosting Acts as a binder for the dough.
For Coating
  • 1 cup White Melting Chips Provides a creamy, sweet exterior.
  • 1 tsp Pumpkin Pie Spice Sprinkle on top for added fall flavor.

Equipment

  • Mixing Bowl
  • whisk
  • Baking Pan
  • microwave-safe bowl
  • Parchment Paper
  • Ice cream scoop
  • Wire rack

Method
 

Step-by-Step Instructions
  1. Preheat your oven to 350°F (175°C) and grease a 9x11 inch baking pan.
  2. In a large mixing bowl, combine spice cake mix, pumpkin puree, egg, water, and vegetable oil. Mix until smooth.
  3. Pour the batter into the greased pan and bake for approximately 33 minutes. Allow to cool for 10 minutes.
  4. Crumble the cooled cake into fine crumbs and let cool for an additional 15 minutes.
  5. Add room-temperature cream cheese frosting to the crumbled cake and mix until you have a dough-like consistency.
  6. Scoop out portions of dough, roll into balls, and place on a parchment-lined baking sheet.
  7. Refrigerate the formed cake balls for about 10 minutes.
  8. Melt the white melting chips in a microwave-safe bowl, stirring until smooth.
  9. Dip each cake ball into the melted coating and sprinkle with pumpkin pie spice.
  10. Let the coated cake balls dry for about 15 minutes at room temperature.
  11. Enjoy or store in an airtight container for later use.

Nutrition

Serving: 1ballCalories: 150kcalCarbohydrates: 20gProtein: 2gFat: 7gSaturated Fat: 4gPolyunsaturated Fat: 1gMonounsaturated Fat: 1gCholesterol: 20mgSodium: 100mgPotassium: 50mgFiber: 1gSugar: 10gVitamin A: 300IUCalcium: 20mgIron: 1mg

Notes

Store in an airtight container; they can be frozen for up to a month without losing flavor.

Tried this recipe?

Let us know how it was!

Mouthwatering Garlic Butter Beef Bowl for Cozy Nights

As I hurriedly chop onions and melt butter, the comforting aroma of garlic fills my kitchen, instantly transporting me to a cozy evening with family gathered around the table. This One-Pan Cozy Garlic Butter Beef Bowl is more than just a meal; it’s a quick meal solution that brings smiles and satisfies cravings all in a delightful, creamy package. With tender ground beef swimming in a luscious cheese sauce combined with rice, you can create a delicious dinner in just 40 minutes, making it the perfect crowd-pleaser for busy nights. Plus, it’s make-ahead friendly, so you can whip it up in advance and enjoy the comforting warmth any time you need it. Are you ready to dive into this easy, homemade dish that’s sure to become a staple in your kitchen?

Why is this dish a family favorite?

Simplicity makes it a breeze to prepare, taking just 40 minutes from start to finish. Flavor-packed with garlic and creamy cheese, this beef bowl hits all the right notes for any comfort food lover. Versatility shines through with easy substitution options, whether you prefer different proteins or need to cater to dietary restrictions. One-pan goodness means less cleanup—just cook, serve, and enjoy! Plus, it’s perfect for meal prep, allowing you to enjoy delicious leftovers throughout the week. For more cozy recipes, check out my Comfort Garlic Butter or Cheesy Garlic Chicken that are sure to delight!

Garlic Butter Beef Bowl Ingredients

• Get ready for a cozy feast!

For the Beef and Rice
Long-grain white rice – Provides structure; substitute with brown rice, but adjust cooking time and liquid accordingly.
Ground beef – Main protein source; alternatively, you can use ground turkey, chicken, or plant-based meat for a lighter option.
Diced onion – Adds flavor and sweetness; use shallots for a milder taste.
Minced garlic – Enhances aroma and taste; fresh garlic is preferred, but garlic powder may work in a pinch.
Beef broth (low sodium) – Adds moisture and flavor; vegetable broth can be used for a vegetarian version.
Salt and pepper – Seasoning to taste; adjust according to dietary restrictions.
Italian seasoning – Brings herbal notes; a homemade mix of oregano, basil, and thyme works delightfully well.

For the Creamy Sauce
Milk – Adds creaminess and richness; swap for a non-dairy alternative for a lactose-free version.
Shredded cheddar – Primary cheese for flavor and creaminess; can be replaced with Monterey Jack or a dairy-free cheese.
Parmesan (grated) – Deepens flavor; nutritional yeast can substitute for a vegan option.
Butter – For sautéing and flavor; olive oil can be a healthier substitute.

For Garnish
Fresh parsley (optional) – Adds a touch of freshness; omit if it’s not available.

This Garlic Butter Beef Bowl is the ultimate comfort food to enjoy on cozy nights!

Step‑by‑Step Instructions for Garlic Butter Beef Bowl

Step 1: Sauté the Onions
In a large skillet, melt 1 tablespoon of butter over medium heat, allowing it to foam gently. Once melted, add the chopped onion and sauté for 3-4 minutes until it becomes soft and translucent, releasing a delightful aroma that fills your kitchen.

Step 2: Cook the Ground Beef
Add the ground beef to the skillet, breaking it apart with a wooden spoon. Continue to cook for about 5-7 minutes until the beef is browned and no longer pink. Drain any excess fat to maintain a flavorful yet healthy Garlic Butter Beef Bowl, then set it aside on a plate.

Step 3: Add Garlic
Return the skillet to medium heat and add the minced garlic. Stir continuously for about 1 minute until fragrant, being careful not to let it brown too much, as it can turn bitter and affect the delicious flavor of your Garlic Butter Beef Bowl.

Step 4: Incorporate the Rice
To the skillet, add the uncooked long-grain white rice, beef broth, Italian seasoning, salt, and pepper. Stir everything together to ensure the rice is evenly coated in the flavorful beef mixture, preparing it for cooking—this is the heart of your Garlic Butter Beef Bowl!

Step 5: Simmer Until Tender
Bring the mixture to a gentle boil, then reduce the heat to low, cover the skillet, and let it simmer for 18-20 minutes. Check occasionally to ensure the rice absorbs all the liquid and becomes tender, creating a hearty base for your bowl.

Step 6: Make the Creamy Sauce
Meanwhile, in a separate saucepan over low heat, melt 2 tablespoons of butter. Stir in the grated Parmesan, shredded cheddar, and milk, mixing until the cheese melts into a smooth and creamy sauce—this will elevate your Garlic Butter Beef Bowl to creamy perfection.

Step 7: Combine and Heat
Once the rice is tender, pour the cheesy sauce into the skillet with the beef and rice mixture. Stir everything to combine well, allowing the flavors to meld together for an additional couple of minutes over low heat until warmed through.

Step 8: Garnish and Serve
If desired, sprinkle fresh parsley on top of your Garlic Butter Beef Bowl for a burst of color and freshness. Serve warm and enjoy the comforting aroma that invites everyone to gather around the table for a delightful homemade meal!

Variations & Substitutions for Garlic Butter Beef Bowl

Feel free to make this delightful bowl your own by exploring these tasty twists and substitutions that cater to your preferences!

  • Lean Protein: Replace ground beef with ground turkey or chicken for a healthier option, without sacrificing taste.
  • Vegetarian Delight: Swap ground meat for plant-based alternatives or lentils to create a hearty, meat-free version full of flavor.
  • Rice Options: Use brown rice for a nutty flavor and added fiber but remember to adjust cooking time and liquid for perfect results.
  • Veggie Boost: Stir in frozen peas, diced peppers, or fresh spinach near the end of cooking for a pop of color and nutrition.
  • Creamy Alternatives: For a lactose-free dish, substitute milk with almond or oat milk and choose a non-dairy cheese that melts well.
  • Herb Mix-Up: Experiment with different herbs—fresh basil or cilantro can introduce a vibrant twist to the classic Italian flavor profile.
  • Spice It Up: Add red pepper flakes or diced jalapeños to the cheese sauce for a fiery kick that will elevate the savory goodness.
  • Garnish Variations: Top with avocado slices or a dollop of sour cream to enhance the creaminess and add a refreshing element.

Whether you’re in the mood for something classic like Garlic Butter Baked chicken or want to explore the flavors of a Korean Ground Beef Bowl, customizing your Garlic Butter Beef Bowl creates a unique experience every time. Enjoy this journey of flavors!

Make Ahead Options

These Cozy Garlic Butter Beef Bowls are perfect for meal prep enthusiasts! You can prepare the beef and rice mixture up to 24 hours in advance by cooking it as instructed, allowing it to cool, and then refrigerating it in an airtight container. The creamy cheese sauce can also be made ahead and stored separately for up to 3 days. When ready to serve, simply reheat both components on low heat, adding a splash of milk to the cheese sauce to maintain its creamy texture. Combining these two will save you valuable time during the week while still delivering a dish that’s just as delicious as when freshly made!

What to Serve with Cozy Garlic Butter Beef Bowl

Elevate your meal experience with delightful side dishes and treats that perfectly complement this creamy bowl of comfort.

  • Garlic Bread: An absolute classic, its crispy, buttery goodness is perfect for soaking up every bit of the rich cheese sauce.
  • Steamed Broccoli: This bright green veggie adds a fresh crunch and complements the savory flavors of the beef bowl. Toss it with a squeeze of lemon for added zest!
  • Garden Salad: A light salad topped with a lemon vinaigrette refreshes the palate and balances the richness of the creamy dish. The crispness of the greens adds textural contrast!
  • Roasted Sweet Potatoes: The natural sweetness of caramelized sweet potatoes pairs wonderfully with the savory notes of garlic and beef. The added sweetness will make your taste buds sing!
  • Coleslaw: This tangy, crunchy side is a lovely contrast to the smoothness of the bowl, providing a refreshing crunch that brightens every bite.
  • Red Wine: A glass of Merlot or Cabernet Sauvignon enhances the meal’s warmth, enriching the savory elements of the beef and garlic flavors in the dish.
  • Chocolate Chip Cookies: End your meal on a sweet note! The warm, gooey cookies are the perfect comfort food to complement the heartfelt flavors of your dinner.

How to Store and Freeze Garlic Butter Beef Bowl

Fridge: Store leftovers in an airtight container for up to 3 days. Be sure to let it cool down to room temperature before sealing to preserve freshness.

Freezer: You can freeze the Garlic Butter Beef Bowl for up to 2 months. Portion it into freezer-safe containers, leaving some space for expansion.

Reheating: When ready to enjoy, thaw overnight in the fridge. Reheat gently on the stove over low heat, adding a splash of milk or broth to restore its creamy texture.

Make-Ahead Tip: This dish is great for meal prep! Prepare it in advance and refrigerate it, so you can have a comforting, homemade meal ready to go during busy weeknights.

Expert Tips for Garlic Butter Beef Bowl

  • Creaminess Adjustment: For a velvetier sauce, don’t hesitate to add extra milk to the cheese mixture during cooking.

  • Right Beef Choice: Use lean ground beef to reduce excess fat while ensuring a tender texture. Avoid overcooking it to keep your Garlic Butter Beef Bowl juicy.

  • Rice Perfection: Stir the rice gently as it cooks; this prevents clumping and ensures even cooking. Check for doneness by tasting a grain before serving.

  • Flavor Boost: Enhance the flavor by adding a splash of Worcestershire sauce or a hint of hot sauce while stirring in the cheese sauce for a little extra kick!

  • Storage Wisdom: Leftovers can be stored in an airtight container for up to 3 days. When reheating, add a splash of broth or milk to prevent drying out.

Garlic Butter Beef Bowl Recipe FAQs

How do I select the best ground beef for my Garlic Butter Beef Bowl?
Absolutely! Look for lean ground beef (80/20 or 90/10) for the best results. This provides a balance of flavor and a lower fat content, ensuring a tender yet healthy meal. If you prefer, you can also use ground turkey or chicken for a lighter option. Just be cautious not to overcook it, as leaner meats can dry out quickly.

What’s the best way to store leftovers from my Garlic Butter Beef Bowl?
Very simply! Allow the dish to cool to room temperature, then transfer it into an airtight container. In the fridge, it’ll stay fresh for up to 3 days. To keep it in prime condition when reheating, add a splash of milk or broth for a creamy texture and warm it gently on low heat.

Can I freeze the Garlic Butter Beef Bowl for later?
Absolutely! You can freeze this delicious dish for up to 2 months. Just portion out the meal into freezer-safe containers, leaving some air space for expansion. When you’re ready to enjoy it again, thaw it overnight in the fridge, then reheat slowly on the stove, adding a splash of liquid to bring back its creamy goodness.

What can I do if my rice is too sticky or mushy?
Don’t worry, it happens! If the rice turns out sticky, ensure you’re using the correct rice-to-liquid ratio and don’t stir it too much while cooking, which can release excess starch. If it’s mushy, try draining the excess moisture and letting it sit uncovered for a few minutes to firm up. Adding a bit of butter or olive oil can also help improve the texture!

Are there any dietary considerations with this recipe for pets or allergies?
Of course! Always consider your family’s dietary needs. This Garlic Butter Beef Bowl contains common allergens like dairy (cheese and milk) and gluten (if using certain rice varieties). For pets, avoid letting them have this dish due to seasoning and richness—stick to vet-approved pet food for your furry friends.

What’s the best way to enhance the flavor of my Garlic Butter Beef Bowl?
Great question! For an extra flavor boost, stir in a splash of Worcestershire sauce or add some hot sauce to the cheese sauce for a kick! You can also mix in veggies like peas, spinach, or bell peppers during cooking for added nutrition and to play up the flavor profile. Enjoy experimenting with different taste enhancements!

Garlic Butter Beef Bowl

Mouthwatering Garlic Butter Beef Bowl for Cozy Nights

This Garlic Butter Beef Bowl is a comforting blend of ground beef, rice, and a creamy cheese sauce, perfect for cozy nights.
Prep Time 10 minutes
Cook Time 30 minutes
Total Time 40 minutes
Servings: 4 bowls
Course: Dinner
Cuisine: American
Calories: 550

Ingredients
  

For the Beef and Rice
  • 1 cup Long-grain white rice Substitute with brown rice, but adjust cooking time and liquid accordingly.
  • 1 pound Ground beef Can use ground turkey, chicken, or plant-based meat.
  • 1 medium Diced onion Use shallots for a milder taste.
  • 2 cloves Minced garlic Fresh garlic is preferred.
  • 2 cups Beef broth (low sodium) Vegetable broth can be used for a vegetarian version.
  • to taste Salt
  • to taste Pepper
  • 1 teaspoon Italian seasoning A homemade mix of oregano, basil, and thyme works well.
For the Creamy Sauce
  • 1 cup Milk Swap for a non-dairy alternative for lactose-free version.
  • 1 cup Shredded cheddar Can be replaced with Monterey Jack or a dairy-free cheese.
  • 1/2 cup Parmesan (grated) Nutritional yeast can substitute for a vegan option.
  • 2 tablespoons Butter Olive oil can be a healthier substitute.
For Garnish
  • 1 tablespoon Fresh parsley (optional) Omit if not available.

Equipment

  • Large skillet
  • Saucepan

Method
 

Step-by-Step Instructions
  1. In a large skillet, melt 1 tablespoon of butter over medium heat, add chopped onion and sauté for 3-4 minutes until soft.
  2. Add ground beef, breaking it apart and cook for 5-7 minutes until browned. Drain any excess fat.
  3. Return skillet to medium heat, add minced garlic, and stir for 1 minute until fragrant.
  4. Add uncooked long-grain white rice, beef broth, Italian seasoning, salt, and pepper to the skillet. Stir to coat rice.
  5. Bring to a gentle boil, reduce heat, cover, and simmer for 18-20 minutes until rice is tender.
  6. In a separate saucepan, melt 2 tablespoons of butter over low heat, stir in Parmesan, cheddar, and milk until smooth.
  7. Pour cheesy sauce into skillet with beef and rice mixture, stirring to combine and heat through.
  8. Garnish with fresh parsley if desired, serve warm, and enjoy.

Nutrition

Serving: 1bowlCalories: 550kcalCarbohydrates: 50gProtein: 30gFat: 25gSaturated Fat: 12gPolyunsaturated Fat: 2gMonounsaturated Fat: 8gCholesterol: 90mgSodium: 800mgPotassium: 600mgFiber: 2gSugar: 3gVitamin A: 500IUVitamin C: 2mgCalcium: 300mgIron: 3mg

Notes

This dish is great for meal prep; prepare in advance for busy weeknights.

Tried this recipe?

Let us know how it was!

Comforting Beef and Potato Casserole for Cozy Nights

As the aroma of sizzling ground beef and creamy goodness fills the kitchen, I can’t help but feel a sense of nostalgia wash over me. This Creamy One-Pot Beef and Potato Casserole is my go-to answer for hectic weeknights when I crave something comforting and hearty yet quick to prepare. In just one dish, you can experience the delightful melding of tender potatoes and savory beef, all enveloped in a velvety sauce that brings the whole family together. Not only is it an easy cleanup dream, but this customizable casserole also doubles as a perfect canvas for seasonal spices or veggie swaps. Are you ready to make a weeknight dinner that everyone will talk about long after the dishes are washed?

Why Is This Casserole So Special?

One-Pot Wonder: This creamy casserole requires minimal cleanup, allowing you to focus on enjoying your family time.

Hearty Satisfaction: Layers of tender potatoes and rich beef create a filling dish perfect for cozy nights.

Customizable Delight: Feel free to explore variations, like adding a Tex-Mex twist or opting for a vegetarian lentil replacement.

Quick Cooking: In just a couple of steps, you can have a wholesome meal baking in the oven, giving you time to unwind.

Crowd-Pleasing Flavor: The savory goodness and creamy texture make this casserole a favorite for family dinners or potlucks. Enjoy alongside roasted vegetables or a crisp salad for a well-rounded meal!

Beef and Potato Casserole Ingredients

For the Casserole

  • Ground Beef – A rich protein source that adds depth to the dish. Substitutions: Consider using ground turkey or plant-based crumble for a lighter or vegetarian option.
  • Onion – Elevates the flavor profile with its aromatic sweetness. Substitution: Shallots can be used for a subtler taste.
  • Potatoes (Russet or Yukon Gold) – The starch base offers perfect texture and structure. Prep Note: Slice them thinly (about 1/8 inch) for even cooking.
  • Cream of Mushroom Soup – Acts as a creamy, delicious binder that brings it all together. Substitution: Try other creamy soups to swap up the flavors.
  • Whole Milk or Heavy Cream – Increases the creaminess of the casserole. Note: Adjust quantity based on how rich you want it.
  • Sour Cream – Adds a delightful tang and creaminess boost. Optional; you can omit for a lighter version.
  • Shredded Cheddar Cheese – Ensures a melty, golden crust on top. Substitution: Monterey Jack or pepper jack cheese can add a flavorful twist.
  • Salt – Essential for enhancing all the flavors. Adjust to your preference.
  • Black Pepper – Brings a mild heat to the dish. Feel free to adjust based on your heat tolerance.
  • Paprika – Infuses a subtle smokiness. Substitution: Use smoked paprika for a more robust flavor.
  • Fresh Parsley – Garnishes the dish beautifully, adding color and freshness.

Every bite of this Beef and Potato Casserole is a delightful escape from the mundane, transforming your dinner routine into a flavorful journey! Enjoy crafting this hearty meal that everyone will cherish.

Step‑by‑Step Instructions for Creamy One-Pot Beef and Potato Casserole

Step 1: Preheat and Prepare
Begin by preheating your oven to 375°F (190°C). Meanwhile, gather a large skillet and heat it over medium-high heat. As the skillet warms, this is a great time to finely chop your onion, preparing it for the sautéing process that will build the dish’s flavor foundation.

Step 2: Sauté the Beef and Onion
Add the ground beef and chopped onion to the hot skillet, using a wooden spoon to break up the meat as it browns. Sprinkle in salt, black pepper, and paprika, cooking for about 5-7 minutes until the beef is no longer pink and the onions are soft and translucent. Drain any excess fat before moving on to the next step.

Step 3: Create the Creamy Mixture
In a mixing bowl, combine the cream of mushroom soup, whole milk (or heavy cream), and sour cream if using. Whisk these ingredients together until smooth and creamy, ensuring there are no lumps. This velvety mixture is going to infuse the casserole with rich flavors in the next steps.

Step 4: Assemble the Casserole
Spread the browned beef and onion mixture evenly in a greased 9×13 baking dish, forming the first layer of your Beef and Potato Casserole. This will create a hearty base for the casserole. Ensure the beef mixture is distributed uniformly for optimal flavor in every bite.

Step 5: Layer the Potatoes
Next, take your thinly sliced potatoes and layer them evenly atop the beef mixture. Overlapping the slices slightly is perfectly fine; aim for a visually appealing look. The potato layer will add a comforting texture, giving the casserole its signature heartiness.

Step 6: Pour the Creamy Sauce
Gently pour the creamy mixture you prepared earlier over the layered potatoes, making sure to cover them completely. A spatula can help spread the sauce for even coverage, creating a luscious base that melds all the flavors together beautifully as the casserole bakes.

Step 7: Add Cheese Topping
Generously sprinkle shredded cheddar cheese on top of the casserole, allowing it to create a golden, melty layer as it cooks. This layer not only enhances the savory goodness but also provides a delightful contrast to the creaminess beneath.

Step 8: Bake with Foil
Cover the assembled casserole with aluminum foil to retain moisture during baking. Place it in the preheated oven and bake for 45 minutes. This initial baking time allows the flavors to develop and the potatoes to soften beautifully.

Step 9: Uncover and Finish Baking
After 45 minutes, carefully remove the foil and return the casserole to the oven. Bake it for an additional 15 minutes, allowing the cheese to bubble and turn a delicious golden color. You’ll know it’s ready when the cheese has melted and appears irresistibly inviting.

Step 10: Rest and Garnish
Once the casserole is bubbly and golden, take it out of the oven and let it rest for 5-10 minutes before serving. This step helps the layers set, making it easier to serve. Sprinkle with fresh parsley for a pop of color and a hint of freshness to this comforting Beef and Potato Casserole.

What to Serve with Creamy One-Pot Beef and Potato Casserole

Creating the perfect meal to accompany your casserole elevates the entire dining experience, providing delightful contrasts and complements.

  • Crisp Garden Salad: A refreshing salad brightens up the plate with its crunchy textures and vibrant flavors, balancing the richness of the casserole.

  • Roasted Vegetables: Sweet caramelized peppers, zucchini, and carrots add color and earthy flavors, making every bite an adventure in taste and texture.

  • Warm Dinner Rolls: Fluffy rolls slathered in butter are perfect for mopping up the creamy sauce, offering a comforting, homestyle feel to your meal.

  • Steamed Green Beans: These tender yet crisp beans bring a fresh crunch to your plate and a lovely pop of color, enhancing both visual and palate appeal.

  • Garlic Bread: The warm, buttery garlic flavor contrasts perfectly with the creamy casserole, making it a delightful side for any Italian-inspired twist.

  • Apple Crisp: For dessert, a warm apple crisp topped with vanilla ice cream rounds out your meal, introducing a hint of sweetness that pairs exquisitely with the savory dish.

Each of these options is designed to complement the rich flavors of your creamy one-pot beef and potato casserole, creating a spread that’s ideal for gathering family and friends around the table.

Beef and Potato Casserole Variations

Feel free to put your unique spin on this comforting casserole—let your creativity shine through every delicious bite!

  • Tex-Mex Twist: Add taco seasoning to the beef, mix in salsa and black beans, and top with pepper jack cheese for a zesty flair. This version transforms a classic into a fiesta on your plate!

  • Vegetarian Delight: Replace ground beef with lentils or chickpeas and enhance flavor with smoked paprika and cumin. A hearty vegetarian option that’s filling and satisfying.

  • Creamy Mushroom Boost: Swap the cream of mushroom soup for a creamy homemade mushroom sauce to elevate the umami flavor. A simple mix of sautéed mushrooms and cream can do wonders!

  • Spicy Kick: Incorporate diced jalapeños or a few dashes of hot sauce into the meat mixture for a playful heat. Your taste buds will love the extra warmth in this cozy dish!

  • Herb-Infused Flavor: Toss in some fresh thyme or rosemary into the creamy mixture for a refreshing herbal note. This will add an aromatic layer to your comforting casserole.

  • Cheesy Variety: Experiment with different cheeses like gouda or fontina for a richer, more complex flavor profile. The melted cheese makes it extra indulgent and inviting.

  • Root Vegetable Medley: Mix in other sliced root vegetables like sweet potatoes or parsnips for a sweet and savory twist. This will add delightful color and unexpected flavors.

  • Smoky Depth: Replace regular paprika with smoked paprika or add a touch of bacon bits for a savory crunch. The smokiness brings another level of depth that is simply irresistible.

For more unique spins on comfort food, check out my Cheesy Hamburger Potato Soup and Tater Tot Casserole. Enjoy making this versatile dish uniquely yours!

Expert Tips for Beef and Potato Casserole

  • Slice Evenly: Ensure potatoes are sliced about 1/8 inch thick for even cooking and a perfect melt-in-your-mouth texture.

  • Foil for Moisture: Covering the casserole with foil during the first half of baking keeps it moist and helps the potatoes cook thoroughly.

  • Mix It Up: Experiment with flavor by adding garlic powder, fresh herbs, or even spicy seasonings to the creamy mixture for a unique twist on the traditional Beef and Potato Casserole.

  • Don’t Rush the Rest: Letting the casserole rest for 5-10 minutes after baking helps the layers set, making it easier to serve and savor each flavorful bite.

  • Storage Savvy: For leftovers, portion the casserole into airtight containers to maintain texture when reheating, and enjoy a delicious home-cooked meal the next day!

Make Ahead Options

These Creamy One-Pot Beef and Potato Casserole preparations are perfect for busy home cooks! You can brown the ground beef and onions and combine the creamy mixture up to 24 hours in advance. Store them separately in airtight containers in the refrigerator to maintain freshness. Additionally, slice your potatoes and soak them in cold water to prevent browning, and refrigerate for up to 3 days. When you’re ready to bake, simply layer the beef mixture and potatoes in the greased dish, pour the creamy sauce, add cheese, then bake as directed. This way, you’ll create a comforting meal with minimal effort, just as delicious as if made fresh!

How to Store and Freeze Beef and Potato Casserole

Fridge: Store leftovers in an airtight container for up to 4 days. Reheat in the oven or microwave, adding a splash of milk if needed to restore creaminess.

Freezer: Freeze portions in airtight containers for up to 2 months. Thaw in the refrigerator overnight before reheating to maintain the best texture and flavor.

Reheating: When reheating, cover with foil and warm in the oven or use a microwave, ensuring to check for heated throughout for safe consumption. Enjoy your comforting Beef and Potato Casserole!

Creamy One-Pot Beef and Potato Casserole Recipe FAQs

How do I choose the right potatoes for my casserole?
Absolutely! For the best results, I recommend using Russet or Yukon Gold potatoes. They offer the perfect balance of creaminess and structure. Look for potatoes without dark spots or blemishes; firm potatoes will deliver the best texture once baked.

How should I store leftovers of the Beef and Potato Casserole?
Store your casserole in an airtight container in the refrigerator for up to 4 days. This way, you can savor the comforting flavors again! If you want to keep it longer, portion it out and freeze it for up to 2 months for an easy meal later.

Can I freeze my Beef and Potato Casserole?
Yes, indeed! Prepare your casserole, cool it completely, and then slice it into portions. Wrap each portion tightly in plastic wrap or foil and place them in a freezer-safe bag. Make sure to label them! When you’re ready to enjoy, thaw the portions in the refrigerator overnight and reheat in the oven until warmed through.

What if my potatoes are not cooking evenly in the casserole?
If you notice that the potatoes aren’t cooking uniformly, it’s often due to uneven slicing. Make sure they’re cut about 1/8 inch thick for even cooking. Additionally, ensure that your casserole is covered with foil during the first part of the baking process, as this helps retain moisture so the potatoes can cook properly.

Is this casserole suitable for special diets?
Yes, very! You can easily adapt the Creamy One-Pot Beef and Potato Casserole to fit various dietary needs. For a vegetarian option, replace the ground beef with cooked lentils or a plant-based crumble. Always check for allergies related to any of the ingredients, like dairy or gluten, and substitute accordingly.

How long should I let my casserole rest before serving?
After removing the casserole from the oven, let it rest for about 5-10 minutes. This allows the layers to set, which makes serving easier and helps the flavors meld beautifully. Plus, it’s hard to resist that inviting aroma during the wait!

Beef and Potato Casserole

Comforting Beef and Potato Casserole for Cozy Nights

This Beef and Potato Casserole is a comforting one-pot dish, perfect for cozy nights with family.
Prep Time 20 minutes
Cook Time 1 hour
Resting Time 10 minutes
Total Time 1 hour 30 minutes
Servings: 6 servings
Course: Casserole
Cuisine: American
Calories: 450

Ingredients
  

For the Casserole
  • 1 lb Ground Beef Substitutions: Consider using ground turkey or plant-based crumble for a lighter or vegetarian option.
  • 1 medium Onion Substitution: Shallots can be used for a subtler taste.
  • 4 medium Potatoes (Russet or Yukon Gold) Prep Note: Slice them thinly (about 1/8 inch) for even cooking.
  • 1 can Cream of Mushroom Soup Substitution: Try other creamy soups to swap up the flavors.
  • 1 cup Whole Milk or Heavy Cream Adjust quantity based on how rich you want it.
  • 1/2 cup Sour Cream Optional; you can omit for a lighter version.
  • 2 cups Shredded Cheddar Cheese Substitution: Monterey Jack or pepper jack cheese can add a flavorful twist.
  • 1 tsp Salt Adjust to your preference.
  • 1/2 tsp Black Pepper Feel free to adjust based on your heat tolerance.
  • 1 tsp Paprika Substitution: Use smoked paprika for a more robust flavor.
  • 2 tbsp Fresh Parsley

Equipment

  • Large skillet
  • 9x13 baking dish
  • Mixing Bowl

Method
 

Step‑by‑Step Instructions
  1. Preheat your oven to 375°F (190°C) and gather a large skillet.
  2. Add ground beef and chopped onion to the skillet, breaking up the meat as it browns.
  3. Sprinkle in salt, black pepper, and paprika, cooking for about 5-7 minutes until the beef is no longer pink and the onions are soft.
  4. In a mixing bowl, combine cream of mushroom soup, whole milk (or heavy cream), and sour cream if using. Whisk until smooth.
  5. Spread the browned beef and onion mixture evenly in a greased 9x13 baking dish.
  6. Layer thinly sliced potatoes evenly atop the beef mixture.
  7. Pour the creamy mixture over the layered potatoes, covering them completely.
  8. Sprinkle shredded cheddar cheese on top of the casserole.
  9. Cover the casserole with aluminum foil and bake for 45 minutes.
  10. Remove the foil and bake for an additional 15 minutes, until the cheese is bubbly and golden.
  11. Let the casserole rest for 5-10 minutes before serving. Garnish with fresh parsley.

Nutrition

Serving: 1servingCalories: 450kcalCarbohydrates: 35gProtein: 25gFat: 25gSaturated Fat: 12gPolyunsaturated Fat: 1gMonounsaturated Fat: 8gTrans Fat: 1gCholesterol: 80mgSodium: 800mgPotassium: 700mgFiber: 3gSugar: 2gVitamin A: 500IUVitamin C: 10mgCalcium: 200mgIron: 3mg

Notes

For leftovers, portion the casserole into airtight containers to maintain texture when reheating. Enjoy a delicious home-cooked meal the next day!

Tried this recipe?

Let us know how it was!

Pumpkin Chocolate Chip Cookies That’ll Make Fall Sweeter

As the leaves start to crunch beneath my feet and the air fills with the scent of cinnamon, I can’t resist the urge to whip up a batch of Classic Pumpkin Chocolate Chip Cookies. There’s something magical about these cookies—they capture the spirit of fall, blending the comforting flavor of pumpkin with sweet, melty chocolate chips. This recipe is not only incredibly simple to make, but also a delightful crowd-pleaser that will have everyone reaching for seconds. Plus, with a no-butter option, you can enjoy a lighter treat without sacrificing taste. So, whether you’re hosting a cozy gathering or simply treating yourself, these cookies are a must-bake this season. Are you ready to fill your kitchen with warmth and delicious aromas? Let’s dive into the recipe!

Why Are Pumpkin Chocolate Chip Cookies Special?

Fall Flavors: These cookies embody the essence of autumn, with the warm spices of pumpkin mingling beautifully with sweet chocolate chips.

Simple Prep: You’ll appreciate the straightforward ingredients and easy steps, making them perfect for bakers of all skill levels.

No-Butter Option: Enjoy a lighter treat without sacrificing richness—substituting butter with canola oil keeps these cookies moist and fluffy.

Versatile Additions: Feel free to mix in nuts, or try swapping the chocolate for dried fruit for a unique twist.

Crowd Favorite: Whether it’s a family gathering or a cozy coffee date, these cookies are sure to please—everyone will want to come back for seconds! Pair them with a nice hot cup of coffee or tea for an unbeatable experience, just like you would with Blueberry Breakfast Cookies.

Pumpkin Chocolate Chip Cookies Ingredients

• Here’s what you need to create these delightful cookies:

For the Cookie Dough

  • Canned Pumpkin Puree – Provides moisture and flavor; feel free to use homemade puree if you’re feeling adventurous.
  • Large Egg or Applesauce (¼ cup) – Binds the ingredients together; applesauce offers a vegan alternative.
  • Granulated Sugar – Sweetens the cookies; adjust to your liking if you’re looking to cut back on sweetness.
  • Brown Sugar – Adds depth and moisture; both light and dark brown sugar work well here.
  • Canola Oil (¼ cup + 2 Tablespoons) – Enhances fluffiness; omit the extra 2 tablespoons for a lighter cookie.
  • Vanilla Extract – Infuses flavor; for the best results, opt for pure vanilla extract.
  • Ground Cinnamon or Pumpkin Spice (1½ teaspoons) – Adds warmth and a hint of fall spice, elevating your pumpkin chocolate chip cookies.
  • Salt (½ teaspoon) – Helps balance the sweetness of the cookie.
  • Baking Soda (½ teaspoon) – Promotes a good rise in your cookie dough.
  • Baking Powder (2 teaspoons) – Provides additional lift for that perfect texture.
  • All-Purpose Flour (2 cups) – Forms the backbone of your cookies; consider a gluten-free blend if necessary.
  • Semi-Sweet Chocolate Chips (1⅓ cup) – Adds a delightful burst of sweetness; dark chocolate chips can be swapped in for more richness.

Step‑by‑Step Instructions for Pumpkin Chocolate Chip Cookies

Step 1: Preheat and Prepare
Start by preheating your oven to 375°F (190°C). While it’s heating, line your baking sheets with parchment paper to prevent the cookies from sticking. This setup will help you slide the freshly baked Pumpkin Chocolate Chip Cookies off easily once they come out of the oven, ensuring a stress-free baking experience.

Step 2: Mix Wet Ingredients
In a large mixing bowl, whisk together 1 cup of canned pumpkin puree, the egg (or ¼ cup of applesauce for a vegan option), granulated sugar, brown sugar, ¼ cup of canola oil, 1 teaspoon of vanilla extract, and 1½ teaspoons of ground cinnamon. The mixture should be well combined, with a smooth consistency that invites the warm, cozy flavors to shine through.

Step 3: Combine Dry Ingredients
In a separate bowl, whisk together ½ teaspoon of salt, ½ teaspoon of baking soda, 2 teaspoons of baking powder, and 2 cups of all-purpose flour. This step is crucial for ensuring even distribution of the leavening agents, promoting a nice rise in your Pumpkin Chocolate Chip Cookies, so that they turn out fluffy and delicious.

Step 4: Mix Wet and Dry Ingredients
Gradually add the dry mixture to the wet ingredients. Stir gently until just combined; this helps keep your cookies from becoming tough. You’ll notice a dough forming that is slightly sticky yet cohesive, filled with the promise of delightful pumpkin goodness and sweet chocolate chunks.

Step 5: Fold in Chocolate Chips
Gently fold in 1⅓ cups of semi-sweet chocolate chips into the dough. Ensure that the chips are evenly distributed throughout the cookie mixture, offering bursts of chocolatey flavor in every bite. This contrast between the warm spices and chocolate is what makes these Pumpkin Chocolate Chip Cookies irresistible.

Step 6: Portion the Dough
Using a cookie scoop or a tablespoon, drop rounded tablespoons of dough onto your prepared cookie sheets. Aim for about 12 cookies per sheet, leaving space between them to allow for spreading as they bake. The dough should look generous and plump, ready to transform into soft, chewy cookies in the oven.

Step 7: Bake to Perfection
Place the cookie sheets in the preheated oven and bake for 10-13 minutes, or until the edges are lightly golden. As they bake, enjoy the delightful aroma filling your kitchen. To check if they’re done, gently press the center of a cookie; it should spring back, indicating your Pumpkin Chocolate Chip Cookies are perfectly baked.

Step 8: Cool and Serve
Once baked, allow the cookies to cool on the baking tray for a few minutes. This resting time helps them set before transferring them to a wire rack to cool completely. The result is a batch of moist, fluffy cookies that are ready to be enjoyed with loved ones or savored on your own as a comforting fall treat.

How to Store and Freeze Pumpkin Chocolate Chip Cookies

Room Temperature: Store your Pumpkin Chocolate Chip Cookies in an airtight container at room temperature for up to 1 week to keep them fresh and delicious.

Fridge: If you prefer your cookies chilled, they can be kept in the fridge for up to 2 weeks; just make sure they’re sealed properly to avoid drying out.

Freezer: For longer storage, freeze the cookies in an airtight container or freezer bag for up to 3 months. Be sure to layer parchment paper between them to prevent sticking.

Reheating: To enjoy a warm cookie, reheat in the microwave for 10-15 seconds or in a preheated oven at 350°F (175°C) for about 5 minutes.

What to Serve with Pumpkin Chocolate Chip Cookies

As the aroma of pumpkin and spice fills your kitchen, consider these delightful pairings to create an unforgettable fall experience.

  • Glass of Milk: A classic pairing, the creaminess of cold milk perfectly complements the sweetness of the cookies, enhancing their rich flavors.

  • Pumpkin Spice Latte: Elevate your cookie experience with this cozy drink that matches the warm spices and pumpkin notes beautifully, creating a seasonal bliss.

  • Hot Apple Cider: The fruity zest and warmth of apple cider mingle wonderfully with the pumpkin chocolate chip cookies, evoking the essence of fall in every sip.

  • Whipped Cream: A dollop of whipped cream on the side brings a delightful creaminess that contrasts the cookies’ chewy texture, making each bite even more indulgent.

  • Dried Fruit Medley: A mix of dried cranberries and apricots adds a chewy tartness that balances the sweetness of the cookies, providing a refreshing taste sensation.

  • Warm Chocolate Sauce: Drizzling warm chocolate sauce over the cookies amplifies the chocolate flavor, making for a luxurious treat that’s hard to resist.

  • Pecans or Walnuts: Sprinkle some toasted nuts for an unexpected crunch. Their earthy flavor takes these cookies to another level of enjoyment, adding depth to every bite.

  • Cinnamon Ice Cream: Pair these cookies with a scoop of cinnamon ice cream for a delicious and cool contrast; the creamy texture complements the soft cookies perfectly.

  • Chai Tea: This spiced tea harmonizes with the pumpkin flavors, creating a cozy and aromatic pairing that captures the essence of fall comfort food.

Make Ahead Options

These Classic Pumpkin Chocolate Chip Cookies are perfect for busy home cooks looking to save time during the week! You can prepare the cookie dough up to 24 hours in advance; simply cover the bowl tightly with plastic wrap and refrigerate it. This helps the flavors meld beautifully while keeping the dough fresh. Alternatively, you can scoop the dough onto parchment-lined baking sheets and freeze them for up to 3 months; just place the frozen cookies directly into the oven without thawing when ready to bake. To finish, bake them as directed, enjoying warm, freshly baked cookies that taste just as delicious as if made that day!

Expert Tips for Pumpkin Chocolate Chip Cookies

Room Temperature Ingredients: Ensure that your canola oil and eggs (or applesauce) are at room temperature to achieve the best texture in your pumpkin chocolate chip cookies.

Avoid Overmixing: After combining the wet and dry ingredients, mix gently. Overmixing can lead to tough cookies instead of the desired soft, fluffy texture.

Testing Doneness: Lightly press the center of a cookie to check for doneness. If it springs back, your pumpkin chocolate chip cookies are ready!

Spacing is Key: When placing cookie dough on the baking sheets, leave enough space between each cookie for spreading, ensuring they bake evenly.

Substitutions: Feel free to experiment with different chocolate types or add nuts to complement the pumpkin; just remember to maintain the same overall dough consistency for the best results.

Pumpkin Chocolate Chip Cookies Variations

Feel free to explore your creativity in the kitchen and customize these cookies to suit your taste!

  • Nutty Delight: Add ½ cup of chopped pecans or walnuts for a delightful crunch and nutty flavor that pairs beautifully with pumpkin.

  • Fruit Twist: Swap chocolate chips with 1 cup of dried cranberries or raisins for a chewy, fruity version that captures the essence of fall.

  • Cinnamon Swirl: Mix in 1 teaspoon of ground nutmeg or ginger for an extra kick of warmth and spice that elevates every bite.

  • Gluten-Free: Substitute regular flour with a 1:1 gluten-free baking blend for deliciously fluffy cookies that everyone can enjoy.

  • Pumpkin Spice Lovers: Enhance the flavor by adding an extra teaspoon of pumpkin spice to the dough; it’s sure to please any pumpkin fanatic!

  • Chocolate Lovers: Use dark chocolate or even a mix of milk and white chocolate chips for a rich, decadent experience that will elevate your cookies.

  • Lower Sugar Option: Reduce the sugars in the recipe by ¼ cup each, or substitute with a natural sweetener like maple syrup for a lighter treat.

  • Chilled Cookies: For a special twist, chill the cookie dough for an hour before baking to create thicker, chewier cookies that are perfect with a glass of cold milk or hot tea.

Enjoy experimenting with these variations, and consider pairing your cookies with a hot drink or serving them alongside a slice of Easter Chocolate Lasagna for dessert!

Pumpkin Chocolate Chip Cookies Recipe FAQs

How do I know if my pumpkin puree is ripe and ready to use?
Absolutely! When selecting pumpkin puree, whether canned or homemade, look for a vibrant orange color and a smooth consistency. If using canned, avoid any that have dark spots or an off smell. For homemade puree, ensure your pumpkin is fully cooked and mashed until smooth to achieve the best flavor and texture for your cookies.

What is the best way to store Pumpkin Chocolate Chip Cookies?
The more the merrier when it comes to storage! You can keep your cookies in an airtight container at room temperature for up to 1 week. For a cooler treat, refrigerate them for up to 2 weeks. Just make sure they are well-sealed to prevent them from drying out!

Can I freeze Pumpkin Chocolate Chip Cookies for later?
Yes, you can absolutely freeze them! To do so, place your cookies in an airtight container or a freezer bag, layering parchment paper between them to avoid sticking. They’ll stay fresh for up to 3 months. When you’re ready to enjoy, simply thaw and reheat them at 350°F (175°C) for about 5 minutes for that fresh-out-of-the-oven taste.

What should I do if my cookies turn out too dry or crumbly?
If your cookies are dry, it could be due to overmixing or using too much flour. To prevent this in the future, measure your flour accurately—spoon it into your measuring cup and level it off with a knife. If the dough seems too dry while mixing, try adding a tablespoon of milk to help moisten it. This will help achieve the soft, fluffy texture you desire.

Are these cookies safe for pets or someone with nut allergies?
Definitely keep these cookies away from pets, as ingredients like chocolate can be harmful to them. For those with nut allergies, stick to the essentials in the recipe—these cookies can be made nut-free without any issues. To keep it safe, avoid adding nuts to the dough or using any nut-based flour as a substitute. Enjoy this delicious treat without concerns!

How can I adjust these cookies for a healthier option?
If you’re looking to make a healthier version of these Pumpkin Chocolate Chip Cookies, consider substituting half of the all-purpose flour with whole wheat flour for added fiber. Reducing the overall sugar by about a quarter can also help, and using applesauce instead of an egg provides a great vegan option while keeping them moist. Happy baking!

Pumpkin Chocolate Chip Cookies

Pumpkin Chocolate Chip Cookies That’ll Make Fall Sweeter

Delicious Pumpkin Chocolate Chip Cookies capturing the essence of fall with warm spices and sweet chocolate.
Prep Time 15 minutes
Cook Time 13 minutes
Cooling Time 10 minutes
Total Time 38 minutes
Servings: 24 cookies
Course: Dessert
Calories: 160

Ingredients
  

For the Cookie Dough
  • 1 cup Canned Pumpkin Puree Homemade puree can be used.
  • 1 Large Egg or Applesauce (¼ cup) Applesauce offers a vegan option.
  • 1 cup Granulated Sugar Adjust to taste.
  • 1/2 cup Brown Sugar Light or dark brown sugar works.
  • ¼ cup Canola Oil Add 2 tablespoons for extra fluffiness.
  • 1 teaspoon Vanilla Extract Use pure extract for best flavor.
  • teaspoons Ground Cinnamon or Pumpkin Spice
  • ½ teaspoon Salt
  • ½ teaspoon Baking Soda
  • 2 teaspoons Baking Powder
  • 2 cups All-Purpose Flour Gluten-free blend can be used.
  • 1⅓ cups Semi-Sweet Chocolate Chips Dark chocolate chips can be substituted.

Equipment

  • Mixing Bowl
  • whisk
  • Cookie Scoop
  • Baking Sheets
  • Parchment Paper

Method
 

Pumpkin Chocolate Chip Cookies Instructions
  1. Preheat your oven to 375°F (190°C) and line your baking sheets with parchment paper.
  2. Whisk together pumpkin puree, egg (or applesauce), granulated sugar, brown sugar, canola oil, vanilla extract, and cinnamon in a bowl.
  3. In another bowl, whisk together salt, baking soda, baking powder, and flour.
  4. Gradually add the dry mixture to the wet ingredients, stirring gently until combined.
  5. Fold in chocolate chips until evenly distributed.
  6. Drop rounded tablespoons of dough onto prepared sheets, leaving space for spreading.
  7. Bake for 10-13 minutes until edges are lightly golden; press cookies lightly to test doneness.
  8. Let cookies cool on the baking tray for a few minutes before transferring to a wire rack.

Nutrition

Serving: 1cookieCalories: 160kcalCarbohydrates: 24gProtein: 2gFat: 7gSaturated Fat: 1gPolyunsaturated Fat: 0.5gMonounsaturated Fat: 5gCholesterol: 20mgSodium: 80mgPotassium: 70mgFiber: 1gSugar: 10gVitamin A: 1200IUVitamin C: 1mgCalcium: 20mgIron: 1mg

Notes

For best results, use room temperature ingredients and avoid overmixing the dough. Store cookies in an airtight container for freshness.

Tried this recipe?

Let us know how it was!

Stay Connected

Get recipes via email: