Crockpot Creamy Coconut Chicken Tikka Masala for Cozy Nights

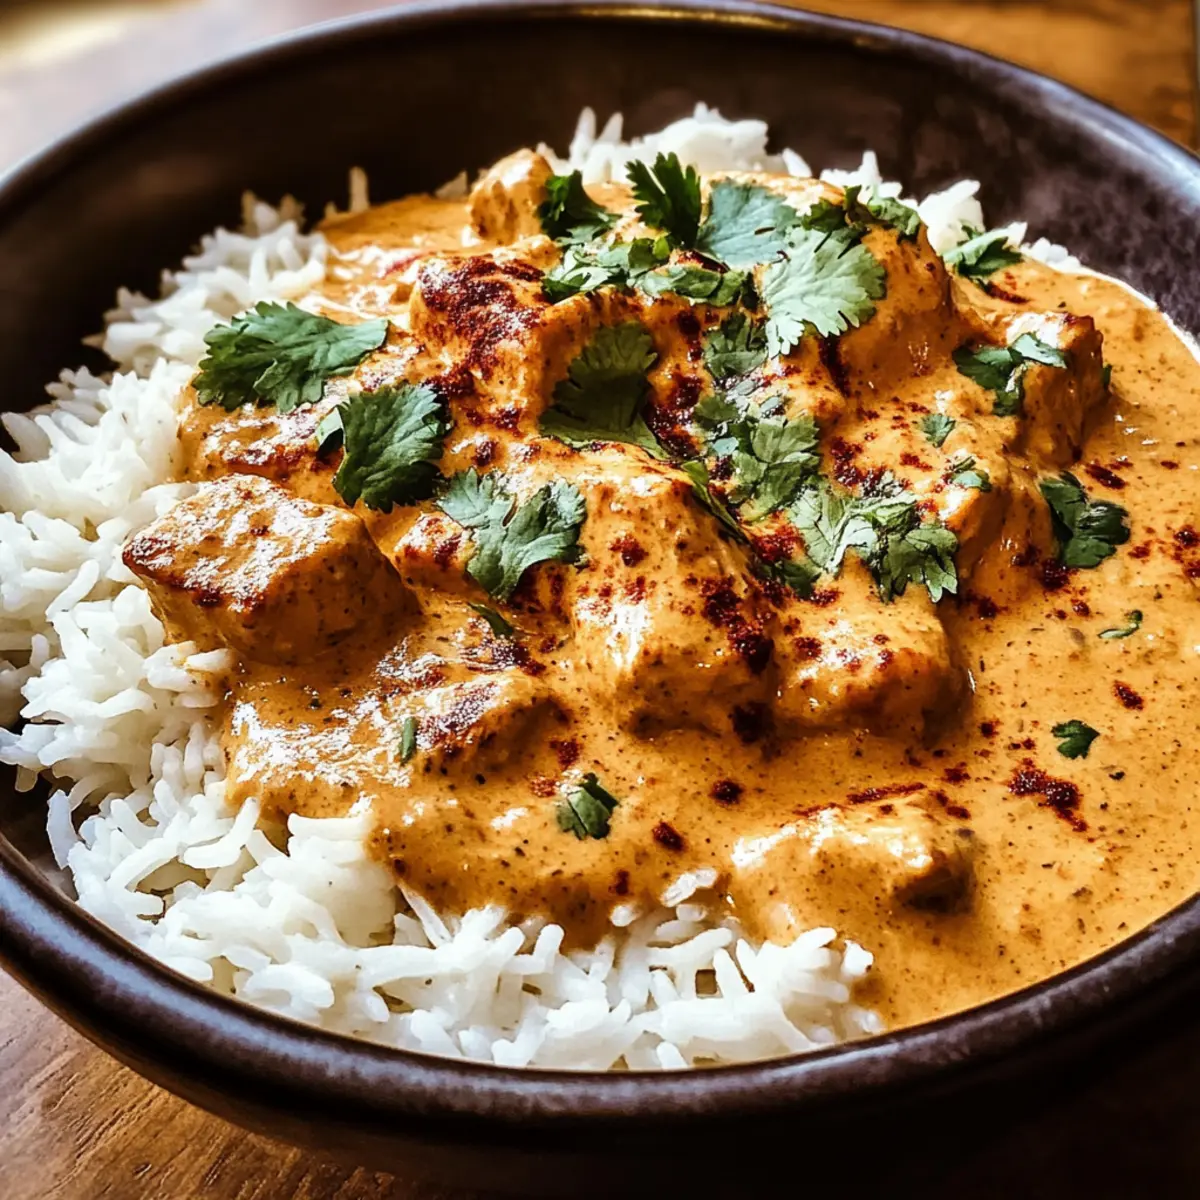
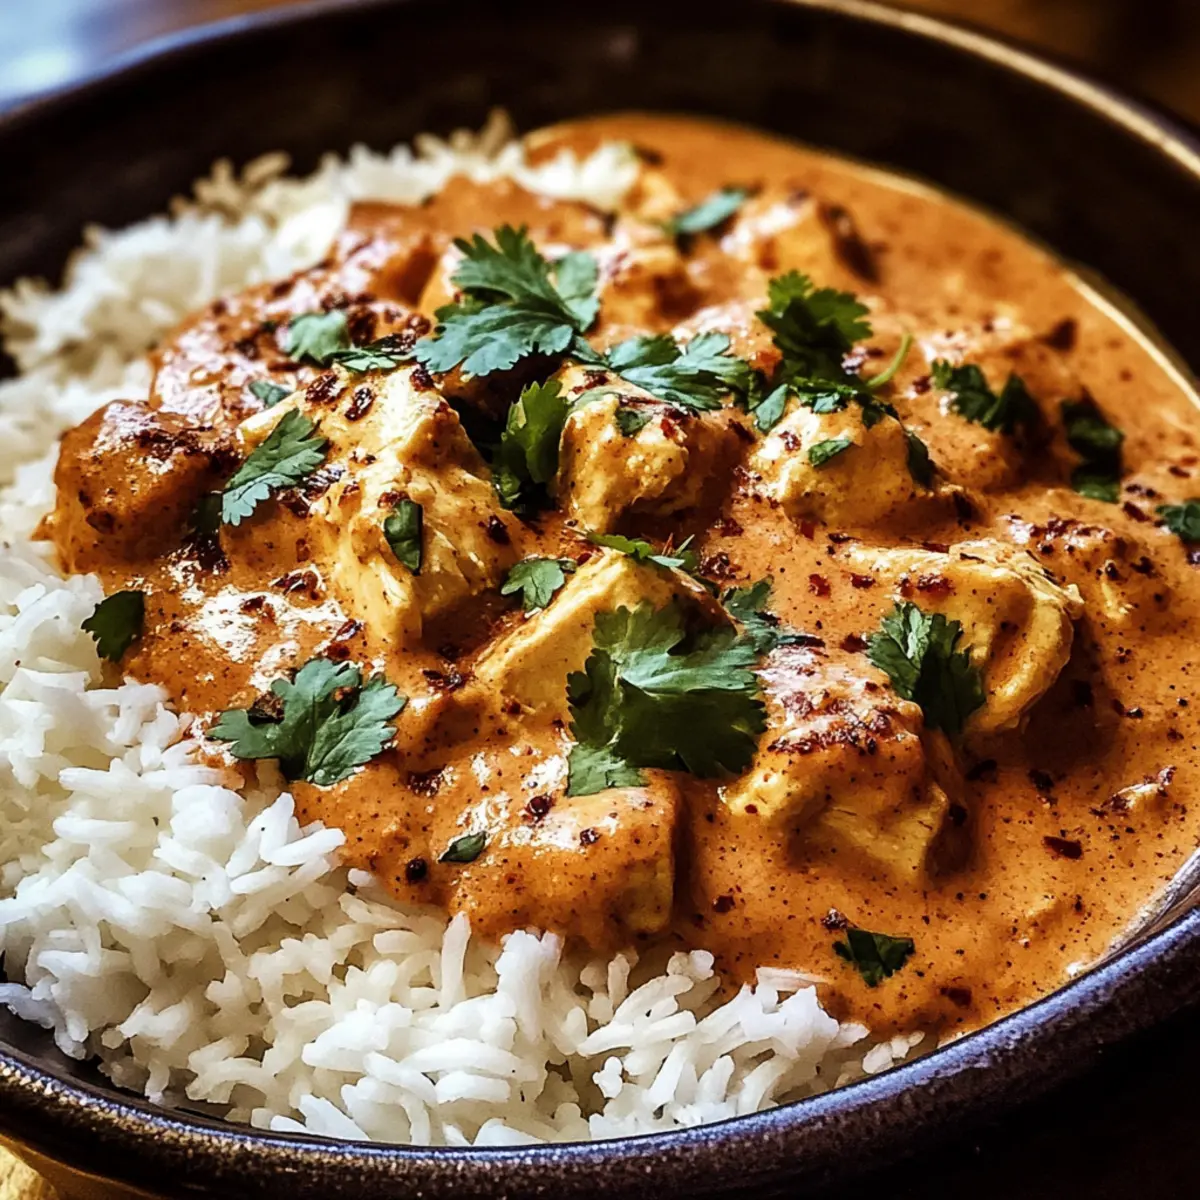
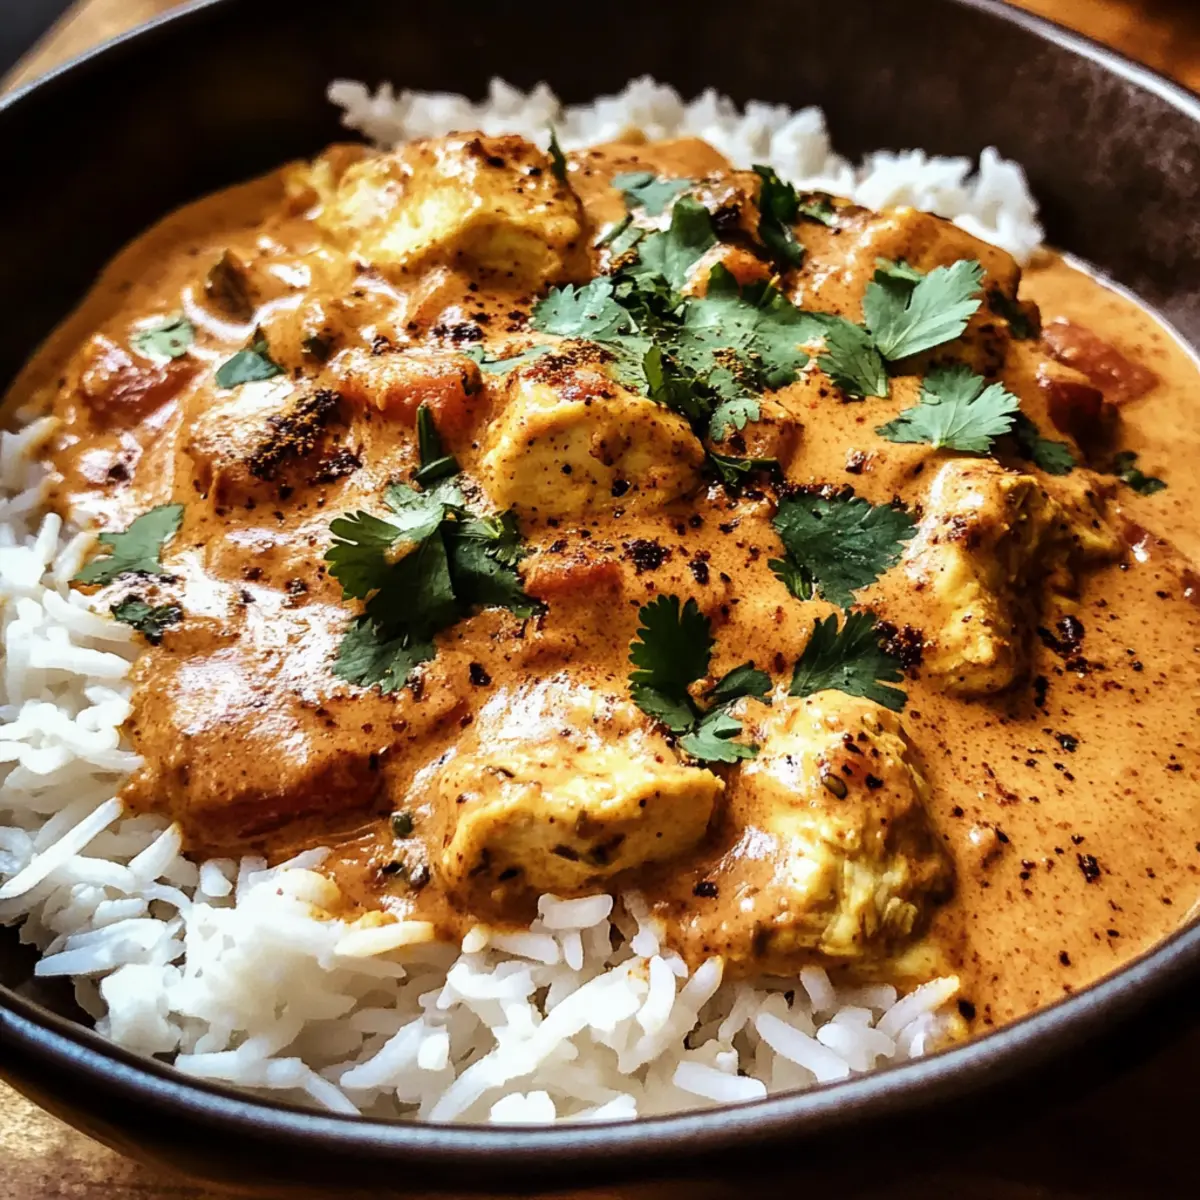
As the sun begins to set on another busy day, the last thing I want is to stress over dinner. Enter my Crockpot Creamy Coconut Chicken Tikka Masala, the definition of effortless weeknight comfort food. With just a few ingredients tossed into the slow cooker, you can create a mouthwatering meal that wraps you in the warmth of aromatic spices and creamy coconut sauce. This dish not only tames your hunger but also takes the hassle out of cooking—with minimal prep and maximum flavor. Perfect for cozy family evenings or impressing friends, this recipe guarantees a satisfying experience from start to finish. Are you ready to fall in love with your new favorite slow-cooked delight?

Why is this Tikka Masala a Must-Try?

Effortless Cooking: With just a few minutes of prep, this recipe transforms your kitchen into a fragrant haven while simmering away in the crockpot.

Aromatic Blend: The combination of spices like cumin and garam masala creates a rich and comforting flavor that’ll leave everyone asking for seconds!

Versatile Options: Not only can you switch out chicken for chickpeas or tofu for a vegetarian twist, but you can also throw in your favorite veggies for extra nutrition.

Crowd-Pleasing: This dish is perfect for family dinners or entertaining friends, combining cozy comfort with an upscale dining experience.

Meal Prep Friendly: Make-ahead and freezer-friendly, it’s perfect for busy nights. Try pairing it with steamed basmati rice or warm naan for an unforgettable meal!

Crockpot Creamy Coconut Chicken Tikka Masala Ingredients

For the Chicken:
Boneless Chicken Thighs – Using thighs keeps the dish tender and juicy.

For the Sauce:
Coconut Milk – Full-fat offers a richer texture, while light coconut milk can lighten the dish.
Cumin – Ensures earthy warmth; fresh is best for maximum flavor.
Coriander – Adds a citrusy note; whole seeds need grinding for better flavor release.
Turmeric – Provides beautiful color and subtle flavor; fresh is nutritious.
Garam Masala – A fragrant spice blend that deepens the dish; can swap with curry powder if needed.
Salt – Enhances flavors; kosher salt is preferred for even seasoning.
Black Pepper – Adds a mild kick; adjust based on your taste preference.

For the Aromatics:
Onion – Sweet yellow onions work best for base flavor.
Garlic – Use fresh cloves for an aromatic richness.
Ginger – Freshly grated ginger adds warmth and spice.

Suggested Sides:
Basmati Rice/Naan – Perfect for soaking up that creamy coconut sauce, making it a must-try with your Crockpot Creamy Coconut Chicken Tikka Masala!

Step‑by‑Step Instructions for Crockpot Creamy Coconut Chicken Tikka Masala

Step 1: Prep Aromatics
Begin by dicing one medium yellow onion, grating three cloves of fresh garlic, and about an inch of fresh ginger. The vibrant colors and aromas will fill your kitchen and set the tone for the Crockpot Creamy Coconut Chicken Tikka Masala. Gather all your prepared ingredients and have them ready for the next step.

Step 2: Combine Ingredients in Crockpot
In your slow cooker, add the diced onion, grated garlic, and ginger. Next, place 2 pounds of boneless chicken thighs in the pot, followed by one can of full-fat coconut milk. Sprinkle in 1 tablespoon of cumin, 1 tablespoon of coriander, a teaspoon of turmeric, and 2 tablespoons of garam masala, along with salt and pepper to taste. Stir everything thoroughly to ensure even coverage.

Step 3: Set Cooking Time
Cover the slow cooker with its lid and set it to cook on low for 6-8 hours or on high for 3-4 hours. The timing will depend on your schedule, but when done, the chicken should be tender and the flavors well-blended. Aromas of the spices will waft through your home, hinting at the delicious meal to come.

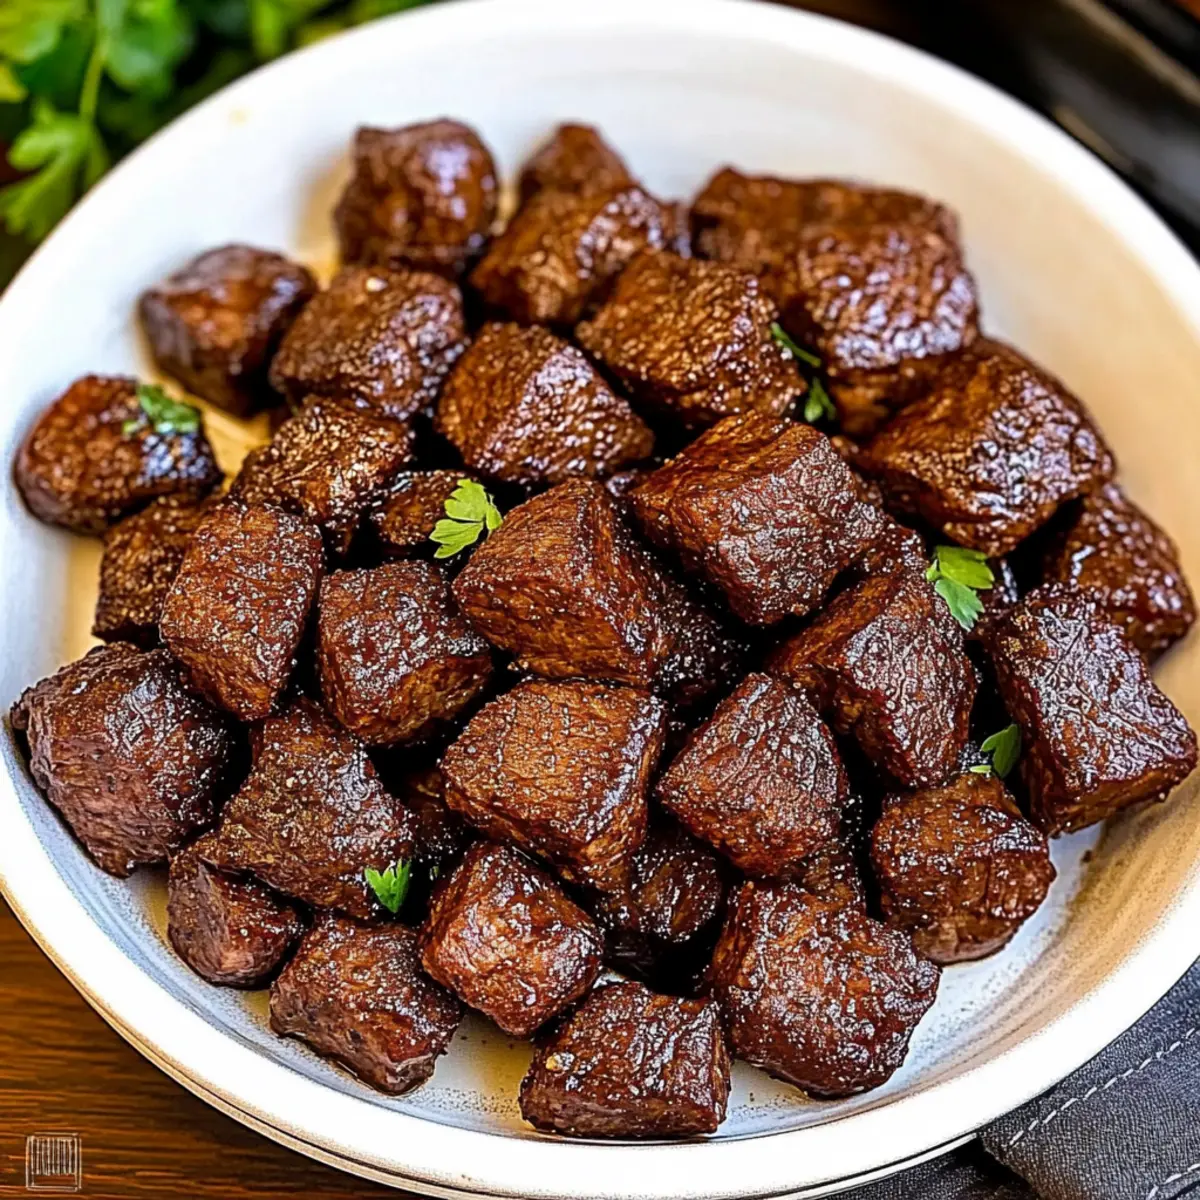
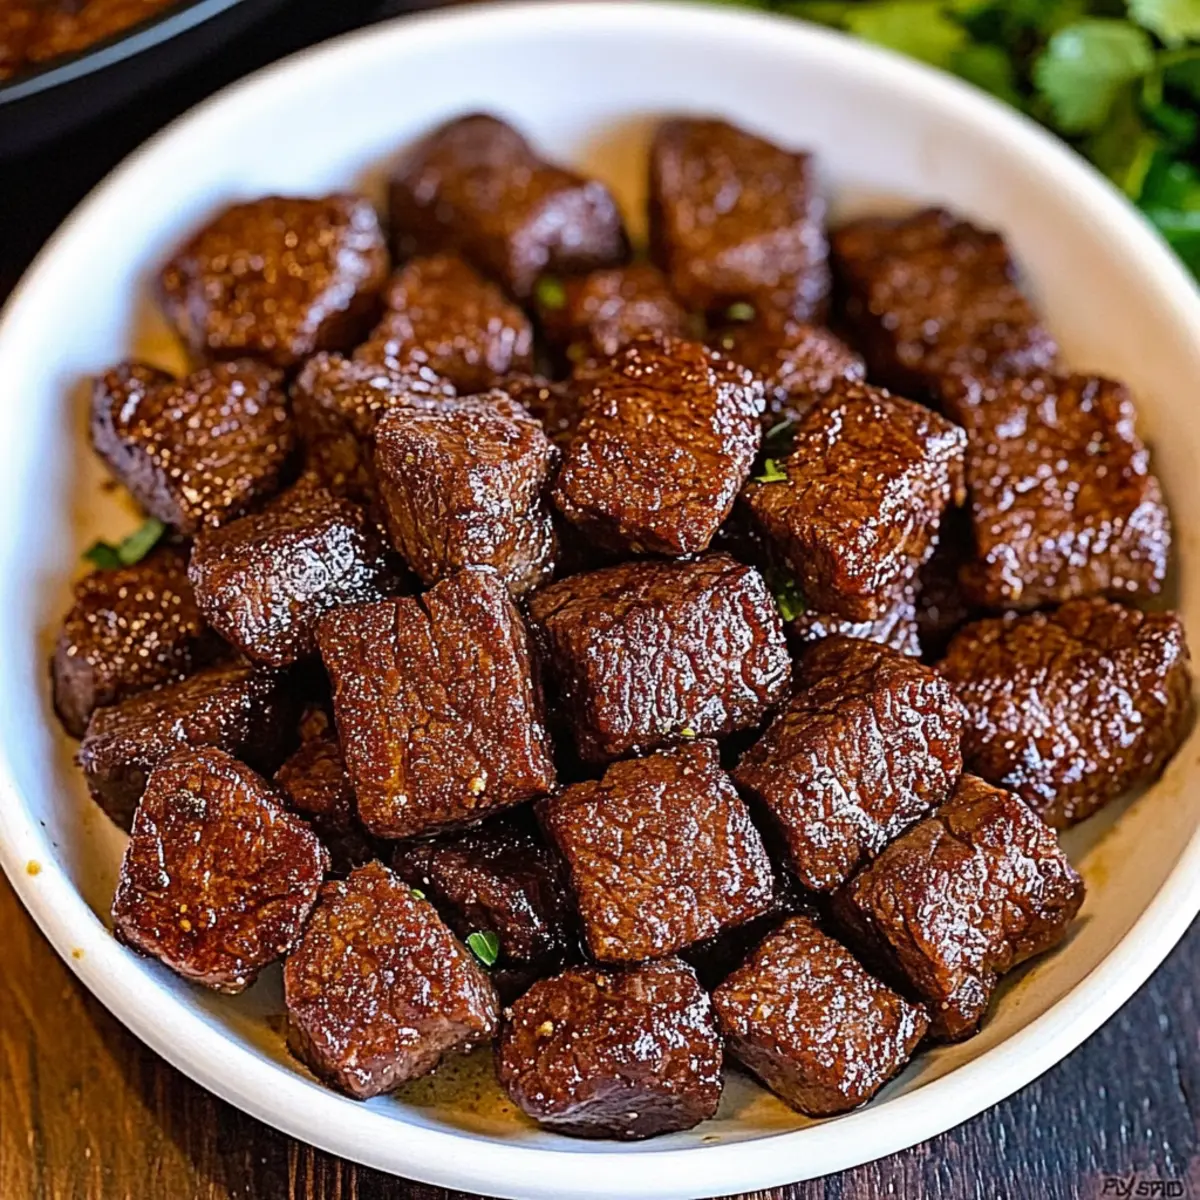
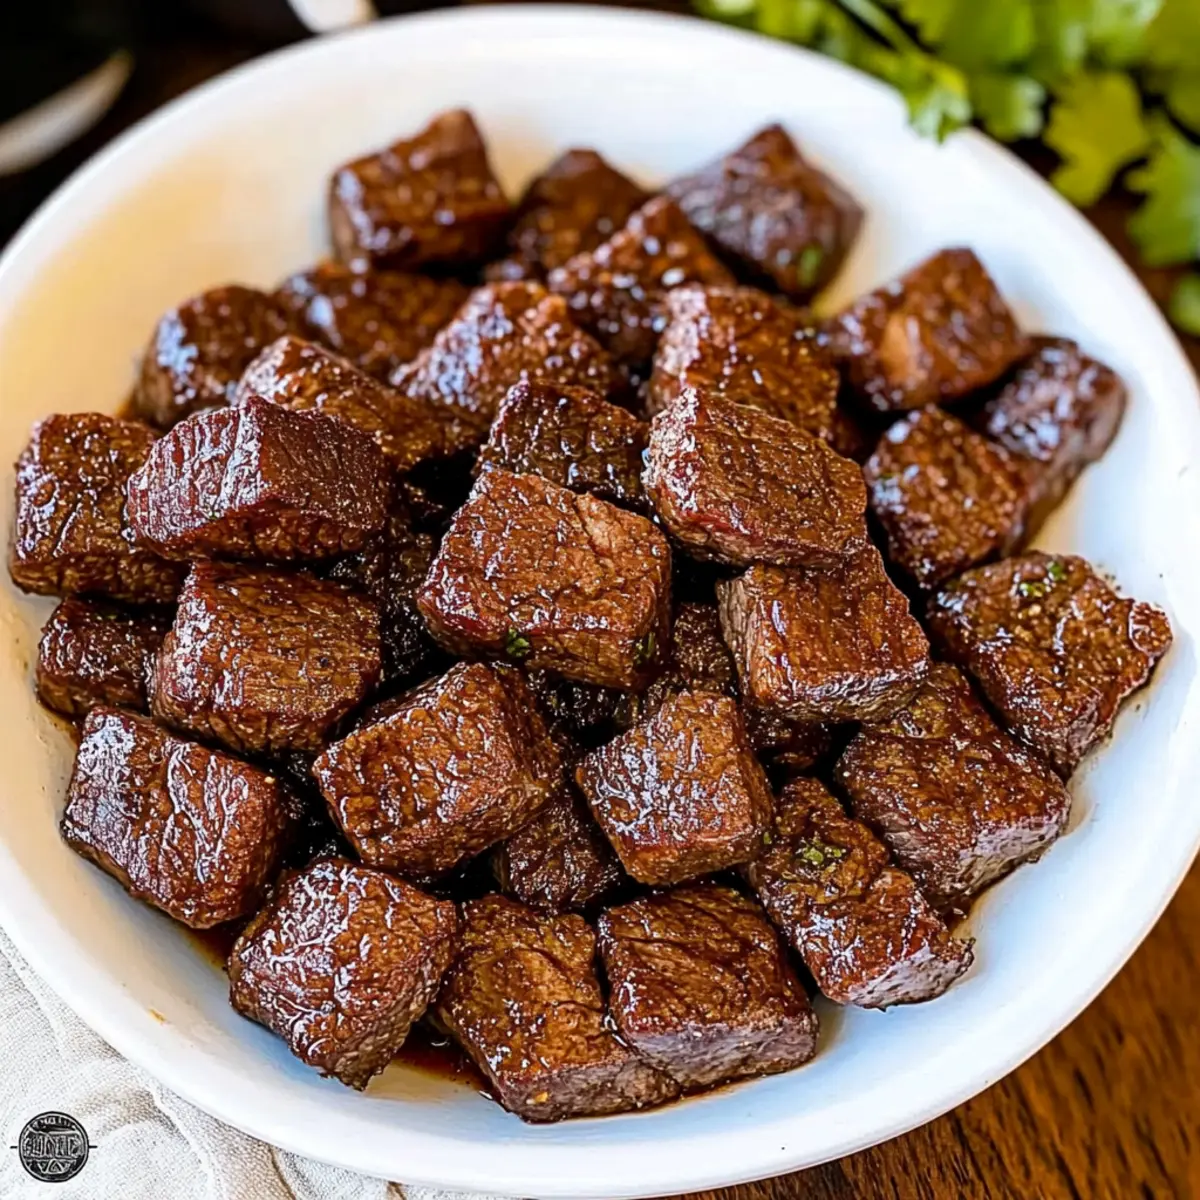
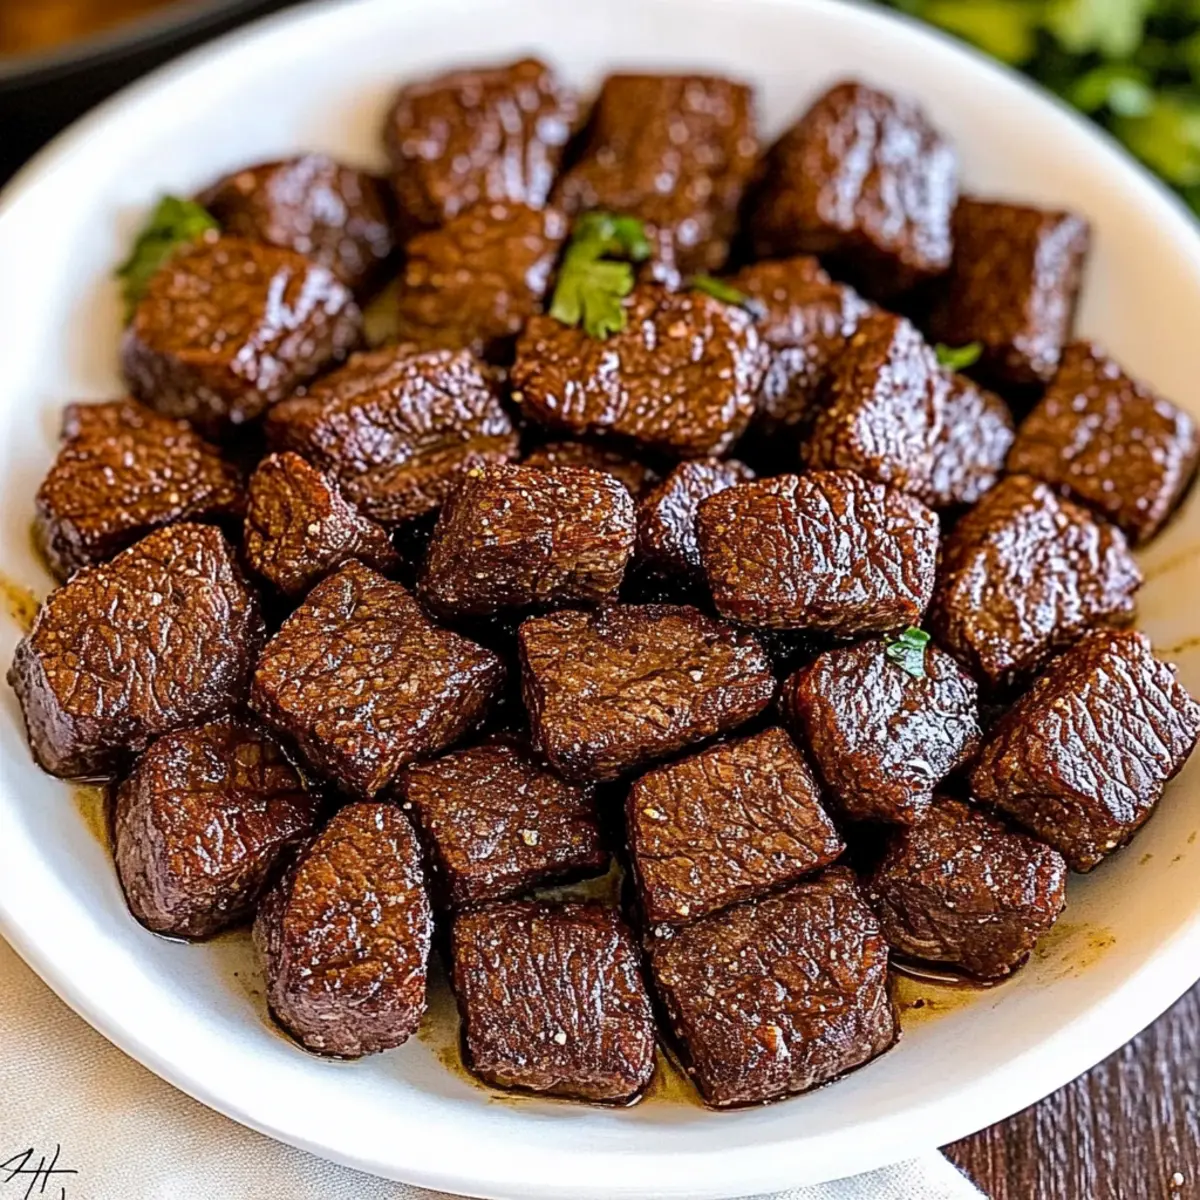
Step 4: Shred Chicken for Texture
Once the cooking time has elapsed, carefully remove the lid. If you prefer a more cohesive dish, use two forks to gently shred the chicken directly in the sauce, ensuring it absorbs the rich flavors of the Crockpot Creamy Coconut Chicken Tikka Masala. Alternatively, you can serve the chicken whole for a rustic presentation.

Step 5: Serve Together
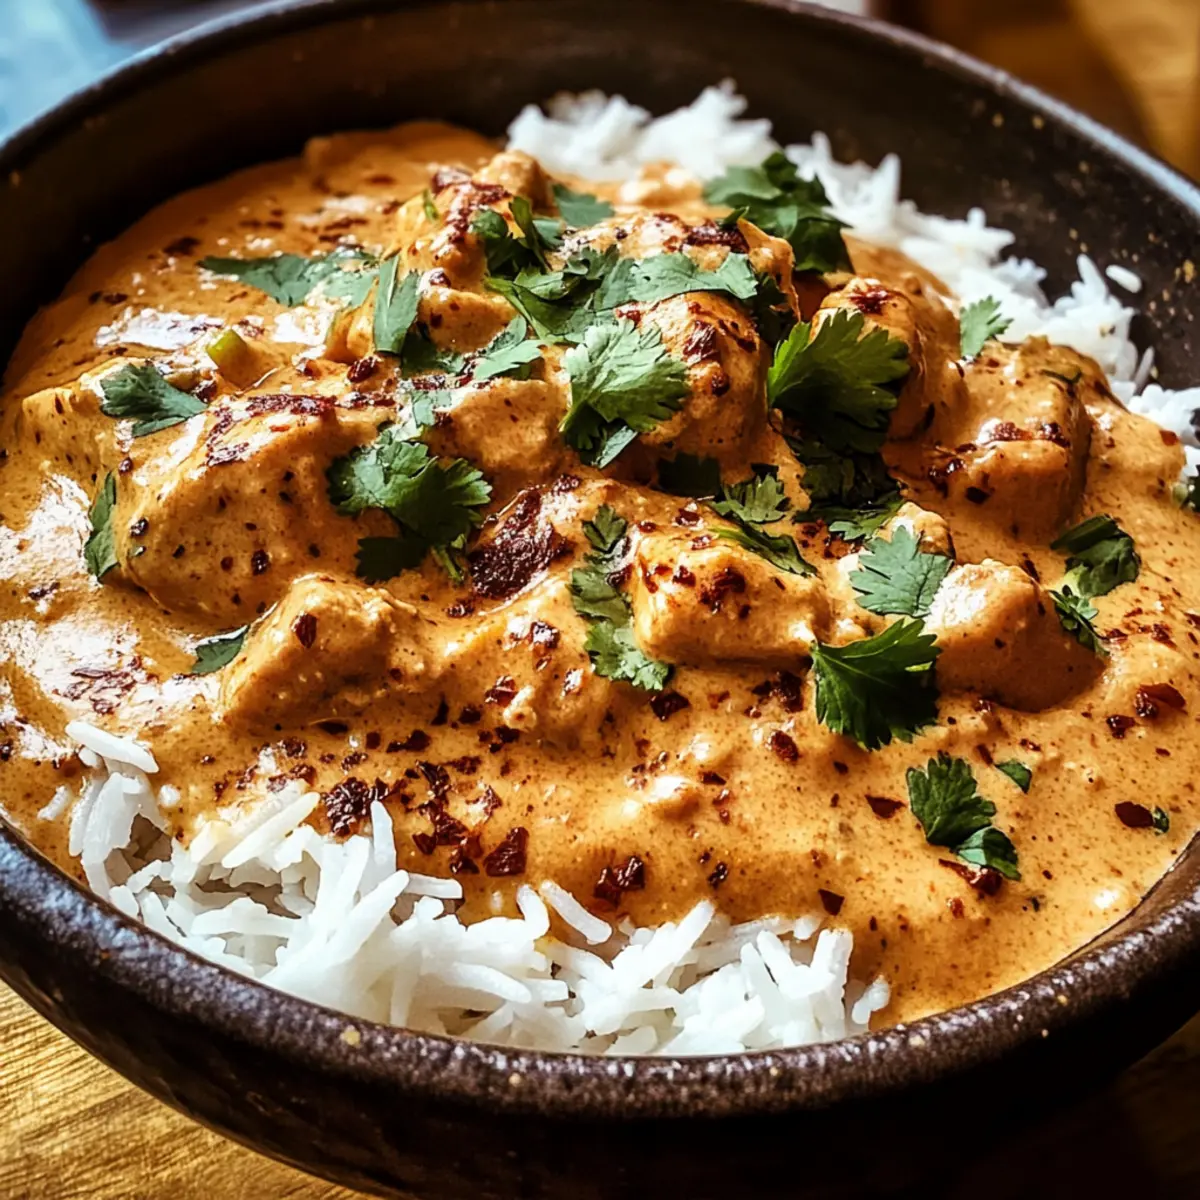
For a delightful meal, serve your Crockpot Creamy Coconut Chicken Tikka Masala over steamed basmati rice or alongside warm naan. These sides will complement the creamy sauce and elevate your dining experience. The meal is best enjoyed fresh but can also be stored for later indulgence.

Storage Tips for Crockpot Creamy Coconut Chicken Tikka Masala

Fridge: Keep leftover Crockpot Creamy Coconut Chicken Tikka Masala in an airtight container for up to 3 days. Reheat it gently on the stovetop or in the microwave until warmed through.

Freezer: This dish freezes well for up to 3 months. Store in freezer-safe containers, making sure to leave space for expansion. Thaw in the fridge overnight before reheating.

Reheating: For best results, reheat in a saucepan over low heat, stirring frequently. Add a splash of coconut milk if the sauce thickens too much during storage.

Make-Ahead: Prepare this dish in advance and store it in the fridge for easy weeknight meals. The flavors deepen over time, making it even more delicious when reheated!

Make Ahead Options

Crockpot Creamy Coconut Chicken Tikka Masala is a fantastic choice for meal prep, allowing you to save precious time on busy weeknights! You can prep the aromatics (onion, garlic, and ginger) up to 24 hours in advance; simply store them in an airtight container in the refrigerator to keep them fresh. Additionally, you can combine all the ingredients in the crockpot the night before and refrigerate it overnight—just remember to cook it right away the next morning. When you’re ready to enjoy this delightful dish, cook on low for 6-8 hours or high for 3-4 hours until the chicken is tender. This dish stays just as delicious when prepped ahead, making it a perfect solution for stress-free dinners!

Crockpot Creamy Coconut Chicken Tikka Masala: Variations & Substitutions

Feel free to unleash your creativity with these delightful twists that will make your Crockpot Creamy Coconut Chicken Tikka Masala truly your own!

  • Vegetarian: Replace chicken with chickpeas or tofu for a hearty vegetarian version. Both options will soak up the flavorful sauce beautifully!
  • Extra Veggies: Toss in a handful of spinach or bell peppers during the last hour of cooking for added color and nutrition, transforming your dish into a veggie-packed delight.
  • Coconut Cream: For an even richer, more indulgent experience, swap the coconut milk for coconut cream. It’s like a cozy hug in a bowl!
  • Heat It Up: Craving a kick? Add a chopped chili pepper or a sprinkle of chili powder for that extra heat. You’ll love the added depth it brings!
  • Curry Powder Alternative: In a pinch? Use curry powder instead of garam masala for a different, yet flavorful, spin on this classic dish.
  • Sweet & Savory: Incorporate a tablespoon of honey or maple syrup for a touch of sweetness, balancing the spices perfectly. It’s a surprising twist that children will adore!
  • Crossover Cook: Have leftovers? Use them to make a delicious filling for a unique taco night alongside some warm naan—you won’t regret it!
  • Grain Swap: Experiment with quinoa or cauliflower rice in place of basmati rice for a nutritious, low-carb option. Both will soak up that creamy sauce just as delightfully.

With these variations, your cozy nights will always have a new flavor adventure waiting for you! For a delicious pairing, don’t forget to check out my recipes for Crack Chicken Penne or Chilli Chicken Takeout that will complement this dish perfectly!

Expert Tips for Crockpot Creamy Coconut Chicken Tikka Masala

Submerge Chicken: Ensure the chicken is fully submerged in the coconut milk to guarantee even cooking and flavorful results.

Adjust Spice Levels: Experiment with the amount of garam masala and black pepper according to your taste preferences; start with less and add more if desired.

Don’t Lift the Lid: Avoid opening the crockpot lid during cooking; it alters the temperature and can extend cooking time.

Fresh Ingredients are Key: Use fresh spices like cumin and ginger for maximum flavor; outdated spices can dull the dish’s vibrant profile.

Customizable Dish: Swap chicken for chickpeas or tofu for a vegetarian variant, and feel free to add seasonal vegetables for extra nutrition.

What to Serve with Crockpot Creamy Coconut Chicken Tikka Masala

As the fragrant aromas of your slow-cooked masterpiece fill the kitchen, it’s time to consider the perfect accompaniments that will elevate your dinner experience.

  • Steamed Basmati Rice: This fluffy rice absorbs the rich coconut sauce beautifully, balancing the creamy flavors with a satisfying texture. It’s a classic pairing that never disappoints.

  • Warm Naan Bread: Soft and pillowy naan is perfect for scooping up the creamy tikka masala. It lends an inviting texture that enhances each savory bite, making every meal feel a bit more special.

  • Fresh Cucumber Salad: A refreshing cucumber salad adds a crisp, cool contrast to the warm, spicy dish. Toss thinly sliced cucumber with lemon juice, salt, and fresh herbs for a burst of freshness.

  • Coconut Lime Quinoa: For a nutty flavor twist, serve with coconut lime quinoa. The nutty texture and zesty taste harmonize beautifully with the creamy dish, creating a delightful culinary fusion.

  • Sautéed Spinach: Lightly sautéed spinach with garlic and a squeeze of lemon serves as a nutritious side that complements the rich flavors of the tikka masala while adding a vibrant splash of color.

  • Mango Chutney: This sweet and tangy chutney contrasts wonderfully with the savory chicken masala. Its fruity undertones enhance the overall flavor experience, adding a delightful twist to each bite.

  • Lassi: Treat yourself to a chilled mango or mint lassi. This creamy yogurt drink cools the palate and makes for a refreshing companion to the spice-laden flavors of the tikka masala.

  • Chocolate Chai Pudding: For dessert, indulge in this silky pudding that pairs beautifully with the spiced notes of the meal. It’s a comforting way to end your culinary journey.

  • Mint Tea: A steaming cup of mint tea boasts refreshing qualities that cleanse the palate, rounding off a rich meal in the most delightful way.

Crockpot Creamy Coconut Chicken Tikka Masala Recipe FAQs

What type of chicken is best for this recipe?
I recommend using boneless chicken thighs for the Crockpot Creamy Coconut Chicken Tikka Masala, as they remain tender and juicy during the slow cooking process. While boneless chicken breasts could work, they may dry out more easily.

How should I store leftovers?
Store your leftover Crockpot Creamy Coconut Chicken Tikka Masala in an airtight container in the refrigerator for up to 3 days. For best results, gently reheat on the stove or in the microwave until warmed through, stirring occasionally.

Can I freeze this dish?
Absolutely! This recipe freezes wonderfully for up to 3 months. Once cooled, transfer the Chicken Tikka Masala to freezer-safe containers, ensuring you leave a little space for expansion. When you’re ready to enjoy it, thaw it overnight in the refrigerator and reheat on low heat, stirring frequently.

What if I don’t have all the spices? Can I still make it?
While the specific spices bring out the best textures and flavors in your Crockpot Creamy Coconut Chicken Tikka Masala, you can substitute garam masala with curry powder if needed. Just keep in mind that the flavor profile will differ slightly, but it can still be delicious!

How do I adjust the spice level?
Spice levels can be modified easily! Start with the recommended amounts of garam masala and black pepper, then taste after cooking. If you’d like more heat, consider adding a pinch of chili powder or fresh chili pepper during the cooking process. Remember, the more the merrier when it comes to flavor!

Is this recipe pet-friendly?
While the primary ingredients are generally safe for pets, it’s best to avoid serving this chicken tikka masala to them, especially due to the spices, garlic, and salt. Stick to plain, unseasoned chicken if you want to share with your furry friends!

Crockpot Creamy Coconut Chicken Tikka Masala

Crockpot Creamy Coconut Chicken Tikka Masala for Cozy Nights

Crockpot Creamy Coconut Chicken Tikka Masala is effortless weeknight comfort food, perfect for cozy family evenings.
Prep Time 10 minutes
Cook Time 8 hours
Total Time 8 hours 10 minutes
Servings: 6 servings
Course: Dinner
Cuisine: Indian
Calories: 500

Ingredients
  

For the Chicken
  • 2 pounds Boneless Chicken Thighs Keeps the dish tender and juicy.
For the Sauce
  • 1 can Full-Fat Coconut Milk Offers a richer texture.
  • 1 tablespoon Cumin Ensures earthy warmth.
  • 1 tablespoon Coriander Adds a citrusy note.
  • 1 teaspoon Turmeric Provides beautiful color.
  • 2 tablespoons Garam Masala A fragrant spice blend.
  • to taste Salt Enhances flavors.
  • to taste Black Pepper Adds a mild kick.
For the Aromatics
  • 1 medium Yellow Onion Sweet onions work best.
  • 3 cloves Garlic Use fresh cloves.
  • 1 inch Fresh Ginger Adds warmth and spice.
Suggested Sides
  • Basmati Rice Perfect for soaking up creamy sauce.
  • Naan Great for pairing.

Equipment

  • Crockpot

Method
 

Step-by-Step Instructions
  1. Prep Aromatics: Dice the onion, grate the garlic, and ginger. Have them ready for the next step.
  2. Combine Ingredients in Crockpot: Add onion, garlic, and ginger into the slow cooker. Add chicken, coconut milk, cumin, coriander, turmeric, and garam masala. Stir to combine.
  3. Set Cooking Time: Cover and cook on low for 6-8 hours or high for 3-4 hours.
  4. Shred Chicken for Texture: After cooking, shred the chicken in the sauce or serve it whole.
  5. Serve Together: Serve over steamed basmati rice or with warm naan.

Nutrition

Serving: 1servingCalories: 500kcalCarbohydrates: 30gProtein: 25gFat: 35gSaturated Fat: 20gPolyunsaturated Fat: 5gMonounsaturated Fat: 5gCholesterol: 120mgSodium: 600mgPotassium: 800mgFiber: 3gSugar: 5gVitamin A: 500IUVitamin C: 10mgCalcium: 40mgIron: 3mg

Notes

Ensure chicken is submerged in coconut milk for even cooking. Adjust spices based on preference. Avoid lifting the lid during cooking.

Tried this recipe?

Let us know how it was!

Savory Air Fryer Steak Bites Ready in Under 20 Minutes

The first sizzle of steak hitting the air fryer is music to my ears—it’s a pure joy that instantly transports me to bustling steakhouses. Today, I’m sharing my go-to recipe for Air Fryer Juicy Steak Bites, a dish that captures the essence of easy, flavorful home cooking. Ready in under 20 minutes, these bite-sized pieces are perfect as a quick protein-packed appetizer or the star of your dinner plate alongside rice or a fresh salad. What I love most? The tender juiciness paired with that delightful seared flavor that rivals any steakhouse dish, and the fact that you can customize it with different cuts or seasonings. Are you ready to elevate your weeknight meals and impress your family with this effortless yet delicious treat? Let’s dive into these irresistible steak bites!

Why are Air Fryer Steak Bites a Must-Try?

Flavor Explosion: The marinated steak bites burst with umami goodness, offering a depth of flavor that keeps you coming back for more.

Quick & Easy: With just 10-20 minutes from start to finish, there’s no excuse not to enjoy a home-cooked meal that impresses!

Versatile Cooking: Swap in your favorite cuts or play with spices—let your culinary creativity shine, just like in Cajun Steak Alfredo.

Crowd-Pleasing Appetizer: Whether for a game day snack or a family dinner, these juicy bites are bound to thrill your guests.

Healthy Choice: Packed with protein and low in carbs, they fit perfectly into a balanced diet while delivering restaurant-quality flavors!

Air Fryer Steak Bites Ingredients

For the Marinade
Olive Oil – This helps to add moisture and ensures the marinade adheres well. Substitute with vegetable or canola oil for a different flavor profile.
Soy Sauce – Brings a savory umami depth to the steak; consider low-sodium soy sauce for a lighter option.
Ground Black Pepper – Adds a mild, aromatic kick; using freshly ground pepper enhances the flavor.
Sea Salt – Elevates the overall taste while tenderizing the meat; you can use other salts but adjust the measurements accordingly.

For the Steak
Sirloin Steak – A rich-flavored protein base for this dish; feel free to swap in ribeye or beef tenderloin for a more tender bite.

These Air Fryer Steak Bites are easy to prepare, making mealtime a pleasure that you won’t want to miss out on!

Step‑by‑Step Instructions for Air Fryer Juicy Steak Bites

Step 1: Prepare the Steak
Begin by cutting the sirloin steak into bite-sized pieces, approximately 1½ inches by 1 inch. This size ensures even cooking in the air fryer, allowing for that perfect tender texture. Place the steak cubes on a clean cutting board and have your ingredients at the ready for a seamless cooking experience.

Step 2: Make the Marinade
In a medium bowl, whisk together 2 tablespoons of olive oil, a teaspoon of ground black pepper, a teaspoon of sea salt, and 2 tablespoons of soy sauce. The combination should create a flavorful marinade that will adhere beautifully to the steak. Take a moment to smell the delightful mixture before adding the meat—it’s a good sign that you’re on the right track to making delicious Air Fryer Steak Bites.

Step 3: Marinate the Steak
Add the cut steak pieces to the marinade, ensuring each piece is well-coated. This step is crucial for infusing the meat with flavor. Allow the steak to marinate for at least 10-30 minutes at room temperature. For optimal flavor absorption, consider letting it marinate longer in the fridge while you gather your air fryer and prep other ingredients.

Step 4: Preheat the Air Fryer
Set your air fryer to preheat at 400°F (200°C) for about 5 minutes. This preheating is important as it creates a hot environment for cooking the steak bites quickly and evenly. You’ll know your air fryer is ready when you hear a light beep or see the indicator light turn green.

Step 5: Cook the Steak Bites
After marinating, place the steak bites in a single layer in the air fryer basket. Cook for 7-12 minutes, shaking the basket halfway through to ensure even cooking. For medium-rare steak bites, aim for 7 minutes; for well-done, extend to 12 minutes. The steak should have a slightly crispy exterior while maintaining juiciness inside.

Step 6: Serve Immediately
Once cooked to your desired doneness, remove the steak bites from the air fryer. Serve these succulent Air Fryer Steak Bites immediately while they are hot, paired with your choice of dipping sauces or alongside some vegetables and rice. Enjoy the wonderful aroma and flavor that fills your kitchen!

What to Serve with Air Fryer Juicy Steak Bites

Indulging in tender, juicy steak bites is just the beginning—let’s create a feast that tantalizes your taste buds!

  • Creamy Mashed Potatoes: These buttery spuds provide a comforting contrast to the savory steak bites, creating the perfect mouthfeel.

  • Garlic Butter Noodles: With a hint of garlic and dunked in butter, these noodles bring a rich warmth that complements the steak’s flavors beautifully.

  • Fresh Garden Salad: Crisp greens tossed with a tangy vinaigrette add freshness to your plate, balancing the savory richness of the steak bites.

  • Roasted Vegetables: Caramelized veggies like zucchini and bell peppers bring natural sweetness and a nice crunch, enhancing the meal’s texture and taste.

  • Chimichurri Sauce: This zesty, herby sauce adds an extra layer of boldness to each bite, elevating the dish while keeping every mouthful exciting.

  • Honey Glazed Carrots: Sweet and tender, these carrots provide a delightful contrast to the beef, serving as a lovely side with bright flavors.

  • Classic Caesar Salad: The creamy dressing and crunchy croutons work harmoniously with the juicy steak, making every bite feel indulgent.

  • Red Wine: A glass of full-bodied red wine complements the rich umami flavors of the steak bites, tying the meal together and enhancing your dining experience.

  • Chocolate Mousse: On a sweeter note, a light chocolate mousse provides a decadent finish that’s rich yet airy, perfect for celebrating the meal.

Make Ahead Options

These Air Fryer Steak Bites are perfect for meal prep enthusiasts! You can marinate the steak pieces up to 24 hours in advance, allowing the flavors to seep in and intensify. Simply cut the sirloin steak into bite-sized pieces and toss them in the marinade (olive oil, soy sauce, black pepper, and sea salt) before refrigerating. When you’re ready to serve, just preheat your air fryer and cook the marinated steak bites for 7-12 minutes based on your preferred doneness. This make-ahead method not only saves you time during busy weeknights but also ensures your steak bites are just as delicious as if they were made fresh! Enjoy your effortlessly flavorful meal!

Expert Tips for Air Fryer Steak Bites

  • Timing is Key: Keep a close eye on the cooking time; overcooking can lead to dry steak bites. Aim for the perfect juiciness by checking at 7 minutes.

  • Cut Evenly: Ensure steak pieces are uniform in size, about 1½ by 1 inch. This guarantees even cooking and helps each Air Fryer Steak Bite achieve that tender texture.

  • Maximize Flavor: Let the steak marinate for at least 30 minutes for the best results. If time allows, marinate longer in the fridge for deeper flavor infusions.

  • Avoid Poking Holes: Never poke holes in the steak while marinating. This can cause precious juices to escape, which might leave you with less juicy bites.

  • Experiment with Cuts: Don’t hesitate to try different cuts of beef! While sirloin works great, using ribeye or tenderloin can elevate your Air Fryer Steak Bites even more.

Air Fryer Steak Bites Variations

Feel free to get creative with your Air Fryer Steak Bites—there are endless ways to make them your own!

  • Different Cuts: Experiment with ribeye or tenderloin for a more luxurious bite. Each cut offers its unique flavor and tenderness, elevating this dish.

  • Vegetable Boost: Add sliced mushrooms or onions to the air fryer for a hearty, flavorful combo. These additions soften beautifully, enhancing the overall taste and texture of your steak bites.

  • Spicy Kick: Mix in some spicy chili flakes or cayenne pepper into the marinade for an extra layer of heat. This twist will awaken your taste buds and add excitement to your meal.

  • Herb Infusion: Toss in fresh herbs like rosemary or thyme with the marinade for a fragrant twist. These herbs give a delightful aromatic quality, making the steak bites even more scrumptious.

  • Cajun Spices: Use Cajun seasoning instead of, or alongside, black pepper for a robust, zesty flavor. Just like in my Cajun Steak Alfredo, this spice blend will add a delicious punch to your steak.

  • Gluten-Free Option: Swap soy sauce for tamari or coconut aminos for a gluten-free alternative that still provides rich umami flavor. Your steak will remain just as delightful while making it suitable for gluten-sensitive guests.

  • Marinade Variations: Incorporate different ingredients like honey or balsamic vinegar into the marinade for a sweet and tangy dimension. Such flavors create an enticing balance with the savory steak, resulting in a truly special dish.

  • Cheesy Delight: Sprinkle shredded cheese over the steak bites in the final minute of cooking for a melty topping that takes them to the next level. You can even go for blue cheese to experience a classic steakhouse flavor.

Embrace these variations and make your Air Fryer Steak Bites a true reflection of your taste!

How to Store and Freeze Air Fryer Steak Bites

Fridge: Store leftover cooked Air Fryer Steak Bites in an airtight container for up to 3 days. Ensure the bites are completely cooled before sealing to maintain freshness.

Freezer: For longer storage, freeze steak bites in a single layer on a baking sheet until firm, then transfer to a freezer bag for up to 3 months. Label with the date for easy tracking.

Reheating: Reheat thawed steak bites in the air fryer at 350°F (175°C) for 5-7 minutes. This method helps restore their crispy exterior while keeping the inside juicy and flavorful.

Room Temperature: Avoid leaving steak bites at room temperature for more than 2 hours to prevent foodborne illness. Always refrigerate leftovers promptly after serving.

Air Fryer Juicy Steak Bites Recipe FAQs

How do I select the right steak for Air Fryer Steak Bites?
Absolutely! For the best results, opt for cuts like sirloin, ribeye, or tenderloin. Look for beef that is bright red with minimal dark spots. The texture should be firm but slightly springy. If you can find steak with good marbling (the white streaks of fat), that’s ideal for flavor and tenderness.

How should I store leftover Air Fryer Steak Bites?
You can store leftover cooked steak bites in an airtight container in the fridge for up to 3 days. Make sure they’re completely cooled before sealing the container to keep them fresh. I often use glass containers as they help maintain moisture levels better.

Can I freeze Air Fryer Steak Bites?
Yes, you can freeze them! Place the cooled steak bites in a single layer on a baking sheet and freeze until firm, about 1-2 hours. Then, transfer to a freezer bag, removing as much air as possible. They’ll stay fresh for up to 3 months. Remember to label the bag with the date for easy tracking!

What should I do if my steak bites are overcooked?
Very! If you find that the steak bites are overcooked, you can try making a sauce to accompany them. A homemade gravy or a rich marinade can help add moisture and flavor back in. If they are just a tad dry, slice the bites thinly and serve them in a warm broth or with a dipping sauce to enhance their tenderness.

Are Air Fryer Steak Bites safe for pets?
While plain steak can be a treat for pets, avoid giving them any leftover steak bites that have been marinated with soy sauce, salt, or spices. These ingredients can be harmful to pets. Always consult your veterinarian for safe food options for your furry friends.

Air Fryer Steak Bites

Savory Air Fryer Steak Bites Ready in Under 20 Minutes

These Air Fryer Steak Bites deliver a flavor explosion, ready in under 20 minutes, perfect for appetizers or dinner.
Prep Time 10 minutes
Cook Time 12 minutes
Marinating Time 30 minutes
Total Time 52 minutes
Servings: 4 bites
Course: Appetizers
Cuisine: American
Calories: 250

Ingredients
  

For the Marinade
  • 2 tablespoons olive oil substitute with vegetable or canola oil for a different flavor
  • 1 teaspoon ground black pepper freshly ground enhances flavor
  • 1 teaspoon sea salt adjust if using other types of salt
  • 2 tablespoons soy sauce consider low-sodium
For the Steak
  • 1 pound sirloin steak can swap in ribeye or beef tenderloin

Equipment

  • Air Fryer

Method
 

Step‑by‑Step Instructions
  1. Begin by cutting the sirloin steak into bite-sized pieces, approximately 1½ inches by 1 inch.
  2. In a medium bowl, whisk together olive oil, ground black pepper, sea salt, and soy sauce.
  3. Add the cut steak pieces to the marinade, ensuring each piece is well-coated.
  4. Preheat the air fryer to 400°F (200°C) for about 5 minutes.
  5. Place the steak bites in a single layer in the air fryer basket and cook for 7-12 minutes.
  6. Once cooked to your desired doneness, remove the steak bites from the air fryer and serve immediately.

Nutrition

Serving: 4bitesCalories: 250kcalCarbohydrates: 2gProtein: 25gFat: 16gSaturated Fat: 6gPolyunsaturated Fat: 1gMonounsaturated Fat: 9gCholesterol: 70mgSodium: 540mgPotassium: 400mgSugar: 1gCalcium: 2mgIron: 15mg

Notes

Experiment with different cuts of beef for varied flavor and texture. Marinating longer enhances taste.

Tried this recipe?

Let us know how it was!

Crab Stuffed Shrimp: Elegant Seafood Delight in Minutes

As I stood in my kitchen, the aroma of the sea filled the air, transporting me to a sun-soaked coastal town where fresh seafood reigned supreme. I’m excited to share my recipe for Crab Stuffed Shrimp, a dish that embodies elegance without the fuss. With tender, seasoned shrimp cradling a savory crab filling, these delightful appetizers combine a gourmet touch with the ease of home cooking. Not only are they perfect for impressing guests at your next gathering, but they’re also quick to whip up, allowing you to spend more time savoring the company rather than slaving over the stove. Whether you serve them as a standout starter at a dinner party or as a special treat during family nights, these seafood wonders are sure to be a hit. Curious about how to make this delightful dish your own? Let’s dive into the recipe!

Why Try Crab Stuffed Shrimp?

Experience the exquisite blend of flavors! Each bite features succulent shrimp paired with a rich crab filling that’s simply irresistible.

Versatile for any occasion: Whether it’s a festive gathering or an intimate family dinner, these elegant appetizers shine on any table.

Quick Prep time means you can spend less time cooking and more time with loved ones. Ideal for busy weeknights or last-minute entertaining!

Perfect for Customization: Swap crab for a zesty Spinach & Artichoke Stuffed Shrimp variation or try adding a kick with Jalapeño Popper Stuffed Shrimp to cater to different tastes.

Crowd-Pleaser: With their eye-catching presentation and savory aroma, these stuffed shrimp will enchant your guests, leaving them wanting more!

Crab Stuffed Shrimp Ingredients

• A delightful array of flavors awaits in every bite.

For the Shrimp

  • Shrimp – Deveined, shell-on shrimp provide a sturdy base packed with flavor.
  • Olive Oil – Enhances moisture and adds a rich depth to the shrimp.
  • Old Bay Seasoning – A classic blend that ushers in a unique seafood flavor profile.

For the Crab Filling

  • Mayonnaise – Acts as a binder to keep your crab filling rich and creamy.
  • Panko Breadcrumbs – Adds the perfect crunch and texture to the stuffing.
  • Grated Parmesan – Introduces a savory richness that beautifully complements the crab.
  • Dijon Mustard – Offers a delightful tanginess to elevate the filling flavors.
  • Lemon Juice & Zest – Brightens and balances the richness of the crab filling.
  • Fresh Parsley – Adds a pop of color and freshness as a garnish.
  • Crabmeat – The star ingredient, providing the delightful seafood taste for your Crab Stuffed Shrimp.
  • Salted Butter – For brushing over the baked shrimp, enriching the overall flavor.
  • Minced Garlic – Infuses the garlic topping with aromatic flavor.
  • Dill – This fresh herb complements the seafood perfectly.

For Seasoning

  • Garlic Powder – A hint of garlic flavor that complements the dish beautifully.
  • Smoked Paprika – Adds a subtle smoky taste to elevate the stuffing.
  • Black Pepper – Provides a touch of heat to round out the flavors.
  • Oregano – Enhances the herbaceous notes in the dish.

With these fresh and quality ingredients, you’ll be well on your way to creating an unforgettable Crab Stuffed Shrimp experience filled with flavor and joy!

Step‑by‑Step Instructions for Crab Stuffed Shrimp

Step 1: Prepare Shrimp
Devein and peel the top shells of your shrimp, leaving the tails intact for a beautiful presentation. Carefully butterfly each shrimp by slicing down the back, ensuring not to cut all the way through—this creates a perfect pocket to hold the delicious crab filling.

Step 2: Marinate Shrimp
In a mixing bowl, combine the butterflied shrimp with olive oil, Old Bay seasoning, garlic powder, smoked paprika, black pepper, and oregano. Toss gently to coat the shrimp evenly and let them marinate for about 15 minutes, allowing the flavors to infuse and enhance the upcoming Crab Stuffed Shrimp.

Step 3: Make Crab Filling
In a separate bowl, mix together mayonnaise, Panko breadcrumbs, grated Parmesan, Dijon mustard, lemon juice, and lemon zest until well combined. Carefully fold in the crabmeat, being gentle to maintain the chunky texture, as this will lend a delectable richness to the stuffing for your Crab Stuffed Shrimp.

Step 4: Preheat Oven
While the shrimp are marinating, preheat your oven to 350°F (175°C). This temperature is ideal for baking the shrimp to perfection, ensuring they are tender on the inside while obtaining a lovely golden-brown finish during the final bake.

Step 5: Stuff Shrimp
Take each marinated shrimp and place a generous dollop of the crab filling into the pocket you created earlier. Press the edges gently to seal the filling inside, making sure it is securely packed—this will create a delightful bite for your Crab Stuffed Shrimp.

Step 6: Bake
Arrange the stuffed shrimp comfortably in a skillet, ensuring they are not overcrowded. Bake them in the preheated oven for about 10 minutes or until the shrimp turn opaque and start curling, indicating they are cooked through and ready for the finishing touch.

Step 7: Finish with Butter
While the shrimp are baking, mix melted butter, minced garlic, and chopped dill together in a small bowl. Once the baking time is up, brush the garlic butter mixture over the hot shrimp and switch the oven to broil for an additional 2 minutes, allowing the tops to turn crispy and golden.

Step 8: Serve Hot
Remove your Crab Stuffed Shrimp from the oven and serve them immediately, garnished with fresh parsley for added color and flavor. These beautiful appetizers are best enjoyed fresh out of the oven, allowing guests to savor the delightful combination of flavors and textures.

Crab Stuffed Shrimp Variations

Feel free to let your creativity shine as you customize this delightful recipe! Each unique spin brings fresh excitement and flavor to your Crab Stuffed Shrimp.

  • Seafood Medley: Swap crab with a mix of shrimp and scallops for a delightful twist. The combination brings new layers of flavor and texture.

  • Vegetarian Delight: Replace crab with a creamy spinach and artichoke dip filling for a vegetarian option. It’s surprisingly indulgent and equally delicious!

  • Jalapeño Kick: Add diced jalapeños to the crab mixture for a spicy kick. Just a few pieces will brighten the flavor and awaken the taste buds.

  • Cheesy Spin: Mix in shredded mozzarella or cream cheese with your crab filling for a melty, cheesy goodness that adds richness.

  • Herb Infusion: Experiment with different herbs like tarragon or basil for a fragrant and unique herbaceous note that pairs wonderfully with the seafood.

  • Citrus Burst: Incorporate orange zest along with lemon zest for an extra fruity brightness, enhancing the overall flavor and making each bite pop.

  • Pesto Infusion: Swirl in a tablespoon of pesto to the crab filling for a basil-flavored surprise that complements the seafood beautifully.

  • Smoky Flavor: Add crumbled bacon into the crab mixture for a smoky flavor and crunch. This twist will definitely have your guests asking for more.

If you love seafood dishes, you might also enjoy trying out my Shrimp Scampi Pasta or the delightful Shrimp Avocado Bowls. Each of these offers unique flavors that pair wonderfully with fresh seafood! Enjoy experimenting with your Crab Stuffed Shrimp, and let the deliciousness unfold!

What to Serve with Crab Stuffed Shrimp?

Imagine a delightful dinner table adorned with complementary dishes that showcase the elegance of your crab-stuffed creations.

  • Garlic Butter Bread: Add a slice of crusty garlic butter bread on the side. Its crunchy texture provides a comforting contrast to the creamy shrimp.

  • Crispy Side Salad: A light, crisp salad with lemon vinaigrette cuts through the richness of the shrimp, refreshing the palate with each bite.

  • Roasted Asparagus: Tender asparagus spears, lightly seasoned and roasted, bring a touch of earthy flavor that pairs beautifully with crab and shrimp.

  • Wild Rice Pilaf: A nutty wild rice pilaf offers a hearty backdrop, enhancing the flavors of the seafood while adding delightful texture and warmth.

  • Chardonnay: A chilled glass of buttery Chardonnay elevates the seafood elegance, providing a balance of citrus that complements the rich crab filling.

  • Lemon Sorbet: End the meal with a light lemon sorbet. Its zesty freshness cleanses the palate, making it a perfect finish after your crab stuffed shrimp.

A well-rounded accompaniment truly elevates your dining experience, creating a feast that celebrates flavor and togetherness!

How to Store and Freeze Crab Stuffed Shrimp

Fridge: Store leftover Crab Stuffed Shrimp in an airtight container for up to 3 days. This keeps them fresh and flavorful for your late-night cravings or unexpected guests.

Freezer: For longer storage, freeze assembled but unbaked stuffed shrimp in a single layer on a baking sheet until solid, then transfer to a freezer-safe bag for up to 2 months. Thaw in the fridge before baking.

Reheating: Reheat by placing leftovers in a preheated oven at 350°F (175°C) for about 10-15 minutes, or until heated through. Brush with a bit of melted butter for a delicious finish.

Prepare Ahead: You can also prepare the filling in advance and store it separately; just stuff and bake the shrimp when you’re ready.

Make Ahead Options

Crab Stuffed Shrimp is perfect for meal prep enthusiasts looking to save time on busy weeknights! You can prepare the shrimp and crab filling up to 24 hours in advance – simply marinate the shrimp and keep it refrigerated alongside the filling. This keeps the flavors fresh and vibrant. When you’re ready to impress your guests, just stuff the shrimp and bake them directly from the fridge, ensuring they reach an internal temperature of 145°F (63°C). For best results, avoid over-mixing the crab filling, as you want those delicious lumps of crab intact! With these make-ahead tips, your Crab Stuffed Shrimp will be just as delightful and flavorful, delivering gourmet results with minimal last-minute effort.

Expert Tips for Crab Stuffed Shrimp

  • Tasty Balance: Ensure a gentle fold when mixing the crab filling; over-mixing can lead to a mushy texture instead of keeping those savory crab chunks intact.

  • Prep Ahead: Consider preparing the shrimp and crab filling a day in advance. Store them separately in the fridge, making the assembly process a breeze when it’s time to bake.

  • Quick Cooking: Remember that shrimp cook rapidly! Always check their internal temperature, aiming for 145°F (63°C) to guarantee they’re perfectly tender and safe to eat.

  • Optimize Flavor: Brushing with garlic butter right before broiling infuses the Crab Stuffed Shrimp with unparalleled richness, perfect for an extra touch of decadence.

  • Variations Welcome: Feel free to experiment! Substitute in your favorite seafood or add a spicy twist with jalapeños for a different take on this classic appetizer.

Crab Stuffed Shrimp Recipe FAQs

How do I choose the best shrimp for my Crab Stuffed Shrimp?
Absolutely! Look for large, fresh shrimp that are deveined and still in their shells, as they provide the best flavor and structure for stuffing. When selecting shrimp, check for a fresh, ocean-like smell. If you see dark spots all over, steer clear! The more vibrant the color of the shrimp, the better.

What is the best way to store leftover Crab Stuffed Shrimp?
Leftover Crab Stuffed Shrimp can be stored in an airtight container in the refrigerator for up to 3 days. It’s always best to let the shrimp cool completely before sealing them. This helps preserve their moisture and flavor for any late-night cravings or surprise guests!

Can I freeze Crab Stuffed Shrimp? If so, how?
Definitely! If you want to freeze your stuffed shrimp, first arrange them in a single layer on a baking sheet until they’re frozen solid. Once they’re firm, place the shrimp in a freezer-safe bag. They can be frozen for up to 2 months. When you’re ready to enjoy them, simply thaw them overnight in the fridge before baking—they’ll be just as delicious!

What should I do if my Crab Stuffed Shrimp shrinks during baking?
Very common! If your shrimp shrink, it might be because they were overcooked. Ensure to monitor the baking time closely, as shrimp cook quickly. An internal temperature of 145°F (63°C) is your goal. Another tip is to remove them from the oven as soon as they turn opaque and just begin to curl, preventing excessive cooking.

Are Crab Stuffed Shrimp suitable for people with shellfish allergies?
It’s essential to avoid anyone with shellfish allergies from enjoying this recipe, as both shrimp and crab are shellfish. A great alternative would be to use a vegetarian filling like sautéed spinach and artichoke or even a cheese blend. Consider your guests’ dietary needs to ensure everyone can enjoy!

Can I make the filling ahead of time for my Crab Stuffed Shrimp?
Absolutely! Making the crab filling in advance saves time. Just prepare it and store in an airtight container in the fridge for up to 2 days. When you’re ready to bake, simply stuff the shrimp and follow the baking instructions. It’s a fantastic way to simplify your hosting duties!

Crab Stuffed Shrimp

Crab Stuffed Shrimp: Elegant Seafood Delight in Minutes

Enjoy Crab Stuffed Shrimp, elegant seafood appetizers that are quick to prepare and impress at any gathering.
Prep Time 15 minutes
Cook Time 12 minutes
Total Time 27 minutes
Servings: 4 shrimp
Course: Appetizers
Cuisine: Seafood
Calories: 200

Ingredients
  

For the Shrimp
  • 16 pieces Deveined shrimp, shell-on
  • 2 tablespoons Olive oil
  • 1 tablespoon Old Bay seasoning
For the Crab Filling
  • 1/2 cup Mayonnaise
  • 1/2 cup Panko breadcrumbs
  • 1/4 cup Grated Parmesan
  • 1 tablespoon Dijon mustard
  • 1 tablespoon Lemon juice
  • 1 teaspoon Lemon zest
  • 1/4 cup Fresh parsley, chopped for garnish
  • 1 cup Crabmeat
  • 2 tablespoons Salted butter, melted for brushing
  • 1 clove Minced garlic
  • 1 teaspoon Dill, chopped
For Seasoning
  • 1 teaspoon Garlic powder
  • 1 teaspoon Smoked paprika
  • 1/2 teaspoon Black pepper
  • 1/2 teaspoon Oregano

Equipment

  • Mixing Bowl
  • Oven
  • Skillet
  • Baking Sheet

Method
 

Step-by-Step Instructions for Crab Stuffed Shrimp
  1. Devein and peel the top shells of your shrimp, leaving the tails intact. Butterfly each shrimp by slicing down the back.
  2. Combine shrimp with olive oil, Old Bay seasoning, garlic powder, smoked paprika, black pepper, and oregano. Marinate for 15 minutes.
  3. Mix mayonnaise, Panko breadcrumbs, grated Parmesan, Dijon mustard, lemon juice, and lemon zest. Fold in crabmeat.
  4. Preheat your oven to 350°F (175°C).
  5. Stuff each shrimp with crab filling, pressing edges to seal.
  6. Arrange shrimp in a skillet. Bake for about 10 minutes until shrimp are opaque.
  7. Mix melted butter, minced garlic, and dill. Brush over baked shrimp and broil for 2 minutes.
  8. Serve immediately, garnished with fresh parsley.

Nutrition

Serving: 1shrimpCalories: 200kcalCarbohydrates: 15gProtein: 12gFat: 13gSaturated Fat: 5gPolyunsaturated Fat: 1gMonounsaturated Fat: 7gCholesterol: 70mgSodium: 500mgPotassium: 200mgFiber: 1gVitamin A: 300IUVitamin C: 1mgCalcium: 50mgIron: 2mg

Notes

Great for gatherings, these stuffed shrimp can be customized with different fillings or spices to suit your taste.

Tried this recipe?

Let us know how it was!

Crispy Keto Fried Shrimp for a Guilt-Free Snack Attack

Amidst the clamor of busy weeknights, the allures of fast food can sometimes drown out our culinary aspirations. Yet, there’s a fantastic way to reclaim dinner with a delightful twist: Crispy Keto Fried Shrimp. This quick low-carb appetizer is your ticket to impressing friends and family without spending hours in the kitchen. In just 15 minutes, you can whip up a batch of these golden, crispy shrimp that are not only rich in flavor but also fit perfectly into your keto lifestyle. Consider them a guilt-free indulgence—perfect for snacking or as a stunning starter at your next gathering. Ready to dive into a deliciously crunchy experience? Let’s get cooking!

Why Choose Keto Fried Shrimp?

Flavorful and Guilt-Free: Enjoy all the crunch and taste of traditional fried shrimp without the carbs—perfect for your keto diet!

Quick Preparation: With just 15 minutes from start to finish, you can tackle those fast food cravings and still serve a restaurant-quality dish.

Impressive Presentation: These golden delights make an eye-catching appetizer that will wow your guests, especially when paired with a delicious dipping sauce.

Versatile Options: Try switching up the spices for a unique twist; a hint of cayenne for heat or use chicken for a keto fried chicken delight.

Easy Cleanup: With minimal mess and simple ingredients, you’ll love how easy it is to whip up this dish and enjoy without the hassle—also check out our Cheesy Fried Egg Quesadilla for another quick win!

Keto Fried Shrimp Ingredients

For the Shrimp
Raw Large Shrimp – Peeled and deveined for the best taste and texture.

For the Coating
Large Eggs – The perfect binding agent keeps the coating crunchy.
Coconut Flour/Almond Flour/Whey Protein/Crushed Pork Rinds – Use crushed pork rinds for a lower-carb crunch.

For Seasoning
Salt – Essential to enhance the flavor of the shrimp.
Black Pepper – Adds a mild heat to elevate the taste.
Garlic Powder – A must-have for that irresistible savory aroma.
Paprika – This adds beautiful color and a hint of seasoning; spice it up for more heat.
Oregano – Offers an herbal note that deepens the flavor profile.

For Frying
Coconut Oil/Preferred Frying Oil – Opt for oil with a high smoke point for frying perfection.

Step‑by‑Step Instructions for Keto Fried Shrimp

Step 1: Whisk the Eggs
Start by cracking the large eggs into a medium bowl. Using a whisk, beat the eggs until they are fully combined and frothy. This should take about 1-2 minutes. The egg mixture serves as the binding agent for the keto fried shrimp, ensuring that the coating sticks beautifully to the shrimp.

Step 2: Prepare the Coating
In another bowl, mix together the coconut flour, salt, black pepper, garlic powder, paprika, and oregano. Stir well so that the seasonings are evenly distributed throughout the dry ingredients. This coating will give your shrimp the crunchiness and flavor characteristic of crispy keto fried shrimp. Aim for a light, airy consistency.

Step 3: Coat the Shrimp
Take each peeled and deveined shrimp and dip it into the egg mixture, allowing any excess to drip off. Next, dredge the shrimp in the coating mixture, pressing gently to ensure it’s fully covered. Set each coated shrimp aside on a plate. This step is key to achieving that delightful crunch in your final dish.

Step 4: Heat the Oil
In a large deep pan, pour in coconut oil or your preferred frying oil and heat it over medium heat. Allow the oil to reach around 350°F (175°C). A good test for readiness is to drop a small piece of coating into the oil; it should sizzle immediately. Getting the oil hot enough will result in perfectly crispy keto fried shrimp.

Step 5: Fry the Shrimp
Carefully lower the coated shrimp into the hot oil in batches, ensuring not to overcrowd the pan. Fry for about 2-3 minutes on each side, or until they turn a beautiful golden brown and achieve that crispy texture. Use a slotted spoon to gently turn them during frying for even cooking.

Step 6: Drain Excess Oil
Once the shrimp are golden and crispy, use a slotted spoon to transfer them to a plate lined with paper towels. This will help drain any excess oil, keeping your keto fried shrimp less greasy while maintaining their delightful crunch. Let them rest for a few moments to finish draining.

Step 7: Serve and Garnish
To complete your dish, arrange the crispy keto fried shrimp on a serving platter. Garnish with fresh parsley and lemon wedges for an extra touch of flavor. Serve immediately with your favorite dipping sauce, and watch them disappear as your family and friends enjoy this low-carb treat!

Make Ahead Options

These Crispy Keto Fried Shrimp are perfect for meal prep, allowing you to enjoy them even on your busiest days! You can coat the shrimp up to 24 hours in advance by dipping them in the egg mixture and dredging them in the coating mixture, then place them on a parchment-lined baking sheet and refrigerate. This helps keep the coating intact while also enhancing the flavor. When you’re ready to serve, simply heat the oil and fry the shrimp in batches for about 2-3 minutes until golden brown. This way, you can savor the same delicious crunch and succulence without the last-minute rush!

How to Store and Freeze Keto Fried Shrimp

Fridge: Store any uneaten keto fried shrimp in an airtight container for up to 3 days. This will keep them fresh but may affect their crispiness.

Freezer: To freeze, place cooled keto fried shrimp in a single layer on a baking sheet, cover, and freeze until solid. Transfer to a freezer bag for up to 3 months.

Reheating: For the best texture, reheat the shrimp in an air fryer or oven at 350°F for about 10 minutes. This helps restore their delightful crunch.

Tips: Avoid storing in plastic wrap or simply in a container without a lid, as this can result in a soggy coating.

Keto Fried Shrimp Variations & Substitutions

Feel free to explore these exciting options and make this dish your own!

  • Dairy-Free: Substitute eggs with a flax or chia seed mixture (1 tablespoon seeds + 2.5 tablespoons water) for a vegan twist.
  • Spicy Kick: Add 1-2 teaspoons of cayenne pepper to the coating mix for a delightful spiciness that excites the palate.
  • Herb-Infused: Swap out oregano with fresh thyme for a different aromatic experience that pairs beautifully with the shrimp.
  • Lower Carb Crunch: Use crushed pork rinds instead of coconut flour for an ultra-low-carb, crunchy coating that elevates flavor too.
  • Flavorful Additions: Incorporate a tablespoon of parmesan cheese into the coating mix for a cheesy, rich flavor.
  • Protein Swap: Try using chicken pieces instead of shrimp, turning this into a delicious keto fried chicken alternative that’s equally satisfying.
  • BBQ Infusion: Mix in a teaspoon of smoked paprika or barbecue seasoning in the coating to give it a smoky undertone, capturing another flavor spectrum.
  • Zesty Dip: Serve with a tangy avocado salsa or zesty lemon aioli that complements the crispy shrimp effortlessly; a refreshing choice alongside your keto fried shrimp.

Don’t forget, for another delightful pairing and inspiration, try our Shrimp Avocado Bowls with Mango Salsa or whip up some Steak and Shrimp Kabobs for your next gathering!

What to Serve with Crispy Keto Fried Shrimp?

There’s so much potential for building a delicious meal around these crispy delights that will keep your taste buds singing.

  • Zesty Avocado Dip: The creamy texture of avocado perfectly balances the crunch of the shrimp, adding richness to every bite.

  • Classic Caesar Salad: This timeless salad brings crisp romaine and creamy dressing to the table, complementing the seafood without overshadowing it.

  • Garlic Butter Zucchini Noodles: Light and flavorful, these noodles provide a refreshing contrast to the savory shrimp, enhancing the meal with their delicate taste.

  • Spicy Keto Mayonnaise: Add a kick with this quick and easy dip. The creaminess will make the shrimp irresistibly addictive.

  • Crisp Coleslaw: This crunchy side adds freshness and tang, cutting through the richness of the shrimp while providing a satisfying crunch.

  • Chilled White Wine Spritzer: A refreshing and light drink that serves as a delightful pairing to the fried shrimp’s crunch and flavor.

  • Coconut Flour Pancakes: A sweet twist to contrast the savory shrimp. These delightful pancakes can also be used as a vessel for scooping bites of shrimp!

Elevate your meal experience by thoughtfully combining these pairings with your crispy keto fried shrimp to impress your family and friends!

Expert Tips for Keto Fried Shrimp

  • Hot Oil Temperature: Ensure your oil is hot enough before frying; test with a small piece of shrimp. The right temperature guarantees a perfectly crispy texture.

  • Avoid Overcrowding: When frying, don’t overcrowd the pan! This can lower the oil temperature, leading to soggy keto fried shrimp. Fry in batches for best results.

  • Perfect Coating: Coat the shrimp thoroughly for maximum crunch. Ensure the egg mixture is even, and press the coating firmly to stick well.

  • Draining Excess Oil: Always drain the shrimp on paper towels after frying to maintain crunchiness and remove unnecessary grease.

  • Store Wisely: If you have leftovers, store them in an airtight container and reheat in the oven to keep the crunch. Enjoy your delicious keto fried shrimp again!

Keto Fried Shrimp Recipe FAQs

What type of shrimp is best for this recipe?
Absolutely! For the best texture and flavor, choose raw large shrimp that are peeled and deveined. They should have a slight bounce when pressed and a fresh briny scent. Avoid shrimp with dark spots or a strong fishy smell.

How should I store leftover keto fried shrimp?
Very! Store any uneaten keto fried shrimp in an airtight container for up to 3 days in the refrigerator. To maintain some crispiness, place a paper towel at the bottom of the container to absorb moisture, but be aware that while they will still be tasty, they might lose some crunch.

Can I freeze keto fried shrimp?
Absolutely! To freeze leftover shrimp, first allow them to cool completely. Next, arrange them in a single layer on a baking sheet and freeze until solid. Once frozen, transfer the shrimp to a freezer bag, ensuring to remove as much air as possible. They will stay fresh for up to 3 months.

How can I reheat keto fried shrimp to retain their crispiness?
Of course! For the best results, reheat the keto fried shrimp in an air fryer or oven at 350°F (175°C) for about 10 minutes. This method helps restore their delightful crunch that may have softened during storage. Avoid using the microwave, as it may make the shrimp soggy.

Are there any dietary considerations for this recipe?
Absolutely! This keto fried shrimp recipe is naturally low-carb and gluten-free, making it suitable for many diets. However, if you have allergies, be cautious with the coatings—the recipe includes egg and various flours. Always check the packages for any potential allergens. Enjoy your cooking!

Keto Fried Shrimp

Crispy Keto Fried Shrimp for a Guilt-Free Snack Attack

Delight in Crispy Keto Fried Shrimp, a low-carb appetizer perfect for snacking or entertaining.
Prep Time 15 minutes
Cook Time 10 minutes
Total Time 25 minutes
Servings: 4 shrimp
Course: Appetizers
Cuisine: Keto
Calories: 220

Ingredients
  

For the Shrimp
  • 1 pound Raw Large Shrimp Peeled and deveined
For the Coating
  • 2 large Large Eggs Binding agent
  • 1 cup Coconut Flour Or Almond Flour/Whey Protein/Crushed Pork Rinds
For Seasoning
  • 1 teaspoon Salt
  • 1/2 teaspoon Black Pepper
  • 1 teaspoon Garlic Powder
  • 1 teaspoon Paprika
  • 1 teaspoon Oregano
For Frying
  • 1 cup Coconut Oil Or Preferred Frying Oil

Equipment

  • medium bowl
  • Large deep pan
  • whisk
  • slotted spoon
  • Measuring cups

Method
 

Step-by-Step Instructions for Keto Fried Shrimp
  1. Whisk the large eggs in a medium bowl until fully combined and frothy.
  2. Prepare the coating by mixing coconut flour, salt, black pepper, garlic powder, paprika, and oregano in another bowl.
  3. Coat each shrimp in the egg mixture and then dredge in the coating mixture, pressing gently.
  4. Heat the coconut oil in a large deep pan over medium heat until it reaches around 350°F.
  5. Fry the shrimp in batches for 2-3 minutes on each side until golden brown.
  6. Drain excess oil on a plate lined with paper towels after frying.
  7. Serve the shrimp on a platter, garnished with fresh parsley and lemon wedges.

Nutrition

Serving: 4shrimpCalories: 220kcalCarbohydrates: 5gProtein: 24gFat: 12gSaturated Fat: 6gPolyunsaturated Fat: 2gMonounsaturated Fat: 4gCholesterol: 170mgSodium: 450mgPotassium: 260mgFiber: 1gSugar: 1gVitamin A: 500IUVitamin C: 1mgCalcium: 30mgIron: 1mg

Notes

For best results, fry in batches and ensure oil is at the right temperature before frying. Drain shrimp on paper towels to maintain crunchiness. Store leftovers in airtight container and reheat in oven for best texture.

Tried this recipe?

Let us know how it was!

Keto Crispy Air Fryer Shrimp for Quick, Guilt-Free Indulgence

The aroma of shrimp sizzling in the air fryer is enough to make anyone’s mouth water, and I can’t help but get excited every time I whip up this dish! My Crispy Keto Air Fryer Shrimp is a quick and easy low-carb delight that brings all the restaurant-style flavors to your dinner table without any of the guilt. In just 20 minutes, you’ll have tender, juicy shrimp coated in a crunchy almond flour layer that’s absolutely irresistible. Not only is this recipe perfect for satisfying your cravings, but it’s also a fantastic way to serve a healthy, crowd-pleasing dinner that the whole family will love. So why not shake things up and treat yourself to a delightful meal tonight? What do you think—are you ready to dive into this deliciousness?

Why Make Keto Crispy Air Fryer Shrimp?

Quick and Easy: In just 20 minutes, you can enjoy a delightful dinner that doesn’t skimp on flavor.

Guilt-Free Indulgence: With minimal carbs, this recipe is perfect for those following a keto lifestyle, allowing for a satisfying meal without any guilt!

Crowd-Pleasing: Everyone will love the crispy texture and succulent shrimp, making it a hit at family dinners or gatherings.

Versatile Options: Serve these shrimp on zoodles or with a fresh salad for a complete and nourishing meal, just like my Shrimp Avocado Bowls or toss them in a salad for added protein.

Flavorful Goodness: The combination of almond flour and spices creates an irresistible crunch that elevates your dining experience.

Meal Prep Friendly: Great leftovers can be reheated in the air fryer for maximum crispiness—perfect for busy days when you crave something delicious!

Keto Crispy Air Fryer Shrimp Ingredients

For the Coating
Almond Flour – Provides a low-carb crunchy coating and is essential for the keto-friendly aspect of this dish.
Garlic Powder – Adds depth of flavor; fresh minced garlic can amp up the taste if you prefer.
Dried Parsley (optional) – Offers a pop of color and freshness; feel free to substitute with fresh parsley.
Salt and Pepper – Essential for seasoning; adjust to your personal taste for the perfect flavor balance.

For the Wet Mixture
Butter – Adds richness and moisture; olive oil works beautifully for a dairy-free alternative.
Egg – Acts as a binding agent to ensure your coating sticks perfectly to the shrimp.
Heavy Cream – Enhances creaminess in the batter; substitute with unsweetened almond milk for a lighter option.

For the Shrimp
Shrimp – The star of the dish! Use peeled and deveined shrimp for ultimate convenience.

Each component plays an essential role in creating the delicious Keto Crispy Air Fryer Shrimp that you won’t be able to resist!

Step‑by‑Step Instructions for Keto Crispy Air Fryer Shrimp

Step 1: Combine the Dry Ingredients
In a small bowl, mix together the almond flour, garlic powder, salt, and pepper. If using dried parsley, add it in for a touch of freshness. Stir until well combined, ensuring there are no clumps. This dry mixture will create the crunchy coating you’ll love on your Keto Crispy Air Fryer Shrimp.

Step 2: Prepare the Wet Mixture
In another bowl, whisk together the melted butter, egg, and heavy cream until the mixture is smooth and creamy. This combination serves as the binding agent for your shrimp, ensuring the dry coating adheres perfectly. You’ll want a luscious wet blend to create that irresistible crispiness.

Step 3: Coat the Shrimp
Take your peeled and deveined shrimp and dip each one first into the wet mixture, ensuring it’s fully covered. Next, roll the shrimp in the dry mixture, pressing lightly for an even coating. This two-step process is essential for achieving perfectly crispy Keto Crispy Air Fryer Shrimp that are both golden-brown and delicious.

Step 4: Preheat the Air Fryer
Spray the air fryer basket with cooking spray to prevent sticking, then preheat your air fryer to 390°F. This temperature is ideal for achieving that crunch and cooking the shrimp evenly. While the air fryer heats up, it’s a good time to finish coating the shrimp.

Step 5: Air Fry the Shrimp
Carefully place the coated shrimp in the air fryer basket in a single layer, making sure not to overcrowd them. Cook at 390°F for 5 minutes. After the timer goes off, flip the shrimp to ensure even cooking, then air fry for an additional 5 minutes, or until they are golden-brown and crispy.

Step 6: Serve and Enjoy
Once the shrimp are done, remove them from the air fryer and let them cool slightly. The crispy coating should be beautifully browned, and the shrimp inside will be tender and juicy. Serve immediately alongside your favorite dipping sauce or over zoodles for a complete Keto meal!

Storage Tips for Keto Crispy Air Fryer Shrimp

Fridge: Store leftovers in an airtight container in the refrigerator for up to 3 days to keep them fresh while preserving the flavor.

Freezer: If you want to freeze your Keto Crispy Air Fryer Shrimp, place them in a single layer on a baking sheet to freeze individually before transferring to a freezer-safe bag for up to 2 months.

Reheating: For best results, reheat in the air fryer at 350°F for about 5 minutes to regain that delightful crunch you love. Avoid microwave reheating as it can make them soggy.

Serving: Enjoy them fresh from the air fryer or add them to salads or zoodles for a quick, nutritious meal!

What to Serve with Keto Crispy Air Fryer Shrimp?

Elevate your dining experience with a satisfying array of delicious sides that harmonize beautifully with your succulent shrimp.

  • Zucchini Noodles: Light and fresh, zoodles offer a perfect, low-carb base that complements the crunchy shrimp while adding a delightful vegetable element. Toss them in olive oil and garlic for extra flavor!

  • Garlic Butter Asparagus: Tender asparagus sautéed in garlic butter brings a vibrant green contrast and an aromatic flavor that pairs wonderfully with the crispy shrimp, enhancing the overall meal.

  • Cauliflower Rice: This fluffy, low-carb option absorbs flavors beautifully, making it a fantastic complement to the shrimp. You can add some herbs or sautéed vegetables for a nutrition-packed side.

  • Garden Salad: A crisp garden salad topped with a zesty vinaigrette adds a refreshing touch, providing a light and crunchy counterpoint to the crispy shrimp’s texture.

  • Cilantro Lime Rice: The bright flavors of cilantro and lime bring a light and citrusy note, balancing the richness of the shrimp while delivering a satisfying mouthfeel.

  • Bang Bang Sauce: Serve your shrimp with this creamy, spicy dip for a punch of flavor. Its sweetness and heat complement the crispy coating perfectly, making each bite irresistible!

  • Sparkling Water with Lemon: A refreshing drink that cleanses the palate between bites, sparkling water also enhances the meal’s healthful vibe without adding calories.

These pairings allow you to create a harmonious meal that tantalizes the taste buds while keeping it deliciously healthy!

Make Ahead Options

These Keto Crispy Air Fryer Shrimp are fantastic for meal prep and can save you precious time on busy weeknights! You can coat the shrimp up to 24 hours in advance; just keep them covered in the refrigerator to maintain their quality and prevent the coating from getting soggy. When you’re ready to cook, simply preheat your air fryer, then air fry the shrimp at 390°F for 5 minutes on one side, flip, and cook for an additional 5 minutes. This way, you’ll have delicious, restaurant-quality shrimp ready in minutes without the fuss! Preparing meals ahead of time makes weeknight dinners a breeze!

Expert Tips for Keto Crispy Air Fryer Shrimp

Perfect Coating: Ensure shrimp are fully coated with the wet mixture, allowing the almond flour to adhere properly for that irresistible crunch.

Batch Cooking: Avoid overcrowding the air fryer. Cook the shrimp in batches to achieve even cooking and crispiness that you’ll love in your Keto Crispy Air Fryer Shrimp.

Temperature Check: Use a cooking thermometer to ensure the air fryer is preheated to 390°F before placing the shrimp inside for best results.

Sauce Suggestions: Enhance flavor by serving with a spicy dipping sauce or squeeze fresh lemon juice on top to brighten the dish.

Storage Method: To maintain crispness, store leftovers in an airtight container and reheat in the air fryer—perfect for meal prep days!

Keto Crispy Air Fryer Shrimp Variations

Feel free to get creative with this recipe and make it your own while enjoying the deliciousness of shrimp cooked to perfection!

  • Spicy Twist: Add cayenne pepper or paprika to the dry mixture for an extra punch of heat that will elevate each bite. It’s an exciting way to bring some fire to your shrimp dish!

  • Zesty Lemon Garlic: Incorporate lemon zest into the wet mixture for a refreshing citrus note that pairs beautifully with the shrimp. A burst of brightness will take your flavor profile to new heights.

  • Bang Bang Sauce: Serve your shrimp with a Bang Bang Shrimp Sauce made from mayonnaise, sweet chili sauce, and sriracha for an irresistible tangy-spicy combination. It’s a match made in foodie heaven!

  • Zoodles Option: Place cooked shrimp atop zoodles (zucchini noodles) for a complete meal that keeps everything low-carb while adding a delightful crunch. Perfect for a fancy dinner or a cozy weeknight meal!

  • Chicken and Shrimp Combo: Mix in diced grilled chicken with the shrimp for a protein-packed meal that adds richness and variety. Why not enjoy the best of both worlds?

  • Herb Flavor Boost: Substituting dried parsley with fresh chopped herbs like cilantro or basil can offer a new take on flavors. These fresh herbs will invigorate your shrimp and add lovely aroma!

  • Crispy Cheesy Version: Sprinkle some grated parmesan or mozzarella cheese into the dry mixture for added flavor and crispy texture. Trust me, it will be hard to resist these cheesy bites!

In case you’re looking for more delicious seafood ideas, be sure to check out my Shrimp Scampi Pasta or for a refreshing twist, try my Shrimp Avocado Bowls. Enjoy the versatility and happy cooking!

Keto Crispy Air Fryer Shrimp Recipe FAQs

What type of shrimp should I use for this recipe?
I recommend using peeled and deveined shrimp for convenience. Fresh shrimp work beautifully, but you can also use frozen shrimp—just make sure to thaw them properly before coating!

How do I store leftovers of Keto Crispy Air Fryer Shrimp?
Leftovers can be stored in an airtight container in the refrigerator for up to 3 days. To maintain their crispy texture, I suggest reheating them in the air fryer at 350°F for about 5 minutes.

Can I freeze Keto Crispy Air Fryer Shrimp?
Absolutely! To freeze, lay the cooked shrimp in a single layer on a baking sheet and flash freeze for about an hour. Once firm, transfer them to a freezer-safe bag and they’ll be perfect for up to 2 months. Just remember to reheat in the air fryer for that crunch!

What if my shrimp aren’t getting crispy?
If your shrimp aren’t achieving that desired crispiness, ensure they are fully coated in the wet mixture before rolling them in the dry mixture. Additionally, avoid overcrowding in the air fryer; it’s best to cook them in batches so each shrimp can get that golden-brown finish.

Are there any dietary considerations I should keep in mind?
Yes! If you’re making this for someone with a nut allergy, you can substitute almond flour with crushed pork rinds or sunflower seed flour. Always check for any sensitivities they may have with the other ingredients as well, like butter or heavy cream.

Can I use alternative ingredients for the coating?
Definitely! If almond flour isn’t available, you can use coconut flour or crushed pork rinds for a different texture. If you want a low-calorie option, unsweetened almond milk can replace heavy cream. Just be mindful of the carb counts to stay within your dietary needs.

Keto Crispy Air Fryer Shrimp

Keto Crispy Air Fryer Shrimp for Quick, Guilt-Free Indulgence

Enjoy guilt-free indulgence with these Keto Crispy Air Fryer Shrimp, a quick and easy low-carb delight that packs restaurant-style flavors.
Prep Time 10 minutes
Cook Time 10 minutes
Total Time 20 minutes
Servings: 4 servings
Course: Appetizers
Cuisine: Keto
Calories: 220

Ingredients
  

For the Coating
  • 1 cup Almond Flour Provides a low-carb crunchy coating
  • 1 teaspoon Garlic Powder Adds depth of flavor
  • 1 tablespoon Dried Parsley Optional, offers a pop of color
  • to taste Salt Essential for seasoning
  • to taste Pepper Essential for seasoning
For the Wet Mixture
  • 4 tablespoons Butter Adds richness and moisture
  • 1 large Egg Acts as a binding agent
  • 3 tablespoons Heavy Cream Enhances creaminess in the batter
For the Shrimp
  • 1 pound Shrimp Peeled and deveined

Equipment

  • Air Fryer

Method
 

Step‑By‑Step Instructions
  1. Combine the almond flour, garlic powder, salt, and pepper in a bowl. If using dried parsley, add it in for freshness.
  2. In another bowl, whisk together the melted butter, egg, and heavy cream until smooth.
  3. Dip each shrimp in the wet mixture, then roll in the dry mixture for coating.
  4. Spray the air fryer basket with cooking spray and preheat to 390°F.
  5. Place the coated shrimp in the air fryer basket and cook at 390°F for 5 minutes, flip, and cook another 5 minutes.
  6. Remove shrimp from air fryer, let cool slightly, and serve with your favorite dipping sauce.

Nutrition

Serving: 4shrimpCalories: 220kcalCarbohydrates: 6gProtein: 20gFat: 14gSaturated Fat: 5gPolyunsaturated Fat: 1gMonounsaturated Fat: 8gCholesterol: 150mgSodium: 500mgPotassium: 300mgFiber: 2gSugar: 1gVitamin A: 200IUVitamin C: 3mgCalcium: 50mgIron: 2mg

Notes

To maintain crispness in leftovers, store in an airtight container and reheat in the air fryer.

Tried this recipe?

Let us know how it was!

Crispy Coconut Shrimp That Will Transport You to Paradise

As the sun dips down and the air fills with the scent of salt and sea, I can’t help but envision a plate of Crispy Coconut Shrimp dancing in front of me. This delectable appetizer brings tropical vibes right to your kitchen with just a quick thirty minutes of prep! Each succulent shrimp is enveloped in a crunchy, golden coconut coating, striking the perfect balance between sweetness and savory flavor. Not only are these little bites a crowd-pleaser for gatherings or game days, but they also offer a gluten-free option for those looking to indulge without the worry. With a delightful dipping sauce on the side, what’s not to love? Ready to take your taste buds on a flavor adventure?

Why is this Coconut Shrimp so Irresistible?

Tropical Escape: Each bite of these Crispy Coconut Shrimp transports you straight to a sunny beach, combining the delightful crunch of coconut with tender shrimp.
Quick Prep Time: In just 30 minutes, you can whip up this impressive appetizer, perfect for last-minute gatherings or cozy dinners.
Versatile Dipping: Pair them with a sweet chili sauce, lime, or even tartar sauce for a customizable experience that everyone will love.
Health-Conscious Choices: Enjoy a gluten-free option with simple flour substitutions, allowing you to indulge guilt-free.
Crowd-Pleaser: Whether you’re hosting a party or preparing a family meal, these shrimp appeal to all ages, making them a go-to favorite. Check out Shrimp Avocado Bowls for another delightful seafood option!

Coconut Shrimp Ingredients

• Bring the taste of paradise home with these key ingredients!

  • For the Shrimp
    Raw Shrimp – Main protein that provides texture and flavor; use jumbo shrimp (21/25 size) for the best results.
    Salt – Enhances flavor and helps brine the shrimp for firmness; can reduce salt for lower sodium options.
    Large Egg – Binds the coating and adds richness; substitute with a flax egg for a vegan version.

  • For the Batter
    Water – Thins the batter for even coating; for extra crispiness, try using sparkling water.
    All-Purpose Flour – Creates a batter that adheres well to shrimp; opt for gluten-free flour as a substitute.

  • For the Coating
    Shredded Unsweetened Coconut – Provides crunch and tropical flavor; opt for finely shredded coconut for a better texture.
    Vegetable Oil – Essential for frying; crucial for achieving that crispy exterior; peanut oil or canola oil can also work.

  • For the Dipping Sauce
    Orange Marmalade – The base for the dipping sauce that adds sweetness; apricot preserves can be used as a substitute.
    Thai Sweet Chili Sauce – Offers a sweet and spicy flavor contrast; feel free to use homemade sweet chili sauce for a twist.
    Lemon Juice – Provides acidity to balance the sweetness in the dip; can substitute with lime juice.

Step‑by‑Step Instructions for Crispy Coconut Shrimp

Step 1: Brine the Shrimp
Start by rinsing your raw shrimp under cold water, then soak them in a bowl with a mixture of salt and water for 10-15 minutes. This brining process firms up the shrimp and enhances their flavor. Once done, drain and gently pat the shrimp dry using paper towels to ensure they are not too wet before coating.

Step 2: Prepare the Dipping Sauce
While the shrimp is brining, you can whip up a delicious dipping sauce. In a mixing bowl, combine orange marmalade, Thai sweet chili sauce, and a splash of lemon juice. Stir well until the ingredients are fully blended, and set it aside for the flavors to meld together, creating a perfect complement for your Crispy Coconut Shrimp.

Step 3: Make the Batter
In a separate bowl, whisk together a large egg and a splash of water until frothy. Gradually incorporate all-purpose flour into the mixture, mixing until smooth and lump-free. Your batter should be thick enough to coat the shrimp well without being too runny, ensuring an even layer when you start to coat them.

Step 4: Coat the Shrimp
Once your shrimp are dry, dip each one into the prepared batter, making sure it’s thoroughly coated. Then, roll the battered shrimp in the shredded coconut, pressing gently to ensure the coconut adheres well. Set the coated shrimp on a baking sheet while you prepare to fry, keeping them organized for a smoother cooking process.

Step 5: Heat the Oil
In a deep pot, pour enough vegetable oil to fry the shrimp (about 2-3 inches deep) and heat it over medium-high heat until it reaches 360°F (180°C). Use a cooking thermometer to check the temperature; the oil is ready when a small drop of batter sizzles immediately upon contact with it, which indicates it’s at the perfect frying temperature.

Step 6: Fry the Shrimp
Carefully add your coated shrimp to the hot oil in batches, ensuring not to overcrowd the pot. Fry them for about 2-3 minutes, turning occasionally until they are golden brown and crispy. Watch for the coconut to brown to a beautiful hue. Use a slotted spoon to remove them and place on a rack or paper towels to drain excess oil.

Step 7: Serve Immediately
Once all the shrimp are fried to perfection, plate them up while they’re still hot. These Crispy Coconut Shrimp are best served right away alongside your sweet chili dipping sauce. The combination of textures and flavors creates a tropical experience that will surely please your guests!

Storage Tips for Coconut Shrimp

Fridge: Store cooked Coconut Shrimp in an airtight container for up to 3 days. To maintain crispness, reheat in the oven before serving.

Freezer: For longer storage, freeze uncooked, coated shrimp in a single layer, then transfer to a bag for up to 2 months. Fry from frozen, adding a couple of extra minutes to the cooking time.

Reheating: To enjoy leftovers, reheat in a preheated oven at 375°F (190°C) until hot and crispy, about 10-12 minutes. Avoid microwaving, as it can make the coating soggy.

Make Ahead Options

These Crispy Coconut Shrimp are perfect for meal prep and can save you valuable time on busy weeknights! You can coat the shrimp up to 24 hours in advance; simply prepare them through the coating step and place them on a baking sheet in the refrigerator (this helps maintain that crunchy texture). When you’re ready to serve, simply heat the oil and fry from chilled, ensuring they are golden brown and delicious. If you want to prep even further ahead, you can freeze the coated shrimp and then cook them directly from frozen, adding an extra minute or two of frying time. By prepping ahead, you’ll enjoy this tropical delight without the last-minute rush!

Expert Tips for the Best Coconut Shrimp

  • Oil Temperature: Ensure the oil is at 360°F (180°C) before frying to achieve that perfect crunchy texture without overcooking the shrimp.
  • Don’t Overcrowd: Fry shrimp in batches to maintain oil temperature; overcrowding can lead to soggy coconut coating instead of crispy perfection.
  • Dry Shrimp Thoroughly: After brining, pat shrimp dry so the batter can adhere better. Excess moisture can cause the coating to slide off during frying.
  • Coat Evenly: Don’t rush the coating process. Make sure each shrimp is well-coated in batter and coconut for a delightful crunch with every bite.
  • Dipping Sauce Variety: Experiment with different dipping sauces like spicy mayo or a citrus-based sauce to elevate your coconut shrimp experience.

What to Serve with Crispy Coconut Shrimp

Bring your tropical taste experience to the next level with these delightful pairings that complement every crunchy bite.

  • Zesty Coleslaw: A crunchy, tangy salad adds a refreshing contrast to the buttery shrimp, enhancing each savory bite.

  • Cilantro Lime Rice: This fragrant rice dish, lightly zested with lime and sprinkled with fresh cilantro, creates a beautifully bright companion. It adds a delightful citrus aroma that pairs perfectly with the shrimp’s sweetness.

  • Mango Salsa: A fruity blend of ripe mango, red onion, and jalapeño brings a luscious sweetness and heat, making every shrimp taste like a summer party in your mouth.

  • Grilled Pineapple Skewers: Charred juicy pineapple offers a smoky sweetness that harmonizes beautifully with the tropical coconut crunch. The juicy texture complements the crispness of the shrimp excellently.

  • Spicy Noodle Salad: Tossed in a light sesame dressing, this salad introduces a satisfying array of textures and flavors, enhancing your meal with a delightful kick.

  • Chilled White Wine: Pair your meal with a crisp, chilled Sauvignon Blanc or a fruity Pinot Grigio, both of which elevate the tropical flavors and cleanse the palate between bites.

  • Coconut Rice Pudding: For dessert, serve creamy coconut rice pudding drizzled with caramel or mango puree, creating a sweet finish that echoes your main dish’s tropical flair.

  • Coconut Mojito: Refreshing with a hint of mint and lime, this cocktail adds a sophisticated touch to your tropical feast, enlivening your taste experience with every sip.

Coconut Shrimp Variations & Substitutions

Feel free to mix things up and let your creativity shine with these delightful twists on Coconut Shrimp!

  • Spicy Kick: Add cayenne pepper or red pepper flakes to the batter for a zesty heat that contrasts beautifully with the sweetness. A little extra spice can turn up the excitement, making each bite an adventure!

  • Gluten-Free Friendly: Substitute all-purpose flour with a gluten-free blend or coconut flour to cater to dietary needs. This way, everyone can revel in the crispy goodness without compromise!

  • Vegan Delight: Replace the egg in the batter with a flax egg (1 tablespoon of ground flaxseed mixed with 2.5 tablespoons of water). This swap invites plant-based eaters to join the feast!

  • Tofu Twist: For a vegetarian treat, replace shrimp with firm tofu cut into bite-sized cubes, following the same coating process for a satisfying meatless option. You’ll love how the coconut pairs with the tofu’s inherent creaminess!

  • Tropical Variations: Incorporate finely chopped pineapple or mango into the dipping sauce for a fruit-infused tropical flair that brightens the dish and adds extra sweetness. Pair it with a light salad to balance the richness of the shrimp!

  • Flavorful Coatings: Experiment with different nuts like crushed almonds or panko breadcrumbs mixed with coconut for an exciting crunch and added depth of flavor. This makes for an even more diverse texture in every bite!

  • Herb Infusion: Blend fresh herbs like cilantro or basil into the batter for a burst of color and flavor that enhances the overall taste experience. The aromatic notes will transport your palate to paradise!

For more seafood delights, why not try making Parmesan Roasted Shrimp or explore the zesty flavors of Marry Me Shrimp Pasta? Each dish brings a unique charm to your dining table!

Crispy Coconut Shrimp Recipe FAQs

What type of shrimp is best for this recipe?
For the best result, I recommend using jumbo shrimp, specifically the 21/25 size. They have a great texture and flavor that stands up beautifully to the crispy coconut coating. Be sure to choose raw shrimp that are fully peeled and deveined for ease of preparation.

How should I store leftover Coconut Shrimp?
You can store cooked Coconut Shrimp in an airtight container in the fridge for up to 3 days. To keep them crispy, I suggest reheating them in the oven at 375°F (190°C) for about 10-12 minutes. This method restores their crunch, making them just as delightful as when they were freshly made!

Can I freeze Coconut Shrimp?
Absolutely! For longer storage, freeze uncooked, coated shrimp in a single layer on a baking sheet. Once frozen solid, transfer them to a freezer bag for up to 2 months. When you’re ready to enjoy them, simply fry them straight from the freezer, adding an extra couple of minutes to the cooking time for perfectly cooked shrimp.

What if my coating falls off during frying?
If you experience issues with the coating falling off, make sure you dry the shrimp thoroughly before battering. Moisture can prevent the coating from adhering properly. Additionally, it’s essential to maintain the oil temperature at 360°F (180°C); too low of a temperature can cause the shrimp to absorb oil rather than fry correctly, leading to sogginess.

Are there any dietary considerations for this recipe?
Yes, you can easily make this dish gluten-free by substituting all-purpose flour with a gluten-free flour blend. For a vegan version, use a flax egg instead of the large egg in the batter. Just mix one tablespoon of flaxseed meal with three tablespoons of water, letting it sit for a few minutes until it thickens to make a perfect binder for your coconut shrimp!

How can I enhance the flavor of my Coconut Shrimp?
Great question! You can amp up the flavor of your shrimp by adding spices like garlic powder, cayenne pepper, or even paprika to the batter. If you’re feeling adventurous, try mixing shredded coconut with some lime zest for a zestier tropical twist that complements the shrimp beautifully.

Coconut Shrimp

Crispy Coconut Shrimp That Will Transport You to Paradise

This Crispy Coconut Shrimp appetizer combines sweetness and savory flavors, bringing a tropical vibe to your table.
Prep Time 30 minutes
Cook Time 10 minutes
Total Time 40 minutes
Servings: 4 shrimp
Course: Appetizers
Cuisine: American, Tropical
Calories: 200

Ingredients
  

For the Shrimp
  • 1 pound Raw Shrimp (jumbo, 21/25 size) Main protein that provides texture and flavor
  • 1 teaspoon Salt Enhances flavor and helps brine the shrimp
  • 1 large Egg Binds the coating and adds richness
For the Batter
  • 3 tablespoons Water Thins the batter for even coating
  • 1 cup All-Purpose Flour Creates a batter that adheres well to shrimp
For the Coating
  • 1 cup Shredded Unsweetened Coconut Provides crunch and tropical flavor
  • 2 cups Vegetable Oil Essential for frying
For the Dipping Sauce
  • 1/2 cup Orange Marmalade The base for the dipping sauce
  • 1/4 cup Thai Sweet Chili Sauce Offers a sweet and spicy flavor contrast
  • 1 tablespoon Lemon Juice Provides acidity to balance the sweetness

Equipment

  • Deep pot
  • Mixing bowls
  • whisk
  • Cooking thermometer
  • slotted spoon
  • Baking Sheet

Method
 

Brining and Dipping Sauce
  1. Rinse raw shrimp under cold water and soak them in a mixture of salt and water for 10-15 minutes. Drain and pat dry.
  2. Combine orange marmalade, Thai sweet chili sauce, and lemon juice in a mixing bowl. Stir until blended and set aside.
Batter and Coating
  1. Whisk egg and water until frothy. Gradually incorporate flour until smooth and lump-free.
  2. Dip each shrimp in batter, then roll in shredded coconut. Set aside on a baking sheet.
Frying
  1. Heat vegetable oil in a deep pot until it reaches 360°F (180°C). Fry shrimp in batches for 2-3 minutes until golden brown.
  2. Remove shrimp using a slotted spoon and place on a rack or paper towels to drain excess oil.
Serving
  1. Plate the shrimp while still hot and serve immediately with the dipping sauce.

Nutrition

Serving: 1shrimpCalories: 200kcalCarbohydrates: 15gProtein: 12gFat: 10gSaturated Fat: 7gPolyunsaturated Fat: 1gMonounsaturated Fat: 2gCholesterol: 120mgSodium: 300mgPotassium: 200mgFiber: 1gSugar: 5gVitamin A: 200IUVitamin C: 2mgCalcium: 20mgIron: 1mg

Notes

For a vegan option, substitute egg with a flax egg. Experiment with different dipping sauces for variety.

Tried this recipe?

Let us know how it was!

Delicious Stuffed Shrimp: Elevate Your Seafood Game Today

As I was prepping for our holiday gathering, a delightful idea sparked—stuffed shrimp! I can almost taste the tender shrimp, perfectly seasoned and generously filled with a creamy mixture of crab, spinach, and artichokes. This Crab Stuffed Shrimp recipe not only transforms simple seafood into an impressive holiday appetizer but also comes together in under 40 minutes, making it a lifesaver for busy home chefs. With its gluten-friendly options and the ability to cater to various tastes, this dish is sure to impress your guests while keeping your stress levels low. Are you ready to elevate your seafood game? Let’s dive into this delicious recipe together!

Why Choose Stuffed Shrimp?

Impressive Presentation: These Crab Stuffed Shrimp look like they belong in a high-end restaurant, making them perfect for your next gathering.
Flavor Fusion: The blend of crab, spinach, and artichokes creates a rich, savory filling that’s both satisfying and delicious.
Quick Preparation: In just under 40 minutes, you can whip up this stellar dish, freeing up time for mingling with guests.
Versatility: Feel free to swap crab for lobster or create a vegetarian version—this recipe easily adapts to various diets.
Crowd-Pleaser: Serve them at your holiday parties or family dinners, and watch as everyone asks for seconds! Why not pair them with a side of Garlic Parmesan Roasted Shrimp for an added seafood delight?

Stuffed Shrimp Ingredients

For the Shrimp
Large Shrimp (16-20 count) – Ensure they are deveined and butterflied for easy filling and cooking.

For the Seasoning
Smoked Paprika – Adds a warm smokiness; substitute with regular paprika if preferred.
Olive Oil – Used for seasoning; melted butter can be a tasty alternative.
Old Bay Seasoning – Delivers a classic seafood flavor; feel free to use your favorite seafood spice blend.
Garlic Powder & Onion Powder – These enhance flavor; fresh garlic and onions work too but alter prep time.
Italian Seasoning & Pepper – Season to taste; adjust quantities according to your palate.

For the Filling
Crab Meat – 8 oz is the star of this mixture; for a vegetarian take, use more veggies or beans.
Cooked Spinach – 1 cup adds moisture and nutrition; be sure to strain before adding.
Artichokes – 6 oz provide a unique texture; substitute with mushrooms if desired.
Mayo – 1 cup acts as a binder; sour cream or cream cheese are great alternatives.
Dijon Mustard & Worcestershire Sauce – Both enhance the overall flavor; adjust based on your diet needs.
Italian Breadcrumbs – ½ cup creates texture in the filling; using homemade breadcrumbs can bring a fresher taste.
Cheese (e.g., mozzarella & pepper jack) – 8 oz for creaminess; choose your favorite melting cheese to delight your taste buds.
Lemon Juice & Zest – Adds a bright flavor to balance the richness of the stuffing.

For Serving
Garlic Butter Dill Sauce – 4 tbsp unsalted butter and 1 tbsp minced garlic create the perfect drizzle over your stuffed shrimp.

Step‑by‑Step Instructions for Crab Stuffed Shrimp

Step 1: Preheat the Oven
Begin by preheating your oven to 350°F (175°C). This ensures a perfectly warm environment for the stuffed shrimp. While the oven heats up, gather all your ingredients and equipment, including a baking sheet and mixing bowls, to streamline your cooking process.

Step 2: Season the Shrimp
In a bowl, combine olive oil, smoked paprika, Old Bay seasoning, garlic powder, onion powder, Italian seasoning, and black pepper. Take each butterflied shrimp and generously brush this mixture all over them. The seasoning will impart a rich flavor, ensuring your Crab Stuffed Shrimp are well-seasoned for that delightful bite.

Step 3: Prepare the Filling
In a separate mixing bowl, combine the lump crab meat, cooked spinach, chopped artichokes, mayonnaise, cheese, minced garlic, Italian breadcrumbs, Dijon mustard, Worcestershire sauce, lemon juice, and zest. Mix thoroughly until the ingredients are well-blended. This creamy filling will elevate your stuffed shrimp and impart luscious flavors throughout the dish.

Step 4: Stuff the Shrimp
Carefully take the seasoned shrimp and fill each with a generous scoop of the prepared filling. Place the stuffed shrimp onto a baking sheet lined with parchment paper or lightly greased to prevent sticking. Arrange them so they’re snug but not overcrowded, allowing even cooking and browning as they bake.

Step 5: Bake the Stuffed Shrimp
Transfer the baking sheet with the stuffed shrimp into the preheated oven and bake for 20-25 minutes. You’ll know they’re ready when the shrimp are opaque and pink, while the topping is golden brown and bubbling. Keep an eye on them to ensure they don’t overbake, as this can lead to a rubbery texture.

Step 6: Drizzle with Sauce and Serve
Once baked, remove the Crab Stuffed Shrimp from the oven and let them cool slightly for a few minutes. Drizzle with freshly made garlic butter dill sauce, made by melting unsalted butter and mixing in minced garlic and fresh dill. Serve warm with lemon wedges on the side for a zesty touch that will tantalize your guests’ taste buds.

What to Serve with Crab Stuffed Shrimp

Creating a memorable meal is all about the perfect pairings—let’s explore delightful sides that will complement your stuffed shrimp beautifully.

  • Creamy Garlic Mashed Potatoes: These buttery, velvety potatoes offer a comforting sidekick to the savory stuffed shrimp, making every bite a delight.

  • Lemon Herb Quinoa: The light, zesty flavors of lemon and herbs will balance the richness of the shrimp, adding a fresh element to your plate.

  • Roasted Asparagus: Crisp-tender asparagus drizzled with olive oil and garlic brings bright flavors and a satisfying crunch that enhances seafood beautifully.

  • Caesar Salad: A classic Caesar salad, with its crisp romaine and creamy dressing, provides a refreshing contrast and completes the meal with a touch of elegance.

  • Garlic Butter Breadsticks: Soft, warm breadsticks slathered with garlic butter are perfect for soaking up any remaining garlic butter dill sauce from your shrimp.

  • White Wine Spritzer: A light and bubbly white wine spritzer refreshes the palate, making it an ideal drink to enjoy alongside your rich seafood dish.

  • Lemon Sorbet: For dessert, a light lemon sorbet will cleanse the palate and add a sweet, zesty finish to your dining experience.

Stuffed Shrimp Variations & Substitutions

Feel free to get creative with your stuffed shrimp! Each variation promises a delightful twist that can enhance the experience of this elegant dish.

  • Lobster Love: Replace crab with fresh lobster meat for a luxurious upgrade. The sweet, tender lobster will shine in this recipe!

  • Vegetarian Delight: For a meatless option, swap the crab for a mixture of hearty vegetables like diced bell peppers, zucchini, and black beans. This colorful filling will add a lovely texture and nutrition!

  • Spicy Twist: Add diced jalapeños or a splash of hot sauce to the filling for a zesty kick. If your guests love a bit of heat, this variation keeps them coming back for more!

  • Cheese Variety: Instead of mozzarella or pepper jack, try a creamy goat cheese or sharp cheddar. Each cheese brings its own unique flavor to the mix.

  • Herb Infusion: Add fresh herbs like parsley, chives, or cilantro to the filling for an aromatic boost. It’s a wonderful way to incorporate a fresh garden flavor into every bite.

  • Nutty Crunch: Incorporate toasted walnuts or pecans into the stuffing for that satisfying crunch. The rich, nutty flavor complements the seafood beautifully.

  • Exotic Fusion: Mix in some chopped roasted red peppers or olives for a Mediterranean flair. This twist pairs exceptionally well with the garlic butter dill sauce.

While you’re at it, don’t forget to explore other seafood delights like Shrimp Avocado Bowls or elevate your gatherings with quick options like Steak Shrimp Kabobs. Each adaptation opens up a world of flavors while keeping the essence of this holiday favorite intact!

Storage Tips for Stuffed Shrimp

Fridge: Store any leftover stuffed shrimp in an airtight container for up to 3 days. Reheat in the oven at 350°F (175°C) until warmed through for best results.

Freezer: You can freeze uncooked stuffed shrimp for up to 2 months. Place them on a baking sheet to freeze individually, then transfer to a freezer bag for storage.

Reheating: Reheat cooked stuffed shrimp in the oven at 350°F (175°C) for 10-15 minutes, or until heated through. Avoid microwaving to maintain texture.

Prep Ahead: For ease during busy occasions, prepare the stuffing a day in advance and store it in the fridge before stuffing the shrimp.

Make Ahead Options

These Crab Stuffed Shrimp are a fantastic option for meal prep, allowing you to impress your guests without the last-minute rush. You can prepare the stuffing up to 24 hours in advance. Simply combine the crab meat, spinach, artichokes, and other filling ingredients, then store it in an airtight container in the refrigerator. When you’re ready to serve, stuff the shrimp and bake them straight from the fridge. This not only saves time but also ensures that the flavors meld beautifully overnight. For optimal quality, cover the shrimp tightly to prevent drying out, and look for the perfect golden brown finish while they bake. With this prep-ahead plan, you’ll have more time to enjoy your gathering, knowing that your elegant appetizer is ready to go!

Expert Tips for Stuffed Shrimp

  • Quality Shrimp: Always choose fresh or high-quality frozen shrimp to ensure the best flavor and texture in your stuffed shrimp dish.

  • Proper Deveining: Make sure your shrimp are deveined thoroughly to avoid any grittiness in your final dish. This small step makes a big difference!

  • Filling Texture: Don’t over-mix the filling; you want it to be fluffy and packed with textures instead of a paste.

  • Baking Precautions: Keep an eye on the shrimp while baking; since ovens can vary, check for that perfect golden brown topping and cooked shrimp color.

  • Make Ahead: For a stress-free preparation, you can prepare the filling in advance and store it in the fridge. Just stuff the shrimp and bake when you’re ready!

  • Serving Suggestions: Present your stuffed shrimp alongside zesty lemon wedges and a drizzle of garlic butter sauce for added flavor.

Crab Stuffed Shrimp Recipe FAQs

What type of shrimp should I use for this recipe?
For the best results, I recommend using large shrimp (16-20 count) that are deveined and butterflied. This size is ideal for holding the flavorful stuffing while providing a beautiful presentation. If budget allows, opt for larger shrimp for an even more impressive holiday appetizer!

How should I store leftovers?
Store leftover Crab Stuffed Shrimp in an airtight container in the refrigerator for up to 3 days. When you’re ready to enjoy them again, simply reheat in the oven at 350°F (175°C) for about 10-15 minutes, ensuring they’re heated through without losing their original texture.

Can I freeze stuffed shrimp?
Absolutely! You can freeze uncooked stuffed shrimp for up to 2 months. Simply place them on a baking sheet to freeze individually for a couple of hours, then transfer them to a freezer bag for long-term storage. When you’re ready to cook, bake them straight from the freezer, adding an extra few minutes to the baking time.

What if my filling is too dry?
If you find your stuffing is too dry, simply add a bit more mayonnaise or sour cream until you reach your desired creamy consistency. It’s essential to strike a balance, as the filling should be moist but not overly runny. Mix in a tablespoon at a time for best results!

Can I make this recipe gluten-free?
Yes, you can easily make these Crab Stuffed Shrimp gluten-friendly! Just substitute regular breadcrumbs with gluten-free breadcrumbs, and ensure all sauces and condiments you use are gluten-free. It’s a wonderful option for those with dietary restrictions!

What’s the best way to ensure shrimp are cooked perfectly?
To ensure your shrimp are cooked to perfection, look for them to turn pink and opaque while the stuffing should be golden brown on top. Baking time may vary based on your oven; therefore, keep an eye on them. Using a meat thermometer can also help; shrimp should reach an internal temperature of 120°F (49°C) when done.

Stuffed Shrimp

Delicious Stuffed Shrimp: Elevate Your Seafood Game Today

This Crab Stuffed Shrimp recipe transforms simple seafood into an impressive holiday appetizer under 40 minutes.
Prep Time 15 minutes
Cook Time 25 minutes
Total Time 40 minutes
Servings: 4 shrimp
Course: Appetizers
Cuisine: Seafood
Calories: 280

Ingredients
  

For the Shrimp
  • 16-20 count Large Shrimp Ensure they are deveined and butterflied.
For the Seasoning
  • 1 tbsp Smoked Paprika Add regular paprika if preferred.
  • 2 tbsp Olive Oil Melted butter can be an alternative.
  • 1 tbsp Old Bay Seasoning Use your favorite seafood spice blend if desired.
  • 1 tsp Garlic Powder Fresh garlic works too but alters prep time.
  • 1 tsp Onion Powder Fresh onions can be substituted.
  • 1 tsp Italian Seasoning Season to taste.
  • 1 tsp Black Pepper Adjust quantities according to your palate.
For the Filling
  • 8 oz Crab Meat For a vegetarian option, use more veggies or beans.
  • 1 cup Cooked Spinach Be sure to strain before adding.
  • 6 oz Artichokes Mushrooms can be used as a substitute.
  • 1 cup Mayo Sour cream or cream cheese are alternatives.
  • 1 tbsp Dijon Mustard
  • 1 tbsp Worcestershire Sauce
  • ½ cup Italian Breadcrumbs Using homemade breadcrumbs can improve taste.
  • 8 oz Cheese e.g., mozzarella & pepper jack, choose your favorite.
  • 1 tbsp Lemon Juice Adds bright flavor.
  • 1 tsp Lemon Zest Enhances the richness.
For Serving
  • 4 tbsp Garlic Butter Dill Sauce Made from unsalted butter and minced garlic.

Equipment

  • Baking Sheet
  • Mixing bowls

Method
 

Step-by-Step Instructions for Crab Stuffed Shrimp
  1. Preheat your oven to 350°F (175°C). Gather all ingredients and equipment.
  2. Combine olive oil, smoked paprika, Old Bay seasoning, garlic powder, onion powder, Italian seasoning, and black pepper. Brush this mixture over the butterflied shrimp.
  3. In a mixing bowl, combine lump crab meat, cooked spinach, chopped artichokes, mayonnaise, cheese, minced garlic, Italian breadcrumbs, Dijon mustard, Worcestershire sauce, lemon juice, and zest. Mix until well-blended.
  4. Fill each seasoned shrimp with a generous scoop of the filling. Arrange them on a baking sheet lined with parchment paper.
  5. Bake for 20-25 minutes until the shrimp are opaque, pink, and the topping is golden brown.
  6. Drizzle with garlic butter dill sauce and serve warm with lemon wedges.

Nutrition

Serving: 1shrimpCalories: 280kcalCarbohydrates: 10gProtein: 20gFat: 19gSaturated Fat: 8gPolyunsaturated Fat: 1gMonounsaturated Fat: 10gCholesterol: 150mgSodium: 900mgPotassium: 300mgFiber: 1gSugar: 2gVitamin A: 600IUVitamin C: 5mgCalcium: 150mgIron: 2mg

Notes

Choose fresh or high-quality frozen shrimp. Prepare stuffing a day in advance for convenience.

Tried this recipe?

Let us know how it was!

Garlic Parmesan Roasted Shrimp: A Delicious Seafood Treat

As I was flipping through an old family recipe book, I stumbled upon a dish that instantly took me back to sun-kissed summers by the coast: Garlic Parmesan Roasted Shrimp. This succulent seafood delight isn’t just delicious; it’s a breeze to whip up, making it an ideal choice for both weeknight dinners and elegant gatherings. The combination of perfectly roasted shrimp, zesty garlic, and savory Parmesan creates a comforting experience that just warms the heart. Not only is it gluten-free, but it also tantalizes your taste buds without a lot of fuss—what’s not to love? Ready to impress your family or friends? Let’s dive into this quick and flavorful recipe that will elevate your cooking game!

Why Choose Garlic Parmesan Roasted Shrimp?

Quick and Easy: The straightforward preparation means you’ll have this delectable dish ready in no time, even on the busiest nights.

Mouthwatering Flavor: A savory blend of garlic and Parmesan creates a taste sensation that’s hard to resist.

Versatile Serving Options: Whether enjoyed as a main course alongside a salad, or as a fancy appetizer during gatherings, it fits any occasion. Consider pairing with Garlic Parmesan Chicken to create a delightful feast!

Healthy Choice: Low in carbs and gluten-free, it’s perfect for a variety of diets without sacrificing flavor.

Crowd-Pleasing Appeal: Impress your guests at dinner parties; this dish looks as stunning as it tastes!

Elevate your meal planning today—with delicious options like Cheesy Garlic Chicken, your kitchen will be buzzing with excitement!

Garlic Parmesan Roasted Shrimp Ingredients

For the Shrimp

  • Shrimp – Fresh or frozen (thawed) shrimp provides the best flavor for your Garlic Parmesan Roasted Shrimp.
  • Butter – Adds richness and helps with browning; feel free to substitute with olive oil or a vegan butter alternative for a healthier version.

For the Flavor Mixture

  • Garlic (minced) – Fresh garlic delivers a robust aroma and delectable flavor—perfect for this dish.
  • Parmesan Cheese (grated) – This cheese adds a savory depth and helps create a crunchy crust; consider a vegetarian version if desired.
  • Black Pepper – Enhances the overall flavor profile; you can adjust the amount according to your taste preferences.
  • Red Pepper Flakes (optional) – For a little added heat; omit if you prefer a milder flavor.

Enjoy making this delightful Garlic Parmesan Roasted Shrimp and watch your loved ones gather around the dinner table!

Step‑by‑Step Instructions for Garlic Parmesan Roasted Shrimp

Step 1: Preheat the Oven
Begin by preheating your oven to 400°F (200°C). This essential step ensures your Garlic Parmesan Roasted Shrimp will roast to perfection, achieving that lovely golden-brown crust. While the oven heats up, you can prepare the shrimp and flavor mixture, maximizing your cooking efficiency.

Step 2: Prepare the Shrimp
Rinse the shrimp under cold water, then shell and devein them carefully. Once cleaned, pat the shrimp dry with paper towels to remove excess moisture. This step is crucial, as it prevents the shrimp from steaming while they bake, allowing for that desired crispy texture in your Garlic Parmesan Roasted Shrimp.

Step 3: Make the Garlic-Parmesan Mixture
In a mixing bowl, combine the melted butter, minced garlic, grated Parmesan cheese, black pepper, and optional red pepper flakes. Stir the mixture until it’s smooth and well combined. The aromatic blend will coat your shrimp beautifully, infusing each bite with bursts of flavor as they roast in the oven.

Step 4: Coat the Shrimp
Add the prepared shrimp to the bowl with the garlic-Parmesan mixture. Gently toss the shrimp until they are evenly coated, ensuring every piece is enveloped in the savory goodness. The shrimp should shimmer with the creamy mixture, promising a delectable result once baked.

Step 5: Transfer to Baking Tray
Line a baking tray with parchment paper for easy cleanup and to prevent sticking. Arrange the coated shrimp in a single layer on the tray, ensuring they aren’t overcrowded. This allows the Garlic Parmesan Roasted Shrimp to roast evenly, achieving that lovely crispy exterior.

Step 6: Bake the Shrimp
Place the baking tray in the preheated oven and bake for 10 to 12 minutes. Keep an eye on the shrimp; they are done when they turn pink and opaque, with the cheese developing a golden-brown crust. This visual cue indicates that the Garlic Parmesan Roasted Shrimp is perfectly cooked and ready to be served.

Step 7: Serve and Garnish
Remove the baking tray from the oven, allowing the Garlic Parmesan Roasted Shrimp to rest for a couple of minutes. Serve hot, optionally garnished with fresh parsley and a squeeze of lemon for an extra burst of flavor. Enjoy this delightful dish immediately for the best taste!

How to Store and Freeze Garlic Parmesan Roasted Shrimp

Fridge: Place leftovers in an airtight container and refrigerate for up to 2 days. Keep the shrimp separate from the mixture to maintain the texture.

Freezer: For longer storage, freeze the Garlic Parmesan Roasted Shrimp in a single layer on a baking sheet for about 1 hour. Once frozen, transfer to a zip-top freezer bag for up to 3 months.

Reheating: To revive the shrimp, reheat in the oven at 350°F (175°C) for about 10 minutes, allowing the cheese to crisp up again for a delightful experience.

Thawing: When ready to enjoy, thaw shrimp in the fridge overnight before reheating for the best results!

Expert Tips for Garlic Parmesan Roasted Shrimp

  • Pat the Shrimp Dry: Always dry your shrimp thoroughly before coating. This prevents them from steaming, ensuring they develop that delicious crispy texture.

  • Monitor Cooking Time: Keep an eye on your shrimp as they bake. Overcooking can lead to rubbery shrimp; perfect timing makes all the difference!

  • Marinate for More Flavor: For a deeper flavor, consider marinating the shrimp in the garlic-Parmesan mixture for 30 minutes before baking, enhancing your Garlic Parmesan Roasted Shrimp experience.

  • Use Fresh Ingredients: Opt for fresh garlic and high-quality Parmesan cheese. Fresh ingredients elevate the dish’s aroma and flavor, bringing richness to the table.

  • Experiment with Cheese: If you’re feeling adventurous, try swapping Parmesan with Pecorino Romano for a unique twist that brightens up the flavors in your Garlic Parmesan Roasted Shrimp.

Make Ahead Options

These Garlic Parmesan Roasted Shrimp are perfect for meal prep enthusiasts! You can prepare the garlic-Parmesan mixture and coat the shrimp up to 24 hours in advance to save precious time on busy weeknights. Just store them in an airtight container in the refrigerator to maintain their quality and prevent any drying out. When you’re ready to enjoy, simply preheat your oven and bake the shrimp as instructed for 10 to 12 minutes, until they are pink and beautifully golden. This way, you’ll have a wonderfully flavorful dish with minimal effort and just as delicious as if you made it fresh!

What to Serve with Garlic Parmesan Roasted Shrimp

Elevate your dining experience by pairing delicious sides that beautifully complement the rich flavors of roasted shrimp.

  • Creamy Garlic Mashed Potatoes: Pairing these buttery potatoes with your shrimp creates a comforting harmony between creamy texture and savory seafood flavors.

  • Fresh Garden Salad: A light and refreshing salad with mixed greens, cherry tomatoes, and a zesty vinaigrette balances the richness of the shrimp.

  • Grilled Asparagus: The slight char and earthy taste of grilled asparagus adds a delightful crunch, making every bite of shrimp an exciting flavor explosion.

  • Lemon Herb Quinoa: This nutty, fluffy quinoa with a hint of lemon and herbs provides a nutritious base that enhances the meal without overpowering the shrimp.

  • Garlic Bread: Crispy on the outside and soft on the inside, garlic bread serves as a perfect vessel for soaking up any remaining buttery, garlicky goodness.

  • Pasta Primavera: Toss some al dente pasta with seasonal vegetables and a light dressing for a vibrant, colorful dish that rounds out your seafood feast.

  • Chardonnay or Sauvignon Blanc: A chilled glass of these crisp white wines perfectly complements the garlic and cheese flavors, enhancing the entire dining experience.

  • Chocolate Lava Cake: For dessert, indulge in a rich chocolate lava cake. The warm, molten center provides a sweet contrast that will leave everyone wanting more.

Garlic Parmesan Roasted Shrimp Variations

Customize your Garlic Parmesan Roasted Shrimp to suit your taste buds and dietary needs with these exciting variations! It’s all about getting creative in the kitchen.

  • Citrus Zest:
    Add lemon or lime zest to the garlic mixture for a refreshing, bright flavor that perfectly complements the shrimp.

  • Pecorino Romano:
    Swap out Parmesan for Pecorino Romano for a sharper, saltier bite that adds a unique twist to the dish.

  • Herb-Infused:
    Toss in fresh herbs like parsley, basil, or thyme for vibrant flavors; fresh herbs can transform your Garlic Parmesan Roasted Shrimp into a garden-fresh delight.

  • Spicy Kick:
    Increase the red pepper flakes or add diced jalapeños to the mixture for a heat-packed experience that will awaken your taste buds.

  • Nutty Crunch:
    Top with toasted pine nuts or slivered almonds before serving to elevate the dish both in flavor and texture, giving it a delightful crunch.

  • Vegetable Boost:
    Add colorful bell peppers, zucchini, or asparagus to the baking tray with the shrimp. They’ll soak up the delicious garlic-Parmesan flavor and add a nutritious element.

  • Creamy Delight:
    For a richer dish, blend in a dollop of cream cheese or mascarpone into the garlic mixture for a luscious, creamy coating on your shrimp.

  • Garlic Butter Sauce:
    Drizzle melted garlic butter over the baked shrimp before serving for an extra layer of buttery goodness, reminiscent of Honey Garlic Salmon elegance.

Explore these variations to transform your Garlic Parmesan Roasted Shrimp every time you make it—your family and friends will love the new surprises with each meal!

Garlic Parmesan Roasted Shrimp Recipe FAQs

What kind of shrimp should I use for this recipe?
For the best flavor, I recommend using fresh shrimp. However, if you choose frozen shrimp, make sure they’re thoroughly thawed and patted dry before cooking. Look for shrimp that have a nice sheen and a mild ocean scent. Avoid any with dark spots or an off smell.

How should I store leftover Garlic Parmesan Roasted Shrimp?
Leftovers can be stored in an airtight container in the refrigerator for up to 2 days. To keep them from becoming soggy, I suggest keeping the shrimp separate from any leftover garlic-Parmesan mixture. When ready to eat, simply reheat in the oven at 350°F (175°C) for about 10 minutes for that crispy texture again.

Can I freeze Garlic Parmesan Roasted Shrimp?
Absolutely! To freeze, lay the cooked shrimp in a single layer on a baking sheet and freeze for about 1 hour. After they’re frozen, transfer them to a zip-top freezer bag, squeezing out any excess air. You can keep them in the freezer for up to 3 months. When you’re ready to enjoy, thaw them in the fridge overnight before reheating.

What should I do if my shrimp turn out rubbery?
If your shrimp turn rubbery, it may be because they were overcooked. Try keeping a close watch on them while baking; they should be pink and opaque in about 10 to 12 minutes. To help with this, you can also marinate the shrimp in the garlic-Parmesan mixture for about 30 minutes before baking to infuse more flavor and moisture, making them juicier.

Are there any dietary considerations I should be aware of?
Yes! For those with dietary restrictions, this dish is naturally gluten-free. If you are serving guests with dairy allergies, consider using a dairy-free butter and a vegan cheese alternative. For anyone with shellfish allergies, this dish would not be suitable, so be sure to check with your diners before serving.

Can I prepare Garlic Parmesan Roasted Shrimp in advance?
You can prepare the garlic-Parmesan mixture in advance and coat the shrimp just before you’re ready to bake. If you want to prep everything, you can marinate the shrimp in the mixture and keep them covered in the fridge for about 30 minutes to an hour. Just remember, they are best served fresh from the oven, so plan accordingly!

Garlic Parmesan Roasted Shrimp

Garlic Parmesan Roasted Shrimp: A Delicious Seafood Treat

Garlic Parmesan Roasted Shrimp is a quick and delicious seafood dish that's gluten-free and perfect for any occasion.
Prep Time 10 minutes
Cook Time 12 minutes
Total Time 22 minutes
Servings: 4 servings
Course: Appetizers
Cuisine: Seafood
Calories: 200

Ingredients
  

For the Shrimp
  • 1 pound Shrimp Fresh or frozen (thawed) provides the best flavor
  • 4 tablespoons Butter Can substitute with olive oil or vegan alternative
For the Flavor Mixture
  • 4 cloves Garlic (minced) Fresh garlic delivers a robust aroma and flavor
  • 1 cup Parmesan Cheese (grated) Consider a vegetarian version if desired
  • 1 teaspoon Black Pepper Adjust according to taste
  • 1 teaspoon Red Pepper Flakes Optional for added heat

Equipment

  • Oven
  • Baking Tray
  • Mixing Bowl
  • Parchment Paper

Method
 

Cooking Steps
  1. Preheat your oven to 400°F (200°C).
  2. Rinse shrimp under cold water, then shell and devein them. Pat dry.
  3. In a bowl, combine melted butter, minced garlic, grated Parmesan, black pepper, and optional red pepper flakes.
  4. Add shrimp to the mixture and toss until evenly coated.
  5. Line a baking tray with parchment paper. Arrange shrimp in a single layer.
  6. Bake for 10 to 12 minutes, or until shrimp are pink and opaque.
  7. Remove from oven, let rest for a couple of minutes, then serve hot.

Nutrition

Serving: 1servingCalories: 200kcalCarbohydrates: 2gProtein: 24gFat: 10gSaturated Fat: 5gPolyunsaturated Fat: 0.5gMonounsaturated Fat: 4gCholesterol: 190mgSodium: 500mgPotassium: 300mgVitamin A: 400IUCalcium: 150mgIron: 1mg

Notes

For extra flavor, consider marinating the shrimp in the garlic-Parmesan mixture for 30 minutes before baking.

Tried this recipe?

Let us know how it was!

Creamy Tuscan Salmon Pasta: A Cozy Dinner in Under 30 Minutes

The aroma of garlic sizzling in olive oil immediately transports me to a rustic Italian kitchen. It’s here that I discovered the joy of whipping up a satisfying meal in just 20 minutes, perfect for those bustling weeknights. Today, I’m excited to share my favorite Creamy Tuscan Salmon Pasta recipe, a delightful harmony of tender salmon and luscious pasta that’s both quick and nourishing. Not only does this dish come together effortlessly, but it’s also a crowd-pleaser, making it ideal for family dinners or gatherings with friends. With a richness that feels indulgent yet light, it’s the perfect way to elevate your dinner game without hours spent in the kitchen. What unique twist will you add to make it your own?

Why is Creamy Tuscan Salmon Pasta Irresistible?

Simplicity: This dish comes together in just 20 minutes, making it an ideal choice for busy weeknights.

Flavor Explosion: The combination of garlic and cream creates a luscious sauce that melds beautifully with tender salmon.

Versatile: Feel free to experiment by adding vegetables like spinach or swapping salmon for chicken or shrimp!

Crowd-Pleaser: Whether it’s a family dinner or a gathering with friends, this recipe is sure to impress everyone at the table.

For more delightful salmon dishes, check out my Creamy Marry Shrimp Pasta or Baked Salmon Honey for added inspiration!

Creamy Tuscan Salmon Pasta Ingredients

For the Pasta
Pasta – any type you love, but spaghetti or penne pairs beautifully with the creamy sauce.

For the Salmon
Salmon – fresh is best, but canned will work if you’re in a pinch—packed with omega-3 fatty acids!

For the Sauce
Olive Oil – a drizzle for sautéing garlic, infusing a rich flavor into the sauce.
Garlic – fresh minced gives the best flavor; garlic powder can be a quick substitute.
Cream – essential for creating that rich, creamy texture; swap with half-and-half for a lighter version.
Spinach – adds a pop of color and nutrients; fresh is ideal, but frozen can work too.

For Flavor Enhancements
Lemon Juice – adds brightness that balances the creaminess; lime is a delicious alternative.
Dill – fresh dill enhances the dish with herbal notes; feel free to use dried if that’s what you have.
Parmesan Cheese – grated parmesan on top brings a salty, nutty finish to pamper your taste buds!

This Creamy Tuscan Salmon Pasta is not just quick and easy to prepare but a perfect blend of flavors that will become a go-to favorite in your kitchen!

Step‑by‑Step Instructions for Creamy Tuscan Salmon Pasta

Step 1: Cook the Pasta
Start by bringing a large pot of salted water to a boil over high heat. Add your choice of pasta, such as spaghetti or penne, and cook according to package instructions until al dente, usually about 8 to 10 minutes. Once cooked, drain the pasta in a colander but reserve about a cup of pasta water to adjust sauce consistency later.

Step 2: Prepare the Salmon
While the pasta cooks, heat a large skillet over medium-high heat and add a drizzle of olive oil. Season the salmon fillets with salt and pepper, then place them skin-side down in the hot skillet. Cook for about 4 to 5 minutes until the skin is crispy, then carefully flip and cook for another 4 to 5 minutes until the salmon is opaque and flakes easily with a fork. Remove from the skillet and set aside.

Step 3: Sauté the Garlic
In the same skillet, lower the heat to medium and add a bit more olive oil if needed. Toss in minced garlic and sauté for about 30 seconds until fragrant and golden, taking care not to burn it. This step infuses the oil with delightful garlic flavor, creating the perfect base for your creamy sauce in the Creamy Tuscan Salmon Pasta.

Step 4: Make the Creamy Sauce
Pour in the cream slowly while stirring to combine it with the sautéed garlic. Allow it to simmer for about 3 to 4 minutes, letting the flavors meld and the sauce thicken slightly. If desired, add a splash of lemon juice and fresh dill at this stage to brighten up the sauce, enhancing the overall flavor profile.

Step 5: Combine Ingredients
Once the sauce is ready, gently add the cooked pasta into the skillet, tossing to coat it evenly with the creamy garlic sauce. Flake the reserved salmon on top and delicately fold it into the pasta mixture to combine. If the sauce seems too thick, gradually add a bit of the reserved pasta water until you achieve your desired consistency.

Step 6: Add Fresh Spinach
Toss in the fresh spinach at the last minute, stirring until just wilted, which should take about 1 to 2 minutes. This step not only adds beautiful color to your Creamy Tuscan Salmon Pasta but also boosts its nutritional value. Ensure everything is well mixed and heated through before serving.

Step 7: Serve and Garnish
Finally, serve the Creamy Tuscan Salmon Pasta warm, garnished with freshly grated Parmesan cheese and an extra sprinkle of dill or freshly cracked black pepper for that finishing touch. Enjoy this comforting dish right away, sharing it with family or friends for a delightful dining experience!

Creamy Tuscan Salmon Pasta Variations

Customize your Creamy Tuscan Salmon Pasta to match your cravings and dietary preferences with these exciting twists.

  • Dairy-Free: Swap cream for coconut milk or cashew cream for a rich, dairy-free alternative. It adds a subtle sweetness that pairs beautifully with salmon.

  • Whole Wheat Option: Use whole wheat pasta for a heartier meal that packs in more fiber and nutrients. Your dinner will be wholesome and satisfying.

  • Spicy Kick: Add red pepper flakes or a splash of sriracha to infuse the dish with a fiery heat. You’ll find that it balances the creaminess perfectly!

  • Vegetable Boost: Toss in roasted cherry tomatoes or bell peppers for extra flavor and nutrition. They not only enhance the aesthetics but also bring a fresh sweetness.

  • Zesty Pesto: Instead of using cream, stir in basil pesto for an herbaceous twist. This variation brings a vibrancy that livens up the traditional creamy sauce, making it fresh and colorful.

  • Lemon Herb Fusion: Complement the dish with fresh herbs like basil or parsley and give it a zesty note by adding lemon zest just before serving. The brightness will uplift your palate!

  • Gluten-Free Twist: Substitute traditional pasta with gluten-free pasta variants to cater to dietary restrictions while still enjoying a delicious meal. It’s a guilt-free kitchen hack!

  • Seafood Medley: Even if you love salmon, mix in shrimp along with the salmon for a delightful seafood medley. This combination is sure to elevate the dish’s flavor profile even more!

These variations set the stage for delightful dinners, just like those found in my Cajun Sausage Pasta or Herb Crusted Salmon. Get creative and make this recipe your own!

Expert Tips for Creamy Tuscan Salmon Pasta

  • Cook Salmon Perfectly: Ensure your salmon is cooked just right; it should flake easily when done. Overcooking can make it dry.

  • Pasta Consistency: Avoid mushy pasta by checking for al dente doneness. Reserve some pasta water to adjust sauce thickness as needed.

  • Enhance Flavor: Finish your dish with a sprinkle of fresh herbs or a squeeze of lemon juice to elevate the overall flavor of the creamy Tuscan salmon pasta.

  • Add Veggies: Incorporate colorful vegetables like cherry tomatoes or bell peppers for a nutritious twist. This can also prevent the dish from feeling too heavy.

  • Sauce Thickness: Be cautious with the cream; if the sauce gets too thick, add a bit of reserved pasta water gradually until you reach your desired consistency.

How to Store and Freeze Creamy Tuscan Salmon Pasta

Fridge: Refrigerate leftover Creamy Tuscan Salmon Pasta in an airtight container for up to 2 days. Make sure it’s completely cooled before sealing to preserve freshness.

Freezer: For longer storage, freeze the pasta without the cream sauce for up to 2 months. When ready to enjoy, thaw overnight in the fridge before reheating.

Reheating: Reheat gently on the stove over low heat, adding a splash of cream or reserved pasta water to restore the creamy consistency and avoid dryness.

Serving Tips: It’s best to enjoy the pasta fresh, but when reheating, be cautious not to overcook the salmon for a delightful dinner each time!

Make Ahead Options

These Creamy Tuscan Salmon Pasta meals are perfect for busy weeknights that are all about saving time! You can prep the salmon and cook your pasta up to 24 hours in advance. Simply season and cook the salmon, then refrigerate it in an airtight container to maintain its flaky texture. You can also boil the pasta, toss it in a bit of olive oil to prevent sticking, and store it in the fridge. When you’re ready to serve, prepare the creamy sauce and add the prepped pasta and salmon, warming everything gently in the skillet until heated through. This way, you enjoy a delicious homemade dinner with minimal time spent!

What to Serve with Creamy Tuscan Salmon Pasta?

Looking to complete your meal with delightful sides that sing in harmony with your creamy creation?

  • Garlic Bread: This classic favorite is a must! Warm, toasty, and buttery, it complements the creamy sauce perfectly while providing that satisfying crunch.

  • Fresh Green Salad: A light salad tossed with a zesty vinaigrette adds a refreshing contrast. The crisp greens cut through the richness of the pasta, creating a well-balanced meal.

  • Roasted Vegetables: Seasonal veggies like asparagus or bell peppers, drizzled with olive oil and roasted until caramelized, are not just colorful but also bring a delightful sweetness that pairs wonderfully.

  • Lemon Zest: A sprinkle of lemon zest over the dish can brighten the flavors instantly. It enhances every creamy bite, making it feel even more refreshing.

  • Chardonnay Wine: A chilled glass of oaked Chardonnay elevates the dining experience, its buttery notes complementing the creamy sauce beautifully. A perfect match!

  • Chocolate Mousse: End your meal on a sweet note with a rich chocolate mousse. The lightness of the dessert offers a satisfying finish without being too heavy after your creamy pasta.

Embrace these pairings to turn your dinner into a delightful, full experience!

Creamy Tuscan Salmon Pasta Recipe FAQs

What type of salmon is best for this recipe?
Absolutely! Fresh salmon fillets are ideal for their flavor and texture, but canned salmon works too if you’re in a pinch. Just make sure to drain it well. Fresh salmon tends to hold up better in the cooking process, making it less likely to dry out.

How should I store leftovers of Creamy Tuscan Salmon Pasta?
After enjoying your delicious meal, refrigerate leftovers in an airtight container for up to 2 days. Let the pasta cool completely before sealing to preserve freshness and avoid condensation, which can lead to a soggy dish.

Can I freeze Creamy Tuscan Salmon Pasta?
Yes! For best results, freeze the pasta without the cream sauce to maintain texture. Place it in an airtight container or resealable freezer bag for up to 2 months. When you’re ready to reheat, thaw overnight in the fridge, then gently warm it on the stove over low heat, adding a splash of cream or reserved pasta water for the perfect creamy consistency.

What if my sauce is too thick?
Very common! If you find your sauce is thicker than you’d like, simply add a bit of the reserved pasta water gradually while stirring until you’ve reached the desired consistency. This extra step ensures your Creamy Tuscan Salmon Pasta stays luscious and smooth without additional calories or heaviness.

Can I make this dish dairy-free?
Absolutely! Swap out the cream for a dairy-free alternative like coconut milk or almond milk. You may also want to add nutritional yeast for that rich, cheesy flavor. Just make sure to adjust the seasoning to keep your dish flavorful and satisfying!

What should I serve with Creamy Tuscan Salmon Pasta?
The more the merrier! Pair your pasta with a light side salad or some warm garlic bread for a complete meal. You can also consider serving it alongside steamed vegetables or a nice glass of white wine to elevate the dining experience.

Creamy Tuscan Salmon Pasta

Creamy Tuscan Salmon Pasta: A Cozy Dinner in Under 30 Minutes

Creamy Tuscan Salmon Pasta is a quick and delicious meal that combines tender salmon with luscious pasta in a creamy garlic sauce. Perfect for busy weeknights.
Prep Time 10 minutes
Cook Time 20 minutes
Total Time 30 minutes
Servings: 4 servings
Course: Pasta
Cuisine: Italian
Calories: 550

Ingredients
  

For the Pasta
  • 8 ounces Pasta spaghetti or penne recommended
For the Salmon
  • 1 pound Salmon fresh, skin-on
For the Sauce
  • 2 tablespoons Olive Oil for sautéing
  • 3 cloves Garlic minced
  • 1 cup Cream or half-and-half
  • 2 cups Spinach fresh
For Flavor Enhancements
  • 2 tablespoons Lemon Juice or lime
  • 2 tablespoons Dill fresh or dried
  • 1/2 cup Parmesan Cheese grated for garnish

Equipment

  • Large pot
  • Colander
  • Large skillet

Method
 

Step-by-Step Instructions
  1. Cook the Pasta: Bring a large pot of salted water to a boil. Add pasta and cook according to package instructions until al dente, about 8 to 10 minutes. Drain, reserving some pasta water.
  2. Prepare the Salmon: Heat a skillet over medium-high heat and add olive oil. Season salmon with salt and pepper, skin-side down, and cook for 4 to 5 minutes until crispy, then flip and cook until opaque. Remove and set aside.
  3. Sauté the Garlic: In the same skillet, add more olive oil if needed, then sauté minced garlic for 30 seconds until fragrant.
  4. Make the Creamy Sauce: Slowly pour cream into the skillet while stirring. Simmer for 3 to 4 minutes, then add lemon juice and dill.
  5. Combine Ingredients: Add cooked pasta to the skillet, tossing to coat with sauce. Flake salmon on top and mix gently. Adjust consistency with pasta water if needed.
  6. Add Fresh Spinach: Stir in spinach until just wilted, about 1 to 2 minutes. Ensure everything is heated through.
  7. Serve and Garnish: Serve warm, garnished with grated Parmesan and additional dill or cracked pepper. Enjoy!

Nutrition

Serving: 1servingCalories: 550kcalCarbohydrates: 45gProtein: 35gFat: 25gSaturated Fat: 10gPolyunsaturated Fat: 3gMonounsaturated Fat: 15gCholesterol: 100mgSodium: 600mgPotassium: 800mgFiber: 3gSugar: 2gVitamin A: 800IUVitamin C: 10mgCalcium: 250mgIron: 2mg

Notes

Ensure salmon is cooked to flaky perfection. Reserve pasta water for adjusting cream sauce thickness. Consider adding vegetables for extra nutrition.

Tried this recipe?

Let us know how it was!

Savor Every Bite of Spicy Thai Curry Soup Dumplings

It was a rainy afternoon, the kind that whispers for warmth and comfort. I found myself daydreaming of Spicy Thai Curry Soup Dumplings, envisioning each delightful bite that promised a burst of flavors and a cozy escape from the grey outside. This recipe is perfect for anyone craving an adventure in their kitchen—it packs a punch while being surprisingly quick to prepare! Whether you’re impressing guests at a dinner party or treating yourself to a special meal, these dumplings are sure to become a go-to favorite. Plus, they freeze beautifully, making it easy to enjoy them whenever the mood strikes. Are you ready to take your taste buds on a journey to Thailand without leaving your home? Let’s dive in!

Why are these dumplings so irresistible?

Bold flavors: Each bite bursts with a perfect blend of spicy Thai curry that dances on your palate, elevating your meal from ordinary to extraordinary.
Quick and easy: This recipe allows you to whip up a gourmet dish in no time, perfect for those busy weeknights.
Freezer-friendly: Make a big batch and freeze them for a quick meal whenever you need a taste of comfort.
Impressive: Your friends and family will be amazed at your culinary skills once they taste these homemade dumplings! For more delicious soup options, don’t miss the comforting Sausage Tortellini Soup or the flavorful Mexican Soup.

Spicy Thai Curry Soup Dumplings Ingredients

For the Dumpling Dough
All-purpose flour – a versatile base for your dumplings, giving them a tender yet chewy texture.
Boiling water – helps to form a smooth, pliable dough that’s easy to work with.
Salt – enhances the flavor of the dough, ensuring every bite is deliciously seasoned.

For the Filling
Ground pork or chicken – adds richness and flavor; feel free to substitute with tofu for a vegetarian option.
Thai red curry paste – infuses the filling with bold, aromatic flavors that define these dumplings.
Coconut milk – brings creaminess to the filling and balances the spiciness of the curry paste.
Chopped cilantro – adds a fresh note; you can swap it for basil if you prefer a different herb.
Garlic – boosts the overall flavor of the filling, making it irresistibly fragrant and savory.

For the Soup
Chicken or vegetable broth – serves as a comforting base for the soup, bringing everything together.
Lime juice – a splash at the end brightens up the soup and ties together the spicy notes perfectly.
Sliced chili peppers – for those who want an extra kick; feel free to adjust to your heat preference.

Get ready to savor every bite of these Spicy Thai Curry Soup Dumplings and delight your family with this exotic yet comforting dish!

Step‑by‑Step Instructions for Spicy Thai Curry Soup Dumplings

Step 1: Dough Preparation
In a mixing bowl, combine 2 cups of all-purpose flour with a pinch of salt. Gradually pour in about ¾ cup of boiling water, mixing with chopsticks or a fork until the dough starts to come together. Once it cools slightly, knead it for about 5 minutes until smooth and elastic. Cover the dough with a damp cloth and let it rest for 30 minutes to relax the gluten.

Step 2: Filling Preparation
In a large mixing bowl, combine 1 pound of ground pork, 2 tablespoons of Thai red curry paste, ¼ cup of chopped green onions, 1 tablespoon of freshly grated ginger, and 2 minced garlic cloves. Add 2 tablespoons of soy sauce, 1 tablespoon of sesame oil, and a splash of fish sauce for depth. Mix thoroughly until all ingredients are well incorporated and the filling is fragrant and evenly seasoned.

Step 3: Dumpling Assembly
After resting, divide the dough into 1-inch pieces and roll each piece into a thin circle about 3 inches in diameter using a rolling pin. Place about one tablespoon of your spicy filling in the center of each dough circle. Carefully fold the dough over the filling, pinching the edges tightly to seal and create beautiful dumplings. Make sure there are no air pockets inside.

Step 4: Cooking
Prepare a large pot by bringing 2 cups of chicken broth to a gentle simmer over medium heat. Once the broth is simmering, place a steamer basket above the pot, making sure it doesn’t touch the broth. Arrange the dumplings in the basket, leaving space between them to expand. Cover and steam for about 10 minutes or until the dumplings are tender and the filling is cooked through.

Step 5: Serving
Carefully remove the dumplings from the steamer and place them on a serving platter. Drizzle with a little fresh lime juice for brightness and garnish with chopped cilantro for a burst of flavor. Serve your Spicy Thai Curry Soup Dumplings immediately, enjoying them hot and fresh to experience all the delightful flavors within!

What to Serve with Spicy Thai Red Curry Soup Dumplings

Looking to create a delightful meal that complements the flavor-packed dumplings? Here are some delicious pairing ideas to elevate your dining experience.

  • Crispy Spring Rolls: Their crunchy exterior and fresh veggie filling provide an irresistible contrast to the soft dumplings. Perfect for sharing!
  • Thai Green Papaya Salad: The zingy, tangy flavors balance the spicy richness of the dumplings, creating a refreshing bite.
  • Coconut Rice: This subtly sweet and creamy side dish soaks up all the broth and enhances the dumplings’ bold flavors beautifully.
  • Stir-Fried Vegetables: Lightly seasoned, vibrant veggies add color and nutrition, bringing a fresh element to your meal.
  • Thai Iced Tea: A creamy, sweet beverage that refreshes the palate between bites; it’s the ideal drink to accompany spicy dishes.
  • Mango Sticky Rice: Finish with a sweet note, where the sweetness of ripe mango perfectly balances the spices in the dumplings.

These accompaniments not only enhance the taste of your Spicy Thai Red Curry Soup Dumplings but also create a memorable dining experience for everyone at your table!

Make Ahead Options

These Spicy Thai Curry Soup Dumplings are perfect for meal prep and can help save you precious time on busy weeknights! You can prepare the dumpling filling up to 3 days in advance by mixing together the ground pork, Thai red curry paste, and other ingredients (just be sure to refrigerate it). For the dough, make it up to 24 hours ahead and wrap it tightly to prevent it from drying out. When you’re ready to enjoy, simply assemble the dumplings and steam them according to the recipe. Remember, fresh lime juice and cilantro should be added just before serving to maintain their vibrant flavors! Enjoy your cozy, homemade adventure without the last-minute rush!

Expert Tips for Spicy Thai Curry Soup Dumplings

  • Dough Consistency: Make sure the dough is neither too sticky nor too dry. Adjust with a little extra water or flour until it’s smooth and pliable.

  • Sealing Dumplings: Be diligent in sealing the dumplings tightly to prevent any leakage during steaming. A little water on the edges can help with sealing.

  • Flavor Fusion: For a richer filling, let the mixture rest for about 15 minutes before assembling. This allows the flavors of the Spicy Thai Curry Soup Dumplings to meld together beautifully.

  • Steaming Technique: Ensure your steamer basket isn’t overcrowded; give each dumpling room to expand while cooking. This ensures even cooking and that each bite is delightful.

  • Freeze for Later: If you want to make a batch ahead of time, freeze unsteamed dumplings on a baking sheet, then transfer to a freezer bag. Steam from frozen, adding an extra couple of minutes to the cooking time.

  • Garnish for Flavor: Don’t skimp on the cilantro or lime! These ingredients add a fresh pop that perfectly balances the richness and spice of the filling.

Spicy Thai Curry Soup Dumplings Variations

Looking to customize your Spicy Thai Curry Soup Dumplings? Here are some delightful twists to inspire your cooking adventure!

  • Vegetarian Delight: Substitute ground pork with finely chopped mushrooms and tofu for a hearty vegetarian option. This twist retains the dumplings’ delicious texture while catering to plant-based diets.

  • Heat It Up: Add extra Thai red curry paste or a splash of chili oil in the filling for those who like it spicy. Just remember, a little goes a long way, so taste as you go!

  • Coconut Creaminess: For a richer filling, substitute regular coconut milk with creamy coconut cream. The result is a luxurious, velvety taste that takes these dumplings to the next level.

  • Zesty Twist: Mix in some lime zest with the filling for a refreshing burst of citrus that brightens the flavors beautifully. It gives each dumpling an unexpected yet pleasant zing.

  • Asian Fusion: Try adding minced water chestnuts for added crunch and texture. They’ll provide a delightful contrast to the tender dough and savory filling.

  • Herbal Upgrade: Instead of cilantro, garnish with fresh basil for a different herbal note. It pairs beautifully with the red curry, giving your dumplings a slightly different flavor profile.

  • Broth Variation: Use miso broth instead of chicken or vegetable broth for steaming to create a rich, umami flavor. It’s a delightful fusion that enhances the overall taste experience.

  • Comfort Combo: Pair these dumplings with a warm bowl of Potato Bacon Soup for a complete comfort meal. The comforting flavors of both recipes will leave everyone satisfied!

How to Store and Freeze Spicy Thai Curry Soup Dumplings

Fridge: Store leftover dumplings in an airtight container for up to 3 days. Be sure to let them cool completely before sealing to prevent sogginess.

Freezer: For longer storage, freeze uncooked dumplings on a baking sheet in a single layer. Once frozen, transfer to a freezer bag and seal for up to 2 months.

Reheating: Steam frozen dumplings directly from the freezer for about 12-15 minutes until warm and cooked through. They’ll taste just as delightful as freshly made!

Preparation Tips: To save time, you can prepare a big batch of Spicy Thai Curry Soup Dumplings ahead and freeze them, making weeknight dinners a breeze!

Spicy Thai Curry Soup Dumplings Recipe FAQs

How do I choose the best ingredients for the dumplings?
Absolutely! For the best dumpling dough, look for all-purpose flour without additives, and make sure your water is boiling when you mix it in for a smooth texture. Ensure your ground pork or any meat you choose is fresh and has a bit of fat for richness. Fresh ginger and garlic will give an aromatic kick; avoid the powdered versions if possible for maximum flavor.

How should I store leftover dumplings?
Very! Place any leftover dumplings in an airtight container in the fridge, where they’ll stay fresh for up to 3 days. It’s important to let them cool completely before sealing them to avoid sogginess. Just reheat by steaming to bring back their delightful texture!

Can I freeze Spicy Thai Curry Soup Dumplings?
Absolutely! To freeze, arrange uncooked dumplings in a single layer on a baking sheet and freeze until solid. Then, transfer them to a freezer bag where they can stay fresh for up to 2 months. When you’re ready to enjoy them, steam the frozen dumplings straight from the freezer, adding about 2-3 extra minutes to the cooking time.

What should I do if my dumpling dough is too sticky?
Very! If your dough is too sticky while you’re kneading, simply sprinkle in a little more flour, a tablespoon at a time, until you reach a nice, smooth consistency. On the flip side, if it feels too dry, add a few drops of warm water and keep kneading—it should feel soft but not tacky.

Are there any dietary considerations I should keep in mind?
Absolutely! If you’re preparing these dumplings for someone with allergies, make sure to use gluten-free flour for the dough and swap soy sauce for a gluten-free variety as well. Additionally, for vegetarian options, substitute ground pork with a mix of finely chopped mushrooms and tofu, ensuring the flavors remain vibrant and delicious. Always check labels for allergens as products can vary.

How can I enhance the flavor of the filling?
Absolutely! To deepen the flavor of your filling, let it sit for 15-30 minutes after mixing the ingredients. This resting period allows the spices and seasonings to meld beautifully, enhancing each flavorful bite you take. If you’re feeling adventurous, adding a splash of lime juice or a dash of chili oil to the filling can give it even more zest!

Savor Every Bite of Spicy Thai Curry Soup Dumplings

Enjoy the delicious flavors of Spicy Thai Curry Soup Dumplings, perfect for a quick and impressive meal.
Prep Time 30 minutes
Cook Time 10 minutes
Resting Time 30 minutes
Total Time 1 hour 10 minutes
Servings: 4 dumplings
Course: Appetizers
Cuisine: Thai
Calories: 250

Ingredients
  

Dumpling Dough
  • 2 cups all-purpose flour a versatile base for your dumplings
  • ¾ cup boiling water helps form a smooth dough
  • 1 pinch salt enhances flavor of the dough
Filling
  • 1 pound ground pork or chicken substitute with tofu for vegetarian option
  • 2 tablespoons Thai red curry paste infuses the filling with bold flavors
  • ¼ cup coconut milk brings creaminess and balances spice
  • ¼ cup chopped cilantro can swap for basil if preferred
  • 2 cloves garlic boosts overall flavor
Soup
  • 2 cups chicken or vegetable broth serves as the soup base
  • 1 tablespoon lime juice brightens the soup
  • to taste sliced chili peppers adjust for desired heat

Equipment

  • Mixing Bowl
  • Steamer basket
  • Rolling Pin
  • Large pot

Method
 

Dough Preparation
  1. In a mixing bowl, combine 2 cups of all-purpose flour with a pinch of salt. Gradually pour in ¾ cup of boiling water, mixing until the dough starts to come together. Knead for 5 minutes until smooth, then let rest covered for 30 minutes.
Filling Preparation
  1. In a large bowl, combine 1 pound of ground pork, 2 tablespoons of Thai red curry paste, ¼ cup of chopped green onions, 1 tablespoon of grated ginger, and 2 minced garlic cloves. Add soy sauce, sesame oil, and fish sauce; mix until well incorporated.
Dumpling Assembly
  1. Divide the dough into 1-inch pieces, roll each into a thin circle about 3 inches in diameter. Place one tablespoon of filling in each circle, fold and pinch to seal.
Cooking
  1. Bring 2 cups of chicken broth to a simmer in a large pot. Arrange dumplings in a steamer basket above, cover, and steam for about 10 minutes until tender.
Serving
  1. Remove dumplings from steam, drizzle with lime juice, garnish with cilantro, and serve immediately.

Nutrition

Serving: 4dumplingsCalories: 250kcalCarbohydrates: 30gProtein: 15gFat: 10gSaturated Fat: 5gCholesterol: 50mgSodium: 600mgPotassium: 200mgFiber: 2gSugar: 1gVitamin A: 500IUVitamin C: 5mgCalcium: 20mgIron: 1mg

Notes

These dumplings freeze well for later enjoyment. Steam frozen dumplings for about 12-15 minutes until warm.

Tried this recipe?

Let us know how it was!