Get my cookbooks

Crispy Onion Ring Chips with a Healthy Twist for Snacking Fun

Standing in the kitchen, I plucked a few onions from the basket—each one a treasure waiting to be transformed into a delightful crispy snack. These Onion Ring Chips have quickly become a go-to treat for me, evoking memories of backyard barbecues and carefree gatherings with friends. Not only are these chips incredibly easy to whip up in just 25 minutes, but they also serve as a versatile appetizer that can be dressed up or down for any occasion. And if you’re looking for a healthier alternative, baking them instead of frying is a breeze. So, whether you crave a bit of crunch during your movie marathon or want to impress guests with a homemade snack, I’ve got you covered! Ready to transform those onions into something truly satisfying? Let’s dive into this crispy adventure!

Why Are These Onion Ring Chips Special?

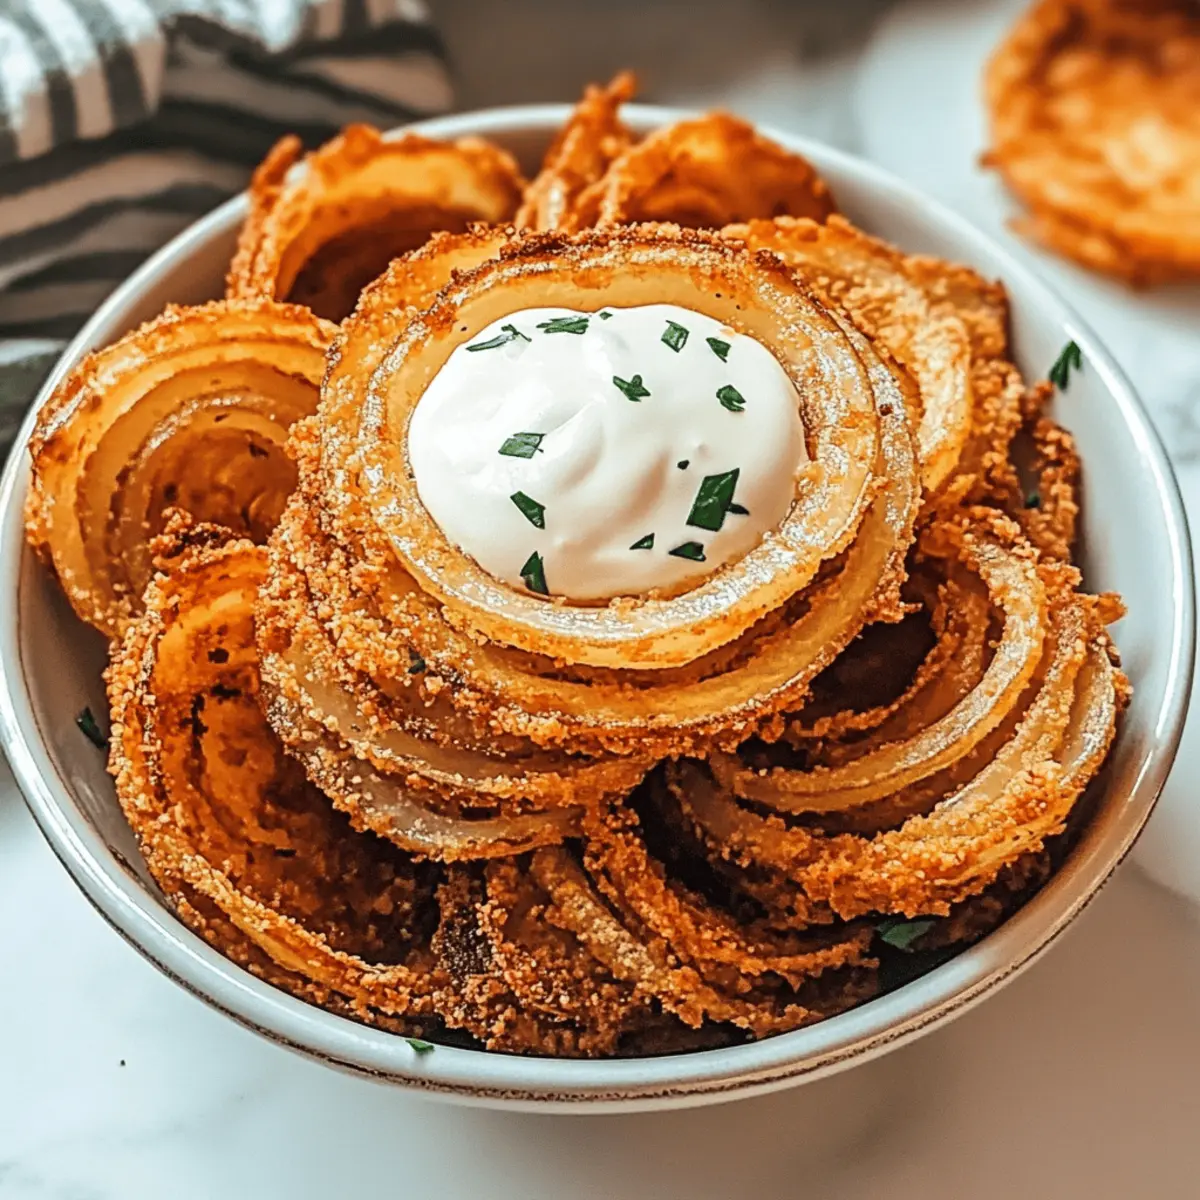
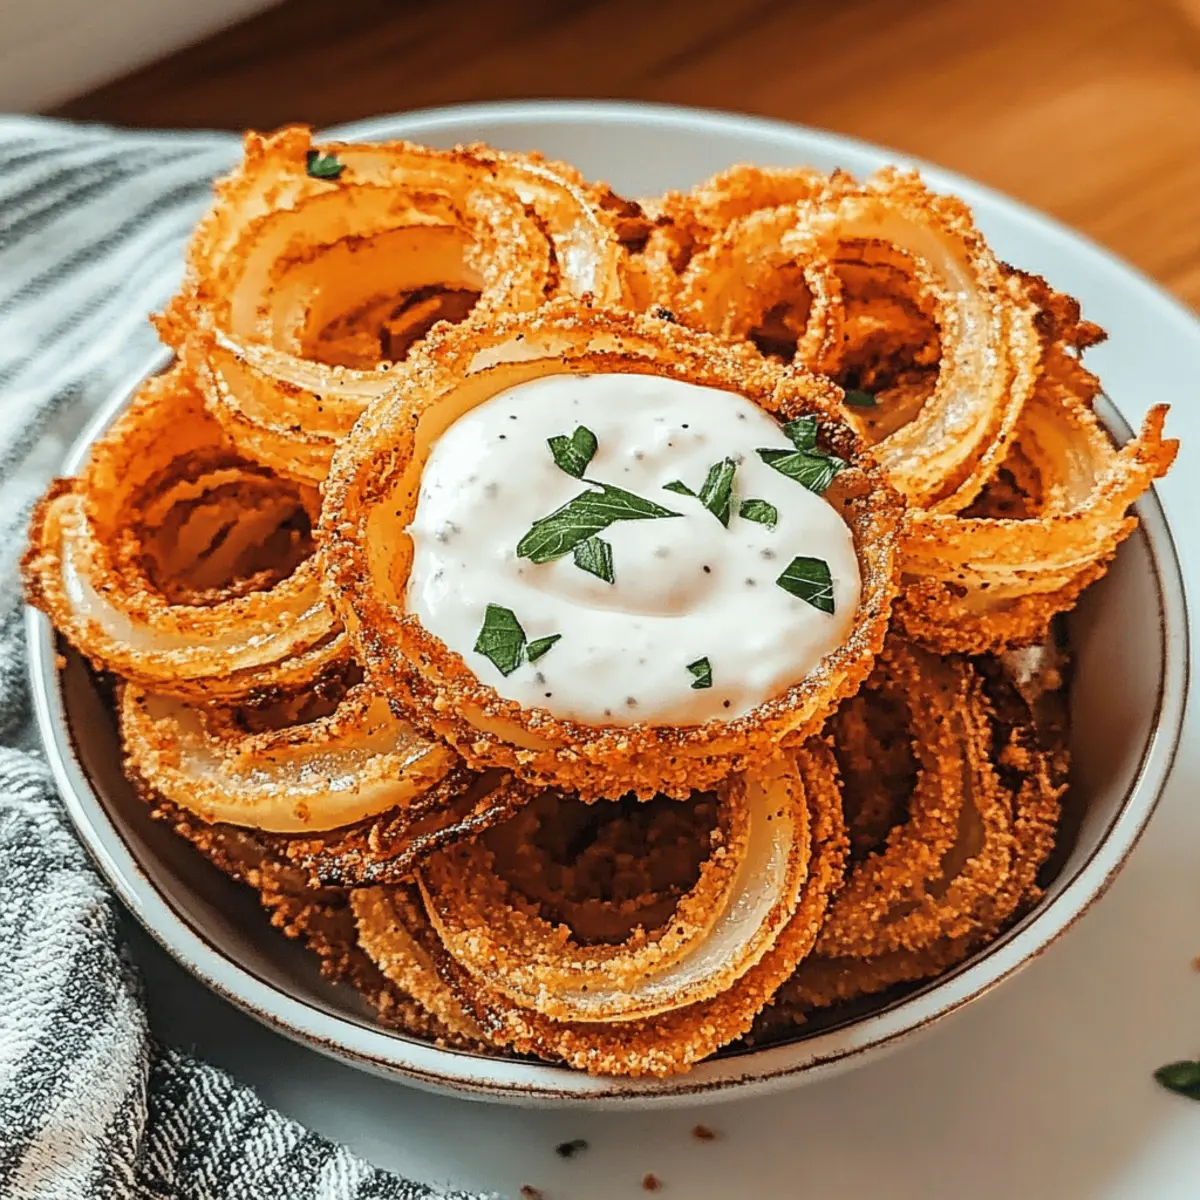
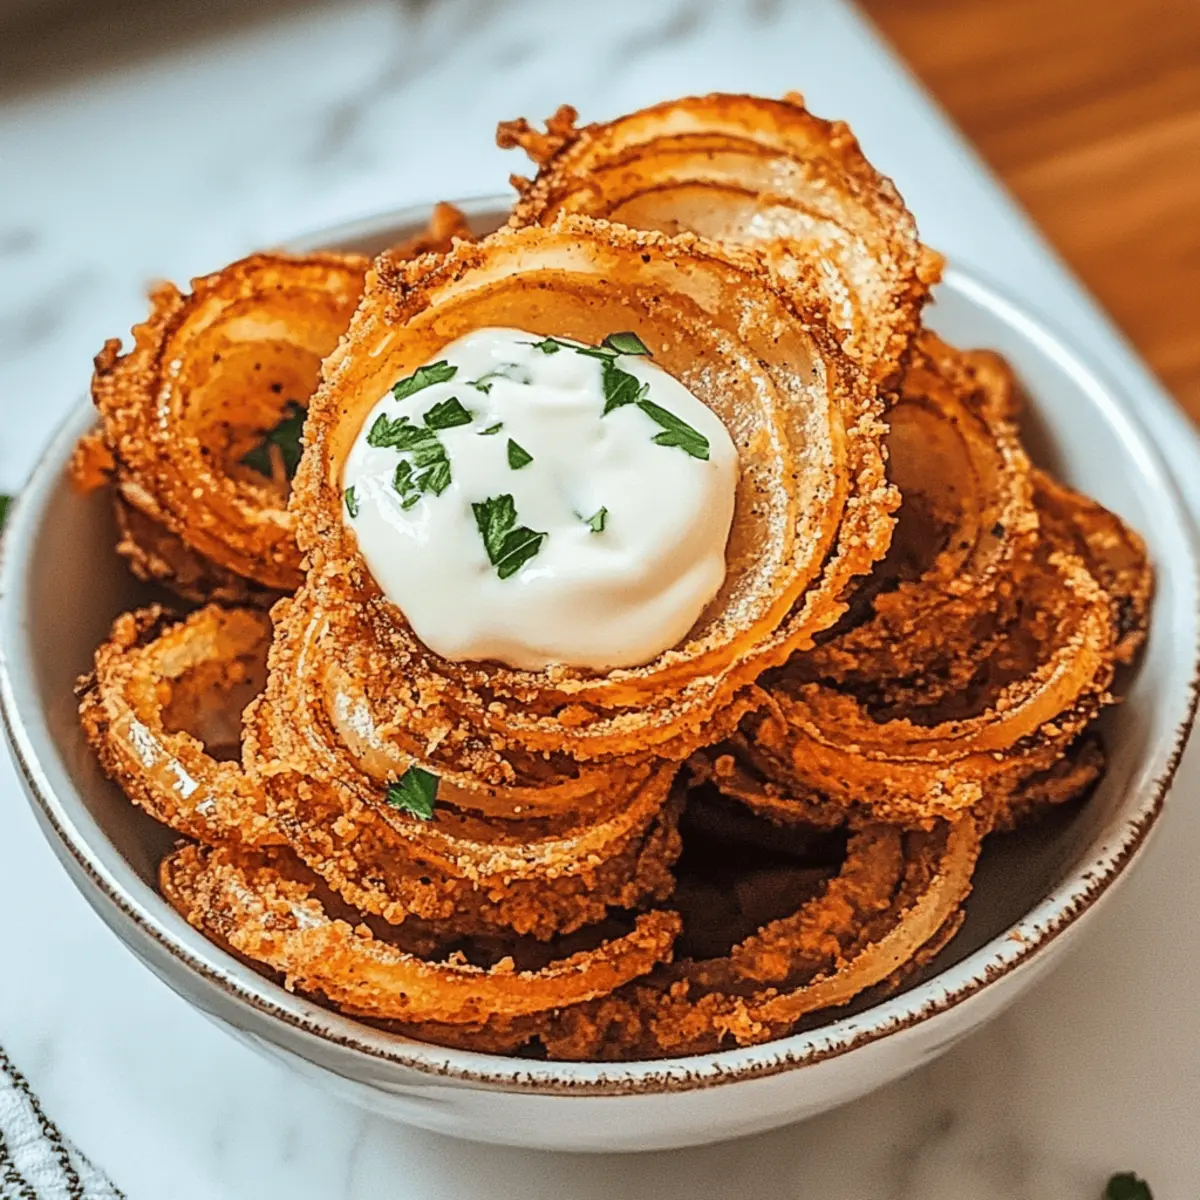
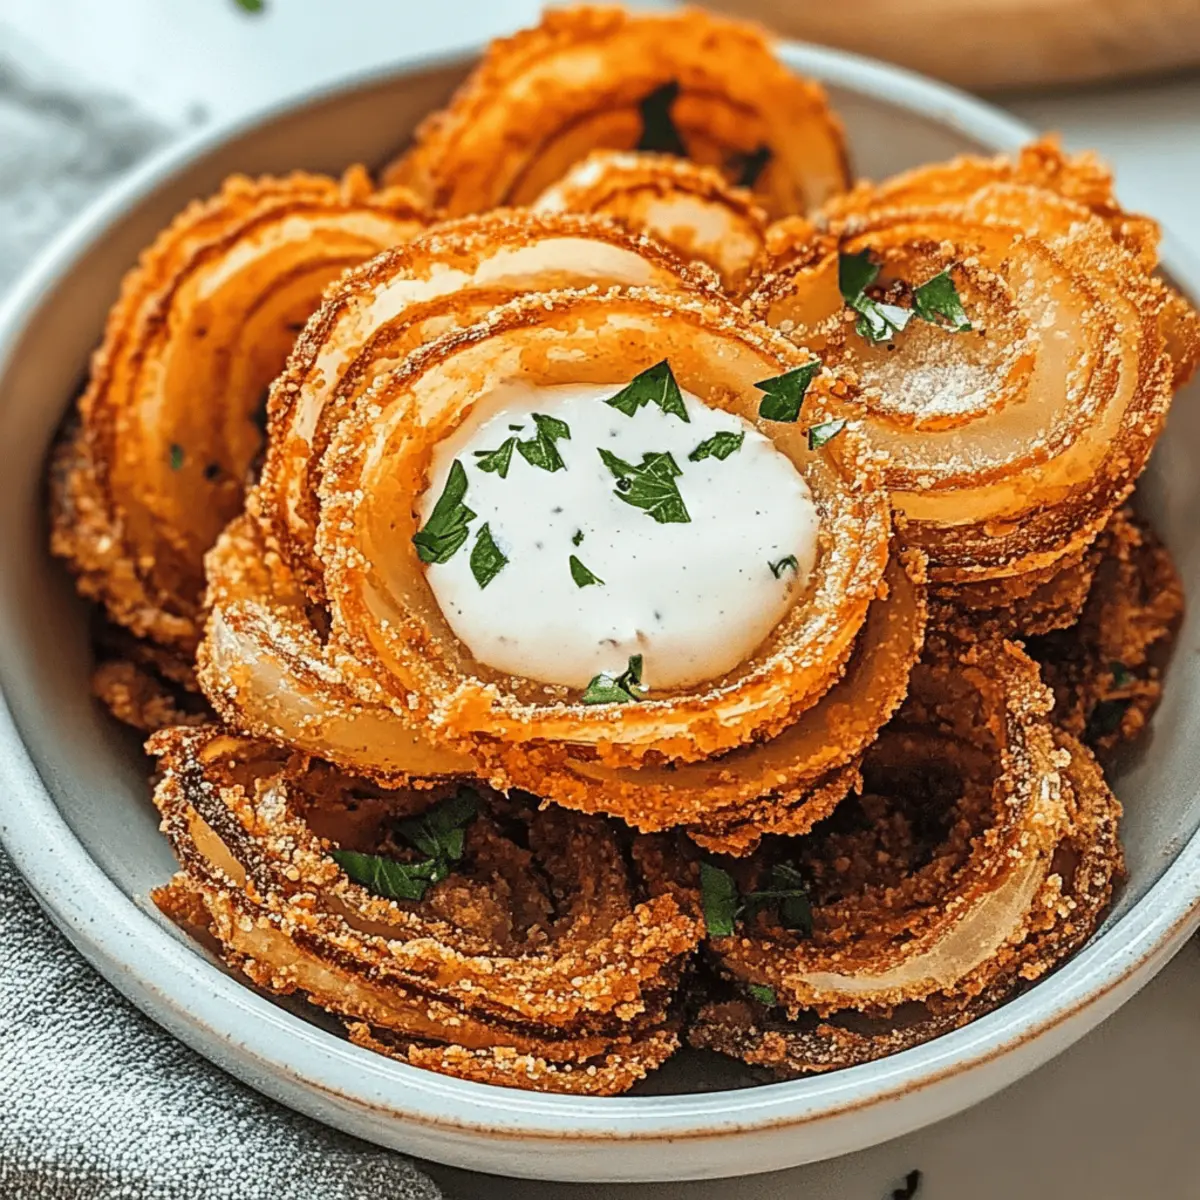
Crispy Perfection: Each bite of these Onion Ring Chips delivers a satisfying crunch that brings the essence of classic snacks right to your home.

Quick and Easy: Whip them up in just 25 minutes! Perfect for those busy days when you crave something tasty without spending hours in the kitchen.

Versatile Options: Feel free to customize! Try adding a spicy kick with cayenne pepper or opt for the healthier baked version that doesn’t skimp on flavor.

Crowd-Pleasing Treat: Whether for game day, movie nights, or casual gatherings, these chips will wow your guests just as an Easter Poke Cake does at celebrations!

Storage-Friendly: Don’t worry about leftovers; they store well in the fridge, and a quick reheat brings back that original crispiness.

Dipping Delights: Pair them with your favorite sauces like ranch or zesty barbecue, creating a snack experience to remember!

Onion Ring Chips Ingredients

For the Coating
Large Onions – The backbone of this recipe; choose Vidalia for a sweeter flavor.
All-Purpose Flour – Provides the initial crunch; swap for gluten-free flour if needed.
Garlic Powder – Enhances savory notes; use fresh minced garlic for a bolder punch.
Paprika – Adds vibrant color and mild spiciness; smoked paprika can elevate the flavor.
Salt – Essential for bringing out all flavors; sea salt can add a coarser texture.
Black Pepper – A dash adds a nice kick; freshly ground offers better depth.

For the Wet Mixture
Buttermilk – Helps the flour stick and adds moisture; mix milk with vinegar as a lighter alternative.

For the Crunchy Finish
Panko Breadcrumbs – Delivers ultimate crispiness; substitute with regular breadcrumbs if desired.
Vegetable Oil – Necessary for frying; you can replace it with canola or peanut oil for high temperatures.

These Onion Ring Chips promise a delightful snack experience that’s quick to prepare and bursting with flavor!

Step‑by‑Step Instructions for Onion Ring Chips

Step 1: Prepare the Oil
Begin by heating vegetable oil in a deep fryer or a large pot until it reaches 350°F (175°C). Ensure there is enough oil to submerge the onion rings completely, which helps achieve that perfect crispy texture. Use a thermometer for accuracy, monitor closely, and prepare your frying area with paper towels nearby to drain excess oil after frying.

Step 2: Mix the Dry Ingredients
In a medium bowl, combine all-purpose flour, garlic powder, paprika, salt, and freshly ground black pepper. Whisk until the mixture is smooth and well-blended, ensuring an even distribution of flavors. This dry mixture is essential for creating the initial crunchy coating on your Onion Ring Chips, so make sure it’s thoroughly combined before moving on to the next step.

Step 3: Set Up the Buttermilk Station
Pour buttermilk into a separate shallow bowl. This ingredient plays a vital role in helping the flour mixture stick to the onion rings while also adding moisture. Having the buttermilk ready and waiting will streamline the coating process, ensuring each onion ring is evenly dressed for perfect frying.

Step 4: Coat the Onion Rings
Dip each onion ring into the buttermilk, allowing any excess to drip off. Then, take the ring and coat it generously in the flour mixture, pressing lightly to ensure a good adhesion. Repeat this step for all onion rings, creating a solid base layer of crunch for your upcoming frying adventure.

Step 5: Double-Dip for Extra Crispiness
For an added crunch, dip each floured onion ring back into the buttermilk and then dredge it in panko breadcrumbs. Press the breadcrumbs firmly to ensure they adhere well. This double-dipping technique will guarantee that your Onion Ring Chips are extra crispy on the outside, resulting in a delightful crunch with every bite.

Step 6: Fry the Onion Rings
Carefully place the coated onion rings into the hot oil, frying them in batches so as not to overcrowd the pot. Fry for about 2-3 minutes, turning occasionally until they turn a beautiful golden brown. This vital step ensures even cooking and a deliciously crispy exterior, enhancing the taste of your homemade onion ring chips.

Step 7: Drain and Serve
Once golden brown, remove the fried onion rings from the oil using a slotted spoon. Transfer them to a plate lined with paper towels to absorb any excess oil. Serve your Onion Ring Chips warm with a variety of dipping sauces, such as ranch or zesty barbecue sauce, for a truly irresistible snack experience.

What to Serve with Crispy Onion Ring Chips?

Creating the perfect meal is an exciting adventure, and these crunchy delights can elevate your dining experience like no other.

  • Creamy Ranch Dip: This classic pairs perfectly, adding a cool contrast to the crispy onion rings. It’s a crowd-pleaser that never disappoints!
  • Zesty Barbecue Sauce: The sweet and smoky flavors complement the savory crunch of the onion rings. A delicious option for a fun twist!
  • Spicy Aioli: A touch of heat enhances the savory notes of your chips, making every bite adventure-filled and zesty.
  • Fresh Salad: A crisp side salad with tangy vinaigrette balances the rich crispy texture of the onion rings, offering a refreshing touch.
  • Coleslaw: The crunch of coleslaw echoes the onion chips, while its creaminess adds a delightful contrast, making for a harmonious bite.
  • Beer: Pairing with a cold, crisp lager or pale ale perfectly enhances the flavors, creating a memorable, relaxing experience.
  • Sliced Pickles: Their tangy crunch provides a pleasant contrast, cutting through the richness of the onion rings in the most delightful way.
  • Potato Wedges: For a hearty meal, serve alongside seasoned potato wedges, bringing a comforting, homey feel to your gathering.
  • Chocolate Brownies: End the meal on a sweet note with fudgy brownies, providing a satisfying conclusion to your savory adventure!

Make Ahead Options

These Onion Ring Chips are a fantastic choice for meal prep! You can slice and coat the onions with the flour mixture up to 24 hours in advance, ensuring they’re ready to fry when you are. Simply store the coated onion rings in an airtight container in the refrigerator to maintain freshness. For best results, avoid adding the panko breadcrumbs until you’re ready to cook to keep them crispy. When it’s time to serve, just dip the prepped onion rings in buttermilk, dredge in panko, and fry for about 2-3 minutes until golden brown. This make-ahead approach lets you enjoy quick and delicious snacks during your busy week!

How to Store and Freeze Onion Ring Chips

Fridge: Store leftover Onion Ring Chips in an airtight container for up to 3 days. This keeps them fresh but may slightly lessen their crispiness.

Freezer: For longer storage, freeze the chips in a single layer on a baking sheet before transferring them to a freezer bag, which can maintain quality for up to 2 months.

Reheating: To regain their crunch, reheat the onion rings in the oven at 375°F (190°C) for about 10-15 minutes, ensuring they’re crispy and ready to enjoy again.

Avoid Moisture: When storing, make sure the chips are completely cooled before sealing to prevent condensation, which can lead to sogginess.

Expert Tips for Onion Ring Chips

Oil Temperature Check: Ensure the oil reaches 350°F (175°C) before frying to achieve that crispy texture; too cool oil leads to soggy onion rings.

Double-Dip Technique: For the ultimate crunch, always double-dip the onion rings in buttermilk and then in panko breadcrumbs, ensuring even coverage for crispiness.

Batch Frying: Fry in small batches to maintain oil temperature; overcrowding can lead to uneven cooking and less crispy Onion Ring Chips.

Flour Alternatives: If gluten-free, substitute all-purpose flour with a gluten-free blend, maintaining structure without sacrificing taste.

Storage Tips: Store any leftover onion ring chips in an airtight container; reheat them in the oven to restore that crispy goodness.

Onion Ring Chips: Variations & Substitutions

Feel free to experiment with these Onion Ring Chips to create a version that’s truly your own, bursting with flavor and texture!

  • Baking Option: Bake the chips at 425°F (220°C) for 20-25 minutes. Flip halfway for perfect crispiness without the oil.

  • Spicy Kick: Add cayenne pepper to the flour mixture for an extra heat level! Feel the warmth ignite your taste buds as you indulge.

  • Sweet Onion Twist: Use sweet onions like Vidalia or even red onions for a milder, sweeter flavor that is delightful in every bite.

  • Herbed Variation: Mix in dried herbs like oregano or thyme for an aromatic twist. It will elevate the flavor profile to a new level.

  • Gluten-Free Swap: Replace all-purpose flour with gluten-free flour to cater to gluten-sensitive pals. Everyone deserves to enjoy crispy snacks!

  • Extra Crunch: Use crushed cornflakes instead of panko breadcrumbs for a delightful, unique crunch. It will surprise your palate!

  • Flavorful Sauces: Pair with unique dipping sauces like spicy aioli or zesty chipotle ranch for an ideal complement to your crispy treats.

  • Cheesy Touch: Grate some Parmesan cheese into the breadcrumb mix before coating for a cheesy, savory explosion.

For more tasty inspirations, check out this delightful Easter Dirt Cups recipe that adds a sweet twist to your get-togethers!

Onion Ring Chips Recipe FAQs

How do I choose the right onions for Onion Ring Chips?
Absolutely! For the best flavor, I recommend using large onions like Vidalia or sweet yellow onions. They add a delightful sweetness to the chips. Avoid onions that have dark spots or are overly soft, as they might impact the texture and taste of your chips.

What’s the best way to store leftover Onion Ring Chips?
Store your leftover Onion Ring Chips in an airtight container in the fridge for up to 3 days. Just a heads up, the chips may lose some of their crispiness, but they’ll still be tasty! To revive that crunch, simply reheat them in the oven.

Can I freeze Onion Ring Chips?
Yes, you can freeze Onion Ring Chips! After frying, let the chips cool completely, then spread them in a single layer on a baking sheet. Freeze them for about 1-2 hours until firm, and then transfer them to a freezer bag. They can stay fresh for up to 2 months. To reheat, bake them straight from the freezer at 375°F (190°C) for about 10-15 minutes.

What should I do if my Onion Ring Chips are soggy?
Very! If your chips come out soggy, it might be due to the oil temperature being too low while frying. Make sure the oil is at 350°F (175°C) before adding the onion rings. If it helps, you can also try frying in smaller batches to maintain that perfect temperature!

Can I make Onion Ring Chips gluten-free?
Certainly! You can easily make these Onion Ring Chips gluten-free by substituting all-purpose flour with a gluten-free baking blend. Ensure that your breadcrumbs are also gluten-free, and you’ll have a crispy, delicious snack suitable for everyone!

What dipping sauces pair well with Onion Ring Chips?
I often serve these delightful chips with ranch dressing, zesty barbecue sauce, or a spicy aioli for a flavor-packed experience! Feel free to get creative with your favorite dipping sauces to elevate your onion ring snacking experience.

Onion Ring Chips

Crispy Onion Ring Chips with a Healthy Twist for Snacking Fun

These crispy onion ring chips are a healthier snack option, perfect for any occasion!
Prep Time 10 minutes
Cook Time 15 minutes
Total Time 25 minutes
Servings: 4 servings
Course: Appetizers
Cuisine: American
Calories: 250

Ingredients
  

For the Coating
  • 2 large Onions Choose Vidalia for a sweeter flavor
  • 1 cup All-Purpose Flour Swap for gluten-free flour if needed
  • 1 teaspoon Garlic Powder Use fresh minced garlic for bolder flavor
  • 1 teaspoon Paprika Smoked paprika can elevate the flavor
  • 1 teaspoon Salt Sea salt can add a coarser texture
  • 1 teaspoon Black Pepper Freshly ground offers better depth
For the Wet Mixture
  • 1 cup Buttermilk Mix milk with vinegar as a lighter alternative
For the Crunchy Finish
  • 1 cup Panko Breadcrumbs Substitute with regular breadcrumbs if desired
  • 2 cups Vegetable Oil Can replace with canola or peanut oil

Equipment

  • Deep fryer
  • Large pot
  • Thermometer
  • medium bowl
  • slotted spoon
  • Baking Sheet

Method
 

Step-by-Step Instructions
  1. Begin by heating vegetable oil in a deep fryer or a large pot until it reaches 350°F (175°C). Prepare your frying area with paper towels nearby.
  2. In a medium bowl, combine all-purpose flour, garlic powder, paprika, salt, and freshly ground black pepper. Whisk until smooth and well-blended.
  3. Pour buttermilk into a separate shallow bowl to help the flour mixture stick to the onion rings.
  4. Dip each onion ring into the buttermilk, then coat generously in the flour mixture, pressing lightly to ensure good adhesion.
  5. For added crunch, dip each floured onion ring back into the buttermilk and then dredge in panko breadcrumbs, pressing firmly.
  6. Carefully place the coated onion rings into the hot oil, frying in batches for about 2-3 minutes until golden brown.
  7. Remove the fried onion rings from the oil using a slotted spoon and transfer to a plate lined with paper towels.

Nutrition

Serving: 1servingCalories: 250kcalCarbohydrates: 30gProtein: 3gFat: 14gSaturated Fat: 2gPolyunsaturated Fat: 1gMonounsaturated Fat: 2gCholesterol: 5mgSodium: 350mgPotassium: 200mgFiber: 1gSugar: 1gVitamin A: 500IUVitamin C: 5mgCalcium: 30mgIron: 1mg

Notes

Store leftovers in an airtight container; reheat in the oven to regain crispiness.

Tried this recipe?

Let us know how it was!

Decadent Bavarian Cream and Berries for Effortless Elegance

Have you ever found yourself in a last-minute dessert panic, hoping to impress but not sure where to begin? Enter the elegant Bavarian Cream with Fresh Berries! This classic French dessert transforms simple ingredients into a luxurious treat that not only looks stunning but tastes divine. The velvety texture of Bavarian cream combined with the tart burst of seasonal berries will charm your guests and elevate any gathering. One of the best parts? It’s a make-ahead delight, ensuring you won’t be stressed at the last moment—leaving you to bask in the joy of your culinary creation. Curious to see how straightforward it is to craft this indulgent dessert? Let’s dive in!

Why is Bavarian Cream a Must-Try?

Irresistible Appeal: The elegant presentation of Bavarian cream topped with vibrant, fresh berries makes it a true showstopper at any event.
Make-Ahead Magic: This dessert is designed for stress-free entertaining, allowing you to prepare it a day in advance, which means you can enjoy your time with guests without worry.
Versatile Flavor: Pair it with seasonal fruits or experiment with different extracts to give your Bavarian cream a twist, adapting to your palate and preferences.
Light Yet Decadent: The light, airy texture of the cream, complemented by the juicy tartness of berries, creates a perfect balance that feels indulgent yet refreshingly delightful.
Treat yourself and your loved ones to this classic French dessert that promises to impress—check out my Bacon Soup Comfort for more comforting recipes!

Bavarian Cream and Berries Ingredients

• Make your dessert shine with these essentials:

For the Bavarian Cream

  • Egg Yolks – Essential for richness and creating the custard base.
  • Sugar – Sweetens the mix, balancing out the creaminess.
  • Powdered Gelatin – Ensures the Bavarian cream holds its shape beautifully.
  • Milk – Forms the creamy foundation of your dessert.
  • Vanilla Extract – Adds a deeply satisfying flavor that enhances sweetness.
  • Heavy Cream – Whipped for that smooth, airy texture that elevates your treat.

For the Fresh Topping

  • Fresh Berries – A delightful burst of tartness that complements the creamy richness of the Bavarian cream; try a mix of strawberries, raspberries, or blueberries for visual appeal!

This delightful Bavarian Cream and Berries is perfect for any occasion, combining elegance with ease!

Step‑by‑Step Instructions for Bavarian Cream And Berries

Step 1: Prepare the Egg Mixture
In a mixing bowl, beat together the egg yolks and sugar using an electric mixer on medium speed until the mixture turns pale and fluffy, about 2-3 minutes. This step is crucial for ensuring a rich Bavarian cream base, setting the stage for an indulgent dessert.

Step 2: Dissolve Gelatin
In a small bowl, combine the powdered gelatin with 2 tablespoons of boiled water, stirring until fully dissolved. This typically takes about 5 minutes. Set the mixture aside as it cools slightly while you prepare the milk mixture, ensuring that it will blend seamlessly into the cream.

Step 3: Heat the Milk
In a saucepan over medium heat, warm the milk along with the vanilla extract until it reaches a gentle boil, stirring occasionally to prevent scorching, about 5-7 minutes. Keep an eye on it, as you want to see small bubbles forming around the edges of the pan, indicating it’s ready for the next step.

Step 4: Temper the Eggs
Gradually pour the hot milk mixture into the egg yolk mixture, whisking continuously to prevent the eggs from scrambling. This should take about 1-2 minutes, ensuring a smooth and creamy batter. The result should be a well-combined custard that will form the base of your Bavarian cream.

Step 5: Cook the Mixture
Return the combined mixture to the saucepan and heat on low for about 2 minutes, whisking constantly. You’ll want to see it thicken slightly without boiling, reaching a consistency where it coats the back of a spoon. This step is vital for developing the perfect texture for your Bavarian cream.

Step 6: Combine Gelatin
Once the mixture has thickened, remove it from heat and stir in the dissolved gelatin until completely integrated. This usually takes about 1 minute. At this stage, your Bavarian cream mixture should be smooth and glossy, ready for the next exhilarating step of incorporating the heavy cream.

Step 7: Cool and Incorporate Cream
Allow the mixture to cool for approximately 10 minutes at room temperature. Then, gently fold in the whipped heavy cream using a spatula, ensuring not to deflate the airiness of the cream. This folding technique is key to achieving the light, airy texture that accompanies the rich Bavarian cream.

Step 8: Chill
Pour the finished Bavarian cream mixture into greased molds or serving cups. Cover them with plastic wrap and refrigerate for at least 6 hours or overnight for the best results. As it chills, the mixture will set beautifully, creating a stunning final presentation when served.

Step 9: Serve
To serve your Bavarian cream and berries, unmold the chilled desserts by dipping the molds into hot water for a few seconds to loosen them. Carefully invert onto plates, and proudly garnish with a generous helping of fresh berries, showcasing the perfect balance of flavors and textures that this elegant dessert promises.

Make Ahead Options

These Bavarian Cream and Berries are perfect for meal prep enthusiasts who want to save time during busy occasions! You can prepare the Bavarian cream up to 24 hours in advance, ensuring the custard sets beautifully overnight. To do this, simply follow the recipe through the chilling step and refrigerate the filled molds. The fresh berries can be washed and stored in the refrigerator for up to 3 days but add them just before serving to maintain their vibrant color and freshness. When you’re ready to impress your guests, unmold the desserts by dipping the molds in hot water and garnish with the prepped berries for a stunning presentation—effortlessly elegant and just as delicious as when made fresh!

Bavarian Cream And Berries Variations

Feel free to explore these delightful twists on the classic Bavarian cream to make it uniquely yours! Each option elevates your dessert adventure in delicious and playful ways.

  • Fruity Fusion:
    Swap fresh berries for tropical delights like mango or passion fruit. The vibrant flavors will add a refreshing zest to your dessert.

  • Chocolatey Indulgence:
    Drizzle melted chocolate over the Bavarian cream before serving. This adds a rich, decadent layer that chocolate lovers will adore.

  • Citrus Burst:
    Replace vanilla extract with almond or citrus extracts. This subtle change can brighten and elevate the overall flavor profile.

  • Nutty Variation:
    Incorporate finely chopped nuts, like pistachios or almonds, into the whipped cream for a lovely crunch and nutty flavor to complement the creaminess.

  • Coconut Bliss:
    Substitute half the milk in the recipe with coconut milk for a tropical twist. This creates a delightful coconut cream that pairs beautifully with berries.

  • Herbal Hint:
    Infuse your heavy cream with fresh mint or basil before whipping. This provides an unexpected freshness that’s perfect for a summer gathering!

  • Sugar Alternatives:
    Use honey or maple syrup instead of regular sugar for a natural sweetness. This will alter the taste, making it more earthy and complex.

  • Spicy Kick:
    Add a pinch of cayenne or chili powder to your berry topping for an exciting kick. The heat contrasts wonderfully with the creamy coolness for adventurous palates.

Each variation opens up a world of flavors—perfect for those moments when you feel adventurous in the kitchen! For comforting recipes, check out my Chicken Noodle Soup or explore the comforting taste of Tortellini Soup Comfort.

What to Serve with Elegant Bavarian Cream and Fresh Berries

The perfect accompaniment can elevate your decadent dessert, creating a delightful dining experience for all.

  • Fresh Mint Leaves: A sprightly garnish that adds a refreshing touch, enhancing the berry flavors and completing the dish’s elegance.
  • Shortbread Cookies: Their buttery crunch provides a beautiful contrast to the creamy softness of the Bavarian cream, making each spoonful a delightful mix of textures.
  • Chocolate Sauce: Drizzle this over the top for an indulgent twist. The rich cocoa notes mingle beautifully with the cream’s sweetness, creating a heavenly blend.
  • Almond Biscotti: This nutty, crunchy option pairs wonderfully, offering a satisfying texture that complements the creaminess and adds a depth of flavor.
  • Sparkling Wine: A glass of bubbly elevates any dessert occasion. Its light effervescence cuts through the creaminess, making every bite refreshing.
  • Citrus Salad: A medley of citrus fruits adds a zesty brightness, balancing out the richness of the Bavarian cream and showcasing seasonal flavors.
  • Coffee or Espresso: A warm cup brings warmth and enhances the dessert’s sweetness with its deep, roasted flavor profile, making your dining experience cozy.
  • Sorbets: A scoop of raspberry or lemon sorbet delivers a fantastic contrast—its icy texture and tartness invigorate the palate after the creaminess.
  • Vanilla Ice Cream: For those who can’t resist more sweetness, a scoop adds a creamy layer to the dish, amplifying its overall indulgence.
  • Pistachio Crumble: This crunchy topping introduces a nutty flavor and textural contrast, creating an exciting balance against the soft Bavarian cream and fresh berries.

Expert Tips for Bavarian Cream And Berries

  • Whisk Continuously: Always whisk the egg mixture while adding hot milk to avoid scrambling, ensuring a smooth Bavarian cream base.
  • Gelatin Care: Make sure the gelatin is completely dissolved before adding it to the mixture to prevent any lumps in your dessert.
  • Cool Gradually: Let your mixture cool slightly before folding in whipped cream, which helps maintain its light, airy texture.
  • Proper Chilling: Refrigerate for a full 6 hours or overnight for the best consistency—this is key for a perfectly set Bavarian cream.
  • Select Ideal Berries: Choose seasonal fresh berries for topping; their tartness beautifully contrasts with the creamy sweetness of the Bavarian cream.

How to Store and Freeze Bavarian Cream and Berries

Fridge: Store leftover Bavarian cream in an airtight container in the refrigerator for up to 3 days. This helps maintain its delicate texture and taste while keeping the berries fresh.

Freezer: While it’s best enjoyed fresh, you can freeze Bavarian cream without berries in a tightly sealed container for up to 1 month. Thaw it overnight in the fridge before serving.

Berries: Keep any fresh berries used for the topping in a separate container in the fridge for up to 2 days, as they can lose their flavor and texture when mixed with the cream too early.

Reheating: If you’ve frozen the Bavarian cream, there’s no need to reheat it; simply thaw and enjoy as a chilled dessert accompanied by fresh berries.

Bavarian Cream and Berries Recipe FAQs

What type of berries work best for Bavarian cream?
Absolutely! Fresh strawberries, raspberries, and blueberries are perfect choices. Their tartness pairs beautifully with the sweet cream, and they add vibrant color. You can also explore other berries depending on the season, like blackberries or even sliced peaches for a twist.

How long can I store Bavarian cream in the fridge?
You can keep your Bavarian cream in an airtight container in the refrigerator for up to 3 days. Ensure that the cream is well-covered to maintain its texture and flavor. Just be mindful to add your berries right before serving for the best freshness!

Can I freeze Bavarian cream?
Yes, you can freeze Bavarian cream! However, I recommend freezing it without the berries. Pour the cooled cream into a tightly sealed container and it will be good for up to 1 month. To serve, thaw it overnight in your refrigerator. Once thawed, delightfully garnish with fresh berries for a fresh touch.

What should I do if my Bavarian cream doesn’t set?
If your Bavarian cream isn’t setting, it may be due to insufficient gelatin. Make sure you dissolved the gelatin completely before incorporating it. If necessary, you can reheat the mixture gently and stir in a little more dissolved gelatin—follow the original steps for best results. Always be sure to chill it for the full duration recommended to achieve that perfect texture!

Is Bavarian cream safe for those with egg allergies?
Unfortunately, Bavarian cream relies heavily on egg yolks for its rich custard base. If someone has an egg allergy, I recommend looking for egg-free desserts as alternatives. There are fantastic egg-free custard recipes available that can satisfy without compromising safety.

Bavarian Cream And Berries

Decadent Bavarian Cream and Berries for Effortless Elegance

Discover the elegance of Bavarian Cream and Berries, a stunning yet simple dessert that's sure to impress your guests.
Prep Time 20 minutes
Cook Time 15 minutes
Chilling Time 6 hours
Total Time 6 hours 35 minutes
Servings: 6 servings
Course: Dessert
Cuisine: French
Calories: 300

Ingredients
  

For the Bavarian Cream
  • 6 large Egg Yolks Essential for richness
  • 1/2 cup Sugar Sweetens the mix
  • 1 tablespoon Powdered Gelatin Ensures the cream holds its shape
  • 2 cups Milk Forms the creamy foundation
  • 1 teaspoon Vanilla Extract Adds flavor
  • 1 cup Heavy Cream Whipped for texture
For the Fresh Topping
  • 2 cups Fresh Berries Mix of strawberries, raspberries, and blueberries

Equipment

  • Mixing Bowl
  • Electric mixer
  • Saucepan
  • whisk
  • spatula
  • Measuring cups
  • Measuring spoons
  • serving cups or molds

Method
 

Step-by-Step Instructions
  1. In a mixing bowl, beat together the egg yolks and sugar until pale and fluffy, about 2-3 minutes.
  2. In a small bowl, dissolve powdered gelatin in 2 tablespoons of boiled water, stirring until fully dissolved.
  3. In a saucepan, warm milk and vanilla extract over medium heat until it reaches a gentle boil, about 5-7 minutes.
  4. Gradually pour the hot milk mixture into the egg yolk mixture, whisking continuously to prevent scrambling.
  5. Return the mixture to the saucepan and heat on low for about 2 minutes, whisking constantly until it thickens slightly.
  6. Remove from heat and stir in the dissolved gelatin until fully integrated.
  7. Allow the mixture to cool for approximately 10 minutes at room temperature, then gently fold in the whipped heavy cream.
  8. Pour the Bavarian cream mixture into greased molds and refrigerate for at least 6 hours or overnight.
  9. To serve, unmold the desserts and garnish with fresh berries.

Nutrition

Serving: 1servingCalories: 300kcalCarbohydrates: 30gProtein: 5gFat: 18gSaturated Fat: 10gCholesterol: 130mgSodium: 50mgPotassium: 200mgFiber: 1gSugar: 12gVitamin A: 500IUVitamin C: 5mgCalcium: 150mgIron: 1mg

Notes

This Bavarian Cream is perfect for any occasion, elegant and easy to prepare in advance. Serve chilled with fresh berries for a delightful dessert.

Tried this recipe?

Let us know how it was!

Delightful Raspberry Chia Pudding for a Wholesome Breakfast

As I rifled through my pantry in search of something vibrant to brighten up my breakfast, a bag of chia seeds caught my eye. Little did I know, those tiny powerhouses would soon transform into a luscious Raspberry Chia Pudding that not only looks delightful but is as wholesome as it gets! This easy-to-make vegan treat is perfect for those busy mornings or anyone looking to step away from fast food. Sweetened naturally with maple syrup, it’s not only packed with nutrients but customizable to suit your taste. Whether you’re planning for meal prep or simply craving a refreshing snack, this pudding checks all the boxes. Have you ever tried layering it with your favorite toppings? Get ready to whip up something sensational!

Why is Raspberry Chia Pudding a Must-Try?

Easy Preparation: This Raspberry Chia Pudding comes together effortlessly, making it perfect for anyone who wants nutritious food without the fuss.

Customizable Delight: Feel free to play with flavors! Top it off with sliced almonds or shredded coconut for a unique twist.

Nutrient-Packed: Chia seeds bring a wealth of omega-3 fatty acids and fiber, contributing to a wholesome, guilt-free indulgence.

Eye-Catching Presentation: Its vibrant color and creamy texture make it a feast for the eyes, ensuring it stands out whether you’re enjoying it solo or impressing guests.

Meal Prep Friendly: Ideal for breakfast or a snack on the go! Prepare it ahead of time and have a delicious treat on hand all week. You might also enjoy exploring more healthy breakfast ideas to further expand your options.

Raspberry Chia Pudding Ingredients

  • For the Pudding

  • Chia Seeds – These little gems are the backbone of your pudding, creating a satisfying thickness and loaded with omega-3 fatty acids.

  • Almond Milk – Acts as a creamy base for your pudding; you can easily swap it for coconut milk for a tropical twist.

  • Pure Maple Syrup – Adds a naturally sweet flavor; honey or agave can be delightful alternatives if you’re seeking a different sweetness.

  • Vanilla Extract – While optional, adding this brings an extra layer of flavor to elevate your Raspberry Chia Pudding’s taste.

  • Fresh or Frozen Raspberries – These beauties are your star ingredient, providing vibrant color and a fresh taste; opt for fresh if you’re aiming for the prettiest presentation.

  • For the Toppings

  • Sliced Almonds – These add a lovely crunch, transforming each bite of your pudding into a delightful texture.

  • Shredded Coconut – This brings a tropical twist and another layer of flavor when added to your creamy dessert.

  • More Raspberries – Top with additional berries for an extra burst of fruitiness and color.

  • Drizzle of Maple Syrup – A finishing touch that amplifies the sweetness and flavor of your pudding.

Step‑by‑Step Instructions for Raspberry Chia Pudding

Step 1: Mix the Ingredients
In a medium bowl, combine the chia seeds, almond milk, maple syrup, and vanilla extract. Whisk these ingredients together for about 2 minutes until fully integrated, ensuring there are no clumps. Set a timer for 5 minutes and stir once more to prevent the chia seeds from settling. You’ll want a smooth, evenly blended mixture to create the base for your Raspberry Chia Pudding.

Step 2: Prepare Raspberries
Using a fork, gently mash the fresh or thawed raspberries in a separate bowl until they’re slightly broken down but still have some texture. If you prefer a smoother pudding, you can blend the raspberries until pureed before folding them in. Fold the mashed raspberries into the chia mixture, incorporating the vibrant colors and flavors.

Step 3: Chill
Cover the bowl with plastic wrap or transfer the pudding mixture to an airtight container. Refrigerate it for at least 2 hours, or overnight for the best results, allowing it to thicken into a creamy, satisfying texture. You’ll know it’s ready when it’s set and has absorbed the liquid, transforming into a wonderfully indulgent Raspberry Chia Pudding.

Step 4: Serve
After chilling, give the pudding a gentle stir to redistribute the chia seeds. Divide the Raspberry Chia Pudding into individual serving cups or bowls. Feel free to have fun with your toppings—add sliced almonds, shredded coconut, more fresh raspberries, or a light drizzle of maple syrup for an extra touch of sweetness and texture.

Raspberry Chia Pudding Variations

Dive into the endless possibilities of customizing your Raspberry Chia Pudding and make it your own with these fun variations!

  • Coconut Cream:
    Swap almond milk for coconut milk to create a tropical paradise in a bowl. Top with shredded coconut for extra flair.

  • Chocolate Delight:
    Stir in a couple of tablespoons of cocoa powder for a rich chocolate version. Imagine indulging your sweet tooth while still staying healthy!

  • Protein Boost:
    Add a scoop of your favorite protein powder to enhance nutrition without altering the flavor. It’s a fantastic upgrade for those looking to fuel their day!

  • Citrus Zing:
    Incorporate a teaspoon of lemon or lime zest for a refreshing twist. The bright, zesty flavor complements the tanginess of the raspberries beautifully.

  • Nutty Crunch:
    Mix in a handful of crushed nuts like walnuts or hazelnuts for an added crunch. This will not only amp up the texture but also add healthy fats.

  • Berry Medley:
    Instead of just raspberries, use a mix of berries like blueberries or strawberries. A swirl of different fruits creates a stunning color palette and flavor profile.

  • Sweetness Overload:
    If you like it sweeter, drizzle extra maple syrup right before serving. Who doesn’t love a little extra indulgence?

Don’t hesitate to explore these variations, and enjoy layering your pudding with delicious toppings! For more inspiration, try experimenting with meal prep breakfast ideas to keep your mornings fresh and exciting.

Make Ahead Options

These delightful Raspberry Chia Pudding cups are perfect for meal prep enthusiasts! You can make the pudding mixture up to 24 hours in advance. Simply combine the chia seeds, almond milk, maple syrup, and vanilla extract, then fold in the raspberries before covering the bowl or transferring it to an airtight container. Refrigerate overnight to allow it to thicken beautifully. When you’re ready to serve, just give it a gentle stir, portion it into cups, and add your favorite toppings like sliced almonds or a drizzle of maple syrup for a sweet finishing touch. This way, you’ll have a nutritious breakfast or snack ready to enjoy with minimal effort!

Expert Tips for Raspberry Chia Pudding

  • Stir Frequently: Ensure to stir the mixture well right after combining to avoid clumping of chia seeds. Aim to give it a gentle mix at least twice in the first 10 minutes.

  • Adjust Consistency: If your Raspberry Chia Pudding thickens more than you like after chilling, simply add a splash of almond milk or your preferred liquid to reach your desired texture.

  • Storage Secrets: Store your pudding in an airtight container in the fridge for up to 5 days to maintain freshness. Can be frozen for up to a month; just remember to thaw it overnight in the refrigerator before serving!

  • Mind the Sweetness: Taste the pudding before serving; depending on the tartness of the raspberries, you may need to adjust the sweetness with a little extra maple syrup.

  • Experiment with Toppings: Get creative with your toppings! Sliced almonds and shredded coconut add texture, while fresh berries can enhance the flavor and aesthetics of your delightful Raspberry Chia Pudding.

What to Serve with Raspberry Chia Pudding

Elevate your breakfast or snack time experience with some perfect pairings that complement this vibrant, creamy delight.

  • Creamy Granola: Adds an irresistible crunch and richness, making each bite exciting and providing extra fiber to your meal.

  • Fresh Fruit Salad: A medley of seasonal fruits elevates the pudding with freshness and color, balancing sweetness with tartness beautifully.

  • Coconut Yogurt: This silky addition enhances the creamy texture while infusing tropical flavors that harmonize wonderfully with the raspberry notes.

  • Nut Butter Drizzle: A touch of almond or peanut butter not only amplifies creaminess but also adds protein, making your chia pudding more filling.

  • Herbal Tea: A warm cup of chamomile or peppermint tea soothes the senses and pairs nicely, bringing warmth to the chilled pudding.

  • Chia Seed Jam: Spread some homemade berry jam on whole grain toast for a delightful textural contrast, combining sweet and savory equally.

  • Cocoa Nibs: Sprinkle on top for a delightful crunch and a hint of chocolatey bitterness that complements the natural sweetness of the pudding.

  • Dark Chocolate Shavings: This provides a decadent topping that enhances the overall indulgence while balancing the tartness of the raspberries.

  • Almond Milk Smoothie: Blend your favorite fruits with almond milk into a refreshing smoothie, making it a great drink to sip alongside your chia pudding treat.

How to Store and Freeze Raspberry Chia Pudding

Fridge: Transfer your Raspberry Chia Pudding into an airtight container and store it in the refrigerator for up to 5 days. This keeps it fresh and ready for a quick breakfast or snack.

Freezer: For longer storage, you can freeze the pudding in a sealed, freezer-safe container for up to 1 month. Be sure to thaw overnight in the refrigerator before enjoying.

Reheating: If the pudding thickens too much after freezing, just stir in a splash of almond milk to regain the desired creamy consistency.

Avoid Clumping: While storing, ensure the pudding is sealed well to prevent any absorption of odors from the fridge and maintain its delightful texture.

Raspberry Chia Pudding Recipe FAQs

How do I choose ripe raspberries for my pudding?
Absolutely! Look for fresh raspberries that are plump, firm, and have a vibrant red color. Avoid any with dark spots or a dull appearance, as these often indicate overripeness. If you’re using frozen raspberries, make sure they are stored properly and are free of freezer burn.

How long can I store Raspberry Chia Pudding?
Your delicious Raspberry Chia Pudding will stay fresh in the refrigerator for up to 5 days when kept in an airtight container. Just make sure to give it a good stir before serving again, as it might thicken slightly over time!

Can I freeze Raspberry Chia Pudding?
Very! To freeze, pour your prepared pudding into a freezer-safe container, leaving some space at the top for expansion. It can be stored for up to 1 month. When ready to enjoy, simply thaw it overnight in the fridge and stir in a splash of almond milk if it’s too thick.

What should I do if my pudding is too thick?
No worries! If your pudding thickens more than you like after chilling, just add a splash of almond milk or your preferred liquid and stir until you reach your desired creamy consistency. This way, you can enjoy it just how you like it!

Are there any dietary considerations with this recipe?
Absolutely! This Raspberry Chia Pudding is vegan-friendly, especially when using non-dairy milk. However, if you or someone you’re serving has allergies, be mindful of the ingredients. Chia seeds are generally safe for most people, but if you have nut allergies, be sure to substitute almond milk with an appropriate alternative like oat milk.

What toppings work best for this pudding?
Get creative! I often recommend topping your Raspberry Chia Pudding with sliced almonds, shredded coconut, or even more fresh raspberries for added texture and burst of flavor. You could also try a drizzle of honey or extra maple syrup if you love it a bit sweeter. Enjoy experimenting!

Raspberry Chia Pudding

Delightful Raspberry Chia Pudding for a Wholesome Breakfast

This Raspberry Chia Pudding is a vibrant and nutritious breakfast option, easy to prepare and customizable for anyone seeking a wholesome treat.
Prep Time 10 minutes
Chill Time 2 hours
Total Time 2 hours 10 minutes
Servings: 2 cups
Course: Breakfast
Cuisine: Vegan
Calories: 250

Ingredients
  

For the Pudding
  • 1/4 cup Chia Seeds These little gems are the backbone of your pudding.
  • 1 cup Almond Milk Acts as a creamy base; can swap for coconut milk.
  • 2 tablespoons Pure Maple Syrup Adds natural sweetness; can use honey or agave.
  • 1 teaspoon Vanilla Extract Optional but enhances flavor.
  • 1 cup Fresh or Frozen Raspberries Star ingredient providing vibrant color.
For the Toppings
  • 2 tablespoons Sliced Almonds Adds crunch to the pudding.
  • 2 tablespoons Shredded Coconut Brings a tropical twist.
  • 1/2 cup More Raspberries For an extra burst of fruitiness.
  • 1 tablespoon Drizzle of Maple Syrup Amplifies sweetness.

Equipment

  • Mixing Bowl
  • whisk
  • air-tight container

Method
 

Step-by-Step Instructions
  1. In a medium bowl, combine the chia seeds, almond milk, maple syrup, and vanilla extract. Whisk these ingredients together for about 2 minutes until fully integrated.
  2. Set a timer for 5 minutes and stir once more to prevent the chia seeds from settling.
  3. Using a fork, gently mash the fresh or thawed raspberries in a separate bowl. Fold the mashed raspberries into the chia mixture.
  4. Cover the bowl with plastic wrap or transfer to an airtight container. Refrigerate for at least 2 hours, or overnight for best results.
  5. After chilling, give the pudding a gentle stir and divide into individual serving cups. Top with sliced almonds, shredded coconut, raspberries, or maple syrup.

Nutrition

Serving: 1cupCalories: 250kcalCarbohydrates: 35gProtein: 6gFat: 10gSaturated Fat: 1gPolyunsaturated Fat: 0.5gMonounsaturated Fat: 5gSodium: 100mgPotassium: 300mgFiber: 10gSugar: 8gVitamin C: 15mgCalcium: 10mgIron: 15mg

Notes

Store in an airtight container for up to 5 days in the fridge. Can be frozen for up to 1 month; thaw overnight in the refrigerator before serving.

Tried this recipe?

Let us know how it was!

Lemon Cake Magic: Moist and Zesty for Every Celebration

As I stepped into the kitchen with a fresh bag of lemons in hand, the scent of citrus instantly lifted my mood. This is my cue for creating the Irresistible Delicious Lemon Cake, a simple yet profoundly satisfying dessert that never fails to impress. Bringing bright flavors and a sunny attitude to any table, this cake is ideal for everything from festive gatherings to casual afternoon tea. With quick prep and minimal fuss, it’s perfect for both beginner bakers and seasoned home chefs looking to share a slice of joy. Plus, its delightful moisture and fluffy texture create a memorable experience with every bite. Are you ready to squeeze some zest into your baking routine? Let’s dive into this lemony adventure!

Why is Lemon Cake so Popular?

Irresistible flavor: The sweet and tangy combination of lemon zest and juice creates a refreshing dessert that’s loved by all.
Perfectly moist: This cake boasts a fluffy, welcoming texture that leaves you wanting more with every bite.
Versatile delight: Serve it at a birthday party, brunch, or as a cozy afternoon treat—it fits every occasion! You can also explore other delightful options like Strawberry Cheesecake Dump for variety.
Quick and easy: With minimal ingredients and simple instructions, this recipe guarantees a stress-free baking experience.
Celebration-ready: Its bright color and delicious aroma make it an instant crowd-pleaser, sure to brighten your next gathering!

Lemon Cake Ingredients

• Here’s everything you’ll need for that irresistible lemon cake!

For the Cake

  • All-Purpose Flour – provides structure; make sure to evenly mix with dry ingredients.
  • Granulated Sugar – adds sweetness; use fine sugar for better creaming with butter.
  • Baking Powder – acts as a leavening agent; always double-check freshness for optimal rising.
  • Salt – enhances flavor; it balances the sweetness and elevates the overall taste.
  • Unsalted Butter – brings moisture and richness; ensure it’s at room temperature for easy creaming.
  • Eggs – binds and adds moisture; bring them to room temperature for better incorporation.
  • Lemon Zest – infuses flavor; fresh zest packs a more potent punch than dried or bottled.
  • Lemon Juice – adds acidity and flavor; freshly squeezed juice provides the best taste.
  • Vanilla Extract – enhances flavor; pure extract is suggested over imitation for a deeper taste.

For Optional Frosting

  • Powdered Sugar – sweetens and thickens; ideal for achieving a smooth frosting consistency.
  • Cream Cheese – provides tanginess; pairs beautifully with lemon for a creamy finish.
  • Lemon Juice – brightens the frosting; for a zesty kick, add more to taste.

Now that you have all the essential ingredients for a delicious lemon cake, let’s get baking and fill your kitchen with that irresistible aroma!

Step‑by‑Step Instructions for Irresistible Delicious Lemon Cake

Step 1: Preheat and Prepare
Begin your lemon cake journey by preheating your oven to 350°F (175°C). While it’s heating, grab two round cake pans and generously grease them with unsalted butter. Then, lightly dust the pans with flour, ensuring even coverage to prevent the cake from sticking. Set these aside and get ready for the delightful mixing ahead!

Step 2: Whisk Dry Ingredients
In a mixing bowl, combine 2 cups of all-purpose flour, 1 tablespoon of baking powder, and ½ teaspoon of salt. Use a whisk to mix these dry ingredients thoroughly, ensuring they are evenly distributed. This step is essential for a uniform rise during baking, so take a moment to enjoy the light, airy texture of your mixture before moving on.

Step 3: Cream Butter and Sugar
In another large bowl, use an electric mixer to cream together 1 cup of unsalted butter and 1 ¾ cups of granulated sugar. Beat them on medium speed for about 3-4 minutes until the mixture is light, fluffy, and has taken on a pale color. The goal here is to incorporate air, which contributes to the cake’s beautiful, moist texture.

Step 4: Add Eggs and Flavor
To the butter and sugar mixture, add 3 large eggs one at a time, mixing well after each addition. Then gently stir in 2 tablespoons of lemon zest, ⅓ cup of freshly squeezed lemon juice, and 1 teaspoon of vanilla extract. The combination of these vibrant flavors enhances the lemon cake, so take a moment to appreciate the fresh aroma as you mix everything until just combined.

Step 5: Combine Wet and Dry Ingredients
Gradually incorporate the dry mixture into the wet ingredients, mixing on low speed until just combined. Be careful not to overmix, as this could result in a denser cake. The batter should be smooth and slightly thick, with all the flour fully moistened. This harmonious blend is what makes your lemon cake irresistibly fluffy.

Step 6: Bake Your Cake
Divide the batter evenly between the prepared cake pans. Use a spatula to smooth the tops and ensure even baking. Place the pans in the preheated oven and bake for 25 to 30 minutes. Your lemon cake is ready when the edges are lightly golden, and a toothpick inserted in the center comes out clean.

Step 7: Cool Before Serving
Once baked, remove the cake layers from the oven and allow them to cool in the pans for about 10 minutes. Then, gently transfer them to a wire rack to cool completely. Allowing your lemon cake to cool is essential to prevent melting any frosting you may choose to add later, so be patient for that delectable moment!

Expert Tips for Lemon Cake

  • Room Temperature Ingredients: Ensure eggs and butter are at room temperature for better emulsification; this helps create a lighter cake texture.
  • Don’t Overmix: Avoid overmixing the batter; doing so can lead to a dense lemon cake instead of a fluffy masterpiece.
  • Proper Cooling: Allow your cakes to cool completely before frosting; this prevents the icing from melting and sliding off your beautifully baked creation.
  • Fresh Ingredients: Always use fresh lemon juice and zest for the best flavor—dried or bottled juice lacks the vibrant tang that makes your lemon cake irresistible.
  • Test for Doneness: Insert a toothpick into the center; it should come out clean or with a few moist crumbs, indicating your lemon cake is perfectly baked!

Lemon Cake Variations & Substitutions

Feel free to explore these exciting twists on your lemon cake, allowing each bite to surprise you pleasantly!

  • Citrus Twist: Swap lemon juice with lime or orange juice for a refreshing alternative. Each citrus brings its own unique flair!

  • Berry Burst: Add fresh blueberries or raspberries to the batter for delightful bursts of flavor. They’re a beautiful contrast to the lemony goodness, creating a colorful treat.

  • Poppy Seed Pleasure: Mix in a tablespoon of poppy seeds for a delightful crunch. This addition not only enhances texture but also evokes the traditional lemon poppy seed cake experience.

  • Dairy-Free Option: Substitute unsalted butter with coconut oil or vegan butter. This creates a lovely plant-based lemon cake that everyone will enjoy without sacrificing moisture.

  • Flavor Boost: Enhance your cake with a teaspoon of almond extract in addition to vanilla. The almond undertones pair wonderfully with the lemon and create a harmonious flavor profile.

  • Frosting Variations: Consider using lemon buttercream, cream cheese frosting, or a simple lemon glaze for a refreshing finish. Each style adds a unique touch to your lemon delight.

  • Nutty Addition: Incorporate finely chopped nuts such as almonds or walnuts for added texture and flavor. They offer a pleasant crunch against the softness of the cake.

  • Spicy Zing: For a hint of warmth, add a pinch of ground ginger or cinnamon to the batter. This unexpected flavor twist elevates your lemon cake to new heights!

For more delightful inspirations, check out the luscious Strawberry Cheesecake Dump or try your hand at the refreshing Honeybun Carrot Cake with Cheesecake Filling. Enjoy unleashing your creativity in the kitchen!

What to Serve with Irresistible Delicious Lemon Cake

Looking to elevate your lemon cake experience? Here are some delightful pairings that will enhance your dessert’s zesty charm and make every bite unforgettable.

  • Whipped Cream: Light and airy, it balances the cake’s tang with sweetness, perfect for a dollop on each slice.

  • Fresh Berries: A medley of strawberries and blueberries adds vibrant color and a juicy contrast to the cake’s texture.

  • Lemon Sorbet: This cool, refreshing treat keeps the citrus flavor alive while offering a delightful frozen snack to accompany your cake.

  • Tea or Herbal Infusions: A warm cup of chamomile or green tea adds a soothing element that complements the lemony zest wonderfully.

  • Almond Biscotti: Crunchy and nutty biscottis provide a lovely textural contrast, making your dessert experience even more satisfying.

  • Chocolate Ganache: Drizzle rich, dark chocolate over slices for a decadent twist that beautifully contrasts lemon’s brightness.

Indulging in these pairings makes your lemon cake moment feel like an exquisite celebration that warms the heart. Enjoy every last crumb!

Make Ahead Options

These irresistible lemon cakes are perfect for meal prep enthusiasts! You can prepare the cake batter up to 24 hours in advance by mixing all the wet and dry ingredients together, storing the batter in an airtight container in the refrigerator. When you’re ready to bake, simply bring the batter to room temperature before dividing it into prepared pans and following the baking instructions. Additionally, you can bake the cakes ahead of time and let them cool completely before wrapping them tightly in plastic wrap; they will stay fresh in the refrigerator for up to 3 days. Just frost the cakes before serving to ensure they remain just as delicious and moist!

How to Store and Freeze Lemon Cake

Room Temperature: Wrap leftover lemon cake in plastic wrap and store it at room temperature for up to 3 days. This keeps it moist and ready for enjoyment!

Fridge: If you prefer, you can refrigerate the cake for up to a week. Make sure to use an airtight container to prevent it from absorbing any fridge odors.

Freezer: For longer storage, freeze well-wrapped slices of lemon cake for up to 3 months. Thaw overnight in the fridge before serving to enjoy its refreshing flavor.

Reheating: To bring back the delightful moisture, reheat slices in the microwave for about 10-15 seconds or until warm. Enjoy your lemon cake at its best!

Irresistible Delicious Lemon Cake Recipe FAQs

What is the best way to choose lemons for my lemon cake?
Absolutely! Look for lemons that are bright yellow with a fine, smooth skin. They should feel heavy for their size, which indicates juiciness. Avoid any that have dark spots or are overly hard, as these may not be ripe enough.

How should I store leftover lemon cake?
You can wrap leftover lemon cake in plastic wrap and keep it at room temperature for up to 3 days. If you want to extend its life, refrigerate it in an airtight container for up to a week. Just be sure to let it come to room temperature before enjoying it for the best taste and texture!

Can I freeze lemon cake? How should I do it?
Yes! To freeze, wrap individual slices- or the entire cake- tightly in plastic wrap followed by aluminum foil to prevent freezer burn. It can be frozen for up to 3 months. When you’re ready to enjoy, simply thaw the cake overnight in the fridge and let it sit at room temperature for a little while before serving.

What if my lemon cake didn’t rise properly?
Very! If your lemon cake didn’t rise well, it could be due to a few reasons. First, make sure your baking powder is fresh; it’s best to check its expiration date. Additionally, ensure you did not overmix the batter after adding the flour, as this can lead to a denser texture. Always give your cake time to cool in the pan for the best results too!

Are there any dietary considerations I should be aware of with this lemon cake?
Indeed! While this lemon cake is a delightful treat, it does contain butter and eggs, which could be a concern for those with dairy or egg allergies. For egg-free options, you can substitute applesauce or a flaxseed mixture. Make sure to check your frosting as well, especially if you choose any pre-made products that might have allergens.

Lemon Cake

Lemon Cake Magic: Moist and Zesty for Every Celebration

This Lemon Cake is a moist and zesty dessert that brings joy to any celebration.
Prep Time 15 minutes
Cook Time 30 minutes
Cooling Time 10 minutes
Total Time 55 minutes
Servings: 8 slices
Course: Dessert
Cuisine: American
Calories: 450

Ingredients
  

For the Cake
  • 2 cups All-Purpose Flour provides structure; make sure to evenly mix with dry ingredients.
  • 1.75 cups Granulated Sugar adds sweetness; use fine sugar for better creaming with butter.
  • 1 tablespoon Baking Powder acts as a leavening agent; always double-check freshness for optimal rising.
  • 0.5 teaspoon Salt enhances flavor; it balances the sweetness and elevates the overall taste.
  • 1 cup Unsalted Butter brings moisture and richness; ensure it’s at room temperature for easy creaming.
  • 3 large Eggs binds and adds moisture; bring them to room temperature for better incorporation.
  • 2 tablespoons Lemon Zest infuses flavor; fresh zest packs a more potent punch than dried or bottled.
  • 0.33 cup Lemon Juice adds acidity and flavor; freshly squeezed juice provides the best taste.
  • 1 teaspoon Vanilla Extract enhances flavor; pure extract is suggested over imitation for a deeper taste.
For Optional Frosting
  • 2 cups Powdered Sugar sweetens and thickens; ideal for achieving a smooth frosting consistency.
  • 8 ounces Cream Cheese provides tanginess; pairs beautifully with lemon for a creamy finish.
  • 1 tablespoon Lemon Juice brightens the frosting; for a zesty kick, add more to taste.

Equipment

  • Oven
  • Mixing bowls
  • Electric mixer
  • spatula
  • Cake pans
  • Wire rack

Method
 

Preparation Steps
  1. Preheat your oven to 350°F (175°C). Grease two round cake pans with unsalted butter and dust with flour.
  2. In a mixing bowl, whisk together the flour, baking powder, and salt.
  3. In another bowl, cream together unsalted butter and granulated sugar for 3-4 minutes until light and fluffy.
  4. Add eggs one at a time, mixing well after each. Stir in lemon zest, lemon juice, and vanilla extract.
  5. Gradually combine dry ingredients with the wet mixture until just blended.
  6. Divide the batter evenly between the prepared pans and bake for 25-30 minutes.
  7. Allow the cakes to cool in pans for 10 minutes before transferring to a wire rack to cool completely.

Nutrition

Serving: 1sliceCalories: 450kcalCarbohydrates: 65gProtein: 5gFat: 20gSaturated Fat: 12gPolyunsaturated Fat: 1gMonounsaturated Fat: 7gCholesterol: 100mgSodium: 250mgPotassium: 150mgFiber: 1gSugar: 35gVitamin A: 350IUVitamin C: 5mgCalcium: 30mgIron: 1mg

Notes

Ensure room temperature ingredients for better emulsification and avoid overmixing for a lighter cake texture.

Tried this recipe?

Let us know how it was!

Crispy Bang Bang Salmon Bites You’ll Crave Every Night

Just the other day, I found myself craving something light yet indulgent, a dish that would satisfy my desire for homemade comfort food while still being quick to whip up. Enter the Bang Bang Salmon — these crispy salmon bites coated in an irresistible sweet and spicy glaze are a game changer! This air fryer recipe is not only simple to make in under 30 minutes but also manages to bring that delightful crunch we all adore in crispy bites. Perfect for busy weeknights or when you’re entertaining friends, these salmon morsels pack a flavorful punch that will have everyone asking for seconds. Are you ready to dive into this flavorful journey and make your own crispy Bang Bang Salmon bites?

Why is Bang Bang Salmon a must-try?

Crispy Perfection: Each bite of Bang Bang Salmon boasts an exhilarating crunch, thanks to the air fryer technique that brings out the best texture without all the oil.

Flavor Explosion: The sweet and spicy glaze creates a stir of flavors, making it a dish you’ll crave again and again.

Quick & Easy: Ready in under 30 minutes, this recipe is perfect for busy evenings when you want something delicious yet easy to prepare.

Versatile Delight: Whether paired with a refreshing Thai cucumber salad or simply served with extra sauce for dipping, this dish complements a variety of sides perfectly.

Crowd-Pleaser: Impress your guests and family alike with these irresistible salmon bites. Looking for more salmon inspiration? Check out my recipes for Baked Salmon Honey and Honey Garlic Salmon for more flavorful options!

Bang Bang Salmon Ingredients

For the Salmon Bites
Salmon Fillets – Use fresh, skinless fillets cut into bite-sized pieces for even cooking.
Olive Oil – Helps in browning and crisping the salmon; any neutral oil can be substituted.
Garlic Powder – Adds savory depth; fresh garlic can work well as an alternative.
Onion Powder – Enhances the overall flavor profile beautifully.
Smoked Paprika – Contributes a smoky nuance; regular paprika can be a suitable substitute.
Salt – Essential for amplifying flavor; sea salt or kosher salt is recommended.
Black Pepper – Provides mild heat; feel free to swap with white pepper if preferred.
Cayenne Pepper (optional) – Adds an extra kick; adjust according to your spice preference.

For the Bang Bang Sauce
Mayonnaise – The creamy base of the sauce; it brings everything together.
Thai Sweet Chili Sauce – Defines the sweet and spicy character of the Bang Bang Salmon.
Sriracha Sauce – Provides that tangy heat; you can adjust it to suit your taste.
Honey – Balances the spice and preserves sweetness; maple syrup makes a great substitute.
Lime Juice – Adds a zesty acidity that brightens the flavor; lemon juice can also be used.

Step‑by‑Step Instructions for Bang Bang Salmon

Step 1: Prepare the Bang Bang Sauce
In a small bowl, whisk together mayonnaise, Thai sweet chili sauce, sriracha sauce, honey, and lime juice until smooth. This will create your delightful Bang Bang sauce. Set the sauce aside to allow the flavors to meld while you prepare the salmon, and make sure it has a creamy consistency for the perfect glaze.

Step 2: Season the Salmon Bites
In a large bowl, combine your bite-sized pieces of fresh salmon with olive oil, garlic powder, onion powder, smoked paprika, salt, black pepper, and cayenne pepper if using. Toss the salmon until each piece is well-coated, ensuring even flavor distribution. You’ll want the spices to cling to the salmon for that scrumptious flavor in your Bang Bang Salmon bites.

Step 3: Preheat the Air Fryer
Set your air fryer to preheat at 400°F (200°C). Preheating will ensure that your salmon bites begin cooking immediately, allowing them to develop a crispy exterior while remaining juicy inside. This step is crucial for achieving that delightful crunch that makes Bang Bang Salmon so irresistible.

Step 4: Air Fry the Salmon Bites
Carefully place the seasoned salmon pieces in a single layer in the preheated air fryer basket. Air fry for 8-10 minutes, shaking the basket halfway through cooking. Look for the salmon to be golden brown and crispy on the outside, while still tender and flaky on the inside. This is where all the magic of Bang Bang Salmon happens!

Step 5: Serve and Enjoy
Once air frying is complete, transfer the crispy Bang Bang Salmon bites to a serving platter. Drizzle them generously with the prepared Bang Bang sauce, ensuring every piece is coated in that sweet and spicy glaze. Serve any remaining sauce on the side for dipping, and watch them disappear as friends and family savor each delicious bite!

Bang Bang Salmon Variations

Feel free to get creative with this delightful recipe and craft your own version of Bang Bang Salmon!

  • Different Fish: Swap salmon for cod or tilapia to explore unique flavors while keeping it light and healthy.

  • Gluten-Free: Ensure your sauces are gluten-free, swapping any problematic ingredients to keep this dish safe for celiacs.

  • Spicy Twist: Add more cayenne pepper to the marinade for those who enjoy an extra kick, making every bite an adventure in heat.

  • Crispy Coating: For an extra crunch, coat the salmon bites in panko breadcrumbs before air-frying; they’ll be irresistibly crispy.

  • Zest Boost: Incorporate lemon or orange zest into the Bang Bang sauce for an aromatic citrus punch that elevates the flavors.

  • Herb Infusion: Mix fresh cilantro or green onions into the Bang Bang sauce to brighten it up, adding a fresh herbal note.

  • Baked Option: For those without an air fryer, bake the coated salmon bites at 425°F (220°C) for 12-15 minutes, flipping halfway for even crispness.

  • Savory Variation: Try adding a tablespoon of soy sauce to the marinade for a savory depth that pairs perfectly with the sweet glaze.

By experimenting with these variations, you can create a personalized version of bang bang salmon that’s uniquely yours! Pair it with a refreshing side, such as an avocado salad, and you’re ready to impress.

Make Ahead Options

Preparing your Bang Bang Salmon ahead of time is a fantastic way to save time during busy weeknights! You can marinate the salmon pieces in the spice mixture and keep them covered in the refrigerator for up to 24 hours before cooking. This not only enhances the flavor but also allows the spices to fully penetrate the salmon. Additionally, you can whip up the Bang Bang sauce and refrigerate it for up to 3 days; just give it a good stir before serving to ensure a smooth consistency. When you’re ready to enjoy your meal, simply air fry the marinated salmon bites straight from the fridge and drizzle with the prepared sauce for that exceptional sweet and spicy finish, making dinner a breeze!

Storage Tips for Bang Bang Salmon

Fridge: Store leftover Bang Bang Salmon in an airtight container in the refrigerator for up to 3 days. Make sure they are completely cool before sealing to maintain freshness.

Freezer: For longer storage, freeze cooked salmon bites in a single layer on a baking sheet, then transfer to an airtight container or freezer bag for up to 2 months.

Reheating: Reheat frozen salmon bites directly in the air fryer at 350°F (175°C) for about 5-7 minutes until crispy and warmed through. Enjoy as if they were freshly made!

Thawing: If frozen, thaw the Bang Bang Salmon in the fridge overnight before reheating for best results, ensuring even warming and texture.

What to Serve with Bang Bang Salmon

Complement your crispy bites with vibrant and delightful sides for a scrumptious meal experience.

  • Creamy Avocado Salad: A cool, creamy avocado salad adds a refreshing contrast to the spicy salmon, balancing flavors beautifully.

  • Thai Cucumber Salad: This light, tangy salad offers crunch and brightness, elevating your meal with its zesty flavor profile.

  • Steamed Jasmine Rice: Fluffy jasmine rice soaks up the flavorful sauce, providing a comforting base that enhances the dish’s appeal.

  • Garlic Green Beans: Sautéed green beans with garlic deliver a delightful crunch and a touch of fresh earthiness to your plate.

  • Coleslaw: A tangy, crunchy coleslaw brings a satisfying texture while cutting through the richness of the salmon bites.

  • Mango Salsa: Sweet and spicy mango salsa introduces a burst of tropical flavor, complementing the savory notes of the Bang Bang sauce.

  • Lemonade or Iced Tea: A refreshing glass of lemonade or iced tea pairs wonderfully, quenching your thirst with a hint of sweetness.

Each of these pairings will beautifully enhance your dining experience, making meal time a joyous occasion!

Expert Tips for Bang Bang Salmon

Uniform Pieces: Ensure your salmon is cut into uniform bite-sized pieces. This promotes even cooking in the air fryer, preventing dryness.

Preheat Perfection: Always preheat the air fryer as directed. This step is essential for achieving that coveted crispy exterior on your Bang Bang Salmon.

Single Layer Magic: Air fry in a single layer, avoiding overcrowding. This allows hot air to circulate freely, resulting in perfectly crispy salmon bites.

Flavor Adjustments: Don’t hesitate to modify the spiciness of the sauce by adjusting the sriracha. Tailor the heat to suit your family’s taste preferences!

Storing Leftovers: Keep any extras in an airtight container in the fridge for up to 3 days. Reheat them in the air fryer for a quick and crispy snack!

Bang Bang Salmon Recipe FAQs

What kind of salmon should I use for Bang Bang Salmon?
I recommend using fresh, skinless salmon fillets to ensure the best texture and flavor. Look for fillets that are bright pink and free of dark spots for optimal ripeness. Cut them into bite-sized pieces to ensure even cooking in the air fryer.

How should I store leftover Bang Bang Salmon?
Store leftovers in an airtight container in the refrigerator for up to 3 days. Make sure the salmon is completely cooled before sealing to maintain freshness. To reheat, place them in the air fryer for a few minutes to restore their crispy texture.

Can I freeze Bang Bang Salmon bites?
Absolutely! For longer storage, freeze cooked salmon bites in a single layer on a baking sheet. Once frozen solid, transfer them to an airtight container or freezer bag, where they will keep for up to 2 months. When ready to enjoy, thaw them in the fridge overnight and reheat directly in the air fryer at 350°F (175°C) for about 5-7 minutes until they’re crispy again.

What do I do if my salmon bites aren’t crispy?
If your Bang Bang Salmon bites are not achieving that desired crispiness, you might need to ensure they’re spaced out in a single layer in the air fryer. Overcrowding can prevent them from crisping up properly. Also, check that your air fryer is preheated correctly; consistent high heat is key to getting that golden, crunchy exterior.

Can I adjust the spiciness of the Bang Bang sauce?
Very much so! If you prefer less heat, simply reduce the amount of sriracha in the sauce. Conversely, if you like it spicier, feel free to add more cayenne pepper during the seasoning of the salmon or increase the sriracha. Customizing flavors is part of the fun!

Is Bang Bang Salmon a healthy option?
Definitely! Bang Bang Salmon features nutritious salmon that is rich in omega-3 fatty acids, making it a heart-healthy choice. You can also tweak the sauce by using less mayonnaise or substituting it with a yogurt-based option to reduce calories while still enjoying that delectable creamy texture.

Bang Bang Salmon

Crispy Bang Bang Salmon Bites You'll Crave Every Night

Try these delicious crispy Bang Bang Salmon bites that pack a flavorful punch!
Prep Time 10 minutes
Cook Time 15 minutes
Total Time 25 minutes
Servings: 4 bites
Course: Appetizers
Cuisine: Thai
Calories: 300

Ingredients
  

For the Salmon Bites
  • 1 pound Salmon Fillets Skinless, cut into bite-sized pieces
  • 1 tablespoon Olive Oil Can use neutral oil
  • 1 teaspoon Garlic Powder Can use fresh garlic
  • 1 teaspoon Onion Powder
  • 1 teaspoon Smoked Paprika Regular paprika can be substituted
  • 1 teaspoon Salt Sea salt or kosher salt
  • 1/2 teaspoon Black Pepper Can swap with white pepper
  • 1/4 teaspoon Cayenne Pepper Optional
For the Bang Bang Sauce
  • 1/2 cup Mayonnaise
  • 1/4 cup Thai Sweet Chili Sauce
  • 1 tablespoon Sriracha Sauce
  • 1 tablespoon Honey Can use maple syrup
  • 1 tablespoon Lime Juice Can substitute with lemon juice

Equipment

  • Air Fryer

Method
 

Step‑by‑Step Instructions for Bang Bang Salmon
  1. Prepare the Bang Bang Sauce: In a bowl, whisk together mayonnaise, Thai sweet chili sauce, sriracha sauce, honey, and lime juice until smooth. Set aside.
  2. Season the Salmon Bites: In a bowl, combine salmon with olive oil, garlic powder, onion powder, smoked paprika, salt, black pepper, and cayenne pepper. Toss until well-coated.
  3. Preheat the Air Fryer: Set to 400°F (200°C) to ensure even cooking and crispiness.
  4. Air Fry the Salmon Bites: Place the salmon pieces in the air fryer basket in a single layer. Air fry for 8-10 minutes, shaking halfway through. Look for golden brown color.
  5. Serve and Enjoy: Transfer salmon bites to a platter, drizzle with Bang Bang sauce, and serve with extra sauce for dipping.

Nutrition

Serving: 2bitesCalories: 300kcalCarbohydrates: 10gProtein: 25gFat: 20gSaturated Fat: 3gPolyunsaturated Fat: 2gMonounsaturated Fat: 10gCholesterol: 60mgSodium: 600mgPotassium: 500mgSugar: 2gVitamin A: 500IUVitamin C: 5mgCalcium: 20mgIron: 1mg

Notes

Ensure uniform piece size for even cooking. Store leftovers in an airtight container.

Tried this recipe?

Let us know how it was!

Creamy Cottage Cheese Tomato Basil Sauce for a Healthy Delight

Stirring a pot of sauce on the stove instantly transports me to sun-drenched Italian villages, where fresh ingredients take the spotlight. Today, I’m excited to share my take on a creamy delight that redefines health and comfort: Creamy Cottage Cheese Tomato Basil Sauce. This luscious sauce combines sweet tomatoes, fragrant basil, and garlic, creating a restorative dish that’s perfect for easy weeknight meals. With its quick prep time and protein-packed goodness, it’s a brilliant alternative to heavy sauces. Imagine twirling strands of pasta coated in this velvety goodness, or drizzling it over roasted veggies. It’s a charming, light option that makes meal prep feel delightful! What will you pair with this irresistible sauce?

Why is This Sauce a Game Changer?

Creamy Comfort: Blending cottage cheese for a rich, silky texture rewrites the rules for healthy sauces.
Quick and Easy: Perfect for busy weeknights, this recipe needs just a handful of ingredients and minimal cooking time.
Versatile Delight: Elevate pasta, veggies, or grilled chicken—the options are endless! You might also love drizzling it over your favorites like Bacon Soup Smoky or Chicken Grilled Cheese for an extra flavor boost.
Healthy Indulgence: Packed with protein yet light on calories, it’s guilt-free satisfaction for any palate.
Fresh Flavor: The combination of sweet tomatoes, fragrant basil, and garlic takes your taste buds on a delightful Italian adventure!

Creamy Cottage Cheese Tomato Basil Sauce Ingredients

For the Sauce

  • Olive Oil – Ideal for sautéing garlic; enhances the overall richness.
  • Garlic (4 cloves, minced) – This fragrant ingredient forms the flavorful base of the sauce.
  • Diced Tomatoes (1 can, 14.5 oz) – The star of the dish; it brings a perfect balance of sweetness and acidity.
  • Salt (1/2 teaspoon) – A subtle enhancer that lifts the flavors of the sauce.
  • Black Pepper (1/4 teaspoon) – Adds a gentle hint of heat to the mix.
  • Red Pepper Flakes (1/4 teaspoon, optional) – Introduces a little kick if you’re up for a spicy adventure.
  • Dried Oregano (1/2 teaspoon) – Delivers a classic herbal note, setting the Italian tone.
  • Cottage Cheese (1 cup, full-fat) – The secret to creaminess; using low-fat will compromise texture.
  • Fresh Basil Leaves (1/4 cup) – Gives vibrant flavor; opt for fresh rather than dried for the best taste.
  • Grated Parmesan (1/4 cup) – Adds a cheesy depth, perfectly balancing the sauce.
  • Pasta Water (1/4 cup, reserved) – This liquid helps achieve your desired sauce consistency.

Unlock the secrets to making the Creamy Cottage Cheese Tomato Basil Sauce that will tantalize your taste buds!

Step‑by‑Step Instructions for Creamy Cottage Cheese Tomato Basil Sauce

Step 1: Sauté the Garlic
In a large skillet, heat 2 tablespoons of olive oil over medium heat. Once the oil is shimmering, add 4 cloves of minced garlic, stirring frequently for about 1-2 minutes until fragrant, but not browned. This aromatic base sets the heartbeat of your Creamy Cottage Cheese Tomato Basil Sauce.

Step 2: Add the Tomatoes and Seasonings
Pour in a 14.5 oz can of diced tomatoes along with 1/2 teaspoon salt, 1/4 teaspoon black pepper, and 1/4 teaspoon of red pepper flakes if you desire some heat. Sprinkle in 1/2 teaspoon of dried oregano and stir everything together. Let the mixture simmer for 5-7 minutes, causing the flavors to meld and the sauce to thicken slightly.

Step 3: Blend the Sauce
Carefully transfer the warm tomato mixture to a blender. Add 1 cup of full-fat cottage cheese, 1/4 cup of fresh basil leaves, and 1/4 cup of grated Parmesan cheese. Blend on high for 30 seconds to 1 minute, until the sauce is completely smooth and creamy, showcasing the delightful Creamy Cottage Cheese Tomato Basil Sauce texture.

Step 4: Heat the Blended Sauce
Return the blended sauce back into the skillet over low heat. To achieve the desired consistency, stir in 1/4 cup of reserved pasta water. Gently warm the sauce for 2-3 minutes, allowing it to become hot throughout without boiling, ensuring a luxurious finish that clings wonderfully to pasta.

Step 5: Serve and Garnish
Once warmed, toss the creamy sauce with your favorite cooked pasta or use it as a topping for roasted vegetables or grilled chicken. For an appealing presentation, garnish with additional fresh basil leaves and a sprinkle of Parmesan. Your Creamy Cottage Cheese Tomato Basil Sauce is ready to transform your meals into a delightful experience!

Make Ahead Options

For busy home cooks, this Creamy Cottage Cheese Tomato Basil Sauce is a meal prep dream! You can prepare the entire sauce up to 4 days in advance and store it in an airtight container in the refrigerator. Simply sauté the garlic and tomatoes as directed, then blend and store the sauce without cooking it again. To maintain its beautiful creamy texture, avoid excessive heating when you rewarm it; just gently warm it on the stovetop before serving. Feel free to toss it with freshly cooked pasta, or use it over roasted veggies when you’re ready to enjoy a comforting meal with minimal effort!

Expert Tips for Creamy Cottage Cheese Tomato Basil Sauce

  • Blend Smoothly: Ensure your sauce is perfectly velvety by blending until completely smooth. A high-speed blender works best for this creamy cottage cheese tomato basil sauce.

  • Fresh Basil Matters: Always opt for fresh basil leaves over dried. The vibrant flavor greatly enhances the sauce, creating that authentic Italian essence every bite deserves.

  • Pasta Water Trick: Don’t skip the reserved pasta water! It helps adjust the sauce’s consistency, ensuring it clings beautifully to your pasta for a delightful finish.

  • Meal Prep Friendly: For better storage, keep the sauce separate from the pasta. This keeps it fresh and ready for a quick meal throughout the week.

  • Watch for Low-Fat Alternatives: Avoid using low-fat cottage cheese; it can compromise the creaminess of your sauce. Full-fat versions create the luscious texture you’re aiming for.

  • Spice to Your Taste: Adjust the red pepper flakes based on your spice preference. Start with less, and you can always add more for an exciting kick later!

What to Serve with Creamy Cottage Cheese Tomato Basil Sauce

Imagine a bustling kitchen filled with delightful aromas, where your plate becomes a canvas for flavor and texture!

  • Garlic Bread: The crispy, buttery goodness of garlic bread perfectly contrasts the creamy sauce, creating a satisfying crunch with every bite.

  • Zucchini Noodles: For a lighter option, try pairing these fresh, spiralized noodles. Their mild taste complements the rich sauce beautifully.

  • Roasted Vegetables: Serve with seasonal roasted veggies like bell peppers and asparagus. Their caramelized edges add depth and earthiness, enhancing the overall dish.

  • Grilled Chicken: This protein-packed addition creates a heartier meal. The savory depth of grilled chicken pairs seamlessly with the sauce’s bright flavors.

  • Caprese Salad: A side of fresh mozzarella, ripe tomatoes, and basil not only looks beautiful but also echoes the sauce’s vivid Italian essence, balancing creamy with fresh.

  • Sparkling Water with Lemon: This refreshing drink provides a light and zesty finish, making it a lovely companion to the delectable creamy sauce.

  • Parmesan Crisps: Crunchy and cheesy, these homemade treats serve as delightful bites to munch on while enjoying the luscious pasta.

  • Pesto Stuffed Mushrooms: The earthy flavors of mushrooms stuffed with pesto introduce a new layer of taste exploration alongside the sauce.

  • Tiramisu: End your meal with this classic Italian dessert. Its coffee-rich, creamy layers provide a wonderful contrast to the savory main dish.

How to Store and Freeze Creamy Cottage Cheese Tomato Basil Sauce

Fridge: Store the sauce in an airtight container for up to 4 days. Keep it separate from pasta to maintain optimal freshness.

Freezer: Freeze the sauce in a freezer-safe container for up to 3 months. Make sure to leave space for expansion as it freezes.

Reheating: Thaw overnight in the fridge for best results. Reheat gently on the stove, adding a splash of water or reserved pasta water to regain the desired consistency.

Room Temperature: Avoid leaving the sauce out for more than 2 hours to ensure its freshness and safety.

Creamy Cottage Cheese Tomato Basil Sauce Variations

Ready to make this delightful sauce your own? Let your culinary imagination run wild!

  • Herb Swap: Use parsley or thyme instead of basil for a different flavor profile. Each herb brings its unique twist to your sauce.

  • Veggie Boost: Add chopped spinach or zucchini to increase nutrients while enhancing the color and texture. This not only makes it healthier but also adds beautiful green hues.

  • Vegan Upgrade: Replace cottage cheese with a plant-based alternative to create a creamy vegan version. Your rich sauce will still shine without the dairy!

  • Cheese Variation: Try different cheeses like ricotta or feta for a tangier taste. Each cheese offers a unique creamy flavor that can elevate your dish.

  • Heat Up: For the spice lovers, increase the red pepper flakes or add diced jalapeños for a robust kick. Enjoy creating a zesty experience that excites your palate.

  • Creamy Addition: Mix in a tablespoon of unsweetened Greek yogurt for extra creaminess without compromising health. It will give your sauce a luscious texture that everyone will love.

  • Citrus Zing: Add a splash of lemon juice or zest for brightness that cuts through the creaminess. This refreshingly enhances the overall flavor profile.

  • Pasta Pairing: For a fun change, serve the sauce with whole grain or chickpea pasta. The nutty flavors of these pastas create a delightful contrast to the creamy sauce.

Dive into these variations and make the Creamy Cottage Cheese Tomato Basil Sauce truly your own! Whether pairing it with pasta or drizzling it over roasted veggies, each twist brings something special to your table. You might also enjoy it as a foundational layer for a comforting bowl of Potato and Bacon Soup. Enjoy your culinary adventure!

Creamy Cottage Cheese Tomato Basil Sauce Recipe FAQs

How do I select the best ingredients for this sauce?
For the best flavor and texture, choose ripe, firm tomatoes for the sauce. Look for tomatoes without dark spots or blemishes. Fresh basil should be vibrant green and fragrant; avoid any leaves that are wilting or browning. When selecting cottage cheese, pick full-fat over low-fat, as it provides the necessary creaminess that makes the sauce delightful.

How should I store leftover sauce and for how long?
Store any leftover Creamy Cottage Cheese Tomato Basil Sauce in an airtight container in the refrigerator for up to 4 days. Keep it separate from any pasta to maintain its freshness and prevent it from becoming too thick. When ready to enjoy, simply reheat it on the stove over low heat and add a splash of water or reserved pasta water as needed.

Can I freeze this sauce?
Absolutely! Freeze the sauce in a freezer-safe container for up to 3 months. Be sure to leave some space at the top, as the sauce will expand when frozen. When you’re ready to use it, thaw it overnight in the fridge. Reheat gently on the stovetop, adding a splash of water or reserved pasta water for a smooth consistency.

What should I do if my sauce is too thick?
If your sauce turns out too thick after blending, don’t worry! Simply add a little lukewarm water or reserved pasta water, a tablespoon at a time, while stirring over low heat until you achieve your desired consistency. This technique ensures you maintain that luscious velvety texture that everyone loves.

Are there any dietary considerations to keep in mind?
For those with dietary restrictions, it’s essential to note that cottage cheese is dairy-based. If you’re looking for a dairy-free option, consider using a plant-based cottage cheese alternative or a combination of silken tofu and nutritional yeast for a similar creamy texture. Additionally, check for allergies to any specific ingredients like garlic or Parmesan cheese.

What can I do if I don’t have fresh basil?
If fresh basil is unavailable, you can substitute dried basil, but be sure to use one-third the amount since dried herbs are more concentrated. Alternatively, consider using other fresh herbs like parsley or thyme that can add different but delicious flavors to your creamy tomato sauce. Adjust to your taste as needed!

Creamy Cottage Cheese Tomato Basil Sauce

Creamy Cottage Cheese Tomato Basil Sauce for a Healthy Delight

This Creamy Cottage Cheese Tomato Basil Sauce is a healthy delight blending sweet tomatoes, fragrant basil, and garlic, perfect for weeknight meals.
Prep Time 10 minutes
Cook Time 15 minutes
Total Time 25 minutes
Servings: 4 servings
Course: Dinner
Cuisine: Italian
Calories: 180

Ingredients
  

For the Sauce
  • 2 tablespoons Olive Oil Ideal for sautéing garlic
  • 4 cloves Garlic Minced
  • 1 can Diced Tomatoes 14.5 oz
  • 1/2 teaspoon Salt
  • 1/4 teaspoon Black Pepper
  • 1/4 teaspoon Red Pepper Flakes Optional
  • 1/2 teaspoon Dried Oregano
  • 1 cup Cottage Cheese Full-fat
  • 1/4 cup Fresh Basil Leaves
  • 1/4 cup Grated Parmesan
  • 1/4 cup Pasta Water Reserved

Equipment

  • Large skillet
  • blender

Method
 

Step-by-Step Instructions
  1. In a large skillet, heat 2 tablespoons of olive oil over medium heat. Add 4 cloves of minced garlic, stirring frequently for 1-2 minutes until fragrant, but not browned.
  2. Pour in a 14.5 oz can of diced tomatoes along with 1/2 teaspoon salt, 1/4 teaspoon black pepper, and 1/4 teaspoon of red pepper flakes if desired. Add 1/2 teaspoon of dried oregano and stir. Let simmer for 5-7 minutes.
  3. Carefully transfer the warm tomato mixture to a blender. Add 1 cup of full-fat cottage cheese, 1/4 cup of fresh basil leaves, and 1/4 cup of grated Parmesan. Blend on high for 30 seconds to 1 minute until smooth.
  4. Return the blended sauce back into the skillet over low heat. Stir in 1/4 cup of reserved pasta water to achieve desired consistency. Warm for 2-3 minutes without boiling.
  5. Toss the creamy sauce with your favorite cooked pasta or use it as a topping for roasted vegetables or grilled chicken. Garnish with additional fresh basil leaves and Parmesan.

Nutrition

Serving: 1cupCalories: 180kcalCarbohydrates: 8gProtein: 10gFat: 12gSaturated Fat: 3gPolyunsaturated Fat: 0.5gMonounsaturated Fat: 8gCholesterol: 20mgSodium: 400mgPotassium: 300mgFiber: 2gSugar: 4gVitamin A: 300IUVitamin C: 5mgCalcium: 200mgIron: 1mg

Notes

Ensure the sauce is perfectly smooth by blending until completely velvety. Fresh basil enhances the flavor significantly. Use reserved pasta water to adjust the sauce's consistency.

Tried this recipe?

Let us know how it was!

Melt-In-Your-Mouth Baked Italian Grinder Sandwiches

As I watched the cheese bubble and the golden crust form, a wave of nostalgia washed over me. Nothing evokes the warmth of home quite like Baked Italian Grinder Sandwiches. These sandwiches are a true celebration of hearty Italian flavors, combining layers of savory meats, melty provolone, and vibrant veggies nestled inside a crispy roll. Not only are they incredibly comforting, perfect for family dinners or a snack with friends, but they also make for a fantastic weeknight meal with minimal prep and cook time. As each bite delivers a delightful crunch followed by gooey goodness, you may find it hard to resist going back for seconds! Curious to find out how to create this delectable masterpiece? Let’s dive into the recipe!

Why are Baked Italian Grinder Sandwiches irresistible?

Comfort Food Redefined: The combination of warm, crusty rolls with creamy, melted cheese and savory meats is nothing short of heavenly.

Quick and Easy: With minimal prep time, these sandwiches are perfect for weeknight dinners or last-minute gatherings.

Customizable Delight: Tailor the fillings to suit your taste—you can switch up meats or go vegetarian.

Crowd-Pleasing Flavor: Whether served at a game night or family gathering, these sandwiches are sure to impress!

Perfect Pairing: Enjoy them with a side salad or crispy fries for a satisfying meal that balances flavors and textures, just like our delicious Garlic Butter Baked Chicken big buttery crunch!

Baked Italian Grinder Sandwich Ingredients

Get ready to create a flavor-packed delight!

For the Sandwiches

  • Italian sub rolls – A sturdy base that holds the fillings well; hoagie rolls or ciabatta can work as substitutes.
  • Unsalted butter (1/2 cup) – Provides a rich, golden crust; feel free to use salted butter if that’s what you have!
  • Garlic powder (1 tbsp) – Infuses deep, savory notes into the bread and filling.
  • Onion powder (1 tbsp) – Adds a mild onion flavor that enhances the overall depth of the sandwich.
  • Dried oregano (1 tbsp) – Brings classic Italian earthy notes to this comforting dish.
  • Dried basil (1 tbsp) – Adds a hint of sweetness, pairing perfectly with mozzarella and provolone.
  • Red pepper flakes (1 tsp) – Provides a zesty kick; adjust based on your spice preference.
  • Salt (1/2 tsp) – Enhances flavors, balancing the richness of the ingredients.
  • Black pepper (1/4 tsp) – Adds warmth and a touch of sharpness to the mix.

For the Meats

  • Deli-sliced salami (1/2 lb) – A rich and flavorful base for your sandwich; turkey or roast beef can be used as substitutes.
  • Deli-sliced ham (1/2 lb) – Adds a lovely sweetness and smokiness; feel free to use turkey for a lighter alternative.
  • Deli-sliced pepperoni (1/2 lb) – Provides a bold flavor; omit if you prefer a milder taste.

For the Cheeses

  • Deli-sliced mozzarella cheese (1/2 lb) – Melts beautifully, adding creaminess to your sandwich.
  • Deli-sliced provolone cheese (1/2 lb) – Introduces a sharp note; try smoked or mild cheese as alternatives.
  • Grated Parmesan cheese (1/4 cup) – Creates a crisp topping layer; you can avoid fresh Parmesan for convenience.

For the Veggies

  • Roasted red peppers (1/4 cup) – Enhances the sandwich with sweet and smoky flavors.
  • Sliced black olives (1/4 cup) – Adds a briny depth to the overall taste; skip if you prefer without.
  • Banana peppers, sliced (1/4 cup) – Provides a tangy crunch; replace with jalapeños for more heat.
  • Fresh basil leaves (1/4 cup) – Brings vibrant herbal freshness; spinach can be a lovely substitute for added nutrition.

Each ingredient contributes to the deliciousness of these Baked Italian Grinder Sandwiches, making your cooking experience fun and satisfying!

Step‑by‑Step Instructions for Baked Italian Grinder Sandwiches

Step 1: Preheat the Oven
Begin by preheating your oven to 375°F (190°C). This temperature is perfect for achieving a crispy exterior on your Baked Italian Grinder Sandwiches while allowing the cheese to melt beautifully. As the oven heats, gather your ingredients so they’re within easy reach, making the process smooth and efficient.

Step 2: Prepare the Rolls
Slice the Italian sub rolls lengthwise, ensuring to keep them hinged at the back. This keeps the fillings contained and makes assembly easier. Place the rolls cut side up on a baking sheet lined with parchment paper, which will help with clean-up and prevent sticking during baking.

Step 3: Mix the Butter and Seasonings
In a microwave-safe bowl, melt the unsalted butter until fully liquefied. Combine it with garlic powder, onion powder, dried oregano, dried basil, red pepper flakes, salt, and black pepper. Stir until well mixed—a beautiful fragrant blend that will coat your rolls and infuse them with flavor.

Step 4: Apply the Butter Mixture
Using a pastry brush or the back of a spoon, generously spread the butter mixture onto the cut sides of the prepared sub rolls. Ensure every inch is coated to create a deliciously golden crust once baked. The aromatic butter will enhance the flavors in your Baked Italian Grinder Sandwiches!

Step 5: Layer the Meats
Start layering the meats onto the bottom halves of the rolls. Begin with the deli-sliced salami, followed by the ham, and finish with the pepperoni. Try to cover the surface evenly, allowing the flavors to meld perfectly in every bite. This layers the rich, savory elements that make up the heart of your sandwich.

Step 6: Add the Cheeses
Next, evenly distribute the deli-sliced mozzarella and provolone cheese over the meats. Make sure the cheese spans the entire width of the rolls, as this will create a luscious, gooey experience in the final product. The melty cheese is key to achieving that comforting texture in your Baked Italian Grinder Sandwiches.

Step 7: Sprinkle with Parmesan
Lightly sprinkle the grated Parmesan cheese over the top of the layered meats and cheeses. This will help create a crispy, golden topping that adds an extra dimension of flavor to your sandwich. The salty richness of Parmesan enhances all the ingredients, making every bite a delight.

Step 8: Add the Veggies
Now, scatter the roasted red peppers, sliced black olives, and banana peppers over the cheeses. These additions bring color as well as a burst of flavor and texture, balancing the richness of the meats and cheeses in your Baked Italian Grinder Sandwiches.

Step 9: Top with Fresh Basil
Place the fresh basil leaves on top of the sandwich components. Not only do they add a delightful aromatic touch, but they also bring a fresh and vibrant flavor to your sandwiches. The herbs are a perfect way to elevate the overall taste and aesthetics of your dish.

Step 10: Bake to Perfection
Carefully transfer the baking sheet to the preheated oven and bake for 10-12 minutes. Keep an eye on them, as you want the cheese to melt beautifully and the edges of the rolls to turn golden brown. This step turns your assembled ingredients into a bubbling, fragrant masterpiece.

Step 11: Cool and Slice
Once baked to perfection, allow the sandwiches to cool for a few minutes on the baking sheet. This will help the cheese set slightly, making slicing easier. Carefully cut the Baked Italian Grinder Sandwiches into portions, revealing the delicious layers you’ve created.

Step 12: Serve Warm
Serve these hearty sandwiches warm, allowing everyone to dive into the melty, savory goodness of the Baked Italian Grinder Sandwiches. Pair with a fresh salad or fries for a full meal, and get ready to enjoy a slice of comfort food that everyone will love!

Make Ahead Options

These Baked Italian Grinder Sandwiches are perfect for meal prep, allowing you to save valuable time during a busy week! You can assemble the sandwiches up to 24 hours in advance—simply prepare all the layers, including meats, cheeses, and veggies, and refrigerate the unbaked sandwiches tightly covered. This not only helps the flavors meld but keeps them fresh for later. When you’re ready to enjoy, bake directly from the fridge for about 10-12 minutes until bubbly and golden, ensuring a delightful, restaurant-quality meal with minimal effort. Just as delicious as if made fresh, these time-saving options make weeknight dinners a breeze!

Storage Tips for Baked Italian Grinder Sandwiches

  • Room Temperature: Serve sandwiches warm for the best experience. If leftovers are at room temperature, finish them within 2 hours to maintain safety.

  • Fridge: Store any leftover Baked Italian Grinder Sandwiches in an airtight container for up to 3 days. Let them cool completely before sealing to preserve texture.

  • Freezer: Assemble unbaked sandwiches and wrap tightly in plastic wrap and aluminum foil for freezing. They can be frozen for up to 3 months; bake directly from frozen, adding a few extra minutes.

  • Reheating: When ready to enjoy leftovers, preheat the oven to 350°F (175°C) and heat wrapped sandwiches for 10-15 minutes until warmed through. This restores their delightful crispiness!

Baked Italian Grinder Sandwiches Variations

Let your creativity shine while preparing these scrumptious sandwiches! Embrace the joy of cooking with different twists that suit your taste.

  • Turkey Swap: Use deli-sliced turkey instead of salami and ham for a lighter option without sacrificing flavor.
  • Vegetarian Delight: Replace all meats with grilled veggies like zucchini and bell peppers, plus extra cheese for a hearty bite.
  • Extra Zest: Enhance spice levels by mixing in fresh jalapeños or switching to spicy pepper jack cheese for a fiery kick!
  • Cheesy Goodness: Add a blend of cheeses like gouda or sharp cheddar alongside mozzarella and provolone for a rich flavor explosion.
  • Pesto Power: Spread a layer of pesto on the rolls before adding the fillings for a burst of herbaceous freshness.
  • Crunchy Texture: Top with crispy fried onions or fresh arugula just before serving to add an unexpected crunch.
  • Italian Dressing: Drizzle your favorite Italian dressing over the veggies for an extra layer of tangy flavor that brightens every bite.
  • Sweet Touch: For a twist, incorporate thinly sliced figs or a drizzle of honey on the top layer for a sweet and savory balance.

For more scrumptious ideas, consider serving with a refreshing mixed greens salad or our delicious Comforting Charm Baked Ham and Cheese Croissants for a delightful meal combo!

What to Serve with Baked Italian Grinder Sandwiches

Create a complete meal that sings with Italian goodness and delights the senses!

  • Mixed Greens Salad: A refreshing side that balances the rich flavors of the sandwiches with crunchy greens and zesty dressing.
  • Crispy Fries: Provide a satisfying contrast in texture, offering a delightful crunch that pairs perfectly with gooey sandwiches.
  • Garlic Bread: Elevate the experience with buttery, crusty bread infused with garlic, making every bite more indulgent.
  • Pickles: A tangy, briny side that cuts through the richness of the sandwiches and adds a delightful crunch.
  • Roasted Vegetables: An earthy side dish bursting with vibrant flavors, enhancing the overall meal with healthy goodness.
  • Italian Pasta Salad: This vibrant and tangy dish adds a refreshing twist, making it a fun, colorful addition to your table.
  • Italian Wine: A glass of Chianti or Pinot Grigio can elevate the flavors, enhancing the hearty experience of your meal.
  • Tiramisu: Finish on a sweet note with this classic Italian dessert, creating a beautiful ending to your comforting meal.

Expert Tips for Baked Italian Grinder Sandwiches

  • Sturdy Bread Selection: Choose high-quality Italian sub rolls to ensure they hold up against the juicy fillings. Weak bread can become soggy.

  • Butter Application: Be generous with the butter mixture to create a beautifully golden and crunchy crust; a light coating will not achieve the desired texture.

  • Layering Technique: Layer meats and cheeses evenly for balanced flavor in every bite. Skipping this step can lead to some parts being overloaded while others are under-seasoned.

  • Veggie Customization: Feel free to swap in your preferred veggies; just remember that adding moisture-heavy ingredients can make the sandwich soggier.

  • Oven Monitoring: Keep an eye on the sandwiches while baking to avoid over-browning. Remove them when the cheese is perfectly melted and the edges are crisp.

  • Serving Warm: For the best experience, serve your Baked Italian Grinder Sandwiches warm. Their gooey, melty texture is best enjoyed fresh from the oven!

Baked Italian Grinder Sandwiches Recipe FAQs

What type of bread is best for Baked Italian Grinder Sandwiches?
I recommend using Italian sub rolls for their sturdiness, which holds the fillings well without becoming soggy. You can also substitute with hoagie rolls or ciabatta if you prefer. Just make sure they have a crispy crust to balance the gooey interior!

How should I store leftover Baked Italian Grinder Sandwiches?
To keep leftovers fresh, store them in an airtight container in the fridge for up to 3 days. Allow the sandwiches to cool completely before sealing to retain their texture. For longer storage, you can freeze unbaked sandwiches wrapped tightly in plastic wrap and aluminum foil for up to 3 months. Bake directly from frozen when you’re ready to enjoy!

Can I freeze Baked Italian Grinder Sandwiches?
Absolutely! Assemble the sandwiches but don’t bake them. Wrap each one tightly in plastic wrap and then in aluminum foil to protect against freezer burn. They will stay fresh for about 3 months. When you’re ready for a quick meal, pop them in the oven from frozen, adding a few minutes to the baking time until they’re melty and golden.

What should I do if my sandwiches don’t hold their shape?
To prevent the sandwiches from falling apart, make sure to choose sturdy bread and layer the ingredients evenly. Avoid overloading one side with too many toppings. If they still struggle, it may help to use a serrated knife when slicing the baked sandwich to keep everything intact. Remember, patience is key as you create these delicious Baked Italian Grinder Sandwiches!

Are Baked Italian Grinder Sandwiches pet-friendly?
While the ingredients themselves aren’t toxic to pets, it’s best to avoid sharing these sandwiches with them. The seasoning and richness can upset their stomachs, so it’s safer to keep this comfort food as a delightful treat just for you!

Baked Italian Grinder Sandwiches

Melt-In-Your-Mouth Baked Italian Grinder Sandwiches

Baked Italian Grinder Sandwiches are a comforting mix of savory meats, melty cheese, and vibrant veggies all in a crispy roll.
Prep Time 15 minutes
Cook Time 12 minutes
Total Time 27 minutes
Servings: 4 sandwiches
Course: Lunch
Cuisine: Italian
Calories: 450

Ingredients
  

For the Sandwiches
  • 4 rolls Italian sub rolls hoagie rolls or ciabatta can work as substitutes
  • 1/2 cup unsalted butter or salted butter
  • 1 tbsp garlic powder
  • 1 tbsp onion powder
  • 1 tbsp dried oregano
  • 1 tbsp dried basil
  • 1 tsp red pepper flakes adjust based on your spice preference
  • 1/2 tsp salt
  • 1/4 tsp black pepper
For the Meats
  • 1/2 lb deli-sliced salami or turkey/roast beef
  • 1/2 lb deli-sliced ham or turkey
  • 1/2 lb deli-sliced pepperoni omit if desired
For the Cheeses
  • 1/2 lb deli-sliced mozzarella cheese
  • 1/2 lb deli-sliced provolone cheese try smoked or mild
  • 1/4 cup grated Parmesan cheese omit fresh Parmesan for convenience
For the Veggies
  • 1/4 cup roasted red peppers
  • 1/4 cup sliced black olives omit if desired
  • 1/4 cup banana peppers, sliced substitute with jalapeños for more heat
  • 1/4 cup fresh basil leaves spinach can be a substitute

Equipment

  • Baking Sheet
  • microwave-safe bowl
  • Pastry Brush

Method
 

Step-by-Step Instructions
  1. Preheat your oven to 375°F (190°C). Gather your ingredients.
  2. Slice the Italian sub rolls lengthwise, keeping them hinged at the back.
  3. Melt the unsalted butter in a microwave-safe bowl and mix with seasonings.
  4. Spread the butter mixture onto the cut sides of the rolls.
  5. Layer the meats onto the bottom halves of the rolls.
  6. Distribute the mozzarella and provolone cheese over the meats.
  7. Sprinkle grated Parmesan cheese over the layered ingredients.
  8. Add roasted red peppers, sliced olives, and banana peppers on top of the cheese.
  9. Top with fresh basil leaves.
  10. Bake for 10-12 minutes until cheese is melted and edges are golden brown.
  11. Allow to cool slightly, then slice and serve warm.

Nutrition

Serving: 1sandwichCalories: 450kcalCarbohydrates: 40gProtein: 20gFat: 25gSaturated Fat: 10gPolyunsaturated Fat: 2gMonounsaturated Fat: 8gCholesterol: 60mgSodium: 1200mgPotassium: 300mgFiber: 2gSugar: 1gVitamin A: 5IUVitamin C: 10mgCalcium: 15mgIron: 10mg

Notes

Serve with a side salad or fries for a complete meal.

Tried this recipe?

Let us know how it was!

Loaded Potato Taco Bowls: Crispy Comfort in Every Bite

As I dove into the world of easy, satisfying meals, I stumbled upon a delightful gem: the Loaded Potato Taco Bowl. It’s a dish that surprises with its crispy roasted potatoes serving as the perfect foundation for a fiesta of flavors. Imagine savory spiced beef mingling with creamy guacamole and tangy salsa, all topped with melted cheese—a true crowd-pleaser that’s both gluten-free and budget-friendly. Not only does this recipe come together in a snap, but it’s also a fantastic option for meal prep, allowing you to whip up all your favorite toppings ahead of time. The best part? Everyone can customize their bowls to suit their tastes, making it a fun addition to any family dinner or casual gathering. Curious about how to bring this scrumptious dish to your table? Let’s dive into the details!

Why Are Loaded Potato Taco Bowls So Irresistible?

Crispy Potatoes are the star of this dish, providing a satisfying crunch that contrasts beautifully with the rich toppings. Flavor-Packed with spiced beef, creamy guacamole, and zesty salsa, each bite bursts with deliciousness. Customizable Options allow you to mix and match toppings, ensuring every family member gets their ideal bowl. Plus, it’s quick and budget-friendly, perfect for busy weeknights or meal prep! For more satisfying meal ideas, check out our Cheesy Hamburger Potato and Potato Bacon Soup recipes!

Loaded Potato Taco Bowl Ingredients

• The following ingredients will help you create the most delicious Loaded Potato Taco Bowls that your family will love!

For the Potatoes

  • Potatoes – The star ingredient, providing a crispy base; Sweet potatoes can be used for a nutritious twist.

For the Beef

  • Ground Beef – Adds heartiness to the dish; Consider swapping for plant-based meat or chicken if you prefer lighter proteins.

For the Toppings

  • Guacamole – Offers creaminess and freshness; You can substitute with Greek yogurt for a healthier option.
  • Salsa – Enhances the bowl with acidity and flavor; Use homemade for extra zest or store-bought for convenience.
  • Cheese – Adds richness and gooeyness; Dairy-free cheese works well for vegan versions or omit for a lighter touch.

Additional Toppings

  • Sour Cream – Provides a cool contrast to the spicy elements; You can also use a dairy-free alternative.
  • Jalapeños – Perfect for spice lovers and adds a kick; Try pickled jalapeños for more flavor.
  • Corn – Sweet, juicy kernels bring a delightful crunch; Frozen corn is a great time-saver.
  • Beans – Black beans or pinto beans add protein and texture; Rinse canned beans for easier cooking.

With these ingredients, you’re well on your way to crafting flavorful Loaded Potato Taco Bowls that everyone will rave about!

Step‑by‑Step Instructions for Loaded Potato Taco Bowls

Step 1: Prep Potatoes
Begin by dicing your potatoes into small, uniform cubes for even cooking. Soak them in a bowl of cold water for about 15 minutes to prevent browning and remove excess starch, which helps achieve that desired crispiness. While the potatoes soak, preheat your oven to 220°C (425°F) to ensure it’s hot and ready for roasting.

Step 2: Roast Potatoes
Drain the potatoes and pat them dry with a clean kitchen towel to eliminate moisture. In a large mixing bowl, toss the potatoes with olive oil, salt, and your choice of seasonings until evenly coated. Spread them out on a parchment-lined baking sheet in a single layer and roast in the preheated oven for 30-35 minutes, turning halfway through, until golden brown and crispy on the outside.

Step 3: Cook Beef
While the potatoes are roasting, heat a large skillet over medium heat and add the ground beef. Use a spatula to break the meat apart as it browns, ensuring it cooks evenly. Once it’s nearly cooked through (about 5-7 minutes), add your homemade taco seasoning and a splash of water, cooking for an additional 3-4 minutes until fully browned and fragrant.

Step 4: Assemble Bowls
Once the potatoes are crispy, remove them from the oven and start to assemble the Loaded Potato Taco Bowls. Place a generous portion of the crispy potatoes at the bottom of each bowl. Top with the spiced ground beef, followed by dollops of creamy guacamole, zesty salsa, and a sprinkle of cheese for an enticing blend of flavors.

Step 5: Melt Cheese
For the ultimate Loaded Potato Taco Bowls experience, return the assembled bowls to the oven. Bake for an additional 2-3 minutes, just until the cheese is melted and bubbly. This quick step enhances the richness of the dish and allows the flavors to meld beautifully together.

Step 6: Serve
Remove the Loaded Potato Taco Bowls from the oven and let them cool slightly. Feel free to customize each bowl with additional toppings like sour cream, jalapeños, corn, and beans to suit your family’s preferences. Serve warm and enjoy a delightful meal that’s both satisfying and fun!

Expert Tips for Loaded Potato Taco Bowls

  • Soak Potatoes: Soaking diced potatoes helps remove excess starch for the crispiest texture. Don’t skip this step for perfect roasted potatoes!

  • Even Seasoning: Make sure to coat potatoes evenly with olive oil and seasonings. Uneven coating can lead to some potatoes being bland while others are flavorful.

  • Homemade Taco Seasoning: For an extra flavor boost, consider making your own taco seasoning blend. Store-bought options may contain additives that dilute the taste of the loaded potato taco bowls.

  • Custom Toppings: Encourage everyone to pick their favorite toppings! Offering a variety, from jalapeños to beans, allows each person to tailor their bowl and enjoy a personal touch.

  • Reheat Wisely: If you have leftovers, reheat them in the oven or air fryer to maintain the crispiness of the potatoes when enjoying your Loaded Potato Taco Bowls again.

What to Serve with Loaded Potato Taco Bowls?

Imagine a colorful spread around your Loaded Potato Taco Bowls, elevating your dining experience to a full feast the whole family will love.

  • Tortilla Chips: A crunchy side that offers a satisfying crunch, perfect for scooping up every last bit of toppings.

  • Fresh Green Salad: Crisp romaine or mixed greens topped with a zesty vinaigrette add a refreshing contrast to the hearty bowls.

  • Mexican Street Corn: Sweet corn drizzled with creamy sauce and sprinkled with cheese provides a deliciously rich flavor that complements your meal.

  • Pico de Gallo: Fresh, vibrant, and packed with tomatoes, onions, and cilantro, this salsa brings an extra layer of freshness to each bite.

  • Black Bean Soup: Silky and full of flavor, a side of this soup stretches your meal while adding fiber and protein.

  • Margaritas: Sip on these refreshing cocktails to perfectly balance the rich flavors of the taco bowls, creating a festive atmosphere.

  • Churros: For the sweet finish, serve crispy churros dusted with cinnamon sugar—a delightful treat to end your meal on a high note.

Pair these options with your Loaded Potato Taco Bowls to create a well-rounded feast that will leave everyone satisfied and happy.

How to Store and Freeze Loaded Potato Taco Bowls

Fridge: Store any leftovers in an airtight container in the fridge for up to 3 days to keep the flavors fresh and the potatoes reasonably crispy.

Freezer: For longer storage, freeze the assembled Loaded Potato Taco Bowls in airtight containers for up to 3 months. Separate the potatoes and toppings in different containers to retain texture upon reheating.

Reheating: When ready to enjoy, thaw the bowls overnight in the fridge. Reheat in the oven or air fryer at 180°C (350°F) for 10-15 minutes until heated through and the potatoes regain their crispiness.

Prep Ahead: You can also prepare the beef and toppings in advance and store them in the fridge for easy assembly throughout the week!

Make Ahead Options

These Loaded Potato Taco Bowls are a fantastic choice for meal prep aficionados! You can prepare the spiced beef and toppings up to 3 days in advance—simply cook the beef, allow it to cool, and store it in an airtight container in the refrigerator. Additionally, you can dice the potatoes and soak them in water overnight to prevent browning. When you’re ready to serve, roast the potatoes fresh for that irresistible crunch, and then assemble your bowls with the reheated beef and toppings. This way, you’ll enjoy a delightful meal with minimal effort, ensuring your Loaded Potato Taco Bowls stay just as delicious and satisfying!

Loaded Potato Taco Bowls Customization

Feel free to get creative with your Loaded Potato Taco Bowls, crafting them exactly to your family’s taste and dietary needs!

  • Sweet Potatoes: Swap regular potatoes for sweet potatoes for a unique sweetness and added nutrients. They bring a lovely flavor twist while still providing that crispy goodness.

  • Plant-Based Meat: Use a meat alternative, like lentils or a veggie crumble, to make this dish vegan-friendly. The spices will still infuse lots of flavor, allowing everyone to enjoy their meal without missing out.

  • Greek Yogurt: For a lighter, protein-packed alternative to guacamole, substitute with Greek yogurt. It adds creaminess and a refreshing taste, perfect for those who enjoy tangy flavors.

  • Spicy Salsa: Kick up the heat by using a spicy salsa or adding chopped fresh jalapeños. For an exciting twist, try a pineapple salsa that combines sweetness with a touch of spice!

  • Dairy-Free Cheese: For a vegan option, replace traditional cheese with dairy-free cheese alternatives made from nuts or soy. They melt beautifully and keep your dish indulgent without the dairy.

  • Corn Salsa: Bring extra freshness and crunch by using corn salsa instead of regular salsa. It adds a delightful texture and a pop of color, making your bowls even more visually appealing.

  • Pickled Onions: For an added zing, top your bowls with pickled onions. Their acidity balances the rich flavors perfectly and adds an appealing crunch.

Replacing your standard sides with crunchy tortilla chips or a vibrant salad can boost your meal, creating a balanced dinner that keeps everyone coming back for more. Explore delightful pairings like the Crispy Chicken Katsu Bowls for more meal inspiration!

Loaded Potato Taco Bowl Recipe FAQs

What kind of potatoes should I use for Loaded Potato Taco Bowls?
For the best crispy texture, I recommend using Yukon Gold or Russet potatoes. They provide a sturdy base for your bowls. You can also swap in sweet potatoes for added nutritional value and a slightly different flavor profile.

How should I store leftovers from my Loaded Potato Taco Bowls?
Store any leftovers in an airtight container in the fridge for up to 3 days. If you want to keep them longer, you can freeze the assembled bowls in airtight containers for up to 3 months. Remember to separate the potatoes and toppings to maintain their individual textures.

Can I freeze the assembled Loaded Potato Taco Bowls?
Absolutely! To freeze, layer your assembled bowls in airtight containers but keep the toppings separate. This way, your crispy potatoes won’t get soggy. They can be stored for up to 3 months. When you’re ready to eat, thaw them overnight in the fridge and reheat in the oven or air fryer.

How do I make my potatoes crispier when roasting?
The secret to achieving crispy potatoes lies in adequately soaking them. After dicing, soak the potatoes in cold water for about 15 minutes to remove excess starch, which helps achieve the perfect crunch. Additionally, make sure to spread them in a single layer on a baking sheet without overcrowding.

Are there any dietary concerns I should be aware of?
For gluten-free dining, this recipe is perfectly safe! However, if you have any allergies—particularly to dairy or certain proteins—there are great substitutes available. Try using dairy-free cheese for lactose intolerance or swapping ground beef with plant-based meat for vegetarian options. Always check the ingredients in store-bought items like salsa and taco seasoning to ensure they’re aligned with your dietary needs.

How can I customize my Loaded Potato Taco Bowls?
The beauty of these bowls is their versatility! I love to encourage customizing toppings—think pickled onions, corn salsa, or even black beans! Each person can tailor their bowl to their preference, making it a fun dish for everyone around the table. Plus, it’s an excellent way to use up any leftover ingredients you might have on hand!

Loaded Potato Taco Bowls

Loaded Potato Taco Bowls: Crispy Comfort in Every Bite

Delight in Loaded Potato Taco Bowls, featuring crispy potatoes and flavorful toppings—perfect for a customizable, gluten-free meal.
Prep Time 15 minutes
Cook Time 40 minutes
Melt Time 3 minutes
Total Time 58 minutes
Servings: 4 bowls
Course: Dinner
Cuisine: Mexican
Calories: 600

Ingredients
  

For the Potatoes
  • 4 medium Potatoes or sweet potatoes for a nutritious twist
For the Beef
  • 1 lb Ground Beef or substitute with plant-based meat or chicken
For the Toppings
  • 1 cup Guacamole or Greek yogurt for a healthier option
  • 1 cup Salsa homemade for extra flavor or store-bought for convenience
  • 1 cup Cheese or dairy-free cheese for a vegan version
Additional Toppings
  • 1/2 cup Sour Cream or dairy-free alternative
  • 1/4 cup Jalapeños or pickled jalapeños for more flavor
  • 1 cup Corn frozen corn is a great option
  • 1 cup Beans black beans or pinto beans, rinsed

Equipment

  • Oven
  • Skillet
  • Mixing Bowl
  • Baking Sheet
  • Parchment Paper

Method
 

Step-by-Step Instructions
  1. Dice your potatoes into small, uniform cubes and soak them in cold water for about 15 minutes.
  2. Preheat your oven to 220°C (425°F).
  3. Drain and pat the potatoes dry, then toss with olive oil, salt, and seasoning before spreading on a baking sheet.
  4. Roast the potatoes for 30-35 minutes, turning halfway through, until golden brown and crispy.
  5. In a skillet, cook the ground beef over medium heat, breaking it apart as it browns. Add taco seasoning and cook until fully browned.
  6. Assemble the bowls with crispy potatoes, spiced beef, guacamole, salsa, and cheese.
  7. Return the bowls to the oven and bake for an additional 2-3 minutes until the cheese is melted.
  8. Serve warm with additional toppings like sour cream, jalapeños, corn, and beans.

Nutrition

Serving: 1bowlCalories: 600kcalCarbohydrates: 45gProtein: 30gFat: 35gSaturated Fat: 15gPolyunsaturated Fat: 2gMonounsaturated Fat: 10gCholesterol: 75mgSodium: 800mgPotassium: 900mgFiber: 6gSugar: 3gVitamin A: 15IUVitamin C: 30mgCalcium: 20mgIron: 25mg

Notes

Soaking potatoes removes excess starch for a crispier texture. Customize toppings per preference and reheat leftovers wisely for best texture.

Tried this recipe?

Let us know how it was!

Tamales Salvadoreños: Discover the Heart of Homemade Comfort

As the scent of warm, earthy spices drifts through my kitchen, I’m instantly transported to the lively markets of El Salvador, where the humble tamal takes center stage. These Tamales Salvadoreños are a labor of love, featuring a delightful masa harina base wrapped in tender banana leaves and filled with savory chicken and vibrant vegetables. The best part? Not only are they gluten-free, but they also make for a perfect make-ahead meal you can freeze for a rainy day. Juicy and comforting, you’ll be able to indulge in these homemade gems any time you crave a taste of tradition. Ready to embark on a delicious culinary journey and impress your loved ones with this authentic dish? Let’s dive in!

Why are Salvadoran tamales irresistible?

Unique flavors: These Tamales Salvadoreños offer a mouthwatering blend of earthy spices, tender masa, and a savory filling that brings your taste buds to life.

Cultural delight: Enjoy a dish steeped in tradition, often savored during celebrations and family gatherings, adding that authentic touch to your dining experience.

Batch-friendly: Perfect for meal prep! Whip up a large batch, freeze them, and have a delightful homemade option ready whenever cravings strike.

Gluten-free option: Use the right masa harina to create a gluten-free delight, satisfying dietary preferences without compromising on taste.

Crowd-pleaser: Whether you’re hosting a cozy dinner or celebrating a festive occasion, these tamales are sure to bring smiles and compliments from family and friends!

Tamales Salvadoreños Ingredients

Enjoy making your own Tamales Salvadoreños with these key ingredients!

For the Masa Dough

  • Masa Harina – Use nixtamalized corn flour for the best texture; ensure it’s labeled for tamales.
  • Salt – Essential for enhancing the flavor of both masa and filling; adjust to taste.
  • Olive Oil – Adds moisture and richness; can be substituted with vegetable oil.

For the Filling

  • Onion – Opt for yellow or sweet onions to bring aromatic flavor to the filling.
  • Garlic – Fresh garlic infuses depth in both masa and filling; don’t skip this!
  • Green Bell Peppers – Adds sweetness; feel free to swap for sweeter peppers like red or yellow.
  • Vegetable or Chicken Bouillon Powder – Boosts flavor in the dough; homemade broth can be a wonderful alternative.
  • Red Beans – Use canned or pre-cooked for convenience in your hearty filling.
  • Tomato – Provides moisture and acidity; remove seeds for a smoother texture.

For Wrapping

  • Banana Leaves – Traditional wrappers that impart a unique flavor; soften them first to avoid cracking.
  • Parchment Paper – Offers extra support while wrapping tamales.
  • Cooking Twine – Secures the tamales during steaming; essential for keeping their shape.

With these ingredients in hand, you’re on your way to creating delightful homemade Tamales Salvadoreños that will surely impress!

Step‑by‑Step Instructions for Tamales Salvadoreños

Step 1: Prepare the Filling
In a Dutch oven, heat 2 tablespoons of olive oil over medium heat. Once hot, add 1 diced onion, 2 minced garlic cloves, and 1 chopped tomato. Sauté for about 5 minutes or until the onion becomes translucent. Then, stir in 1 cup of cooked red beans, seasoning with salt and pepper, and continue sautéing for an additional 10 minutes. Blend the mixture with a splash of boiling water until smooth and set it aside.

Step 2: Prepare the Masa Dough
In a medium skillet, heat another tablespoon of olive oil and sauté the remaining onion, garlic, and 1 diced green bell pepper until softened. After a few minutes, transfer this vegetable mixture to a blender and blend with 1 cup of water until smooth. In a stand mixer, combine 2 cups of masa harina, 1 teaspoon of salt, and 1 teaspoon of bouillon powder. Gradually add in the blended mixture until a soft dough forms, about 5 minutes of mixing.

Step 3: Prepare Banana Leaves
To make the banana leaves pliable for wrapping, immerse each square in boiling water for 30 seconds. This process helps soften them and makes them easier to fold without cracking. After soaking, carefully remove the leaves and pat them dry with a clean towel to ensure they’re ready for assembly in your Tamales Salvadoreños.

Step 4: Assemble Tamales
On a piece of parchment paper, lay out a banana leaf. Scoop 2 tablespoons of prepared masa dough onto the leaf and flatten it slightly. Next, add about 2 teaspoons of your savory filling in the center. Carefully fold the edges of the banana leaf over the masa and filling, then secure the tamal with cooking twine to hold its shape. Repeat this process until all ingredients are used.

Step 5: Steam Tamales
In a large Dutch oven, arrange a steaming rack or crumpled balls of aluminum foil to elevate the tamales above the water. Place your secured tamales upright inside the pot, then pour in boiling water until it’s just below the tamales. Cover the pot with a lid, and steam the tamales for 1.5 hours, checking the water level occasionally to prevent burning. The tamales should be firm and slightly springy when done.

Expert Tips for Tamales Salvadoreños

  • Masa Consistency: Aim for a smooth, spreadable masa. If it’s too dry, add small amounts of water gradually until achieving a soft texture.

  • Pliable Banana Leaves: Soak banana leaves thoroughly to ensure they are flexible and won’t crack while wrapping your tamales. A brief pass over an open flame can also help.

  • Cooling Filling: Always let your filling cool before assembly. A hot mixture can warm up the masa and affect texture.

  • Filling Amount: Avoid overstuffing your tamales—stick to the recommended amounts: 2-3 tablespoons of masa and 1-2 tablespoons of filling for the perfect bite.

  • Steaming Method: Keep an eye on the water level during steaming to prevent drying out. Ensure the tamales are standing upright during cooking for even steaming.

These tips will help you create delightful homemade tamales Salvadoreños that your loved ones will cherish!

How to Store and Freeze Tamales Salvadoreños

  • Room Temperature: Tamales Salvadoreños are best enjoyed fresh, but if needed, they can be kept at room temperature for up to 2 hours before serving.

  • Fridge: Store leftover tamales wrapped in their banana leaves in the refrigerator for up to 4 days; they remain flavorful and moist this way.

  • Freezer: Freeze tamales in airtight freezer bags or containers for up to 3 months. Be sure to remove as much air as possible to preserve their taste.

  • Reheating: To reheat, steam frozen tamales directly from the freezer for about 30-40 minutes until heated through, or microwave them wrapped in a damp paper towel for 2-3 minutes.

Make Ahead Options

These Tamales Salvadoreños are perfect for busy home cooks looking to save time while enjoying homemade meals! You can prepare the masa dough and filling up to 24 hours in advance; simply store both components in airtight containers in the refrigerator to maintain freshness. For even greater convenience, assemble the tamales, wrap them tightly in banana leaves, and refrigerate them for up to 3 days before steaming. When you’re ready to enjoy, steam the tamales directly from the fridge—there’s no need to thaw! This method ensures they stay just as delicious and flavorful, allowing you to savor traditional Salvadoran flavors with minimal effort during your busy week.

What to Serve with Authentic Salvadoran Tamales

These vibrant and savory tamales deserve the perfect sidekicks to transform your meal into a heartwarming feast.

  • Curtido: A tangy Salvadoran cabbage slaw that adds a crunchy, refreshing contrast to the warm tamales, balancing out their richness.
  • Salsa Roja: A zesty sauce for dipping, bursting with flavor and heat, it enhances the comforting essence of your tamales and excites the palate.
  • Fresh Avocado Slices: Creamy and smooth, slices of avocado deliver a luscious texture that complements the earthiness of the tamales beautifully.
  • White Rice: Fluffy and neutral, white rice serves as a perfect canvas for the flavorful tamales, absorbing the delightful juices and making every bite satisfying.
  • Corn Tortillas: Serve warm, these tortillas provide a familiar comfort that pairs perfectly with the sturdy tamales, inviting you to savor every morsel.
  • Chili Beans: Rich and hearty, a side of seasoned chili beans adds protein and depth, making for a comforting, filling meal.
  • Mango Salsa: Sweet and tangy, this fruity salsa brightens up the dish, adding a refreshing twist to the savory dynamic of your tamales.
  • Aguas Frescas: These refreshing fruit beverages enhance the meal with cool, sweet flavors and help cleanse the palate between bites.
  • Plantains: Fried plantains add a sweet and caramelized element that contrasts with the savory tamales, making for a delightful combination of flavors.
  • Chocolate Flan: For dessert, this luscious flan with a rich chocolate layer can finish off your meal on a sweet note, beautifully complementing the flavors of the tamales.

Tamales Salvadoreños: Fun Variations Await!

Feel free to get creative with these delicious tamales and make them truly your own!

  • Bean Swaps: Instead of red beans, try black beans or refried beans for a rich, earthy twist. Each type adds a different texture and flavor profile to your tamales.
  • Meat Lovers: Add shredded chicken or pulled pork to the filling for a heartier option that will satisfy any meat craving. This adds protein and transforms your tamales into a comforting main dish.
  • Crunch Factor: Toss in sweet corn or jalapeños for a delightful crunch and a hint of spice. Each bite becomes an adventure, giving you a burst of flavor that keeps things exciting!
  • Herb Infusion: Incorporate fresh cilantro or parsley into the masa or filling for a fresh, aromatic touch. This simple addition can elevate your tamales with vibrant flavors reminiscent of lush gardens.
  • Cheesy Goodness: Mix in some crumbled queso fresco or shredded cheese to the filling for a creamy richness that melds beautifully with the other ingredients. Who doesn’t love a little extra cheese?
  • Spicy Kick: For spice enthusiasts, add chopped green chilies or a dash of hot sauce to the filling. This brings a fiery element that will make your taste buds dance!
  • Sweet Twist: Create a dessert version by mixing in cinnamon and sugar with your masa and filling fruit like mango or pineapple. These sweet tamales offer a delightful ending to your meal, making them perfect for special occasions.
  • Gluten-Free Delight: Ensure your masa harina is labeled gluten-free for a suitable option that doesn’t compromise on flavor. This way, everyone can enjoy these homemade treats together!

With these variations, your tamales salavadoreños are bound to be a culinary hit in your home! Enjoy experimenting and discovering new favorites!

Tamales Salvadoreños Recipe FAQs

What kind of masa harina should I use for Tamales Salvadoreños?
Absolutely! Look for masa harina that is specifically labeled for tamales. This nixtamalized corn flour is crucial for achieving the right texture. If you’re going gluten-free, make sure it’s certified, as some masa harina products may contain gluten.

How long can I store Tamales Salvadoreños in the refrigerator?
Fresh tamales can be kept wrapped in their banana leaves in the refrigerator for up to 4 days. Just be sure to keep them well-sealed to maintain their moisture and flavor. If you find yourself with leftovers, enjoy them while they’re fresh for the best taste!

Can I freeze Tamales Salvadoreños for later? How do I do it?
Yes, you can freeze these delightful tamales for up to 3 months! Here’s how: After they’ve cooled completely, wrap each tamal in plastic wrap or foil, then place them in airtight freezer bags, squeezing out as much air as possible. This will help preserve their rich flavors.

What if my masa dough is too dry?
If the masa is too dry, don’t worry! Simply add small amounts of warm water, about 1 tablespoon at a time, and mix until you achieve a smooth, spreadable consistency. The goal is to have a pliable dough that can easily spread on the banana leaves without cracking.

Are there any dietary considerations with these tamales?
When it comes to allergies, the key ingredients are typically safe for most people. However, it’s best to avoid adding any allergens like nuts or gluten-containing ingredients. For pet owners, ensure neither the filling nor the masa includes harmful ingredients like onions or garlic, as these can be toxic to pets.

How can I prevent my banana leaves from cracking while wrapping?
To keep banana leaves pliable, immerse them in boiling water for about 30 seconds. This quick soak softens the leaves, making them much easier to fold without tearing. If your leaves are still too stiff, you can also pass them briefly over an open flame to warm them up!

Tamales Salvadoreños

Tamales Salvadoreños: Discover the Heart of Homemade Comfort

Experience the delightful flavors of Tamales Salvadoreños, a labor of love filled with savory chicken and vibrant vegetables.
Prep Time 30 minutes
Cook Time 1 hour 30 minutes
Total Time 2 hours
Servings: 8 tamales
Course: Dinner
Cuisine: Salvadoran
Calories: 250

Ingredients
  

For the Masa Dough
  • 2 cups masa harina Use nixtamalized corn flour for the best texture.
  • 1 teaspoon salt Essential for enhancing flavor; adjust to taste.
  • 1 tablespoon olive oil Can be substituted with vegetable oil.
For the Filling
  • 1 medium onion Opt for yellow or sweet onions.
  • 2 cloves garlic Fresh garlic infuses depth.
  • 1 medium green bell pepper Adds sweetness; can swap for sweeter peppers.
  • 1 teaspoon vegetable or chicken bouillon powder Boosts flavor.
  • 1 cup red beans Use canned or pre-cooked for convenience.
  • 1 medium tomato Provides moisture and acidity.
For Wrapping
  • 6 pieces banana leaves Traditional wrappers that impart unique flavor.
  • 6 sheets parchment paper Offers extra support while wrapping.
  • 1 roll cooking twine Secures the tamales during steaming.

Equipment

  • Dutch oven
  • Stand mixer
  • blender
  • steaming rack
  • Knife
  • Cutting board

Method
 

Step-by-Step Instructions for Tamales Salvadoreños
  1. In a Dutch oven, heat 2 tablespoons of olive oil over medium heat. Add 1 diced onion, 2 minced garlic cloves, and 1 chopped tomato. Sauté for 5 minutes until translucent. Stir in 1 cup of cooked red beans, season with salt and pepper, and sauté for another 10 minutes. Blend until smooth and set aside.
  2. In a medium skillet, heat another tablespoon of olive oil and sauté the remaining onion, garlic, and 1 diced green bell pepper until softened. Transfer this mixture to a blender, blend with 1 cup of water until smooth. In a stand mixer, combine 2 cups of masa harina, 1 teaspoon of salt, and 1 teaspoon of bouillon powder. Gradually add in the blended mixture until a soft dough forms.
  3. To make the banana leaves pliable, immerse each square in boiling water for 30 seconds. Remove and pat dry.
  4. On a piece of parchment paper, lay out a banana leaf. Scoop 2 tablespoons of masa dough onto the leaf, slightly flatten. Add about 2 teaspoons of filling in the center. Fold the edges over and secure with cooking twine. Repeat until all ingredients are used.
  5. In a large Dutch oven, arrange a steaming rack. Place tamales upright and pour boiling water until just below them. Cover and steam for 1.5 hours, checking water level to prevent burning.

Nutrition

Serving: 1tamaleCalories: 250kcalCarbohydrates: 35gProtein: 8gFat: 9gSaturated Fat: 1gPolyunsaturated Fat: 1gMonounsaturated Fat: 7gSodium: 300mgPotassium: 400mgFiber: 5gSugar: 2gVitamin A: 5IUVitamin C: 20mgCalcium: 2mgIron: 8mg

Notes

Tamales Salvadoreños can be kept at room temperature for up to 2 hours, stored in the refrigerator for up to 4 days, and can be frozen for up to 3 months. Reheat by steaming or microwaving wrapped in damp paper towel.

Tried this recipe?

Let us know how it was!

Delicious Vegan Burrito Wraps Ready in Just 10 Minutes

The vibrant colors and enticing aromas of these 10-Minute Vegan Burrito Wraps immediately transport me to a sun-soaked kitchen filled with laughter. Perfect for those frantic weeknights when time is of the essence, this recipe combines creamy avocado and protein-rich black beans, all wrapped in a soft tortilla. This quick meal not only satisfies your taste buds but also keeps life healthy and exciting with its customizable ingredients. No stoves or lengthy prep times here—just fresh flavors in the blink of an eye! Grab your favorite fresh veggies, and let’s dive into creating this delicious bundle of goodness together. What will you add to make it your own?

Why are these wraps a game changer?

Quick Preparation: With just 10 minutes to make these Vegan Burrito Wraps, you’ll have a satisfying meal ready in no time. Perfect for busy individuals or families!

Endless Customization: Each wrap can be a reflection of your taste. You can easily swap in different beans or veggies like shredded carrots or spinach.

Nutritious and Delicious: Filled with protein-rich black beans and creamy avocado, these wraps not only taste great but also nourish your body.

Crowd-Pleaser: Whether it’s a busy weeknight or casual get-together, these wraps bring everyone to the table, making them an excellent alternative to fast food. If you’re searching for something similar, try these Garlic Chicken Wraps for another delicious option!

No-Cook Convenience: No need to turn on the stove—just assemble and enjoy! This makes them ideal for hot summer days or when you crave something fresh and light.

Vegan Burrito Wraps Ingredients

For the Wraps

  • Tortillas – Use soft flour or corn tortillas for flexibility and an easy wrap.
  • Avocado – Provides a creamy texture and healthy fats that enhance the dish.

For the Filling

  • Black beans – Packed with protein and fiber; feel free to replace with pinto beans or chickpeas for variation.
  • Onion – Adds flavor and crunch; substitute with green onions for a milder taste if desired.
  • Cilantro – Fresh herb that elevates the flavor; you can omit it or use parsley instead.

For the Spice

  • Chili powder – Introduces mild spiciness and smokiness; adjust according to your personal heat preference.

Step‑by‑Step Instructions for 10-Minute Vegan Burrito Wraps

Step 1: Prepare Ingredients
Begin by gathering all your ingredients for the Vegan Burrito Wraps. Take your fresh tortillas, black beans, ripe avocado, and onion. Dice the onion and chop the cilantro finely, creating a colorful mix. Mash the avocado in a bowl until creamy, and drain and rinse the black beans, ensuring they are ready for the next steps.

Step 2: Mix Filling
In a large mixing bowl, combine the creamy mashed avocado with the black beans, chopped onion, chopped cilantro, and a sprinkle of chili powder. Stir everything gently to ensure the ingredients are evenly distributed, creating a deliciously cohesive filling. Taste your mixture and add more chili powder if you want a spicier kick, making sure each bite bursts with flavor.

Step 3: Assemble Burritos
Before wrapping, briefly warm your tortillas in a dry skillet over medium heat for about 15-30 seconds on each side. This softens them, making them more pliable. Spoon a generous amount of the filling mixture onto the center of each tortilla, then fold the sides over the filling and roll tightly from the bottom up to secure your Vegan Burrito Wraps.

Step 4: Serve and Enjoy
Once assembled, place your burritos seam-side down on a plate. Cut them in half for easy handling, and feel free to serve with salsa or fresh pico de gallo on the side for an extra flavor boost. These vibrant burritos are now ready to be enjoyed, bringing a quick, healthy meal to your table in just 10 minutes!

How to Store and Freeze Vegan Burrito Wraps

  • Room Temperature: For best taste and texture, enjoy your Vegan Burrito Wraps right after preparing. Avoid leaving them out for more than 2 hours.

  • Fridge: Wrap any leftovers tightly in plastic wrap or foil, and store them in the refrigerator for up to 24 hours. This will keep the flavors intact while preventing sogginess.

  • Freezer: Freeze the assembled burritos in an airtight container or freezer-safe bag for up to 3 months. For optimal freshness, consider double wrapping them.

  • Reheating: To reheat, remove from the fridge or freezer, and warm in a skillet over medium heat for about 5 minutes on each side. This restores the original texture and flavor!

Expert Tips for Vegan Burrito Wraps

  • Fresh Ingredients: Use ripe avocados and fresh veggies to maximize flavor and nutrition in your Vegan Burrito Wraps.

  • Warm Tortillas: Always warm your tortillas briefly before assembly to prevent cracking and ensure the perfect roll.

  • Savory Seasoning: Adjust chili powder to suit your taste, but don’t be shy—this spice adds depth and flavor to the filling!

  • Avoid Sogginess: If preparing ahead, store filling and tortillas separately; this keeps your wraps fresh and enjoyable.

  • Extra Veggies: Feel free to add finely shredded carrots or fresh spinach for added crunch and nutrition without overwhelming the flavor.

What to Serve with 10-Minute Vegan Burrito Wraps

Elevate your meal experience with these delightful accompaniments, perfectly balancing flavors and textures.

  • Crispy Sweet Potato Fries: These vibrant fries offer a sweet contrast to the savory burrito, adding a delightful crunch to your meal.

  • Zesty Corn Salsa: Refreshing and bright, this salsa, made with lime juice and cilantro, adds a burst of flavor that complements the wraps beautifully.

  • Spicy Guacamole: Creamy and rich, this dip elevates the avocado goodness already in your burrito while introducing a kick of spice. Pair with crunchy tortilla chips!

  • Mexican Street Corn Salad: This salad brings a tangy, creamy element with harmonious flavors of charred corn, lime, and cotija cheese, adding freshness to your plate.

  • Chilled Cucumber Salad: Light and crisp, diced cucumbers tossed with lime and cilantro provide a refreshing, cooling contrast to the flavors of the burrito wraps.

  • Chili Lime Water: Refresh your palate with this drink that ties the meal together, combining zesty lime and a hint of chili for a bold and exciting sip.

  • Creamy Tomato Soup: Dip your burrito wraps into a warm, smooth tomato soup for a comforting and satisfying combination, making a lovely, cozy meal.

  • Fresh Fruit Salad: A medley of seasonal fruits adds a naturally sweet and refreshing side, balancing out the savory flavors and rounding out your meal nicely.

Enjoy crafting your ideal combination for a truly memorable table spread!

Vegan Burrito Wraps Variations

Feel free to jazz up your Vegan Burrito Wraps—each variation is like a new adventure for your taste buds!

  • Bean Swaps: Use pinto beans or chickpeas instead of black beans for a fresh twist. Each option brings its unique flavor and texture, making your wraps even more delightful.

  • Avocado Alternative: Swap avocado with refried beans for a hearty mash that still delivers creaminess. This is a fantastic option if you’re looking for something a little different, with that satisfying richness.

  • Herb Changes: Replace cilantro with parsley or coriander for a different herbal note. The flavor transformation can add an unexpected freshness to your wraps, all while keeping it vibrant.

  • Spicy Kick: Add diced jalapeños or sprinkle red pepper flakes for extra heat. This is a perfect enhancement for spice lovers seeking that extra zing!

  • Veggie Boost: Toss in shredded carrots or diced bell peppers for an added crunch. The colorful veggies not only amp up the nutrition but also create a visually appealing wrap.

  • Lettuce Wraps: For a low-carb option, use large lettuce leaves instead of tortillas. This makes for a light, refreshing meal, ideal for warm weather days.

  • Flavor Enhancement: Drizzle some lime juice over the filling for a zesty burst. This simple addition can elevate the overall taste experience of your wraps.

  • Topping Tales: Serve your wraps with a side of vibrant salsa or cooling guacamole for an explosion of flavor. These dips offer complimentary textures that truly enhance the enjoyment of each bite.

For more mouth-watering wrap ideas, explore these delicious Garlic Chicken Wraps that make for a wonderful meal option too!

Make Ahead Options

These 10-Minute Vegan Burrito Wraps are perfect for busy home cooks looking to save time! You can prepare the filling—mashed avocado, black beans, diced onion, cilantro, and chili powder—up to 24 hours in advance. Simply mix the ingredients and store them in an airtight container in the refrigerator to maintain freshness. To keep the avocado from browning, consider adding a squeeze of lime juice. When you’re ready to serve, warm the tortillas for about 30 seconds and assemble the wraps as directed. With these make-ahead strategies, you’ll enjoy delicious burritos that are just as satisfying and vibrant, all while making your weeknight cooking a breeze!

10-Minute Vegan Burrito Wraps Recipe FAQs

How do I choose ripe avocados for my burrito wraps?
Absolutely! The best avocados are slightly soft to the touch when gently pressed, indicating ripeness. Look for dark green or black skin, and avoid any with large dark spots, which indicate overripeness. If you find unripe avocados, place them in a brown paper bag at room temperature for a day or two to speed up the ripening process.

What’s the best way to store leftover Vegan Burrito Wraps?
To keep your wraps fresh, wrap any leftovers tightly in plastic wrap or foil and store them in the refrigerator for up to 24 hours. This will prevent them from getting soggy and maintain their delicious flavors. When you’re ready to eat, I recommend reheating them in a skillet to restore that perfect texture!

Can I freeze Vegan Burrito Wraps?
Absolutely! You can freeze your assembled burrito wraps for up to 3 months. Just ensure they are wrapped tightly in plastic wrap or stored in an airtight container. For extra protection against freezer burn, consider double wrapping. When ready to enjoy, let them thaw in the fridge overnight, and then reheat in a skillet over medium heat for about 5-7 minutes per side until heated through.

What should I do if my burrito filling is too runny?
If your filling is too runny, I recommend trying to drain some of the liquid from the black beans before mixing them into the avocado. You can also add a bit more mashed avocado or some finely chopped veggies like bell peppers, which will help absorb excess moisture and retain the right texture.

Are these burrito wraps safe for people with allergies?
Yes, though always check if your tortillas contain gluten or other allergens. For a gluten-free option, you can use corn tortillas. As for beans, if anyone has legume allergies, feel free to substitute the beans with quinoa or cooked rice for a similar texture. Always check each component based on dietary needs to ensure a safe and delightful meal!

Vegan Burrito Wraps

Delicious Vegan Burrito Wraps Ready in Just 10 Minutes

These Vegan Burrito Wraps are quick, customizable, and packed with flavor, making them a perfect meal for busy weeknights.
Prep Time 10 minutes
Total Time 10 minutes
Servings: 4 wraps
Course: Lunch
Cuisine: Vegan
Calories: 250

Ingredients
  

For the Wraps
  • 4 pieces Tortillas Use soft flour or corn tortillas for flexibility and an easy wrap.
  • 2 medium Avocado Provides a creamy texture and healthy fats.
For the Filling
  • 1 can Black beans Packed with protein; can substitute with pinto beans or chickpeas.
  • 1 medium Onion Adds flavor and crunch; substitute with green onions for milder taste.
  • 0.5 cup Cilantro Fresh herb to enhance flavor; can be omitted.
For the Spice
  • 1 teaspoon Chili powder Adjust according to your heat preference.

Equipment

  • Mixing Bowl
  • Skillet

Method
 

Preparation Steps
  1. Gather all ingredients: tortillas, black beans, avocado, onion, and cilantro. Dice the onion and chop the cilantro. Mash the avocado.
  2. Mix mashed avocado with black beans, onion, cilantro, and sprinkle chili powder. Stir gently.
  3. Warm tortillas in a skillet for 15-30 seconds. Spoon filling onto each tortilla and fold sides over, then roll tightly.
  4. Serve burritos seam-side down, cut in half. Enjoy with salsa or pico de gallo.

Nutrition

Serving: 1wrapCalories: 250kcalCarbohydrates: 30gProtein: 10gFat: 12gSaturated Fat: 2gPolyunsaturated Fat: 0.5gMonounsaturated Fat: 9gSodium: 400mgPotassium: 450mgFiber: 10gSugar: 1gVitamin A: 10IUVitamin C: 20mgCalcium: 8mgIron: 15mg

Notes

Use fresh ingredients for best flavor and avoid sogginess by storing filling and tortillas separately if preparing ahead.

Tried this recipe?

Let us know how it was!

Stay Connected

Get recipes via email: