Get my cookbooks

Irresistibly Chewy Strawberry Crunch Cookies for Summer Bliss

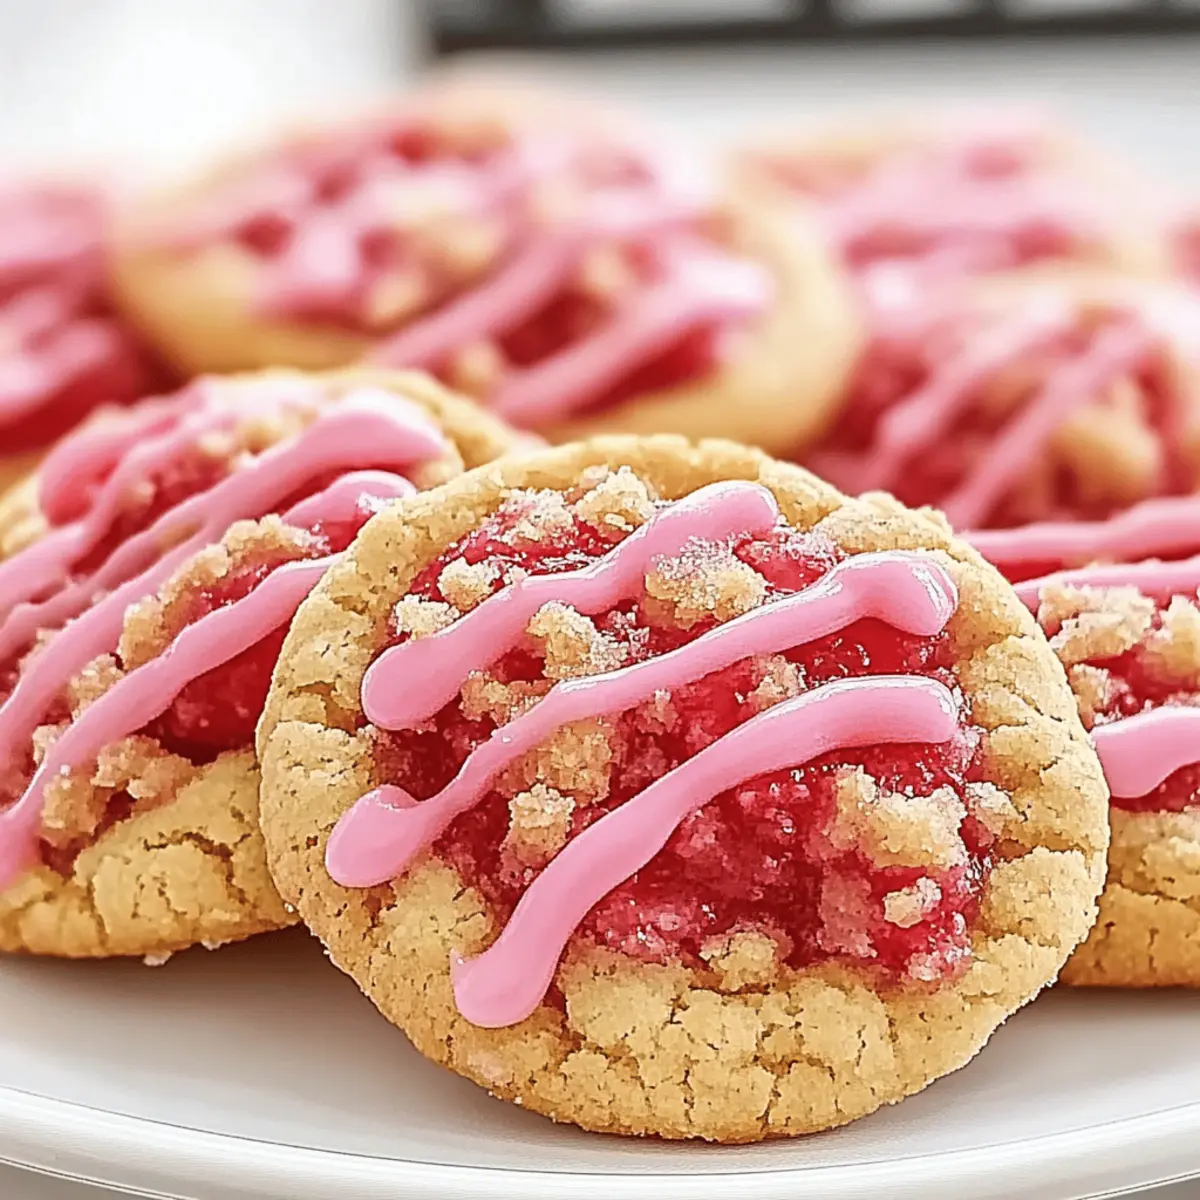
Rainy days can lead to unexpected delights in the kitchen! As I stood by the window, the sky drab and gray, I found myself reaching for a jar of strawberry jam. That’s when the idea hit me: why not whip up a batch of Strawberry Crunch Cookies? These delightful treats are perfect for uplifting your spirits, featuring a chewy center that echoes summer vibes and a tempting crunchy topping that adds an exciting twist. Additionally, the best part? They’re easy to make, requiring minimal time and effort, so you can satisfy your sweet tooth without the fuss of complicated baking. Each bite blooms with vibrant strawberry goodness, making these cookies an irresistibly fun addition to gatherings or even just an afternoon snack at home. What are you waiting for? Let’s dive into this berry bliss together!

Why are Strawberry Crunch Cookies a must-try?

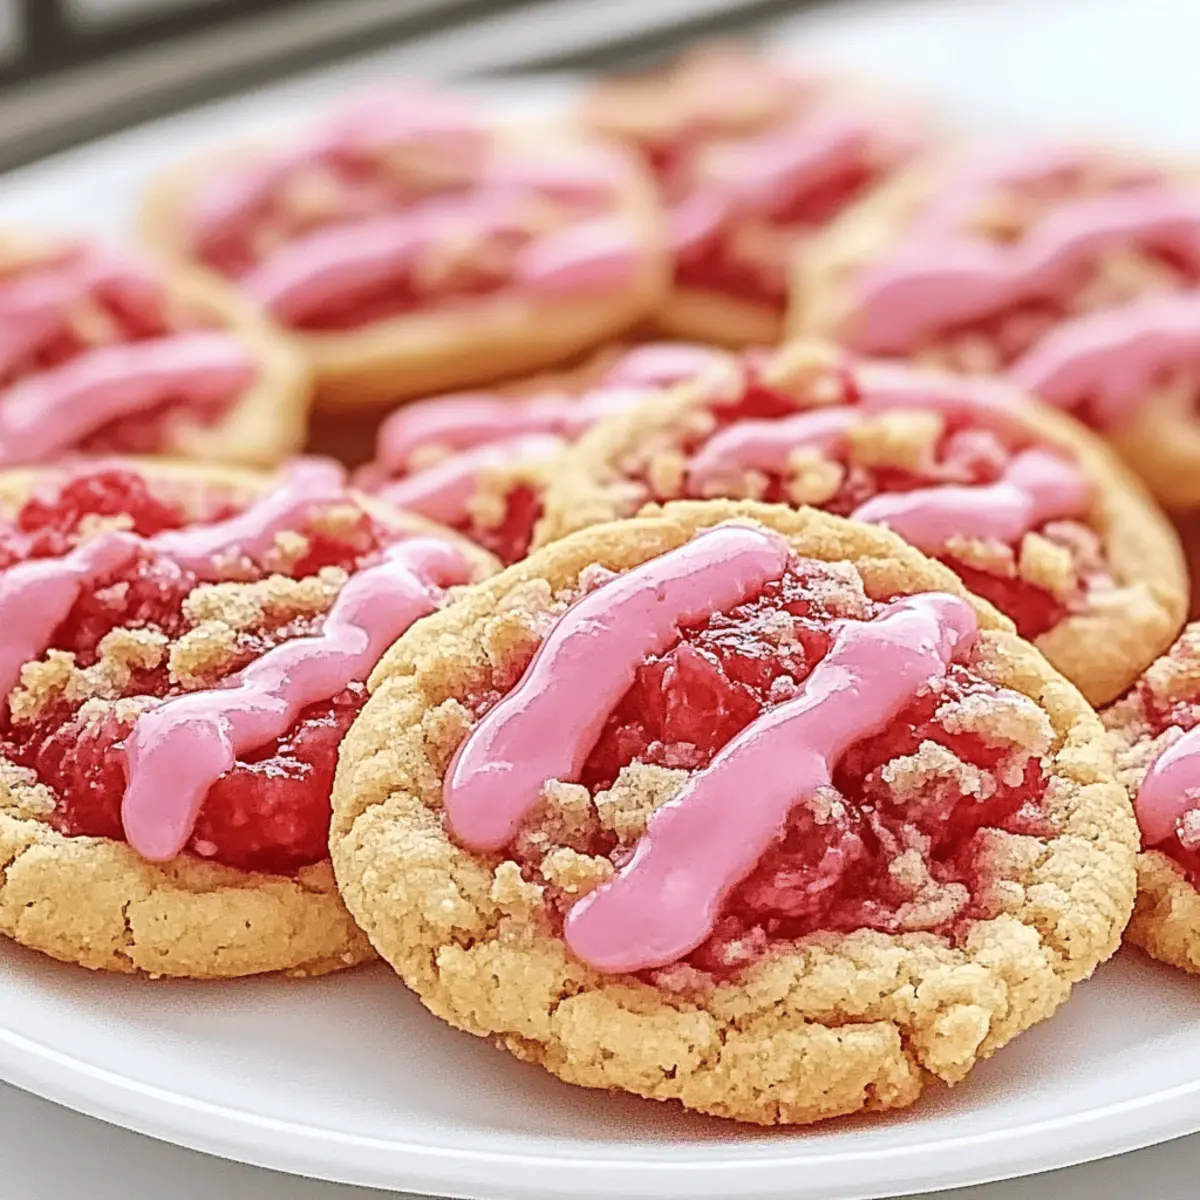
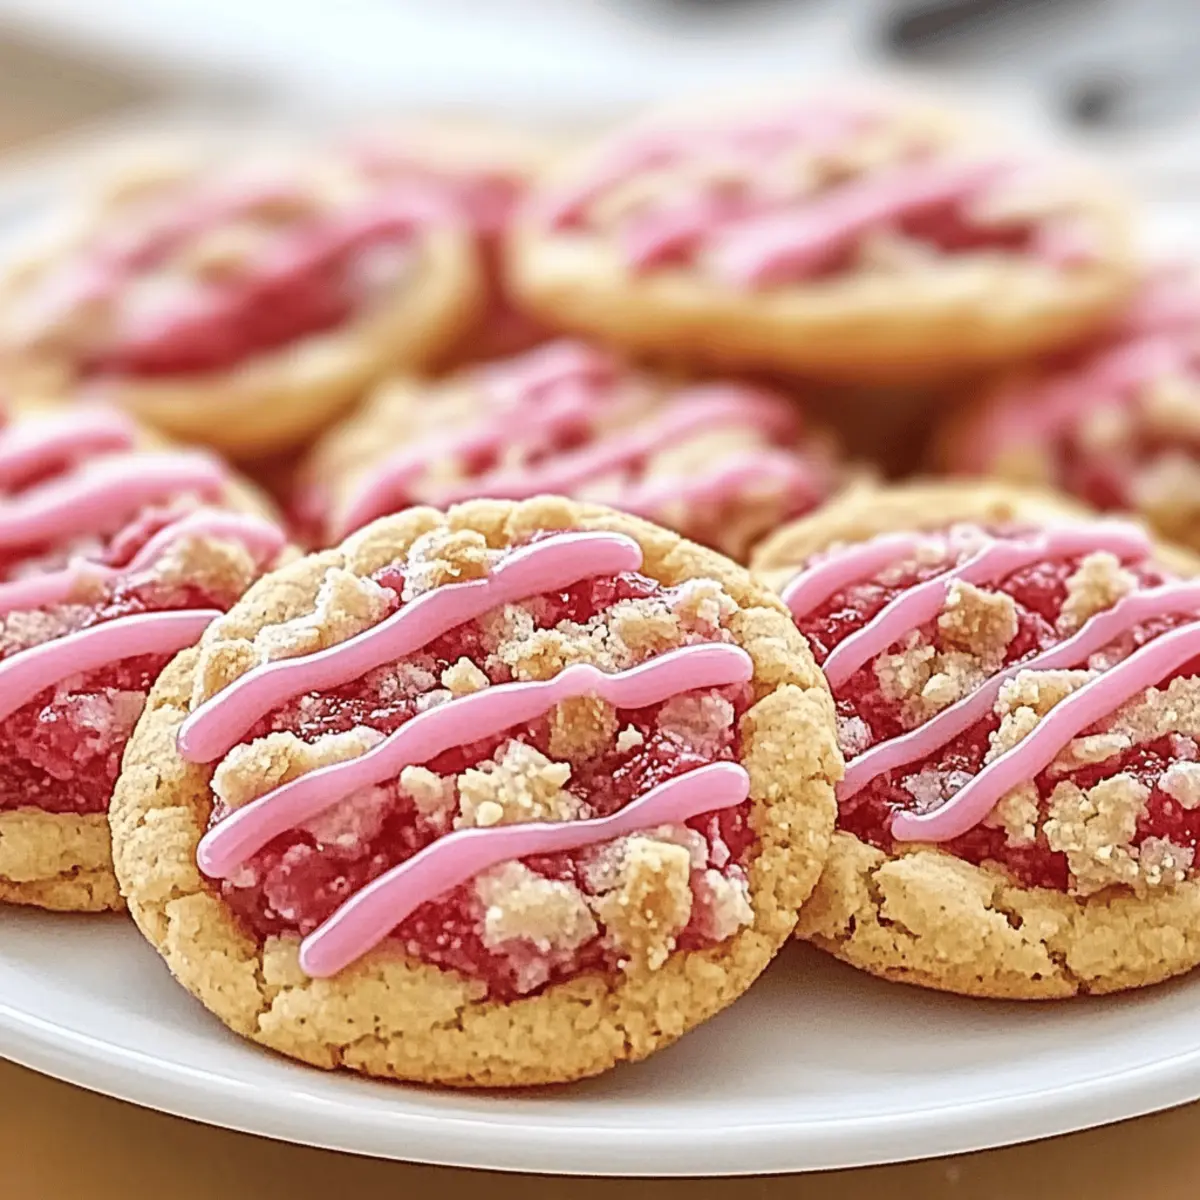
Irresistible Summer Treat: These cookies encapsulate the vibrant flavors of summer, bringing sunshine to any occasion.

Easy to Make: With straightforward steps and minimal ingredients, even beginner bakers can whip these up effortlessly.

Flavor Explosion: The soft, chewy centers burst with strawberry sweetness, while the crunchy topping creates a delightful contrast.

Versatile Variations: Feel free to mix things up—try swapping in dark chocolate or experimenting with flavors like almond in Blueberry Breakfast Cookies.

Perfect for Sharing: These cookies are visually stunning and delicious, making them a crowd-pleaser at gatherings, similar to Strawberry Cheesecake desserts!

Dive into these Strawberry Crunch Cookies for a delightful experience that will brighten your day!

Strawberry Crunch Cookie Ingredients

• Ready to embark on a berry-filled adventure?

For the Dough
Unsalted Butter – Adds richness and moisture to the cookies; margarine works as a non-dairy substitute.
Granulated Sugar – Provides sweetness and a light texture; brown sugar can deepen the flavor profile.
Brown Sugar – Contributes chewiness; swap with granulated sugar for a less chewy cookie.
Egg – Binds the ingredients and adds moisture; a flax egg can be a great vegan alternative.
Vanilla Extract – Enhances the cookie’s flavor; consider almond extract for a twist.
All-Purpose Flour – Gives structure; use a 1:1 gluten-free flour blend for gluten-free cookies.
Baking Soda – Helps the cookies rise; baking powder can work in a pinch.
Salt – Balances sweetness; skip if using salted butter.

For the Strawberry Filling
Strawberry Jam – Infuses the cookies with flavor and moisture; fresh puree intensifies the taste.

For the Crunch Topping
Crushed Strawberry-Flavored Cereal – Provides a delightful crunch; use crushed graham crackers if needed.
White Chocolate Chips – Adds sweetness and creaminess; dark chocolate chips can offer a richer flavor.

This simple yet delightful combination of ingredients is sure to bring joy into your kitchen while making Strawberry Crunch Cookies!

Step‑by‑Step Instructions for Strawberry Crunch Cookies

Step 1: Preheat the Oven
Begin by preheating your oven to 350°F (175°C). While the oven warms up, line your baking sheets with parchment paper to prevent sticking. This ensures your Strawberry Crunch Cookies will bake evenly and release effortlessly once they’re finished.

Step 2: Cream the Butters and Sugars
In a large mixing bowl, cream together softened unsalted butter, granulated sugar, and brown sugar. Use an electric mixer on medium speed for about 3 to 5 minutes, until the mixture is light and fluffy. The texture should be soft, indicating that air is incorporated, which helps your cookies become perfectly chewy.

Step 3: Add Wet Ingredients
Next, beat in one egg and a splash of vanilla extract into the creamed butter mixture until everything is well combined. This step adds moisture and flavor to your Strawberry Crunch Cookies, making them irresistibly tasty and ensuring the dough is cohesive.

Step 4: Mix Dry Ingredients
In a separate bowl, whisk together all-purpose flour, baking soda, and a pinch of salt. Once combined, gradually add the dry ingredients to the wet mixture. Stir gently with a spatula until just combined, being careful not to overmix, as this may result in tougher cookies.

Step 5: Fold in the Goodies
Now, it’s time to infuse your cookie dough with delicious flavor! Gently fold in the strawberry jam, crushed strawberry-flavored cereal, and a handful of white chocolate chips. These ingredients bring a burst of strawberry flavor and delightful texture to each bite of your Strawberry Crunch Cookies.

Step 6: Scoop the Dough
Using a rounded tablespoon or cookie scoop, portion the dough onto the prepared baking sheets, making sure to leave about 2 inches between each scoop. This spacing allows for spreading during baking. Each generous scoop ensures your cookies will be thick and chewy.

Step 7: Bake to Perfection
Place the baking sheets in the preheated oven and bake for 10 to 12 minutes. Look for the edges to turn golden and the centers to look set but slightly soft. The visual cues mean your Strawberry Crunch Cookies are just right—soft and chewy with a lovely golden hue.

Step 8: Cool and Transfer
Once baked, allow the cookies to cool on the baking sheets for about 5 minutes. This resting period firms them up a bit. Afterward, carefully transfer them to a wire rack to cool completely, allowing air to circulate and ensuring the perfect chewy texture.

Step 9: Prepare the Crunch Topping
While your cookies cool, create the crunchy topping. In a bowl, mix crushed freeze-dried strawberries with crushed graham crackers and melted butter until well combined. Once your cookies are cooled, generously sprinkle this mixture over the top, adding that irresistible crunch to your Strawberry Crunch Cookies.

How to Store and Freeze Strawberry Crunch Cookies

Room Temperature: Store your Strawberry Crunch Cookies in an airtight container at room temperature for up to 5 days, keeping them fresh and delicious.

Fridge: For extended freshness, you can refrigerate the cookies for up to 1 week. Just be sure they’re in a well-sealed container to prevent them from drying out.

Freezer: Freeze cookies in a single layer on a baking sheet. Once firm, transfer them to a freezer bag. They’ll stay tasty for up to 3 months.

Reheating: To enjoy your cookies warm, reheat them in the microwave for 10-15 seconds or place them in a preheated oven at 350°F (175°C) for about 5 minutes. Enjoy every delightful bite!

Make Ahead Options

These delightful Strawberry Crunch Cookies are perfect for meal prep enthusiasts! You can prepare the cookie dough up to 24 hours in advance; simply mix all the ingredients as instructed and store it in an airtight container in the refrigerator. This helps to enhance the flavors and maintain the cookies’ quality. Additionally, you can bake them fresh or scoop the dough into balls and freeze them for up to 3 months. When you’re ready to bake, just place the frozen dough on a baking sheet straight from the freezer and add a minute or two to the baking time. Enjoy the convenience of having these berry-filled treats ready at a moment’s notice—just as delicious as if you made them the same day!

Helpful Tricks for Strawberry Crunch Cookies

  • Chill for Chewiness: Allow your dough to chill in the fridge for 30 minutes. This simple step enhances the chewiness of your Strawberry Crunch Cookies, preventing them from spreading too thin.

  • Room Temperature Ingredients: Make sure butter, eggs, and other ingredients are at room temperature. This helps create a smooth batter, ensuring your cookies bake evenly and maintain that delightful chewy texture.

  • Avoid Overmixing: Mix just until combined when adding dry ingredients. Overmixing can lead to tough cookies, so treat your dough gently to keep the centers soft and tender.

  • Fresh Baking Soda: Always check your baking soda’s freshness before use. A quick test—mix it with vinegar; if it fizzes, it’s fresh! This ensures your Strawberry Crunch Cookies rise beautifully.

  • Uniform Scoops: Use a cookie scoop for evenly sized dough portions. This helps all your cookies bake at the same rate, resulting in a consistent texture and perfect golden edges.

What to Serve with Delightfully Chewy Strawberry Crunch Cookies?

A warm kitchen filled with sweet aromas is the perfect backdrop for serving these delightful treats that promise summer vibes.

  • Vanilla Ice Cream: The creamy and cold ice cream perfectly offsets the chewy cookie texture, creating a delightful contrast.

  • Fresh Strawberries: Serve them on the side to enhance the strawberry flavor and add a refreshing, fruity note to each bite.

  • Chocolate Milk: This rich and creamy beverage complements the sweetness of the cookies and is perfect for dunking.

  • Lemonade: The bright, tart notes of lemonade provide a refreshing balance to the rich flavors of the cookies.

  • Chocolate Fondue: A fun treat for gatherings, dipping cookie pieces into warm chocolate fondue elevates the indulgent experience.

  • Fruit Salad: A vibrant mix of seasonal fruits adds freshness and color to your dessert table while lightening the overall meal.

Indulging in these Strawberry Crunch Cookies alongside any of these pairings will elevate your snacking experience, leaving you with sweet memories!

Strawberry Crunch Cookies Variations

Feel free to let your creativity shine by customizing these delightful cookies to suit your taste!

  • Fresh Strawberries: Replace freeze-dried strawberries with fresh for a juicier texture, but reduce other liquids slightly.

  • Dark Chocolate Swap: Use semi-sweet or dark chocolate chips instead of white chocolate for a richer, more intense flavor.

  • Nutty Twist: Add chopped nuts, like pecans or walnuts, for a satisfying crunch and additional flavor. A few handfuls can elevate these cookies deliciously!

  • Almond Extract: Swap out vanilla extract for almond extract for a delightful almond aroma that adds a unique touch to each cookie. It’s a small change with huge impact.

  • Cinnamon Sugar Dusting: After baking, toss the cookies in a mixture of cinnamon and sugar for an extra sweet and spicy kick. This twist feels cozy and festive!

  • Zesty Lemon: Add lemon zest to the dough for a refreshing citrus note that balances the sweetness beautifully. It’s a bright surprise that pairs perfectly with strawberries!

  • Chia Seed Boost: For a healthy twist, incorporate chia seeds into the dough; they add fiber and a subtle crunch for an extra nutrient boost.

  • Strawberry Jam Layering: Instead of mixing the jam into the dough, you could place a dollop on top of each cookie before adding the crunch topping. This brings even more strawberry flavor to the forefront!

Whether you’re enjoying them solo or sharing with family and friends, these variations will keep your baking exciting and delicious! For more tasty ideas, don’t forget to check out our recipes for Strawberry Cheesecake or Strawberry Cheesecake Dump for fruity inspiration!

Strawberry Crunch Cookies Recipe FAQs

How do I know when strawberries are ripe for the recipe?
Absolutely! Look for strawberries that are bright red, plump, and fragrant. The leaves should be green and fresh, and avoid any that have dark spots or mold, as they may compromise the flavor of your cookies.

What is the best way to store Strawberry Crunch Cookies?
For optimal freshness, store your Strawberry Crunch Cookies in an airtight container at room temperature for up to 5 days. If you have any left after that, you can refrigerate them for an additional week, just ensure they are well-sealed to keep them from drying out!

Can I freeze these cookies? If so, how?
Very! To freeze your Strawberry Crunch Cookies, start by arranging them in a single layer on a baking sheet. Once frozen solid, transfer them to a freezer bag or an airtight container. They can be kept in the freezer for up to 3 months. When you’re ready to enjoy them, just reheat in the microwave for about 10-15 seconds or pop them in the oven at 350°F (175°C) for 5 minutes.

What should I do if the cookies turn out too dry or hard?
If your cookies are a bit dry or hard, it could be due to overmixing or too much flour. Avoid overmixing the dough—mix just until the dry ingredients are combined. Also, make sure you’re measuring flour properly (spoon it into the measuring cup and level it off) to avoid adding too much.

Are these cookies safe for pets?
While these Strawberry Crunch Cookies are delicious for humans, they contain ingredients like chocolate which are harmful to pets. Always keep baked goods out of reach of animals and consider looking for pet-safe treat recipes to share the joy!

Can I use a different type of jam instead of strawberry?
Absolutely! Feel free to explore other flavors such as raspberry, blueberry, or even apricot jam. Just keep in mind that the flavor profile will change a bit, but experimenting can lead to delightful surprises—especially if you use a jam that pairs well with the white chocolate chips!

Strawberry Crunch Cookies

Irresistibly Chewy Strawberry Crunch Cookies for Summer Bliss

These Strawberry Crunch Cookies are a delightful treat with a chewy center and a crunchy topping, perfect for summer snacking.
Prep Time 15 minutes
Cook Time 12 minutes
Chilling Time 30 minutes
Total Time 57 minutes
Servings: 24 cookies
Course: Dessert
Cuisine: American
Calories: 150

Ingredients
  

For the Dough
  • 1 cup Unsalted Butter softened
  • 3/4 cup Granulated Sugar
  • 3/4 cup Brown Sugar
  • 1 large Egg
  • 1 teaspoon Vanilla Extract
  • 2 cups All-Purpose Flour
  • 1 teaspoon Baking Soda
  • 1/2 teaspoon Salt
For the Strawberry Filling
  • 1/2 cup Strawberry Jam
For the Crunch Topping
  • 1 cup Crushed Strawberry-Flavored Cereal
  • 1/2 cup White Chocolate Chips

Equipment

  • Oven
  • Mixing Bowl
  • Electric mixer
  • spatula
  • Cookie Scoop
  • Baking Sheets
  • Parchment Paper
  • Wire rack

Method
 

Step-by-Step Instructions
  1. Preheat your oven to 350°F (175°C) and line baking sheets with parchment paper.
  2. Cream together softened unsalted butter, granulated sugar, and brown sugar until light and fluffy.
  3. Beat in the egg and vanilla extract until well combined.
  4. Whisk together flour, baking soda, and salt, then gradually add to wet ingredients until just combined.
  5. Fold in strawberry jam, crushed cereal, and white chocolate chips.
  6. Scoop dough onto prepared baking sheets, leaving space between cookies.
  7. Bake for 10 to 12 minutes, until edges are golden and centers are set but soft.
  8. Allow cookies to cool for 5 minutes, then transfer to a wire rack to cool completely.
  9. For the topping, mix crushed freeze-dried strawberries with crushed graham crackers and melted butter. Sprinkle over cooled cookies.

Nutrition

Serving: 1cookieCalories: 150kcalCarbohydrates: 20gProtein: 2gFat: 7gSaturated Fat: 4gPolyunsaturated Fat: 1gMonounsaturated Fat: 2gCholesterol: 20mgSodium: 150mgPotassium: 50mgFiber: 1gSugar: 10gVitamin A: 250IUVitamin C: 2mgCalcium: 20mgIron: 0.5mg

Notes

For best results, chill the dough for 30 minutes before baking to enhance chewiness.

Tried this recipe?

Let us know how it was!

Comfort Au Gratin Shepherd’s Pie That’s Pure Cozy Delight

As I stood in my cozy kitchen, the aroma of sizzling ground beef and fragrant Italian sausage filled the air, igniting memories of family gatherings around the dinner table. It was the perfect moment to embrace a feel-good classic. Today, I’m excited to share my Comfort Au Gratin Shepherd’s Pie with Cheesy Potato Topping, a dish that not only warms the heart but also invites endless customization based on what’s in your pantry. This gluten-free recipe is not just a hearty meal; it transforms simple ingredients into a comforting masterpiece that’s sure to impress your loved ones. Plus, it’s the kind of dish that you can easily prepare in advance, making busy nights a breeze. Ready to trade in fast food for something special? Let’s dive into this delightful recipe!

Why is this shepherd’s pie so comforting?

Hearty Comfort: This Comfort Au Gratin Shepherd’s Pie brings all the warmth of home-cooked meals, perfect for cozy nights in. Customize with Ease: You can easily swap ingredients based on what you have on hand, making it flexible and resourceful. Irresistible Cheesy Topping: A golden, cheesy crust made with Gruyere and Parmesan adds a delightful finish. Crowd-Pleasing Flavor: This dish combines savory beef and lush vegetables that will satisfy even the pickiest eaters. Quick Preparation: With simple steps, you can whip up this delicious meal, transitioning from fast food to comfort food effortlessly. If you’re excited for more cozy recipes, check out my Pie Soup Comfort or Heartwarming Comfort Sausage for your next family feast!

Comfort Au Gratin Shepherd’s Pie Ingredients

For the Filling

  • Lean Ground Beef – The main protein source; choose lean variants like 90/10 or 93/7 to keep it healthier.
  • Gluten-Free Italian Sausage – Adds a rich flavor; feel free to use your favorite sausage as a substitute.
  • Olive Oil – Great for cooking the meat; consider using butter for extra richness if desired.
  • Garlic (3 cloves, minced) – Fresh garlic enhances the flavor; garlic powder can work in a pinch!
  • Sweet Onion (½ medium, diced) – Provides sweetness and depth; yellow onion makes a good swap.
  • Frozen Mixed Vegetables (2 cups) – Brings nutrition and texture; fresh or single veggies can be used instead.
  • Dried Thyme (½ tsp) – Adds a lovely herbal note; Italian seasoning can substitute for a different flavor twist.
  • Salt and Pepper – Essential seasonings; adjust them according to personal taste.
  • Tomato Paste (3 tbsp) – Deepens the filling’s flavor; don’t skip this for maximum umami!
  • Gluten-Free Worcestershire Sauce (1 tbsp) – Adds a special umami flavor; coconut aminos can replace soy sauce here.
  • Gluten-Free Broth (1 cup) – Helps moisten the filling; beef, chicken, or vegetable broth works well.

For the Potato Topping

  • Rice Flour – Dust the potatoes to prevent sticking; it’s a handy ingredient for gluten-free baking.
  • Russet Potato (1, thinly sliced) – The star of the topping; ensure even slicing for consistent cooking.
  • Sweet Potato (1, peeled and thinly sliced) – Adds a touch of sweetness; you can use only russet potatoes if preferred.
  • Butter (2 tbsp) – For flavor in the potato topping; replace with margarine if necessary.
  • Seasoned Salt – Enhances potato flavor; feel free to adjust the amount to your liking.
  • Gruyere Cheese (1 cup, grated) – Melts beautifully for a luscious crust; mozzarella can be a milder substitute.
  • Parmesan Cheese (¼ cup, grated) – Provides a nutty taste; pecorino cheese is a tasty alternative.
  • Paprika – For added color and flavor; smoked paprika can elevate this dish further.
  • Fresh Italian Parsley – For garnish; substitute with chives or green onions for a different fresh touch.

This Comfort Au Gratin Shepherd’s Pie is a delightful combination of flavors and textures, ready to bring a bit of warmth to your table!

Step‑by‑Step Instructions for Comfort Au Gratin Shepherd’s Pie

Step 1: Brown the Meat
In a large stainless steel pan over medium-low heat, add 1 tablespoon of olive oil. Once heated, carefully add 1 pound of lean ground beef and ½ pound of gluten-free Italian sausage. Cook, breaking the meat apart, until browned and cooked through, about 5-7 minutes. Drain any excess fat to keep the filling from being greasy.

Step 2: Sauté the Aromatics
To the browned meat, stir in ½ medium sweet onion (diced) and 3 minced garlic cloves. Cook until the onion is softened and translucent, which should take around 3-4 minutes. The combination of beef and Italian sausage will create a rich base while the onion and garlic infuse delightful flavors into the filling.

Step 3: Add Vegetables and Seasonings
Mix in 2 cups of frozen mixed vegetables, stirring for about 4 minutes until heated through. Next, add 3 tablespoons of tomato paste, ½ teaspoon of dried thyme, salt, and pepper to taste. Pour in 1 cup of gluten-free broth and 1 tablespoon of Worcestershire sauce, then let the mixture simmer for 30 minutes until it thickens and the flavors meld together beautifully.

Step 4: Prepare the Oven and Potatoes
Preheat your oven to 400°F (200°C) while you prepare the potatoes. Using a mandoline, slice 1 russet potato and 1 sweet potato thinly, aiming for 1/8-inch thickness for even cooking. It’s important to have consistent slices to ensure that your toppings bake perfectly golden on the Comfort Au Gratin Shepherd’s Pie.

Step 5: Layer the First Potato Layer
Drizzle some olive oil in a large pie dish to coat the bottom. Arrange half of the potato slices evenly over the meat mixture in the dish. Sprinkle with paprika for extra flavor, then add ½ cup of grated Gruyere cheese on top, creating a lovely cheesy base that complements the savory filling.

Step 6: Complete the Topping
Layer the remaining potato slices on top of the first layer. Finish by sprinkling the last half cup of Gruyere and ¼ cup of grated Parmesan cheese across the layered potatoes. Dot the top with 2 tablespoons of butter to enhance richness and help achieve that perfect golden crust during baking.

Step 7: Bake the Pie
Cover the pie dish with foil and place it in your preheated oven. Bake for 30 minutes to allow the flavors to meld and the potatoes to start cooking. After this initial bake, remove the foil and continue baking for an additional 25-30 minutes, or until the potatoes are tender and a beautiful golden crust forms on top.

Step 8: Final Touches
Once your Comfort Au Gratin Shepherd’s Pie is bubbling and golden, remove it from the oven and let it rest for 10 minutes. This resting time will help the layers set for easier slicing. Just before serving, garnish with freshly chopped parsley to add a touch of color and freshness to this delightful comfort food.

What to Serve with Comfort Au Gratin Shepherd’s Pie

Elevate your mealtime experience by pairing this cozy pie with delicious sides that complement its hearty richness.

  • Creamy Mashed Potatoes: A classic side that adds even more comfort, perfect for soaking up the delicious filling.
  • Mixed Green Salad: A light and refreshing contrast to the richness of the pie; choose a zesty vinaigrette for an added kick.
  • Garlic Bread: Warm, buttery, and crispy, this option brings a delightful crunch and is perfect for mopping up extra gravy.
  • Roasted Vegetables: Seasoned root veggies add color and a caramelized sweetness that balances the savory pie beautifully.
  • Coleslaw: The crunchy texture and tangy flavor make it a fantastic contrast, adding a fresh note to the meal.
  • Herbed Rice: Fluffy and aromatic, a side of herbed rice will bring a subtle flavor that pairs well with the beef filling.
  • Crispy Brussels Sprouts: These roasted delights add a nutty flavor and extra crunch that complements the creamy potatoes.
  • Buttery Corn on the Cob: Sweet and tender, this classic side dish harmonizes with the heartiness of the shepherd’s pie.
  • Chilled White Wine: A glass of crisp Chardonnay brings a refreshing lift to your meal; its acidity cuts through the richness perfectly.
  • Chocolate Pudding: For dessert, a simple yet indulgent chocolate pudding is an easy way to finish off your comforting feast!

Comfort Au Gratin Shepherd’s Pie Variations

Feel free to get creative and make this Comfort Au Gratin Shepherd’s Pie your own with various swaps and twists!

  • Lamb Swap: Replace the ground beef with lamb for a rich, traditional flavor that will delight your taste buds.

  • Cheese Blend: Experiment with different cheese combinations, such as sharp cheddar or tangy feta, for a unique cheesy crust.

  • Vegetable Boost: Add extra vegetables like sautéed mushrooms or colorful bell peppers for even more nutrition and texture in your filling.

  • Herb Infusion: To elevate the flavor, try adding fresh herbs like rosemary or oregano in place of the thyme for a fragrant twist.

  • Spicy Kick: If you enjoy some heat, incorporate a pinch of red pepper flakes or diced jalapeños into the meat mixture for an exciting zing.

  • Creamy Layer: Stir in a dollop of cream cheese or sour cream into the filling to add a luscious, creamy texture that everyone will love.

  • Cauliflower Topping: For a low-carb alternative, replace the potato topping with mashed cauliflower for an equally satisfying finish.

  • Mushroom Mix: Use a mix of sautéed cremini and shiitake mushrooms instead of meat for a hearty vegetarian version that doesn’t skimp on flavor.

For more comforting creations like my delicious Bacon Soup Comfort or a cozy Tortellini Soup Comfort, you’ll never run out of inspiration in your kitchen!

Expert Tips for Comfort Au Gratin Shepherd’s Pie

  • Grease Management: Drain fat thoroughly from the meat after cooking to avoid a greasy filling; consider using paper towels for an extra touch.
  • Potato Precision: Slice potatoes to 1/8-inch thickness for even cooking; if they are wet, dust with rice flour to prevent sticking.
  • Taste Test: Always taste the filling before assembling the pie to adjust the seasoning to your preference, ensuring a flavorful Comfort Au Gratin Shepherd’s Pie.
  • Resting Time: Allow the pie to rest for at least 10 minutes after baking; this helps with cleaner slices when serving.
  • Layering Tips: Start with a layer of potatoes over the filling and make sure to sprinkle cheese generously for that irresistible golden topping.

Make Ahead Options

These Comfort Au Gratin Shepherd’s Pie are ideal for meal prep, allowing you to enjoy homemade goodness even on your busiest days! You can prepare the filling (cooked meat and vegetables) up to 3 days in advance and refrigerate it in an airtight container to maintain its flavor and freshness. The potato topping can be sliced and stored separately for up to 24 hours in cold water to prevent browning. When you’re ready to assemble and bake, simply layer the prepped filling and potatoes, top with cheese, and bake as directed. This way, you can savor the comforting taste of homemade shepherd’s pie with minimal effort after a long day!

Storage Tips for Comfort Au Gratin Shepherd’s Pie

  • Fridge: Store leftovers in an airtight container and refrigerate for up to 4 days. Make sure to let it cool before sealing to maintain moisture.
  • Freezer: Freeze the shepherd’s pie for up to 3 months. Wrap it tightly in plastic wrap, then aluminum foil to prevent freezer burn.
  • Reheating: To reheat, cover the pie with foil and bake at 350°F (175°C) for about 30-35 minutes until heated through. For individual portions, use the microwave on medium heat.
  • Serving After Storage: Always check the flavor and moisture after storage, adding a splash of broth if it seems dry to revive your Comfort Au Gratin Shepherd’s Pie.

Comfort Au Gratin Shepherd’s Pie Recipe FAQs

What kind of potatoes are best for topping?
For a fluffy and creamy topping, I recommend using a combination of Russet and sweet potatoes. Russet potatoes offer a classic texture while sweet potatoes add a delightful twist of sweetness. If you prefer just one type, stick with Russet for an all-around comforting flavor.

How should I store leftovers from the shepherd’s pie?
After your meal, let the leftovers cool completely before transferring them to an airtight container. You can refrigerate it for up to 4 days. Just ensure it is properly sealed to maintain moisture and flavor. When you’re ready to enjoy it again, simply reheat and you’re good to go!

Can I freeze Comfort Au Gratin Shepherd’s Pie?
Absolutely! To freeze your shepherd’s pie, first, ensure it’s cooled completely. Wrap the pie tightly in plastic wrap, and then in aluminum foil to prevent freezer burn. It can be stored in the freezer for up to 3 months. When you’re ready to serve, thaw it overnight in the fridge and reheat as directed.

How do I troubleshoot a runny filling?
If your filling turns out too runny, it could be due to excess moisture from the vegetables or broth. To thicken it, you can simmer the mixture longer to allow more liquid to evaporate. Alternatively, you might incorporate a tablespoon of cornstarch dissolved in water, allowing it to thicken as it cooks.

Any dietary considerations for this recipe?
Certainly! This Comfort Au Gratin Shepherd’s Pie can be made gluten-free by ensuring all ingredients, especially sauces and broths, are labeled as gluten-free. Additionally, if you have dietary restrictions, consider adjusting the types of meats or cheeses, and feel free to use more vegetables for a veggie-packed twist.

What if I don’t have Gruyere cheese?
If Gruyere is not available, you can substitute it with mozzarella for a milder flavor or use cheddar for a sharper taste. Each will still provide that delightful cheesy topping, ensuring your shepherd’s pie is as comforting and delicious as intended.

Comfort Au Gratin Shepherd’s Pie

Comfort Au Gratin Shepherd's Pie That's Pure Cozy Delight

This Comfort Au Gratin Shepherd’s Pie is a hearty and customizable dish that warms the heart and impresses loved ones.
Prep Time 30 minutes
Cook Time 1 hour 15 minutes
Resting Time 10 minutes
Total Time 1 hour 55 minutes
Servings: 6 slices
Course: Casserole
Cuisine: American
Calories: 450

Ingredients
  

For the Filling
  • 1 pound lean ground beef 90/10 or 93/7 for a healthier option
  • ½ pound gluten-free Italian sausage substitute with favorite sausage
  • 1 tablespoon olive oil can use butter for richness
  • 3 cloves garlic minced; garlic powder can substitute
  • ½ medium sweet onion diced; yellow onion is a good swap
  • 2 cups frozen mixed vegetables fresh or single veggies can be used
  • ½ teaspoon dried thyme Italian seasoning can substitute
  • salt to taste
  • pepper to taste
  • 3 tablespoons tomato paste for maximum umami flavor
  • 1 tablespoon gluten-free Worcestershire sauce coconut aminos can replace soy sauce
  • 1 cup gluten-free broth beef, chicken, or vegetable broth works
For the Potato Topping
  • 1 cup rye flour to dust potatoes
  • 1 large russet potato thinly sliced
  • 1 large sweet potato peeled and thinly sliced
  • 2 tablespoons butter can replace with margarine
  • seasoned salt to taste
  • 1 cup Gruyere cheese grated; mozzarella can be a substitute
  • ¼ cup Parmesan cheese grated; pecorino is an alternative
  • paprika for added color and flavor
  • fresh Italian parsley for garnish

Equipment

  • large stainless steel pan
  • mandoline
  • Pie dish

Method
 

Preparation
  1. In a large stainless steel pan over medium-low heat, add 1 tablespoon of olive oil. Once heated, carefully add 1 pound of lean ground beef and ½ pound of gluten-free Italian sausage. Cook until browned, about 5-7 minutes.
  2. Stir in ½ medium sweet onion (diced) and 3 minced garlic cloves. Cook until the onion is softened, about 3-4 minutes.
  3. Mix in 2 cups of frozen mixed vegetables and stir for about 4 minutes. Add 3 tablespoons of tomato paste, ½ teaspoon of dried thyme, salt and pepper. Pour in 1 cup of gluten-free broth and 1 tablespoon of Worcestershire sauce, then simmer for 30 minutes.
  4. Preheat your oven to 400°F (200°C). Slice 1 russet potato and 1 sweet potato thinly, aiming for consistent 1/8-inch slices.
  5. Drizzle olive oil in a large pie dish. Layer half of the potato slices over the meat mixture. Sprinkle with paprika and ½ cup of grated Gruyere cheese.
  6. Layer the remaining potato slices on top and sprinkle with the remaining Gruyere and ¼ cup of grated Parmesan cheese. Dot with 2 tablespoons of butter.
  7. Cover with foil and bake for 30 minutes. Remove foil and bake for an additional 25-30 minutes, or until potatoes are tender and golden.
  8. Let the pie rest for 10 minutes before serving. Garnish with freshly chopped parsley.

Nutrition

Serving: 1sliceCalories: 450kcalCarbohydrates: 50gProtein: 25gFat: 20gSaturated Fat: 10gPolyunsaturated Fat: 2gMonounsaturated Fat: 8gCholesterol: 75mgSodium: 600mgPotassium: 800mgFiber: 5gSugar: 6gVitamin A: 120IUVitamin C: 15mgCalcium: 25mgIron: 15mg

Notes

Taste the filling before assembling to adjust flavors. Ensure even potato slices for best results.

Tried this recipe?

Let us know how it was!

Cinnamon Keto Pumpkin Spice Coffee Cake for Cozy Mornings

As the cool autumn air settles in, I can already smell the inviting spices of cozy holiday baking filling my kitchen. This Keto Cinnamon Pumpkin Spice Coffee Cake is my go-to for those brisk mornings when I crave a touch of warmth and sweetness without the guilt. Not only does this low-carb treat pair perfectly with my morning coffee, but it satisfies those seasonal cravings for pumpkin spice that we all love. With its tender crumb and a crunchy crumble topping, this cake is so delicious that your family won’t even notice it’s keto-friendly! Are you ready to embrace the cozy flavors of fall in a healthier way? Let’s dive in!

Why will you love this keto coffee cake?

Deliciously Guilt-Free: This Cinnamon Keto Pumpkin Spice Coffee Cake is a delightful treat that fits perfectly into your low-carb lifestyle without sacrificing flavor.

Autumnal Aromas: Enjoy the warm, inviting scents of cinnamon and pumpkin spice that will fill your kitchen, creating a cozy atmosphere as you bake.

Versatile Treat: Ideal for breakfast or an afternoon snack, this cake pairs beautifully with a hot cup of coffee or tea. For added indulgence, serve it with fresh berries or a dollop of unsweetened whipped cream!

Quick & Easy: With a straightforward recipe that requires minimal fuss, you can savor this low-carb delight without spending all day in the kitchen.

Crowd-Pleasing Flavor: Impress your family and friends with a cake they won’t believe is keto. This treat is so good that it might just become your new go-to dessert—right alongside other favorites like Honeybun Carrot Cake and Strawberry Cheesecake Dump!

Cinnamon Keto Pumpkin Spice Coffee Cake Ingredients

For the Cake
6 large eggs – Provides structure and moisture; using large eggs ensures consistency in your cake.
3/4 cup canned pumpkin puree – Adds moisture and delicious pumpkin flavor; ensure you choose plain pumpkin puree, not pie filling.
1/2 cup butter, melted – Contributes richness and moisture; can be substituted with coconut oil for a dairy-free option.
3/4 cup coconut flour – This is the main dry ingredient; it gives a light texture and should not be swapped directly for all-purpose flour due to high absorbency.
1/2 cup brown sugar replacement (e.g., Swerve) – Sweetens the cake while keeping it low-carb; feel free to use other keto-friendly sweeteners if preferred.
3/4 tsp ground cinnamon – Imparts that warm, spicy flavor; you can adjust the amount based on your preference.
1/2 tsp ground nutmeg – Enhances the pumpkin spice profile; it’s optional to omit or reduce if you prefer a milder taste.
1/8 tsp ground ginger – Adds depth to the flavor; can be substituted with fresh ginger if desired.
1 tsp vanilla extract – Complements the sweet flavors beautifully.
1 tsp baking powder – Essential for giving the cake its lift; make sure it’s fresh for the best results.

For the Crumble Topping
1/3 cup coconut flour – Adds texture to the topping; it’s a fantastic low-carb option.
1/4 cup brown sugar alternative – Keeps sweetness consistent with the cake; use the same sweetener as above for best results.
1/4 cup cold butter – Creates a wonderfully crumbly texture; must be kept cold to prevent melting.
1/2 tsp ground cinnamon – Follows the same role as in the cake, enhancing the overall spice blend.
1/8 tsp ground nutmeg – Adds more warming spices to the topping.
1/8 tsp ground ginger – Continues the flavor profile established in the cake.

For the Creamy Drizzle
2 tbsp soft cream cheese – Introduces richness to the drizzle; dairy-free alternatives can be used if necessary.
1/4 cup heavy cream – Provides great creaminess; can also be substituted with coconut cream for a dairy-free approach.
2 tbsp powdered sweetener (e.g., Swerve) – Sweetens the drizzle without adding carbs, and can be swapped with your preferred keto sweetener if needed.

This Cinnamon Keto Pumpkin Spice Coffee Cake is sure to warm your heart and satisfy your cravings this fall!

Step‑by‑Step Instructions for Cinnamon Keto Pumpkin Spice Coffee Cake

Step 1: Preheat the Oven
Begin by preheating your oven to 325°F (163°C). This setting will ensure that your Cinnamon Keto Pumpkin Spice Coffee Cake bakes evenly, creating that perfect tender crumb. While the oven heats, prepare your baking equipment by greasing a springform pan, ensuring easy removal later.

Step 2: Prepare the Crumble
In a small bowl, mix together cold butter, coconut flour, brown sugar replacement, ground cinnamon, nutmeg, and ginger. Use a pastry cutter or your fingers to combine these ingredients until you achieve coarse crumbs. Set this delightful mixture aside, as it will add a perfect crunchy topping to your cake.

Step 3: Blend Wet Ingredients
In a blender, combine the six large eggs, pumpkin puree, and melted butter until the mixture is smooth and well combined. This step is crucial as it helps to incorporate air, giving your Cinnamon Keto Pumpkin Spice Coffee Cake the moisture and structure needed. Pour this blended mixture into a large bowl afterward.

Step 4: Mix Dry Ingredients
In another large mixing bowl, whisk together the coconut flour, brown sugar replacement, vanilla extract, ground cinnamon, nutmeg, and baking powder. Ensure that all ingredients are evenly distributed, creating a flavorful base for your coffee cake. The dry mix will add depth to the cake’s flavor profile, enhancing that warm autumn essence.

Step 5: Combine Batters
Gently add the blended wet ingredients to the dry mixture, stirring until just combined. Be cautious not to overmix, as this can result in a denser texture. The batter should remain thick with no visible dry flour, forming a perfect base for your Cinnamon Keto Pumpkin Spice Coffee Cake.

Step 6: Assemble and Bake
Pour the batter into the greased springform pan, spreading it evenly. Generously sprinkle the crumble topping over the batter, ensuring it covers the entire surface for that delightful crunch. Place the pan in the preheated oven and bake for 32–35 minutes, or until a toothpick inserted in the center comes out clean.

Step 7: Cool and Drizzle
Allow the Cinnamon Keto Pumpkin Spice Coffee Cake to cool in the pan for about 10 minutes once it’s out of the oven. While it’s cooling, prepare the creamy drizzle by mixing soft cream cheese, heavy cream, and powdered sweetener in a bowl until well combined. Once the cake is cooled, drizzle this mixture over the top, adding a delightful finish to your autumn-inspired treat.

Make Ahead Options

These Cinnamon Keto Pumpkin Spice Coffee Cake options are perfect for those busy mornings when you need a delicious start to your day without the fuss! You can prepare the batter and the crumble topping up to 24 hours in advance; simply store them separately in the refrigerator. For the best quality, ensure the crumble is kept cold and covered to maintain its texture. When you’re ready to bake, combine the prepared batter in your greased springform pan, sprinkle the chilled crumble on top, and bake as directed. This method allows you to enjoy a warm, fragrant keto coffee cake with minimal effort, making it an ideal choice for meal prep!

Cinnamon Keto Pumpkin Spice Coffee Cake Variations

Feel free to unleash your creativity and make this delightful cake your own with these simple swaps and additions!

  • Nutty Texture: Add chopped walnuts or pecans to the crumble for an extra crunch. Nuts not only introduce a delightful texture but also enhance the flavor profile for a satisfying treat.
  • Sweetener Options: Use erythritol or monk fruit instead of brown sugar replacement for a different sweetening option. Each sweetener brings its unique taste, allowing you to find your perfect match!
  • Fruit Twist: Substitute canned pumpkin puree with unsweetened applesauce for a lighter flavor and moisture. This adjustment brings a subtle sweetness, perfect for those who crave variety!
  • Spice Levels: Experiment with extra pumpkin pie spice in place of some cinnamon and nutmeg for an intensified autumn flavor. This will amplify that cozy, spice-infused aroma throughout your kitchen.
  • Dairy-Free Delight: Try using coconut cream in place of heavy cream for the drizzle to keep it dairy-free. It adds a hint of tropical flavor while keeping your cake wonderfully creamy.
  • Fruity Flavor Burst: Incorporate fresh blueberries or cranberries into the batter before baking for a delightful burst of fruitiness. This addition not only looks beautiful but also elevates the flavor in every bite!
  • Gluten-Free Flour: Substitute almond flour for coconut flour if desired; just be mindful of adjusting liquid ratios accordingly. Almond flour can give a different texture, resulting in a deliciously unique cake.
  • Added Heat: For a spicy kick, toss in a pinch of cayenne pepper or chili powder to the batter. It’s an unexpected twist that elevates the flavor and adds an exciting depth to your cake!

For more ideas on cozy fall treats, don’t miss out on this delightful Easter Poke Cake or the magnificent flavors of Bananas Foster Cinnamon to further inspire your baking journey!

Expert Tips for Cinnamon Keto Pumpkin Spice Coffee Cake

  • Egg Quality Matters: Use large eggs to ensure consistency in texture and moisture. Fresh eggs also help the cake rise beautifully.

  • Coconut Flour Caution: Avoid swapping coconut flour directly for all-purpose flour; coconut flour is more absorbent and requires adjustments to liquids.

  • Moisture Check: Ensure your pumpkin puree isn’t watery. Drain any excess moisture to prevent a soggy cake, keeping it fluffy.

  • Crumble Consistency: Keep the butter for the topping cold. Handle minimally when mixing to maintain that delicious crumbly texture atop your cake.

  • Doneness Test: Always check for doneness with a toothpick inserted into the center. If it comes out clean or with a few moist crumbs, it’s ready!

  • Cool Before Drizzling: Let the Cinnamon Keto Pumpkin Spice Coffee Cake cool completely before adding the creamy drizzle. This prevents melting and ensures a beautiful presentation.

What to Serve with Cinnamon Keto Pumpkin Spice Coffee Cake

Enjoy the comforting warmth of your Cinnamon Keto Pumpkin Spice Coffee Cake with delightful pairings that enhance every bite.

  • Creamy Mashed Cauliflower: A low-carb alternative to mashed potatoes, this dish is velvety and fills you up without the extra carbs.
  • Spicy Chai Tea: The aromatic blend of spices complements the warm flavors of pumpkin spice, making for a cozy drink pairing.
  • Fresh Berry Medley: A vibrant mix of strawberries, blueberries, and raspberries adds a burst of freshness; the tartness balances the sweetness of the cake beautifully.
  • Maple Candied Nuts: Crunchy, caramelized nuts bring a delightful texture contrast and a hint of sweetness that gorgeous matches the cake’s flavors.
  • Cinnamon-Infused Coffee: Elevate your breakfast experience with aromatic coffee enriched with cinnamon. The warmth enhances your cake’s fall-inspired taste.
  • Unsweetened Whipped Cream: Whipped cream provides a light and fluffy topping that delights your taste buds while keeping it keto-friendly.
  • Cheese Platter: Pair with brie or aged cheddar for a savory contrast, creating a perfect afternoon snack or elegant dessert offering.
  • Pumpkin Spice Latte: Keep the cozy vibes alive with a delicious latte, combining flavors that perfectly mirror your coffee cake for a dynamic duo.

Let your taste buds dance as you enjoy your favorite keto cake with these wonderful accompaniments.

How to Store and Freeze Cinnamon Keto Pumpkin Spice Coffee Cake

Fridge: Store the cake tightly wrapped in the refrigerator for up to 5 days. This helps maintain its moisture and flavor, keeping your low-carb treat fresh.

Freezer: Freeze the cake (without frosting) for up to 3 months in an airtight container or freezer bag. Thaw overnight in the fridge before serving, so it tastes just-baked.

Serving Leftovers: Reheat slices in the microwave for about 15-20 seconds on low power, or enjoy cold for a quick snack. It remains delicious whether warm or chilled!

Avoid Sogginess: If the cake shows signs of excess moisture, ensure it’s completely cooled before wrapping to preserve the perfect texture of your Cinnamon Keto Pumpkin Spice Coffee Cake.

Cinnamon Keto Pumpkin Spice Coffee Cake Recipe FAQs

What kind of pumpkin puree should I use?
Absolutely use plain canned pumpkin puree for this recipe, as it provides the right moisture and flavor. Avoid using pumpkin pie filling, which contains added sugars and spices, altering the cake’s taste and nutritional profile.

How should I store the Cinnamon Keto Pumpkin Spice Coffee Cake?
Store the cake tightly wrapped in the refrigerator for up to 5 days. Not only does this keep it moist, but it also helps to maintain its delicious flavor. Just be sure to check the texture; if the cake seems slightly wet, ensure it’s completely cooled before wrapping it to prevent any sogginess!

Can I freeze the cake, and if so, how?
Definitely! You can freeze the Cinnamon Keto Pumpkin Spice Coffee Cake for up to 3 months. Make sure to do so without frosting. Simply slice it and place the pieces in an airtight container or freezer bag, separating layers with parchment paper to prevent sticking. When you’re ready to enjoy, thaw overnight in the fridge, and you’ll have a delicious treat at the ready!

What if my cake comes out dense?
If your cake turns out dense, it might be because of overmixing, especially after adding the coconut flour. To avoid this, mix the batter gently until just combined. Additionally, make sure that your eggs are at room temperature to help with aeration. Always check that your baking powder is fresh as well, as old leavening agents won’t give the desired lift.

Are there any dietary considerations I should know about?
If you have allergies, note that this Cinnamon Keto Pumpkin Spice Coffee Cake contains eggs and dairy (butter and cream cheese). For a dairy-free version, you can substitute coconut oil for the butter and use a dairy-free cream cheese alternative. Always check the labels of sweeteners to ensure they meet your dietary needs.

Can I use a different flour in this recipe?
You can swap coconut flour with almond flour based on your preference. However, keep in mind that almond flour requires a different liquid ratio—usually about double the amount—so be prepared to adjust your ingredient measurements accordingly for a successful bake.

Cinnamon Keto Pumpkin Spice Coffee Cake

Cinnamon Keto Pumpkin Spice Coffee Cake for Cozy Mornings

This Cinnamon Keto Pumpkin Spice Coffee Cake is a delightful low-carb treat, perfect for cozy mornings and guilt-free indulgence.
Prep Time 15 minutes
Cook Time 35 minutes
Cooling Time 10 minutes
Total Time 1 hour
Servings: 8 slices
Course: Dessert
Cuisine: American
Calories: 180

Ingredients
  

For the Cake
  • 6 large eggs Provides structure and moisture
  • 3/4 cup canned pumpkin puree Ensure it's plain, not pie filling
  • 1/2 cup butter, melted Can substitute with coconut oil for dairy-free
  • 3/4 cup coconut flour Main dry ingredient, do not swap directly for all-purpose flour
  • 1/2 cup brown sugar replacement (e.g., Swerve) Use other keto-friendly sweeteners if preferred
  • 3/4 tsp ground cinnamon Adjust based on preference
  • 1/2 tsp ground nutmeg Optional to omit or reduce
  • 1/8 tsp ground ginger Can be substituted with fresh ginger
  • 1 tsp vanilla extract Complements sweet flavors
  • 1 tsp baking powder Essential for lift
For the Crumble Topping
  • 1/3 cup coconut flour Adds texture to the topping
  • 1/4 cup brown sugar alternative Use the same sweetener as above
  • 1/4 cup cold butter Must be kept cold
  • 1/2 tsp ground cinnamon Enhances spice blend
  • 1/8 tsp ground nutmeg Adds warming spices
  • 1/8 tsp ground ginger
For the Creamy Drizzle
  • 2 tbsp soft cream cheese Dairy-free alternatives can be used
  • 1/4 cup heavy cream Can substitute with coconut cream
  • 2 tbsp powdered sweetener (e.g., Swerve) Use preferred keto sweetener if needed

Equipment

  • blender
  • Mixing bowls
  • Springform Pan
  • pastry cutter

Method
 

Step-by-Step Instructions
  1. Preheat your oven to 325°F (163°C) and grease a springform pan.
  2. In a small bowl, mix together cold butter, coconut flour, brown sugar replacement, ground cinnamon, nutmeg, and ginger until having coarse crumbs. Set aside.
  3. Blend the eggs, pumpkin puree, and melted butter until smooth, then pour into a large bowl.
  4. Whisk together coconut flour, brown sugar replacement, vanilla extract, ground cinnamon, nutmeg, and baking powder in another bowl.
  5. Gently combine the blended wet ingredients with the dry mixture, stirring until just combined.
  6. Pour the batter into the greased springform pan, sprinkle the crumble topping over the batter, and bake for 32–35 minutes.
  7. Cool the cake for about 10 minutes, then mix the cream cheese, heavy cream, and powdered sweetener for the drizzle before serving.

Nutrition

Serving: 1sliceCalories: 180kcalCarbohydrates: 8gProtein: 5gFat: 15gSaturated Fat: 8gCholesterol: 100mgSodium: 200mgPotassium: 100mgFiber: 3gSugar: 1gVitamin A: 500IUVitamin C: 2mgCalcium: 20mgIron: 1mg

Notes

Keep the butter for the crumble topping cold and ensure the pumpkin puree isn't watery. Cool the cake completely before drizzling.

Tried this recipe?

Let us know how it was!

The Ultimate Chocolate Chip Cookies You’ll Crave Forever

The aroma wafting through the kitchen as cookies bake is like a warm hug on a cool day. These Easy Chocolate Chip Cookies are your ticket to a world of gooey joy, each bite unleashing a cascade of melted chocolate that warms the soul. Perfect for both novice bakers and seasoned pros, this recipe promises quick prep and minimal fuss, meaning you can whip up a nostalgic treat any time you crave something sweet. Imagine surprising friends and family at gatherings or cozying up on the couch with a cookie (or three!) and a glass of milk. Plus, with options for mix-ins like nuts or dried fruit, it’s easy to customize your batch exactly how you like it. Ready to fill your home with delicious scents and even better memories?

Why Are These Cookies Irresistible?

Irresistible nostalgia: These Easy Chocolate Chip Cookies capture the essence of classic home-baked goodness, making them perfect for sharing memories with loved ones.
Customizable delight: With options for nuts or dried fruits, you can tailor every batch to suit your taste, similar to how you might enjoy Chocolate Chip Pancakes.
Quick prep: Whip up this recipe in no time at all, making it an ideal choice for those unexpected cravings or surprise guests.
Comforting experience: The aroma of freshly baked cookies wafting through your home will create an inviting atmosphere, reminiscent of cozy family nights.
Crowd-pleasing treat: These cookies are a guaranteed hit at gatherings, similar to serving Chocolate Fudge Cupcakes at parties!

Chocolate Chip Cookie Ingredients

For the Dough

  • All-purpose Flour – Provides structure; substitute with gluten-free flour for a gluten-free version.
  • Baking Soda – Helps cookies rise; ensure it’s fresh for best results.
  • Salt – Enhances flavor; use kosher salt or sea salt for a cleaner taste.
  • Granulated Sugar – Adds sweetness and crispness; can be substituted with coconut sugar for a healthier option.
  • Brown Sugar – Introduces moisture and chewiness; feel free to use dark brown sugar for a richer flavor.
  • Butter (softened) – Essential for richness and texture; consider vegan butter for a dairy-free version.
  • Vanilla Extract – Offers aromatic sweetness; a drop of almond extract adds a unique twist.
  • Eggs – Bind the ingredients and enrich flavor; flax eggs or applesauce work for vegan substitutions.
  • Semi-Sweet Chocolate Chips – Provide that signature chocolate flavor; swapping for dark or white chocolate, or adding nuts or dried fruits can enhance your chocolate chip cookies even further!

Step‑by‑Step Instructions for Irresistibly Gooey Easy Chocolate Chip Cookies

Step 1: Preheat and Prepare
Begin by preheating your oven to 350°F (175°C). While it warms up, line your baking sheets with parchment paper, which will ensure your cookies don’t stick. Set these aside, and get ready to create a luscious batch of chocolate chip cookies that you’ll want to share with everyone.

Step 2: Mix Dry Ingredients
In a medium-sized bowl, whisk together 2 cups of all-purpose flour, 1 teaspoon of baking soda, and ½ teaspoon of salt. This step is crucial as it ensures the leavening agent is evenly distributed and sinks into the cookie dough, promising a perfect rise and delectable texture when you bake your cookies. Set this mixture aside.

Step 3: Cream the Butter and Sugars
In a spacious bowl, use an electric mixer to cream together ¾ cup of softened butter, ½ cup of granulated sugar, and ¾ cup of packed brown sugar. Beat this mixture for about 2 minutes until it’s light and fluffy, creating an irresistible base for your chocolate chip cookies. The sugars melt into the butter for a rich, sweet flavor.

Step 4: Add Vanilla and Eggs
Next, incorporate 1 teaspoon of vanilla extract and add in your eggs one at a time, mixing well after each addition. This step not only enriches the cookie dough but also binds the ingredients cohesively. You’re building a delightful structure for your cookies, so ensure everything is smoothly blended.

Step 5: Combine Mixtures
Gradually add the dry ingredient mixture to the creamed butter and sugars, mixing on low speed just until combined. Be careful not to overmix at this stage—doing so can affect the chewy texture of your chocolate chip cookies. You want a slightly sticky dough that is ready for the delicious chocolate chips!

Step 6: Fold in Chocolate Chips
Gently fold in 1 ½ cups of semi-sweet chocolate chips, and if you’re feeling adventurous, toss in some optional mix-ins like nuts or dried fruit. Use a spatula to ensure they’re evenly distributed throughout your cookie dough, setting the stage for bursts of gooey chocolate in every bite of your heavenly cookies.

Step 7: Shape and Space the Cookies
Scoop generous spoonfuls of cookie dough onto the prepared baking sheets, spacing them about 2 inches apart. This gives your cookies enough room to spread while baking, creating that perfect soft center and a slightly crisp edge that every chocolate chip cookie craves.

Step 8: Bake to Perfection
Slide the baking sheets into your preheated oven and bake for 10-12 minutes, or until the edges are golden brown while the centers still appear soft. The subtle aroma wafting through your kitchen will have everyone eager to taste these irresistible chocolate chip cookies.

Step 9: Cool and Transfer
Once baked, let your cookies cool on the baking sheet for about 1-2 minutes. This allows them to slightly set before transferring them to wire racks. Let them cool completely, or enjoy one warm for that ultimate gooey experience—each bite will be a delightful reminder of home baking!

How to Store and Freeze Chocolate Chip Cookies

  • Room Temperature: Keep your chocolate chip cookies in an airtight container at room temperature for up to 1 week to maintain their soft, chewy texture.

  • Fridge: For longer freshness, you can store cookies in the fridge for up to 2 weeks. Just ensure they are tightly wrapped to prevent them from drying out.

  • Freezer: Freeze cookies in a single layer on a baking sheet for about 1-2 hours, then transfer them to a zip-top bag. They can be frozen for up to 3 months.

  • Reheating: To enjoy freshly baked goodness, reheat frozen cookies in a 350°F (175°C) oven for 5-7 minutes or in the microwave for 10-15 seconds until warm.

Expert Tips for Chocolate Chip Cookies

  • Perfect Sugar Blend: Aim for a mix of granulated and brown sugar to achieve that ideal chewy texture in your chocolate chip cookies.

  • Avoid Overmixing: Once you add the dry ingredients, mix just until combined. Overmixing can lead to tough cookies instead of the desired softness.

  • Slightly Underbake: For ultimate gooeyness, bake your cookies for a minute or two less than recommended. They will firm up perfectly as they cool.

  • Chill the Dough: Allowing your dough to chill for 30 minutes can help create thicker cookies. This enhances flavor and improves texture significantly.

  • Watch Your Oven: Baking times can vary, so keep an eye on your cookies. Ovens can be unpredictable, and this ensures you avoid burnt treats.

What to Serve with Irresistibly Gooey Easy Chocolate Chip Cookies

Imagine the joy of pairing these classic cookies with delightful accompaniments that amplify the indulgence.

  • Cold Milk: A timeless partner, ice-cold milk complements the warm, gooey cookies, enhancing the chocolatey experience with every sip.

  • Vanilla Ice Cream: Serving a scoop of vanilla ice cream on the side transforms your cookie into a luscious dessert, creating a blissful contrast between temperatures.

  • Fresh Berries: Juicy blueberries or raspberries provide a refreshing tartness that cuts through the sweetness, balancing your dessert with a burst of fruity flavor.

  • Hot Cocoa: Cozy up with a mug of rich hot cocoa next to your cookies. The warm chocolate notes will deepen your treat’s chocolate flavor, making each bite feel extra special.

  • Caramel Sauce: Drizzling warm caramel over your cookies adds a luxurious touch. The sticky sweetness elevates the gooey chocolate, creating a dessert that’s impossible to resist.

  • Coffee: A cup of freshly brewed coffee enhances the overall sensory experience. Its rich, bitter notes beautifully balance the sweetness of the cookies while keeping you energized.

  • Nutty Granola: For a unique crunch, serve a side of nutty granola. The texture complements the soft cookies perfectly, providing a delightful contrast to every bite.

  • Chocolate Dipped Fruit: Dip strawberries or banana slices in melted chocolate for a succulent twist. This combination makes every bite decadent, while also keeping things light and fruity.

  • Marshmallow Fluff: Spread a layer of marshmallow fluff on your cookie for that s’mores vibe. The creaminess combined with gooey chocolate is an unbeatable treat!

Chocolate Chip Cookies Variations

Personalize your cookie experience by exploring these delightful twists that elevate regular chocolate chip cookies into something truly special.

  • Nutty Crunch: Add ¾ cup of chopped walnuts or pecans for extra crunch and depth. The earthy flavors beautifully complement the sweetness of the chocolate.

  • Coconut Delight: Fold in ½ cup of shredded coconut to give your cookies a tropical twist. This will introduce a slightly chewy texture that contrasts wonderfully with the chocolate.

  • Dried Fruit Infusion: Mix in ½ cup of chopped dried apricots or cranberries for a fruity surprise. The tartness of dried fruits pairs perfectly with sweet chocolate.

  • Spiced Up: Enhance your dough with 1 teaspoon of cinnamon or a pinch of nutmeg. This warming spice will create a cozy, comforting aroma as they bake, evoking memories of holiday baking.

  • Vegan Friendly: Replace eggs with flax eggs and use vegan butter to accommodate dairy-free diets. This ensures everyone can enjoy your delicious treats without compromise.

  • Gluten-Free Goodness: Substitute all-purpose flour with a gluten-free flour blend. Your cookies will still turn out soft, chewy, and utterly satisfying for gluten-sensitive followers.

  • Candy Crush: For a fun twist, add 1 cup of crushed candy bars or chocolate-covered toffee. This luscious combination will create an unexpected, delightful crunch.

  • Chill Out: Freeze dough balls for later baking! Bake them fresh straight from the freezer by adding an extra minute to the baking time. It’s a great way to enjoy cookies any time you need a sweet pick-me-up!

Don’t forget to check out other dessert inspirations like Easter Chocolate Lasagna or indulge in some Blueberry Breakfast Cookies for more joy in your baking adventures!

Make Ahead Options

These Irresistibly Gooey Easy Chocolate Chip Cookies are the perfect solution for meal prep lovers! You can prepare the cookie dough up to 3 days in advance by mixing all the ingredients and storing the dough in an airtight container in the refrigerator. Alternatively, you can scoop the dough into balls and freeze them for up to 3 months; just place them on a baking sheet to harden before transferring to a freezer bag. When you’re ready to bake, simply preheat your oven and place the frozen dough directly on the baking sheet (no need to thaw!) and bake for an extra minute or two for that fresh-out-of-the-oven experience. This way, you get to enjoy warm, homemade cookies with minimal effort, bringing comfort and joy to your busy evenings!

Easy Chocolate Chip Cookies Recipe FAQs

What type of chocolate chips should I use for the best flavor?
Absolutely! I recommend using semi-sweet chocolate chips as they balance sweetness and richness perfectly. However, don’t hesitate to experiment with dark chocolate or even white chocolate chips. It’s delightful to mix and match your favorites for a customized cookie adventure!

How do I know when my cookies are done baking?
Very important! Look for edges that are golden brown while the centers still appear soft. They might look underbaked at first, but they will firm up as they cool. A good rule of thumb is to remove them from the oven once the edges set, which usually takes around 10-12 minutes.

What is the best way to store leftover cookies?
I often store my chocolate chip cookies in an airtight container at room temperature for about 1 week. If you want to keep them longer, they can be safely stored in the fridge for up to 2 weeks. Just be sure to wrap them well to maintain softness!

Can I freeze cookie dough for later baking?
Absolutely! To freeze, scoop the dough into individual cookie portions and arrange them on a baking sheet. Freeze them for about 1-2 hours, then transfer the frozen dough balls into a zip-top bag. They can be kept in the freezer for up to 3 months. When you’re ready, bake them straight from the freezer, adding a couple of extra minutes to the baking time for perfect fresh cookies at any moment!

Are these cookies suitable for people with allergies?
Very! For gluten-free options, substitute all-purpose flour with a gluten-free blend. To make them dairy-free, you can use vegan butter and opt for dairy-free chocolate chips. If you’re concerned about egg allergies, flax eggs or applesauce can be a great alternative. Just always check labels for any specific allergens you might need to avoid.

What should I do if my cookie dough is too dry?
If you find your dough is dry and crumbly, it’s likely due to overmeasuring your flour. Try adding a little bit of milk or water, one tablespoon at a time, while mixing until you reach the desired consistency. Don’t hesitate to bring a few extra ingredients to the party; baking is often about adjusting and adapting!

Chocolate Chip Cookies

The Ultimate Chocolate Chip Cookies You’ll Crave Forever

These Chocolate Chip Cookies are your ticket to gooey joy, perfect for nostalgic treats.
Prep Time 15 minutes
Cook Time 12 minutes
Cooling Time 2 minutes
Total Time 29 minutes
Servings: 24 cookies
Course: Dessert
Cuisine: American
Calories: 150

Ingredients
  

For the Dough
  • 2 cups All-purpose Flour Substitute with gluten-free flour for a gluten-free version.
  • 1 teaspoon Baking Soda Ensure it’s fresh for best results.
  • ½ teaspoon Salt Use kosher salt or sea salt for a cleaner taste.
  • ¾ cup Granulated Sugar Can be substituted with coconut sugar for a healthier option.
  • ¾ cup Brown Sugar Feel free to use dark brown sugar for a richer flavor.
  • ¾ cup Butter (softened) Consider vegan butter for a dairy-free version.
  • 1 teaspoon Vanilla Extract A drop of almond extract adds a unique twist.
  • 2 large Eggs Flax eggs or applesauce work for vegan substitutions.
  • 1 ½ cups Semi-Sweet Chocolate Chips Swapping for dark or white chocolate, or adding mix-ins can enhance the cookies.

Equipment

  • Oven
  • Mixing bowls
  • Electric mixer
  • Baking Sheets
  • Parchment Paper
  • spatula

Method
 

Step-by-Step Instructions
  1. Preheat your oven to 350°F (175°C) and line your baking sheets with parchment paper.
  2. In a medium bowl, whisk together 2 cups of all-purpose flour, 1 teaspoon of baking soda, and ½ teaspoon of salt.
  3. In a spacious bowl, cream together ¾ cup of softened butter, ½ cup of granulated sugar, and ¾ cup of brown sugar for about 2 minutes.
  4. Incorporate 1 teaspoon of vanilla extract and add eggs one at a time, mixing well.
  5. Gradually add the dry mixture to the creamed butter and sugars on low speed until just combined.
  6. Fold in 1 ½ cups of semi-sweet chocolate chips and any optional mix-ins.
  7. Scoop spoonfuls of dough onto the prepared sheets, spacing them about 2 inches apart.
  8. Bake for 10-12 minutes until edges are golden brown with soft centers.
  9. Let cookies cool on the baking sheet for about 1-2 minutes before transferring to wire racks.

Nutrition

Serving: 1cookieCalories: 150kcalCarbohydrates: 20gProtein: 2gFat: 7gSaturated Fat: 4gPolyunsaturated Fat: 0.5gMonounsaturated Fat: 2gCholesterol: 20mgSodium: 100mgPotassium: 30mgFiber: 1gSugar: 9gVitamin A: 300IUCalcium: 30mgIron: 0.5mg

Notes

For extra gooeyness, consider baking for a minute or two less than the recommended time.

Tried this recipe?

Let us know how it was!

Coconut Cream Pie Overnight Oats: Tropical Breakfast Bliss

Mornings often feel rushed, but one bite of these Coconut Cream Pie Overnight Oats transports me to a tropical paradise, transforming my day. This recipe is a wonderful blend of creamy coconut milk, ripe bananas, and a splash of vanilla, combining indulgence and health into a wholesome breakfast. With just ten minutes of prep time, these oats are perfect for anyone looking to savor a fulfilling and quick morning meal without sacrificing nutrition. Plus, they’re completely customizable—set yourself up for success with a plant-based twist or add your favorite toppings! Who knew breakfast could feel this luxurious and still be so easy? So, are you ready to dive into this creamy delight?

Why are Coconut Cream Pie Overnight Oats amazing?

Unmatched Creaminess: The coconut milk creates an incredibly rich and smooth texture, making your bowl feel like a decadent dessert.
Time-Saving Delight: With a quick ten-minute prep, you can enjoy a nutritious breakfast even on the busiest mornings.
Customization Galore: This recipe is easily adaptable—swap in almond milk or add your favorite toppings for a personal twist!
Healthy Indulgence: Each serving delivers a perfect balance of carbohydrates, protein, and healthy fats to fuel your day without the guilt.
Meal Prep Friendly: Make-ahead in jars allows you to grab and go, making these oats a perfect choice for busy individuals.
Transform your mornings with these delicious oats, and if you’re craving something savory, don’t forget to check out my Spicy Brazilian Coconut recipe for another twist on coconut flavor!

Coconut Cream Pie Overnight Oats Ingredients

For the Oats
Rolled oats – Provides structure and fiber for a filling breakfast.
Coconut milk – Adds creaminess and a tropical flavor; substitute with almond or oat milk for a different taste.
Greek yogurt – Contributes protein and creaminess; can be swapped with plant-based yogurt for a vegan option.
Shredded unsweetened coconut – Enhances coconut flavor and adds texture.
Maple syrup – Acts as a natural sweetener; honey can be used for a non-vegan alternative.
Vanilla extract – Adds depth of flavor.
Ground cinnamon – Provides warmth and spice.
Salt – Balances sweetness.

For Toppings
Sliced bananas (optional) – Offers natural sweetness and a creamy texture; skip if unwanted.
Fresh whipped cream (optional, for topping) – Adds an indulgent and creamy finish.
Additional shredded coconut (optional, for garnish) – Enhances presentation and coconut flavor.

Feel the tropical goodness right in your morning routine with these Coconut Cream Pie Overnight Oats! Enjoy customizing them to fit your taste.

Step‑by‑Step Instructions for Coconut Cream Pie Overnight Oats

Step 1: Combine the Base Ingredients
In a medium bowl, mix 1 cup of rolled oats with 1 cup of coconut milk, ½ cup of Greek yogurt, and ¼ cup of shredded unsweetened coconut. Add 2 tablespoons of maple syrup, 1 teaspoon of vanilla extract, ½ teaspoon of ground cinnamon, and a pinch of salt. Stir the mixture until everything is well combined, creating a creamy base for your Coconut Cream Pie Overnight Oats.

Step 2: Fold in Bananas
If you desire additional sweetness and a delightful creaminess, gently fold in 1 sliced banana into the oat mixture. Use a spatula to incorporate the bananas without mashing them too much, maintaining some chunks for texture. This step enhances the tropical flavor profile while contributing to the overall nutrition of your breakfast.

Step 3: Portion into Jars
Evenly divide the oat mixture into two mason jars or airtight containers, leaving a little space at the top for expansion as they soak. Secure the lids tightly to keep the freshness locked in. This makes it easy to grab and go during busy mornings, ensuring you have your healthy Coconut Cream Pie Overnight Oats ready for enjoyment.

Step 4: Chill for Optimal Flavor
Refrigerate your jars overnight or for at least 4 hours to allow the oats to soak up all the delicious flavors. As they sit, the oats will soften and meld with the coconut milk and yogurt, achieving that rich creaminess. If you check the jars after a few hours, you’ll see a thickened, inviting texture forming inside!

Step 5: Serve and Garnish
Before serving, give the oats a good stir to ensure everything is combined and creamy. Top with a dollop of fresh whipped cream and sprinkle additional shredded coconut on top for a beautiful presentation. If you’re a fan of bananas, feel free to add more slices for that extra tropical touch to your Coconut Cream Pie Overnight Oats!

Make Ahead Options

These Coconut Cream Pie Overnight Oats are a fantastic option for meal prep, allowing you to streamline your busy mornings! You can prepare the oat mixture up to 3 days in advance, ensuring each serving is just as fresh and delicious. Simply combine the rolled oats, coconut milk, Greek yogurt, shredded coconut, maple syrup, vanilla extract, ground cinnamon, and salt in jars. Before serving, remember to fold in sliced bananas for extra sweetness and creaminess just before you’re ready to enjoy them. Store the jars in the refrigerator to maintain their creamy texture, and you’ll have a delightful and nutritious breakfast ready to go, saving you precious time on hectic mornings!

Coconut Cream Pie Overnight Oats Variations

Embrace your creativity with these Coconut Cream Pie Overnight Oats and customize them to suit your taste buds!

  • Dairy-Free: Use almond milk or oat milk instead of coconut milk for a lighter, nutty flavor.
  • Protein Boost: Add a scoop of your favorite protein powder, elevating your breakfast to fuel your active day.
  • Chocolate Twist: Mixed in cocoa powder for a dreamy chocolate vibe, satisfying both dessert cravings and breakfast needs.
  • Fruity Delight: Incorporate fresh berries or diced mango for a burst of color and tropical sweetness in every bite.
  • Nutty Extra: Toss in chopped nuts or seeds for added crunch and healthy fats, making your oats even more satisfying.
  • Flavorful Spice: Experiment with nutmeg or lemon zest to add an unexpected twist, enhancing the depth of flavor wonderfully.
  • Peanut Butter Bliss: Swirl in a spoonful of peanut butter for an indulgent creaminess and a punch of protein.
  • Sweetener Swap: Swap maple syrup for agave nectar or stevia for a lower-calorie alternative while keeping it naturally sweet.

Now, if you’re looking for more delightful recipes, check out my Key Lime Pie Rice Treats or savor the heartwarming flavors of Shepherd’s Pie Soup!

Tips for the Best Coconut Cream Pie Overnight Oats

  • Perfect Soaking Time: Ensure oats soak for at least 4 hours, preferably overnight. This achieves maximum creaminess and digestibility for your Coconut Cream Pie Overnight Oats.
  • Right Texture: Mix thoroughly to avoid clumps. Clumping can lead to uneven soaking and result in a less enjoyable breakfast experience.
  • Flavor Enhancements: Don’t hesitate to add nutmeg or even a dash of cocoa powder to elevate your Coconut Cream Pie Overnight Oats for an adventurous twist.
  • Balanced Sweetness: Adjust the maple syrup to your taste; remember that bananas also add natural sweetness. Taste the mixture before sealing for optimal flavor.
  • Meal Prep Magic: These oats can be made up to three days in advance. Just store in the fridge, and you’ll always have a nutritious breakfast at your fingertips!

What to Serve with Coconut Cream Pie Overnight Oats

Elevate your breakfast experience by pairing these indulgent oats with delightful accompaniments that perfectly complement their creamy texture.

  • Fresh Tropical Fruit: Enhance the flavor with sliced mango or kiwi, adding a burst of freshness and vibrant color to your breakfast.

  • Nutty Granola: Crunchy granola provides a perfect contrast to the soft, creamy oats, creating a satisfying combination that adds a delightful crunch.

  • Smoothie Bowl:

Blend up a vibrant smoothie with spinach, banana, and coconut water. The refreshing chill will balance the richness of the oats, making for a nourishing morning.

  • Spiced Chai Tea: The aromatic spices in chai tea complement the warm cinnamon notes in the oats, creating a cozy beverage to sip alongside your breakfast.

  • Almond Butter Toast:

Spread creamy almond butter on whole-grain toast for a protein-packed option. The nutty flavor pairs beautifully with the sweetness of the Coconut Cream Pie Overnight Oats.

  • Yogurt Parfait: Layer some plant-based yogurt with fresh berries for a colorful parfait. This adds a tangy note that beautifully contrasts the sweet flavors in your oats.

  • Coconut Chia Pudding:

Create a layered dessert experience with coconut chia pudding. The added texture and flavor of coconut sustain the tropical theme throughout your meal.

  • Green Juice:

Refresh your palate with a green juice made from cucumber, kale, and citrus. This light drink harmonizes with the creamy richness of the oats, making it feel light yet nourishing.

  • Coconut Coffee:

Pair with a bracing cup of coconut-infused coffee for an energizing start to your day. The coffee’s bitter notes enhance the creaminess of the oats while keeping your spirits high.

How to Store and Freeze Coconut Cream Pie Overnight Oats

Fridge: Store your Coconut Cream Pie Overnight Oats in an airtight container for up to 3 days to maintain freshness and flavor.

Make-Ahead: These oats are perfect for meal prep. Prepare them in advance and keep them refrigerated, ready for quick breakfasts during the week.

Reheating: To enjoy warm oats, transfer to a saucepan, add a splash of coconut milk, and heat over low until warm, stirring gently.

Freezer: If you’d like to enjoy them later, freeze the oat mixture in a freezer-safe container for up to 2 months. Thaw in the fridge overnight before consuming.

Coconut Cream Pie Overnight Oats Recipe FAQs

What type of coconut milk should I use for the best flavor?
I recommend using full-fat coconut milk for a luxuriously creamy texture that truly enhances the flavor of your Coconut Cream Pie Overnight Oats. However, if you’re looking for a lighter option, low-fat coconut milk works too. You can also substitute with almond milk or oat milk for different taste profiles.

How long can I store Coconut Cream Pie Overnight Oats in the fridge?
You can keep your Coconut Cream Pie Overnight Oats in an airtight container in the fridge for up to 3 days. They’re perfect for meal prep—just make sure to give them a nice stir before serving as the mixture may settle.

Can I freeze Coconut Cream Pie Overnight Oats?
Absolutely! If you want to enjoy your oats later, freeze the oat mixture in a freezer-safe container for up to 2 months. To thaw, place the container in the fridge overnight, and for a warm treat, simply heat on the stovetop with a splash of coconut milk until warmed through, stirring as needed for even heating.

What should I do if my oats are too thick after soaking?
If you find the texture of your Coconut Cream Pie Overnight Oats too thick after soaking, simply stir in a little extra coconut milk or water until you achieve your desired consistency. Sometimes, variations in rolled oat absorption can lead to different textures, so don’t hesitate to adjust until it’s just right!

Are Coconut Cream Pie Overnight Oats safe for those with nut allergies?
Absolutely! This recipe can be modified to avoid nuts altogether if you’re allergic. Opt for oat milk instead of almond milk for your soaking liquid, and ensure any toppings or additional ingredients are also nut-free. Just check labels to be certain!

Do I need to refrigerate the Coconut Cream Pie Overnight Oats after preparing?
Yes, it’s important to refrigerate the Coconut Cream Pie Overnight Oats after preparation. They need at least 4 hours (or overnight) in the fridge to soak up all the delicious flavors and reach that perfect creamy consistency. Enjoy your tropical breakfast bliss!

Coconut Cream Pie Overnight Oats

Coconut Cream Pie Overnight Oats: Tropical Breakfast Bliss

Coconut Cream Pie Overnight Oats blend creamy coconut milk, ripe bananas, and vanilla for a nutritious breakfast experience.
Prep Time 10 minutes
Chill Time 4 hours
Total Time 4 hours 10 minutes
Servings: 2 jars
Course: Breakfast
Cuisine: Tropical
Calories: 290

Ingredients
  

For the Oats
  • 1 cup rolled oats Provides structure and fiber for a filling breakfast.
  • 1 cup coconut milk Adds creaminess and tropical flavor.
  • ½ cup Greek yogurt Contributes protein and creaminess.
  • ¼ cup shredded unsweetened coconut Enhances coconut flavor and adds texture.
  • 2 tablespoons maple syrup Acts as a natural sweetener.
  • 1 teaspoon vanilla extract Adds depth of flavor.
  • ½ teaspoon ground cinnamon Provides warmth and spice.
  • 1 pinch salt Balances sweetness.
For Toppings
  • 1 medium sliced bananas Offers natural sweetness and creamy texture; optional.
  • fresh whipped cream Optional for topping; adds indulgent finish.
  • additional shredded coconut Optional for garnish; enhances presentation.

Equipment

  • medium bowl
  • Mason jars or airtight containers
  • spatula

Method
 

Preparation
  1. In a medium bowl, mix rolled oats, coconut milk, Greek yogurt, and shredded coconut. Add maple syrup, vanilla extract, ground cinnamon, and salt. Stir until well combined.
  2. Gently fold in sliced banana into the oat mixture, maintaining some chunks for texture.
  3. Evenly divide the oat mixture into two mason jars or airtight containers, leaving a little space at the top for expansion.
  4. Refrigerate your jars overnight or for at least 4 hours to allow the oats to soak up all the flavors.
  5. Before serving, stir and top with whipped cream and shredded coconut.

Nutrition

Serving: 1jarCalories: 290kcalCarbohydrates: 44gProtein: 9gFat: 10gSaturated Fat: 8gPolyunsaturated Fat: 0.5gCholesterol: 5mgSodium: 90mgPotassium: 350mgFiber: 6gSugar: 8gVitamin A: 150IUVitamin C: 2mgCalcium: 150mgIron: 1.5mg

Notes

These oats can be made up to three days in advance. Adjust sweetness based on preference.

Tried this recipe?

Let us know how it was!

Delicious Vegan Burrito Wraps Ready in Just 10 Minutes

As I rummaged through my fridge one chaotic afternoon, a bright idea sparked—a quick meal that whisks me away from fast food and into the arms of vibrant flavors. Enter the 10-Minute Vegan Burrito Wraps, a delightful dish that’s as easy to assemble as it is satisfying. Perfect for tackling those busy weeknights or giving your lunch a refreshing upgrade, these wraps come together without any cooking fuss. They’re packed with nutritious ingredients that everyone in the family will love, making them a healthy and fun option for any meal. Curious about how these tasty wraps can transform your dining experience and free you from the fast food routine? Let’s dive in!

Why Choose Vegan Burrito Wraps?

Quick and Easy: In just 10 minutes, you can whip up these delicious burrito wraps, making them perfect for those hectic days.

Healthy Ingredients: Featuring black beans, fresh veggies, and creamy avocado, they’re packed with nutrients and flavor.

Versatile Options: Feel free to toss in your favorite vegetables—like bell peppers or corn—for a personalized twist.

No Cooking Required: Forget the stove; simply mix, wrap, and enjoy these wholesome delights!

Family-Friendly: Everyone will adore these vibrant wraps, ensuring a crowd-pleasing meal that’s sure to satisfy. Whether paired with a side of salsa or enjoyed on their own, these wraps are a guaranteed hit. Check out how to elevate your flavor game with Garlic Chicken Wraps for more inspiration!

Vegan Burrito Wraps Ingredients

For the Wraps
Tortillas – A soft base for these wraps; warm them slightly to make rolling easier.

For the Filling
Canned Black Beans – A nutritious source of protein and fiber; rinse and drain to prepare.
Avocado – Provides creaminess and healthy fats; swap with hummus if you prefer a different texture.
Onion (Chopped) – Adds flavor; can be omitted or replaced with green onions for a milder taste.
Cilantro – Offers fresh herbal notes; substitute with parsley if you’re not a cilantro fan.
Chili Powder – Imparts smokiness; feel free to reduce or omit for less heat.
Salt & Pepper – Essentials for balancing flavors; adjust these to suit your taste.

Step‑by‑Step Instructions for Vegan Burrito Wraps

Step 1: Prep Ingredients
Begin by gathering all your ingredients to streamline the process. Rinse and drain the canned black beans, chop the onion, and finely dice the cilantro. Warm the tortillas in a dry skillet over medium heat for about 20-30 seconds per side, until they are pliable and fragrant. This will make wrapping your Vegan Burrito Wraps much easier and prevent any breaks.

Step 2: Mix Filling
In a large bowl, mash the avocado with a fork until creamy, leaving a few small chunks for texture. Stir in the prepared black beans, chopped onion, cilantro, chili powder, salt, and pepper. Mix until well combined, creating a colorful and flavorful filling that embodies the essence of these quick Vegan Burrito Wraps. Taste and adjust seasoning if needed.

Step 3: Assemble Burritos
Lay a warm tortilla flat on a clean surface. Spoon a generous amount of the bean and avocado mixture onto the center of the tortilla, ensuring it’s not overloaded. Fold the sides toward the center, then roll the tortilla tightly from the bottom up to enclose the filling. Repeat this step for each tortilla, creating your delicious Vegan Burrito Wraps ready to enjoy!

Step 4: Serve Immediately
Once assembled, cut the burritos in half for easier handling or serve them whole. Present them on a plate alongside your favorite salsa, guacamole, or a fresh salad. Dive into your Vegan Burrito Wraps right away for the best experience, as they are at their peak freshness and flavor.

Expert Tips for Vegan Burrito Wraps

  • Warm Tortillas: Using warm tortillas not only makes them easier to roll but also prevents breaks, ensuring a perfect wrap every time.

  • Separate Storage: If you’re preparing ahead, store the filling and tortillas separately to avoid soggy wraps. This keeps each component fresh and delicious.

  • Flavor Balance: Adjust the seasoning according to your taste. It’s easy to under-season when making Vegan Burrito Wraps, so be sure to taste along the way.

  • Add More Veggies: Don’t hesitate to add shredded carrots, bell peppers, or even corn to amp up the nutrition and texture in your burritos.

  • Spice it Up: If you like heat, try adding diced jalapeños or increase the chili powder for a spicier kick that complements the creamy avocado beautifully.

Vegan Burrito Wraps: Flavorful Twists

Feel free to add your own flair to these wraps by exploring the delightful variations below!

  • Protein Boost: Substitute black beans with cooked quinoa or lentils for a hearty twist. They’re packed with protein and give your burrito a different texture.

  • Veggie Delight: Toss in diced bell peppers, corn, or roasted zucchini to enhance the flavor profile. Each crunchy bite adds delightful bursts of freshness.

  • Creamy Hummus: Swap avocado for hummus for a tangy, creamy texture. It’s an excellent variation that pairs beautifully with the spices in the filling.

  • Spicy Kick: For heat lovers, add diced jalapeños or sprinkle in some cayenne pepper. This fiery twist will wake up your taste buds and take your wraps to the next level.

  • Herbaceous Flavor: Replace cilantro with fresh basil or mint for a unique herbal experience. These herbs offer a refreshing twist that brightens up the whole dish.

  • Tortilla Variety: Experiment with whole wheat or spinach tortillas. Not only do they add extra nutrients, but they also introduce exciting colors to your meal!

  • Toppings Galore: Serve with a side of homemade guacamole or pico de gallo. The extra dips will elevate the experience, making each bite even more enjoyable.

For more inspirations, feel free to explore other delicious options like our savory Garlic Chicken Wraps, which are also quick and easy! Plus, don’t hesitate to integrate any favorite flavors and textures that appeal to your palate.

How to Store and Freeze Vegan Burrito Wraps

Fridge: Wrap leftover burritos tightly in foil or plastic wrap and store them in the refrigerator for up to 24 hours. They’re perfect for a quick meal when you’re on the go!

Freezer: If you’d like to store your Vegan Burrito Wraps for longer, freeze them in an airtight container or freezer bag for up to 3 months. Just make sure to label them!

Reheating: To reheat, simply thaw in the fridge overnight, then microwave for 30–60 seconds or warm in a skillet until heated through, ensuring you enjoy that fresh taste again.

Filling Storage: Keep remaining filling in an airtight container in the fridge, where it can stay fresh for about 1 day. Use it as a topping for salads or grain bowls to enjoy those flavors again!

Make Ahead Options

These 10-Minute Vegan Burrito Wraps are perfect for meal prep enthusiasts! You can prepare the filling up to 24 hours in advance by mixing the mashed avocado, black beans, onion, cilantro, chili powder, salt, and pepper, then refrigerate in an airtight container to maintain freshness. To keep the tortillas from becoming soggy, wrap them separately in plastic wrap or aluminum foil. When you’re ready to enjoy your burritos, simply warm the tortillas as directed, fill them with the prepped filling, and roll them up. This way, you’ll have a quick, satisfying meal that’s just as delicious as when made fresh, saving you precious time on busy weeknights!

What to Serve with 10-Minute Vegan Burrito Wraps

Complete your vibrant meal with delightful pairings that elevate these tasty wraps into an unforgettable dining experience.

  • Fresh Salsa: A zesty salsa adds a burst of flavor, balancing the creaminess of the burritos and offering a refreshing crunch.
  • Guacamole: This iconic dip complements the wrap’s texture and enhances the creamy avocado flavor, making every bite indulgent.
  • Crisp Side Salad: A light salad with mixed greens, cherry tomatoes, and a tangy dressing brings in freshness and texture to your meal.
  • Roasted Vegetables: Seasoned roasted veggies provide a warm, savory contrast that enhances the colorful filling of the burritos.
  • Corn on the Cob: Grilled corn adds sweetness and a delightful crunch that pairs beautifully with the savory elements of the wrap.
  • Chilled Lemonade: A glass of refreshing lemonade offers a citrusy zing, perfectly cleansing your palate between bites.
  • Coconut Rice: Fluffy coconut rice provides a creamy, fragrant side that harmonizes with the bold flavors of the vegan burrito wraps.
  • Spicy Pinto Beans: Heat up some pinto beans with chili powder for an extra kick. Their texture aligns well with the wrap’s filling.
  • Dark Chocolate Squares: For a sweet finish, consider dark chocolate squares that contrast the savory meal and satisfy your sweet tooth.

10-Minute Vegan Burrito Wraps Recipe FAQs

How do I select ripe avocados for my burrito wraps?
Absolutely! Look for avocados that yield slightly to gentle pressure when you squeeze them. If they feel too firm, they may not be ripe enough, while those with dark spots or mushy textures are best avoided. Ripe avocados will have a uniform skin and a creamy texture, perfect for mashing into your burrito filling.

What is the best way to store leftover burrito wraps?
Very simple! Wrap any leftover burritos tightly in foil or plastic wrap and refrigerate them for up to 24 hours. This method helps retain their moisture and flavor. If you want to keep them longer, store them in an airtight container in the freezer for up to 3 months. Remember to label your containers to avoid any surprises!

Can I freeze Vegan Burrito Wraps, and how should I do it?
Definitely! To freeze your burrito wraps, wrap each one tightly in plastic wrap or foil and place them into a freezer-safe bag or container. Be sure to squeeze out any excess air before sealing. This helps prevent freezer burn. When you’re ready to enjoy them, thaw in the fridge overnight and reheat in the microwave or a skillet.

What if my burrito wraps turn out soggy?
If your wraps become soggy, it’s often due to moisture from the filling making the tortillas wet. To prevent this, always warm the tortillas first, and store the filling and tortillas separately if prepping in advance. If you find that the wraps are soggy after storage, you can briefly toast them in a skillet to help crisp up the tortillas again.

Are Vegan Burrito Wraps safe for dogs or any common allergies?
When it comes to sharing with furry friends, it’s best to avoid feeding them the filling as it contains ingredients like onions, which are harmful to dogs. As for common allergies, this recipe is plant-based, making it suitable for many dietary restrictions. However, individuals with legume allergies should be cautious with the black beans. Always consult your healthcare provider for dietary concerns!

Can I add more vegetables to the burrito filling?
Of course! The more the merrier when it comes to vegetables. Feel free to incorporate shredded carrots, diced bell peppers, or even corn to add extra flavor and texture. Also, make sure to adjust the seasoning to complement the new ingredients for a delicious and vibrant filling that enhances your Vegan Burrito Wraps!

Vegan Burrito Wraps

Delicious Vegan Burrito Wraps Ready in Just 10 Minutes

Quick and easy Vegan Burrito Wraps packed with nutritious ingredients for a satisfying meal.
Prep Time 10 minutes
Total Time 10 minutes
Servings: 4 wraps
Course: Lunch
Cuisine: Vegan
Calories: 250

Ingredients
  

For the Wraps
  • 4 tortillas Tortillas Warm slightly to make rolling easier.
For the Filling
  • 1 can Canned Black Beans Rinse and drain before use.
  • 1 medium Avocado Swap with hummus if preferred.
  • 1 medium Onion (Chopped) Can be omitted or replaced with green onions.
  • 1/4 cup Cilantro Substitute with parsley if desired.
  • 1 teaspoon Chili Powder Adjust for desired heat level.
  • to taste Salt & Pepper Essential for flavor balancing.

Equipment

  • Skillet

Method
 

Step-by-Step Instructions for Vegan Burrito Wraps
  1. Begin by gathering all your ingredients to streamline the process. Rinse and drain the canned black beans, chop the onion, and finely dice the cilantro. Warm the tortillas in a dry skillet over medium heat for about 20-30 seconds per side.
  2. Mash the avocado in a large bowl until creamy, leaving some chunks for texture. Stir in the prepared black beans, onion, cilantro, chili powder, salt, and pepper until well combined.
  3. Lay a warm tortilla flat and spoon a generous amount of the filling onto the center. Fold the sides toward the center, then roll the tortilla tightly from the bottom up.
  4. Cut the burritos in half for easier handling or serve whole. Enjoy immediately with your favorite salsa or guacamole.

Nutrition

Serving: 1wrapCalories: 250kcalCarbohydrates: 32gProtein: 8gFat: 12gSaturated Fat: 2gPolyunsaturated Fat: 1gMonounsaturated Fat: 8gSodium: 320mgPotassium: 600mgFiber: 8gSugar: 2gVitamin A: 10IUVitamin C: 15mgCalcium: 6mgIron: 15mg

Notes

Using warm tortillas makes rolling easier and helps prevent breaks. Store remaining filling and tortillas separately if preparing ahead.

Tried this recipe?

Let us know how it was!

Crispy Asian-Style Tuna Cakes with Spicy Mayo You’ll Love

As I was experimenting in the kitchen last week, a simple can of tuna transformed into a delightful inspiration for my dinner. Enter these Bold Asian-Style Tuna Cakes with Spicy Mayo—a game-changer for anyone looking to jazz up their seafood routine. Crispy on the outside and tender on the inside, these scrumptious cakes are bursting with vibrant Korean flavors that will fire up your taste buds. Not only are they a quick dinner option, perfect for those busy weeknights, but they also pack a protein punch to keep you feeling satisfied. Whether you’re serving them as appetizers or a light meal, you’ll impress your family and friends with this delightful recipe. Ready to elevate your tuna game? Let’s dive in!

Why are these tuna cakes irresistible?

Crispy Delight: Each bite delivers a satisfying crunch while being tender inside, creating a perfect textural contrast.
Flavor Burst: Infused with rich Asian flavors, these cakes elevate your seafood experience like never before.
Quick Preparation: With just a few simple steps, you can whip up dinner in no time—ideal for busy weeknights.
Versatile Serving: Serve them as an appetizer at a gathering or as a light meal alongside a fresh salad; they fit any occasion!
Nutrient Powerhouse: Packed with protein, these cakes not only taste great but also keep you full. Pair these with Nutella Pancakes Blend for a sweet finish or enjoy them alongside Spicy Brazilian Coconut for an amazing meal combo!

Asian-Style Tuna Cakes Ingredients

For the Tuna Cakes
Tuna (canned, 2 cans, 5 oz each) – Main protein source; drain well to avoid sogginess.
Onion (1/4 cup, finely chopped) – Adds sweetness and texture; substitute with shallots for a milder flavor.
Carrot (1/4 cup, chopped) – Provides color and crunch; can use grated zucchini as a substitute.
Green onion (1/4 cup, chopped) – Enhances flavor with its mild bite; replace with chives if unavailable.
Salt (1/4 tsp) – Enhances overall flavor; adjust based on canned tuna saltiness.
Ground black pepper (2 pinches) – Adds warmth; freshly ground is recommended.
Eggs (2) – Binds the mixture together; no direct substitute, but flax egg can be used for a vegan option.
All-purpose flour (3 tbsp) – Provides structure; can use gluten-free flour if preferred.
Neutral cooking oil (2 tbsp, e.g., vegetable or avocado) – For frying; can substitute with olive oil for a richer flavor.

For the Spicy Mayo
Mayonnaise (3 tbsp) – Adds creaminess to the mayo sauce; any type works, Greek yogurt can be a lighter alternative.
Gochujang (1 tbsp) – Provides a spicy kick; can substitute with sriracha for a different type of heat.
Lemon juice (1 tsp) – Adds acidity and brightness; lime juice can be used interchangeably.
Sugar (optional, 1/2 tsp) – Balances flavors in the spicy mayo; could be omitted if preferred.

Step‑by‑Step Instructions for Asian-Style Tuna Cakes with Spicy Mayo

Step 1: Prepare the Mixture
In a large mixing bowl, combine the drained tuna, finely chopped onion, chopped carrot, and green onion. Sprinkle in salt and black pepper, then crack in the eggs and add the flour. Using a fork or your hands, mix everything together until just combined, ensuring the mixture remains slightly chunky for texture.

Step 2: Shape the Patties
Once your mixture is ready, take about a golf ball-sized amount and form small patties about 2–3 inches in diameter. Aim for a uniform thickness to ensure even cooking. You’ll yield around 8 patties. Place them on a plate or tray, giving them a light press to flatten slightly, making them easier to cook.

Step 3: Cook the Patties
Heat a non-stick skillet over medium heat and add the neutral cooking oil. Once the oil is shimmering, carefully add the shaped patties in a single layer, allowing some space between them. Cook for about 2–3 minutes on each side until they are golden brown and crispy, flipping gently with a spatula.

Step 4: Make the Spicy Mayo
While the patties are cooking, prepare the spicy mayo. In a small bowl, whisk together the mayonnaise, gochujang, lemon juice, and optional sugar until smooth and creamy. Adjust the spice level to your taste by adding more gochujang if you like it spicier. Set aside to let the flavors meld.

Step 5: Serve Hot
Once the tuna cakes are beautifully golden and crisp, transfer them to a paper towel-lined plate to drain any excess oil. Serve them warm, either drizzled with the spicy mayo or as a delightful dipping sauce on the side. These Asian-Style Tuna Cakes are perfect for impressing guests or treating yourself!

Tips for the Best Tuna Cakes

Drain Tuna Well: Make sure to drain the canned tuna thoroughly to avoid mushy cakes. This prevents excess moisture and helps achieve that desired crispiness.

Fresh Ingredients Matter: Use fresh vegetables, like onions and carrots, for an enhanced texture and flavor. Substituting with older produce can lead to a less vibrant dish.

Form Uniform Patties: Keep your patties about 2–3 inches in diameter and uniform in thickness. This ensures even cooking and helps maintain that delightful crunch in your Asian-Style Tuna Cakes with Spicy Mayo.

Cook at the Right Temperature: Monitor the skillet’s heat carefully. Too low, and your patties will absorb oil; too high, and they might burn. Aim for medium heat for perfect golden brown results.

Don’t Overmix: When combining the ingredients, mix just until they come together. Overmixing can lead to dense cakes instead of light, tender ones.

Experiment with Spices: Feel free to add a pinch of garlic powder or cayenne to the tuna mixture for an extra flavor boost. Get creative and enjoy the process!

Make Ahead Options

These Asian-Style Tuna Cakes with Spicy Mayo are perfect for meal prep enthusiasts! You can prepare the tuna mixture up to 24 hours in advance—just combine the drained tuna, chopped vegetables, and spices in a bowl, then cover and refrigerate. Additionally, you can shape the patties ahead of time and store them in an airtight container with parchment paper between each layer to prevent sticking, lasting up to 3 days in the fridge. When you’re ready to enjoy these delicious cakes, simply heat oil in a skillet and pan-fry the patties for about 2–3 minutes on each side until golden brown and crisp. This way, you’ll have a delightful, homemade meal ready in no time!

What to Serve with Asian-Style Tuna Cakes with Spicy Mayo

Enhance your culinary experience by pairing these delectable tuna cakes with side dishes that complement their robust flavors.

  • Steamed Jasmine Rice: Fluffy rice absorbs the spicy mayo and balances the dish’s rich flavors, creating a satisfying meal.

  • Sesame Green Beans: These tender green beans add a crunchy texture with sesame oil’s nutty notes, making for a delightful contrast.

  • Cucumber Salad: A refreshing salad of thinly sliced cucumbers drizzled with rice vinegar adds a crisp, tangy element that complements the richness of the cakes.

  • Pickled Radishes: The sharpness of pickled radishes cuts through the flavors beautifully, adding a refreshing crunch that contrasts with the tender tuna cakes.

  • Spicy Kimchi: This traditional fermented side adds a kick and depth of flavor, perfectly pairing with the Korean-inspired elements of the tuna cakes.

  • Miso Soup: A light, warm bowl of miso soup provides a comforting, umami-rich complement, enhancing your overall dining experience.

  • Chilled Sake: Pairing your meal with a chilled sake can elevate the flavors, bringing a refreshing balance alongside the spicy mayo.

  • Mango Sorbet: For a sweet finish, try a scoop of mango sorbet; its fruity sweetness provides a delightful contrast to the savory tuna cakes.

Asian-Style Tuna Cakes with Spicy Mayo Variations

Feel free to get creative and customize these cakes to suit your taste buds or dietary needs!

  • Salmon Swap: Substitute tuna with canned salmon for a rich, slightly different flavor profile.
  • Vegan Option: Replace the eggs with a flax egg to make this dish completely plant-based without losing texture.
  • Gluten-Free Delight: Use a gluten-free flour mix instead of all-purpose flour to cater to gluten sensitivities.
  • Spice it Up: Add minced jalapeños or cayenne pepper for a fiery kick; adjust the amount based on your spice preference.
  • Herb Infusion: Enhance freshness by incorporating finely chopped cilantro or parsley into the mixture before shaping the patties.

Try serving these yummy cakes alongside a crunchy salad or in a lettuce wrap for a lighter meal. For a touch of sweetness, these crispy cakes pair wonderfully with a side of Honeybun Carrot Cake with Cheesecake Filling to wrap up your meal with dessert.

How to Store and Freeze Asian-Style Tuna Cakes

Fridge: Keep leftover tuna cakes in an airtight container for up to 2 days. This will help them retain their flavor and prevent drying out.

Freezer: For longer storage, freeze the patties individually wrapped in plastic wrap or stored in a freezer-safe bag for up to 1 month. This ensures they stay fresh and ready for a quick meal.

Reheating: To enjoy your Asian-Style Tuna Cakes again, reheat them in a skillet over medium heat for about 3–5 minutes on each side until warmed through and crispy.

Thawing: If frozen, transfer the patties to the fridge the night before to thaw or heat directly from the freezer for a few extra minutes in the skillet!

Asian-Style Tuna Cakes with Spicy Mayo Recipe FAQs

What type of tuna should I use?
Absolutely! I recommend using canned tuna packed in water for a leaner option, but oil-packed tuna can add extra flavor. Just ensure you drain it well—this prevents your cakes from becoming soggy and helps achieve that perfect crispiness.

How should I store leftover tuna cakes?
For the fridge, store leftover patties in an airtight container for up to 2 days. This will help preserve their flavor and moisture. If you want to save them for longer, refrigerate them right away to keep them fresh.

Can I freeze Asian-Style Tuna Cakes?
Very! To freeze, wrap each patty individually in plastic wrap and place them in a freezer-safe bag. They can keep for up to 1 month. To reheat, thaw in the fridge overnight or cook directly from frozen for about 5–7 minutes on each side until heated through.

How do I ensure my tuna cakes don’t fall apart while cooking?
Great question! To avoid falling apart, make sure you mix just until combined and form your patties with a light hand. The eggs and flour will help bind them together, but overmixing can make them dense. If you find your mixture is too wet, you can add a touch more flour to help it hold better.

Are these tuna cakes suitable for people with allergies?
Check for allergens! These tuna cakes contain eggs and can be made gluten-free by using gluten-free flour. For someone with a seafood allergy, consider alternatives like canned salmon or chickpeas. It’s always best to adapt recipes according to dietary needs to keep everyone safe.

What do I serve with tuna cakes?
The more the merrier! These cakes pair wonderfully with a variety of dishes. Serve them over a bed of greens for a light meal, or alongside rice for heartiness. You can also include a refreshing salad or some pickled veggies to round out your plate!

Asian-Style Tuna Cakes with Spicy Mayo

Crispy Asian-Style Tuna Cakes with Spicy Mayo You’ll Love

Asian-Style Tuna Cakes with Spicy Mayo are crispy on the outside and packed with flavor, perfect for a quick dinner.
Prep Time 15 minutes
Cook Time 10 minutes
Total Time 25 minutes
Servings: 4 cakes
Course: Appetizers
Cuisine: Asian
Calories: 180

Ingredients
  

For the Tuna Cakes
  • 2 cans Tuna (canned, 5 oz each) Drain well to avoid sogginess
  • 1/4 cup Onion, finely chopped Substitute with shallots for a milder flavor
  • 1/4 cup Carrot, chopped Can use grated zucchini as a substitute
  • 1/4 cup Green onion, chopped Replace with chives if unavailable
  • 1/4 tsp Salt Adjust based on canned tuna saltiness
  • 2 pinches Ground black pepper Freshly ground is recommended
  • 2 Eggs Binds the mixture together; no direct substitute
  • 3 tbsp All-purpose flour Can use gluten-free flour if preferred
  • 2 tbsp Neutral cooking oil For frying; can substitute with olive oil
For the Spicy Mayo
  • 3 tbsp Mayonnaise Any type works, Greek yogurt can be a lighter alternative
  • 1 tbsp Gochujang Provides a spicy kick; can substitute with sriracha
  • 1 tsp Lemon juice Lime juice can be used interchangeably
  • 1/2 tsp Sugar (optional) Could be omitted if preferred

Equipment

  • Mixing Bowl
  • Non-stick skillet
  • spatula

Method
 

Step‑by‑Step Instructions
  1. In a large mixing bowl, combine the drained tuna, onion, carrot, and green onion. Sprinkle in salt and black pepper, then add the eggs and flour. Mix until just combined.
  2. Take a golf ball-sized amount and form small patties about 2–3 inches in diameter. Aim for uniform thickness.
  3. Heat a non-stick skillet over medium heat and add the cooking oil. Once shimmering, carefully add patties in a single layer. Cook for about 2–3 minutes on each side until golden brown.
  4. In a small bowl, whisk together mayonnaise, gochujang, lemon juice, and optional sugar until smooth. Adjust spiciness to taste.
  5. Transfer cooked tuna cakes to a paper towel-lined plate to drain excess oil. Serve warm drizzled with spicy mayo.

Nutrition

Serving: 1cakeCalories: 180kcalCarbohydrates: 10gProtein: 15gFat: 9gSaturated Fat: 1gCholesterol: 100mgSodium: 300mgPotassium: 200mgFiber: 1gSugar: 1gVitamin A: 100IUVitamin C: 2mgCalcium: 30mgIron: 1mg

Notes

Use fresh ingredients for best flavor. Drain tuna well to avoid mushy cakes.

Tried this recipe?

Let us know how it was!

Deliciously Easy Creamy Lemon Cheesecake Crumb Bars Recipe

As I sat on my sun-drenched patio, a slice of nostalgia crumbled in my hands—those delightful Creamy Lemon Cheesecake Crumb Bars instantly transported me back to summer gatherings filled with laughter and joy. With a buttery graham cracker base topped with a velvety lemon cheesecake filling, these bars are not just another dessert; they’re the perfect way to impress your friends while enjoying a taste of zest and lightness. The beauty of this easy-to-make recipe lies in its versatility: whether it’s a casual weeknight treat or a show-stopping finale at your next gathering, these crumb bars deliver comfort with a refreshing twist. Have you ever wondered how a simple dessert can elevate an ordinary day? Grab your apron, and let’s dive into this refreshing experience together!

Why Are These Cheesecake Bars Irresistible?

Easy to Make: This recipe simplifies dessert preparation—perfect for busy days or spontaneous gatherings.

Refreshing Flavor: The zesty lemon and creamy filling create a balanced explosion of flavors that invigorate your palate.

Impressive Presentation: With their eye-catching layers, these bars are sure to wow your guests, making you the star of any event.

Versatile Serving Options: Enjoy them chilled with fresh berries or a dollop of whipped cream, just like my go-to Strawberry Cheesecake Dump for more delicious inspiration!

Make-Ahead Convenience: These bars store beautifully in the fridge, allowing you to prepare them a day in advance for hassle-free hosting.

Crowd Pleaser: Whether it’s a family meal or a special occasion, these bars appeal to both kids and adults alike, ensuring everyone leaves satisfied!

Creamy Lemon Cheesecake Crumb Bars Ingredients

For the Crust

  • Graham Cracker Crumbs – These create a warm, toasty base that is essential for the crumb bars; consider gluten-free crumbs as a delicious alternative.
  • Melted Butter – Binds the crust together and adds richness; don’t skip this for ultimate flavor!
  • Granulated Sugar – Sweetens and balances the flavors; just the right amount is key for these Creamy Lemon Cheesecake Crumb Bars!
  • All-Purpose Flour – Provides structure to the crumb mixture; can be easily swapped with gluten-free flour if needed.
  • Salt – Enhances the overall flavor without adding saltiness; a pinch goes a long way.

For the Cheesecake Filling

  • Cream Cheese – The star of the filling provides that rich and creamy texture; opt for full-fat block cream cheese for best results.
  • Eggs – Essential for binding the filling and enriching its texture; room temperature eggs are easiest to mix.
  • Lemon Zest – Adds fragrant and bright citrus notes that elevate the dessert; fresh zest is always best!
  • Lemon Juice – Offers the essential tang that brightens the cheesecake; fresh-squeezed creates the most vibrant flavor.
  • Vanilla Extract – Rounds out the flavors, giving depth to the sweetness; a must-have addition!

For the Topping

  • Remaining Crumb Mixture – Use the leftover crust mixture to add a delightful crunch on top; it creates a perfect contrast to the creamy filling.

Step‑by‑Step Instructions for Creamy Lemon Cheesecake Crumb Bars Recipe

Step 1: Prepare the Oven and Pan
Preheat your oven to 350°F (175°C). While the oven heats up, line an 8×8-inch baking dish with parchment paper, ensuring to leave some overhang for easy removal later. This will be the foundation for your Creamy Lemon Cheesecake Crumb Bars, perfectly setting the stage for delicious layers.

Step 2: Make the Crust
In a large mixing bowl, combine graham cracker crumbs, flour, granulated sugar, and a pinch of salt. Pour in the melted butter and mix until the mixture resembles wet sand. Press two-thirds of this crumb mixture firmly into the lined baking dish, creating an even layer that will serve as the base for your cheesecake filling.

Step 3: Prepare the Filling
In a stand mixer or a large bowl, beat the softened cream cheese until smooth and creamy, ensuring there are no lumps. Gradually add in the granulated sugar, then mix in the eggs one at a time. Finally, fold in the fresh lemon zest, lemon juice, and vanilla extract until the filling is velvety and well combined, ensuring the fragrant lemon notes shine through.

Step 4: Assemble Bars
Carefully pour the luscious cheesecake filling over the crust in your baking dish, spreading it out evenly with a spatula. Then, sprinkle the remaining crumb mixture on top, making sure to cover the filling evenly for a delightful crumbly topping that contrasts beautifully with the creamy center of your Creamy Lemon Cheesecake Crumb Bars.

Step 5: Bake
Place your assembled cheesecake in the preheated oven. Bake for 30–35 minutes, until the edges are set but the center still has a slight wobble. Keep an eye on it, as the perfect bake will result in a firm texture without cracks—this ensures your cheesecake bars will remain luscious and creamy.

Step 6: Cool and Chill
Once baked, remove the dish from the oven and let it cool at room temperature for about one hour. Then, transfer it to the refrigerator and chill for a minimum of 3 hours, or overnight if possible. This chilling process allows the flavors to meld beautifully, resulting in a decadent dessert that’s ready to impress at any gathering.

Expert Tips for Creamy Lemon Cheesecake Crumb Bars Recipe

  • Room Temperature Cream Cheese: Ensure your cream cheese is at room temperature to achieve a smooth filling without any lumps.

  • Chilling Time is Essential: Allow the bars to chill for at least 3 hours or overnight for the best texture and flavor, enhancing your Creamy Lemon Cheesecake Crumb Bars.

  • Avoid Overbaking: Keep an eye on your bars in the oven; they should have a slight wobble in the center when done to prevent dryness.

  • Sharp Knife for Cutting: Use a sharp, warm knife to cut the bars for clean edges; this makes serving more visually appealing!

  • Customize Your Topping: Feel free to add fresh berries or a drizzle of lemon curd on top, enhancing both the flavor and presentation of your dessert.

Make Ahead Options

These Creamy Lemon Cheesecake Crumb Bars are a dream for busy home cooks looking to save time without compromising on flavor! You can prepare the crust and filling up to 24 hours in advance and store them separately in the refrigerator. Simply press the crust into the baking dish and refrigerate, while covering the filling in an airtight container. When you’re ready to bake, pour the cheesecake filling over the crust, sprinkle the topping, and bake as directed. This way, you’ll have a delicious dessert with minimal effort, just as delightful as if you’d made it fresh. Remember, chilling for at least 3 hours (or preferably overnight) after baking enhances the flavors and texture, ensuring your bars remain irresistible!

What to Serve with Creamy Lemon Cheesecake Crumb Bars

When you’re ready to round out your dessert experience, consider these delightful companions to elevate your Creamy Lemon Cheesecake Crumb Bars.

  • Fresh Berries: A medley of strawberries, blueberries, and raspberries adds a burst of color and tartness, perfectly complementing the creamy cheesecake flavors.
  • Light Whipped Cream: Lightly sweetened whipped cream provides a fluffy contrast that enhances the richness of the bars while adding an elegant touch.
  • Mint Leaves: Fresh mint leaves aren’t just for decoration; they bring a refreshing breath of flavor that makes every bite feel even more luxurious.
  • Iced Tea or Lemonade: A chilled glass of homemade lemonade or iced tea enhances the summery vibe of your dessert. Their vibrant flavors harmonize beautifully with the lemon zest in the cheesecake.
  • Chocolate Drizzle: A simple melt of dark chocolate to drizzle on top can add a rich, decadent note that pairs wonderfully with the bar’s zesty flavors.
  • Lemon Curd: Adding a dollop of lemon curd gives an extra zing of citrus, elevating the already bright flavors while creating an inviting plate.

With these pairings, your dessert table transforms into a vibrant celebration, ensuring that each bite of the Creamy Lemon Cheesecake Crumb Bars is not only memorable but also enhances your guests’ experience!

How to Store and Freeze Creamy Lemon Cheesecake Crumb Bars

Fridge: Keep your Creamy Lemon Cheesecake Crumb Bars in an airtight container in the refrigerator for up to 5 days. This helps maintain their freshness and flavor.

Freezer: For longer storage, wrap individual bars tightly in plastic wrap, then place them in a freezer-safe container. They can be frozen for up to 3 months without losing quality.

Thawing: When ready to enjoy, transfer them to the fridge to thaw overnight. Alternatively, you can let them sit at room temperature for about an hour before serving.

Serving Freshness: For the best taste, consume your cheesecake bars within a few days of making them, as the flavors are at their peak during this time.

Creamy Lemon Cheesecake Crumb Bars Variations

Elevate your dessert game and personalize these crumb bars with delightful variations that tickle the taste buds!

  • Gluten-Free: Substitute graham cracker crumbs and flour with gluten-free alternatives to enjoy a deliciously inclusive dessert for all your guests.

  • Berry Bliss: Top the bars with fresh raspberries or blueberries before serving to add a burst of color and extra fruity flavor, turning every slice into a picture-perfect delight.

  • Creamier Twist: Swap out cream cheese for mascarpone for an even richer, silkier filling that makes each bite melt in your mouth—perfect for special occasions!

  • Citrus Sensation: Drizzle lemon curd over the cooled bars to amplify the citrusy goodness and create layers of flavor that are undeniably refreshing.

  • Chocolate Indulgence: Add chocolate chips to the cheesecake filling for a decadent twist on the classic that combines tang and sweetness for an exciting flavor surprise.

  • Nutty Crunch: For added texture and taste, sprinkle chopped nuts atop the cheesecake layer before baking, giving your bars that delightful crunch with every bite.

  • Spicy Kick: Introduce a hint of spice by adding a teaspoon of ground ginger or cinnamon to the crust—it’s a beautiful way to jazz up the flavors and warm the palate.

  • Sweet Citrus Zing: Incorporate a splash of orange juice alongside the lemon juice for an intriguing flavor combination that brightens the creaminess and enhances the summery essence.

These variations will keep your Creamy Lemon Cheesecake Crumb Bars exciting and fresh, ensuring they’re the highlight of any gathering—just like the irresistible Strawberry Cheesecake Dump or the refreshing Lemon Blueberry Summery. Embrace creativity and make these bars uniquely yours!

Creamy Lemon Cheesecake Crumb Bars Recipe FAQs

What type of graham cracker crumbs should I use?
I recommend using finely crushed regular graham cracker crumbs for the ideal texture, but if you’re looking for a gluten-free option, finely crushed gluten-free graham cracker crumbs work just as beautifully!

How long do these cheesecake bars last in the fridge?
Your Creamy Lemon Cheesecake Crumb Bars can be stored in an airtight container in the refrigerator for up to 5 days. This ensures they stay fresh and tasty while ready to impress at your next gathering.

Can I freeze these cheesecake bars?
Absolutely! For freezing, wrap each individual bar tightly in plastic wrap and place them in a freezer-safe container. They can be frozen for up to 3 months. When you’re ready to enjoy them, simply transfer them to the fridge to thaw overnight, or let them sit at room temperature for about an hour.

What should I do if my bars are cracked after baking?
If you see cracks forming, don’t worry! It typically means they were baked a little too long or cooled too quickly. To prevent this, ensure you remove the bars when they are set but still slightly wobbly in the center and allow them to cool gradually at room temperature before chilling. If cracks do happen, simply cover them with a layer of whipped cream or berries for a beautiful presentation!

Are there any dietary considerations for these bars?
Yes, if you’re accommodating allergies or dietary restrictions, you can easily make these bars gluten-free by using gluten-free graham cracker crumbs and flour. Additionally, keep an eye on cream cheese selections, opting for full-fat options for the best flavor and texture. Always check ingredients for any specific allergies, especially for guests with food sensitivities.

Can pets safely enjoy any part of these cheesecake bars?
Most ingredients in the Creamy Lemon Cheesecake Crumb Bars, like cream cheese and sugar, aren’t suitable for pets. It’s best to keep these bars as a delightful treat for yourself and your guests, while your furry friends stick to their specially formulated foods.

Creamy Lemon Cheesecake Crumb Bars Recipe

Deliciously Easy Creamy Lemon Cheesecake Crumb Bars Recipe

This Creamy Lemon Cheesecake Crumb Bars recipe is a delightful dessert that combines a buttery crust with a zesty filling.
Prep Time 25 minutes
Cook Time 35 minutes
Chilling Time 3 hours
Total Time 4 hours
Servings: 16 bars
Course: Dessert
Cuisine: American
Calories: 250

Ingredients
  

For the Crust
  • 1.5 cups Graham Cracker Crumbs Consider gluten-free crumbs as an alternative.
  • 1/2 cup Melted Butter Don’t skip for ultimate flavor!
  • 1/3 cup Granulated Sugar Sweetens and balances flavors.
  • 1/4 cup All-Purpose Flour Can be swapped with gluten-free flour.
  • 1/4 teaspoon Salt A pinch enhances overall flavor.
For the Cheesecake Filling
  • 8 oz Cream Cheese Opt for full-fat block cream cheese.
  • 3 large Eggs Room temperature for easier mixing.
  • 1 tablespoon Lemon Zest Fresh zest is best!
  • 1/4 cup Lemon Juice Fresh-squeezed creates vibrant flavor.
  • 1 teaspoon Vanilla Extract A must-have addition!
For the Topping
  • 1 cups Remaining Crumb Mixture Creates a delightful crunch on top.

Equipment

  • 8×8-inch baking dish
  • Mixing Bowl
  • Stand mixer

Method
 

Step-by-Step Instructions
  1. Preheat your oven to 350°F (175°C) and line an 8×8-inch baking dish with parchment paper.
  2. In a bowl, combine graham cracker crumbs, flour, sugar, and salt. Add melted butter and mix until resembling wet sand. Press two-thirds into the baking dish.
  3. In a mixer, beat cream cheese until smooth. Gradually add sugar, then eggs one at a time. Fold in lemon zest, juice, and vanilla until velvety.
  4. Pour cheesecake filling over the crust and sprinkle remaining crumb mixture on top.
  5. Bake for 30–35 minutes until edges are set but center wobbles slightly.
  6. Cool at room temperature for 1 hour, then chill for at least 3 hours or overnight before serving.

Nutrition

Serving: 1barCalories: 250kcalCarbohydrates: 30gProtein: 3gFat: 13gSaturated Fat: 8gPolyunsaturated Fat: 0.5gMonounsaturated Fat: 3gCholesterol: 50mgSodium: 180mgPotassium: 80mgFiber: 1gSugar: 14gVitamin A: 500IUVitamin C: 2mgCalcium: 50mgIron: 0.4mg

Notes

For the best taste, consume within a few days of making as flavors peak initially.

Tried this recipe?

Let us know how it was!

Lobster Ravioli in Lemon Butter Sauce: A Luxurious Delight

As the pot of salted water bubbles away, I can’t help but feel a surge of excitement—it’s Lobster Ravioli in Lemon Butter Sauce night! This dish is my ultimate go-to for those times when I want to impress without spending hours in the kitchen. The combination of creamy, flavorful lobster enveloped in tender ravioli, all draped in a zesty lemon butter sauce, is pure culinary bliss. Not only is this recipe impressively quick to whip up, but it also brings that cozy restaurant feel right to my dining table. Perfect for a romantic dinner or a friendly gathering, I can’t wait for you to discover this luxurious yet simple meal that’s sure to delight. Are you ready to dive into this Italian-inspired indulgence?

Why Is This Dish So Irresistible?

Unforgettable Flavor: The zesty lemon butter sauce melds perfectly with the rich lobster, creating a dish that’s bursting with flavor.

Quick and Easy: You can pull this gourmet meal together in just 30 minutes, making it perfect for a weeknight or surprise date night.

Versatile Ingredients: Substitute the lobster with shrimp or crab for a personal twist, or enjoy it vegetarian by using cheese ravioli instead.

Crowd-Pleasing Appeal: Whether it’s a dinner party or a cozy night in, everyone will leave satisfied and raving about this delightful dish.

Elegant Presentation: You’re not just serving dinner; you’re serving a work of art! The ravioli, drizzled with a creamy sauce and garnished with parsley, looks stunning. Check out other great recipes like Comfort Garlic Butter and Garlic Butter Baked for more impressive bites!

Lobster Ravioli in Lemon Butter Sauce Ingredients

For the Ravioli

Lobster Ravioli – The main attraction providing a rich lobster flavor; feel free to use frozen or fresh.

For the Sauce

Unsalted Butter – This creamy base adds richness and depth to your sauce.
Garlic – Use fresh garlic for a fragrant, savory bite, enhancing the overall flavor.
Lemon Zest – Brightens the dish with zesty citrus notes that balance the richness of the butter.
Fresh Lemon Juice – Adds a punch of acidity, elevating the flavor profile of the sauce.
Heavy Cream – Makes the sauce luxuriously smooth and velvety, truly embodying the indulgence of Lobster Ravioli in Lemon Butter Sauce.
Grated Parmesan Cheese – Provides extra flavor and helps thicken the sauce; a must for a creamy finish.
Chopped Parsley – Adds a burst of color and a fresh herbal note as a lovely garnish.
Salt and Black Pepper – Adjust to taste for enhancing the overall flavor balance.
Cayenne Pepper/Red Pepper Flakes – Optional, but a great way to spice things up if you love a little heat!

Step‑by‑Step Instructions for Lobster Ravioli in Lemon Butter Sauce

Step 1: Boil the Ravioli
Bring a large pot of salted water to a rolling boil over high heat. Once boiling, gently add the lobster ravioli and cook according to package instructions, typically around 3-4 minutes. You’ll know they’re ready when they float to the surface. Carefully drain the ravioli, reserving about a half cup of the pasta water for later.

Step 2: Sauté the Garlic
In a large skillet, melt 4 tablespoons of unsalted butter over medium heat. Add finely minced garlic and sauté for 1-2 minutes until it becomes fragrant and slightly golden. This step builds a flavorful base for your rich Lemon Butter Sauce, setting the stage for the indulgent Lobster Ravioli you’ll soon coat.

Step 3: Create the Sauce
Stir in the lemon zest and fresh lemon juice, allowing the mixture to bubble for about 1 minute. Then, pour in 1 cup of heavy cream, raising the heat slightly as you bring everything to a gentle simmer. Watch for the sauce to slightly thicken over the next 2-3 minutes, creating a luscious coating that will beautifully envelop your lobster ravioli.

Step 4: Add Cheese for Creaminess
Once your sauce is simmering, gradually whisk in ½ cup of grated Parmesan cheese until it’s fully melted and the sauce becomes smooth and creamy. This addition enhances the richness of the sauce while perfectly complementing the delicate flavors of the lobster ravioli.

Step 5: Toss the Ravioli in Sauce
Carefully add the cooked lobster ravioli to the skillet, using a spatula to gently toss them in the creamy sauce. If the sauce seems too thick, gradually add a splash of the reserved pasta water until you reach your desired consistency. The goal is to have each ravioli beautifully coated in the decadent Lemon Butter Sauce.

Step 6: Season and Serve
Finish by seasoning the dish with salt and black pepper to taste. For a touch of heat, feel free to add a pinch of cayenne pepper or red pepper flakes if desired. Garnish with freshly chopped parsley for a colorful presentation. Serve your Lobster Ravioli in Lemon Butter Sauce immediately for the best experience!

How to Store and Freeze Lobster Ravioli in Lemon Butter Sauce

Fridge: Store any leftover Lobster Ravioli in Lemon Butter Sauce in an airtight container for up to 3 days. Reheat gently on the stove or in a microwave, adding a splash of cream if needed.

Freezer: You can freeze the lobster ravioli without sauce for up to 2 months. Lay them flat on a baking sheet to freeze individually before transferring to a zip-top bag.

Sauce Storage: The lemon butter sauce can be stored in the fridge for up to 2 days or frozen for up to 1 month. Reheat slowly, whisking in a little water or cream to regain its silky texture.

Reheating Tips: When reheating, be cautious not to boil the sauce, as this can change its creamy texture. Aim for low, gentle heat for optimal results.

Expert Tips for Lobster Ravioli in Lemon Butter Sauce

  • Use Fresh Ingredients: Always opt for fresh lobster ravioli if possible. It elevates the flavor and texture of your dish, making your Lobster Ravioli in Lemon Butter Sauce even more indulgent.

  • Don’t Overcook the Ravioli: Be careful not to overcook the ravioli, as they should be tender but still hold their shape. Follow package instructions and watch for them to float.

  • Adjusting Sauce Thickness: If your sauce is too thick, add a splash of reserved pasta water until it reaches the silky consistency you desire. This ensures every bite is coated perfectly.

  • Flavor Boost: For an aromatic twist, consider adding a pinch of fresh herbs like thyme along with the garlic. This will deepen the flavor profile of your Lobster Ravioli in Lemon Butter Sauce.

  • Serving Suggestions: Pair your dish with a side of lightly dressed arugula salad or crusty bread to soak up the delicious sauce, enhancing your meal experience.

What to Serve with Lobster Ravioli in Lemon Butter Sauce

Delight in creating a beautifully rounded meal that perfectly complements your indulgent pasta dish.

  • Light Arugula Salad: The peppery greens add a refreshing contrast to the creamy sauce, enhancing the overall dining experience.
  • Garlic Bread: Crunchy, buttery bread is perfect for mopping up the luscious lemon butter sauce, making every bite memorable.
  • Roasted Asparagus: Tender asparagus drizzled with olive oil and lemon elevates the dish with its vibrant flavor and elegant presentation.
  • Chardonnay: A chilled glass of this white wine beautifully complements the richness of the dish while balancing the citrus notes with its acidity.
  • Lemon Sorbet: A light, refreshing dessert that cleanses the palate after the richness of the ravioli, creating a satisfying ending to your meal.
  • Caprese Skewers: Combining fresh mozzarella, tomatoes, and basil, these skewers provide a burst of flavor that pairs wonderfully with the smooth pasta.
  • Mushroom Risotto: Creamy risotto with earthy mushrooms enhances the indulgence of your meal, bringing comforting flavors to the table.
  • Pineapple Mojito: A tropical drink that adds a fun twist and refreshing burst, perfectly contrasting the richness of the ravioli!

Lobster Ravioli in Lemon Butter Sauce Variations

Feel free to give this delightful dish your personal touch by incorporating these tempting variations and substitutions!

  • Shrimp-Easy: Swap lobster ravioli for shrimp ravioli to keep the taste fresh yet equally indulgent. Shrimp adds a subtle sweetness that complements the lemon butter beautifully.

  • Dairy-Free: Use vegan butter and coconut cream to craft a dairy-free lemon butter sauce. This alternative offers a creamy texture while making the dish accessible for those with dietary restrictions.

  • Veggie Twist: Toss in sautéed spinach or sweet peas for a pop of color and nutrition. This simple addition not only boosts the dish’s healthiness but also makes it even more appealing visually!

  • Cheesy Goodness: Substitute lobster ravioli with four-cheese ravioli for a flavor-packed alternative. The rich cheeses meld perfectly with the lemon butter sauce, creating a lusciously comforting dish.

  • Herb Infusion: Add fresh basil or dill to the sauce just before serving for an aromatic flavor lift. These herbs enhance the citrus notes while providing a lovely finishing touch to your presentation.

  • Heat It Up: Spice things up by sprinkling red pepper flakes or cayenne pepper into the sauce while it simmers. This variation adds a tantalizing kick! If you love heat, don’t hold back!

  • Nutty Finale: Stir in toasted pine nuts or chopped walnuts before serving for an added crunch. The nuts provide great texture, ensuring every bite has a delightful contrast.

  • Seafood Medley: Replace lobster ravioli with a mix of crab and scallop ravioli to elevate the indulgence. Combining seafood offers a sophisticated twist that’s perfect for special occasions.

For a taste of more impressive flavors, don’t miss out on my Cowboy Butter Chicken or Cajun Honey Butter recipes that will inspire your culinary journey!

Make Ahead Options

These Lobster Ravioli in Lemon Butter Sauce are perfect for meal prep, saving you precious time on busy weeknights! You can prepare the lemon butter sauce up to 3 days in advance. Simply follow the initial steps to create the sauce, then let it cool before transferring it to an airtight container and refrigerating. When you’re ready to serve, gently reheat the sauce on low heat while cooking the ravioli according to package instructions. Just toss the hot ravioli into the warmed sauce, adding a splash of reserved pasta water for the perfect consistency. This makes for a luxurious meal that’s just as delicious as when made fresh!

Lobster Ravioli in Lemon Butter Sauce Recipe FAQs

How do I choose the right lobster ravioli?
Absolutely! When selecting lobster ravioli, look for fresh options if available, as they provide a superior flavor and texture. If using frozen, ensure there are no visible ice crystals on the package, indicating proper storage. The ravioli should feel firm when you squeeze the package.

What’s the best way to store leftover Lobster Ravioli in Lemon Butter Sauce?
Store any leftover Lobster Ravioli in Lemon Butter Sauce in an airtight container in the fridge for up to 3 days. When you’re ready to enjoy it again, gently reheat on the stove or in the microwave. Adding a splash of cream can help revive the sauce’s creamy texture!

Can I freeze the lobster ravioli and sauce?
For sure! You can freeze the homemade lobster ravioli without sauce for up to 2 months. Lay them out flat on a baking sheet to freeze individually for about an hour before transferring them to a zip-top bag. Unfortunately, it’s best to freeze the lemon butter sauce separately for up to 1 month. Reheat slowly on low heat, adding water or cream to restore its silky texture.

What should I do if my sauce is too thick?
Very good question! If your sauce turns out too thick, simply add a splash of the reserved pasta water while gently whisking to reach your desired consistency. Start with a tablespoon at a time and continue until it’s perfectly creamy and luscious!

Are there any dietary considerations I should keep in mind?
Great point! For a dairy-free version of Lobster Ravioli in Lemon Butter Sauce, substitute the butter and heavy cream with plant-based alternatives, like vegan butter and coconut milk. Be sure to check the ravioli for eggs if you’re preparing it for a strict vegan diet. Always keep an eye on any specific allergies related to seafood as well.

Can I make the sauce ahead of time?
Definitely! You can prepare the lemon butter sauce ahead and store it in the fridge for up to 2 days. Just be sure to reheat it gently over low heat to maintain that creamy, velvety goodness!

Lobster Ravioli in Lemon Butter Sauce

Lobster Ravioli in Lemon Butter Sauce: A Luxurious Delight

A quick and impressive Lobster Ravioli in Lemon Butter Sauce dish perfect for romantic dinners or gatherings.
Prep Time 10 minutes
Cook Time 20 minutes
Total Time 30 minutes
Servings: 2 servings
Course: Pasta
Cuisine: Italian
Calories: 650

Ingredients
  

For the Ravioli
  • 1 package Lobster Ravioli fresh or frozen
For the Sauce
  • 4 tablespoons Unsalted Butter for sauce base
  • 3 cloves Garlic minced
  • 1 tablespoon Lemon Zest for brightness
  • 2 tablespoons Fresh Lemon Juice adds acidity
  • 1 cup Heavy Cream for a rich sauce
  • 1/2 cup Grated Parmesan Cheese for creaminess
  • 2 tablespoons Chopped Parsley for garnish
  • to taste pinch Salt
  • to taste pinch Black Pepper
  • to taste pinch Cayenne Pepper/Red Pepper Flakes optional for heat

Equipment

  • Large pot
  • Large skillet
  • spatula

Method
 

Step-by-Step Instructions
  1. Bring a large pot of salted water to a rolling boil. Add the lobster ravioli and cook according to package instructions, about 3-4 minutes. Drain, reserving 1/2 cup of pasta water.
  2. In a large skillet, melt 4 tablespoons of unsalted butter over medium heat. Add minced garlic and sauté for 1-2 minutes until fragrant.
  3. Stir in lemon zest and lemon juice; let bubble for 1 minute. Add 1 cup of heavy cream and simmer for 2-3 minutes until sauce thickens.
  4. Whisk in 1/2 cup of grated Parmesan cheese until melted and smooth.
  5. Add cooked lobster ravioli to the skillet, gently tossing to coat in the sauce. If too thick, add reserved pasta water until desired consistency.
  6. Season with salt, black pepper, and optional cayenne. Garnish with chopped parsley and serve immediately.

Nutrition

Serving: 1servingCalories: 650kcalCarbohydrates: 50gProtein: 30gFat: 35gSaturated Fat: 20gPolyunsaturated Fat: 2gMonounsaturated Fat: 10gCholesterol: 120mgSodium: 700mgPotassium: 600mgFiber: 2gSugar: 2gVitamin A: 800IUVitamin C: 15mgCalcium: 300mgIron: 2mg

Notes

Use fresh ingredients for best results and be careful not to overcook the ravioli. Pair with a salad or bread for an enhanced meal experience.

Tried this recipe?

Let us know how it was!

Savoury Lentil Pancakes that Make Breakfast Exciting

As the sun rises, it signals the perfect opportunity for something fresh and satisfying. Enter my Savoury Lentil Pancakes, a delightful way to kickstart your morning! Packed with protein and fiber, these pancakes are not only egg-free but also incredibly versatile, making them suitable for everyone, including those with dietary restrictions. The best part? You can whip them up in no time! Imagine gathering around the table, savoring warm pancakes topped with your favorite sauces or fresh herbs. Whether you’re hosting a brunch or simply treating yourself, they’re bound to impress. Are you ready to discover a new breakfast staple that’s as nutritious as it is delicious?

Why Try Savoury Lentil Pancakes?

Nutrient-Packed: These pancakes are loaded with plant-based protein and fiber, making them an ideal breakfast or snack for health-conscious individuals.
Versatile Base: You can enjoy them with a variety of toppings, from rich tomato sauce to fresh herbs, catering to any palate.
Quick & Easy: Whipping up these pancakes takes just minutes, perfect for busy mornings or spontaneous brunch plans.
Diet-Friendly: They’re egg-free and can easily be modified for gluten-free diets, ensuring everyone can indulge.
Crowd-Pleaser: Impress family and friends with a unique twist on classic pancakes that’s both delicious and wholesome.
For even more delightful breakfast options, check out my Nutella Pancakes Blend or the classic Chocolate Chip Pancakes!

Savoury Lentil Pancake Ingredients

For the Pancake Batter

  • Red Lentils – the star of the show, providing high protein and fiber; rinse and soak for the best texture.
  • Water – essential for soaking lentils and creating the right batter consistency; around 6 cups is needed for soaking.
  • Rice Flour – offers structure and helps bind the pancake; substitute with chickpea flour for a gluten-free option.
  • Cilantro – adds a burst of fresh flavor; optional, but highly recommended for an aromatic touch.

Enjoy whipping these Savoury Lentil Pancakes up in no time!

Step‑by‑Step Instructions for Savoury Lentil Pancakes

Step 1: Rinse and Soak Lentils
Start by rinsing 1 cup of red lentils under running water until the water runs clear. Then, place the lentils in a bowl and cover them with 6 cups of boiling water. Allow them to soak for about 30 minutes, which will soften the lentils and prepare them for blending into a smooth batter.

Step 2: Blend the Lentils
Once soaked, drain the lentils and transfer them to a high-quality blender. Add a bit of water, about ½ cup, and blend the mixture on high for 1-2 minutes until it forms a smooth paste. The batter should be thick yet pourable; add more water as needed for the right consistency when making your Savoury Lentil Pancakes.

Step 3: Combine with Rice Flour
In a mixing bowl, combine the blended lentil paste with ½ cup of rice flour. Stir well until the mixture is fully combined, ensuring no dry spots remain. You want a batter that is not too thick; add a splash of water if it seems too dense. This step is crucial for achieving the perfect pancake texture in your Savoury Lentil Pancakes.

Step 4: Heat the Skillet
Place a non-stick skillet over medium heat and allow it to warm up for about 2-3 minutes. You can test the temperature by splashing a few drops of water on the surface; they should sizzle and evaporate immediately. Lightly grease the skillet with a teaspoon of oil for the best cooking results and to prevent the pancakes from sticking.

Step 5: Cook the Pancakes
Spoon about ¼ cup of the batter onto the heated skillet, spreading it slightly into a circle with the back of the spoon. Cook for approximately 3-4 minutes, or until tiny bubbles begin to form on the surface. Wait for the edges to turn golden and slightly firm before carefully flipping the pancake to cook the other side for another 2-3 minutes until golden brown.

Step 6: Serve Warm
Once cooked, remove the Savoury Lentil Pancakes from the skillet and place them on a plate. Serve them warm with your choice of toppings, such as a drizzle of tomato sauce, a sprinkle of fresh cilantro, or even a dollop of yogurt for added flavor. These pancakes are a delightful and healthy way to start your day!

What to Serve with Savoury Lentil Pancakes

A beautiful meal deserves exciting companions; let these delicious pancakes inspire your breakfast spread.

  • Creamy Avocado Spread: A rich and creamy avocado spread enhances the savory notes with a buttery texture that complements the lentils perfectly.
  • Fresh Tomato Salsa: The acidity of fresh salsa brightens the earthy flavors of the pancakes, offering a refreshing bite that’s hard to resist.
  • Mixed Green Salad: A crisp, light salad with vinaigrette brings a burst of freshness, balancing the savory heft of the lentil pancakes beautifully.
  • Chickpea Hummus: This creamy, tangy dip pairs wonderfully, adding protein and a new layer of flavor that dances on your palate. Try serving it with a sprinkle of paprika for extra zest!
  • Spiced Yogurt Sauce: A dollop of spiced yogurt adds a luscious tanginess, enhancing the overall experience while offering a cooling contrast to the savory pancakes.
  • Roasted Vegetables: Roasted seasonal vegetables bring both color and a delightful caramelized sweetness that enhances every bite of your lentil pancakes.
  • Herbal Tea: A warm cup of herbal tea, like chamomile or peppermint, creates an inviting atmosphere and aids in digestion, rounding out your meal.
  • Honeyed Coconut Cream: For a touch of indulgence, serve with a side of coconut cream sweetened with honey for a dessert-style finish after your savory pancakes.
  • Fruit Smoothie: Blend up a refreshing fruit smoothie loaded with your choice of berries or bananas for a sweet touch that will energize your day.

Storage Tips for Savoury Lentil Pancakes

  • Fridge: Store any leftover Savoury Lentil Pancakes in an airtight container in the fridge for up to 3 days. This keeps them fresh and flavorful.
  • Freezer: For longer storage, freeze the pancakes in a single layer on a baking sheet before transferring them into a freezer-safe airtight container. They can last for up to 2 months.
  • Reheating: To enjoy frozen pancakes, simply thaw them in the fridge overnight. Reheat in a non-stick skillet over low heat for about 3-4 minutes per side, ensuring they’re heated through without losing their delightful texture.

Savoury Lentil Pancakes Variations

Customize your Savoury Lentil Pancakes and make them even more delightful with these creative twists!

  • Spicy Kick: Add chili flakes or diced jalapeños for a fiery flavor that invigorates every bite. Feel the heat rise as you savor each pancake!

  • Herb Infusion: Incorporate fresh herbs like parsley or spinach for a burst of color and flavor. This twist not only enhances the taste but also boosts the nutrient profile.

  • Chickpea Flour: Substitute rice flour with chickpea flour for a nutty flavor and an even more satisfying texture. This gluten-free option is both delicious and wholesome!

  • Savory Cheese: Folding in some crumbled feta or nutritional yeast can add a rich, cheesy note to your pancakes, making them irresistibly savory.

  • Smoky Flavor: Mix in smoked paprika or liquid smoke to infuse a delightful barbecue flavor, perfect for those who enjoy a hint of the grill.

  • Nutty Seeds: Add sunflower or pumpkin seeds into the batter for a crunchy texture. These little gems will give your pancakes an appealing bite.

  • Savoury Sauce: Top with a homemade avocado crema or tahini sauce for an extra layer of creaminess that complements the earthy lentils beautifully.

  • Curry Spice: Sprinkling curry powder can transform your pancakes into a deliciously exotic meal, marrying well with various chutneys or yogurt dips.

For more brunch ideas, be sure to explore my Nutella Pancakes Blend and the classic Chocolate Chip Pancakes!

Make Ahead Options

These Savoury Lentil Pancakes are perfect for meal prep, allowing you to enjoy a nutritious breakfast even on your busiest mornings! You can prepare the lentil batter up to 24 hours in advance by blending the soaked lentils and mixing with rice flour, then refrigerate it in an airtight container. Additionally, the cooked pancakes can be stored in the fridge for up to 3 days. When you’re ready to enjoy, simply reheat them in a skillet over low heat for a few minutes until warmed through, ensuring they remain tender and delicious. By prepping ahead, you’ll save precious time and still serve up a wholesome meal that your family will crave!

Expert Tips for Savoury Lentil Pancakes

  • Soak Thoroughly: Ensure lentils are properly soaked for at least 30 minutes to achieve the smoothest batter possible, avoiding any gritty texture.
  • Adjust Consistency: If your batter seems too thick, fear not! Add a splash of water to make it more pourable and easier to spread on the skillet.
  • Cook Fresh: For the best flavor and texture, serve your Savoury Lentil Pancakes immediately after cooking. Reheating may alter their delightful chewiness.
  • Use Quality Equipment: A good-quality blender will help eliminate lumps in your batter, ensuring a silky smooth consistency for the perfect pancake.
  • Experiment with Flavors: Don’t hesitate to add your favorite spices, like cumin or chili flakes, to the batter for a personalized touch!

Savoury Lentil Pancakes Recipe FAQs

How do I know when my red lentils are ripe/ready to use?
Absolutely! Look for lentils that are clean, with no dark spots or blemishes. They should have a bright color and be firm to the touch. If you’re soaking them, ensure you rinse the lentils until the water runs clear, which helps remove any debris.

What is the best way to store Savoury Lentil Pancakes?
Once they are completely cool, store your Savoury Lentil Pancakes in an airtight container in the fridge for up to 3 days. This keeps them fresh and ideal for a quick breakfast or snack. Just make sure to layer them with parchment paper to prevent them from sticking together!

Can I freeze Savoury Lentil Pancakes for later use?
Yes, indeed! To freeze, first, allow the pancakes to cool completely. Lay them in a single layer on a baking sheet and freeze for about 1 hour. Then, transfer them into a freezer-safe airtight container or a zip-top bag with parchment between layers. They can be enjoyed for up to 3 months! When you’re ready to eat, just thaw in the fridge overnight and reheat in a skillet.

What should I do if my pancake batter is too thick?
Very! If your batter doesn’t pour easily, don’t hesitate to adjust it. Gradually add a splash of water, stirring well after each addition, until you reach a pourable consistency. Remember, a good-quality blender helps to achieve a smooth batter too—ensure you blend long enough and add enough water if needed!

Are Savoury Lentil Pancakes safe for people with allergies?
Definitely! These pancakes are egg-free and can be adjusted for gluten-free diets by using chickpea flour instead of rice flour. However, always check ingredient labels for any possible cross-contamination with allergens, especially if you’re serving someone with a dietary restriction. Always ensure to use fresh, whole ingredients for the best results.

Can Savoury Lentil Pancakes be reheated?
Yes, you can reheat them, but for the best flavor and texture, it’s recommended to reheat them in a non-stick skillet over low heat for about 3-4 minutes per side, ensuring they’re warmed through without compromising their delightful chewiness. Enjoy them fresh for the best experience!

Savoury Lentil Pancakes

Savoury Lentil Pancakes that Make Breakfast Exciting

Savoury Lentil Pancakes are a nutritious, protein-packed breakfast option, perfect for everyone, including those with dietary restrictions.
Prep Time 30 minutes
Cook Time 10 minutes
Total Time 40 minutes
Servings: 4 pancakes
Course: Breakfast
Cuisine: Vegan
Calories: 150

Ingredients
  

Pancake Batter
  • 1 cup red lentils rinse and soak for the best texture
  • 6 cups water for soaking lentils
  • ½ cup rice flour or substitute with chickpea flour for gluten-free
  • 1 bunch cilantro optional but recommended for added flavor

Equipment

  • blender
  • Non-stick skillet
  • Mixing Bowl

Method
 

Step-by-Step Instructions
  1. Rinse 1 cup of red lentils under running water until clear, then soak in 6 cups of boiling water for 30 minutes.
  2. Drain lentils and blend with ½ cup of water until smooth.
  3. Combine blended lentils with ½ cup of rice flour in a mixing bowl, stirring until mixed.
  4. Heat a non-stick skillet over medium heat for 2-3 minutes and grease lightly with oil.
  5. Pour ¼ cup of batter into the skillet, cook for 3-4 minutes until bubbles form, then flip and cook 2-3 minutes more.
  6. Serve warm with toppings like tomato sauce, cilantro, or yogurt.

Nutrition

Serving: 1pancakeCalories: 150kcalCarbohydrates: 28gProtein: 8gFat: 2gPolyunsaturated Fat: 0.5gMonounsaturated Fat: 0.5gSodium: 200mgPotassium: 350mgFiber: 6gSugar: 1gVitamin A: 400IUVitamin C: 3mgCalcium: 20mgIron: 2mg

Notes

These pancakes are best served fresh but can be stored for up to 3 days in the fridge or frozen for 2 months.

Tried this recipe?

Let us know how it was!

Stay Connected

Get recipes via email: