Get my cookbooks

Crispy Air Fryer French Fries – Your Healthier Snack Fix

There I was, feeling the familiar tug of cravings as the afternoon sun dipped low. All I wanted was something crispy, golden, and satisfying—no soggy fast food fries in sight! That’s when I discovered the magic of Air Fryer French Fries. Not only are these homemade beauties incredibly easy to whip up, but they’re also a healthier alternative that delivers on crunch without the excess oil. Using just a few fresh ingredients, I found a way to transform simple Russet potatoes into a quick after-school snack or a perfect side dish for any meal. Picture gathering the family around as the aroma wafts through the kitchen, each bite offering that delightful crunch we’re all craving. Ready to embark on a fry adventure that’s delicious and guilt-free? Let’s dive in!

Why Choose Air Fryer French Fries?

Versatile Cooking: These fries can easily adapt to suit any taste—experiment with spices like Italian herbs or even a touch of cayenne for a fiery kick!

Health-Conscious Choice: Enjoy the crunchy satisfaction you desire without the guilt; air frying uses significantly less oil than traditional frying methods.

Kid-Friendly Appeal: With their irresistible texture and flavor, these fries are sure to please kids and adults alike. They make for a perfect side dish or after-school snack, just like our delightful Creme Brulee French Toast!

Quick Preparation: In just under 20 minutes, you can have golden-brown fries on the table, making it a fantastic time-saving option for busy days ahead.

Crispy Perfection: Achieve that restaurant-quality crispiness right in your kitchen, reminiscent of fast-food fries without the heaviness! Try them alongside your favorite burger or sandwich for the ultimate meal, just like the scrumptious Blueberry French Toast.

Air Fryer French Fries Ingredients

• Here’s everything you need to create crispy, homemade Air Fryer French Fries!

For the Fries

  • Russet Potatoes – Choose 2 large or 3 medium potatoes for the best crispiness and flavor; leaving the skins on packs in extra nutrients.
  • Olive Oil – Adds richness and ensures a crispy texture; substitute with avocado oil if desired for a higher smoke point.
  • Salt – Essential for enhancing flavor; feel free to adjust according to your taste preferences.
  • Ground Black Pepper – This adds a subtle warmth; use it to taste for an extra kick.
  • Garlic Powder – Provides a lovely savory depth; you can swap it out for fresh minced garlic for a bolder flavor.
  • Paprika – Offers a smoky depth and beautiful color; try using chili powder if you’re in the mood for something spicier.

Enjoy whipping up this quick, healthy, and delicious treat in no time!

Step‑by‑Step Instructions for Air Fryer French Fries

Step 1: Prepare the Potatoes
Begin by scrubbing and cleaning 2 large or 3 medium Russet potatoes under cold running water to remove any dirt. Once clean, cut the potatoes into even ¼-inch thick strips, ensuring uniformity for even cooking. This preparation is crucial for achieving delightful crispy Air Fryer French Fries.

Step 2: Rinse and Dry
Next, rinse the cut fries in a bowl of cold water to eliminate excess starch, which enhances crispiness. After rinsing, pat the fries thoroughly dry with a clean kitchen towel or paper towels to remove any moisture. Drying is vital, as moisture can prevent your fries from achieving that golden crunchy texture.

Step 3: Season the Fries
Place the dried fries into a large mixing bowl and drizzle them with olive oil. Toss to coat evenly, ensuring every fry is slicked with oil for crispiness. Sprinkle salt, ground black pepper, garlic powder, and paprika over them; toss again to evenly distribute the seasoning, ensuring that each fry is deliciously flavored, ready for the air fryer.

Step 4: Air Fry the First Batch
Transfer the seasoned fries into the air fryer basket in a single layer, making sure they’re not overcrowded. Set the air fryer temperature to 380°F and cook the fries for 10 minutes initially. This stage begins the magic, as you’ll start to see them crisping up beautifully.

Step 5: Toss and Continue Cooking
After the initial 10 minutes have passed, carefully open the air fryer and toss the fries to ensure even cooking on all sides. Close the air fryer again and cook for an additional 6 to 10 minutes, or until the fries are golden brown and crispy. Keep an eye on them during this phase for that perfect fry crunch.

Step 6: Serve and Garnish
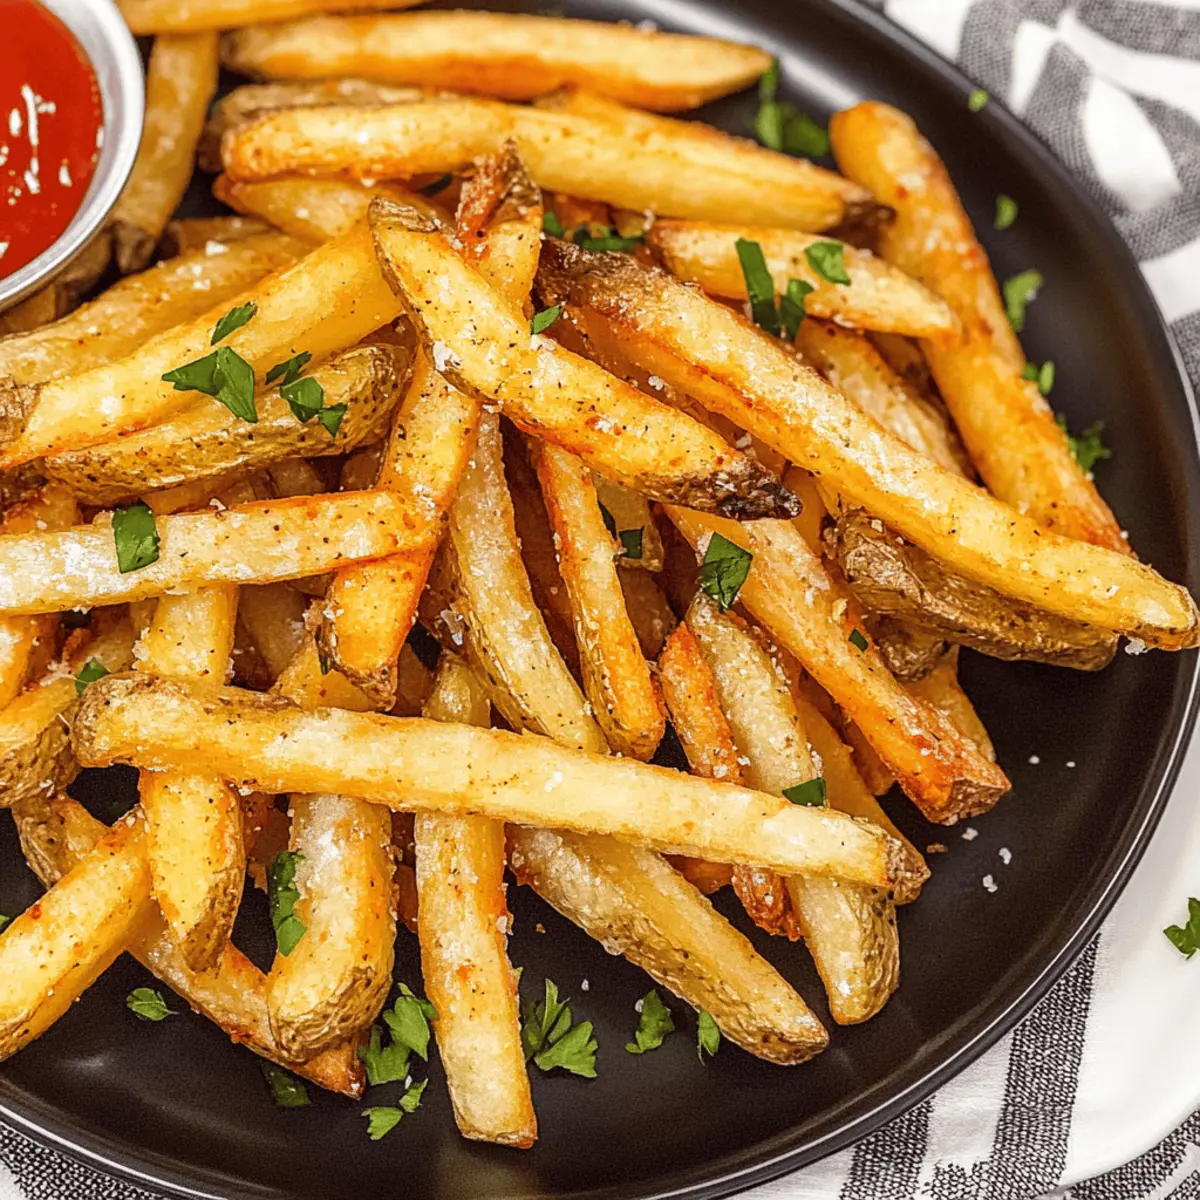
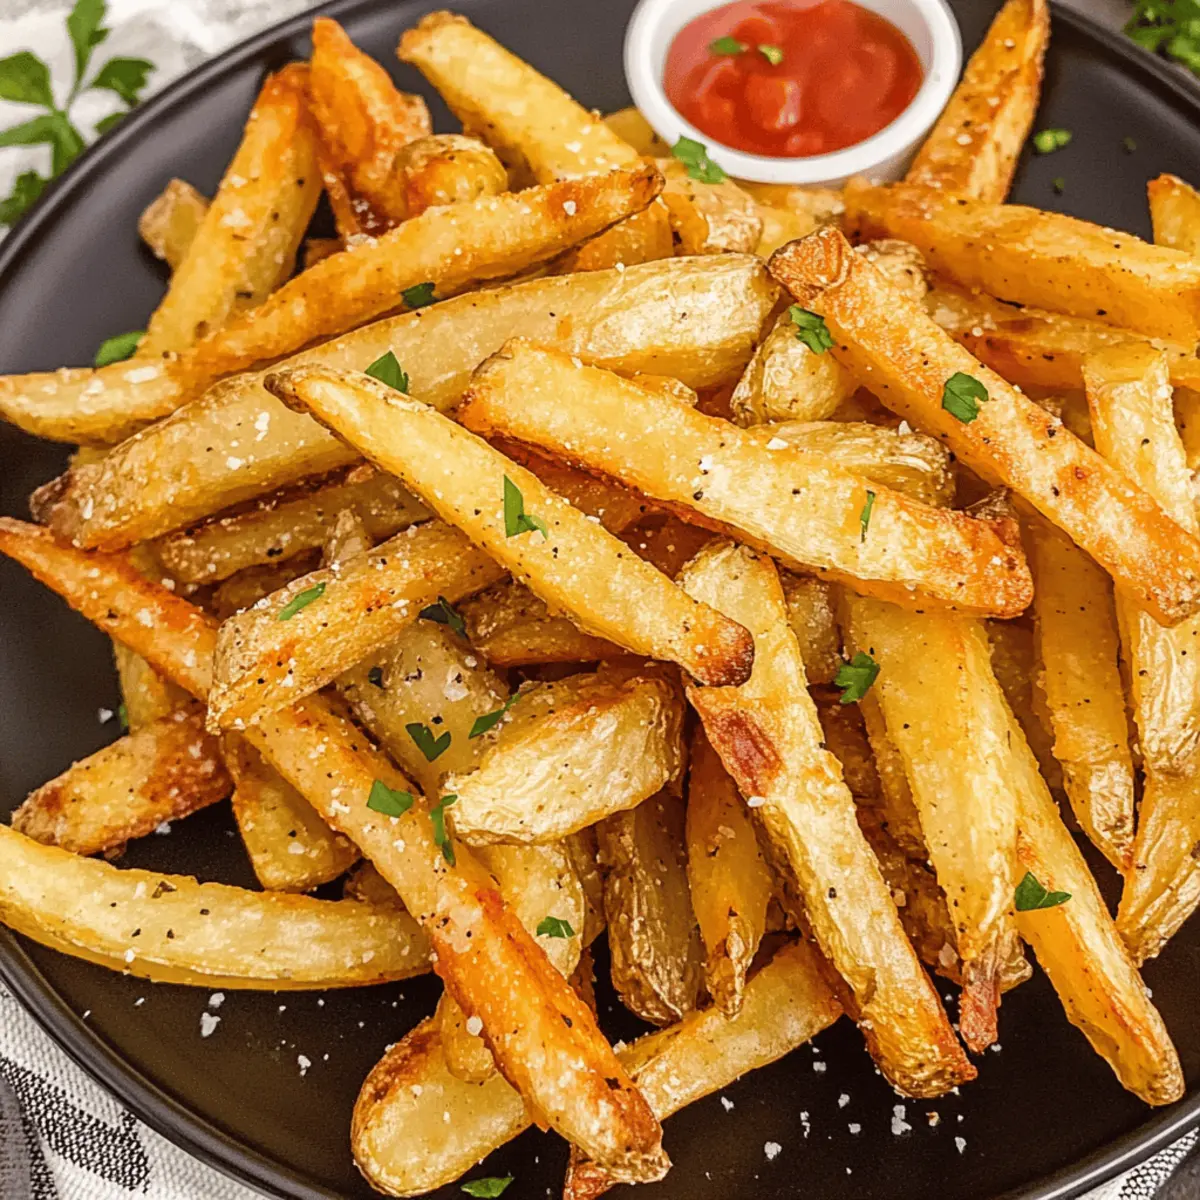
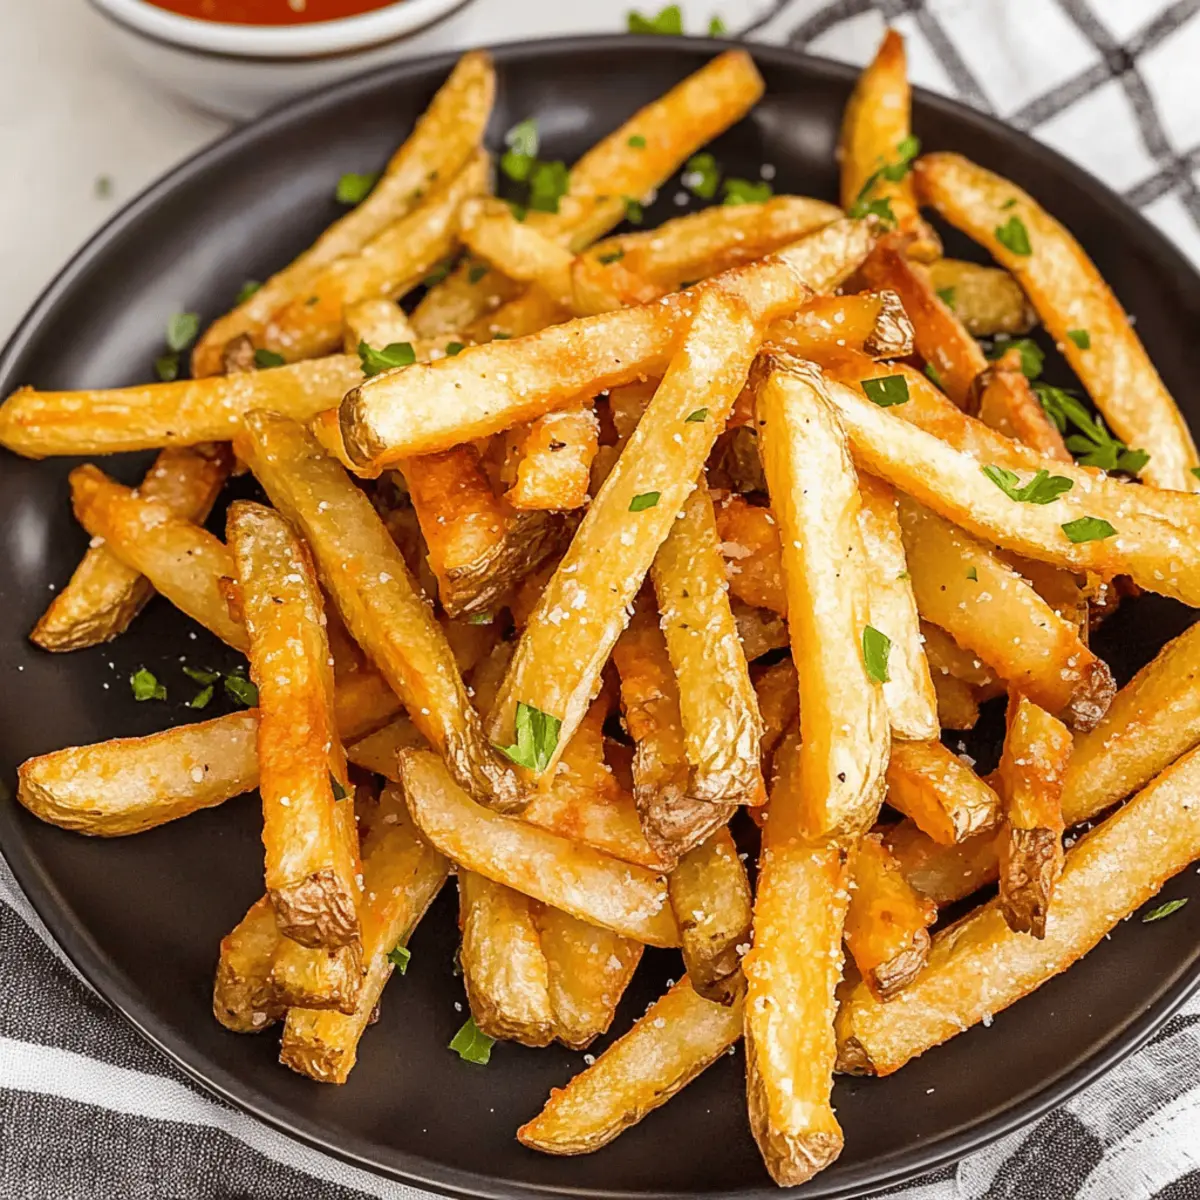
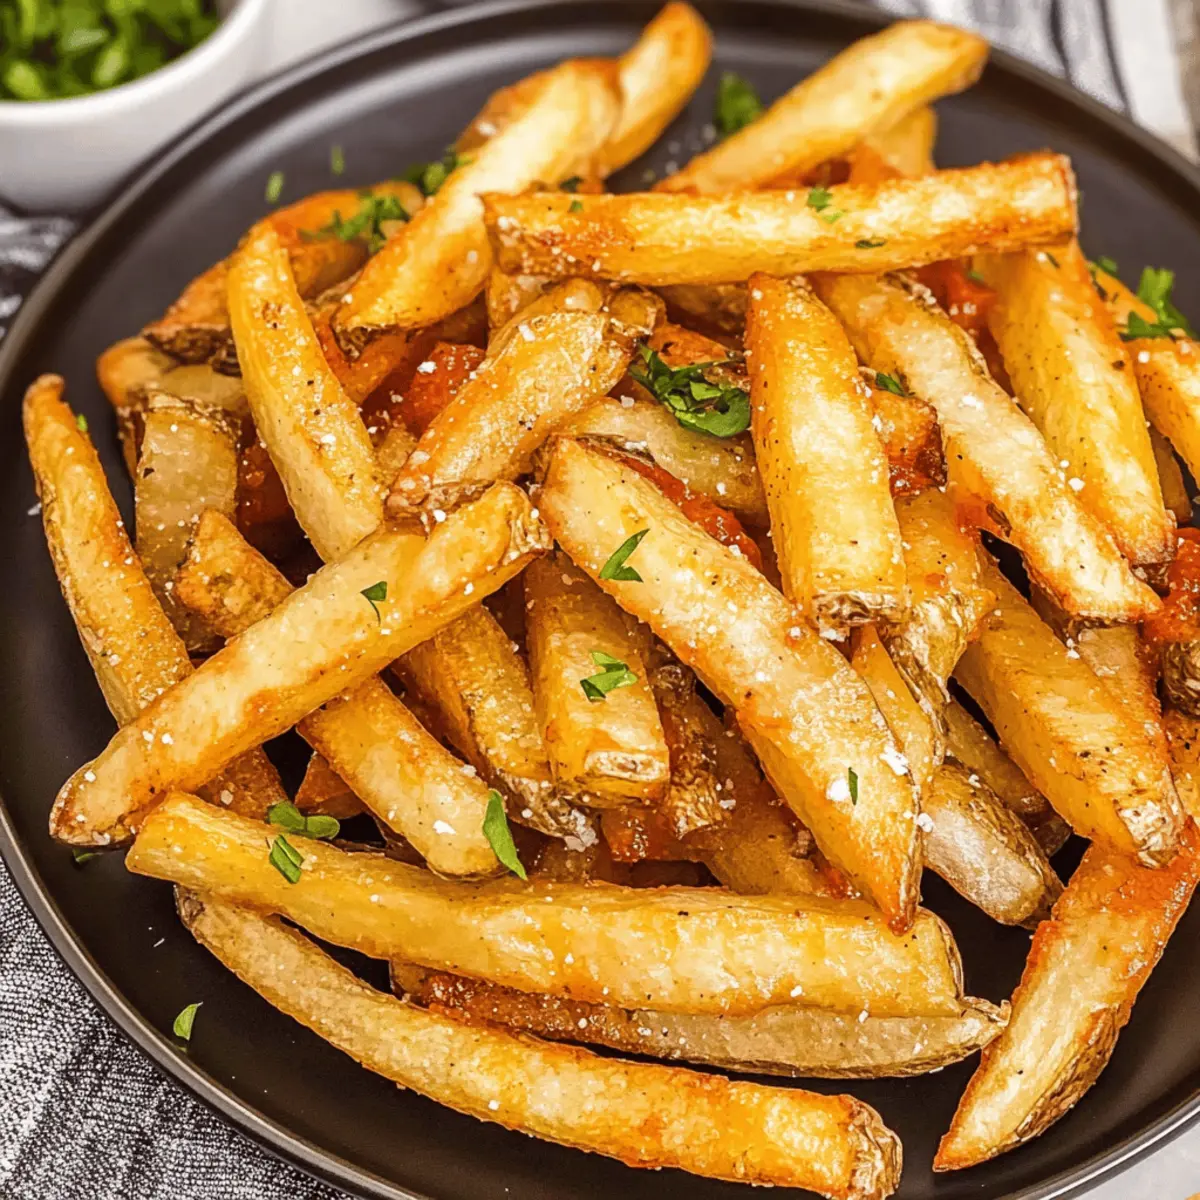
Once your Air Fryer French Fries are beautifully crisp, carefully remove them from the air fryer and transfer them to a serving platter. Optionally, garnish with freshly chopped parsley for a pop of color and flavor. Serve these delightful fries warm, along with your favorite dipping sauces like ketchup or homemade ranch for an irresistible snack!

Make Ahead Options

These Air Fryer French Fries are perfect for busy home cooks looking to save time during the week! You can cut, rinse, and season the Russet potatoes up to 24 hours in advance. Just prep the fries, pat them dry, and toss them in olive oil, salt, and spices before placing them in an airtight container in the refrigerator. This also prevents browning and moisture retention. When you’re ready to serve, simply place the prepped fries directly in the air fryer, cooking them at 380°F for the initial 10 minutes, tossing halfway through, and finishing with an extra 6-10 minutes until they’re golden and crispy. You’ll have delicious, homemade Air Fryer French Fries ready in no time!

What to Serve with Homemade Air Fryer French Fries?

Picture the joy of a casual meal where everything on your plate sings in harmony, enhancing that crispy goodness.

  • Juicy Burgers: Pairing these fries with a grilled burger creates a delightful balance of textures, making it the ultimate comfort duo.

  • Crisp Chicken Tenders: The crunchy fries complement the tender meat, providing flavor contrast and a satisfying crunch with every bite.

  • Fresh Salad: A light, vibrant salad adds freshness and color, elevating your meal while keeping it wholesome and bright.

  • Garlic Aioli: This creamy dip pairs beautifully with crispy fries, enhancing their flavor while adding a gourmet touch to your meal.

  • Zesty Coleslaw: The crunchiness of coleslaw balances the fries, making it a refreshing side that enhances your snacking experience.

  • Homemade Ranch Dressing: This classic dip brings a cool, savory flavor that perfectly complements the fries’ crispy texture.

  • Icy Lemonade: A refreshing drink that cuts through the richness, lemonades are the perfect thirst quencher alongside your crispy snack.

  • Chocolate Chip Cookies: End your meal on a sweet note! The warm, gooey cookies are a delightful treat that pairs unexpectedly with salty fries.

How to Store and Freeze Air Fryer French Fries

Fridge: Store leftover Air Fryer French Fries in an airtight container for up to 3-5 days to maintain their crispiness.

Freezer: For longer storage, freeze fries in a single layer on a baking sheet, then transfer to a freezer-safe bag for up to 2 months.

Reheating: Reheat directly from the fridge or freezer in the air fryer at 350°F for 5-8 minutes to revive their crunchy texture.

Avoid Sogginess: Keep fries in a well-sealed container to prevent moisture buildup and maintain that irresistible crispiness!

Expert Tips for Air Fryer French Fries

  • Choose the Right Potatoes: Russet potatoes are ideal for their starch content and structure. Avoid waxy potatoes for fries as they won’t yield the crispy texture you’re craving.

  • Dry Thoroughly: After rinsing, ensure the fries are patted dry to remove all moisture; this step is crucial for achieving that perfect air-fryer crispiness.

  • Avoid Overcrowding: Air fry in batches if necessary. Overcrowding the basket can prevent hot air from circulating, leading to soggy fries instead of crispy Air Fryer French Fries.

  • Season at the Right Time: Season your fries just before air frying to prevent salt from drawing out moisture, which can hinder that desired crunch.

  • Adjust Cooking Time: Keep an eye on your fries, as air fryer models may vary. Start with the suggested times and adjust as needed for your personal preference and fryer type.

Air Fryer French Fries Variations

Feel free to unleash your creativity and transform these fries into something uniquely delightful!

  • Herb-Infused: Add dried oregano and thyme to the seasoning mix for a fragrant twist. The aromatic herbs elevate the flavor while still keeping it kid-friendly!

  • Sweet Potato Swap: Use sweet potatoes instead of Russets for a nutritious alternative with a hint of natural sweetness. Their creamy texture pairs perfectly with your favorite dips.

  • Spicy Kick: Toss the fries with chili powder or cayenne pepper for an added heat level. Perfect for those who like their fries with a fiery punch!

  • Zesty Lemon: Squeeze fresh lemon juice over your fries after cooking for a bright, refreshing flavor. This tangy addition offers a delightful contrast to the crispy exterior.

  • Cheesy Finish: Sprinkle freshly grated Parmesan or cheddar on top while the fries are still hot for a melty, cheesy indulgence. It’s like bringing a touch of the bistro experience home.

  • Ranch Lovers: Toss fries in a ranch seasoning mix for an herby, creamy explosion of flavor. Pair them with homemade ranch dressing for an extra treat!

  • Garlic Butter Bliss: Melt some butter with minced garlic and toss the fries in it after air frying. This luscious addition creates a savory twist that will have everyone coming back for seconds. You might also enjoy these flavors with delicious French Onion Soup Meatloaf.

  • Smoky BBQ: Combine paprika with barbecue seasoning for a smoky, sweet flavor profile. Serve these with aioli for dipping for a fun, backyard-barbecue vibe!

Each of these variations allows you to craft the perfect French fry experience, and remember, the sky’s the limit!

Air Fryer French Fries Recipe FAQs

How do I choose the best potatoes for air fryer French fries?
Absolutely! For the crispiest results, I recommend using Russet potatoes. They boast a high starch content, which helps achieve that crunchiness we all crave. Choose 2 large or 3 medium-sized potatoes, and leave the skins on for added flavor and nutrients.

How should I store leftover air fryer French fries?
For best results, store any remaining French fries in an airtight container in the refrigerator. They’ll stay fresh for about 3-5 days. Make sure they’re completely cooled before sealing to maintain their crispiness!

Can I freeze air fryer French fries?
Yes, you can! To freeze, first lay the seasoned fries in a single layer on a baking sheet and pop them in the freezer until solid. After a couple of hours, transfer them to a freezer-safe bag or container. They can last for up to 2 months in the freezer.

What’s the best way to reheat frozen air fryer French fries?
When you’re ready to enjoy your frozen fries, preheat the air fryer to 350°F. Place the frozen fries in the basket and reheat for about 5-8 minutes, or until they’re crispy again. No need to thaw—they’ll get that delicious crunch back right from the freezer!

Why are my air fryer French fries soggy?
Sogginess can often occur if the fries aren’t dried thoroughly after rinsing. Make sure to pat them dry with a kitchen towel before seasoning. Overcrowding the air fryer basket can also lead to steam, making them less crispy. Always cook in a single layer for optimal crunch.

Can I add different seasonings for my air fryer French fries?
The more the merrier! Feel free to experiment with various seasonings to suit your taste. Some favorites include Italian herbs, ranch seasoning, or even a touch of cayenne for a kick. Just remember to season just before cooking to keep those fries deliciously crunchy.

Air Fryer French Fries

Crispy Air Fryer French Fries – Your Healthier Snack Fix

Enjoy crispy Air Fryer French Fries, a healthier snack alternative perfect for cravings.
Prep Time 10 minutes
Cook Time 20 minutes
Total Time 30 minutes
Servings: 4 servings
Course: Appetizers
Cuisine: American
Calories: 180

Ingredients
  

For the Fries
  • 2 large Russet Potatoes Choose large or medium for best crispiness and flavor; leaving skins on adds nutrients.
  • 1 tablespoon Olive Oil Can substitute with avocado oil for a higher smoke point.
  • 1 teaspoon Salt Adjust according to taste preferences.
  • 0.5 teaspoon Ground Black Pepper Use to taste for extra warmth.
  • 0.5 teaspoon Garlic Powder Can swap for fresh minced garlic for bolder flavor.
  • 0.5 teaspoon Paprika Can use chili powder for a spicier option.

Equipment

  • Air Fryer

Method
 

Step-by-Step Instructions
  1. Begin by scrubbing and cleaning the potatoes under cold running water. Cut them into ¼-inch thick strips for even cooking.
  2. Rinse the cut fries in cold water to remove excess starch, then pat them thoroughly dry with a clean towel.
  3. Place the dried fries in a large bowl, drizzle with olive oil, and toss to coat. Season with salt, pepper, garlic powder, and paprika, then toss again.
  4. Transfer the fries into the air fryer basket in a single layer and cook at 380°F for 10 minutes.
  5. After 10 minutes, toss the fries and cook for an additional 6 to 10 minutes until golden brown and crispy.
  6. Remove the fries from the air fryer, garnish with parsley if desired, and serve warm with your favorite dipping sauces.

Nutrition

Serving: 1servingCalories: 180kcalCarbohydrates: 28gProtein: 4gFat: 6gSaturated Fat: 1gPolyunsaturated Fat: 1gMonounsaturated Fat: 3gSodium: 200mgPotassium: 700mgFiber: 4gSugar: 1gVitamin C: 20mgCalcium: 2mgIron: 6mg

Notes

Russet potatoes are preferred for their starch content. Ensure fries are dry before air frying, and avoid overcrowding the basket for best results.

Tried this recipe?

Let us know how it was!

Sumptuous Bourbon Peach Upside Down Cake for Summer Bliss

As I pulled the Bourbon Peach Upside-Down Cake from the oven, the intoxicating aroma of caramelized peaches and rich bourbon filled the kitchen, instantly transporting me to warm summer evenings spent with loved ones. This cake isn’t just a dessert; it’s a celebration of flavor and nostalgia, perfect for those moments when you want to impress without the stress. With its moist, fluffy texture and a stunning layer of glistening fruit, this dessert is a true crowd-pleaser that comes together in no time. Not only does it elevate any gathering, but it also showcases the splendid marriage of sweet peaches and smooth bourbon caramel—a delightful twist on a classic summer treat. What could be more inviting than a slice of this Southern-inspired delicacy alongside a scoop of vanilla ice cream? Ready to treat yourself and your guests to the sweetest summer indulgence?

Why is Bourbon Peach Upside-Down Cake Irresistible?

Decadent Flavor: The rich bourbon caramel mingles beautifully with ripe peaches, creating a dessert that sings with flavor and warmth.
Simplicity at Heart: Crafted with everyday ingredients, this recipe is approachable yet impressive—ideal for any home cook.
Perfect Presentation: With its stunning top layer of caramelized peaches, this cake is eye-catching and sure to be the highlight of any gathering.
Versatile Options: Swap out peaches for seasonal fruits like nectarines or berries for a delightful twist, making it suitable for every occasion.
Quick to Prepare: From prep to oven, you’ll have this cake ready in no time, freeing you up for summer fun!

Bourbon Peach Upside-Down Cake Ingredients

For the Cake

  • Peaches – Essential for the topping, providing sweetness and moisture; make sure to use ripe peaches and keep the skin on for added texture.
  • Sugar – Sweetens the cake and is key for the bourbon caramel; consider brown sugar if you desire a deeper flavor.
  • Almond Flour – Adds moisture and a subtle almond flavor; can be substituted with more all-purpose flour if necessary.
  • All-Purpose Flour – Provides structure to the cake’s base; don’t skip this for a well-crafted cake.
  • Butter – Adds richness and moisture, enhancing both the cake and the caramel.
  • Eggs – Integral for binding all ingredients and providing lift for a fluffy cake.
  • Bourbon – Enhances flavor and sweetness; for a non-alcoholic variation, use vanilla extract instead.
  • Cinnamon – Infuses warmth and extra depth; adjust it to your personal taste.
  • Baking Powder – Helps the cake rise for an airy texture.

For the Caramel

  • Sugar – The primary ingredient for the caramel; watch it closely to avoid burning.
  • Water – Used to help dissolve the sugar before cooking; ensures a smooth caramel texture.

With these ingredients, you’ll be well on your way to creating a delightful Bourbon Peach Upside-Down Cake that will be the talk of any summer gathering!

Step‑by‑Step Instructions for Bourbon Peach Upside Down Cake

Step 1: Preheat the Oven
Begin by preheating your oven to 350°F (175°C). This step ensures that your Bourbon Peach Upside Down Cake bakes evenly and rises beautifully. While the oven is heating, prepare your cake pan, allowing you to flow seamlessly into the next steps.

Step 2: Prepare the Cake Pan
Take a 9-inch cake pan and line the bottom with parchment paper, then butter the sides generously. The parchment paper will help your cake release easily after baking, while the butter provides an extra layer of non-stick assurance. Set the prepared pan aside as you focus on the peaches.

Step 3: Arrange the Peaches
Slice your ripe peaches evenly and arrange them in a circular pattern at the bottom of the prepared cake pan. Sprinkle a dash of cinnamon over the peaches to enhance their natural sweetness. This step not only adds flavor but also visually prepares the base of your delightful Bourbon Peach Upside Down Cake.

Step 4: Make the Caramel
In a medium saucepan over medium-high heat, combine sugar and water, stirring until the sugar dissolves. Allow the mixture to cook undisturbed for about 10-15 minutes until it turns a light amber color. Quickly add a splash of bourbon, taking care as it may bubble up, then pour the caramel over the arranged peaches, coating them evenly.

Step 5: Prepare the Cake Batter
In a large mixing bowl, cream together butter and sugar until the mixture is light and fluffy, about 3-5 minutes. Add eggs one at a time, mixing well after each addition, followed by vanilla and bourbon. This step creates a rich, flavorful batter for your Bourbon Peach Upside Down Cake.

Step 6: Combine Dry Ingredients
In a separate bowl, whisk together the almond flour, all-purpose flour, baking powder, and remaining cinnamon. Gradually add this dry mixture to your wet batter, mixing until just combined. Be careful not to overmix, as this will help keep your cake light and fluffy once baked.

Step 7: Assemble and Bake
Pour the cake batter evenly over the peaches in the pan, smoothing the top with a spatula. Bake in the preheated oven for 30-35 minutes, or until the top is golden brown and a toothpick inserted into the center comes out clean. This ensures your Bourbon Peach Upside Down Cake will be perfectly fluffy and moist.

Step 8: Cool and Serve
Once baked, remove the cake from the oven and allow it to cool in the pan for 15-30 minutes. Gently invert the cake onto a serving plate, revealing the beautifully caramelized peaches on top. Let it cool completely before slicing so the flavors meld beautifully together, offering a delicious treat to savor.

Make Ahead Options

These Bourbon Peach Upside-Down Cakes are a fantastic option for meal prep, allowing you to save time during busy summer days. You can prepare the caramel and arrange the peaches up to 24 hours in advance by refrigerating them in an airtight container. The cake batter can also be made ahead and stored in the refrigerator for up to 3 days. To maintain the cake’s moisture, cover the bowl tightly with plastic wrap. When you’re ready to bake, simply pour the batter over the caramelized peaches and bake as directed for a delicious dessert that’s just as delightful as when freshly made. Enjoy a hassle-free way to impress your guests!

Bourbon Peach Upside-Down Cake Variations

Feel free to personalize your Bourbon Peach Upside-Down Cake with these tempting twists that will delight your taste buds!

  • Seasonal Fruits: Try swapping peaches with seasonal fruits like nectarines, plums, or blackberries for a fresh twist. This not only diversifies the flavor but also showcases the fruits of the season.

  • Non-Alcoholic Option: Bourbon Substitution: Substitute bourbon with vanilla extract or apple juice for a delightful non-alcoholic version that still packs a punch of flavor. You’ll still enjoy a lovely sweetness that keeps the spirit of the dessert alive!

  • Nutty Surprise: Add Nuts: Incorporate crushed pecans or walnuts into the batter for an added crunch. The combination of textures creates a satisfying contrast to the soft, moist cake.

  • Spice it Up: Cinnamon Variation: Experiment with spices! Add a pinch of nutmeg or cardamom to the batter or over the fruit layer to elevate the warm flavors—perfect for cozy gatherings.

  • Gluten-Free Alternative: Flour Swap: For gluten-free baking, swap all-purpose flour with a gluten-free baking blend. You’ll still enjoy the wonderful fluffiness of the cake while catering to dietary needs.

  • Zesty Kick: Citrus Infusion: Add the zest of a lemon or orange to the batter for an uplifting citrus tone. It brightens the cake’s flavor profile and balances the sweetness beautifully.

  • Creamy Layer: Cream Cheese Swirl: For a decadent twist, mix cream cheese with a bit of sugar and swirl it into the cake batter before baking. It creates a luscious, creamy surprise in each bite.

For additional delights, why not serve your cake with a scoop of ice cream alongside Honeybun Carrot Cake or Strawberry Cheesecake Dump at your summer gatherings? These desserts will surely complement your Bourbon Peach Upside-Down Cake beautifully!

How to Store and Freeze Bourbon Peach Upside-Down Cake

Room Temperature: Store the cake in an airtight container at room temperature for up to 3 days to maintain its moisture and flavor.

Fridge: For longer freshness, refrigerate the cake in an airtight container for up to a week. Bring it back to room temperature before serving for the best taste.

Freezer: You can freeze the Bourbon Peach Upside-Down Cake by wrapping it tightly in plastic wrap and aluminum foil; it will keep well for up to 3 months.

Reheating: To enjoy leftovers, reheat individual slices in the microwave for 15-20 seconds or warm slices in an oven preheated to 350°F (175°C) for about 10-15 minutes.

Expert Tips for Bourbon Peach Upside-Down Cake

  • Use Ripe Peaches: Only use ripe, juicy peaches for the best flavor and texture; under-ripe peaches can lead to a sour taste.
  • Caramel Consistency: Watch the sugar closely while it cooks—caramel can quickly turn from perfect to burnt. Stirring is unnecessary during this process; just let it be!
  • Prevent Sticking: Always cool the cake for at least 15 minutes before inverting to ensure the bourbon peach upside-down cake releases cleanly from the pan.
  • Batter Mixing: Avoid overmixing the batter after adding the dry ingredients; this keeps your cake light and airy.
  • Check for Doneness: Since this cake has a moist layer underneath, check doneness with a toothpick in the center—make sure it comes out clean!

What to Serve with Bourbon Peach Upside-Down Cake

Now that you’ve baked this stunning dessert, it’s time to curate the perfect meal to accompany it.

  • Creamy Vanilla Ice Cream: The cool creaminess of vanilla ice cream perfectly complements the warm cake, enhancing its flavors and adding an irresistible contrast. A scoop atop a slice creates a delightful harmony of hot and cold.

  • Fresh Whipped Cream: Light and airy, whipped cream adds a touch of sweetness while allowing the cake’s flavors to shine through. A generous dollop elevates this dessert to another level of indulgence.

  • Cinnamon Roll Coffee: This warm beverage blends beautifully with the cinnamon and bourbon notes in the cake, making each bite and sip a joyous experience. It’s a cozy, comforting pairing for afternoon gatherings.

  • Chilled Sparkling Lemonade: The refreshing brightness of sparkling lemonade balances the rich sweetness of the cake. Its fizzy nature adds a vibrant touch that invigorates the palate.

  • Plum Tart: A tart with a similar fruity base will create a delightful interplay of flavors and textures. This choice extends the fruit theme while offering a slight tartness to contrast the cake’s sweetness.

  • Peach Iced Tea: Brewed with fresh peach slices, this iced tea mirrors the cake’s star ingredient and provides a refreshing drink that’s sweet yet not overpowering. It’s the perfect sip to enjoy on a warm summer day!

  • Coconut Macaroons: These chewy treats add a different texture to your dessert table, providing a nutty and sweet element that pairs charmingly with the rich bourbon flavors of the cake.

  • Chocolate Sauce Drizzle: For a touch of decadence, a drizzle of warm chocolate sauce can create a lovely flavor combination with the caramel and peaches. The harmony of flavors is sure to delight anyone who takes a bite!

  • Fruit Salad: A refreshing mix of seasonal fruits can cleanse the palate beautifully, making it a light and healthy addition to your dessert spread. It offers a burst of freshness that complements the cake’s richness.

  • Sweet Tea: Classic Southern sweet tea provides a refreshing contrast to the dessert. Its subtle sweetness and herbal notes keep the flavor profile light, making for an enjoyable pairing.

Bourbon Peach Upside-Down Cake Recipe FAQs

What kind of peaches should I use for the cake?
Absolutely! Use ripe peaches for the best flavor and moisture in your Bourbon Peach Upside-Down Cake. Look for peaches that yield slightly to pressure and have no dark spots all over. Keeping the skin on adds texture and enhances the overall appeal. If peaches are out of season, nectarines or even canned peaches (well-drained) can be great alternatives!

How should I store the Bourbon Peach Upside-Down Cake?
I recommend storing your cake in an airtight container at room temperature for up to 3 days to keep it moist. If you’d like it to last longer, refrigerate it for up to a week. Just bring it back to room temperature before serving to enjoy its full flavor!

Can I freeze the Bourbon Peach Upside-Down Cake?
Yes, you can! To freeze, wrap the cake tightly in plastic wrap followed by aluminum foil to prevent freezer burn. It will keep well in the freezer for up to 3 months. When you’re ready to enjoy it, let it thaw in the refrigerator overnight or counter for a few hours, then warm individual slices if desired.

What are some common issues when making this cake?
One common issue is undercooked peaches leading to a soggy cake texture. Make sure your peaches are ripe, and arrange them evenly in the pan for even cooking. Also, watch the caramel closely as it can burn quickly—don’t stir while it’s cooking! If the cake remains sticky after baking, ensure your toothpick comes out clean; the cake needs a proper bake to set.

Is this cake suitable for people with dietary constraints?
If you need to make this cake allergy-friendly, feel free to substitute almond flour with more all-purpose flour if nut allergies are a concern. For a non-alcoholic version, simply replace the bourbon with vanilla extract or omit it. Always check that other ingredients match dietary needs, like gluten-free flour or dairy-free butter for specific restrictions.

How do I perfectly invert the cake without damaging the peaches?
To invert your Bourbon Peach Upside-Down Cake successfully, allow it to cool in the pan for 15-30 minutes. Then, gently run a knife around the edge to loosen it. Place a serving plate over the top of the cake pan and flip it upside down. Carefully lift the pan off while still holding the plate in place – this will reveal your stunning layer of caramelized peaches!

Bourbon Peach Upside Down Cake

Sumptuous Bourbon Peach Upside Down Cake for Summer Bliss

Enjoy this Bourbon Peach Upside Down Cake, a decadent dessert featuring caramelized peaches and rich bourbon, perfect for summer gatherings.
Prep Time 15 minutes
Cook Time 35 minutes
Cooling Time 30 minutes
Total Time 1 hour 20 minutes
Servings: 8 slices
Course: Dessert
Cuisine: Southern
Calories: 320

Ingredients
  

For the Cake
  • 3 cups Peaches Ripe, sliced, skin on
  • 1 cup Sugar Consider brown for deeper flavor
  • 1 cup Almond Flour Can substitute with more all-purpose flour
  • 1 cup All-Purpose Flour
  • 1/2 cup Butter Softened
  • 2 large Eggs
  • 1/4 cup Bourbon Or use vanilla extract for non-alcoholic
  • 1 teaspoon Cinnamon Adjust to personal taste
  • 1 tablespoon Baking Powder
For the Caramel
  • 1 cup Sugar Primary ingredient for caramel
  • 1/4 cup Water

Equipment

  • 9-inch cake pan
  • medium saucepan
  • large mixing bowl
  • whisk
  • spatula

Method
 

Step-by-Step Instructions
  1. Preheat your oven to 350°F (175°C).
  2. Prepare a 9-inch cake pan with parchment paper and butter the sides.
  3. Slice peaches and arrange them in a circular pattern at the bottom of the pan. Sprinkle with cinnamon.
  4. In a medium saucepan, combine sugar and water over medium-high heat until sugar dissolves and turns light amber. Add bourbon.
  5. Cream butter and sugar together until light and fluffy, then add eggs, bourbon, and vanilla.
  6. Whisk together dry ingredients and add to wet ingredients, mixing until just combined.
  7. Pour batter over peaches and bake for 30-35 minutes, or until a toothpick comes out clean.
  8. Cool in the pan for 15-30 minutes before inverting onto a serving plate.

Nutrition

Serving: 1sliceCalories: 320kcalCarbohydrates: 45gProtein: 3gFat: 15gSaturated Fat: 9gPolyunsaturated Fat: 1gMonounsaturated Fat: 3gCholesterol: 70mgSodium: 250mgPotassium: 200mgFiber: 2gSugar: 22gVitamin A: 500IUVitamin C: 6mgCalcium: 30mgIron: 1mg

Notes

For best results, use ripe peaches and monitor the caramel closely to avoid burning.

Tried this recipe?

Let us know how it was!

Honey Roasted Peaches: Your Sweet Summer Treat Awaits

As the sweet aroma of roasting peaches fills the kitchen, I’m reminded of sun-drenched summer afternoons spent indulging in nature’s candy. This Honey Roasted Peaches recipe is my go-to dessert — it’s not only a simple and quick dessert but also a delightful twist on traditional fruit preparations. With just a drizzle of honey, ripe peaches transform into warm, caramelized gems that are perfect for breakfast, dessert, or simply a healthy snack. Plus, it offers a vegan option using maple syrup, making it a versatile treat that everyone can enjoy. Ready to discover how to create this mouthwatering dish in your own kitchen? Let’s dive into the sweetness!

Why Are Honey Roasted Peaches Awesome?

Simplicity at its best: This recipe requires just a handful of ingredients, making it easy for anyone to whip up a gourmet dessert at home.

Naturally sweet: The natural sweetness of ripe peaches shines through, elevated by the rich caramelization from roasting.

Versatile delight: Enjoy these tasty treats warm with a scoop of ice cream or chilled over yogurt for breakfast, offering a delightful twist for any time of day.

Quick and easy: In just 30 minutes, you can create a show-stopping dish that impresses your friends and family without the fuss.

Health-conscious choice: Not only is it scrumptious, but it’s also packed with vitamins and antioxidants, proving that indulgence can be healthy.

If you’re looking for more delicious ideas, you might enjoy the flavors of a Honey Banana Grilled Cheese for lunch or elevate your dinner with some Garlic Parmesan Roasted Shrimp.

Honey Roasted Peaches Ingredients

• Perfectly sweet and simple!

For the Peaches

  • Ripe Peaches – Choose peaches that are sweet and firm to ensure they hold their shape while roasting.
  • Honey – This adds a warm sweetness and forms a lovely glaze; feel free to swap it with maple syrup for a vegan option.

For the Roasting

  • Butter or Coconut Oil – Both help with flavor and caramelization; coconut oil is great for a dairy-free treat.
  • Cinnamon (optional) – Adds a lovely warm spice; you can omit it if you prefer a straightforward peach flavor.
  • Vanilla Extract (optional) – Enhances overall flavor and depth, making your honey roasted peaches even more irresistible.

For Garnish (optional)

  • Fresh Mint or Thyme – A sprinkle adds a refreshing touch and elevates presentation.

Enjoy crafting these honey roasted peaches to savor the delights of summer!

Step‑by‑Step Instructions for Honey Roasted Peaches

Step 1: Preheat the Oven
Start by preheating your oven to 375°F (190°C). This ensures that your honey roasted peaches will bake evenly, creating that perfect caramelized glaze. While the oven is heating up, find a baking dish that is large enough to hold your peach halves comfortably without overcrowding.

Step 2: Prepare the Peaches
Take your ripe peaches and carefully slice them in half, removing the pits while keeping the skins on. This method not only maintains the shape but also enhances the flavor as they roast. Once halved, arrange the peach halves in your baking dish, cut-side facing up to allow for even drizzling of honey.

Step 3: Drizzle with Honey
Generously drizzle honey over each peach half, ensuring that they’re well-coated for that delightful sweetness. If you prefer a vegan option, substitute honey with maple syrup for an equally delicious result. Don’t forget to add small dots of butter or coconut oil to each peach; this step boosts flavor and aids in caramelization during baking.

Step 4: Add Optional Ingredients
For an added layer of flavor, sprinkle cinnamon over the peaches and add a drop of vanilla extract if desired. The warm spice of cinnamon complements the sweet peaches beautifully. If you choose to omit these, your honey roasted peaches will still shine in their simplicity, bursting with natural flavors.

Step 5: Bake to Perfection
Place the baking dish in the preheated oven and bake uncovered for 20-25 minutes. As they bake, keep an eye out for the peaches becoming soft and golden, signaling that they are perfectly roasted. The kitchen will fill with the enticing aroma of caramelizing fruit, a sure sign of deliciousness!

Step 6: Broil for Extra Caramelization
For an irresistible finishing touch, switch to the broil setting for an additional 1-2 minutes after baking, watching closely to avoid burning. This step enhances the caramelization on top, giving your honey roasted peaches a beautiful, irresistible golden crust that is sure to impress.

Step 7: Cool and Serve
Once done, remove the baking dish from the oven and let the peaches cool slightly for about 5 minutes. This rest period allows the honey glaze to thicken up a bit. When ready to serve, spoon the pan juices over the warm peaches. They can be enjoyed on their own or paired with yogurt for a delightful breakfast or snack.

Make Ahead Options

These Honey Roasted Peaches are perfect for meal prep, saving you time on busy evenings. You can roast the peaches up to 24 hours in advance; simply allow them to cool completely and store them in an airtight container in the refrigerator. To maintain their deliciousness, be sure to spoon some of the pan juices over the peaches before sealing them up, which helps keep them moist. When you’re ready to serve, reheat them gently in the oven at 350°F (175°C) for about 10 minutes, or enjoy them cold over yogurt or oatmeal. This way, you can have a delightful and healthy treat ready in no time!

Storage Tips for Honey Roasted Peaches

Fridge: Store leftover honey roasted peaches in an airtight container for up to 3 days. This preserves their sweet flavor and moisture.

Freezer: For longer storage, freeze the peaches in a single layer on a baking sheet before transferring to a freezer-safe container. They can be stored for up to 3 months.

Reheating: To enjoy the peaches warm again, gently reheat in the oven at 350°F (175°C) for about 10 minutes, or microwave for 30-45 seconds until warm.

Serving Suggestions: These honey roasted peaches can be served warm, chilled, or even straight from the fridge, making them a versatile treat for any meal or snack!

Honey Roasted Peaches Variations

Feel free to explore these delectable variations that will allow your honey roasted peaches to shine even brighter!

  • Maple Syrup: Swap honey for maple syrup to create a vegan-friendly delight without sacrificing sweetness. The maple flavor adds a unique twist.
  • Fruit Medley: Combine peaches with other fruits like plums or nectarines for a vibrant fruit roast, enhancing textures and flavors in every bite.
  • Nutty Crunch: Top your peaches with chopped almonds or walnuts before roasting for a delightful crunch and nutty flavor that complements the sweetness.
  • Spice It Up: Experiment with spices like nutmeg or cardamom to elevate the flavor profile, giving your peaches a warm, aromatic touch.
  • Coconut Flakes: Add shredded coconut on top before roasting for a tropical flair, bringing a delightful texture and flavor that transports you to paradise.
  • Balsamic Drizzle: After roasting, drizzle with balsamic reduction for a sweet-savory contrast that transforms these fruits into a gourmet masterpiece.
  • Yogurt Layer: Serve your warm peaches over creamy Greek yogurt or coconut yogurt for extra creaminess and protein, creating an indulgent breakfast or snack option.
  • Chocolate Drizzle: For a luxurious touch, drizzle melted dark chocolate over the roasted peaches right before serving, making each bite deeply satisfying.

Don’t forget, you can always take inspiration from these variations when making recipes like the Honey Banana Grilled Cheese for an exciting lunch or the delightful Honey Garlic Salmon for dinner. Feel free to let your creativity flow in the kitchen!

Expert Tips for Honey Roasted Peaches

Choose Ripe Peaches: Ensure your peaches are ripe but firm to maintain a tender texture. Overripe peaches may become mushy when roasted.

Perfect Honey Substitute: If opting for a vegan version, maple syrup works beautifully as a substitute, giving a unique flavor while keeping the recipe sweet.

Watch the Baking Time: Keep an eye on the roasting process; peaches should be soft and golden. Over-baking can lead to a loss of texture and flavor.

Garnish for Freshness: Adding fresh mint or thyme not only enhances the presentation but also adds a refreshing herb aroma that complements the sweetness.

Serve Warm or Cold: These honey roasted peaches are versatile—enjoy them warm for dessert or chilled as a snack or breakfast topping.

Thicken the Glaze: Allow the peaches to rest for a few minutes post-baking. This helps the honey glaze thicken, ensuring a delightful drizzle over your succulent peaches.

What to Serve with Honey Roasted Peaches

The delightful aroma of honey roasted peaches creates an inviting atmosphere, perfect for complementing a full meal or simple snack.

  • Creamy Greek Yogurt: A dollop of tangy Greek yogurt adds creaminess, balancing the sweetness of the peaches beautifully.
  • Vanilla Ice Cream: The rich, cold ice cream melts slightly over warm peaches, creating a luscious dessert experience.
  • Granola Crunch: Sprinkle some granola for a satisfying crunch that contrasts with the soft, tender fruit while adding a wholesome touch.
  • Spiced Oatmeal: Enjoy these peaches warmed on a bed of oatmeal, bringing together comforting flavors for a hearty breakfast.
  • Savory Cheese Platter: Pair with cheeses like goat cheese or ricotta to elevate your appetizer spread with sweet and savory nuances.
  • Fresh Mint Tea: Served chilled or hot, this refreshing beverage enhances the fruity flavors, bringing a soothing, herbal note to the table.
  • Almond Butter Toast: Spread almond butter on toast, topped with slices of honey roasted peaches for a quick yet delightful snack.
  • Chocolate Drizzle: A light drizzle of dark chocolate over the peaches transforms them into an indulgent dessert that’s still guilt-free.
  • Coconut Chia Pudding: A tropical twist, this creamy pudding pairs well and adds a beautiful layer of flavor to a delightful brunch spread.

Honey Roasted Peaches Recipe FAQs

How do I choose ripe peaches for roasting?
Absolutely! Look for peaches that are slightly soft to the touch but still firm. The skins should be vibrant and free from dark spots or wrinkles. Aim for peaches that are fragrant, indicating their sweetness and ripeness.

How should I store leftover honey roasted peaches?
Store your leftovers in an airtight container in the fridge for up to 3 days. Just make sure to refrigerate them promptly after cooling to maintain their juicy goodness. When you’re ready to enjoy them again, simply reheat gently for the best taste.

Can I freeze honey roasted peaches?
Yes, you can freeze them! Lay the roasted peach halves on a baking sheet in a single layer and freeze until solid. This usually takes about 2 hours. Once frozen, transfer them to a freezer-safe bag or container. They can be kept for up to 3 months. Remember to label the container with the date, and when you’re ready to use them, thaw in the refrigerator or directly in a warm oven.

What are some common troubleshooting tips for this recipe?
If your peaches turn out too mushy, it’s likely because they were overripe to begin with or baked too long. Keep an eye on them in the oven; they should become tender but not fall apart. If the glaze is too thin, allow the peaches to rest for a few minutes after baking to thicken up. You can also add a cornstarch slurry to the pan juices before reheating to create a thicker glaze.

Are honey roasted peaches safe for my pets?
While peaches are generally safe for dogs in moderation, be cautious. Always remove the pit and limit the amount given. The honey in this recipe is not suitable for pets and could upset their stomachs. As for cats, it’s best to avoid feeding them fruit entirely, as their diets are primarily carnivorous. Always consult with your veterinarian if you’re unsure!

Can I make honey roasted peaches vegan?
Very! Just swap the honey for maple syrup, which works beautifully and adds its own unique richness. Use coconut oil instead of butter for a fully plant-based version. This swap makes a delightful vegan dessert that everyone can enjoy!

Honey Roasted Peaches

Honey Roasted Peaches: Your Sweet Summer Treat Awaits

Enjoy the delightful flavors of Honey Roasted Peaches, a simple and quick dessert perfect for any time of day.
Prep Time 5 minutes
Cook Time 25 minutes
Cooling Time 5 minutes
Total Time 35 minutes
Servings: 4 peaches
Course: Dessert
Cuisine: American
Calories: 150

Ingredients
  

For the Peaches
  • 4 pieces Ripe Peaches Choose sweet and firm peaches.
  • 2 tablespoons Honey Can substitute with maple syrup for vegan option.
For the Roasting
  • 1 tablespoon Butter or Coconut Oil Coconut oil is great for a dairy-free option.
  • 1 teaspoon Cinnamon Optional, can be omitted.
  • 1 teaspoon Vanilla Extract Optional, enhances flavor.
For Garnish
  • 1 sprig Fresh Mint or Thyme Optional, for garnish.

Equipment

  • Oven
  • baking dish

Method
 

Instructions
  1. Preheat your oven to 375°F (190°C).
  2. Slice the ripe peaches in half and remove the pits. Arrange peach halves cut-side up in a baking dish.
  3. Drizzle honey generously over each peach half and add small dots of butter or coconut oil to each.
  4. Sprinkle cinnamon and vanilla extract over the peaches if desired.
  5. Place the baking dish in the preheated oven and bake uncovered for 20-25 minutes until soft and golden.
  6. Switch to the broil setting for an additional 1-2 minutes for extra caramelization.
  7. Let the peaches cool for about 5 minutes before serving.

Nutrition

Serving: 1peachCalories: 150kcalCarbohydrates: 35gProtein: 1gFat: 3gSaturated Fat: 1gMonounsaturated Fat: 2gSodium: 1mgPotassium: 180mgFiber: 3gSugar: 30gVitamin A: 500IUVitamin C: 10mgCalcium: 20mgIron: 0.5mg

Notes

These honey roasted peaches can be enjoyed warm, chilled, or straight from the fridge, making them a versatile treat for any meal or snack.

Tried this recipe?

Let us know how it was!

Thai Peanut Chicken Wraps for a Quick Flavor Explosion

In the hustle and bustle of everyday life, discovering a meal that combines speed with vibrant flavors feels like uncovering a hidden gem. These 15-Minute Thai Peanut Chicken Wraps not only come together in a flash, but they’re also a perfect solution for those of us craving something homemade and nutritious. With tender chicken nestled among crunchy coleslaw and fresh veggies, all wrapped up in warm tortillas, each bite is a delightful celebration of textures and tastes. Plus, they’re meal prep-friendly, offering the flexibility to customize for various dietary preferences, whether you’re looking for a gluten-free option or a vegetarian twist. Ready to elevate your weeknight dinners with this quick and scrumptious recipe? Let’s dive in!

Why You’ll Crave These Wraps?

Quick Preparation: In just 15 minutes, you can whip up these wraps, making them perfect for busy weeknights.

Flavorful Fusion: The creamy homemade peanut sauce beautifully combines sweet, savory, and spicy notes, elevating every bite to a flavorful experience.

Customizable Options: Whether you prefer a vegetarian twist with tofu, a nut-free version with sunflower seed butter, or the classic chicken delight, there’s a variation for everyone.

Meal Prep Friendly: Make ahead and store the filling separately for easy lunches throughout the week! For a refreshing side, try pairing them with a light cucumber salad.

Crowd-Pleaser: These wraps are not just a hit at home; they shine at gatherings too, especially when sliced into pinwheels for easy serving.

Thai Peanut Chicken Wraps Ingredients

For the Peanut Sauce

  • Peanut Butter – Creamy base for the sauce; substitute with sunflower seed butter for a nut-free option.
  • Low-Sodium Soy Sauce – Adds umami flavor; use tamari for a gluten-free alternative.
  • Brown Sugar or Honey – Sweetness that balances the sauce; maple syrup can be used as a substitute.
  • Rice Wine Vinegar – Provides acidity; can be swapped with apple cider vinegar.
  • Minced Garlic – Flavor enhancer; both fresh and jarred work great.
  • Minced Ginger – Adds warmth and spice; fresh is ideal, but powdered can be a quick substitute.
  • Sriracha Sauce – Adds heat; adjust the quantity based on spice preference or omit for a milder taste.

For the Wraps

  • Chicken Breasts – Your lean protein; rotisserie chicken is a convenient alternative.
  • Coleslaw Mix – Base for the filling; feel free to add fresh veggies like bell peppers for extra crunch.
  • Grated Carrot – Adds color and sweetness; optional but recommended for more nutrition.
  • Chopped Cilantro – Fresh herb that enhances flavor; can be replaced with parsley if preferred.
  • Roasted, Salted Peanuts – Provides lovely crunch as a garnish; substitute with other nuts or seeds for variation.
  • Tortillas – Wrap everything together; swap for large lettuce leaves for a low-carb version.

These Thai Peanut Chicken Wraps are an exciting way to elevate your meals, offering a delightful burst of flavors in every bite!

Step‑by‑Step Instructions for Thai Peanut Chicken Wraps

Step 1: Prepare Peanut Sauce
In a medium bowl, whisk together 1/2 cup of creamy peanut butter, 1/4 cup low-sodium soy sauce, 2 tablespoons brown sugar or honey, 2 tablespoons rice wine vinegar, 2 minced garlic cloves, 1 tablespoon minced ginger, and 1 tablespoon sriracha sauce. If the sauce is too thick, thin it with a tablespoon or two of water until you reach a smooth, pourable consistency. Set this delicious peanut sauce aside to let the flavors meld.

Step 2: Mix Filling
In a large mixing bowl, combine 2 cups of cooked, shredded chicken, 2 cups of coleslaw mix, 1 cup of grated carrot, and 1/4 cup of chopped cilantro. Sprinkle in 1/4 cup of roasted, salted peanuts for added crunch. Drizzle about half of the peanut sauce over the filling and toss everything together until well coated. For best results, let the mixture marinate for about 5 minutes, enhancing flavor absorption in your Thai Peanut Chicken Wraps.

Step 3: Warm Tortillas
To make the tortillas pliable, wrap them in a damp paper towel and microwave for about 30 seconds. This softening step is key to avoiding tears while wrapping. If you prefer, you can also warm them in a skillet over medium heat for 1-2 minutes until no longer cold. A warm tortilla creates a cozy envelope for your tasty filling.

Step 4: Assemble Wraps
Take a warmed tortilla and place a generous scoop of the chicken filling in the center. Fold the sides over the filling and then roll from the bottom up, tucking in the edges as you go for a secure wrap. Repeat with the remaining tortillas and filling. These Thai Peanut Chicken Wraps are best served right away while the tortillas are warm and the flavors are fresh.

Expert Tips for Thai Peanut Chicken Wraps

  • Warm Tortillas: Warming tortillas makes them pliable, preventing tears and ensuring easier wrapping. Microwave them for 30 seconds for the best results.

  • Avoid Overfilling: To keep your wraps from falling apart, avoid the temptation to overfill. Use just enough filling, tucking sides in as you roll for a secure seal.

  • Sauce Separation: If you’re meal prepping, store the peanut sauce and filling separately to maintain texture and prevent sogginess in your Thai Peanut Chicken Wraps.

  • Customize Your Filling: Don’t hesitate to add or substitute veggies like bell peppers or radishes to enhance crunch and flavor. Explore your preferences!

  • Opt for Fresh Ingredients: For maximum flavor, use fresh ginger and garlic when possible. Their vibrant profiles make a notable difference in your sauce!

Thai Peanut Chicken Wraps Variations

Feel free to sprinkle your own creativity and adjust these wraps to suit your tastes!

  • Vegetarian Option: Replace chicken with firm tofu or canned chickpeas for a hearty plant-based twist. You’ll enjoy the same rich flavors while keeping dinner satisfying!

  • Nut-Free Version: For those avoiding nuts, swap peanut butter for sunflower seed butter or tahini. This retains the creamy goodness without any nut allergens.

  • Flavor Boost: Add a splash of lime juice for a zesty pop! The acidity brightens the overall flavor profile, adding a refreshing touch to the meal.

  • Extra Crunch: Toss in additional veggies like bell peppers, cucumber, or crunchy radishes for an exciting texture variation. Each bite will be a crisp adventure!

  • Low-Carb Alternative: Ditch the tortillas and opt for large lettuce leaves instead. These fresh wraps are light and perfect for a healthy twist!

  • Spice Level: Adjust the level of sriracha based on your heat preference. Prefer it mild? Simply omit entirely, or kick it up a notch with extra hot sauce!

  • Herb Substitutes: If cilantro isn’t your favorite, you can easily swap it out for fresh parsley or mint, both of which add a delightful freshness without overpowering the dish.

  • Grain-Boost: Add cooked quinoa or brown rice to the filling for a heartier wrap. This not only amps up the nutrition but also adds a fun chew!

And if you’re in the mood for more delicious wraps, why not try these tasty options? Check out the Garlic Chicken Wraps or the zingy flavors of Chilli Chicken Takeout. Each brings its own exciting twist to your dinner table!

Make Ahead Options

These Thai Peanut Chicken Wraps are a fantastic choice for meal prep! You can prepare the filling and peanut sauce up to 24 hours in advance, allowing the flavors to meld beautifully. Simply mix the cooked chicken, coleslaw mix, grated carrot, cilantro, and half of the peanut sauce in a bowl, then store it in an airtight container in the refrigerator. To maintain that delightful crunch, keep the filled mixture separate from the tortillas until you’re ready to serve. When it’s time to enjoy, warm the tortillas, assemble the wraps with the chilled filling, and drizzle with any remaining sauce for a quick, satisfying meal that’s just as delicious as when freshly made!

How to Store and Freeze Thai Peanut Chicken Wraps

Fridge: Store assembled wraps in an airtight container for up to 2 days. Be sure to wrap them securely in parchment and foil to maintain freshness.

Freezer: For longer storage, wrap individual Thai Peanut Chicken Wraps in plastic wrap and then in aluminum foil. Freeze for up to 2 months.

Reheating: To reheat, thaw overnight in the fridge. Warm in the microwave or a skillet until heated through, ensuring the tortilla remains soft without becoming rubbery.

Meal Prep Tip: If preparing for the week, store the filling and sauce separately from tortillas to keep all components fresh and prevent sogginess.

What to Serve with Thai Peanut Chicken Wraps?

These delightful wraps can bring together a whole meal that celebrates fresh flavors and textures, leaving your taste buds dancing.

  • Cucumber Salad: A light, refreshing salad dressed in rice vinegar that complements the richness of the peanut sauce with its crisp and cool texture.

  • Tom Yum Soup: This aromatic Thai soup, filled with fragrant herbs and spices, adds a comforting contrast to the wraps, making for a heartier meal option.

  • Sweet Potato Fries: Crispy on the outside and soft on the inside, they provide a sweet contrast that balances with the savory and spicy notes of the wraps.

  • Mango Salsa: Bursting with tropical sweetness, this salsa offers a vibrant, fruity element that enhances the overall dining experience.

  • Sesame Edamame: These lightly salted edamame are packed with protein and provide a fun, pop-in-your-mouth snack that pairs perfectly with the wraps.

  • Pineapple Coconut Smoothie: A creamy, refreshing drink blending pineapple and coconut milk that cools your palate after each spicy bite of the wraps.

Enhancing your Thai Peanut Chicken Wraps with these careful pairings can transform a simple dish into an unforgettable meal.

Thai Peanut Chicken Wraps Recipe FAQs

How do I select ripe ingredients for my Thai Peanut Chicken Wraps?
Absolutely! When selecting ingredients, look for fresh produce: choose vibrant, crisp coleslaw mixes and carrots without dark spots or wilting. For chicken, opt for skinless breasts that feel firm to the touch. If you’re using peanut butter, go for pure, natural varieties without added sugars or oils for the freshest taste.

What is the best way to store leftover Thai Peanut Chicken Wraps?
To maintain their deliciousness, store assembled wraps in an airtight container for up to 2 days. I always wrap them securely in parchment paper first, then in foil, to avoid drying out, keeping the freshness intact. If you’re storing the components separately, the chicken filling can last up to 3 days refrigerated.

Can I freeze my Thai Peanut Chicken Wraps?
Absolutely! To freeze, wrap individual wraps tightly in plastic wrap and then wrap in aluminum foil to prevent freezer burn. They can last up to 2 months in the freezer. When you’re ready to enjoy, simply thaw them overnight in the fridge, then warm them in the microwave or skillet until heated through. A gentle reheat will keep the tortillas soft!

What should I do if my wraps are falling apart?
Very! If your wraps are falling apart, ensure you’re not overfilling them. A good rule of thumb is to use a generous but manageable scoop of filling. Tuck in the sides tightly as you roll to secure everything. Also, warming the tortillas beforehand is key – this pliability helps them fold nicely without tearing.

Are there any dietary considerations I should be aware of for Thai Peanut Chicken Wraps?
Of course! If you’re making these wraps for someone with a peanut allergy, you can substitute peanut butter with sunflower seed butter or tahini for a nut-free option. Also, always check the soy sauce label for gluten content if serving gluten-free. Fresh veggies can be tailored to preference and dietary needs, making this recipe incredibly adaptable!

How do I make these wraps vegetarian or low-carb?
All in for variety! For a vegetarian option, replace the chicken with firm tofu or chickpeas, which work beautifully to maintain texture. For a low-carb twist, switch the tortillas out for large lettuce leaves. This not only cuts carbs but adds a refreshing crunch! Simply fill the leaves as you would the tortillas and enjoy your delicious wraps!

Thai Peanut Chicken Wraps

Thai Peanut Chicken Wraps for a Quick Flavor Explosion

Experience a flavor explosion with Thai Peanut Chicken Wraps - a quick and nutritious meal option.
Prep Time 15 minutes
Total Time 15 minutes
Servings: 4 wraps
Course: Lunch
Cuisine: Thai
Calories: 350

Ingredients
  

Peanut Sauce
  • 1/2 cup creamy peanut butter substitute with sunflower seed butter for nut-free option
  • 1/4 cup low-sodium soy sauce use tamari for gluten-free alternative
  • 2 tablespoons brown sugar or honey maple syrup can be used as a substitute
  • 2 tablespoons rice wine vinegar can be swapped with apple cider vinegar
  • 2 cloves minced garlic both fresh and jarred work great
  • 1 tablespoon minced ginger fresh is ideal, but powdered can be a quick substitute
  • 1 tablespoon sriracha sauce adjust based on spice preference
Wraps
  • 2 cups cooked, shredded chicken rotisserie chicken is a convenient alternative
  • 2 cups coleslaw mix feel free to add fresh veggies like bell peppers
  • 1 cup grated carrot optional but recommended for more nutrition
  • 1/4 cup chopped cilantro can be replaced with parsley
  • 1/4 cup roasted, salted peanuts substitute with other nuts or seeds for variation
  • 4 large tortillas swap for large lettuce leaves for low-carb version

Equipment

  • Mixing Bowl
  • whisk
  • Microwave
  • Skillet

Method
 

Preparation Steps
  1. In a medium bowl, whisk together 1/2 cup of creamy peanut butter, 1/4 cup low-sodium soy sauce, 2 tablespoons brown sugar or honey, 2 tablespoons rice wine vinegar, 2 minced garlic cloves, 1 tablespoon minced ginger, and 1 tablespoon sriracha sauce. If the sauce is too thick, thin it with water until smooth.
  2. In a large mixing bowl, combine 2 cups of cooked, shredded chicken, 2 cups of coleslaw mix, 1 cup of grated carrot, and 1/4 cup of chopped cilantro. Sprinkle with 1/4 cup of roasted, salted peanuts, drizzle half of the peanut sauce, and toss until well coated.
  3. Wrap tortillas in a damp paper towel and microwave for about 30 seconds, or warm in a skillet for 1-2 minutes until pliable.
  4. Take a warmed tortilla, place a generous scoop of the chicken filling in the center, fold the sides over, and roll from the bottom up. Repeat with remaining tortillas and filling.

Nutrition

Serving: 1wrapCalories: 350kcalCarbohydrates: 40gProtein: 25gFat: 15gSaturated Fat: 3gPolyunsaturated Fat: 5gMonounsaturated Fat: 7gCholesterol: 70mgSodium: 600mgPotassium: 500mgFiber: 4gSugar: 8gVitamin A: 500IUVitamin C: 15mgCalcium: 50mgIron: 2mg

Notes

These wraps are best served right away while the tortillas are warm and flavors are fresh. Warm tortillas prevent tears during wrapping.

Tried this recipe?

Let us know how it was!

Watermelon Feta Basil Salad: A Refreshing Summer Delight

As I reached for a slice of juicy watermelon at the market, I couldn’t help but think about how this summer staple could transform into something extraordinary. Enter the Watermelon Feta Basil Salad—an effortless way to impress at your next get-together. Ready in just 10 minutes, this gluten-free delight not only shines as a light meal but also adds a refreshing twist to any occasion. The delightful marriage of sweet watermelon, creamy feta, and aromatic basil creates a flavor balance that is simply irresistible. And let’s not forget the zesty honey-lime vinaigrette that brings everything together! Are you ready to elevate your summer dining experience with this vibrant salad that celebrates the season’s best flavors?

Why is this salad a summer favorite?

Quick and Easy: In just 10 minutes, you can whip up a fresh, flavorful dish that’s perfect for busy summer days.

Flavor Explosion: The sweet watermelon contrasts beautifully with the salty feta and aromatic basil, creating a taste sensation that’s both refreshing and satisfying.

Versatile Dish: Whether as a side for grilled chicken or a light main dish, this salad adapts to any meal, making it ideal for picnics or barbecues.

Crowd-Pleasing: Bring it to your next gathering, and watch as everyone raves about this delightful combination. It’s a guaranteed hit!

Health Boost: Packed with vitamins A and C, this gluten-free salad is a nutritious option that keeps you feeling great. For other quick and healthy meals, check out my delicious Blt Chicken Salad or try some Feta Fried Eggs for a delightful twist!

Watermelon Feta Basil Salad Ingredients

For the Salad

  • Seedless Watermelon – Adds sweetness and juiciness; cut into 1-inch cubes. If you prefer, cantaloupe can be used for a similar texture.
  • Fresh Basil – Provides a fragrant herbal note; use fresh and cut into thin strips. For a different taste, mint or cilantro can be substituted.
  • Feta Cheese – Delivers creaminess and saltiness; use crumbled or chunked. Goat cheese can also offer a tangy alternative.

For the Dressing

  • Lime Juice – Brightens flavors and adds acidity; always use freshly squeezed for the best taste.
  • Honey – Introduces a touch of sweetness to the dressing; lessen the amount for a less sweet profile.
  • Olive Oil – Serves as the base for the vinaigrette; enhances richness and mouthfeel.
  • Champagne Vinegar – Complements the dressing with a light tang; if unavailable, white wine vinegar can be used.

For Seasoning

  • Kosher Salt – Enhances flavor balance; adjust according to your taste.
  • Freshly Ground Black Pepper – Brings warmth to the dish; add to taste.

This Watermelon Feta Basil Salad is as easy to prepare as it is delicious, making it a staple for all your summer meals!

Step‑by‑Step Instructions for Watermelon Feta Basil Salad

Step 1: Prepare the Ingredients
Begin by washing and drying the fresh basil leaves before slicing them into thin strips. Next, take the seedless watermelon and cut it into 1-inch cubes, showcasing its vibrant pink color. You can do this using a sharp knife and a large cutting board. Set both the watermelon and basil aside in separate bowls for easy assembly.

Step 2: Mix the Salad Base
In a large mixing bowl, gently combine the watermelon cubes and basil strips with crumbled feta. Use a spatula to fold them together carefully, ensuring that the feta stays intact and doesn’t crumble too much. This creates a beautiful contrast of colors and textures in your Watermelon Feta Basil Salad, making it visually appealing and ready for dressing.

Step 3: Whisk the Dressing
In a small bowl, whisk together the freshly squeezed lime juice, honey, olive oil, and champagne vinegar until the mixture is emulsified and slightly thickened. You should see a glossy appearance on the dressing, indicating it’s ready to enhance the flavors of the salad. This zesty dressing will bring the salad to life and elevate its fresh ingredients.

Step 4: Combine Salad and Dressing
Drizzle the honey lime dressing over the watermelon, feta, and basil mixture. Using a large spoon, gently toss everything together until the salad is well coated with the dressing, being cautious not to break apart the watermelon too much. This will ensure each bite of the Watermelon Feta Basil Salad is packed with flavor from the delicious vinaigrette.

Step 5: Season Your Salad
Sprinkle kosher salt and freshly ground black pepper over the salad according to your taste preferences. This seasoning will help balance the sweetness of the watermelon and creaminess of the feta. Give it one last gentle toss to distribute the seasoning evenly throughout the salad, enhancing the overall flavor profile.

Step 6: Serve and Enjoy
You can serve the Watermelon Feta Basil Salad immediately for a fresh experience, or for an even more refreshing dish, refrigerate it for up to an hour. This chilling time allows the flavors to meld beautifully. Serve it as a light meal or as an accompaniment to grilled meats for a delightful summer dining experience.

Make Ahead Options

These Watermelon Feta Basil Salad components are perfect for meal prep, allowing you to save time on busy days! You can cut and store the watermelon cubes and basil strips up to 24 hours in advance; just make sure to refrigerate them in airtight containers to retain their freshness. The feta can also be crumbled ahead of time and kept separately to prevent sogginess. When you’re ready to enjoy, simply whisk together the dressing, combine all the ingredients in a bowl, and toss gently to coat. This way, you’ll have a stunning, refreshing dish ready to go with minimal effort, perfect for any summer gathering!

What to Serve with Watermelon Feta Basil Salad

Nothing pairs more beautifully with this refreshing salad than vibrant sides that embrace the essence of summer.

  • Grilled Chicken Skewers: The smoky flavors of grilled chicken enhance the salad’s freshness, creating a delightful balance of textures. Serve these tender bites alongside for a satisfying meal.

  • Quinoa Salad: A nutty, protein-packed addition, quinoa salad brings heartiness and complements the lightness of the watermelon, feta, and basil perfectly. It’s a great way to add nutritional value.

  • Roasted Vegetable Medley: The savory warmth of roasted veggies contrasts beautifully with the salad’s bright flavors and adds a delightful depth. Try zucchini, bell peppers, and eggplant for a winning combination!

  • Seafood Tacos: Fresh, zesty fish tacos bring a fun twist. Their brightness and crispness align seamlessly with the sweet and salty taste of the salad, making for a vibrant summer feast.

  • Sparkling Lemonade: A chilled glass of sparkling lemonade echoes the fresh citrus in the honey-lime dressing, creating a refreshing sip that pairs perfectly with your meal.

  • Pineapple Sorbet: For dessert, consider a light and refreshing pineapple sorbet. The sweet-fruity flavor cleanses the palate and echoes the salad’s tropical elements, making it an ideal way to finish your meal.

How to Store and Freeze Watermelon Feta Basil Salad

Fridge: Store leftovers in an airtight container for up to 6 hours to maintain freshness. The salad is best enjoyed right after preparation for optimal flavor and texture.

Freezer: This salad is not recommended for freezing, as the watermelon will become mushy and the feta can change texture. Enjoy your Watermelon Feta Basil Salad fresh!

Reheating: If you’ve made a batch ahead of time, simply toss the salad again before serving. No reheating necessary; serve chilled for the best results.

Make-Ahead Tips: Feel free to prepare the dressing and chop the watermelon and basil a few hours prior. Combine just before serving to keep everything crisp and delicious!

Expert Tips for Watermelon Feta Basil Salad

  • Use Fresh Ingredients: Always opt for the freshest watermelon, basil, and feta. This ensures the best flavor and texture in your Watermelon Feta Basil Salad.

  • Cut Uniformly: Cube the watermelon into even pieces to allow for a consistent bite; this makes the salad more enjoyable and visually appealing.

  • Chill Before Serving: Refrigerate the salad for about 30 minutes before serving. This enhances the flavors and makes for a refreshing treat on a hot day.

  • Mind Your Dressing: Avoid oversaturating the salad with dressing; start with a small amount and add more to taste. You want the vinaigrette to enhance, not overwhelm.

  • Mix Up the Herbs: If you prefer a different flavor profile, consider substituting basil with mint or cilantro in your Watermelon Feta Basil Salad for a unique twist.

  • Enjoy Freshness: This salad is best served fresh but can be refrigerated for up to 1 hour. Aim to enjoy it the same day to savor all its vibrant flavors!

Watermelon Feta Basil Salad Variations

Feel free to explore exciting twists on this lovely salad to suit your taste and occasion!

  • Dairy-Free: Substitute feta with almond or cashew cheese for a creamy, plant-based option that retains texture without the dairy.
  • Herbal Swap: Use fresh mint for a refreshing twist, or blend in cilantro for an unexpected flair that brightens up your salad.
  • Delicious Addition: Add sliced cucumbers for a refreshing crunch that complements the juicy watermelon beautifully.
  • Berry Boost: Toss in fresh blueberries or raspberries for a burst of color and added sweetness—perfect for summer picnics!
  • Mediterranean Flair: Mix in kalamata olives to introduce a briny taste that pairs deliciously with the sweetness of the watermelon.
  • Spicy Kick: Add red pepper flakes or finely chopped jalapeños to give your salad a spicy edge, perfect for those who love a bit of heat.
  • Grainy Texture: Incorporate quinoa or farro for added protein and texture, transforming your salad into a more filling meal.
  • Nutty Crunch: Sprinkle some toasted walnuts or almonds over the top for a satisfying crunch and a delightful earthiness.

Whatever you choose, tailoring this Watermelon Feta Basil Salad to your preferences will surely create an unforgettable dish!

Watermelon Feta Basil Salad Recipe FAQs

How do I choose a ripe watermelon?
Absolutely! Look for a watermelon that feels heavy for its size and has a uniform shape. The skin should be a deep green color, and a nice creamy spot on one side indicates ripeness. Avoid any watermelons with dark spots all over, as these may be overripe or spoiled.

How should I store leftovers?
Very! Store any leftover Watermelon Feta Basil Salad in an airtight container in the refrigerator for up to 6 hours. To preserve texture, it’s best consumed the same day. If you prep in advance, separate the dressing until you’re ready to serve to keep the ingredients crisp!

Can I freeze the watermelon salad?
Not recommended! Freezing the Watermelon Feta Basil Salad will turn the watermelon mushy, and the feta’s texture will change. Enjoy it fresh for the best flavors and vibrant experience!

What if my salad gets too salty?
No worries! If your salad turns out a bit too salty, you can balance the flavor by adding more fresh watermelon or even a bit of lime juice. Just add incrementally, tasting as you go, to achieve that perfect flavor balance.

Is this salad suitable for my gluten-free diet?
Yes, indeed! This Watermelon Feta Basil Salad is naturally gluten-free. Just be sure the feta cheese you select is gluten-free as well, though most are! It’s a perfect light dish that doesn’t compromise on flavor while being safe for gluten-sensitive folks.

What if I have a feta allergy?
Of course! If you’re allergic to feta, you can easily substitute it with goat cheese for a similar tangy flavor or skip it altogether and add sliced almonds or walnuts for a crunchy texture. Enjoy some customization!

Watermelon Feta Basil Salad

Watermelon Feta Basil Salad: A Refreshing Summer Delight

Experience a vibrant Watermelon Feta Basil Salad, a refreshing summer delight perfect for any occasion.
Prep Time 10 minutes
Total Time 10 minutes
Servings: 4 servings
Course: Salad
Cuisine: American
Calories: 130

Ingredients
  

For the Salad
  • 4 cups Seedless Watermelon Cut into 1-inch cubes
  • 1 cup Fresh Basil Cut into thin strips
  • 1 cup Feta Cheese Crumble or chunk
For the Dressing
  • 1/4 cup Lime Juice Freshly squeezed
  • 2 tbsp Honey Adjust for sweetness
  • 1/4 cup Olive Oil Base for the vinaigrette
  • 2 tbsp Champagne Vinegar Or white wine vinegar
For Seasoning
  • 1 tsp Kosher Salt Adjust according to taste
  • 1/2 tsp Freshly Ground Black Pepper Add to taste

Equipment

  • Mixing Bowl
  • Cutting board
  • Sharp knife
  • small bowl

Method
 

Step‑by‑Step Instructions
  1. Wash and dry the fresh basil leaves before slicing them into thin strips. Cut the seedless watermelon into 1-inch cubes.
  2. In a large mixing bowl, gently combine the watermelon cubes, basil strips, and crumbled feta.
  3. Whisk together lime juice, honey, olive oil, and champagne vinegar in a small bowl until emulsified.
  4. Drizzle the dressing over the salad mixture and gently toss until well coated.
  5. Sprinkle kosher salt and freshly ground black pepper over the salad, and toss gently to distribute evenly.
  6. Serve immediately or refrigerate for up to an hour before serving.

Nutrition

Serving: 1cupCalories: 130kcalCarbohydrates: 18gProtein: 3gFat: 6gSaturated Fat: 2gMonounsaturated Fat: 4gCholesterol: 10mgSodium: 300mgPotassium: 300mgFiber: 1gSugar: 10gVitamin A: 500IUVitamin C: 20mgCalcium: 200mgIron: 1mg

Notes

Best served fresh for optimal flavor; can be refrigerated before serving.

Tried this recipe?

Let us know how it was!

Creamy Italian Sausage Orzo for Cozy Weeknight Dinners

In the hustle and bustle of everyday life, I’ve discovered the joy of one-pot meals that serve up comfort without a kitchen nightmare. This Creamy One Pot Italian Sausage Orzo has quickly become a weeknight hero in my kitchen; it’s rich, satisfying, and, best of all, ready in just 30 minutes! Combining the savory goodness of Italian sausage with the tender charm of orzo pasta, this dish is perfect for anyone craving a delicious homemade meal without the fuss. With minimal cleanup and exceptional flavor, it has all the elements of a crowd-pleaser. Plus, as an added bonus, it’s versatile—you can easily customize it to suit your taste! Why not give your culinary routine a little lift with this delightful recipe? What are you waiting for? Let’s dive in!

Why Is This Recipe So Special?

Simplicity at Its Finest: This creamy Italian sausage orzo is a one-pot wonder that takes just 30 minutes to prepare, ensuring minimal cleanup while filling your kitchen with mouthwatering aromas.

Rich, Savory Flavor: The combination of hearty Italian sausage and creamy goodness creates a comforting dish that warms the soul.

Endless Customization: Feel free to add your favorite veggies or swap in turkey sausage for a lighter twist—this recipe is your canvas!

Crowd-Pleasing Delight: Whether it’s a family dinner or a friendly gathering, this dish satisfies everyone’s cravings, turning any evening into an occasion.

Health-Conscious Choices: With minor tweaks, like substituting heavy cream for coconut milk, you can enjoy a healthier version without sacrificing flavor.

For more comforting ideas, check out Heartwarming Comfort Sausage for another weekly favorite or explore our Sausage Tortellini Soup for more creamy goodness!

Italian Sausage Orzo Ingredients

• This creamy Italian sausage orzo is packed with flavor; here’s what you’ll need!

For the Main Dish

  • Italian Sausage – Provides a savory, rich flavor; you can choose mild or spicy based on your taste preference.
  • Onion – Adds sweetness and depth to the dish; substitute with shallots for a milder taste.
  • Garlic – Enhances flavor with its aromatic quality; fresh minced garlic is recommended for the best results.
  • Red Pepper Flakes – Offers a touch of heat; adjust the amount to suit your spice tolerance.
  • Uncooked Orzo Pasta – The star of the dish; it cooks quickly and brings a comforting texture. Substitute with other small pasta types if necessary.
  • Chicken Broth – Creates a savory base that enhances the flavor of the orzo; vegetable broth works well for a vegetarian version.
  • Heavy Whipping Cream – Gives the dish its creamy texture; consider half-and-half or full-fat coconut milk for a lighter option.
  • Fresh Grated Parmesan – Adds saltiness and a rich, nutty flavor; try Pecorino Romano or nutritional yeast for a dairy-free alternative.
  • Fresh Baby Spinach – Offers color and nutrients, wilting down beautifully; kale can be a sturdy substitute if desired.

Step‑by‑Step Instructions for Creamy One Pot Italian Sausage Orzo

Step 1: Brown the Sausage
In a large soup pot or Dutch oven, heat over medium-high heat and add the crumbled Italian sausage. Cook for about 5 minutes, stirring occasionally, until the sausage is browned and no longer pink, releasing its rich flavors and aromas that will fill your kitchen.

Step 2: Sauté the Aromatics
Add the chopped onion to the pot, continuing to cook for another 5 minutes. Stir frequently until the onion is translucent and softened, mingling beautifully with the sausage. The combination of these two ingredients creates a flavorful base for your creamy Italian sausage orzo.

Step 3: Add Garlic and Orzo
Next, stir in the minced garlic and red pepper flakes, cooking for an additional 30 seconds until fragrant. Toss in the uncooked orzo and mix well, ensuring that the orzo is coated in the savory sausage mixture as it begins to absorb those delicious flavors.

Step 4: Pour in the Liquids
Carefully pour in the chicken broth and heavy whipping cream, stirring to combine everything thoroughly. Bring the mixture to a gentle boil, checking that the orzo is distributed evenly. Once boiling, reduce the heat and let it simmer uncovered for about 10 minutes, stirring frequently to prevent sticking.

Step 5: Finish Cooking and Add Spinach
Once the orzo has absorbed most of the liquid and is tender, remove the pot from heat. Gently stir in the fresh grated Parmesan cheese and baby spinach, allowing the spinach to wilt into the creamy Italian sausage orzo. Cover the pot and let it sit for 3-5 minutes until thickened to your liking.

Step 6: Season and Serve
Finally, taste the dish and season with salt and pepper as desired, enhancing the rich flavors of your creamy Italian sausage orzo. Serve hot, delighting in the comforting aromas and textures, and enjoy this easy weeknight meal with your loved ones!

Italian Sausage Orzo Variations

Feel free to customize your Italian sausage orzo with these exciting twists that can elevate the flavor and texture of this comforting dish!

  • Gluten-Free: Substitute regular orzo with gluten-free orzo or any gluten-free pasta to enjoy this dish without worry.
  • Vegetable Boost: Add mushrooms, bell peppers, or zucchini for more nutrition and vibrant color; these veggies will enhance both flavor and texture.
  • Lean Protein: Swap Italian sausage for ground turkey or chicken for a lighter version that’s just as satisfying.
  • Creamy Twist: Use mascarpone cheese instead of Parmesan for an ultra-creamy texture that truly indulgent.
  • Heat Adjustment: Raise the spice level by adding more red pepper flakes or toss in fresh diced jalapeños for a fiery kick!
  • Plant-Based Delight: Use plant-based sausage to make this a vegetarian-friendly meal without sacrificing flavor.
  • Nutty Flavor: Incorporate toasted pine nuts or walnuts before serving for an added crunch plus a delightful nuttiness.
  • Extra Savory: Mix in sundried tomatoes or olives for a burst of umami that beautifully complements the creamy sauce.

For more delicious combinations, you might want to explore our rich Cajun Sausage Pasta or delve into the comforting warmth of Italian Penicillin Soup. Happy cooking!

Expert Tips for Italian Sausage Orzo

  • Stir Frequently: Regular stirring prevents the orzo from sticking to the pot, ensuring a creamy texture in your Italian sausage orzo.

  • Adjust Liquid Wisely: Depending on your stovetop’s heat, you may need to tweak the amount of broth or cream to achieve the desired consistency.

  • Let It Rest: If your dish appears too wet, covered resting allows excess moisture to be absorbed, enhancing the richness of flavors.

  • Taste as You Go: Season gradually; you can always add more salt and pepper, but it’s harder to fix if over-seasoned!

  • Embrace Substitutions: Feel free to swap ingredients, such as using ground turkey for a lighter dish or adding your favorite veggies for extra nutrition.

What to Serve with Creamy One Pot Italian Sausage Orzo

Let the comforting flavors of Italian sausage orzo take center stage in a cozy meal that’s bursting with possibilities.

  • Garlic Bread: The crispy, buttery layers of garlic bread make the perfect companion, ideal for soaking up every creamy bite.
  • Side Salad: A refreshing arugula or mixed greens salad adds a crisp contrast, enhancing the warmth of the orzo with its zesty dressing.
  • Roasted Vegetables: Seasoned and roasted veggies bring a delightful crunch and color, balancing the rich flavors of the orzo wonderfully.
  • Parmesan Crusted Cauliflower: This dish features tender cauliflower with a golden, cheesy crust, echoing the savory notes of your orzo delightfully.
  • Wine Pairing: A glass of Pinot Grigio or Chianti creates a lovely pairing, its bright acidity complements the creaminess beautifully.
  • Dessert: Finish on a sweet note with a slice of tiramisu, offering a perfect sweet contrast that echoes Italian flavors.
  • Bruschetta: Tasty bruschetta with fresh tomatoes and basil presents a luscious, fresh touch, enhancing the meal’s Italian flair.

Explore these delightful pairings, and take your dining experience to the next level with memorable complements to your creamy Italian sausage orzo!

Make Ahead Options

These Creamy One Pot Italian Sausage Orzo meal prep options are perfect for busy weeknights! You can cook the Italian sausage and sauté the onions up to 24 hours in advance; simply store them in an airtight container in the refrigerator. The orzo can be pre-measured and kept sealed with the red pepper flakes to save time during your cooking process. When you’re ready to enjoy this comforting dish, just combine the prepped ingredients in a pot with chicken broth and cream, and follow the same cooking steps. To ensure the best quality, consider adding a splash of broth when reheating for a creamy texture that’s just as delightful!

How to Store and Freeze Italian Sausage Orzo

  • Fridge: Store leftovers in an airtight container for up to 3 days. To maintain creaminess, consider adding a splash of broth when reheating.
  • Freezer: Freeze Italian sausage orzo in a freezer-safe container for up to 2 months. Be sure to cool it completely before sealing to prevent ice crystals.
  • Reheating: Thaw overnight in the fridge and reheat on the stovetop over low heat, adding more broth or cream as needed to restore its creamy texture.
  • Room Temperature: Avoid leaving the dish out for more than 2 hours to maintain food safety.

Italian Sausage Orzo Recipe FAQs

What type of Italian sausage should I use?
You can use any type of Italian sausage—mild or spicy, depending on your preference! For a lighter option, ground turkey or chicken also works wonderfully, providing a similar savory flavor without the extra fat.

How should I store leftover Italian sausage orzo?
Store leftovers in an airtight container in the refrigerator for up to 3 days. To maintain the creamy texture when reheating, I recommend adding a splash of chicken broth to bring it back to life.

Can I freeze Italian sausage orzo?
Absolutely! To freeze, let the dish cool completely, then transfer it to a freezer-safe container for up to 2 months. Remember to portion it out for easier thawing later on!

What if my orzo turns out too dry when reheating?
If your Italian sausage orzo looks dry after reheating, add a bit of chicken broth or cream to restore its luxurious creaminess. Heat gently on the stovetop, stirring until it reaches your desired consistency.

Is this dish safe for my dog?
While Italian sausage orzo may seem tempting for your furry friend, it’s best to avoid sharing this dish as it contains ingredients like onions and garlic that can be harmful to dogs. Always check ingredients before sharing human food.

Can I make this recipe vegetarian?
Definitely! For a vegetarian version, simply substitute the Italian sausage with a plant-based sausage or omit it altogether. Use vegetable broth instead of chicken broth, and pack in extra veggies like bell peppers or mushrooms to enhance the dish’s heartiness.

Italian Sausage Orzo

Creamy Italian Sausage Orzo for Cozy Weeknight Dinners

Discover the joy of Creamy Italian Sausage Orzo, a one-pot meal that's ready in just 30 minutes, perfect for busy weeknight dinners.
Prep Time 10 minutes
Cook Time 20 minutes
Resting Time 5 minutes
Total Time 30 minutes
Servings: 4 servings
Course: Pasta
Cuisine: Italian
Calories: 400

Ingredients
  

For the Main Dish
  • 1 lb Italian Sausage Mild or spicy, based on preference
  • 1 medium Onion Chopped
  • 3 cloves Garlic Fresh minced recommended
  • 1 teaspoon Red Pepper Flakes Adjust to taste
  • 1 cup Uncooked Orzo Pasta Substitute with other small pasta types if necessary
  • 4 cups Chicken Broth Vegetable broth for vegetarian version
  • 1 cup Heavy Whipping Cream Consider half-and-half or coconut milk for lighter option
  • 1 cup Fresh Grated Parmesan Substitute with Pecorino Romano for variation
  • 2 cups Fresh Baby Spinach Kale can be used as a substitute

Equipment

  • large soup pot or Dutch oven

Method
 

Cooking Steps
  1. In a large soup pot or Dutch oven, heat over medium-high heat and add the crumbled Italian sausage. Cook for about 5 minutes, stirring occasionally, until the sausage is browned and no longer pink.
  2. Add the chopped onion to the pot, continuing to cook for another 5 minutes until translucent.
  3. Stir in the minced garlic and red pepper flakes, cooking for an additional 30 seconds.
  4. Add the uncooked orzo and mix well, ensuring it is coated in the sausage mixture.
  5. Pour in the chicken broth and heavy whipping cream, bringing to a gentle boil. Reduce heat and simmer uncovered for about 10 minutes.
  6. Stir in the fresh grated Parmesan cheese and baby spinach, allowing spinach to wilt. Cover and let sit for 3-5 minutes.
  7. Season with salt and pepper as desired before serving.

Nutrition

Serving: 1cupCalories: 400kcalCarbohydrates: 38gProtein: 22gFat: 18gSaturated Fat: 10gPolyunsaturated Fat: 1gMonounsaturated Fat: 7gCholesterol: 65mgSodium: 800mgPotassium: 600mgFiber: 2gSugar: 3gVitamin A: 500IUVitamin C: 10mgCalcium: 250mgIron: 2mg

Notes

Great for meal prep; can be adjusted with different vegetables or proteins as desired.

Tried this recipe?

Let us know how it was!

Effortless 5-Ingredient Cherry Pineapple Dump Cake Bliss

At a recent summer cookout, I overheard a delightful conversation between two friends: “You have to try that cherry pineapple dump cake—it’s incredible!” Their excitement sparked my curiosity, and as I took a bite, I understood the hype. This Easy 5-Ingredient Cherry Pineapple Dump Cake brings together sweet and tangy flavors with a moist, buttery texture that leaves everyone reaching for seconds. Perfect for potlucks or weeknight treats, it requires minimal effort—just dump, spread, sprinkle, dot, and bake! The beauty of this cake lies not only in its simplicity but also in how it effortlessly pleases a crowd. Plus, with just five ingredients, it’s a hassle-free option for those evenings when you want something sweet without a lot of fuss. Ready to impress your friends and family? Let’s dive into this delightful recipe that’s sure to become a summer staple in your kitchen!

Why is this cake the perfect dessert?

Simplicity at its finest: With just five ingredients, this Cherry Pineapple Dump Cake comes together in no time, making it ideal for those busy days when you’re craving something sweet without the hassle.

Bursting with flavor: The combination of sweet cherries and tangy pineapple creates a delightful taste sensation that will keep everyone coming back for more.

Ultimate crowd-pleaser: Perfect for potlucks or summer cookouts, this cake will impress your friends and family, just like the popular Strawberry Cheesecake Dump or the classic Honeybun Carrot Cake.

Versatile options: Feel free to swap in different flavors, like chocolate cake mix or blueberry pie filling, to suit your taste or dietary needs.

Effortless cleanup: The straightforward assembly means less time in the kitchen and more time enjoying the company of loved ones—just pop it in the oven and wait for the aroma to fill your home!

5-Ingredient Cherry Pineapple Dump Cake Ingredients

• Here’s everything you need to create this easy dessert!

For the Cake Base

  • Yellow cake mix – Provides the foundation for this moist cake. Note: Feel free to swap with chocolate cake mix for a unique twist!

For the Fruit Layers

  • Crushed pineapple (in 100% juice) – Adds a refreshing sweetness and moisture. Note: Make sure to leave it undrained for the best consistency.
  • Cherry pie filling – Imparts delightful tartness and sweetness. Note: Replace with blueberry pie filling if you’re in the mood for a different flavor.

For the Crust and Crunch

  • Salted butter, sliced – Adds richness and flavor to your cake. Note: Unsalted butter works just as well if you prefer!
  • Chopped pecans – Provides a lovely crunch and nutty flavor. Note: Feel free to omit or substitute with walnuts if desired.

Step‑by‑Step Instructions for 5-Ingredient Cherry Pineapple Dump Cake

Step 1: Preheat the Oven
Begin by preheating your oven to 350°F (175°C). While the oven warms up, grab a 9×13-inch baking dish and generously grease it with butter to prevent sticking. This step ensures your cake comes out beautifully and with ease.

Step 2: Add the Pineapple Layer
Open the can of crushed pineapple, ensuring you do not drain it. Dump the undrained pineapple into the greased baking dish, spreading it evenly across the bottom. This layer of pineapple will provide moisture, creating a deliciously fruity foundation for your 5-Ingredient Cherry Pineapple Dump Cake.

Step 3: Pour the Cherry Filling
Next, pour the cherry pie filling over the pineapple layer. Use a spatula to distribute the cherries evenly across the pineapple, making sure every bite will be packed with flavor. The combination of cherries and pineapple already begins to create a colorful and enticing sight!

Step 4: Sprinkle the Cake Mix
Now, take the yellow cake mix and sprinkle it evenly over the fruit layers in the baking dish. Use a spoon or spatula to smooth it out gently, creating a uniform layer. Avoid stirring, as you want to keep each layer distinct for the best texture in your cake.

Step 5: Dot with Butter
Cut the salted butter into thin slices and dot them evenly over the top of the cake mix layer. This helps to create a moist and flavorful topping as the butter melts while baking, enriching the overall taste of your Cherry Pineapple Dump Cake.

Step 6: Add the Pecans
Sprinkle the chopped pecans over the buttery layer, ensuring you cover the surface adequately. The nuts not only add a delightful crunch but also enhance the flavor profile of your cake. If you’re not a fan of pecans, feel free to omit them or replace them with walnuts.

Step 7: Bake the Cake
Place the baking dish in the preheated oven and let it bake for 48-53 minutes. Keep an eye on it, looking for a bubbly, golden-brown topping. The aroma of the cherry and pineapple will fill your kitchen, making it hard to resist peeking!

Step 8: Serve and Enjoy
Once baked, remove the cake from the oven and allow it to cool slightly. This 5-Ingredient Cherry Pineapple Dump Cake can be served warm, hot, or cold, and goes wonderfully with a scoop of vanilla ice cream on top. Indulge in this delightful dessert and share the joy with family and friends!

Make Ahead Options

These Easy 5-Ingredient Cherry Pineapple Dump Cakes are perfect for meal prep! You can prepare the fruit layers (crushed pineapple and cherry pie filling) up to 24 hours in advance, simply mix and store them covered in the refrigerator. The dry cake mix can also be portioned and stored in an airtight container until you’re ready to bake. When you’re set to enjoy your dessert, just preheat the oven and layer the cake mix over the fruit, dot with butter, sprinkle with pecans, and bake as directed. This way, you’ll reduce prep time significantly and still achieve that delightful fresh-baked flavor that everyone loves!

Expert Tips for 5-Ingredient Cherry Pineapple Dump Cake

  • Keep Pineapple Undrained: Ensure you use undrained crushed pineapple to maintain the cake’s moisture and prevent it from being dry.
  • Layering is Key: Avoid mixing the ingredients; let each layer shine for the best texture and flavor contrast in your dump cake.
  • Watch the Bake Time: Baking can vary by oven, so start checking for a golden brown color and bubbly edges around the 48-minute mark.
  • Substitution Savvy: Experiment with a chocolate or gluten-free cake mix for alternate variations of this delightful 5-Ingredient Cherry Pineapple Dump Cake.
  • Nuts Optional: If you’re allergic to nuts or prefer a simpler texture, feel free to leave out the pecans without compromising flavor!

What to Serve with Easy 5-Ingredient Cherry Pineapple Dump Cake

Indulging in this delightful dessert is just the beginning of your culinary journey—let’s create a meal that dazzles the senses!

  • Creamy Vanilla Ice Cream: A scoop of this classic complement adds a rich creaminess that balances the sweet and tangy layers of the cake. It’s a match made in dessert heaven!

  • Light Summer Salad: A refreshing green salad with mixed greens, strawberries, and a citrus vinaigrette adds a bright, crisp contrast, making your meal feel complete.

  • Pineapple-Mango Salsa: This vibrant, fruity salsa adds a tropical twist to your dessert experience, echoing the cake’s flavors while introducing a zesty kick.

  • Grilled Chicken Skewers: Juicy, marinated chicken skewers lend a savory balance to the sweetness of the dump cake. The grilled flavors will delight your palate.

  • Lemonade Sparkler: A refreshing lemonade with a splash of club soda complements the cake’s fruity flavors, adding a fizzy zest that brings everything together.

  • Chocolate Chip Cookies: Adding a plate of warm chocolate chip cookies offers a variety of textures and flavors, making your gathering even more inviting and fun.

  • Coconut Cream Pie: Serve alongside a slice of creamy coconut pie, and the combination of flavors will transport you to a sunny beach with every bite.

  • Mojito Mocktail: For an adult twist, a minty mojito mocktail featuring fresh lime and mint is a delicious and refreshing pairing that enhances the dessert experience.

  • Caramel Drizzle: Drizzling a bit of warm caramel sauce on your cake can elevate the serving, creating an irresistible blend of flavors that will have guests raving.

Embrace the joy of homemade meals while celebrating the nostalgia of desserts that warm the heart!

5-Ingredient Cherry Pineapple Dump Cake Variations

Feel free to get creative with this recipe and customize it to your liking—delicious options await!

  • Gluten-Free: Use a gluten-free cake mix to cater to dietary needs without sacrificing taste.
  • Chocolate Twist: Swap yellow cake mix for chocolate cake mix for an indulgent flavor surprise.
  • Berry Bliss: Replace cherry pie filling with blueberry pie filling or mixed berries for a delightful summer twist.
  • Nut-Free: Omit chopped pecans for a nut-free dessert option that still retains delightful crunch from the cake topping.
  • Tropical Flavors: Add shredded coconut on top of the pecans for a touch of the tropics that pairs perfectly with pineapple.
  • Cinnamon Spice: Sprinkle a dash of cinnamon over the cake mix before baking to add a warm, cozy flavor to every bite.
  • Ice Cream Sundae Style: Serve slices warmed, drizzled with chocolate syrup and a cherry on top for an unforgettable dessert experience.
  • Layered Delight: For a more sophisticated presentation, layer the fruit in a glass dish, alternating between cake layers for a stunning visual effect—perfect for gatherings!

Whichever variation you choose, remember that this cake can shine in countless ways, much like my easy Nutella Pancakes Blend. For more delicious ideas, explore the crowd-pleasing Easter Poke Cake that’s sure to brighten up any occasion!

Storage Tips for 5-Ingredient Cherry Pineapple Dump Cake

  • Room Temperature: The cake is best enjoyed fresh, but if left out, it can remain at room temperature for up to 1-2 days in an airtight container to preserve its moist texture.
  • Fridge: If you plan to store it longer, keep it in the refrigerator for up to 5 days. Be sure to cover it tightly to prevent it from drying out or absorbing odors.
  • Freezer: You can freeze this delightful cake for up to 3 months. Wrap it tightly in plastic wrap followed by aluminum foil to ensure it stays fresh.
  • Reheating: To enjoy frozen pieces, simply thaw in the fridge overnight and warm in the oven at 350°F (175°C) for about 10-15 minutes, or until heated through.

5-Ingredient Cherry Pineapple Dump Cake Recipe FAQs

What kind of cake mix should I use?
I recommend using a yellow cake mix for the classic flavor of the 5-Ingredient Cherry Pineapple Dump Cake. However, if you’re feeling adventurous, you can switch it up with a chocolate or even a gluten-free cake mix to cater to your preferences or dietary needs!

How do I store the leftover dump cake?
To keep your 5-Ingredient Cherry Pineapple Dump Cake fresh, store it in an airtight container at room temperature for up to 1-2 days. If you want to extend its shelf life, refrigerate it for up to 5 days, ensuring it’s tightly covered to prevent drying out or absorbing any fridge odors.

Can I freeze this cake?
Absolutely! To freeze your 5-Ingredient Cherry Pineapple Dump Cake, wrap it tightly in plastic wrap followed by aluminum foil to prevent freezer burn. It will stay good for up to 3 months. When you’re ready to enjoy, simply thaw it in the fridge overnight, and warm it in the oven at 350°F (175°C) for about 10-15 minutes or until heated through.

What should I do if my cake is too dry?
If you find that your Cherry Pineapple Dump Cake has turned out dry, a great tip is to ensure you used undrained crushed pineapple, as the juice keeps the cake moist. Also, consider checking the bake time—if it’s left in the oven too long, it can dry out. You could also drizzle a little extra pineapple juice over the top before serving for added moisture.

Are there any dietary considerations I should keep in mind?
Yes! If you’re making this cake for guests, it’s wise to check on any allergies, particularly regarding pecans. They can be omitted entirely without affecting the overall flavor of your cake. Furthermore, for gluten-free dietary needs, just swap the yellow cake mix with a gluten-free option and ensure all other ingredients meet those standards.

5-Ingredient Cherry Pineapple Dump Cake

Effortless 5-Ingredient Cherry Pineapple Dump Cake Bliss

This 5-Ingredient Cherry Pineapple Dump Cake is an easy, crowd-pleasing dessert filled with sweet and tangy flavors.
Prep Time 10 minutes
Cook Time 50 minutes
Total Time 1 hour
Servings: 12 slices
Course: Dessert
Cuisine: American
Calories: 250

Ingredients
  

For the Cake Base
  • 1 box yellow cake mix Feel free to swap with chocolate cake mix for a unique twist!
For the Fruit Layers
  • 1 can crushed pineapple (in 100% juice) Make sure to leave it undrained for the best consistency.
  • 1 can cherry pie filling Replace with blueberry pie filling if you’re in the mood for a different flavor.
For the Crust and Crunch
  • 1/2 cup salted butter, sliced Unsalted butter works just as well if you prefer!
  • 1 cup chopped pecans Feel free to omit or substitute with walnuts if desired.

Equipment

  • 9x13 inch baking dish

Method
 

Step-by-Step Instructions
  1. Preheat your oven to 350°F (175°C) and grease a 9x13-inch baking dish with butter.
  2. Dump the undrained crushed pineapple into the greased baking dish, spreading it evenly across the bottom.
  3. Pour the cherry pie filling over the pineapple layer and distribute the cherries evenly.
  4. Sprinkle the yellow cake mix evenly over the fruit layers in the baking dish.
  5. Dot with sliced salted butter evenly over the top of the cake mix layer.
  6. Sprinkle chopped pecans over the buttery layer, covering the surface adequately.
  7. Place the baking dish in the preheated oven and let it bake for 48-53 minutes.
  8. Once baked, allow to cool slightly and serve warm, hot, or cold.

Nutrition

Serving: 1sliceCalories: 250kcalCarbohydrates: 35gProtein: 3gFat: 12gSaturated Fat: 6gPolyunsaturated Fat: 1gMonounsaturated Fat: 4gCholesterol: 30mgSodium: 200mgPotassium: 150mgFiber: 1gSugar: 15gVitamin A: 300IUVitamin C: 5mgCalcium: 20mgIron: 1mg

Notes

Store leftovers in an airtight container at room temperature for 1-2 days or refrigerate for up to 5 days.

Tried this recipe?

Let us know how it was!

Savory Ground Turkey Teriyaki Stir Fry Ready in 30 Minutes

As the sun sets and the kitchen starts to fill with the mingling scents of garlic and ginger, I find comfort in quick-fix dinners. My favorite go-to? Ground Turkey Teriyaki Stir Fry. This vibrant dish combines sweet, tangy flavors with a delightful hint of orange zest, creating a homemade teriyaki experience that can be on your table in under 30 minutes. What’s not to love? It’s family-friendly, making mealtimes a breeze, and the satisfaction of knowing it’s all made from scratch is unmatched. Whether you’re looking to impress on a busy weeknight or seeking a healthier alternative to takeout, this recipe offers the perfect solution. Ready to transform your dinner routine? Let’s get cooking!

Why Is This Stir Fry a Must-Try?

Quick preparation: In less than 30 minutes, you can serve up a delectable meal that warms the heart.

Homemade goodness: With a delicious teriyaki sauce made from scratch, you can say goodbye to store-bought options.

Family-friendly: Ideal for even the pickiest of eaters, this dish combines nutritious ingredients in a fun and colorful way.

Versatile meal base: Serve it over rice, quinoa, or cauliflower rice to tailor it to your family’s preferences or dietary needs. Check out my Chicken Pepper Stir for another quick dinner option!

Flavor explosion: The combination of garlic, ginger, and orange zest brings a delicious twist that elevates your weeknight meals.

Crowd-pleaser: Whether for family dinner or meal prep, this stir fry is sure to impress everyone around your table, making it a reliable favorite!

Ground Turkey Teriyaki Stir Fry Ingredients

For the Teriyaki Sauce
Soy Sauce – Provides the base flavor with salty and umami notes; use tamari for gluten-free or coconut aminos for a soy-free option.
Brown Sugar – Adds sweetness to complement the salty soy sauce; coconut sugar is a lower glycemic index alternative.
Water – Helps to create the teriyaki sauce base; divided into two portions for sauce thickening.
Honey – Enhances sweetness and richness; replace with maple syrup for a vegan option.
Garlic (3 cloves, minced) – Provides aromatic flavor depth.
Fresh Ginger (1 tsp, grated) – Contributes zest and warmth to the dish.
Corn Starch (2 tbsp) – Acts as a thickening agent for the teriyaki sauce.
Orange Zest (1 tbsp) – Adds a fresh and bright citrus note; optional for a classic teriyaki flavor.

For the Stir Fry
Turkey (1 lb) – The main protein source, providing texture and flavor; feel free to interchange with ground chicken or beef.
Sesame Oil (2 tsp) – Introduces a nutty flavor; olive oil can be used as a substitute.
Broccoli Florets (3 cups, fresh or frozen) – A key vegetable for color and nutrition.
Onion (1 small, diced) – Adds sweetness and depth to the stir fry.
Shredded Carrots (1 cup) – Brings natural sweetness and vibrant color to the dish.
Salt and Pepper – To taste, enhances the overall flavor.

With this collection of fresh ingredients, your Ground Turkey Teriyaki Stir Fry will turn into a stunning masterpiece that’s not just satisfying but full of delightful flavors! Happy cooking!

Step‑by‑Step Instructions for Ground Turkey Teriyaki Stir Fry

Step 1: Prepare the Teriyaki Sauce
In a small saucepan, combine ¾ cup water, ¼ cup soy sauce, ¼ cup brown sugar, 2 tablespoons honey, 3 minced garlic cloves, and 1 teaspoon grated ginger. Heat over medium-high until the mixture reaches a low boil, stirring occasionally. This flavorful base will enhance your Ground Turkey Teriyaki Stir Fry, creating that classic sweet and tangy profile.

Step 2: Thin the Sauce
While the sauce is heating, whisk ¼ cup of water with 2 tablespoons of corn starch in a separate bowl until smooth. Once the sauce is boiling, slowly stir this corn starch mixture into the bubbling concoction. Allow it to thicken, which should take about 2-3 minutes. Remove from heat and mix in 1 tablespoon of orange zest for a refreshing twist.

Step 3: Cook the Stir Fry
In a large wok or skillet, heat 2 teaspoons of sesame oil over medium-high heat. Once hot, add 1 diced onion and sauté for 2-3 minutes until softened and translucent. The aroma will fill your kitchen, setting the stage for your delicious Ground Turkey Teriyaki Stir Fry.

Step 4: Add Turkey
Next, introduce 1 pound of ground turkey to the wok. Break it apart with a spatula, cooking for about 7-10 minutes until it’s fully browned and reaches an internal temperature of 165°F. Stir occasionally to ensure even cooking and to integrate those lovely onion flavors.

Step 5: Incorporate Vegetables
Add 3 cups of broccoli florets and 1 cup of shredded carrots to the turkey and onion. Stir-fry these vibrant veggies until they turn bright green and are tender yet crisp, about 3-4 minutes. This combination brings color, nutrition, and crunch to your Ground Turkey Teriyaki Stir Fry.

Step 6: Combine with Sauce
Reduce the heat to low and pour in your prepared teriyaki sauce, stirring gently to coat all the ingredients. Allow everything to simmer for another 2-3 minutes, letting those flavors meld beautifully together. The glossy sauce will cling to your turkey and veggies, making each bite irresistible.

Step 7: Serve and Enjoy
To serve, spoon the Ground Turkey Teriyaki Stir Fry over a bed of rice or your preferred base. This comforting dish is best enjoyed warm, offering a delightful culinary experience that’s homemade and wholesome.

How to Store and Freeze Ground Turkey Teriyaki Stir Fry

Refrigerator: Store leftovers in an airtight container for up to 3-4 days. This keeps the flavors fresh and ready to enjoy again.

Freezer: Freeze your Ground Turkey Teriyaki Stir Fry in a suitable container or freezer bag for up to 3 months. This makes for an easy meal ready to heat up on a busy day.

Reheating: When you’re ready to enjoy your stir fry, simply thaw it in the refrigerator overnight and reheat in a skillet over medium heat until warmed through, about 5-7 minutes.

Portioning: Consider dividing the stir fry into individual portions before freezing. This allows for convenient meal prep and easy access to a quick dinner option!

Expert Tips for Ground Turkey Teriyaki Stir Fry

  • Proper Cooking: Ensure the turkey is fully cooked to the recommended 165°F for food safety; use a meat thermometer for accuracy.

  • Thickening Sauce: For a thicker sauce, add more corn starch slurry. If you prefer a thinner consistency, gradually stir in additional water.

  • Vegetable Variety: Don’t hesitate to add extra vegetables like bell peppers or snap peas for a colorful and nutritious Ground Turkey Teriyaki Stir Fry.

  • Storing Leftovers: Cool leftovers before transferring to an airtight container. Store in the fridge for up to 3-4 days or freeze for up to 3 months.

  • Serving Flexibility: Experiment by serving this dish in lettuce wraps or over cauliflower rice for a fun twist to the classic meal.

Make Ahead Options

These Ground Turkey Teriyaki Stir Fry ingredients are perfect for meal prep enthusiasts! You can chop the vegetables (broccoli, onion, and carrots) and store them in an airtight container in the refrigerator up to 3 days in advance, saving you valuable time during the week. Additionally, you can prepare the teriyaki sauce (without the orange zest) and refrigerate it for up to 24 hours; this enhances the flavors while keeping it fresh. When you’re ready to cook, simply heat the sesame oil, follow the cooking instructions starting with the onion, and add in your prepped ingredients along with the teriyaki sauce. You’ll have a delicious, homemade meal on the table with minimal fuss!

What to Serve with Ground Turkey Teriyaki Stir Fry

Transform your weeknight meals into a delightful feast with these delicious pairings that perfectly complement the savory stir fry.

  • Fluffy Jasmine Rice: Its delicate texture soaks up the teriyaki sauce, adding a subtle fragrance that enhances every bite.
  • Steamed Broccoli: Adding even more greens to your plate, the bright crunch of broccoli works beautifully with the stir fry’s tender turkey.
  • Sweet and Sour Cucumber Salad: The cool, crisp cucumber salad adds a refreshing contrast to the warm stir fry, balancing flavors and textures perfectly.
  • Sesame Noodles: Tossed in a light sesame sauce, these noodles offer a nutty counterpart to the sweet and tangy stir fry, keeping the meal cohesive.
  • Miso Soup: A comforting bowl of miso soup brings warmth and umami richness to your dinner, complementing the main dish beautifully.
  • Sliced Avocado: Creamy and rich, avocado adds a smooth texture that enhances the overall experience of the stir fry while providing healthy fats.
  • Sparkling Water with Lime: Effervescent and light, this drink adds a refreshing fizz that cleanses the palate between bites, making your meal more enjoyable.
  • Chocolate Mochi Ice Cream: For dessert, this delightful treat offers a chewy texture and sweet finish to your dinner, leaving everyone with smiles!

Ground Turkey Teriyaki Stir Fry Variations

Feel free to get creative with this recipe! It’s a fun way to adjust the flavors and ingredients to suit your tastes and dietary needs.

  • Paleo-Friendly: Use coconut aminos instead of soy sauce for a gluten-free and paleo-friendly option. You won’t notice the difference, and it still carries that sweet, savory flavor.

  • Keto-Friendly: Swap out the brown sugar for erythritol or another keto-friendly sweetener to reduce carbs without sacrificing taste. Your family won’t even know it’s low-carb!

  • Vegetarian: Replace the ground turkey with crumbled tofu or tempeh for a hearty vegetarian option. This twist adds a protein punch while keeping the stir fry deliciously satisfying.

  • Thai Twist: Squeeze in a tablespoon of lime juice and add some fresh basil or cilantro for a vibrant Thai-inspired version. The zesty herbs provide refreshing flavors that’ll wow your taste buds.

  • Extra Crunch: Toss in a handful of cashews or peanuts during the last few minutes of cooking to add an appealing crunch and a nutty flavor to your stir fry.

  • Heat It Up: For those who enjoy a spicy kick, throw in a few slices of jalapeño or a sprinkle of crushed red pepper flakes. This will elevate your dish to a new, fiery level!

  • Additional Veggies: Incorporate snap peas, bell peppers, or baby corn to up the nutritional value and add a splash of color. Dishing up this vibrant medley will make your meal that much more enticing.

  • Other Grain Options: Try serving it over quinoa or brown rice for a more nutrient-dense base. For a lighter choice, cauliflower rice is an excellent alternative, offering a delicious texture while keeping it low-carb.

These variations will keep your meals exciting and help you make each stir fry uniquely yours! And if you’re on the hunt for even more quick dinner inspirations, don’t miss my recipes for Korean Ground Beef or the flavorful Mongolian Ground Beef. Happy cooking!

Ground Turkey Teriyaki Stir Fry Recipe FAQs

How do I choose ripe ground turkey?
Absolutely! When selecting ground turkey, look for fresh, pale pink meat with minimal odor. Avoid packages with dark spots or excessive liquid. Check the expiration date—fresh turkey should be used within 1-2 days of purchase for optimal flavor and safety.

How should I store my Ground Turkey Teriyaki Stir Fry?
Store any leftovers in an airtight container in the refrigerator for up to 3-4 days. Ensure the dish has cooled before sealing. For longer storage, consider freezing. It’s a simple way to keep your stir fry fresh, and it’ll be ready for a fast meal later!

Can I freeze the Ground Turkey Teriyaki Stir Fry?
Yes, you can freeze your stir fry! Allow it to cool completely, then transfer it to a freezer-safe container or bag. Label it with the date, and it will keep well for up to 3 months. When you’re ready to enjoy it, thaw in the fridge overnight, then reheat in a skillet over medium heat, stirring occasionally, for about 5-7 minutes until warmed through.

What if my teriyaki sauce is too thin?
Very! If your sauce is too thin, don’t worry! You can thicken it by mixing 1 tablespoon of corn starch with 2 tablespoons of cold water in a separate bowl. Once combined, gradually stir it into the simmering sauce until thickened to your liking. This should only take a few minutes, and it’ll give that beautiful glossy finish you’re after.

Are there any dietary considerations for this dish?
Indeed! This Ground Turkey Teriyaki Stir Fry is a versatile dish. For gluten-free needs, opt for tamari sauce instead of regular soy sauce. If you have a soy allergy, coconut aminos are a great substitution. And if you’re looking for a vegan option, replace the ground turkey with crumbled tofu and honey with maple syrup. The dish can be customized to fit various dietary preferences!

Can pets share this dish?
While some ingredients in the stir fry, like carrots and broccoli, are safe for pets, avoid giving them any soy sauce and honey due to their salt and sugar content. Always consult your veterinarian before sharing human food with your pets to ensure it’s safe for their diet.

Ground Turkey Teriyaki Stir Fry

Savory Ground Turkey Teriyaki Stir Fry Ready in 30 Minutes

A delicious Ground Turkey Teriyaki Stir Fry that's quick and easy, ready in under 30 minutes, perfect for a family dinner.
Prep Time 10 minutes
Cook Time 20 minutes
Total Time 30 minutes
Servings: 4 servings
Course: Dinner
Cuisine: Asian
Calories: 350

Ingredients
  

For the Teriyaki Sauce
  • 0.25 cup Soy Sauce Use tamari for gluten-free or coconut aminos for soy-free.
  • 0.25 cup Brown Sugar Coconut sugar can be used as an alternative.
  • 0.75 cup Water Divided into two portions for sauce thickening.
  • 2 tablespoons Honey Maple syrup can be used for a vegan option.
  • 3 cloves Garlic, minced
  • 1 teaspoon Fresh Ginger, grated
  • 2 tablespoons Corn Starch A thickening agent for the sauce.
  • 1 tablespoon Orange Zest Optional for a classic teriyaki flavor.
For the Stir Fry
  • 1 lb Ground Turkey Can interchange with ground chicken or beef.
  • 2 teaspoons Sesame Oil Olive oil can be used as a substitute.
  • 3 cups Broccoli Florets Fresh or frozen.
  • 1 small Onion, diced
  • 1 cup Shredded Carrots
  • Salt To taste.
  • Pepper To taste.

Equipment

  • wok
  • Saucepan
  • Mixing Bowl

Method
 

Step-by-Step Instructions
  1. In a small saucepan, combine ¾ cup water, ¼ cup soy sauce, ¼ cup brown sugar, 2 tablespoons honey, 3 minced garlic cloves, and 1 teaspoon grated ginger. Heat over medium-high until the mixture reaches a low boil, stirring occasionally.
  2. While the sauce is heating, whisk ¼ cup of water with 2 tablespoons of corn starch in a separate bowl until smooth. Once the sauce is boiling, slowly stir this corn starch mixture into the bubbling concoction. Allow it to thicken, which should take about 2-3 minutes.
  3. In a large wok or skillet, heat 2 teaspoons of sesame oil over medium-high heat. Once hot, add 1 diced onion and sauté for 2-3 minutes until softened and translucent.
  4. Next, introduce 1 pound of ground turkey to the wok. Break it apart with a spatula, cooking for about 7-10 minutes until it’s fully browned.
  5. Add 3 cups of broccoli florets and 1 cup of shredded carrots to the turkey and onion. Stir-fry until they turn bright green and are tender yet crisp, about 3-4 minutes.
  6. Reduce the heat to low and pour in your prepared teriyaki sauce, stirring gently to coat all the ingredients. Allow everything to simmer for another 2-3 minutes.
  7. To serve, spoon the Ground Turkey Teriyaki Stir Fry over a bed of rice or your preferred base and enjoy!

Nutrition

Serving: 1servingsCalories: 350kcalCarbohydrates: 30gProtein: 28gFat: 12gSaturated Fat: 2gPolyunsaturated Fat: 4gMonounsaturated Fat: 6gCholesterol: 100mgSodium: 800mgPotassium: 700mgFiber: 3gSugar: 10gVitamin A: 500IUVitamin C: 50mgCalcium: 50mgIron: 2mg

Notes

Ensure the turkey is fully cooked to 165°F. Store leftovers in an airtight container for up to 3-4 days in the fridge or freeze for up to 3 months.

Tried this recipe?

Let us know how it was!

Savory Shrimp Rolls with Creamy Herb Mayo to Delight Your Tastebuds

The salty breeze, the sound of waves crashing, and the taste of seafood—the essence of a perfect summer day is captured in these East Coast Shrimp Rolls. As I savored my first bite, tender shrimp mingling with a creamy herb mayo, I was transported to a charming New England seaside shack. This easy recipe allows you to recreate that blissful moment in your own kitchen, making it ideal for lunch or dinner. Not only are these shrimp rolls a delicious way to enjoy seafood, but they also offer a quick and satisfying meal for those busy days when cooking feels like a chore. Ready to dive into this taste of the coast? Let’s roll up our sleeves and make something extraordinary together!

Why are these shrimp rolls a must-try?

Simplicity at its Finest: This recipe is straightforward, perfect for home cooks of any skill level.

Freshness Guaranteed: Enjoy a burst of flavor with tender shrimp combined with creamy herb mayo that elevates every bite.

Perfect for Any Occasion: Whether you’re hosting a summer barbecue or need a quick weeknight dinner, these shrimp rolls fit the bill.

Quick and Easy: With minimal prep time and simple ingredients, you’ll have a delightful meal ready in no time.

Endless Customization: Want a twist? Try adding jalapeños for heat or serve with crispy potato chips alongside. For other delicious seafood options, check out Garlic Parmesan Roasted Shrimp or Shrimp Scampi Pasta.

Every bite of these shrimp rolls transports you to the coast—who wouldn’t love that?

Shrimp Rolls Ingredients

Explore the simple yet vibrant components of these delightful shrimp rolls.

For the Shrimp Filling

  • Shrimp – Fresh or frozen shrimp provide the main flavor; if fresh is unavailable, flash-frozen shrimp is a suitable alternative.
  • Sea Salt – Enhances flavor and is necessary for boiling shrimp; avoid coarse salt for best results.
  • Lemon Juice – Fresh lemon juice adds brightness; it’s preferable for an improved flavor profile.
  • Celery – Fresh celery adds a satisfying crunch; omit for a simpler dressing.
  • Green Onions – Offers a mild onion flavor; can substitute with regular onions but use sparingly.
  • Dill, Chives, Parsley – Fresh herbs bring depth to the flavor; dried herbs can be a stand-in, but will differ in potency.
  • Capers – Provides a briny kick; can be omitted if unavailable or not to your taste.
  • Garlic – Fresh garlic adds depth; powdered garlic is a last resort for flavor.

For the Creamy Dressing

  • Mayonnaise – Acts as the base for your dressing; use regular or vegan mayo for a creamy binder.
  • Dijon Mustard – This adds tanginess; substitute with yellow mustard if necessary.
  • Red Wine Vinegar – Provides necessary acidity; apple cider vinegar can be a suitable substitute.
  • Paprika, Garlic Salt, Onion Powder, Cracked Pepper – These seasonings enhance the shrimp and dressing flavors together.

For the Buns

  • Hot Dog Buns – Provides structure for the roll; fresh or toasted buns add a crispy texture.
  • Butter – Essential for softening the buns; olive oil is a great dairy-free alternative.

Dive into these Shrimp Rolls, where each ingredient plays a crucial role in creating that delightful coastal experience!

Step‑by‑Step Instructions for Shrimp Rolls

Step 1: Prepare the Shrimp
Fill a large pot with water and add 2 teaspoons of sea salt along with the juice of half a lemon. Bring the water to a rolling boil over medium-high heat. Once boiling, it’s time to add the shrimp—be sure to use fresh or properly thawed shrimp. Cook them for about 2-3 minutes until they turn opaque, signaling they’re ready for the ice bath.

Step 2: Mix the Herb Mayo
While the shrimp cook, grab a medium bowl and combine the mayonnaise with chopped dill, chives, parsley, Dijon mustard, and red wine vinegar. Add the finely diced celery, green onions, and a sprinkle of garlic salt, onion powder, cracked pepper, and paprika for flavor. Stir the mixture until all ingredients are well incorporated, creating a creamy and flavorful dressing for your shrimp rolls.

Step 3: Ice Bath for the Shrimp
Immediately transfer the cooked shrimp from the boiling water to a large bowl filled with ice water. This ice bath halts the cooking process and ensures your shrimp remain tender, preventing a rubbery texture. Let them chill for about 5 minutes before draining them well and preparing for the next step.

Step 4: Toast the Buns
Preheat your broiler while you butter the insides and tops of each hot dog bun for the shrimp rolls. Place the buns on a baking sheet, cut side up, and broil them for 1-2 minutes until they’re golden brown and crispy. Keep a close eye on them, as broilers can vary in intensity, and you want to avoid burning.

Step 5: Combine Shrimp and Dressing
Once the shrimp have cooled, chop them into bite-sized pieces and add them to the bowl containing your herb mayo mixture. Gently fold the shrimp in until they are fully coated with the creamy dressing, allowing all those delicious flavors to meld perfectly for your shrimp rolls.

Step 6: Assemble the Shrimp Rolls
Carefully stuff the toasted hot dog buns with the shrimp and herb mayo mixture. As you fill each bun, feel free to add an extra squeeze of lemon juice and a sprinkle of sea salt and cracked pepper to enhance the fresh taste. Garnish with additional parsley for a vibrant finish to your East Coast Shrimp Rolls.

Make Ahead Options

These East Coast Shrimp Rolls are perfect for meal prep enthusiasts! You can prepare the herb mayo and chop your veggies up to 24 hours in advance, storing them in separate airtight containers in the refrigerator to maintain freshness. The shrimp can be cooked ahead and stored for up to 3 days in an airtight container, but do remember to cool them in an ice bath immediately after cooking to ensure they stay tender. When you’re ready to serve, simply mix the shrimp with the prepped mayo and fill the toasted buns. You’ll enjoy delightful, restaurant-quality shrimp rolls with minimal effort, making mealtime a breeze!

Expert Tips for Shrimp Rolls

  • Choose Quality Shrimp: Fresh shrimp is ideal; if unavailable, ensure any frozen shrimp is flash-frozen for best flavor and texture.
  • Avoid Overcooking: Cook shrimp just until opaque (2-3 minutes); overcooking results in a rubbery texture in your shrimp rolls.
  • Master the Ice Bath: Transfer shrimp immediately to the ice bath to halt cooking; this preserves their tenderness and juiciness.
  • Monitor the Broiler: Keep a close watch on the buns while they toast; a minute too long can turn your warm rolls into charred bits.
  • Customize the Flavor: Don’t be afraid to adjust the herb mayo to your taste; adding extra Dijon mustard or fresh herbs can elevate these shrimp rolls.

What to Serve with Easy East Coast Shrimp Rolls

Brighten your seafood experience with perfect accompaniments that enhance the flavors and textures of these scrumptious shrimp rolls.

  • Crispy Potato Chips: A satisfying crunch that complements the tender shrimp, crispy chips add a delightful texture for each bite.
  • Coleslaw: Creamy coleslaw offers a refreshing contrast with its tanginess, perfectly balancing the richness of the shrimp rolls.
  • Fresh Garden Salad: Tossed greens with vibrant veggies provide a light, fresh side that enhances the coastal vibe of your meal.
  • Corn on the Cob: Sweet, juicy corn pairs beautifully with shrimp, highlighting your dish’s maritime feel and bringing summer to your table.
  • Garlic Butter Bread: Soft, buttery bread infused with garlic creates a lovely dip for any leftover herb mayo, making every bite irresistible.
  • Lemonade: A refreshing glass of chilled lemonade adds a zesty brightness that echoes the citrus notes in the shrimp rolls, making for a delightful combination.
  • Mango Salsa: Sweet and zesty mango salsa brings a tropical flair, perfectly complementing the savory shrimp with its bold flavors.
  • French Fries: Golden, crispy fries provide a rustic charm and are great for dipping in that yummy herb mayo.
  • White Wine: A chilled glass of crisp Chardonnay elevates your meal, offering a light, fruity note that pairs superbly with seafood.

Shrimp Rolls Variations & Substitutions

Feel free to let your creativity shine with these flavorful twists to customize your shrimp rolls!

  • Spicy Kick: Add diced jalapeños or a pinch of cayenne pepper to the mayo for a zesty punch.

  • Dairy-Free Delight: Swap butter with olive oil and use vegan mayo for a completely dairy-free option.

  • Gluten-Free: Choose gluten-free hot dog buns to accommodate dietary restrictions without sacrificing flavor.

  • Creamy Avocado: Mix in diced avocado with the shrimp for an extra creamy and rich texture. It blends beautifully with the herb mayo!

  • Fresh Crunch: Toss in diced bell peppers alongside celery for an added layer of crunch and color.

  • Herb Extra: Experiment with different herbs like tarragon or basil alongside the dill for a unique flavor profile. Each herb brings its own personality to the dish!

  • Citrus Twist: Add a splash of orange juice to the dressing for a delightful citrus twist that brightens every bite.

  • Wild Seafood Swap: Replace shrimp with lobster, crab, or even grilled scallops for an elevated seafood experience. Perfect for those days when you’re feeling a bit extravagant!

Don’t forget to serve your shrimp rolls with a side of crispy potato chips or a fresh salad to round out this delicious meal. You might also want to check out some delightful recipes like Shrimp Avocado Bowls for more inspiration!

How to Store and Freeze Shrimp Rolls

Fridge: Store any leftover shrimp mixture in an airtight container for up to 2 days to keep it fresh and flavorful.

Freezer: For longer storage, you can freeze the shrimp mixture in a freezer-safe container for up to 3 months. Just remember to thaw it in the fridge overnight before using it.

Buns: It’s best to keep the hot dog buns separate and stored at room temperature for up to 2 days. If freezing, wrap them tightly to prevent freezer burn.

Reheating: When ready to enjoy your shrimp rolls again, gently reheat the shrimp mixture on the stovetop over low heat until warmed through. Avoid microwaving as it can rubberize the shrimp.

East Coast Shrimp Rolls Recipe FAQs

What kind of shrimp should I use for the rolls?
I recommend using fresh shrimp for the best flavor and texture. If fresh shrimp isn’t available, opt for flash-frozen shrimp for your East Coast Shrimp Rolls; they retain their flavor well and are a suitable alternative. Just make sure to thaw them properly before cooking.

How should I store leftover shrimp rolls?
Any leftover shrimp mixture can be stored in an airtight container in the refrigerator for up to 2 days. Make sure to keep the shrimp and the buns separate; the buns are best eaten fresh. If you need to store them, do so in a cool, dry place for up to 2 days.

Can I freeze the shrimp mixture?
Absolutely! You can freeze the shrimp mixture in a freezer-safe container for up to 3 months. When you’re ready to enjoy it again, simply thaw it in the fridge overnight. You can warm it gently on the stovetop over low heat, avoiding the microwave to prevent rubbery shrimp.

What if my shrimp turn out rubbery?
To avoid rubbery shrimp, make sure not to overcook them. Cook shrimp just until they turn opaque, which typically takes about 2-3 minutes in boiling water. Additionally, transferring them immediately to an ice bath is essential to halt the cooking process. This step ensures your shrimp remain tender and enjoyable.

Are there any dietary considerations for this recipe?
Yes, for those with dietary restrictions, you can easily adapt the recipe. Use gluten-free hot dog buns if needed, and substitute the regular mayonnaise with a vegan version for a dairy-free option. If you have seafood allergies, this recipe might not be suitable, but you can consider using chicken or tofu for a different filling.

Can I prepare the dressing ahead of time?
Very much so! I often recommend prepping the herb mayo the day before to allow the flavors to meld beautifully. Just store it in an airtight container in the fridge, and you’ll have a flavorful base ready when you cook your shrimp.

Shrimp Rolls

Savory Shrimp Rolls with Creamy Herb Mayo to Delight Your Tastebuds

These Shrimp Rolls are a perfect blend of tender shrimp and creamy herb mayo, encapsulating the essence of a delightful summer meal.
Prep Time 15 minutes
Cook Time 5 minutes
Chilling Time 5 minutes
Total Time 25 minutes
Servings: 4 rolls
Course: Lunch
Cuisine: American
Calories: 300

Ingredients
  

For the Shrimp Filling
  • 1 pound shrimp Fresh or frozen, flash-frozen if fresh is unavailable.
  • 2 teaspoons sea salt For boiling shrimp.
  • 1 tablespoon lemon juice Preferably fresh.
  • 1 cup celery Finely chopped, optional.
  • 2 tablespoons green onions Chopped, can substitute with regular onions.
  • 2 tablespoons fresh dill Or dried herbs as a substitute.
  • 1 tablespoon chives
  • 1 tablespoon parsley
  • 1 tablespoon capers Can be omitted.
  • 2 cloves garlic Minced, or powdered as a last resort.
For the Creamy Dressing
  • 1 cup mayonnaise Regular or vegan.
  • 1 tablespoon Dijon mustard Or yellow mustard as a substitute.
  • 1 tablespoon red wine vinegar Apple cider vinegar can substitute.
  • 1 teaspoon paprika
  • 1 teaspoon garlic salt
  • 1 teaspoon onion powder
  • 1 teaspoon cracked pepper
For the Buns
  • 4 pieces hot dog buns Fresh or toasted.
  • 2 tablespoons butter Or olive oil as a dairy-free alternative.

Equipment

  • Large pot
  • medium bowl
  • Baking Sheet

Method
 

Shrimp Preparation
  1. Fill a large pot with water and add 2 teaspoons of sea salt along with the juice of half a lemon. Bring the water to a rolling boil over medium-high heat.
  2. Once boiling, add the shrimp and cook for about 2-3 minutes until they turn opaque.
  3. Transfer the cooked shrimp to a large bowl filled with ice water to halt the cooking process. Let them chill for about 5 minutes.
Herb Mayo Preparation
  1. In a medium bowl, combine mayonnaise with chopped dill, chives, parsley, Dijon mustard, and red wine vinegar.
  2. Add finely diced celery, green onions, garlic salt, onion powder, cracked pepper, and paprika. Stir until well incorporated.
Bun Preparation
  1. Preheat your broiler while buttering the insides and tops of each hot dog bun.
  2. Place the buns on a baking sheet, cut side up, and broil for 1-2 minutes until golden brown.
Assembly
  1. Chop the cooled shrimp into bite-sized pieces and add them to the herb mayo mixture. Gently fold until coated.
  2. Stuff the toasted buns with the shrimp mixture and garnish with extra lemon juice, sea salt, and cracked pepper.

Nutrition

Serving: 1rollCalories: 300kcalCarbohydrates: 30gProtein: 20gFat: 15gSaturated Fat: 3gPolyunsaturated Fat: 1gMonounsaturated Fat: 8gCholesterol: 60mgSodium: 600mgPotassium: 250mgFiber: 1gSugar: 3gVitamin A: 500IUVitamin C: 5mgCalcium: 50mgIron: 1mg

Notes

Leftover shrimp mixture can be stored in an airtight container in the fridge for up to 2 days. Buns should be kept separate at room temperature.

Tried this recipe?

Let us know how it was!

Savory Shredded Kale and Brussels Sprout Salad with Lemon Dressing

There’s something invigorating about a salad that cradles a colorful mix of textures and flavors, and my Shredded Kale and Brussels Sprout Salad with Lemon Dressing does just that. Combining the earthy crunch of Brussels sprouts with the robust feeling of kale, this salad is not only healthy but also a feast for the eyes and palate. It comes together in no time and pairs beautifully with almost any main dish, making it perfect for both busy weeknights and festive dinner parties. With a zesty lemon dressing that revitalizes your greens and toasty almonds for that satisfying crunch, this salad is a delightful reminder that healthy eating doesn’t have to be boring. Are you ready to brighten up your meal routine?

Why is this salad a must-try?

Vibrant, Fresh Ingredients: This Shredded Kale and Brussels Sprout Salad embraces nutritious greens, bringing earthy flavors to the forefront.

Zesty Dressing: The homemade lemon dressing adds a tangy brightness that beautifully enhances the crunchy textures of the salad.

Quick Preparation: In just a few minutes, you can whip up this salad, making it a time-saving option for busy days or unexpected guests.

Versatile Pairing: Whether served alongside grilled fish or as a hearty vegetarian main, it fits effortlessly into any meal.

Crowd-Pleasing Flavor: With its delightful crunch from almonds and fresh taste, this salad is sure to become a favorite at your gatherings.

Elevate your next meal experience with this remarkable salad, and if you’re in the mood for more delicious options, check out the Honeybun Carrot Cake or the refreshing Blt Chicken Salad.

Shredded Kale and Brussels Sprout Salad Ingredients

For the Dressing

  • Dijon Mustard – Adds tanginess to the dressing; you can substitute with whole grain mustard for a different texture.
  • Lemon Juice – Provides acidity that brightens the salad; fresh lemon juice is best for ultimate flavor.
  • Lemon Zest – Enhances the lemon flavor; ensure to zest before juicing to retain the oils from the skin.
  • Honey or Agave Nectar – Sweetens the dressing to balance acidity; maple syrup works as a vegan alternative.
  • Olive Oil – Acts as the base of the dressing, contributing richness; you can use avocado oil for a lighter taste.

For the Salad

  • Lacinato Kale – Provides a sturdy base for the salad; regular kale can be used but may require massaging to soften.
  • Brussels Sprouts – Adds crunch and mild flavor; shredding them finely yields a pleasant texture.
  • Sliced Almonds – Delivers a nutty crunch; pecans or walnuts are great alternatives, and toasting them enhances flavor.
  • Grated Parmesan or Pecorino Cheese – Introduces creaminess; for a dairy-free option, use feta or nutritional yeast.

Embrace the delightful crunch and fresh flavors of this Shredded Kale and Brussels Sprout Salad with Lemon Dressing and treat your taste buds today!

Step‑by‑Step Instructions for Shredded Kale and Brussels Sprout Salad with Lemon Dressing

Step 1: Prepare the Dressing
In a small bowl, whisk together minced shallots, Dijon mustard, fresh lemon juice, and lemon zest until well combined. Gradually drizzle in olive oil while continuously whisking until the dressing emulsifies into a smooth, creamy texture. Taste and season with salt and pepper, adjusting to your preference. Set the dressing aside to allow the flavors to meld.

Step 2: Shred the Greens
Using a sharp knife or mandoline, carefully shred the Lacinato kale and Brussels sprouts into fine pieces. Aim for thin, even strips for a delicate texture that blends well in your salad. Place the shredded greens into a large mixing bowl, ensuring they are light and airy for optimal showcasing of your vibrant salad.

Step 3: Toast the Almonds
In a dry sauté pan over low heat, add the sliced almonds. Stir them frequently for about 5-7 minutes, or until they turn golden brown and fragrant. Keep a close eye to prevent burning. Once toasted, remove from heat and let them cool slightly before adding them to the salad for that essential nutty crunch.

Step 4: Assemble the Salad
Add the shredded Lacinato kale, shredded Brussels sprouts, and cooled toasted almonds to the mixing bowl. Drizzle your prepared dressing generously over the greens, and toss everything together well for an even distribution. The colors and textures should come alive as the dressing lightly coats each ingredient.

Step 5: Add Cheese
Sprinkle the grated Parmesan, or your choice of cheese alternative, over the top of the salad. Gently toss the salad once more, ensuring the cheese is evenly distributed throughout. This will enhance the creaminess and flavor, balancing beautifully with the refreshing dressing in your Shredded Kale and Brussels Sprout Salad.

Step 6: Serve Immediately
Transfer your vibrant Shredded Kale and Brussels Sprout Salad with Lemon Dressing to a serving platter or bowl, making it visually appealing. Serve right away for the freshest taste and crunch. This delightful salad pairs wonderfully with a variety of main dishes or can stand alone as a healthy, satisfying meal.

How to Store and Freeze Shredded Kale and Brussels Sprout Salad

Fridge: Store any leftovers in an airtight container for up to 3 to 5 days. It’s best to keep the dressing separate until ready to eat to maintain the salad’s fresh crunch.

Freezer: Freezing is not recommended for this salad, as the greens can become soggy when thawed. Enjoy your Shredded Kale and Brussels Sprout Salad fresh!

Reheating: If you’ve prepared the salad in advance, simply mix in fresh dressing before serving to revive its flavors.

Expert Tips for Shredded Kale and Brussels Sprout Salad

  • Choose Fresh Greens: Opt for crisp, vibrant kale and Brussels sprouts; wilted greens can lead to a sad salad.

  • Proper Shredding: Use a sharp knife or mandoline for finely shredding the Brussels sprouts; a rough chop can affect the texture in your Shredded Kale and Brussels Sprout Salad.

  • Drizzle Gently: When adding dressing, start with a small amount and gradually increase; adding too much can overwhelm the delicate greens.

  • Taste Test: Always taste and adjust seasoning before serving; fresh lemon juice varies, and you might need more salt or acidity.

  • Storing Leftovers: Keep leftovers in an airtight container and dress just before serving; this preserves the crispness of the salad for days.

Shredded Kale and Brussels Sprout Salad Variations

Feel free to put your personal spin on this delicious salad, and let your creativity shine through with these delightful variations!

  • Nut-Free: Replace almonds with sunflower seeds to maintain crunchiness while keeping it nut-free. The seeds add a wonderful earthy flavor that complements the greens beautifully.

  • Spicy Kick: Add freshly chopped jalapeños or a pinch of red pepper flakes to your salad for an exciting heat. This adjustment effortlessly elevates the flavor profile and adds a surprising twist that spice lovers will appreciate.

  • Fruity Fusion: Toss in some diced apples or pears for a hint of sweetness, balancing the bitterness of the kale. This fresh addition makes the salad even more refreshing and perfect for any season.

  • Herb-Infused: Mix in finely chopped fresh herbs like dill or cilantro to enhance the salad’s aroma and flavor. The right herbs can lift the dish to new heights, introducing a playful taste that’s aromatic and vibrant.

  • Protein Boost: Add cooked quinoa or chickpeas for extra protein, transforming the salad into a hearty meal. With this nutritious addition, you won’t just enjoy crunch, but a fulfilling dish that leaves you satisfied.

  • Tropical Twist: Incorporate shredded coconut or diced mango to introduce a tropical flair that contrasts beautifully with the savory dressing. This unexpected combination will transport you to sun-soaked beaches with each bite.

  • Creamy Upgrade: For a richer experience, mix in creamy avocado slices either on top or mashed into the dressing. This enhances the texture and provides a sumptuous richness that will make your taste buds dance.

  • Grain Variation: Substitute the salad base with arugula for a peppery flavor or toss in some cooked farro for an unexpected chewy texture. This adds another layer, creating a fusion of flavors that is delightful.

As you delve into these variations, your Shredded Kale and Brussels Sprout Salad with Lemon Dressing becomes a canvas for your imagination. While you’re at it, why not serve this salad alongside a comforting dish like Hamburger Steak with Country Gravy or a delightful dessert like Chocolate Granola Cups with Peanut Butter Filling? It’s a wonderful way to mix and match your culinary creations!

Make Ahead Options

This Shredded Kale and Brussels Sprout Salad with Lemon Dressing is an excellent choice for meal prep busy cooks will love! You can prepare the dressing up to 4 days in advance, storing it in an airtight container in the refrigerator. Additionally, you can pre-shred the kale and Brussels sprouts, and toast the almonds up to 24 hours ahead of time, ensuring they stay fresh by keeping them in separate airtight containers. When you’re ready to serve, simply combine the prepped ingredients in a bowl, add the dressing, toss everything together, and enjoy a delicious, stress-free salad that tastes just as vibrant as when freshly made!

What to Serve with Shredded Kale and Brussels Sprout Salad with Lemon Dressing

Infuse your dinner table with a colorful symphony of flavors that elevate this vibrant salad into a memorable meal.

  • Roasted Chicken: The savory, tender chicken contrasts beautifully with the crispness of the salad, creating a well-rounded dining experience.

  • Grilled Salmon: The rich, buttery flavor of grilled salmon pairs effortlessly with the zesty lemon dressing, enhancing the freshness of the greens.

  • Quinoa Pilaf: A fluffy quinoa pilaf introduces hearty grains that complement the crunch of the salad, making each bite a delightful blend of textures.

  • Stuffed Bell Peppers: These vibrant peppers, filled with grains and spices, echo the salad’s healthful theme while providing a satisfying main course.

  • Herbaceous Couscous: Light and fragrant couscous flavored with fresh herbs makes a lovely side that harmonizes with the crunchy greens in your salad.

  • Limoncello Spritz: The citrusy notes of this refreshing drink mirror the lemon in the salad, providing a bright, palate-cleansing effect.

Feel free to mix and match these pairings to craft a full meal that resonates with healthy, home-cooked goodness. Enjoy!

Shredded Kale and Brussels Sprout Salad with Lemon Dressing Recipe FAQs

How do I select the best kale and Brussels sprouts for this salad?
Absolutely! When choosing kale, look for dark green, crisp leaves without any wilting or yellowing. For Brussels sprouts, select firm ones that are tightly closed without any dark spots or blemishes. This ensures a fresher and crunchier salad!

What is the best way to store leftovers of this salad?
Very! You can store any leftover Shredded Kale and Brussels Sprout Salad in an airtight container in the refrigerator for up to 3 to 5 days. To keep it fresh and crunchy, it’s best to keep the dressing separate until you’re ready to serve it.

Can I freeze the Shredded Kale and Brussels Sprout Salad?
No, freezing is not recommended for this salad. The greens will lose their texture and become soggy when thawed. Enjoy this vibrant salad fresh for the best flavor and crunch!

What should I do if my dressing is too tangy or salty?
If you find the dressing too tangy, you can balance it by adding a teaspoon of honey or agave nectar to soften the acidity. If it’s too salty, try adding a bit more olive oil or a splash of water to dilute it to your preferred taste. It’s all about finding that perfect harmony!

Are there any allergy considerations I should be aware of?
Absolutely! This salad contains nuts (almonds) and dairy (Parmesan or cheese alternative), so be aware of any nut allergies or lactose intolerance. For a nut-free alternative, consider using sunflower seeds, and for a dairy-free option, nutritional yeast works wonderfully to add some cheesy flavor without the dairy.

Can I prepare the dressing in advance?
Yes, indeed! You can prepare the dressing up to four days in advance. Store it in an airtight container in the refrigerator, and be sure to whisk it well before using to bring back all those delicious flavors. It’s a great time-saver for busy nights!

Shredded Kale and Brussels Sprout Salad with Lemon Dressing

Savory Shredded Kale and Brussels Sprout Salad with Lemon Dressing

This Shredded Kale and Brussels Sprout Salad with Lemon Dressing is a vibrant mix of textures and flavors, perfect for any meal.
Prep Time 15 minutes
Cook Time 7 minutes
Total Time 22 minutes
Servings: 4 servings
Course: Salad
Cuisine: American
Calories: 200

Ingredients
  

Dressing Ingredients
  • 1 tablespoon Dijon Mustard Substitute with whole grain mustard for a different texture.
  • 2 tablespoons Lemon Juice Fresh lemon juice is best for ultimate flavor.
  • 1 teaspoon Lemon Zest Ensure to zest before juicing.
  • 1 tablespoon Honey or Agave Nectar Maple syrup works as a vegan alternative.
  • 4 tablespoons Olive Oil Avocado oil can be used for a lighter taste.
Salad Ingredients
  • 4 cups Lacinato Kale Regular kale can be used but may require massaging.
  • 2 cups Brussels Sprouts Shred finely for a pleasant texture.
  • 1/2 cup Sliced Almonds Pecans or walnuts are great alternatives; toasting enhances flavor.
  • 1/4 cup Grated Parmesan or Pecorino Cheese For dairy-free, use feta or nutritional yeast.

Equipment

  • Mixing Bowl
  • whisk
  • Knife
  • mandoline
  • sauté pan

Method
 

Preparation
  1. In a small bowl, whisk together minced shallots, Dijon mustard, fresh lemon juice, and lemon zest until well combined. Gradually drizzle in olive oil while continuously whisking until emulsified.
  2. Using a sharp knife or mandoline, shred the Lacinato kale and Brussels sprouts into fine pieces. Place in a large mixing bowl.
  3. In a dry sauté pan over low heat, toast sliced almonds for 5-7 minutes until golden brown, stirring frequently. Let cool before adding to salad.
  4. Add the shredded kale, Brussels sprouts, and toasted almonds to the mixing bowl. Drizzle with prepared dressing and toss well.
  5. Sprinkle grated cheese over the top, gently toss once more to evenly distribute.
  6. Transfer to a serving platter or bowl. Serve immediately for the freshest taste.

Nutrition

Serving: 1bowlCalories: 200kcalCarbohydrates: 12gProtein: 6gFat: 15gSaturated Fat: 2gPolyunsaturated Fat: 3gMonounsaturated Fat: 10gCholesterol: 5mgSodium: 150mgPotassium: 300mgFiber: 4gSugar: 2gVitamin A: 1500IUVitamin C: 90mgCalcium: 150mgIron: 2mg

Notes

Opt for crisp, vibrant greens and taste to adjust seasoning before serving. Store leftovers in an airtight container for up to 3-5 days, dress just before serving.

Tried this recipe?

Let us know how it was!

Stay Connected

Get recipes via email: