Get my cookbooks

Irresistible Traditional Moussaka Recipe to Savor at Home

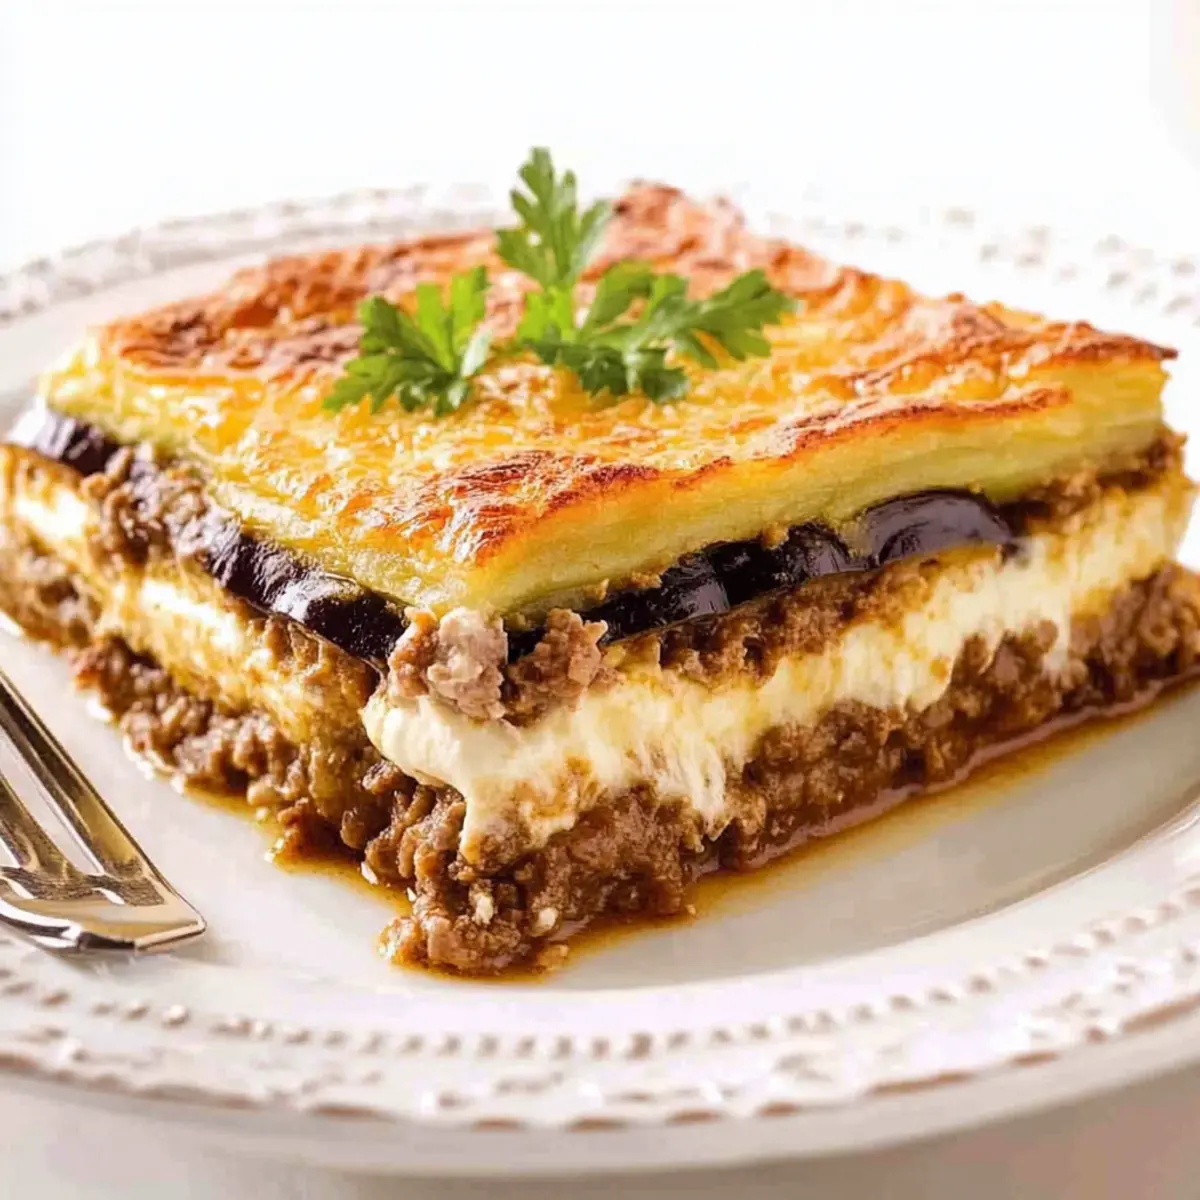
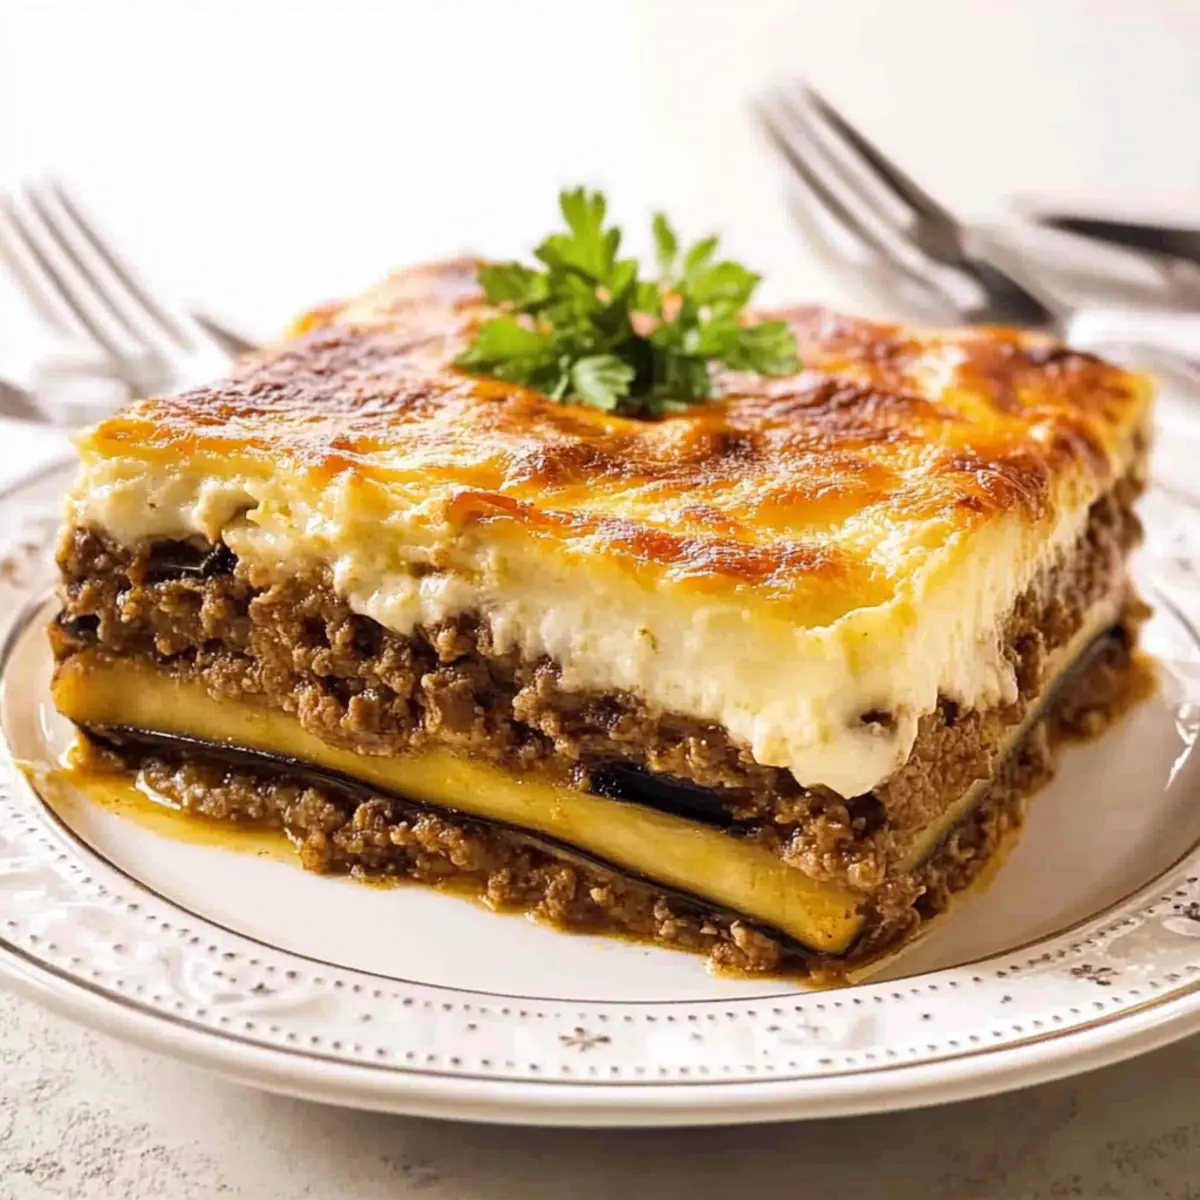
The aroma of baked eggplant and spiced meat simmering in rich tomato sauce transports me straight to a sun-soaked terrace overlooking the Aegean Sea. With this Traditional Moussaka recipe, you can recreate that essence in your own kitchen, bringing a slice of Greece to your dinner table. This dish is not only a crowd-pleaser but also surprisingly easy to prepare, making it perfect for those special family gatherings or cozy weeknight dinners. Imagine savoring layer upon layer of tender eggplant, savory minced meat, and a creamy béchamel, all bringing comfort and satisfaction with every bite. Plus, with simple variations, you can cater to both traditionalists and vegan diners alike. Ready to embark on this delicious culinary journey? Let’s dive into making your own Moussaka masterpiece!

Why is Moussaka so beloved?

Authenticity: This Traditional Moussaka recipe captures the heart of Greek cuisine, bringing genuine flavors right to your table.
Ease of Preparation: With simple steps, even novice cooks can impress family and friends.
Versatile Options: You’ll love the ability to customize for all dietary preferences, including delicious vegan alternatives.
Crowd-Pleasing Appeal: A guaranteed hit at gatherings, its hearty layers delight palates young and old.
Cultural Experience: Each bite tells a story of Greek tradition, making meals memorable even beyond the dinner plate.
Explore a variety of serving suggestions to elevate your experience, including a refreshing Greek salad or tzatziki for dipping. Enjoy the journey as you create this delightful dish!

Traditional Moussaka Ingredients

For the Eggplant and Potatoes

  • Eggplants (Aubergines) – Essential for layers and moisture; choose large, uniform sizes for even cooking.
  • Potatoes – Creates a stable base; optional but recommended for authentic texture and flavor.

For the Meat Sauce

  • Ground Meat (Beef or Lamb) – Provides richness and depth; traditional recipes use lamb, but beef or a mix works too. Vegan alternative: lentils or mushroom mix.
  • Onions – Adds sweetness and builds the flavor base; use yellow or white onions for best results.
  • Garlic – Freshly minced enhances the aroma and depth; don’t skip this key ingredient!
  • Tomatoes (Chopped or Puree) – Acts as a flavorful liquid base; consider using fresh or canned without added sodium.
  • Red Wine – Enhances flavor; omit for a non-alcoholic option or substitute with broth.
  • Olive Oil – Ideal for cooking and lightly coating veggies before baking; opt for extra-virgin for the best taste.

For the Béchamel Sauce

  • Butter – The base for the sauce; melt before adding flour for a smooth consistency.
  • Flour – Thickens the béchamel; use gluten-free flour if needed for a gluten-free traditional moussaka.
  • Milk – Adds creaminess; gradually whisk in for smooth texture; lactose-free milk can be used too.
  • Cheese (Parmesan or Gruyère) – Brings richness to the béchamel; substitute with vegan cheese if desired.
  • Egg Yolks – Adds thickness and richness; omit for a vegan béchamel.
  • Nutmeg – Elevates the flavor beautifully; use sparingly to avoid overwhelming the dish.

Now that you have all the essential components, you’re ready to bring this traditional Moussaka to life!

Step‑by‑Step Instructions for Traditional Moussaka

Step 1: Prepare the Eggplants
Begin by slicing the eggplants into 1/2-inch thick rounds and sprinkling them generously with salt. Allow them to sit for about 30 minutes to draw out any bitterness. Afterward, rinse the slices under cold water, pat them dry with a kitchen towel, and set aside to prepare for baking.

Step 2: Bake Potatoes and Eggplants
Preheat your oven to 180°C (350°F). Next, toss the sliced potatoes and eggplant with olive oil, a pinch of salt, and pepper. Spread them in a single layer on a baking sheet and bake for approximately 20 minutes, or until they are slightly tender and just beginning to brown. This step is essential for achieving a flavorful texture in your traditional moussaka.

Step 3: Make the Meat Sauce
In a large skillet, heat a drizzle of olive oil over medium heat. Sauté finely chopped onions and minced garlic for about 5 minutes until they soften and turn translucent. Add the ground meat, season with salt and pepper, and cook until browned, about 10 minutes. Once browned, deglaze the pan with red wine, stirring to combine, then add in the chopped tomatoes. Let the mixture simmer for 15-20 minutes until it thickens.

Step 4: Prepare the Béchamel Sauce
In a saucepan over medium heat, melt the butter, then whisk in the flour to form a roux, cooking for about 2 minutes. Gradually add in the milk, whisking continuously until it thickens to a creamy consistency, about 5-7 minutes. Stir in the cheese, nutmeg, and egg yolks off heat, ensuring a rich béchamel sauce perfect for layering in your traditional moussaka.

Step 5: Assemble the Moussaka
In a greased baking dish, start layering your assembled moussaka. Begin with an even layer of baked potatoes, followed by half of the roasted eggplant slices, and then the meat sauce. Repeat the layering with the remaining eggplants, finishing with the creamy béchamel sauce spread thick on top.

Step 6: Bake
Place the assembled moussaka in your preheated oven and bake uncovered for about 60 minutes, or until the top is a beautiful golden brown and bubbly. The baking time allows all the flavors to meld beautifully, resulting in that classic, comforting taste of traditional moussaka that’s hard to resist.

Expert Tips for Traditional Moussaka

  • Perfect Eggplant Prep: Salt and let eggplants sit to draw out bitterness, ensuring a more pleasant flavor and texture in your traditional moussaka.

  • Layer with Care: When assembling, make sure to press down lightly on each layer to eliminate air pockets, resulting in a beautifully structured dish that holds together when served.

  • Béchamel Consistency: Whisk vigorously while adding milk to avoid lumps in your béchamel sauce; it should reach a custard-like thickness for the best topping.

  • Cooling Time: Allow your assembled moussaka to rest for at least 15 minutes before cutting; this helps the layers set and enhances flavor melding.

  • Storage Savvy: Store leftovers in an airtight container for up to 3 days. Reheat gently in the oven to maintain that warming comfort, pivotal to traditional moussaka.

How to Store and Freeze Traditional Moussaka

Fridge: Refrigerate leftovers in an airtight container for up to 3 days to maintain freshness and flavor.

Freezer: Freeze portions of moussaka in airtight freezer bags for up to 3 months. Thaw overnight in the refrigerator before reheating.

Reheating: Reheat in the oven at 180°C (350°F) for about 25-30 minutes. You can also microwave individual portions, ensuring they are heated thoroughly.

Assembly Tip: When freezing, it’s best to do so before baking, allowing you to enjoy freshly baked traditional moussaka on your schedule.

Traditional Moussaka Variations & Substitutions

Feel free to get creative with this Traditional Moussaka recipe; exciting twists await your kitchen adventures!

  • Gluten-Free: Substitute traditional flour in the béchamel with cornstarch or a gluten-free flour blend to ensure everyone can enjoy this dish.

  • Vegan Delight: Swap out the ground meat for a savory lentil mix or sautéed mushrooms, along with a creamy nut-based béchamel for a plant-based treat that everyone will love.

  • Lower-Carb: Replace potatoes with thinly sliced zucchini for a lighter twist that still retains that delicious layered essence. Zucchini will add moisture and a touch of sweetness.

  • General Flavor Boost: Add a sprinkle of fresh herbs like oregano or thyme into your meat sauce to elevate flavor profiles and infuse that classic Mediterranean aroma.

  • Cheesy Goodness: Stir some additional cheese into the béchamel, such as feta or ricotta, for a richer and more decadent sauce that complements the layers beautifully.

  • Spice It Up: For a bit of heat, mix in some crushed red pepper flakes or diced jalapeños with your meat sauce—we all love a little kick, especially when paired with the creaminess of the béchamel!

  • Nutty Twist: Incorporate toasted pine nuts or almonds within the layers for a delightful crunch and an unexpected surprise in each bite.

  • Layered Vegetables: Mix in some spinach or kale between layers, adding flavor and nutrition while making your moussaka vibrant and colorful.

Each variation can lead to a new family favorite, and while you’re here, don’t hesitate to serve it alongside a refreshing Greek salad or a cool bowl of tzatziki for dipping. Enjoy the adventure of creating your perfect Moussaka!

What to Serve with Traditional Moussaka?

Imagine a table brimming with vibrant flavors that perfectly complement the heartiness of your moussaka, creating a delightful feast.

  • Greek Salad: A refreshing mix of cucumbers, tomatoes, and feta adds a crisp and tangy counterpoint to the rich moussaka.
  • Tzatziki Sauce: This creamy yogurt-based dip, infused with garlic and cucumbers, brings a cooling element that balances the dish’s warmth.
  • Pita Bread: Soft and warm pita is perfect for scooping up moussaka and tzatziki, adding a fun, interactive element to your meal.
  • Roasted Vegetables: Seasonal roasted vegetables provide a lovely caramelization and natural sweetness, enhancing the layered flavors of the moussaka.
  • Lemon Rice: Fluffy rice tossed with lemon zest adds a bright zing that beautifully harmonizes with the rich béchamel sauce.
  • Wine Pairing: A glass of dry red wine, like a nice Chianti, complements the savory notes of the meat sauce, enriching your dining experience.
  • Baklava for Dessert: End your meal with this sweet, flaky pastry. Its honey and nut sweetness perfectly contrasts the savory moussaka.
  • Grilled Halloumi: Crispy on the outside and soft within, the salty cheese makes a heavenly addition that echoes Mediterranean flavors.
  • Olives and Marinated Feta: These bites will enhance the meal’s Mediterranean essence while offering a delightful texture contrast through their briny goodness.

Make Ahead Options

These Traditional Moussaka are perfect for busy home cooks who want to save time without sacrificing flavor! You can prepare the eggplants and béchamel sauce up to 24 hours in advance; slice and salt the eggplants, then refrigerate them in an airtight container to prevent browning. The béchamel can also be made ahead and stored in the fridge. Cook the meat sauce and assemble your moussaka up to 3 days before baking; cover tightly and refrigerate. When you’re ready to serve, simply bake the moussaka straight from the fridge, adding an extra 10-15 minutes to the cooking time to ensure it’s heated through just as delicious as when freshly made!

Traditional Greek Moussaka Recipe FAQs

What kind of eggplants should I use?
When selecting eggplants for your traditional moussaka, look for large, uniform-sized eggplants, which provide an even cooking texture. Ensure they are firm and shiny, avoiding any dark spots or blemishes. If you’re looking for a lighter option, zucchini makes a great substitution!

How should I store leftovers?
Refrigerate any leftover moussaka in an airtight container for up to 3 days. This helps maintain its flavors and textures, allowing you to enjoy it just like the first serving. Simply reheat in the oven for a delightful experience.

Can I freeze traditional moussaka?
Absolutely! For optimal results, freeze your assembled moussaka before baking. Wrap it in plastic wrap and then foil to protect it from freezer burn, allowing it to stay fresh for up to 3 months. When you’re ready to enjoy, thaw it overnight in the refrigerator and then bake at 180°C (350°F) for about 60 minutes, until bubbling and golden!

What if my béchamel sauce gets lumpy?
If your béchamel sauce develops lumps, don’t worry! Simply whisk vigorously while gradually adding in the milk to break down the lumps. If it remains lumpy, you can also blend the mixture with an immersion blender until smooth. This process ensures a velvety consistency perfect for topping your moussaka!

Is this traditional moussaka suitable for allergies?
For those with gluten allergies, you can easily make a gluten-free traditional moussaka by substituting regular flour in the béchamel with cornstarch or a gluten-free flour blend. Additionally, you can use plant-based cheese and omit the egg yolks for a vegan variation without compromising flavor!

How can I incorporate more vegetables?
You can boost the vegetable content of your traditional moussaka by adding layers of spinach, kale, or even bell peppers. Not only does this enhance the nutrition, but it also adds delightful flavors to your dish. Just sauté them briefly before layering to maintain their color and texture!

Traditional Moussaka

Irresistible Traditional Moussaka Recipe to Savor at Home

Discover the flavors of the Aegean with this traditional moussaka recipe, featuring layers of eggplant, meat, and béchamel.
Prep Time 30 minutes
Cook Time 1 hour 25 minutes
Cooling Time 15 minutes
Total Time 2 hours 10 minutes
Servings: 6 slices
Course: Casserole
Cuisine: Greek
Calories: 400

Ingredients
  

For the Eggplant and Potatoes
  • 2 Eggplants (Aubergines) Choose large, uniform sizes for even cooking.
  • 2 Potatoes Optional but recommended for texture and flavor.
For the Meat Sauce
  • 500 grams Ground Meat (Beef or Lamb) Traditional recipes use lamb, beef or a mix works too.
  • 1 medium Onion Use yellow or white onions for best results.
  • 2 cloves Garlic Freshly minced enhances aroma and depth.
  • 400 grams Tomatoes (Chopped or Puree) Use fresh or canned without added sodium.
  • 150 ml Red Wine Omit for non-alcoholic option or substitute with broth.
  • 3 tbsp Olive Oil Opt for extra-virgin for the best taste.
For the Béchamel Sauce
  • 100 grams Butter Melt before adding flour.
  • 100 grams Flour Use gluten-free flour if needed.
  • 500 ml Milk Lactose-free milk can be used.
  • 100 grams Cheese (Parmesan or Gruyère) Substitute with vegan cheese if desired.
  • 2 large Egg Yolks Omit for a vegan béchamel.
  • 1 pinch Nutmeg Use sparingly to avoid overwhelming the dish.

Equipment

  • Oven
  • Skillet
  • baking dish
  • Saucepan

Method
 

Preparation
  1. Slice the eggplants into 1/2-inch thick rounds and sprinkle generously with salt. Let sit for 30 minutes to draw out bitterness.
  2. Rinse the slices under cold water, pat dry, and set aside.
  3. Preheat the oven to 180°C (350°F). Toss the sliced potatoes and eggplant with olive oil, salt, and pepper. Spread in a single layer on a baking sheet and bake for about 20 minutes until slightly tender.
  4. In a large skillet, heat olive oil over medium heat. Sauté chopped onions and minced garlic for 5 minutes until soft.
  5. Add the ground meat, season with salt and pepper, and cook until browned, about 10 minutes. Deglaze with red wine, then add chopped tomatoes. Let simmer for 15-20 minutes.
  6. In a saucepan, melt butter, then whisk in flour to form a roux. Gradually add milk, whisking continuously until thickened, about 5-7 minutes. Stir in cheese, nutmeg, and egg yolks off heat.
  7. In a greased baking dish, layer baked potatoes, half roasted eggplant, meat sauce, remaining eggplants, and top with béchamel sauce.
  8. Bake uncovered for about 60 minutes until top is golden brown and bubbly.

Nutrition

Serving: 1sliceCalories: 400kcalCarbohydrates: 30gProtein: 20gFat: 25gSaturated Fat: 10gPolyunsaturated Fat: 2gMonounsaturated Fat: 5gCholesterol: 80mgSodium: 600mgPotassium: 800mgFiber: 5gSugar: 6gVitamin A: 1000IUVitamin C: 10mgCalcium: 200mgIron: 2mg

Notes

Allow moussaka to rest for at least 15 minutes before cutting to enhance flavor melding.

Tried this recipe?

Let us know how it was!

Zesty Sumac Potato Salad That Will Refresh Your Plate

Stepping into my kitchen, the warm aroma of fresh herbs mingling with the zest of citrus transports me straight to the sun-drenched coasts of the Mediterranean. This Vibrant Sumac Potato Salad captures that essence, transforming the humble potato into a refreshing and light dish perfect for any gathering. What I love most is how quick it is to prepare—ideal for weeknight meals or unexpected guests. Plus, it’s vegan and gluten-free, making it a nutritious choice that everyone can enjoy. The tangy sumac marries beautifully with tender potatoes and crispy veggies, resulting in a colorful salad that feels downright luxurious. Curious to discover how to whip up this delightful dish?

Why is Sumac Potato Salad a Must-Try?

Bright, Refreshing Flavors: This salad brings together the vibrant zest of sumac with tender potatoes, creating a taste explosion that’s both light and satisfying.

Quick to Make: With minimal prep and cooking time, you’ll have a delicious side dish ready in under 30 minutes! Perfect for busy nights or impromptu gatherings.

Versatile Ingredients: Feel free to get creative! Add cucumber, chickpeas, or even grilled chicken to customize this dish according to your mood or dietary needs.

Healthy & Nutritious: Packed with fresh vegetables and herbs, this salad is not only vegan and gluten-free, but it’s also low in calories and high in flavor, making it a guilt-free indulgence.

Crowd-Pleasing Appeal: Whether at a picnic, potluck, or family barbecue, this stunning salad is sure to impress and satisfy guests of all culinary preferences. For something equally sensational, check out Cheesy Hamburger Potato or Potato Bacon Soup.

Sumac Potato Salad Ingredients

For the Salad

  • Potatoes – The starchy base providing structure, with Yukon gold or red potatoes recommended for their buttery flavor.
  • Red Onion – Adds a sharp crunch; shallots can substitute for a milder taste.
  • Black Olives – Contributes a briny depth; green olives work for a tangy twist.
  • Pickles – Adds tang and texture; dill pickles are recommended for an extra kick.
  • Capers – Provides a salty burst; you can substitute with chopped green olives if needed.
  • Parsley – Fresh herbiness enhances the flavor; cilantro can be used for a different profile.
  • Sun-Dried Tomatoes – Offers sweetness and umami; fresh tomatoes are an option but may alter texture.

For the Dressing

  • Olive Oil – The base for richness; consider avocado oil for a lighter alternative.
  • Balsamic Vinegar – Adds a perfect balance of acidity and sweetness; red wine vinegar can be used for a sharper taste.
  • Sumac – A unique tangy spice that enhances the flavor; essential for authentic taste.
  • Chili Flakes – Adds a touch of heat; adjust according to your spice preference.
  • Salt – Elevates all flavors; taste and adjust as necessary.

Enjoy making your vibrant Sumac Potato Salad, a beautiful blend of Mediterranean ingredients that will surely refresh your plate!

Step‑by‑Step Instructions for Sumac Potato Salad

Step 1: Boil the Potatoes
Start by bringing a large pot of salted water to a boil. Carefully add your unpeeled potatoes, ensuring they’re fully submerged. Allow them to cook for about 20 minutes, or until tender when pierced with a fork, but not mushy. This step is crucial for achieving the perfect texture in your Sumac Potato Salad.

Step 2: Cool and Chop
Once the potatoes are cooked, drain them in a colander and let them cool slightly. After about 5 minutes, peel the potatoes while they’re still warm, as this helps the skin come off easily. Cut the peeled potatoes into bite-sized cubes, setting them aside in a large mixing bowl to combine later with all the delicious ingredients.

Step 3: Mix in the Vegetables
In the bowl with your chopped potatoes, add diced red onion, parsley, pickles, black olives, capers, and sun-dried tomatoes. Each ingredient brings its own unique flavor to the Sumac Potato Salad, so take a moment to enjoy the vibrant colors and aromas as you mix them in. Stir gently to combine without breaking up the potato pieces.

Step 4: Prepare the Dressing
In a small bowl, whisk together olive oil and balsamic vinegar. Add in the sumac, chili flakes, and salt to create a tangy dressing that will elevate the flavors of your salad. The richness of the olive oil pairs perfectly with the acidity of the vinegar, creating a balanced dressing for your lush Sumac Potato Salad.

Step 5: Toss It All Together
Drizzle the prepared dressing over the potato and vegetable mixture. Using a large spoon, gently toss all the ingredients together until everything is well coated. Be careful not to mash the potatoes; you want your Sumac Potato Salad to have nice, intact cubes for a pleasing texture in every bite.

Step 6: Taste and Adjust
Before serving, give your Sumac Potato Salad a taste and adjust any seasonings as necessary. This is the perfect moment to tweak flavors by adding a pinch more salt or a sprinkle of chili flakes, ensuring that the dish is well-balanced to your liking. Allowing the salad to sit for at least 15 minutes will let the flavors meld beautifully.

Expert Tips for Sumac Potato Salad

  • Choose the Right Potatoes: Opt for Yukon gold or red potatoes, as they hold their shape well and provide a creamy texture that enhances your Sumac Potato Salad.

  • Perfect Cooking Time: Avoid overcooking the potatoes by checking them for doneness after 15 minutes. They should be tender but firm, ensuring a satisfying bite.

  • Flavor Boosting: Let the salad sit for a minimum of 15 minutes before serving. This resting time allows the flavors to meld, making each bite more delicious.

  • Dressing Quality Matters: Use high-quality olive oil for the dressing. It elevates the overall flavor of your Sumac Potato Salad and contributes to a richer experience.

  • Customize with Veggies: Feel free to experiment with additional veggies like bell peppers or cucumbers. They’ll add an extra crunch and freshness to your salad.

Make Ahead Options

These vibrant Sumac Potato Salad ingredients are perfect for meal prep enthusiasts! You can boil and chop the potatoes up to 24 hours in advance, storing them in an airtight container in the refrigerator to maintain their texture. Prepare the dressing (olive oil, balsamic vinegar, sumac, chili flakes, and salt) a day ahead as well; keep it in a separate container to preserve its freshness. When ready to serve, simply mix the prepped potatoes with fresh vegetables and drizzle the dressing over the top, tossing gently. This way, you’ll have a deliciously refreshing potato salad waiting for you, perfect for busy weeknights or unexpected gatherings!

What to Serve with Vibrant Sumac Potato Salad?

Imagine a colorful spread, where the essence of the Mediterranean comes alive in every bite alongside your vibrant potato salad.

  • Grilled Lemon Chicken: Juicy and zesty, this tender chicken complements the tangy notes of the salad beautifully. It makes for a hearty centerpiece, perfect for gatherings.

  • Mediterranean Quinoa Bowl: This protein-packed dish adds nutty flavor and texture to your meal, creating a deliciously wholesome spread. The quinoa is a fantastic partner for the bright flavors of the salad.

  • Roasted Vegetables: A medley of seasonal vegetables, caramelized to perfection, brings sweetness and warmth that pairs wonderfully with the refreshing salad, making each bite satisfying and heartwarming.

  • Herbed Hummus and Pita Chips: Creamy hummus adds a rich, savory element while the crunchy pita chips provide an exciting contrast. It’s an easy appetizer that flows right into a delightful meal.

  • Chilled White Wine: A crisp Sauvignon Blanc or a refreshing Pinot Grigio enhances the lightness of the entire meal, perfectly harmonizing with the dish’s aromatic herbs and zesty flavors.

  • Fresh Watermelon Salad: Juicy and sweet, this salad with feta and mint adds a refreshing twist that balances out the earthy tones of the potato salad, making each forkful a delightful experience.

  • Garlic Bread: Crunchy, golden garlic bread adds a pleasing texture and aromatic flavor that complements the lightness of your meal and encourages everyone to indulge a bit more.

  • Zucchini Fritters: Crispy on the outside and tender on the inside, these fritters introduce a delightful herbaceous note that marries nicely with the other flavors on your plate.

These choices will not only elevate your vibrant Sumac Potato Salad but also create a memorable dining experience for you and your guests!

Sumac Potato Salad Variations

Feel free to adapt this delightful recipe to suit your tastes and preferences—your kitchen is your playground!

  • Fresh Crunch: Add cucumber or diced tomatoes for an extra layer of freshness. These ingredients bring a pop of texture that will brighten your salad.

  • Protein Boost: Incorporate chickpeas for added protein and texture. They transform this side into a hearty meal option, perfect for satisfying appetites.

  • Grilled Goodness: Make it a full meal by tossing in grilled chicken or your favorite protein. Pairing these with the salad creates a satisfying dinner anyone will love.

  • Herb Swap: Use cilantro in place of parsley for a different herbal flavor profile. This simple switch adds an interesting twist to the traditional recipe!

  • Olive Options: Try green olives instead of black for a tangy twist. This change not only affects the flavor but also the overall appearance of the salad.

  • Spice it Up: Adjust the chili flakes to increase or decrease the heat level. Use more for a spicy kick or leave it out entirely for a milder salad.

  • Nutty Flavor: Toss in toasted pine nuts or walnuts for added crunch and nutty taste. This variation imparts a fantastic texture and enriches the salad’s flavor experience.

For more delightful ideas, consider a comforting pairing like Parmesan Chicken Potatoes or check out the light and savory BLT Chicken Salad for a delicious way to elevate your dining table!

Storage Tips for Sumac Potato Salad

Fridge: Store your Sumac Potato Salad in an airtight container for up to 3 days. This will keep it fresh while allowing the flavors to further develop over time.

Freezer: For longer storage, you can freeze the salad, although the texture may change. Wrap tightly in plastic wrap before placing it in an airtight container, and consume within 1 month for best quality.

Reheating: If using leftovers, gently reheat in the microwave, but consider serving it cold for the best flavor experience. You can add a splash of olive oil or vinegar to refresh the taste.

Serving Idea: This salad is great served chilled and makes a delightful addition to any meal, especially alongside grilled meats or at summer picnics!

Sumac Potato Salad Recipe FAQs

How do I choose the best potatoes for this salad?
Absolutely! For the best results, I recommend using Yukon gold or red potatoes. They have a nice waxy texture that holds up well when boiled, ensuring your salad maintains a lovely bite. Avoid starchy varieties like Russet potatoes, as they can turn mushy.

How long can I store Sumac Potato Salad in the refrigerator?
You can store your Sumac Potato Salad in an airtight container in the fridge for up to 3 days. As it sits, the flavors will deepen and blend beautifully, making each bite even more delicious!

Can I freeze Sumac Potato Salad?
While you can freeze the salad, it’s important to note that the texture of the potatoes might change after being thawed. If you decide to freeze it, place the salad in an airtight container wrapped tightly in plastic wrap. Enjoy it within 1 month for the best flavor!

What should I do if my salad is too salty?
If your Sumac Potato Salad turns out too salty, fear not! You can balance it by adding additional chopped potatoes to dilute the saltiness. Another option is to toss in some fresh veggies like cucumber or additional parsley, which can help absorb some of the excess salt.

Is Sumac Potato Salad suitable for people with dietary restrictions?
Very! This salad is vegan and gluten-free, making it a great choice for anyone with specific dietary needs. However, if you have nut allergies, ensure that your olive oil is free from cross-contamination. Always check labels if you’re uncertain!

Sumac Potato Salad

Zesty Sumac Potato Salad That Will Refresh Your Plate

This vibrant Sumac Potato Salad combines fresh herbs and citrus with tender potatoes for a refreshing dish that's vegan and gluten-free.
Prep Time 10 minutes
Cook Time 20 minutes
Resting Time 15 minutes
Total Time 45 minutes
Servings: 6 servings
Course: Salad
Cuisine: Mediterranean
Calories: 250

Ingredients
  

For the Salad
  • 2 pounds Yukon gold or red potatoes cut into bite-sized cubes
  • 1 medium red onion diced
  • 1 cup black olives pitted and sliced
  • 1 cup pickles diced dill pickles
  • 2 tablespoons capers chopped
  • 1 cup fresh parsley chopped
  • 1 cup sun-dried tomatoes chopped
For the Dressing
  • 1/4 cup olive oil or avocado oil
  • 2 tablespoons balsamic vinegar or red wine vinegar
  • 2 tablespoons sumac essential for authentic taste
  • 1/2 teaspoon chili flakes to taste
  • 1 teaspoon salt to taste

Equipment

  • Large pot
  • Colander
  • Mixing Bowl
  • small bowl
  • large spoon

Method
 

Step-by-Step Instructions for Sumac Potato Salad
  1. Bring a large pot of salted water to a boil and add unpeeled potatoes. Cook for about 20 minutes until tender.
  2. Drain the potatoes, let cool, peel while warm, and cut into bite-sized cubes.
  3. In a bowl, combine chopped potatoes with red onion, parsley, pickles, black olives, capers, and sun-dried tomatoes.
  4. Whisk together olive oil and balsamic vinegar, then add sumac, chili flakes, and salt to create the dressing.
  5. Drizzle the dressing over the potato mixture and gently toss to combine without mashing the potatoes.
  6. Taste and adjust seasonings, then let sit for at least 15 minutes before serving.

Nutrition

Serving: 1cupCalories: 250kcalCarbohydrates: 32gProtein: 4gFat: 12gSaturated Fat: 2gPolyunsaturated Fat: 1gMonounsaturated Fat: 8gSodium: 500mgPotassium: 700mgFiber: 5gSugar: 3gVitamin A: 10IUVitamin C: 30mgCalcium: 4mgIron: 10mg

Notes

For best flavor, let the salad sit before serving to allow the flavors to meld together.

Tried this recipe?

Let us know how it was!

Garlic Butter Steak Tips with Cheesy Rigatoni: A Cozy Delight

As I stirred my bubbling pot of rigatoni, a compelling aroma wafted through my kitchen—garlic and butter mingling in the air like an irresistible invitation. It was the perfect foreshadowing of the joy to come with my Garlic Butter Steak Tips with Cheesy Rigatoni. This dish isn’t just a feast for the senses; it’s family-friendly comfort food that transforms dinner into a warm gathering. In just under 30 minutes, you can take succulent steak tips sautéed in fragrant garlic butter and wrap them in a creamy, cheesy delight that’s sure to please everyone at the table. It’s a quick yet decadent choice for those hectic weekdays or a cozy date night in. Curious about how to elevate your dinner game? Let’s dive into this mouthwatering recipe together!

Why Will You Love This Recipe?

Simplicity: This dish is incredibly easy to prepare, making it perfect for home cooks of all levels.

Rich, Comforting Flavors: The combination of juicy steak tips with creamy Parmesan sauce creates a savory explosion that your taste buds will adore.

Versatile Base: Rigatoni can easily be swapped out for your favorite pasta or enhanced with seasonal vegetables like spinach or mushrooms.

Time-Saving: With just under 30 minutes of cook time, you can enjoy a delicious meal on even the busiest of nights.

Family-Friendly: This recipe is sure to impress the whole family, making it a great choice for gatherings or a cozy dinner at home.

Crowd-Pleasing: Whether it’s a family dinner or a date night, this Garlic Butter Steak Tips with Cheesy Rigatoni delivers the warmth and comfort everyone craves.

Pair it with a side of Garlic Butter Steak or some delicious Cheesy Garlic Chicken for an irresistible feast!

Garlic Butter Steak Tips Ingredients

For the Pasta

  • Rigatoni – Provides the base for the dish; feel free to swap in penne or fettuccine if preferred.

For the Steak

  • Strip Steaks – Choose tender cuts for better texture and succulent flavor.
  • Olive Oil – Used for searing the steak; extra virgin olive oil enhances the richness.

For the Garlic Butter Sauce

  • Butter – Adds creaminess and depth to the sauce; unsalted is best for balancing flavors.
  • Garlic – Crucial for aromatics; fresh garlic cloves provide intense flavor.
  • Chicken Broth – Used to enhance the sauce; opt for low-sodium to control saltiness.
  • Heavy Cream – Creates a luscious creaminess; substitute with half-and-half for a lighter option.
  • Red Pepper Flakes – Add a hint of spice; adjust to your heat preference.
  • Oregano & Thyme – Dried herbs give herbal notes; opt for fresh herbs for more vibrant flavors.
  • Parmesan Cheese – Adds creaminess and flavor; grate fresh for the best melt.

For Optional Add-Ins

  • Sun-Dried Tomatoes – Offer a sweet and tangy element; feel free to leave them out based on your taste.

This harmonious blend of Garlic Butter Steak Tips with Cheesy Rigatoni ingredients is sure to spark your culinary creativity!

Step‑by‑Step Instructions for Garlic Butter Steak Tips with Cheesy Rigatoni

Step 1: Cook the Rigatoni
Start by bringing a large pot of salted water to a boil. Add the rigatoni and cook according to package instructions until al dente, usually around 10-12 minutes. Stir occasionally to prevent sticking. Once cooked, drain the pasta in a colander and set it aside, allowing it to rest briefly while you prepare the steak tips.

Step 2: Sear the Steak
In a large skillet, heat 2 tablespoons of olive oil over medium-high heat until shimmering. Season the strip steaks generously with salt and pepper. Carefully add the steaks to the hot skillet, searing them for 4-5 minutes on each side until a golden-brown crust forms and the internal temperature reaches about 130°F for medium-rare. Once done, transfer the steaks to a plate and let them rest.

Step 3: Slice the Steaks
After the steak tips have rested for about 5 minutes, slice them into bite-sized pieces against the grain to maximize tenderness. This will ensure that each piece is juicy and flavorful. Set the sliced steak aside, allowing the juices to redistribute while you work on the garlic butter sauce.

Step 4: Sauté the Garlic
In the same skillet, reduce the heat to medium and add 2 tablespoons of unsalted butter. Once melted, add 4 minced garlic cloves and sauté for about 30 seconds, stirring continuously until fragrant and lightly golden. Be careful not to let the garlic burn, as this can make it bitter, which would alter the harmony of flavors in your Garlic Butter Steak Tips with Cheesy Rigatoni.

Step 5: Prepare the Sauce
Pour in 1 cup of chicken broth and 1 cup of heavy cream, stirring well to combine with the garlic butter mixture. Sprinkle in ½ teaspoon of red pepper flakes, along with 1 teaspoon each of dried oregano and thyme. Allow this to simmer on medium heat for 3-4 minutes until the sauce thickens slightly, creating a creamy base for the upcoming cheesy goodness.

Step 6: Add the Cheese and Tomatoes
Once the sauce has thickened, gradually whisk in 1 cup of freshly grated Parmesan cheese until the sauce is smooth and creamy. If you’re using sun-dried tomatoes, fold them in now for an extra layer of flavor. Allow the sauce to heat through for another minute, stirring gently to prevent sticking and ensure a deliciously cohesive blend.

Step 7: Combine the Pasta and Steak
Add the cooked rigatoni and sliced steak tips directly into the skillet with the creamy sauce. Toss everything together until the rigatoni and steak are thoroughly coated with the garlic butter sauce. Continue to cook on low heat for about 1 minute to heat everything through and meld the flavors beautifully in this Garlic Butter Steak Tips with Cheesy Rigatoni.

Step 8: Serve and Enjoy
Spoon the hearty mixture onto individual plates or a large serving platter. For an extra touch of decadence, garnish with additional grated Parmesan cheese and freshly cracked black pepper. Serve hot, savoring the rich, comforting flavors that define this delightful dish, perfect for a family dinner or special occasion.

Make Ahead Options

These Garlic Butter Steak Tips with Cheesy Rigatoni are a fantastic choice for meal prep enthusiasts! You can cook the rigatoni and prepare the garlic butter sauce up to 24 hours in advance; simply refrigerate them in separate airtight containers. To maintain quality, store the steak tips separately to prevent sogginess. When you’re ready to serve, just reheat the steak and sauce gently over medium heat, then toss in the rigatoni for about 1 minute until heated through. This way, you can enjoy a comforting meal on busy weeknights with minimal effort, and it’ll taste just as delicious as when made fresh!

Garlic Butter Steak Tips Variations

Embrace the joy of tailoring your Garlic Butter Steak Tips with Cheesy Rigatoni to suit your taste buds and pantry!

  • Pasta Swap: Substitute rigatoni with penne, fettuccine, or any pasta you adore for a delightful twist in texture.

  • Veggie Boost: Add sautéed spinach, mushrooms, or colorful bell peppers to enhance nutrition and flavor, creating a vibrant dish.

  • Creamy Light: Use half-and-half instead of heavy cream for a lighter sauce while still keeping that creamy allure.

  • Heat It Up: Adjust the spice by increasing red pepper flakes or incorporating fresh chopped chilies for a bolder kick.

  • Herb Infusion: Complement dried herbs with fresh oregano and thyme for a fresher taste that elevates the dish.

  • Cheese Delight: Try Parmesan alternatives like Pecorino Romano or a sprinkle of mozzarella for a different cheesy experience.

For additional meal inspiration, you might enjoy my Honey Garlic Salmon for a tangy alternative or consider whipping up some Garlic Butter Baked Chicken as a great side!

Expert Tips for Garlic Butter Steak Tips

Hot Oil is Key: Ensure your olive oil is shimmering hot before adding the steak to achieve a perfect sear and lock in juices.

Resting Time Matters: After cooking, let the steak tips rest for at least 5 minutes. This helps retain moisture for tender bites.

Watch the Sauce: Keep a close eye on the sauce as cream and cheese can thicken quickly. Stir gently to achieve the right consistency without burning.

Taste as You Go: The richness of the creamy sauce can mellow flavors. Always taste and adjust seasoning before serving your Garlic Butter Steak Tips with Cheesy Rigatoni.

Customize Freely: Feel free to swap out the rigatoni for any pasta of your choice, or add vegetables for extra nutrition and flavor!

How to Store and Freeze Garlic Butter Steak Tips with Cheesy Rigatoni

Fridge: Store leftovers in an airtight container for up to 3 days. Reheat gently in a skillet over low heat, adding a splash of cream to maintain creaminess.

Freezer: For longer storage, freeze the dish in an airtight container for up to 2 months. Thaw in the fridge overnight before reheating to preserve texture.

Reheating: Always reheat slowly on low heat to avoid curdling the cream and cheese. Stir occasionally to ensure even warming.

Portioning: Consider portioning out servings before freezing to make reheating quick and easy for future meals. Enjoy your delicious Garlic Butter Steak Tips with Cheesy Rigatoni anytime!

What to Serve with Garlic Butter Steak Tips with Cheesy Rigatoni

Transform your delicious pasta dish into an unforgettable feast by pairing it with these delightful sides and drinks.

  • Garlic Bread: The buttery, toasted perfection of garlic bread complements the creamy pasta, making each bite feel indulgent.

  • Mixed Green Salad: A fresh salad with tangy vinaigrette balances the richness of the dish while adding a crunchy texture.

  • Roasted Vegetables: Tossed in olive oil and herbs, roasted seasonal vegetables bring a vibrant addition to your plate, enhancing nutritional balance.

  • Creamy Coleslaw: The cool, crunchy texture of coleslaw provides a refreshing contrast, making it an excellent companion to the savory steak tips.

  • Red Wine: A glass of full-bodied red wine, like Cabernet Sauvignon, beautifully pairs with the hearty flavors, enhancing the overall dining experience.

  • Chocolate Mousse: For dessert, a rich, airy chocolate mousse offers a sweet ending, perfectly capping off your comforting Italian-American meal.

Garlic Butter Steak Tips with Cheesy Rigatoni Recipe FAQs

How do I choose the best steak for this recipe?
Absolutely! For the best flavor and texture, opt for tender cuts like strip steak or ribeye. Look for steaks with a good amount of marbling, which helps maintain juiciness during cooking. Freshness is key—choose steak that has a bright red color and avoid any that have dark spots or an off-putting smell.

What’s the best way to store leftovers?
Very! Store your Garlic Butter Steak Tips with Cheesy Rigatoni in an airtight container in the refrigerator for up to 3 days. Make sure to let it cool to room temperature before sealing to prevent condensation inside the container. When reheating, do so gently on low heat to keep that creamy texture.

Can I freeze this dish?
Yes, you can! For freezing, place the entire dish in an airtight container or divide it into smaller portions for convenient meals later. It can be frozen for up to 2 months. To reheat, simply thaw it overnight in the fridge and warm it up slowly on the stove or in the microwave, adding a splash of cream to restore creaminess and avoid curdling.

What should I do if my sauce gets too thick?
If your sauce thickens too much, don’t worry! You can simply add a bit more chicken broth or heavy cream, one tablespoon at a time, while stirring over low heat until you reach your desired consistency. If it’s too thin, let it simmer a bit longer; just keep a close eye to prevent burning.

Are there any dietary considerations I should keep in mind?
Definitely! If you or your guests have allergies, be sure to check all ingredient labels for hidden allergens, especially with dairy products and gluten in the pasta. For gluten-free diets, use gluten-free pasta and ensure that chicken broth is also free from gluten. The recipe is also adaptable for various dietary needs, so feel free to customize it with veggies or alternative proteins.

Can I make any adjustments to this recipe?
Of course! This Garlic Butter Steak Tips with Cheesy Rigatoni is incredibly customizable. You can swap rigatoni for your favorite pasta type like penne or fettuccine. Additionally, adding fresh veggies like spinach, bell peppers, or mushrooms not only enhances nutrition but also adds flavors. Adjust the level of red pepper flakes to suit your family’s taste—more or less spice, the choice is yours!

Garlic Butter Steak Tips with Cheesy Rigatoni

Garlic Butter Steak Tips with Cheesy Rigatoni: A Cozy Delight

A savory and rich dish featuring succulent steak tips in garlic butter, paired with creamy cheesy rigatoni for a family-friendly comfort meal.
Prep Time 10 minutes
Cook Time 20 minutes
Resting Time 5 minutes
Total Time 35 minutes
Servings: 4 servings
Course: Dinner
Cuisine: Italian
Calories: 500

Ingredients
  

For the Pasta
  • 8 oz Rigatoni Can substitute with penne or fettuccine.
For the Steak
  • 1 lb Strip Steaks Choose tender cuts for better texture.
  • 2 tbsp Olive Oil Extra virgin preferred.
For the Garlic Butter Sauce
  • 2 tbsp Butter Unsalted is best for balancing flavors.
  • 4 cloves Garlic Minced.
  • 1 cup Chicken Broth Low-sodium recommended.
  • 1 cup Heavy Cream Can substitute with half-and-half.
  • 0.5 tsp Red Pepper Flakes Adjust to taste.
  • 1 tsp Dried Oregano
  • 1 tsp Dried Thyme
  • 1 cup Parmesan Cheese Freshly grated is best.
For Optional Add-Ins
  • 0.5 cup Sun-Dried Tomatoes Optional based on taste.

Equipment

  • Large pot
  • Large skillet
  • Colander

Method
 

Step‑by‑Step Instructions
  1. Start by bringing a large pot of salted water to a boil. Add the rigatoni and cook according to package instructions until al dente, usually around 10-12 minutes. Drain and set aside.
  2. In a large skillet, heat olive oil over medium-high heat until shimmering. Season strip steaks with salt and pepper. Sear steaks for 4-5 minutes on each side until golden brown. Transfer steaks to a plate and let them rest.
  3. Slice the rested steak into bite-sized pieces against the grain.
  4. In the same skillet, reduce heat to medium and melt butter. Add minced garlic and sauté for about 30 seconds until fragrant.
  5. Pour in chicken broth and heavy cream, stirring to combine. Add red pepper flakes, oregano, and thyme, and simmer for 3-4 minutes until thickened.
  6. Gradually whisk in Parmesan cheese until the sauce is smooth. Fold in sun-dried tomatoes if using.
  7. Add rigatoni and sliced steak to the skillet, tossing to coat with sauce. Cook on low heat for about 1 minute to heat through.
  8. Serve hot, garnished with additional Parmesan cheese and freshly cracked black pepper.

Nutrition

Serving: 1servingCalories: 500kcalCarbohydrates: 40gProtein: 35gFat: 25gSaturated Fat: 10gPolyunsaturated Fat: 3gMonounsaturated Fat: 9gCholesterol: 100mgSodium: 600mgPotassium: 800mgFiber: 2gSugar: 3gVitamin A: 600IUVitamin C: 2mgCalcium: 250mgIron: 3mg

Notes

Ensure olive oil is hot before adding steak for a perfect sear. Let steak rest before slicing for better moisture retention. Stir sauce gently to avoid burning.

Tried this recipe?

Let us know how it was!

Fluffy Greek Yogurt Blueberry Muffins for a Healthy Start

As I stood in my kitchen, the sweet aroma of fresh blueberries began to fill the air, instantly igniting memories of childhood summer vacations spent berry-picking. It’s this feeling of nostalgia that inspired my Soft and Fluffy Greek Yogurt Blueberry Muffins, perfect for anyone seeking a healthier breakfast option free from refined sugar. These delightful muffins, enriched with protein-rich Greek yogurt and wholesome oats, make mornings easier and more satisfying. Not only are they ready in about 30 minutes with just one bowl required, but they’re also freezer-friendly, making it simple to indulge in homemade goodness whenever the craving strikes. Are you curious about how to create these irresistible treats that will brighten your breakfast table? Let’s dive in!

Why are Greek Yogurt Muffins so special?

Healthy Twist: These Greek Yogurt Blueberry Muffins ditch refined sugar, relying on honey for natural sweetness.

Protein-Packed: Loaded with protein from Greek yogurt, they fuel your day with nourishing goodness.

Quick & Easy: With just one bowl and under 30 minutes to prepare, they’re perfect for busy mornings or last-minute snack cravings.

Freezer-Friendly: Make a batch and freeze them for a quick breakfast option whenever you need it—just warm and enjoy!

Endless Variations: Feel free to experiment by swapping blueberries for other fruits or using whole wheat flour for added fiber, just like in my Lemon Blueberry Summery treat!

Greek Yogurt Blueberry Muffin Ingredients

• Get ready to gather your kitchen staples for these delightful muffins!

For the Muffins

  • Plain Greek Yogurt – Provides moisture and protein; for the best texture, stick to full-fat yogurt or use your favorite plant-based option.
  • Milk – Adds liquid and richness; feel free to substitute with any milk you prefer.
  • Honey (or Maple Syrup) – Works as a natural sweetener; use maple syrup if you’re opting for a vegan version.
  • Egg – Binds everything together and contributes to rise; a crucial ingredient for fluffy muffins!
  • Vegetable Oil – Adds moisture; replace it with melted coconut oil for a hint of tropical flavor.
  • Vanilla Extract – Enhances flavor depth; almond extract can also be used for a delicious twist.
  • Old-Fashioned Rolled Oats – Offers a hearty texture and nutrition; avoid quick oats to maintain the right consistency.
  • All-Purpose Flour – Provides structure; you can swap half for whole wheat flour for extra fiber.
  • Baking Powder – Helps the muffins rise to perfection; don’t skip this essential ingredient!
  • Cinnamon – Infuses warmth and flavor; it pairs beautifully with the blueberries.
  • Baking Soda – Works in conjunction with baking powder for extra lift; a little goes a long way.
  • Salt – Enhances the overall flavor of the muffins.
  • Fresh or Frozen Blueberries – The star ingredient for sweetness; if using frozen, make sure to thaw and drain them to avoid a streaky batter.

These Greek Yogurt Blueberry Muffins are not only easy to whip up but promise a burst of flavor and nutrition in every bite!

Step‑by‑Step Instructions for Greek Yogurt Blueberry Muffins

Step 1: Preheat the Oven
Begin by preheating your oven to 375°F (190°C). This ensures it reaches the perfect temperature for baking the Greek Yogurt Blueberry Muffins. While the oven is heating, prepare a standard muffin tin by lining it with paper liners or lightly greasing the cups with oil to prevent sticking.

Step 2: Mix Wet Ingredients
In a large mixing bowl, combine the plain Greek yogurt, milk, honey, egg, vegetable oil, and vanilla extract. Whisk these ingredients together until smooth and well-blended, which should take about 1-2 minutes. The mixture should appear creamy and slightly thick, providing a perfect base for the muffins.

Step 3: Combine Dry Ingredients
In a separate bowl, whisk together the old-fashioned rolled oats, all-purpose flour, baking powder, baking soda, cinnamon, and salt. This step is crucial for distributing the leavening agents evenly throughout the mixture. Aim for a homogeneous blend with no clumps in sight, ensuring the Greek Yogurt Blueberry Muffins rise beautifully.

Step 4: Unite Wet and Dry Ingredients
Carefully fold the dry ingredients into the wet mixture using a spatula or wooden spoon. Mix gently until just combined, being cautious not to overmix as this can lead to dense muffins. The batter should be thick but slightly lumpy, with no dry flour remaining visible.

Step 5: Add Blueberries
Gently fold in your fresh or well-drained thawed blueberries into the batter. This is where the muffins start to shine, as the blueberries will offer bursts of flavor. Make sure to combine them evenly without breaking the berries, preserving their beautiful shape for that delightful surprise in every bite.

Step 6: Fill Muffin Cups
Spoon the batter evenly into the prepared muffin tin, filling each cup about two-thirds full. This allows space for the muffins to rise without overflowing. The batter should look thick and colorful, dotted with vibrant blueberries, ensuring a visually appealing result once baked.

Step 7: Bake the Muffins
Place the muffin tin in the preheated oven and bake for 18-20 minutes. Watch for a golden-brown top, and insert a toothpick into the center of a muffin; it should come out clean or with a few moist crumbs attached. This indicates the muffins are perfectly baked and ready to enjoy.

Step 8: Cool and Serve
Once baked, remove the muffin tin from the oven and allow the muffins to cool in the pan for about 10 minutes. This cooling time helps prevent them from sticking to the liners. After that, transfer the muffins to a wire rack to cool completely before serving—they’ll be soft and fluffy, perfect for a delightful breakfast!

Make Ahead Options

These Greek Yogurt Blueberry Muffins are perfect for meal prep, saving you time on busy mornings! You can prepare the batter up to 24 hours in advance by mixing the wet ingredients and dry ingredients separately, then covering and refrigerating until ready to bake. When you’re ready to enjoy, simply fold in the blueberries and bake as directed for fresh, delicious muffins just like homemade. Alternatively, you can bake a batch and store the muffins in an airtight container at room temperature for up to 3 days or freeze them for up to 6 months. Just reheat in the microwave for a quick breakfast that’s just as fluffy and delightful!

Expert Tips for Greek Yogurt Blueberry Muffins

  • Avoid Overmixing: Gently fold in the dry ingredients to keep your muffins light and fluffy; overmixing can lead to dense muffins.

  • Fresh vs. Frozen: Use fresh blueberries for the best flavor and texture. If using frozen, thaw and drain them to prevent a soggy batter.

  • Let Them Cool: Allow muffins to cool in the pan for 10 minutes to avoid sticking; this also helps them set properly.

  • Freezing Made Easy: Cool completely before freezing on a baking sheet. Once frozen, transfer to a bag or container for up to 6 months of quick breakfasts.

  • Experiment with Flavors: Try adding lemon zest or a pinch of nutmeg to your batter for a unique flavor twist in your Greek Yogurt Blueberry Muffins.

What to Serve with Greek Yogurt Blueberry Muffins

These muffins are perfect companions for creating a delightful breakfast or snack spread that tantalizes the senses.

  • Fresh Fruit Salad: A colorful blend of seasonal fruits adds brightness and freshness alongside the muffins, enhancing their fruity flavor.

  • Creamy Greek Yogurt Parfait: Layer Greek yogurt with honey and granola for a delightful parfait that echoes the muffins’ flavor profile.

  • Scrambled Eggs: Light, fluffy scrambled eggs provide a savory contrast to the sweet muffins, making for a wholesome, balanced meal.

  • Nut Butter Spread: A drizzle of almond or peanut butter on a warm muffin adds a nutty richness, elevating the dish’s flavor.

  • Herbal Tea Collection: Pair with a soothing chamomile or peppermint tea, offering warmth and a calming effect to your breakfast experience.

  • Honey Drizzle and Butter: Serve warm muffins with a pat of butter and a drizzle of honey to amplify their natural sweetness and create a cozy indulgence.

  • Smoothie Bowl: Blend a refreshing smoothie bowl with spinach, banana, and almond milk topped with nuts, creating a vibrant palate that complements the muffins beautifully.

Greek Yogurt Blueberry Muffins Variations

Feel free to mix things up with these delightful adaptations to make your muffins even more uniquely yours!

  • Whole Wheat Blend: Substitute half of the all-purpose flour with white whole wheat flour or oat flour for added nutrition and fiber.

  • Mini Muffins: Use a mini muffin pan for bite-sized treats and bake for just 10–13 minutes, perfect for kids or quick snacks!

  • Flavorful Fruits: Swap blueberries for seasonal options like raspberries or strawberries to enjoy different bursts of fruitiness. Each fruit brings its own delightful sweetness.

  • Dairy-Free Twist: For a vegan option, use dairy-free yogurt and plant-based milk. Your muffins will still be deliciously fluffy!

  • Nutty Crunch: Add a handful of chopped nuts, like walnuts or almonds, to the batter for an added crunch and richness in every bite.

  • Spice It Up: Enhance the flavor by adding a teaspoon of nutmeg or a zip of lemon zest for a bright twist. It’s amazing how small changes can create new favorites!

  • Chocolate Lovers: Fold in a handful of dark chocolate chips along with the blueberries for a sweet contrast that chocolate lovers will adore.

  • Exotic Twist: Incorporate a teaspoon of coconut extract in place of vanilla for a tropical infusion in your muffins—perfect when paired with blueberries!

These muffins are incredibly versatile—don’t hesitate to experiment and create your own heartwarming versions. For even more ideas on fruity breakfasts, check out my tasty Banana Blueberry Breakfast recipes or treat yourself to my delightful Blueberry French Toast. Happy baking!

How to Store and Freeze Greek Yogurt Blueberry Muffins

Room Temperature: Store these delicious Greek Yogurt Blueberry Muffins in an airtight container at room temperature for up to 3 days for optimal freshness.

Freezer: For long-term storage, place fully cooled muffins in a freezer-safe bag or container. They can be frozen for up to 6 months—just thaw at room temperature or warm in the microwave when ready to enjoy!

Reheating: To reheat, pop muffins in the microwave for about 15-20 seconds for a warm, fluffy treat. Alternatively, you can place them in a toaster oven until heated through for a delightful texture.

Make Ahead: Feel free to make a big batch ahead of time! These freezer-friendly muffins are perfect for busy mornings, allowing you to savor homemade goodness whenever the craving strikes.

Greek Yogurt Blueberry Muffins Recipe FAQs

How can I choose ripe blueberries for my muffins?
Absolutely! When selecting blueberries, look for plump, smooth berries that are deep blue in color. Avoid any with green or red hues, as these may not be fully ripe. A few small dark spots are normal, but avoid berries that have dark spots all over or signs of mold.

What’s the best way to store Greek Yogurt Blueberry Muffins?
Store your Greek Yogurt Blueberry Muffins in an airtight container at room temperature for up to 3 days to maintain their softness. If you want to prolong their freshness, consider freezing them.

Can I freeze these muffins, and how do I do it?
Of course! To freeze Greek Yogurt Blueberry Muffins, first cool them completely on a wire rack. Then, place them on a baking sheet without touching each other and freeze until solid, about 1-2 hours. Once they are frozen, transfer them to a freezer-safe bag or container. They can be stored in the freezer for up to 6 months—just thaw at room temperature or warm them up in the microwave when ready to enjoy.

What should I do if my muffins come out dense?
If your muffins turn out dense, it’s often due to overmixing the batter. Make sure to mix the wet and dry ingredients until just combined, and avoid excessive stirring. Additionally, using fresh ingredients and making sure your baking powder and baking soda are within their expiration date will contribute to a lighter texture.

Are there any dietary considerations for these muffins?
Yes! These muffins are friendly for many dietary preferences—just swap honey for maple syrup for a vegan option. However, if you’re cooking for someone with allergies, it’s essential to check labels on your ingredients, especially the flours and any alternative milks you use. Also, be mindful that oats can sometimes be cross-contaminated, so look for gluten-free oats if necessary.

Can I make variations to this recipe?
Very! You can experiment by substituting blueberries for other fruits like raspberries or chopped apples. Try using half whole wheat flour for added fiber or spice it up with a few teaspoons of lemon zest for a refreshing twist. I often make them with different fruits depending on what I have on hand!

Greek Yogurt Blueberry Muffins

Fluffy Greek Yogurt Blueberry Muffins for a Healthy Start

Enjoy these Greek Yogurt Blueberry Muffins, a healthier breakfast option without refined sugar, perfect for starting your day right.
Prep Time 10 minutes
Cook Time 20 minutes
Cooling Time 10 minutes
Total Time 40 minutes
Servings: 12 muffins
Course: Breakfast
Cuisine: American
Calories: 150

Ingredients
  

For the Muffins
  • 1 cup Plain Greek Yogurt Use full-fat or your favorite plant-based option
  • 1/2 cup Milk Any milk of your choice
  • 1/3 cup Honey Can substitute maple syrup for a vegan version
  • 1 large Egg Binds ingredients and contributes to rise
  • 1/4 cup Vegetable Oil Can replace with melted coconut oil
  • 1 tsp Vanilla Extract Almond extract can be used for variation
  • 1 cup Old-Fashioned Rolled Oats Do not use quick oats
  • 1 cup All-Purpose Flour Swap half for whole wheat flour if desired
  • 2 tsp Baking Powder Essential for rising
  • 1 tsp Cinnamon
  • 1/2 tsp Baking Soda Works with baking powder for lift
  • 1/2 tsp Salt
  • 1 cup Fresh or Frozen Blueberries If frozen, thaw and drain first

Equipment

  • Mixing Bowl
  • Muffin Tin
  • whisk
  • spatula

Method
 

Step-by-Step Instructions
  1. Preheat your oven to 375°F (190°C). Prepare a muffin tin with liners or grease it.
  2. In a large mixing bowl, combine Greek yogurt, milk, honey, egg, vegetable oil, and vanilla extract. Whisk until smooth.
  3. In a separate bowl, whisk together rolled oats, flour, baking powder, baking soda, cinnamon, and salt.
  4. Fold dry ingredients into wet mixture gently until just combined.
  5. Fold in blueberries without breaking them.
  6. Fill muffin cups about two-thirds full with batter.
  7. Bake for 18-20 minutes until golden and a toothpick comes out clean.
  8. Cool in the pan for 10 minutes, then transfer to a wire rack to cool completely.

Nutrition

Serving: 1muffinCalories: 150kcalCarbohydrates: 20gProtein: 4gFat: 6gSaturated Fat: 1gCholesterol: 20mgSodium: 150mgPotassium: 120mgFiber: 2gSugar: 5gVitamin A: 2IUVitamin C: 5mgCalcium: 4mgIron: 6mg

Notes

These muffins are great for meal prep and can be frozen for quick breakfasts.

Tried this recipe?

Let us know how it was!

Air Fryer Honey Garlic Salmon: Quick, Glazed Perfection

As the sun dips below the horizon, a sweet and savory aroma fills the kitchen, drawing everyone in. That’s the magic of my Air Fryer Honey Garlic Salmon—a dish that seamlessly transforms a simple weeknight into something extraordinary. In just 15 minutes, this recipe combines the health benefits of succulent salmon with the delightful flavors of honey and garlic, making it a contender for your next go-to meal. Not only is this dish incredibly quick to prepare, but it’s also a fantastic healthier alternative to takeout that the whole family will love. Trust me, you’ll want to keep this one in regular rotation! Ready to discover the secret to a satisfying, home-cooked dinner? Let’s get started!

Why Is This Salmon Recipe a Game Changer?

Quick and Easy: In just 15 minutes, you can whip up a delicious meal that makes busy weeknights a breeze.

Healthy Choice: Packed with omega-3 fatty acids, this Air Fryer Honey Garlic Salmon offers nourishment while pleasing your palate.

Gluten-Free: By simply swapping out soy sauce for coconut aminos, you cater to gluten-sensitive diets without sacrificing flavor.

Irresistibly Flavorful: The sweet honey glaze and aromatic garlic elevate each bite, ensuring your family will be asking for seconds. Pair it with a fresh salad or my Honey Garlic Salmon for a delightful seafood experience!

Versatility: Experiment with spices or marinades to make this dish your own, turning it into something new every time.

Air Fryer Honey Garlic Salmon Ingredients

• Perfectly prepared salmon awaits!

For the Salmon

  • Salmon Fillets – Fresh or thawed fillets work best, delivering rich flavor and healthy fats.

For the Marinade

  • Olive Oil – Adds moisture and richness; substitute with avocado oil for a different taste.
  • Honey – Provides sweetness and contributes to the caramelized glaze; maple syrup serves as a vegan option.
  • Soy Sauce – Enhances umami flavor; use coconut aminos for a gluten-free alternative.
  • Garlic (finely chopped) – Freshly minced garlic gives the best aromatic experience in this air fryer honey garlic salmon dish.
  • Salt – Adjust to taste for a perfectly seasoned dish.
  • Black Pepper – Adds depth; leave out for a milder flavor.

Step‑by‑Step Instructions for Air Fryer Honey Garlic Salmon

Step 1: Make the Marinade
In a medium bowl, combine olive oil, honey, soy sauce, chopped garlic, salt, and black pepper. Whisk together until you achieve a smooth, cohesive mixture. This honey garlic marinade will give your salmon a beautiful glaze and rich flavor. Prepare this in advance so the flavors have time to mingle!

Step 2: Prepare the Salmon
Place the fresh or thawed salmon fillets on a clean plate. Brush each fillet generously with the honey garlic marinade you just made. For even more flavorful results, let the salmon marinate for about 30 minutes in the refrigerator, allowing the fish to absorb the delicious flavors that make the Air Fryer Honey Garlic Salmon so irresistible.

Step 3: Preheat Air Fryer
Set your air fryer to 370°F (188°C). While it preheats, give the air fryer basket a light spray with olive oil to prevent sticking. Preheating is crucial for achieving that perfect crispiness on the outside of your salmon while keeping the inside tender and flaky.

Step 4: Cook the Salmon
Carefully place the marinated salmon fillets in the air fryer basket, ensuring there’s space between them for even cooking. Air fry for 5 minutes, then open the basket and brush the fillets with any remaining marinade for an extra layer of flavor. Continue to cook for an additional 3 minutes or until the salmon flakes easily with a fork and reaches an internal temperature of 145°F (63°C).

Step 5: Serve
Once cooked, gently remove the salmon from the air fryer. Serve immediately with lemon slices and your choice of fresh herbs for a vibrant finish. The glossy caramelized exterior and mouthwatering aroma of the Air Fryer Honey Garlic Salmon will make this dish the highlight of your dinner table!

Expert Tips for Air Fryer Honey Garlic Salmon

  • Choose Quality Salmon: Select fresh or thawed salmon fillets for the best flavor and texture; frozen fillets might require longer cooking times.

  • Perfect Marinade Time: For richer flavor, let the salmon marinate in the honey garlic mixture for at least 30 minutes before cooking.

  • Watch Your Cooking Time: Avoid overcooking by monitoring closely; the ideal internal temperature for salmon is 145°F to ensure flaky goodness.

  • Space Matters: Arrange salmon fillets with space in the air fryer basket; overcrowding can lead to uneven cooking and less crispiness.

  • Add a Twist: Experiment with spices like paprika or cayenne pepper for added heat, or swap honey for agave syrup for a different flavor profile in your Air Fryer Honey Garlic Salmon.

What to Serve with Air Fryer Honey Garlic Salmon

Enhance your dining experience with perfectly complementing sides that elevate this delightful dish.

  • Creamy Mashed Potatoes:
    Soft and buttery, these potatoes absorb the honey garlic sauce beautifully, making every bite a comforting delight.

  • Steamed Broccoli:
    Tender, vibrant green florets add a fresh crunch, balancing the rich flavors of the salmon perfectly while offering a nutritional punch.

  • Citrus Spinach Salad:
    Refreshing and zingy, a salad with oranges or grapefruits brightens up the meal, cutting through the richness of the salmon for a harmonious taste profile.

  • Garlic Bread:
    With a crispy texture and rich garlic flavor, it’s the perfect side for soaking up the sweet and savory glaze from your air fryer honey garlic salmon.

  • Quinoa Pilaf:
    Nutty and fluffy, quinoa adds a delightful texture that complements the flaky salmon while providing a wholesome, gluten-free option.

  • Sparkling Lemonade:
    A bright and bubbly drink, this refreshing citrus beverage keeps the dinner light and invigorating, making it a delightful pairing with your meal.

  • Chocolate Mousse:
    Indulge in a richest, smooth dessert to finish, with a touch of sweetness that wraps up your dining experience beautifully.

Air Fryer Honey Garlic Salmon Variations

Feel free to explore these delightful twists that will elevate your Air Fryer Honey Garlic Salmon experience!

  • Spicy Kick: Add cayenne pepper to the marinade for a fiery burst. This heat complements the sweetness beautifully, adding depth to every bite.

  • Citrusy Zing: Incorporate lemon or lime juice into the marinade. The acidity brightens the dish, making your salmon taste refreshingly vibrant.

  • Herb Infusion: Replace garlic with finely chopped fresh herbs like dill or parsley. Each herb brings its unique flavor profile, enhancing the aromatic experience.

  • Vegan-Friendly: Use maple syrup instead of honey. This swap makes your dish suitable for vegans while maintaining the sweet glaze that everyone loves.

  • Nutty Flavor: Mix in some toasted sesame oil with the olive oil. The nutty undertones beautifully complement the savory taste of soy sauce.

  • Sweet and Savory Mix: Blend in a bit of sriracha or chili garlic sauce for a sweet and spicy mix. This addition will tantalize your taste buds and elevate your reels of flavors!

  • Mediterranean Twist: Replace soy sauce with a splash of balsamic vinegar. This altercation lends a sweet tang that pairs well with fresh herbs and the richness of salmon.

  • Coconut Escape: Swap out soy sauce for coconut aminos for a gluten-free option with a subtly sweeter flavor. This swap is great for anyone avoiding gluten, as seen in my Honey Garlic Salmon recipe!

Feel free to mix and match these variations to make the dish uniquely yours!

How to Store and Freeze Air Fryer Honey Garlic Salmon

Fridge: Store leftovers in an airtight container for up to 3-4 days to maintain freshness and flavor.

Freezer: Wrap the cooled salmon tightly in plastic wrap and then in aluminum foil; it can be frozen for up to 3 months.

Reheating: To enjoy your Air Fryer Honey Garlic Salmon again, reheat it in the air fryer at 280°F for about 7-10 minutes to keep it moist and delicious.

Thawing: When ready to use, thaw the salmon in the fridge overnight before reheating to ensure even warming and best texture.

Make Ahead Options

These Air Fryer Honey Garlic Salmon fillets are perfect for meal prep enthusiasts! You can prepare the honey garlic marinade up to 24 hours in advance, allowing the flavors to combine beautifully. Simply mix together the olive oil, honey, soy sauce, garlic, salt, and black pepper, then store it in an airtight container in the refrigerator. Additionally, you can brush the salmon fillets with the marinade and let them marinate for up to 30 minutes before cooking, or leave them marinating for 1-3 days for deeper flavor. When you’re ready to serve, simply air fry the marinated salmon fillets as directed, and you’ll have a delightful, glowing dish on the table with minimal effort!

Air Fryer Honey Garlic Salmon Recipe FAQs

What is the best way to select salmon fillets?
Absolutely! When choosing salmon fillets, look for fresh pieces that are bright in color and firm to the touch. Avoid fillets with dull coloration or dark spots all over, as this indicates age. If you’re purchasing frozen salmon, ensure it’s properly sealed without any signs of freezer burn, which can affect the flavor.

How should I store leftover Air Fryer Honey Garlic Salmon?
After enjoying your delicious salmon, any leftovers can be stored in an airtight container in the fridge for up to 3-4 days. Keeping it sealed helps maintain its flavor and texture. If you plan to eat it later, always label the container with the date to track freshness!

Can I freeze Air Fryer Honey Garlic Salmon?
Absolutely! To freeze your Air Fryer Honey Garlic Salmon, wrap it tightly in plastic wrap, followed by aluminum foil to prevent freezer burn. It can be stored in the freezer for up to 3 months. When you’re ready to enjoy it again, simply thaw it in the fridge overnight before reheating.

How do I reheat Air Fryer Honey Garlic Salmon without drying it out?
To reheat your salmon and keep it moist, the air fryer is your best friend! Preheat it to 280°F and place the salmon in the basket. Heat for about 7-10 minutes, checking frequently to ensure it doesn’t overcook. This method revives that tender, flaky texture you love!

Can I use alternative ingredients for dietary needs?
Very! For gluten-free requirements, swap soy sauce for coconut aminos—this way, you don’t miss out on that savory flavor. If you’re vegan, consider substituting honey with maple syrup. Always remember to check labels to ensure your alternative ingredients meet your dietary preferences, and adapt the recipe as needed!

Air Fryer Honey Garlic Salmon

Air Fryer Honey Garlic Salmon: Quick, Glazed Perfection

Experience the delightful flavors of Air Fryer Honey Garlic Salmon, a quick and healthy dinner option perfect for busy weeknights.
Prep Time 15 minutes
Cook Time 8 minutes
Marinating Time 30 minutes
Total Time 53 minutes
Servings: 4 fillets
Course: Dinner
Cuisine: American
Calories: 300

Ingredients
  

For the Salmon
  • 4 fillets Salmon Fresh or thawed fillets work best.
For the Marinade
  • 2 tablespoons Olive Oil Can substitute with avocado oil.
  • 3 tablespoons Honey Maple syrup can be used as a vegan option.
  • 2 tablespoons Soy Sauce Use coconut aminos for a gluten-free alternative.
  • 3 cloves Garlic (finely chopped) Freshly minced garlic gives the best flavor.
  • 1 teaspoon Salt Adjust to taste.
  • 1/2 teaspoon Black Pepper Add for extra depth.

Equipment

  • Air Fryer

Method
 

Step-by-Step Instructions
  1. In a medium bowl, combine olive oil, honey, soy sauce, chopped garlic, salt, and black pepper. Whisk together until smooth.
  2. Place the salmon fillets on a clean plate and brush each fillet with the marinade. Optionally, marinate for 30 minutes.
  3. Preheat the air fryer to 370°F (188°C) and spray the basket with olive oil.
  4. Place the marinated salmon in the air fryer baskets, spaced apart. Air fry for 5 minutes, then brush with remaining marinade and cook for an additional 3 minutes.
  5. Remove the salmon from the air fryer and serve with lemon slices and fresh herbs.

Nutrition

Serving: 1filletCalories: 300kcalCarbohydrates: 12gProtein: 25gFat: 15gSaturated Fat: 3gPolyunsaturated Fat: 5gMonounsaturated Fat: 7gCholesterol: 75mgSodium: 600mgPotassium: 700mgSugar: 10gVitamin C: 2mgCalcium: 2mgIron: 4mg

Notes

For extra flavor, let the salmon marinate longer. Overcooking should be avoided for perfect flakiness.

Tried this recipe?

Let us know how it was!

Cowboy Butter Chicken Linguine: A Creamy Dinner Delight

The aroma of sizzling garlic and tender chicken fills the kitchen, instantly transforming any evening into something special. I couldn’t resist sharing my favorite dish: Cowboy Butter Chicken Linguine. This creamy, savory delight wraps perfectly cooked linguine in a rich cowboy butter sauce that feels like a warm hug on a plate. Whether you’re racing against the clock on a busy weeknight or planning a cozy dinner for friends, this dish is your go-to for a comforting meal that also impresses. Plus, with its simple prep and versatile variations, it’s as fun to make as it is to savor. Are you ready to dive into this culinary adventure?

Why is Cowboy Butter Chicken Linguine a Must-Try?

Flavor Explosion: This dish offers a bold twist on traditional pasta with a savory cowboy butter sauce, packed with depth and richness.

Quick & Simple: The preparation is effortless, making it an ideal choice for weeknight dinners without sacrificing taste.

Versatile Options: Easily switch up the pasta shape or protein, perfect for mixing in your favorite ingredients or catering to dietary preferences.

Crowd-Pleaser: Its creamy texture and well-balanced flavors are sure to impress friends and family, making special occasions even more memorable.

Pair it with a side of garlic bread or a fresh green salad for a complete meal that satisfies. Dive into this comforting delight, and you’ll understand why it’s a favorite among home cooks!

Cowboy Butter Chicken Linguine Ingredients

• To create this creamy delight at home, gather these essential ingredients for a meal that’s sure to impress!

For the Pasta

  • Linguine Pasta – This forms the dish’s base; penne or fettuccine work as great alternatives.

For the Chicken

  • Boneless, Skinless Chicken Breast – The star protein; feel free to use rotisserie chicken for quicker prep.

For the Sauce

  • Olive Oil – Essential for cooking the chicken; canola or vegetable oil also works.
  • Heavy Cream – Ensures the sauce is wonderfully creamy; substitute with half-and-half for a lighter version.
  • Garlic Powder & Onion Powder – These spices deepen the flavors; using fresh garlic and onions can enhance the taste further.
  • Crushed Red Pepper Flakes – Add heat to the dish; adjust the quantity based on your spice tolerance.
  • Grated Parmesan Cheese – This adds a savory, cheesy element; replace it with nutritional yeast for a dairy-free option.

For Seasoning

  • Salt – Vital for enhancing all flavors; customize to your taste.
  • Black Pepper – Freshly ground adds a nice warmth and depth to the dish.

For Garnish

  • Fresh Basil or Parsley – These brighten up the dish; cilantro can be substituted for a different flavor.

Now that you have all the ingredients, you’re just moments away from diving into a plate of comforting Cowboy Butter Chicken Linguine!

Step‑by‑Step Instructions for Cowboy Butter Chicken Linguine

Step 1: Cook the Linguine
Begin by boiling a large pot of salted water over high heat. Once the water reaches a rolling boil, add the linguine pasta and cook according to package directions until al dente, usually around 8-10 minutes. Stir occasionally to prevent sticking. Once cooked, reserve about a cup of the pasta water, then drain the linguine and set it aside while you prepare the sauce.

Step 2: Prepare the Cowboy Butter Sauce
In a medium bowl, melt ½ cup of butter in the microwave or on the stove until completely melted. Whisk in minced garlic, Dijon mustard, Worcestershire sauce, smoked paprika, crushed red pepper flakes, lemon juice, parsley, salt, and pepper until well combined. This rich mixture is the key to the Cowboy Butter Chicken Linguine, providing deep flavors for the dish.

Step 3: Cook the Chicken
Heat 2 tablespoons of olive oil in a large skillet over medium heat. Season the boneless, skinless chicken breasts with salt, black pepper, garlic powder, and onion powder. Place the chicken in the skillet and cook for 6-7 minutes per side, or until golden brown and cooked through. The chicken should reach an internal temperature of 165°F. Once done, transfer the chicken to a plate and let it rest.

Step 4: Create the Sauce Base
In the same skillet used for the chicken, pour in the prepared cowboy butter sauce and bring it to a gentle simmer over medium-low heat. Let the sauce infuse for about 2-3 minutes, allowing the flavors to meld beautifully. This step ensures that every bite of your Cowboy Butter Chicken Linguine will be bursting with flavor.

Step 5: Combine Cream and Cheese
Reduce the heat and slowly stir in 1 cup of heavy cream into the simmering sauce. Mix well until the cream is fully integrated. Then, add ½ cup of grated Parmesan cheese, continuing to stir until the sauce is smooth and creamy. This will create a luscious coating for the chicken and pasta in your Cowboy Butter Chicken Linguine.

Step 6: Finish the Dish
Return the cooked chicken to the skillet, slicing it if desired, and coat it thoroughly in the decadent sauce. Then, add the linguine to the skillet, tossing everything together until the pasta is well coated. If the sauce appears too thick, gradually incorporate reserved pasta water until you reach the desired consistency.

Step 7: Serve and Garnish
Once well combined, remove the skillet from heat and plate the Cowboy Butter Chicken Linguine. Garnish generously with freshly chopped basil or parsley for a burst of color and flavor. This vibrant touch enhances the dish’s visual appeal and completes your comforting meal!

Expert Tips for Cowboy Butter Chicken Linguine

Perfect Chicken: Ensure the chicken is cooked just until golden to retain its juiciness, making your Cowboy Butter Chicken Linguine moist and flavorful.

Fresh Ingredients: Using fresh garlic and parsley significantly enhances the sauce’s flavor—never underestimate the power of vibrant herbs and spices!

Silky Sauce: Add reserved pasta water gradually to achieve a silky, creamy sauce texture. This prevents the sauce from becoming too thick and clumpy.

Adjusting Spice: If you prefer less heat, start with a small amount of crushed red pepper flakes and gradually increase to taste; you can always add more, but it’s hard to take away!

Herb Variations: Feel free to experiment with different herbs like thyme or oregano for a unique flavor profile that personalizes your Cowboy Butter Chicken Linguine.

What to Serve with Cowboy Butter Chicken Linguine

Transform your hearty dish into a delightful feast with these perfect pairings that enhance each bite of creamy goodness.

  • Garlic Bread: Freshly baked or toasted, garlic bread adds a crunchy contrast, perfect for soaking up every luscious drop of sauce.

  • Simple Green Salad: A cool side salad with mixed greens and a light vinaigrette provides a refreshing balance to the rich pasta dish.

  • Roasted Vegetables: Caramelized seasonal veggies bring a depth of flavor and colorful presentation, creating a delightful harmony of textures on your plate.

  • Steamed Asparagus: Bright green spears with a sprinkle of lemon zest add a pop of color and a subtle earthiness, elevating your dining experience.

  • Creamy Coleslaw: This crunchy and tangy side adds a refreshing bite, making each forkful of Cowboy Butter Chicken Linguine feel lighter and more lively.

  • Sparkling Wine: A chilled glass of sparkling wine, such as Prosecco, effervesces beautifully with the creamy sauce, enhancing the overall flavor experience.

  • Chocolate Mousse: End your meal on a sweet note with a silky chocolate mousse, bringing a touch of luxury that complements the dish’s richness perfectly.

How to Store and Freeze Cowboy Butter Chicken Linguine

Fridge: Store leftovers in an airtight container for up to 3 days to maintain freshness and flavor.

Freezer: For longer storage, freeze in an airtight container for up to 2 months. To prevent freezer burn, use plastic wrap before sealing.

Reheating: When ready to enjoy, thaw in the fridge overnight. Reheat on the stove over low heat with a splash of water or cream to revive the creamy sauce.

Leftover Tips: Consider keeping the pasta and sauce separate before storing to prevent sogginess, ensuring a delightful taste when you serve your Cowboy Butter Chicken Linguine again!

Cowboy Butter Chicken Linguine Variations

Feel free to make this comforting dish your own with these exciting twists and substitutions!

  • Pasta Shape: Swap linguine for penne or fettuccine to add a new texture to your dish. Different shapes can alter the overall experience, making each bite unique!

  • Spicy Cajun Chicken: Dust your chicken with Cajun seasoning for a Southern-inspired flavor boost. This adds a delightful kick, perfect for those who love a bit of heat!

  • Vegetarian Delight: Replace the chicken with mushrooms or roasted vegetables. By using hearty veggies, you can create a completely delicious and meatless version without sacrificing satisfaction.

  • Dairy-Free Option: Use coconut milk or almond milk in place of heavy cream and skip the cheese for a creamy, non-dairy version that’s still packed with flavor.

  • Herb Variations: Substitute fresh basil with cilantro or chives for a fresh twist on the classic flavors. Each herb brings a unique flair that dances beautifully with the sauce.

  • Flavor Infusion: Introduce a splash of white wine when simmering the sauce for an added depth of flavor and a touch of sophistication. The wine will elevate the sauce and pair beautifully with the chicken.

  • Additional Veggies: Toss in some spinach or sun-dried tomatoes for an extra layer of flavor and nutrition. These add a vibrant color, making your dish not only tasty but visually appealing.

  • Nuts for Crunch: Sprinkle with toasted pine nuts or walnuts before serving, offering a delightful crunch that contrasts wonderfully with the creamy sauce.

Explore these variations to personalize your Cowboy Butter Chicken Linguine experience. Don’t forget to enjoy it with a side of crisply baked garlic bread or alongside a light Tuscan Chicken Soup to create a delicious spread that everyone will love!

Make Ahead Options

Cowboy Butter Chicken Linguine is perfect for meal prep, saving you time during busy weeknights! You can prepare the cowboy butter sauce up to 3 days in advance; simply refrigerate it in an airtight container. The chicken can also be seasoned and cooked ahead of time, storing it in the fridge for up to 2 days. When ready to serve, reheat the sauce and chicken in a skillet over medium heat, then toss in freshly cooked linguine, adding reserved pasta water for a creamy consistency. This ensures your dish is just as delicious and comforting, making your meal planning hassle-free!

Cowboy Butter Chicken Linguine Recipe FAQs

What type of pasta is best for Cowboy Butter Chicken Linguine?
Absolutely! While linguine is ideal for this dish, you can easily substitute it with penne, fettuccine, or even spaghetti. Each pasta shape brings its own unique texture to the meal, so feel free to experiment and see what you enjoy most!

How should I store leftovers of Cowboy Butter Chicken Linguine?
To keep your Cowboy Butter Chicken Linguine fresh, simply store leftovers in an airtight container in the fridge for up to 3 days. Just remember to reheat it gently on the stove with a splash of water or cream to revive its creamy texture!

Can I freeze Cowboy Butter Chicken Linguine?
Absolutely, you can freeze this dish! To do so, let it cool completely, then transfer it to an airtight container. Make sure to use plastic wrap to seal it tightly to prevent freezer burn. It can be frozen for up to 2 months. When ready to enjoy, thaw it in the fridge overnight, then reheat on the stove, adding a little cream or water if the sauce is too thick.

What if my sauce is too thick when making Cowboy Butter Chicken Linguine?
If you find that your sauce has thickened too much, no worries! Simply add reserved pasta water a little at a time, stirring continuously until you achieve your desired consistency. This step helps maintain that silky, creamy feel that makes the dish so comforting.

Are there any dietary considerations for this recipe?
The key ingredients in Cowboy Butter Chicken Linguine are straightforward, but if you have dietary restrictions, there are easy substitutes! For instance, to make it dairy-free, use cashew cream instead of heavy cream and Nutritional Yeast for the Parmesan. For gluten-free options, you can use gluten-free pasta varieties. Just remember to adjust the cooking time based on the pasta type!

Cowboy Butter Chicken Linguine

Cowboy Butter Chicken Linguine: A Creamy Dinner Delight

Cowboy Butter Chicken Linguine is a creamy, savory dish that combines perfectly cooked linguine with a rich cowboy butter sauce.
Prep Time 15 minutes
Cook Time 30 minutes
Total Time 45 minutes
Servings: 4 servings
Course: Pasta
Cuisine: American
Calories: 600

Ingredients
  

For the Pasta
  • 8 oz Linguine Pasta can substitute with penne or fettuccine
For the Chicken
  • 2 pieces Boneless, Skinless Chicken Breast can use rotisserie chicken for quicker prep
For the Sauce
  • 0.5 cup Olive Oil can substitute with canola or vegetable oil
  • 1 cup Heavy Cream can substitute with half-and-half
  • 1 tsp Garlic Powder can use fresh garlic for better flavor
  • 1 tsp Onion Powder can use fresh onions for better flavor
  • 0.5 tsp Crushed Red Pepper Flakes adjust according to spice tolerance
  • 0.5 cup Grated Parmesan Cheese can substitute with nutritional yeast for dairy-free option
For Seasoning
  • 1 tsp Salt adjust to taste
  • 0.5 tsp Black Pepper freshly ground for better flavor
For Garnish
  • Fresh Basil or Parsley can substitute with cilantro

Equipment

  • Large pot
  • Skillet
  • medium bowl
  • whisk

Method
 

Cooking Instructions
  1. Cook the Linguine: Boil a large pot of salted water, add the linguine pasta, and cook until al dente, about 8-10 minutes. Reserve a cup of pasta water, drain, and set aside.
  2. Prepare the Cowboy Butter Sauce: Melt ½ cup of butter and whisk in garlic, mustard, Worcestershire sauce, smoked paprika, red pepper flakes, lemon juice, parsley, salt, and pepper.
  3. Cook the Chicken: Heat 2 tablespoons of olive oil, season chicken with salt, pepper, garlic powder, and onion powder, then cook until golden and internal temperature reaches 165°F. Rest the chicken.
  4. Create the Sauce Base: Pour prepared cowboy butter sauce into the skillet and bring to a gentle simmer for 2-3 minutes.
  5. Combine Cream and Cheese: Stir in 1 cup of heavy cream and ½ cup of Parmesan until smooth and creamy.
  6. Finish the Dish: Add chicken back to the skillet, slice if desired. Toss in linguine, incorporating reserved pasta water until desired consistency is reached.
  7. Serve and Garnish: Plate the dish and garnish with freshly chopped basil or parsley before serving.

Nutrition

Serving: 1servingCalories: 600kcalCarbohydrates: 60gProtein: 30gFat: 25gSaturated Fat: 12gCholesterol: 90mgSodium: 800mgPotassium: 600mgFiber: 4gSugar: 2gVitamin A: 500IUVitamin C: 2mgCalcium: 200mgIron: 2mg

Notes

Store leftovers in an airtight container for up to 3 days in the fridge. For longer storage, freeze for up to 2 months.

Tried this recipe?

Let us know how it was!

Creamy Healthy Garlic Parmesan Chicken Pasta Recipe You’ll Love

I don’t know about you, but I often find myself stuck in a fast-food rut, craving comfort but knowing I need to stay healthy. That’s why I’m thrilled to share my Healthy Garlic Parmesan Chicken Pasta Recipe. It’s amazing how a dish that feels so indulgent can stay light and guilt-free! This creamy delight features a luscious sauce made with Greek yogurt and low-fat milk, all while packing a high protein punch. Plus, it’s perfect for those busy weeknights when you need dinner on the table in just 30 minutes. If you’re looking for something that’s both a crowd-pleaser and good for you, keep scrolling to uncover how to whip up this nutritious twist on classic pasta!

Why Is This Recipe a Game-Changer?

Creamy Comfort: Rich, cheesy goodness that satisfies cravings without the guilt.
Quick Preparation: Whip this up in just 30 minutes—perfect for busy weeknights!
High Protein: Packed with lean chicken and Greek yogurt for a nutritious meal.
Versatile Ingredients: Use whole wheat pasta and fresh veggies for tailored nutrition.
Meal Prep Friendly: Great for leftovers, making healthy eating effortless throughout the week.
Plus, if you love garlic flavors, try pairing it with options like Garlic Butter Baked for a complete meal experience!

Healthy Garlic Parmesan Chicken Pasta Ingredients

Here’s everything you’ll need to create this deliciously nutritious dish!

For the Pasta
Whole Wheat Pasta – Serves as the foundation, offering complex carbohydrates for energy.
Salt – Enhances the flavor of the pasta while cooking.

For the Chicken
Chicken Breast – The main protein source; opt for skinless and cubed pieces for best texture.
Olive Oil – A healthy fat for sautéing the chicken and mixing in the sauce; can be swapped with avocado oil for a unique twist.
Salt, Pepper, Paprika, Italian Seasoning – Essential seasonings that elevate the overall taste; feel free to use fresh herbs for a fresher profile.

For the Sauce
Minced Garlic – Adds an aromatic kick; make sure to sauté it until just fragrant to avoid bitterness.
Whole Wheat Flour – Thickens the sauce when combined with oil; gluten-free flour is a suitable alternative if needed.
Chicken Broth – Provides the liquid base for your sauce; low-sodium options are great for healthier cooking.
Low-Fat Milk – Gives the sauce its creamy texture without the calories; nut milk can also work well.
Greek Yogurt – Introduces creaminess without the guilt; can be swapped for low-fat sour cream if preferred.
Parmesan Cheese – Delivers rich flavor and creaminess; consider nutritional yeast for a dairy-free version.

For Adding Nutrition
Spinach (optional) – Adds a boost of nutrients and vibrant color; kale can be a great substitute.
Chopped Parsley – For garnishing, it offers a fresh touch and eye-catching appeal to your finished dish.

Enjoy the simplicity and flavor of this Healthy Garlic Parmesan Chicken Pasta Recipe!

Step‑by‑Step Instructions for Healthy Garlic Parmesan Chicken Pasta Recipe

Step 1: Boil the Pasta
Begin by bringing a large pot of salted water to a rolling boil over high heat. Add your whole wheat pasta to the pot and cook according to package instructions until al dente, typically about 8–10 minutes. Reserve 1/4 cup of the starchy pasta water, then drain the pasta and set it aside, allowing it to cool slightly.

Step 2: Cook the Chicken
In a large skillet, heat 1 tablespoon of olive oil over medium heat. Add the cubed chicken breast, seasoning it with salt, pepper, paprika, and Italian seasoning. Sauté the chicken for 5–6 minutes or until it turns golden brown and is cooked through, reaching an internal temperature of 165°F. Transfer the cooked chicken to a plate and set aside.

Step 3: Sauté the Garlic
Return to the same skillet and add another tablespoon of olive oil. Over medium heat, add the minced garlic and sauté for 30–60 seconds until it becomes fragrant but not browned, as burnt garlic can turn bitter. Stir gently to ensure even cooking and to release that wonderful aromatic flavor.

Step 4: Make the Roux
Once the garlic is fragrant, sprinkle in the whole wheat flour, stirring to create a roux. Cook this mixture for about 30 seconds, stirring continuously to ensure it doesn’t stick or burn. This step will create a thickening base for your creamy sauce in the Healthy Garlic Parmesan Chicken Pasta recipe.

Step 5: Whisk in the Liquids
Gradually pour in the chicken broth while whisking vigorously to prevent lumps from forming. Follow this by adding low-fat milk while continuing to stir. Cook the mixture for 2 to 3 minutes, or until the sauce thickens up and reaches a nice creamy consistency. Look for a smooth texture that coats the back of a spoon.

Step 6: Incorporate the Yogurt and Cheese
Lower the heat to medium-low, and mix in the Greek yogurt, stirring until the sauce is smooth and creamy. Add the grated Parmesan cheese, allowing it to melt completely into the sauce. This will enrich your Healthy Garlic Parmesan Chicken Pasta with flavor and a velvety mouthfeel.

Step 7: Combine Everything
Return the sautéed chicken back to the skillet, followed by the cooked pasta. If you’re adding optional spinach, toss it in now. Gently stir everything together until the pasta is well-coated with the creamy sauce, ensuring the flavors meld beautifully for a satisfying dish.

Step 8: Serve and Garnish
Plate the Healthy Garlic Parmesan Chicken Pasta immediately while it’s warm. Garnish with freshly chopped parsley and extra Parmesan cheese if desired. The dish should look inviting and creamy, presenting a perfect finish to your delightful meal!

Make Ahead Options

These Healthy Garlic Parmesan Chicken Pasta meal prep strategies are perfect for busy cooks! You can cook the whole wheat pasta up to 24 hours in advance and store it in an airtight container in the refrigerator. The chicken can also be seasoned and cooked ahead of time; just ensure to cool it completely before refrigerating for up to 3 days. For the sauce, prepare the garlic, roux, and whisk in the liquids, then refrigerate for up to 2 days. When you’re ready to serve, gently reheat the sauce and add the pasta and chicken, stirring until everything is warmed through and well-combined. This way, your Healthy Garlic Parmesan Chicken Pasta will taste just as delicious with minimal effort on busy weeknights!

Healthy Garlic Parmesan Chicken Pasta Variations

Feel free to get creative with this delightful recipe that encourages you to customize and elevate your dish!

  • Shrimp Swap: Replace chicken with sautéed shrimp for a quick seafood twist that pairs beautifully with garlic.

  • Tofu Upgrade: Use firm tofu instead of chicken for a vegetarian version packed with protein; just cube and pan-fry until golden.

  • Gluten-Free Pasta: Swap whole wheat pasta with your favorite gluten-free option, ensuring everyone at the table can enjoy this dish.

  • Creamy Vegan: For a dairy-free option, substitute Greek yogurt and Parmesan with cashew cream and nutritional yeast.

  • Seasonal Veggies: Incorporate seasonal veggies like zucchini or bell peppers, adding color and nutrition while keeping it fresh and vibrant.

  • Spicy Kick: Add a pinch of red pepper flakes for an unexpected heat element that will wake up your taste buds.

  • Pesto Infusion: Stir in a few tablespoons of pesto with the sauce for a basil-infused, herby flavor bomb that transforms the dish.

  • Lemon Zest: A squeeze of fresh lemon juice just before serving brightens the flavors, making your dish feel even more refreshing.

For a delightful pairing, consider enjoying this dish alongside Garlic Parmesan Roasted shrimp for a magnificent dinner spread or savor it with a side of Cheesy Garlic Chicken wraps for a comforting meal option!

Expert Tips for Healthy Garlic Parmesan Chicken Pasta

Perfectly Cooked Chicken: Ensure chicken is evenly cooked by cutting into uniform pieces; this promotes even browning and tenderness.

Flavor Boosting: For extra flavor, consider marinating the chicken in your favorite spices for at least 30 minutes before cooking.

Sauce Consistency: The reserved pasta water is your friend! Use it to adjust the creaminess of the sauce for your Healthy Garlic Parmesan Chicken Pasta.

Watch the Garlic: Always sauté garlic over medium heat and avoid browning it to prevent a bitter taste that can ruin your dish.

Fresh Herbs: Incorporate fresh herbs like basil or thyme for an aromatic touch that elevates your pasta’s flavor profile beautifully.

How to Store and Freeze Healthy Garlic Parmesan Chicken Pasta

Fridge: Store leftovers in an airtight container for up to 3 days. Reheat gently on the stove with a splash of water to revive the creamy sauce.

Freezer: For longer storage, place cooled portions in freezer-safe bags or containers, and freeze for up to 3 months. Thaw overnight in the fridge before reheating.

Reheating: Reheat on low heat in a skillet, adding a little chicken broth or water as needed to maintain creaminess.

Serving Leftovers: This Healthy Garlic Parmesan Chicken Pasta is delicious reheated or enjoyed cold in a pasta salad.

What to Serve with Healthy Garlic Parmesan Chicken Pasta

Create a delightful dining experience by pairing this creamy pasta dish with complementary sides and flavors.

  • Garlic Bread: Perfectly crispy on the outside and soft inside, it’s the ideal accompaniment for wiping up that creamy sauce.

  • Caesar Salad: Crisp romaine and crunchy croutons provide a refreshing contrast, making every bite of pasta feel even more indulgent.

  • Roasted Vegetables: Seasonal veggies like zucchini and bell peppers add a lovely caramelized sweetness that beautifully balances the pasta’s rich flavors.

  • Steamed Broccoli: Bright green florets offer a nutritious boost and a delightful crunch, enhancing both nutrition and presentation.

  • White Wine: A chilled glass of Sauvignon Blanc complements the garlic and cheese, elevating the meal to a cozy yet sophisticated experience.

  • Lemon Sorbet: A light and zesty dessert that cleanses the palate, refreshing you after the rich and creamy main dish.

Embrace the joy of creating a well-rounded meal full of warmth and satisfaction!

Healthy Garlic Parmesan Chicken Pasta Recipe FAQs

How do I select the best chicken breast for this recipe?
Look for skinless chicken breasts that are plump and tender, without any dark spots or bruising. Fresh chicken should have a light pink color. If you have the option, choose organic or free-range for better flavor and quality.

What’s the best way to store leftover Healthy Garlic Parmesan Chicken Pasta?
Store leftovers in an airtight container in the fridge for up to 3 days. When you’re ready to enjoy it again, reheat gently on the stove with a splash of water to bring back that creamy texture. Avoid the microwave if you want to keep it from drying out.

Can I freeze Healthy Garlic Parmesan Chicken Pasta?
Absolutely! To freeze, allow the pasta to cool completely, then place individual portions in freezer-safe bags or containers. It can be stored for up to 3 months. When you’re ready to eat, simply thaw overnight in the fridge and reheat on low heat, adding a touch of chicken broth or water if necessary.

What should I do if my sauce isn’t thickening properly?
If you find your sauce is too thin, try adding a bit more whole wheat flour to create a roux. Mix 1 tablespoon of flour with a little olive oil in a separate bowl until smooth, and then slowly stir it into your sauce. Cook for an additional 2–3 minutes until thickened, ensuring you stir continuously to avoid lumps.

Are there any dietary considerations for this recipe?
Yes, if you have allergies or dietary restrictions, consider using gluten-free flour for the roux and substituting Greek yogurt with low-fat sour cream or a dairy-free yogurt alternative. Vegans can replace chicken with tofu or chickpeas and skip the cheese or opt for nutritional yeast to enjoy the cheesy flavor. Always check for cross-contamination with allergens, particularly if serving to guests.

How can I enhance the nutritional value of this dish?
Consider adding seasonal vegetables like zucchini, bell peppers, or mushrooms to boost both flavor and nutrients! Toss in these veggies when sautéing the garlic to allow their flavors to meld beautifully with the sauce. This not only adds color but also increases fiber and vitamins in your meal.

Healthy Garlic Parmesan Chicken Pasta Recipe

Creamy Healthy Garlic Parmesan Chicken Pasta Recipe You’ll Love

A delicious Healthy Garlic Parmesan Chicken Pasta Recipe that's creamy and high in protein, making it perfect for quick weeknight dinners.
Prep Time 10 minutes
Cook Time 20 minutes
Total Time 30 minutes
Servings: 4 servings
Course: Pasta
Cuisine: Italian
Calories: 450

Ingredients
  

For the Pasta
  • 8 oz Whole Wheat Pasta Serves as the foundation, offering complex carbohydrates for energy.
  • 1 tsp Salt Enhances the flavor of the pasta while cooking.
For the Chicken
  • 1 lb Chicken Breast Opt for skinless and cubed pieces for best texture.
  • 2 tbsp Olive Oil Can be swapped with avocado oil for a unique twist.
  • 1 tsp Salt Essential seasoning.
  • 1 tsp Pepper Essential seasoning.
  • 1 tsp Paprika Essential seasoning.
  • 1 tsp Italian Seasoning Essential seasoning.
For the Sauce
  • 4 cloves Minced Garlic Adds an aromatic kick.
  • 2 tbsp Whole Wheat Flour Thickens the sauce.
  • 2 cups Chicken Broth Provides the liquid base for your sauce.
  • 1 cup Low-Fat Milk Gives the sauce its creamy texture.
  • 1 cup Greek Yogurt Introduces creaminess without the guilt.
  • 1/2 cup Parmesan Cheese Delivers rich flavor and creaminess.
For Adding Nutrition
  • 2 cups Spinach Optional, adds a boost of nutrients.
  • 1/4 cup Chopped Parsley For garnishing.

Equipment

  • Large pot
  • Skillet
  • whisk

Method
 

Step-by-Step Instructions
  1. Boil the Pasta: Bring a large pot of salted water to a rolling boil. Add the whole wheat pasta and cook until al dente.
  2. Cook the Chicken: Heat olive oil in a large skillet, add cubed chicken seasoned with salt, pepper, paprika, and Italian seasoning.
  3. Sauté the Garlic: Add minced garlic to the skillet and sauté until fragrant.
  4. Make the Roux: Sprinkle in whole wheat flour and stir continuously.
  5. Whisk in the Liquids: Gradually pour in chicken broth and low-fat milk while whisking.
  6. Incorporate the Yogurt and Cheese: Mix Greek yogurt and Parmesan cheese into the sauce.
  7. Combine Everything: Return the sautéed chicken back to the skillet with cooked pasta.
  8. Serve and Garnish: Plate immediately and garnish with chopped parsley and extra Parmesan if desired.

Nutrition

Serving: 1servingCalories: 450kcalCarbohydrates: 50gProtein: 35gFat: 14gSaturated Fat: 4gPolyunsaturated Fat: 2gMonounsaturated Fat: 6gCholesterol: 80mgSodium: 600mgPotassium: 800mgFiber: 6gSugar: 4gVitamin A: 20IUVitamin C: 30mgCalcium: 15mgIron: 10mg

Notes

This dish is perfect for meal prep and can be stored in the fridge for up to 3 days.

Tried this recipe?

Let us know how it was!

Beef Enchilada Casserole with Rice: A Cozy Family Favorite

As I stood in my kitchen, the aroma of sizzling beef and fragrant spices filled the air, and I couldn’t help but think about how a simple One-Pan Beef Enchilada Casserole with Rice could bring my family together on a busy weeknight. This dish isn’t just a hearty meal; it’s a celebration of convenience and comfort, perfect for those evenings when time is tight, but your heart craves a home-cooked dinner. With just one pan, you’ll achieve layers of tender ground beef, zesty Tex-Mex flavors, and gooey cheese—all harmoniously baked with rice. Plus, this recipe is freezer-friendly, making it a lifesaver for meal prep enthusiasts! So, what are you waiting for? Let’s dive into creating some delicious memories together!

Why is this casserole a must-try?

Convenience is key! This One-Pan Beef Enchilada Casserole with Rice simplifies your dinner prep by combining all the delicious flavors and textures in one dish. Hearty and filling, it’s perfect for a satisfying weeknight meal that the whole family will love. Customizable for various tastes, you can swap beef for turkey or add extra veggies, ensuring everyone enjoys their plate. Plus, it’s freezer-friendly, making it ideal for meal prepping or busy weeks ahead. The melty, golden cheese and zesty spices create a comforting warmth that transforms every bite into a cherished memory, reminiscent of a cozy family gathering. Don’t forget to check out my other easy recipes like Sticky Beef Noodles or Tater Tot Casserole for more flavorful dish ideas!

Beef Enchilada Casserole with Rice Ingredients

For the Casserole
Ground Beef – The main protein that gives this dish a hearty foundation; you can swap it with ground turkey or chicken for a lighter option.
Onion – Adds sweetness and depth; yellow or white onions work beautifully here.
Garlic – Fresh garlic is preferred for its aromatic depth and punchy flavor.
Diced Tomatoes – Moisture and acidity enhancer; consider using fire-roasted tomatoes for a smokier taste.
Red Enchilada Sauce – This provides a spicy kick and vibrant flavor; feel free to use homemade or your favorite store-bought version.
Black Beans – A fantastic source of fiber and protein; pinto beans work as a tasty substitute too.
Corn – For a touch of sweetness and crunch; using frozen corn is a quick and easy alternative.
Cooked Rice – The perfect filler to make this dish hearty; quinoa is a great gluten-free substitute.
Slap Ya Mama Seasoning – Gives a delightful zesty kick; substitute it with your preferred Cajun or Creole seasoning.
Chili Powder – Essential for enhancing the dish’s Tex-Mex flair.
Cumin – Deepens the flavor profile; it’s a must-have spice in this recipe.
Garlic Powder, Black Pepper, Red Pepper Flakes – These spices elevate the taste, adding warmth and a bit of heat.
Cheddar Cheese – A melty, gooey topping that everyone loves; feel free to try Monterey Jack or Pepper Jack for variety.
Cilantro & Green Onions – Fresh herbs for garnish that brighten the dish; you can omit cilantro if it’s not your favorite.

Optional Toppings
Sour Cream – Adds creaminess and balances the spice; a dollop goes a long way.
Avocado Slices – Creamy and nutritious, avocado adds richness and an extra layer of flavor.
Lime Wedges – A squeeze of lime adds brightness and freshness that completes the meal!

Dive into this delicious Beef Enchilada Casserole with Rice, and savor the warmth and comfort it brings to your family table!

Step‑by‑Step Instructions for Beef Enchilada Casserole with Rice

Step 1: Preheat and Prepare
Preheat your oven to 350°F (175°C) and grab a 3-quart casserole dish. Lightly coat the dish with non-stick spray to ensure easy serving. This first step is crucial, as it sets the perfect environment for your Beef Enchilada Casserole to bake and achieve that delightful golden cheese on top.

Step 2: Brown the Beef
In a large skillet or Dutch oven over medium heat, add the ground beef and diced onion. Cook for about 8-10 minutes, stirring occasionally, until the beef is browned and no longer pink, and the onions are soft and translucent. You’ll want that lovely sizzling sound as the flavors meld—a promising start for your casserole!

Step 3: Sauté the Garlic
Once the beef and onion mixture is ready, add minced garlic to the skillet. Sauté for an additional 2 minutes, or until fragrant. The aroma will fill your kitchen, creating an irresistible base for the Beef Enchilada Casserole. Be careful not to let the garlic burn!

Step 4: Combine Ingredients
Drain any excess fat from the skillet, then stir in the diced tomatoes, enchilada sauce, black beans, corn, cooked rice, and all seasonings. Mix well to combine every ingredient evenly. This robust mixture should be colorful and aromatic, promising a hearty and flavorful dish.

Step 5: Simmer the Mixture
Cover the skillet and let the mixture simmer on medium-low heat for about 10 minutes. Stir occasionally, checking that the rice is tender and the ingredients are heated through. You’ll know it’s ready when everything is bubbling and the flavors have melded beautifully.

Step 6: Transfer and Top
Carefully transfer the mixture into your prepared casserole dish, spreading it evenly. Top generously with shredded cheddar cheese, ensuring a nice layer covers the entire surface. This step is key to achieving that melty, gooey goodness that everyone loves in a Beef Enchilada Casserole.

Step 7: Bake to Perfection
Place the casserole in the preheated oven and bake for approximately 20 minutes or until the cheese is melty and bubbly, with a hint of golden color on top. Keep an eye on it towards the end of baking for that perfect finishing touch!

Step 8: Garnish and Serve
Once baked, remove the casserole from the oven and let it cool for a few minutes. Sprinkle chopped cilantro and sliced green onions on top for a fresh flavor contrast. This finishing touch elevates your Beef Enchilada Casserole with Rice, making it ready to serve and enjoy with your family.

Make Ahead Options

This Beef Enchilada Casserole with Rice is perfect for meal prep! You can assemble the entire casserole up to 24 hours in advance; simply cover it tightly and refrigerate. To maintain quality and prevent the rice from getting mushy, it’s best to cook the rice al dente. If you’re planning to enjoy it after a few days, this casserole can also be frozen for up to 3 months—just be sure to wrap it well to avoid freezer burn. When you’re ready to serve, uncover and bake from frozen at 350°F (175°C) for about 40-45 minutes or until heated through and the cheese is bubbly. This way, you’ll still achieve that comforting, delicious flavor with minimal effort on busy nights!

How to Store and Freeze Beef Enchilada Casserole with Rice

Fridge: Store leftovers in an airtight container for up to 4 days. Just reheat covered in the oven until warmed through for a quick meal.

Freezer: This casserole is freezer-friendly and can be frozen for up to 3 months. Allow it to cool completely before transferring to a freezer-safe container.

Thawing: When ready to enjoy, transfer to the fridge overnight to thaw. Reheat in the oven at 350°F (175°C) until hot and bubbly, about 25-30 minutes.

Reheating: For best results, reheat individual portions in the microwave or the whole casserole in the oven. Enjoy the comforting flavors of your Beef Enchilada Casserole with Rice even after it’s been stored!

Expert Tips for Beef Enchilada Casserole

  • Mix Gently: Stir the casserole mixture gently to prevent breaking down the rice. This keeps the texture hearty and appealing when serving.

  • Cheese Distribution: Ensure cheese is evenly distributed on top. This allows for optimal melting and provides that delicious gooey layer throughout the Beef Enchilada Casserole.

  • Cooling Time: Let the casserole cool for about 5-10 minutes after baking. This helps it set, making it easier to cut and serve without falling apart.

  • Spice Adjustments: If you prefer less heat, reduce the amount of chili powder and red pepper flakes. Tailoring spice levels ensures a friendly dish for everyone at the table.

  • Ingredient Substitutions: Feel free to experiment with substitutions. Ground turkey or chicken can lighten your Beef Enchilada Casserole while still keeping it deliciously satisfying.

What to Serve with Beef Enchilada Casserole with Rice

Elevate your dinner experience with delightful sides that perfectly complement this cozy dish, adding even more flavor to your table.

  • Avocado Salad: Creamy avocado and fresh greens provide a cool contrast to the casserole’s warm spices. Toss in lime juice for a refreshing zing!

  • Mexican Street Corn: Grilled corn slathered with creamy sauce and sprinkled with cotija cheese adds a vibrancy that echoes the Tex-Mex theme. Each bite offers delightful crunch and sweetness.

  • Garlic Bread: This classic favorite brings a crusty texture and warm aroma, perfect for scooping up cheesy casserole goodness. It’s a comforting touch that invites sharing!

  • Pico de Gallo: This fresh, tangy salsa made of diced tomatoes, onions, and cilantro enhances the richness of the casserole with its bright flavors. It’s an effortless way to add freshness to your meal.

  • Refried Beans: Creamy refried beans on the side balance the dish’s texture, offering a rich flavor that complements the spices in the casserole beautifully.

  • Sour Cream: A dollop of cool, tangy sour cream brings harmony and creaminess, counteracting any heat from the spices. It’s a quintessential topping that everyone loves.

  • Margaritas: Pair with a refreshing margarita to elevate your Tex-Mex experience. The zesty tang and coolness contrast deliciously with the comforting, hearty casserole.

  • Churros: Finish off your meal with sweet churros for dessert. Their crispy exterior and warm, sugary filling make for a delightful sweet ending that’s hard to resist.

Beef Enchilada Casserole with Rice Variations

Feel free to get creative and make this dish your own with these delightful twists!

  • Beef Swap: Replace ground beef with ground sausage for a savory twist that adds an extra depth of flavor. The spices from the sausage will create a delightful richness.

  • Veggie Boost: Toss in diced bell peppers, zucchini, or spinach for a colorful and nutritious boost. This will not only enhance the flavor profile—it’s a great way to sneak in some veggies!

  • Cheese Variety: Experiment with different cheeses like Gouda or a melty Mexican blend to change things up. Each cheese brings its own unique flavor, adding an exciting twist to your casserole.

  • Spicy Kick: For those who love heat, add jalapeños or extra red pepper flakes to ignite the flavors even more. Just a little bit can elevate the entire dish with vibrant spice!

  • Quinoa Twist: Swap rice for quinoa for a gluten-free alternative that’s packed with protein. This substitution maintains the hearty feel while offering a delightful nutty flavor.

  • Taco Flavoring: Instead of traditional spices, try using taco seasoning for a different flavor dimension. The bold taco seasoning will give you that familiar Tex-Mex taste in every bite!

  • Bean Variety: Use kidney or garbanzo beans instead of black beans to mix textures and flavors. Each type of bean adds not only variety but also nutritional benefits!

  • Sauce Replacement: For a different depth of flavor, use salsa verde instead of red enchilada sauce. This brings a fresh, tangy brightness to the casserole that’s simply irresistible.

For more comforting recipes like this, don’t miss my Chili Beef Experience or the flavor-packed Korean Ground Beef!

Beef Enchilada Casserole with Rice Recipe FAQs

How do I choose ripe ingredients for this casserole?
Absolutely! When selecting your ingredients, look for firm, ripe tomatoes without dark spots or blemishes. Choose onions with a smooth, shiny skin. For garlic, pick bulbs that are plump and firm; avoid any that feel soft or have sprouted. These fresh selections will make your Beef Enchilada Casserole pop with flavor!

What’s the best way to store leftover casserole?
Very important! Store leftovers in an airtight container in the fridge for up to 4 days. Allow the casserole to cool completely before refrigerating to prevent condensation. When reheating, cover it with foil to keep it moist and heat it in the oven at 350°F until warmed through—about 20-25 minutes.

Can I freeze Beef Enchilada Casserole with Rice?
Absolutely! This casserole is freezer-friendly and can be frozen for up to 3 months. After your casserole has cooled, transfer it to a freezer-safe container, ensuring it’s tightly sealed. To reheat, transfer it to the fridge the night before to defrost, then bake in the oven at 350°F for about 25-30 minutes until bubbly.

What should I do if my casserole turns out too watery?
Common issue! If your casserole is watery, it might have been due to excess liquid from the canned tomatoes or not allowing the rice to simmer long enough. For next time, drain the tomatoes or adjust the amount of enchilada sauce. If it happens when you serve, try mixing in a bit of cooked rice to absorb some moisture, or let it sit for a few minutes before serving for the flavors to meld!

Are there any dietary considerations I should be aware of?
Very much so! If you have dietary restrictions, substituting ground beef with turkey or chicken can lighten the dish. For a vegetarian option, omit the meat and increase the beans and veggies. Remember to check the enchilada sauce for any allergens, such as gluten or dairy, as some sauces may contain these ingredients. Always adapt the recipe to suit your family’s needs!

Beef Enchilada Casserole with Rice

Beef Enchilada Casserole with Rice: A Cozy Family Favorite

This Beef Enchilada Casserole with Rice combines flavors of tender beef, zesty spices, and gooey cheese for a comforting family meal.
Prep Time 15 minutes
Cook Time 30 minutes
Cooling Time 10 minutes
Total Time 55 minutes
Servings: 6 servings
Course: Casserole
Cuisine: Mexican
Calories: 450

Ingredients
  

For the Casserole
  • 1 lb Ground Beef can substitute with ground turkey or chicken
  • 1 Onion yellow or white
  • 2 cloves Garlic minced
  • 1 can Diced Tomatoes fire-roasted for smokier taste
  • 1 cup Red Enchilada Sauce homemade or store-bought
  • 1 can Black Beans or pinto beans
  • 1 cup Corn frozen corn is quick and easy
  • 2 cups Cooked Rice quinoa is a gluten-free substitute
  • 1 tbsp Slap Ya Mama Seasoning or your preferred Cajun/Creole seasoning
  • 1 tbsp Chili Powder
  • 1 tsp Cumin
  • 1 tsp Garlic Powder
  • 1 tsp Black Pepper
  • 1 tsp Red Pepper Flakes
  • 2 cups Cheddar Cheese or Monterey Jack/Pepper Jack
  • 0.5 cup Cilantro for garnish
  • 0.5 cup Green Onions for garnish
Optional Toppings
  • 1 cup Sour Cream for creaminess
  • 1 medium Avocado sliced
  • 1 medium Lime cut into wedges

Equipment

  • Skillet
  • casserole dish

Method
 

Step-by-Step Instructions
  1. Preheat your oven to 350°F (175°C) and coat a casserole dish with non-stick spray.
  2. In a large skillet over medium heat, brown the ground beef with diced onion for 8-10 minutes.
  3. Add minced garlic and sauté for 2 minutes until fragrant.
  4. Drain excess fat and stir in diced tomatoes, enchilada sauce, black beans, corn, cooked rice, and all seasonings.
  5. Cover and let the mixture simmer on medium-low heat for about 10 minutes.
  6. Transfer the mixture into the casserole dish and top with shredded cheddar cheese.
  7. Bake for approximately 20 minutes until the cheese is melted and bubbly.
  8. Let the casserole cool for a few minutes, then garnish with chopped cilantro and sliced green onions.

Nutrition

Serving: 1servingCalories: 450kcalCarbohydrates: 40gProtein: 30gFat: 20gSaturated Fat: 10gPolyunsaturated Fat: 3gMonounsaturated Fat: 5gCholesterol: 70mgSodium: 800mgPotassium: 800mgFiber: 8gSugar: 3gVitamin A: 700IUVitamin C: 15mgCalcium: 300mgIron: 3mg

Notes

This casserole is freezer-friendly, allowing you to enjoy delicious leftovers even after storage.

Tried this recipe?

Let us know how it was!

Savory Teriyaki Salmon Avocado Rice Stack for Quick Meals

As I stood in my kitchen, the fragrant aroma of grilling salmon mingled delightfully with the sweet and savory notes of homemade teriyaki sauce wafting through the air. It’s hard to imagine a dish more vibrant and satisfying than my Quick Teriyaki Salmon Avocado Rice Stack! This recipe not only delivers a healthy dose of protein but also allows you to whip up a delicious meal in no time—perfect for busy weeknights when you crave something nourishing yet enticing. With creamy avocado layered atop flaky salmon and fluffy rice, every bite is a delightful explosion of flavor and texture. Plus, you can easily swap the salmon for grilled chicken or tofu, making it a versatile option for everyone at the table. Curious how to bring this colorful dish to life in your own kitchen? Let’s dive in!

Why Is This Recipe a Must-Try?

Quick Preparation: You’ll have this Teriyaki Salmon Avocado Rice Stack ready in under 30 minutes, making it the ideal solution for a busy evening.

Nutritious Delight: Packed with high-quality protein from salmon and healthy fats from avocado, this dish is not just tasty but also supports a balanced diet.

Easy Substitutions: Whether you’re a salmon lover or prefer grilled chicken or tofu, this recipe offers flexibility without compromising on flavor.

Visual Appeal: The vibrant colors of the avocado, salmon, and rice create a stunning presentation that will impress family and friends alike!

Cultural Experience: Enjoy a taste of traditional Japanese cuisine with a modern twist, as the sweet and savory teriyaki sauce elevates your meal to gourmet status.

For more seafood inspiration, consider trying out my Honey Garlic Salmon or Baked Salmon Honey recipes!

Teriyaki Salmon Avocado Rice Stack Ingredients

For the Salmon
Salmon – Choose fresh or thawed salmon for the best flavor and texture; this is the star of your Teriyaki Salmon Avocado Rice Stack.

For the Rice
Rice – Any variety works well, but sushi rice adds an authentic touch if you want to go all in on presentation.

For the Avocado
Avocado – Use ripe avocados for the creamiest texture; they’ll complement the flaky salmon beautifully.

For the Sauce
Teriyaki Sauce – Opt for store-bought for convenience or make your own with soy sauce, honey, and ginger for a fresh flavor boost.

Optional Enhancements
Seaweed Sheets – These add a delightful flavor and a fun way to wrap and eat your stack; feel free to skip if you prefer a simpler approach!

Step‑by‑Step Instructions for Teriyaki Salmon Avocado Rice Stack

Step 1: Cook the Rice
Start by cooking your rice according to the package instructions. Rinse the rice under cold water until the water runs clear to remove excess starch, then combine with water in a pot. Bring to a boil, cover, and simmer on low heat for about 15-20 minutes until tender. Once cooked, fluff the rice with a fork and set it aside to cool slightly, creating the perfect base for your Teriyaki Salmon Avocado Rice Stack.

Step 2: Prepare and Cook the Salmon
While the rice is cooking, heat a non-stick skillet over medium-high heat. Season your salmon fillets with salt and pepper, then add a splash of oil to the pan. Cook the salmon for about 3-4 minutes on each side, or until it easily flakes apart and reaches an internal temperature of 145°F (63°C). Keep a close eye on it for a beautiful golden crust that enhances the flavors of your Teriyaki Salmon Avocado Rice Stack.

Step 3: Slice the Avocado
Once your salmon is cooked to perfection, take a moment to slice your ripe avocado. Cut it in half, remove the pit, and scoop out the flesh with a spoon. Slice the avocado into thin pieces; the creaminess will beautifully complement the flaky salmon in your stack. This step adds not only flavor but also that lovely, vibrant color to your Teriyaki Salmon Avocado Rice Stack.

Step 4: Assemble the Stack
Now it’s time to assemble your Teriyaki Salmon Avocado Rice Stack! Begin by placing a generous scoop of rice onto a plate as your base. Layer the cooked salmon on top, followed by an artful arrangement of sliced avocado. The goal is a visually appealing tower that showcases the bright colors of the ingredients, creating an inviting presentation for your meal.

Step 5: Drizzle with Teriyaki Sauce
To finish off your beautiful stack, drizzle a generous amount of teriyaki sauce over the top. You can use store-bought sauce or your homemade version for an extra kick of flavor. Ensure each layer receives a good coating for that sweet and savory flavor that defines the Teriyaki Salmon Avocado Rice Stack.

Step 6: Optional Seaweed Sheets
For an added touch, if you’re using seaweed sheets, place one or two on the side to serve with your stack. These can be wrapped around bites of your rice stack for a unique flavor experience. This step not only enhances the presentation but also gives a deliciously authentic twist to your Teriyaki Salmon Avocado Rice Stack.

Step 7: Serve Immediately
Serve your Teriyaki Salmon Avocado Rice Stack immediately while it’s warm, ensuring the avocado stays fresh and vibrant. This is the perfect opportunity to share your culinary creation with family or friends, showcasing this delightful balance of textures and flavors. Don’t forget to grab a fork and dig into your quick, healthy meal!

What to Serve with Teriyaki Salmon Avocado Rice Stack

Elevate your meal experience with delightful sides and flavors that beautifully complement each element of this vibrant dish.

  • Steamed Vegetables: Steamed broccoli and snap peas add a fresh crunch and vibrant color that balance the rich flavors of the salmon and avocado.
  • Cucumber Salad: A refreshing cucumber salad tossed with rice vinegar and sesame oil brightens up your plate with a tangy zing and crisp texture.
  • Miso Soup: A warm bowl of miso soup enhances the umami experience, providing a soothing contrast to the sweet teriyaki notes in the main dish.
  • Edamame: Lightly salted edamame pods offer a satisfying bite that fits right in, sharing the protein-rich love of your main dish.
  • Teriyaki Glazed Brussels Sprouts: Roasted Brussels sprouts drizzled with teriyaki sauce extend the flavor profile while introducing a sweet and savory twist.
  • Fruity Green Tea: A chilled glass of fruity green tea is a refreshing drink option that complements the Asian-inspired flavors of the meal.
  • Mango Sorbet: For dessert, a light mango sorbet provides a sweet, tropical finish that cleanses the palate beautifully after the savory stack.

Pair these options with your flavorful Teriyaki Salmon Avocado Rice Stack for an unforgettable dining experience!

How to Store and Freeze Teriyaki Salmon Avocado Rice Stack

Fridge: Store any leftovers in an airtight container for up to 2 days to keep the flavors fresh and the avocado from browning too quickly.

Freezer: It is not recommended to freeze the assembled Teriyaki Salmon Avocado Rice Stack, as the avocado may change texture; however, you can freeze cooked salmon for up to 3 months.

Reheating: When reheating the salmon, do so gently in the oven at 350°F (175°C) or in the microwave at reduced power to avoid drying out the fish.

Assembly Tip: For the best taste, assemble the stack just before serving, allowing each component to maintain its freshness and visual appeal.

Teriyaki Salmon Avocado Rice Stack Variations

Feel free to make this delicious dish your own by exploring various substitutions and twists that cater to your taste!

  • Grilled Chicken: Swap salmon for grilled chicken breast, marinated in teriyaki for a hearty alternative. Chicken offers a lighter protein that’s just as satisfying.

  • Tofu Delight: Replace salmon with firm tofu, pan-seared until golden for a vegetarian-friendly option that beautifully absorbs the teriyaki sauce.

  • Crunchy Veggies: Add fresh cucumber and shredded carrots for an extra crunch and vibrant color. These fresh additions not only boost nutrition but elevate the overall dish.

  • Heat It Up: Spice things up by drizzling sriracha or incorporating sliced jalapeños into your stack for a fiery kick that will awaken your taste buds!

  • Rice Variety: Experiment with quinoa or cauliflower rice for a different texture and flavor twist. Alternating rice choices keeps things exciting, plus adds nutritional benefits.

  • Flavor Boost: Enhance your teriyaki sauce by infusing it with sesame oil or garlic for a fragrant spin that adds depth to your dish.

  • Herbed Twist: Sprinkle fresh herbs like cilantro or green onions on top before serving to introduce a fresh, aromatic layer that brightens the plate.

  • Sushi-Inspired: Wrap the layers in nori for a fun sushi roll experience! This not only adds texture but also a unique way to enjoy all the delicious flavors together.

Looking for more seafood inspiration? Try incorporating salmon in other delicious ways with my Shrimp Avocado Bowls or savor the flavors of my Herb Crusted Salmon to delight your family and friends!

Expert Tips for Teriyaki Salmon Avocado Rice Stack

Thaw Salmon Properly: Always thaw frozen salmon in the refrigerator to maintain its texture and flavor during cooking.

Fresh Avocado: Use ripe avocados for the best creaminess and to prevent browning; store them at room temperature until ready to use.

Layer Thoughtfully: When stacking, place the rice first, followed by salmon, and then avocado for a beautiful presentation that remains stable.

Customize Your Sauce: Feel free to adjust the sweetness of your teriyaki sauce by adding more honey or ginger for a personal touch that enhances the flavors.

Eat Fresh: Assemble the Teriyaki Salmon Avocado Rice Stack just before serving to maintain freshness, especially the avocados.

Make Ahead Options

Preparing your Teriyaki Salmon Avocado Rice Stack in advance is a fantastic way to save time during busy weeknights! You can cook the rice and salmon up to 24 hours ahead of time; simply refrigerate them in an airtight container to keep them fresh. Additionally, slice your avocado right before serving to prevent browning, keeping its vibrant color. When you’re ready to enjoy, simply reheat the rice and salmon, stack them with the avocado, and drizzle with teriyaki sauce for a quick assembly. This strategy ensures a delicious, healthy meal with minimal effort, allowing you to delight in every flavorful bite of your stack!

Teriyaki Salmon Avocado Rice Stack Recipe FAQs

What should I look for when selecting salmon?
When selecting salmon, look for fish that has a bright, vibrant color and moist flesh. Fresh salmon should have a slight sheen and a mild ocean scent. Avoid any fillets with dark spots or a dry appearance, as these can indicate inferior quality. If possible, seek out sushi-grade salmon for the freshest flavor.

How do I store leftovers of the Teriyaki Salmon Avocado Rice Stack?
Store any leftovers in an airtight container in the refrigerator for up to 2 days. To prevent the avocado from browning, consider pressing plastic wrap directly onto the surface of the avocado to limit air exposure. Ensure that the container is sealed well to maintain the dish’s flavors.

Can I freeze the Teriyaki Salmon Avocado Rice Stack?
While it’s not recommended to freeze the entire assembled Teriyaki Salmon Avocado Rice Stack due to the avocado’s texture changes, you can freeze cooked salmon separately for up to 3 months. To do this, let the salmon cool completely, wrap it tightly in plastic wrap, and then place it in a freezer-safe bag. Remember to label the bag with the date!

Why is my salmon not cooking evenly?
If your salmon isn’t cooking evenly, it could be because it’s too thick, or the heat was too low. Make sure your salmon fillets are of uniform thickness. For best results, pan-sear over medium-high heat to achieve a golden crust. Additionally, ensure there’s enough space in the pan; overcrowding can lead to uneven cooking. Flip the salmon only once to allow it to cook properly.

Is this recipe suitable for those with dietary restrictions?
Yes! The Teriyaki Salmon Avocado Rice Stack can be customized to meet various dietary preferences. If you’re allergic to fish, you can easily substitute the salmon with grilled chicken or tofu, as mentioned. For gluten-free options, opt for gluten-free soy sauce in your teriyaki sauce. Always ensure that the additional ingredients, like any teriyaki sauce, meet your dietary needs as well.

How can I prevent avocado from browning when preparing this dish?
To keep your avocado fresh and vibrant, slice it just before assembling your Teriyaki Salmon Avocado Rice Stack. If you must prepare the avocado earlier, sprinkle lemon or lime juice over the cut surface, which helps slow down the browning process. Another effective method is to store the avocado slices in an airtight container with a layer of water covering them until you’re ready to use them.

Teriyaki Salmon Avocado Rice Stack

Savory Teriyaki Salmon Avocado Rice Stack for Quick Meals

Enjoy a quick and healthy Teriyaki Salmon Avocado Rice Stack, packed with protein and vibrant flavors—perfect for busy weeknights!
Prep Time 10 minutes
Cook Time 20 minutes
Total Time 30 minutes
Servings: 2 stack
Course: Dinner
Cuisine: Japanese
Calories: 500

Ingredients
  

For the Salmon
  • 2 fillets Salmon Choose fresh or thawed for best flavor.
For the Rice
  • 1 cup Rice Sushi rice adds authenticity.
For the Avocado
  • 1 Avocado Use ripe avocados for creaminess.
For the Sauce
  • 1/2 cup Teriyaki Sauce Use store-bought or homemade.
Optional Enhancements
  • 2 sheets Seaweed Sheets Optional for wrapping and flavor.

Equipment

  • Non-stick skillet
  • Pot
  • Fork

Method
 

Step-by-Step Instructions
  1. Cook the rice according to package instructions and set aside to cool slightly.
  2. Prepare the salmon by seasoning and cooking it in a skillet until easily flakes apart.
  3. Slice the ripe avocado and arrange it on top of the salmon.
  4. Assemble the stack by placing rice on a plate, followed by salmon and avocado.
  5. Drizzle teriyaki sauce over the assembled stack to add flavor.
  6. Optionally serve with seaweed sheets for wrapping.
  7. Serve immediately while warm and enjoy!

Nutrition

Serving: 1stackCalories: 500kcalCarbohydrates: 50gProtein: 30gFat: 20gSaturated Fat: 3gPolyunsaturated Fat: 6gMonounsaturated Fat: 10gCholesterol: 60mgSodium: 800mgPotassium: 800mgFiber: 5gSugar: 5gVitamin A: 10IUVitamin C: 15mgCalcium: 4mgIron: 10mg

Notes

Assemble the stack just before serving for the best texture and flavor. Customize the teriyaki sauce sweetness to your preference.

Tried this recipe?

Let us know how it was!

Decadent No-Bake Oreo Cheesecake That’s Super Easy to Make

As I stood in the kitchen, the aroma of chocolatey goodness brought back memories of birthday celebrations filled with laughter and cheer. Today, I’m excited to share a recipe that will whisk you back to those sweet moments: No-Bake Oreo Cheesecake. This easy-to-make dessert combines a creamy, luscious filling with a crunchy Oreo crust that will have your taste buds dancing in delight. What’s more, it takes less than 30 minutes to prepare, making it the perfect solution for last-minute gatherings or family dinners. Plus, you can make it ahead of time, allowing you to savor every moment without the stress of baking on the big day. Are you ready to indulge in this effortless treat that everyone will rave about? Let’s get started!

Why Choose No-Bake Oreo Cheesecake?

Simplicity at its finest: This no-bake recipe requires minimal ingredients and can be whipped up in just 30 minutes!

Rich, creamy filling: The smooth cheesecake filling paired with crushed Oreos creates a delightful flavor explosion.

Perfect for any occasion: Whether it’s a birthday party or a cozy family dinner, this dessert is sure to impress everyone.

Make-ahead convenience: Prepare it a day in advance, freeing you to enjoy your gathering without last-minute baking stress.

Versatile variations: Feel free to explore different cookie flavors or top it with fresh berries for a twist. You might also enjoy our Strawberry Cheesecake Dump or the divine Carrot Cake Cheesecake for more delicious options!

No-Bake Oreo Cheesecake Ingredients

For the Crust
Oreos – Key component for the crust and filling; use regular or Double Stuf for a richer flavor.
Unsalted Butter – Binds Oreo crumbs in the crust; make sure it’s melted for the best texture.

For the Filling
Cream Cheese (brick-style) – Provides a dreamy, creamy texture; avoid using cream cheese spread from a tub.
Powdered Sugar – Sweetens and stabilizes the cheesecake filling; feel free to adjust to your taste.
Vanilla Extract – Adds depth of flavor; opt for pure vanilla for the best results.
Cold Heavy Whipping Cream – Essential for achieving lightness and texture; must be cold for proper whipping.

For Topping
Mini Oreos/Full-size Oreos – Perfect for decoration; optional if you want to swap in other toppings like fresh fruit.

Elevate your dessert game with this No-Bake Oreo Cheesecake that’s delightfully easy to make!

Step‑by‑Step Instructions for No-Bake Oreo Cheesecake

Step 1: Prepare the Crust
Start by crushing 24 Oreos into fine crumbs using a food processor or a zip-top bag and a rolling pin. Melt 4 tablespoons of unsalted butter in a microwave or on the stove. Combine the Oreo crumbs with the melted butter in a mixing bowl, ensuring all crumbs are evenly coated. Press the mixture firmly into the bottom of a 9-inch springform pan to form a solid crust. Chill in the refrigerator for at least 10 minutes to set.

Step 2: Make the Filling
In a large mixing bowl, using an electric mixer, beat 16 ounces of softened brick-style cream cheese until smooth and creamy. Gradually add 1 cup of powdered sugar and 1 teaspoon of vanilla extract, mixing until fully incorporated and aerated. This fluffy mixture is the base of your No-Bake Oreo Cheesecake filling, providing the perfect blend of sweetness and flavor.

Step 3: Whip the Cream
In a separate chilled bowl, pour in 1 cup of cold heavy whipping cream. With an electric mixer, whip the cream on medium speed until stiff peaks form, which should take about 3-5 minutes. The whipped cream should be thick and hold its shape well. This step is crucial for achieving a light and airy texture in your cheesecake filling.

Step 4: Combine Mixtures
Gently fold the whipped cream into the cream cheese mixture using a rubber spatula. Be careful not to deflate the whipped cream; fold until just combined. Next, take 8-10 roughly chopped Oreos and fold them into the mixture to add extra texture and flavor. You want every bite of this No-Bake Oreo Cheesecake to have that delightful Oreo crunch.

Step 5: Assemble Cheesecake
Remove the crust from the refrigerator and pour the creamy filling into the chilled Oreo crust. Use a spatula to smooth the top evenly. For a decorative touch, consider piping additional whipped cream around the edges and scatter some mini Oreos on top. This presentation adds an inviting layer to your gorgeous cheesecake.

Step 6: Chill
Cover the cheesecake with plastic wrap and refrigerate for at least 4 to 5 hours, or ideally overnight. This chilling time is essential for the cheesecake to firm up properly, ensuring that every slice will hold its shape when served. Allowing it to set overnight enhances the flavor and makes for a truly decadent No-Bake Oreo Cheesecake experience.

Storage Tips for No-Bake Oreo Cheesecake

Fridge: Store your leftover No-Bake Oreo Cheesecake in an airtight container for up to 4 days to maintain its creamy texture and flavor.

Freezer: For longer storage, freeze slices wrapped in plastic wrap and aluminum foil for up to 2 months. Thaw in the fridge overnight before serving.

Reheating: There’s no need to reheat this cheesecake; serve it chilled straight from the fridge for the best taste!

Make-Ahead: To enhance flavor, consider making the No-Bake Oreo Cheesecake a day in advance; just keep it well-covered in the refrigerator.

Make Ahead Options

The No-Bake Oreo Cheesecake is perfect for meal prep, allowing you to enjoy a stress-free dessert any time. You can easily prepare the crust and filling up to 24 hours in advance. Simply crush the Oreos and mix them with melted butter for the crust, then refrigerate it until you’re ready to fill it. For the filling, mix the cream cheese, powdered sugar, and vanilla, then fold in the whipped cream and chopped Oreos, and store it in the fridge. When you’re ready to serve, simply pour the prepared filling into the crust, smooth it out, and chill for at least 4 to 5 hours or overnight. This way, the No-Bake Oreo Cheesecake remains just as delicious and has a perfect texture!

No-Bake Oreo Cheesecake Variations

Feel free to add a personal touch and make this delicious dessert your own with these exciting options!

  • Gluten-Free: Use gluten-free sandwich cookies instead of Oreos for a celiac-friendly version. This way, everyone can enjoy the treat!

  • Fruit-Infused: Add fresh raspberries or strawberries to the filling for a fruity twist. Their tartness complements the rich creaminess beautifully.

  • Mini Cheesecakes: Create individual servings by using cupcake liners instead of a springform pan. They’re perfect for parties or as a fun treat for kids!

  • Minty Fresh: Swap out regular Oreos for mint-flavored cookies for a refreshing sensation that will awaken your taste buds. It’s like dessert and a breath mint in one!

  • Peanut Butter: Incorporate creamy peanut butter into the filling for a nutty explosion. The addition of chopped peanuts as a topping can elevate the flavor experience even more.

  • Lower-Sugar: Substitute sugar with a sugar alternative like stevia or erythritol for a healthier version without sacrificing the decadent taste you crave. It’s a guilt-free pleasure.

  • Chocolate Drizzle: Enhance the flavor by drizzling melted chocolate on top of each slice. This extra layer adds beautiful contrast and indulgence!

  • Oreo ICE Cream: Get creative and mix the filling with softened vanilla ice cream before chilling for a frozen treat version. Serve it in bowls topped with extra crushed Oreos for an icy delight.

For more delightful variations, you might also find inspiration from our Strawberry Cheesecake Dump or the mouthwatering Strawberry Cheesecake. Enjoy exploring the world of flavors!

What to Serve with No-Bake Oreo Cheesecake?

Creating a delightful meal is easy when you complement your No-Bake Oreo Cheesecake with delicious side dishes and drinks.

  • Fresh Berries: Juicy strawberries or raspberries add a burst of freshness that contrasts beautifully with the rich cheesecake.

  • Chocolate Drizzle: A simple drizzle of melted chocolate enhances the dessert with an additional layer of indulgence, making each bite even more decadent.

  • Whipped Cream: Light and airy, a dollop of freshly whipped cream brings a classic touch to your cheesecake, making it even more irresistible.

  • Coffee: Pairing your cheesecake with a warm cup of coffee balances the sweetness, making for a cozy dessert experience.

  • Mint Leaves: A sprinkle of fresh mint leaves not only garnishes the plate but also provides a refreshing note that brightens each forkful.

  • Ice Cream: Serve alongside a scoop of vanilla or chocolate ice cream for a sweet, creamy combo that feels like a luxurious treat.

  • Chocolate-Covered Strawberries: These elegant bites create a delightful pairing, combining smooth chocolate with the freshness of fruit for a memorable finish.

  • Homemade Lemonade: A zesty, refreshing beverage that cuts through the richness of the cheesecake, making every bite feel light and refreshing.

Elevate your dessert experience with these perfect pairings and watch everyone swoon over your delicious No-Bake Oreo Cheesecake!

Expert Tips for No-Bake Oreo Cheesecake

Perfectly Crushed Crust: Make sure to crush the Oreos into fine crumbs to achieve a solid crust. Larger pieces can result in a crumbly texture that won’t hold together well.

Room Temperature Cream Cheese: Allow your cream cheese to come to room temperature for easier blending, resulting in a smoother filling that incorporates perfectly with other ingredients.

Whip to Stiff Peaks: Whip the heavy cream until stiff peaks form; this is key to making your No-Bake Oreo Cheesecake light and fluffy. Under-whipped cream can lead to a dense cheesecake.

Springform Pan Usage: Always use a springform pan for easy removal and an elegant presentation. It’s a lifesaver when it comes to serving!

Chill Well: Be patient and chill your cheesecake for at least 4 hours, preferably overnight. This allows the flavors to meld and the cheesecake to set properly.

Substitution Mindfulness: If using whipped topping instead of heavy cream, reduce the powdered sugar to adjust sweetness accordingly and maintain the right texture.

No-Bake Oreo Cheesecake Recipe FAQs

How do I choose the right Oreos for the crust?
Absolutely, you can use either regular or Double Stuf Oreos for the crust and filling! Both options provide that iconic cookie flavor. If you’re seeking a gluten-free alternative, there are gluten-free Oreo varieties available as well, ensuring everyone can enjoy this delightful dessert.

How should I store leftover No-Bake Oreo Cheesecake?
To maintain its fresh and creamy texture, store any leftover No-Bake Oreo Cheesecake in an airtight container in the refrigerator for up to 4 days. If you notice it starting to lose its vibrancy, that’s a sign it’s nearing the end of its freshness.

Can I freeze No-Bake Oreo Cheesecake?
Certainly! To freeze, slice the cheesecake and wrap individual pieces tightly in plastic wrap, followed by aluminum foil. This will prevent freezer burn. It can be stored for up to 2 months. When you’re ready to enjoy a slice, simply move it to the refrigerator overnight to thaw. Enjoy it chilled straight from the fridge!

What if my cream cheese filling is too lumpy?
If your cream cheese filling turns out lumpy, it’s likely because your cream cheese was cold. Make sure to let it sit at room temperature for about 30 minutes before mixing. If you find lumps during mixing, continue to beat the mixture until smooth, and if necessary, strain it through a fine mesh sieve for an ultra-smooth filling.

Are there any dietary considerations for pets or allergies?
Yes, it’s important to note that this No-Bake Oreo Cheesecake is made with ingredients that are not safe for pets, especially chocolate and sugar. Keep the cheesecake stored away from pets. For allergies, ensure to double-check ingredient labels for any common allergens, such as dairy or gluten, especially if you’re using alternatives.

Can I make this cheesecake ahead of time?
Definitely! In fact, making the No-Bake Oreo Cheesecake a day in advance is advisable. Chill it covered in the refrigerator overnight; this not only allows it to set properly but also enhances the flavors. Just be sure to give it enough time to chill—aim for at least 4 to 5 hours!

No-Bake Oreo Cheesecake

Decadent No-Bake Oreo Cheesecake That's Super Easy to Make

This No-Bake Oreo Cheesecake combines a creamy filling with a crunchy crust, perfect for any occasion.
Prep Time 30 minutes
Chilling Time 5 hours
Total Time 5 hours 30 minutes
Servings: 8 slices
Course: Dessert
Cuisine: American
Calories: 320

Ingredients
  

Crust
  • 24 Oreos Regular or Double Stuf
  • 4 tablespoons Unsalted Butter Melted
Filling
  • 16 ounces Cream Cheese (brick-style) Softened
  • 1 cup Powdered Sugar Adjust to taste
  • 1 teaspoon Vanilla Extract Pure vanilla recommended
  • 1 cup Cold Heavy Whipping Cream Must be cold
Topping
  • 8-10 Mini Oreos/Full-size Oreos Optional for decoration

Equipment

  • Springform Pan
  • Food Processor
  • Mixing Bowl
  • Electric mixer

Method
 

Step-by-Step Instructions
  1. Crush 24 Oreos into fine crumbs and melt 4 tablespoons of unsalted butter. Combine and press into a 9-inch springform pan. Chill for at least 10 minutes.
  2. Beat 16 ounces of softened cream cheese until smooth, then mix in 1 cup of powdered sugar and 1 teaspoon of vanilla extract.
  3. Whip 1 cup of cold heavy whipping cream until stiff peaks form, about 3-5 minutes.
  4. Gently fold the whipped cream into the cream cheese mixture, then add 8-10 chopped Oreos.
  5. Pour the filling into the crust, smooth the top, and add any extra toppings like mini Oreos.
  6. Cover and refrigerate for at least 4-5 hours, ideally overnight, to set.

Nutrition

Serving: 1sliceCalories: 320kcalCarbohydrates: 30gProtein: 4gFat: 20gSaturated Fat: 10gCholesterol: 45mgSodium: 300mgPotassium: 150mgFiber: 1gSugar: 18gVitamin A: 500IUCalcium: 80mgIron: 0.5mg

Notes

Make sure to allow the cream cheese to reach room temperature for easier blending, and chill the cheesecake for the best results.

Tried this recipe?

Let us know how it was!

Stay Connected

Get recipes via email: