Get my cookbooks

Delicious Healthy Tuna Salad with Greek Yogurt Twist

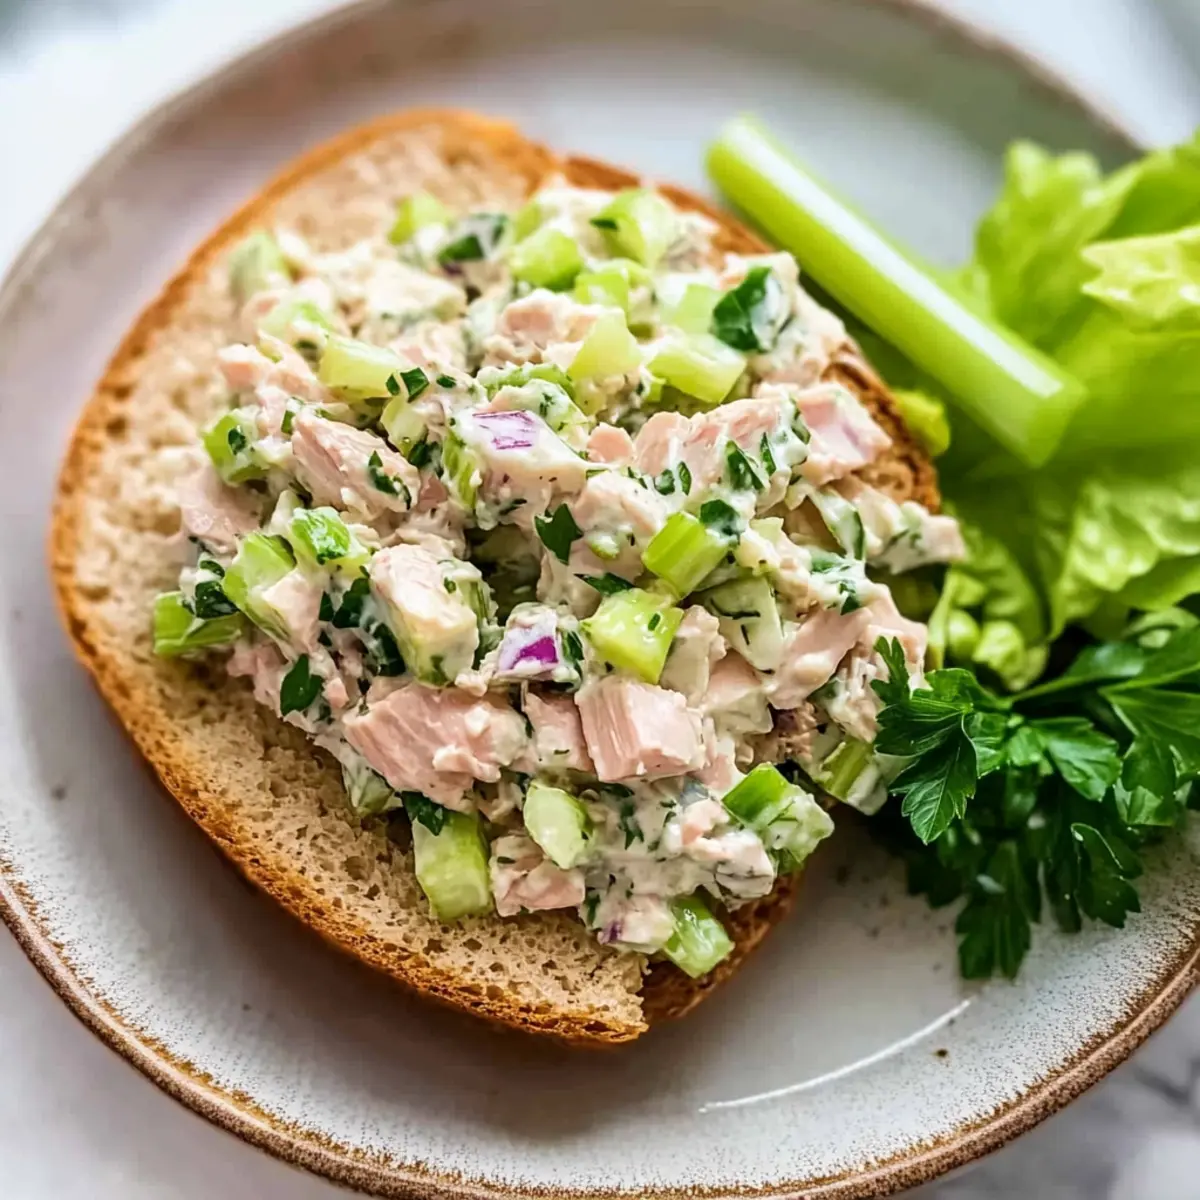
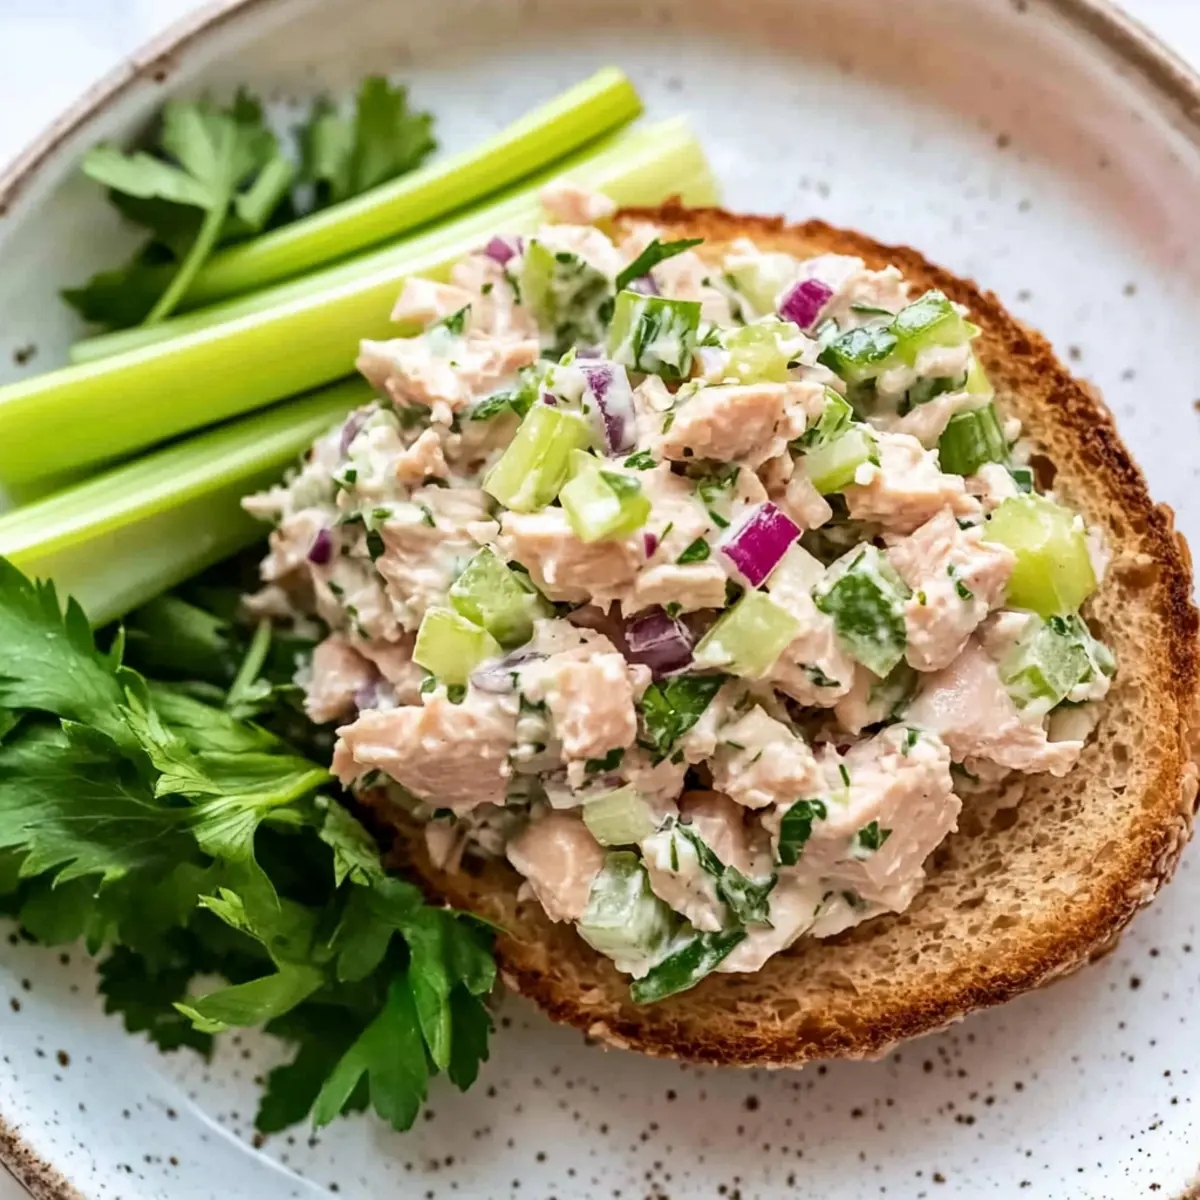
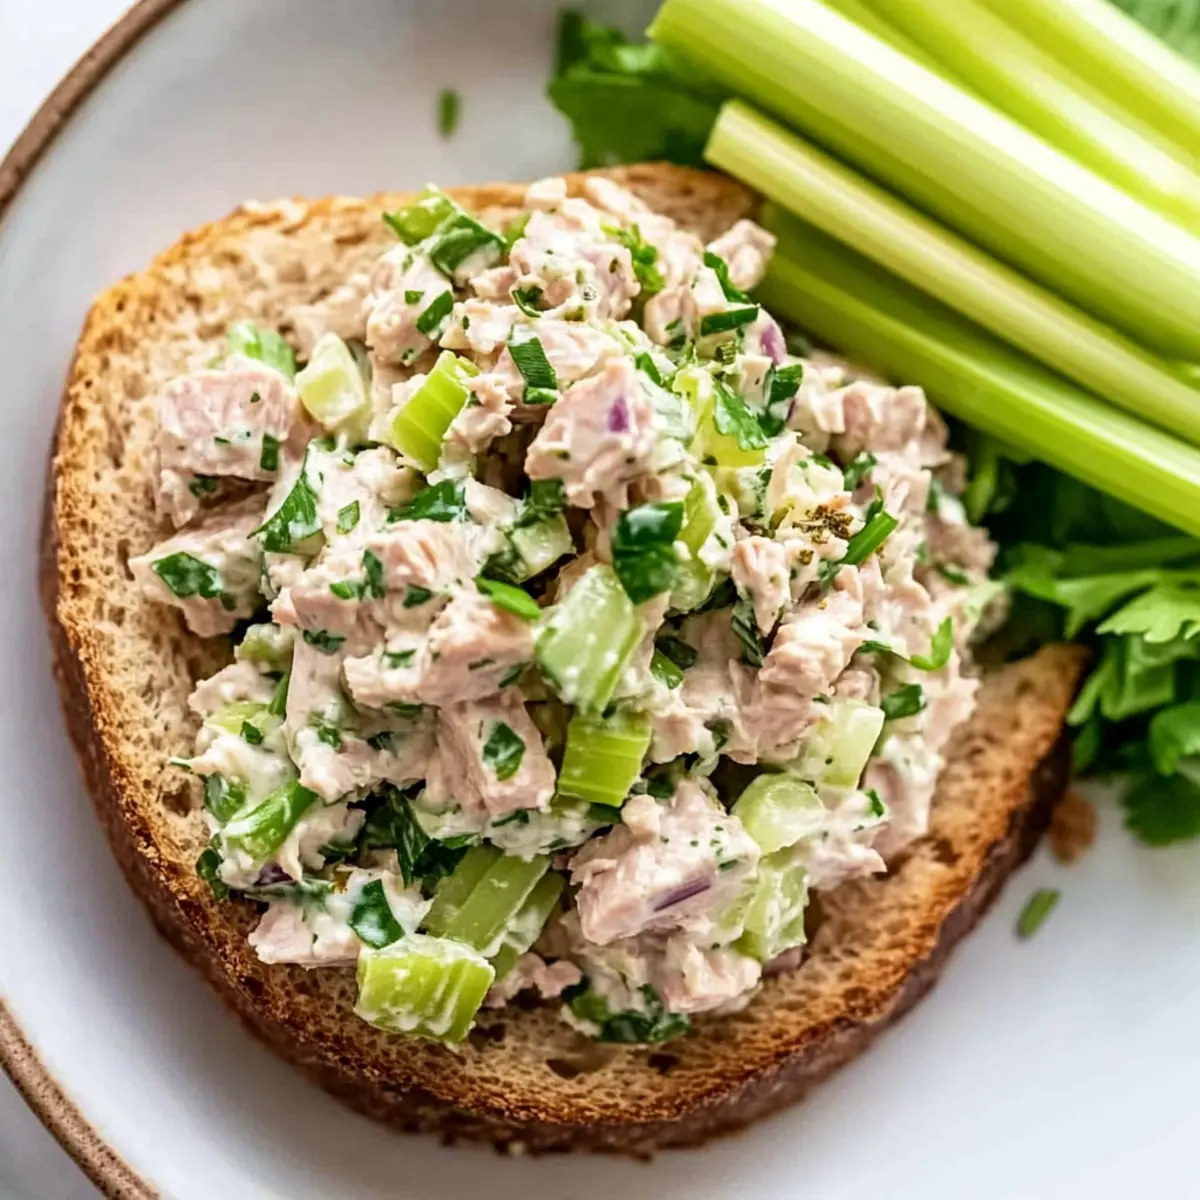
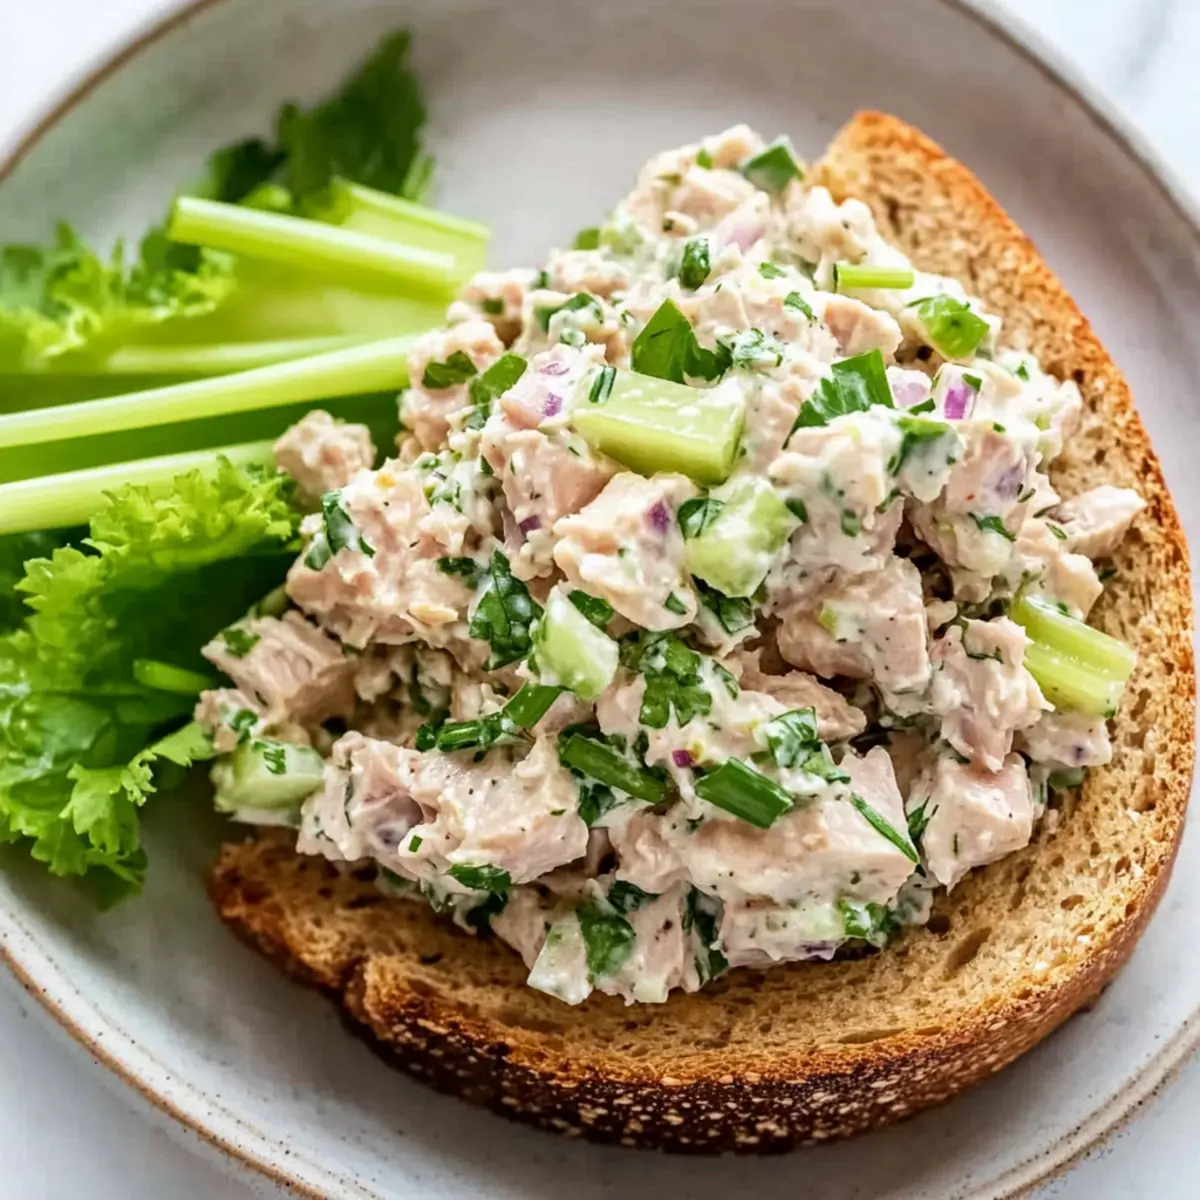
As I stood in my kitchen, the sun pouring in, I couldn’t help but reminisce about lazy summer days filled with picnics and light bites. That’s when I decided to whip up this Healthy Greek Yogurt Tuna Salad, a fresher take on a classic. By replacing mayonnaise with Greek yogurt, this dish shines as a low-calorie, high-protein meal that’s perfect for anyone seeking delicious, nutritious options. It’s surprisingly simple to prepare and works beautifully in so many ways—whether nestled on a bed of crisp greens, piled high in a sandwich, or wrapped in lettuce for a satisfying low-carb treat. With just a handful of wholesome ingredients, this salad delivers on taste and health, making it a go-to for quick lunches or a satisfying snack. Curious to see how it all comes together? Let’s dive into the recipe!

Why Make Healthy Tuna Salad?

Versatility: This dish can be enjoyed in so many ways! Serve it on mixed greens, as a sandwich filling, or even wrapped in lettuce for a low-carb option.

Light & Refreshing: Replacing mayonnaise with Greek yogurt makes this salad creamy yet light, creating a delightful experience on your palate without the guilt.

Protein Power: Packed with 20g of protein per serving, it’s perfect for those needing a filling yet healthy meal to keep you energized.

Quick & Easy: With straightforward ingredients and steps, you can whip this up in no time, making it a great choice for busy individuals or families. If you’re looking for wholesome yet tasty meals, why not check out this Blt Chicken Salad or explore the freshness of the Inside Out Option?

Nutritional Benefits: With only 115 calories and minimal fat, this salad caters to health-conscious eaters without compromising on flavor.

Healthy Tuna Salad Ingredients

For the Salad

  • Greek Yogurt – Provides creaminess while reducing calories; substitute with regular yogurt or omit for varied texture.
  • Lemon Juice – Adds brightness and acidity; fresh is preferable, but bottled juice can work.
  • Dijon Mustard – Offers tanginess and depth of flavor; yellow mustard can be used as an alternative.
  • Salt – Enhances overall flavor; adjust based on dietary restrictions.
  • Black Pepper – Adds a touch of heat; freshly ground is best, but pre-ground can be used.
  • Dill or Parsley – Fresh herbs for flavor enhancement; substitute with any preferred herbs for a personal touch.
  • Albacore Tuna – The primary protein source, providing 20g of protein per serving; ensure it’s well-drained.
  • Celery – Adds crunch and freshness to the salad; feel free to incorporate other crunchy vegetables for variety.
  • Red Onion – Provides a mild bite; green onions can substitute for a milder flavor or omit entirely.

Step‑by‑Step Instructions for healthy tuna salad

Step 1: Whisk the Base
In a medium mixing bowl, combine 1 cup of Greek yogurt, 2 tablespoons of fresh lemon juice, and 1 tablespoon of Dijon mustard. Use a whisk to blend these ingredients until smooth and creamy, about 1–2 minutes. You want a vibrant, tangy mixture that forms a delightful base for your healthy tuna salad.

Step 2: Season the Mixture
Add a pinch of salt, freshly cracked black pepper, and 2 tablespoons of your preferred fresh herbs like dill or parsley to the yogurt mixture. Stir well with a spatula for another 1–2 minutes until all ingredients are evenly distributed, creating a flavorful dressing that bumps up the deliciousness of your tuna salad.

Step 3: Incorporate the Tuna
Next, drain 1 can of albacore tuna thoroughly and flake it into the bowl with the yogurt mixture. Use a fork to break up the tuna pieces gently while combining, careful to maintain some texture. This step should take about 2 minutes, ensuring the tuna is well coated with the creamy dressing for a harmonious blend.

Step 4: Add Crunchy Veggies
Finely chop 1 stalk of celery and ¼ of a red onion, then add them to the tuna mixture. Fold everything together gently with a spatula for about 1–2 minutes, allowing the crunchy veggies to bring freshness and texture to this healthy tuna salad while evenly distributing their flavors.

Step 5: Taste and Adjust
Once the ingredients are well mixed, taste the salad for seasoning. Adjust the salt, pepper, or lemon juice as needed to suit your palate, mixing in any additional flavorings. This crucial step ensures your healthy tuna salad packs the right punch, with bright flavors coming through prominently.

Step 6: Serve or Store
Your healthy tuna salad is now ready to enjoy! Serve it immediately over a bed of mixed greens, in a sandwich, or in lettuce wraps. If not serving right away, transfer it to an airtight container and refrigerate for up to 3-4 days, keeping the flavors fresh while allowing them to meld beautifully.

Tips for the Best Healthy Tuna Salad

Taste Test: Always taste your salad before serving. Adjust lemon juice, salt, and pepper to ensure the flavors shine.

Creamy Consistency: Avoid over-mixing after adding the tuna and veggies to retain a delightful texture in your healthy tuna salad.

Fresh Ingredients: Use fresh herbs and veggies for the best flavor and crunch. Freshness elevates each bite to a whole new level.

Quick Prep: Prepare all ingredients beforehand to streamline the process. This makes whipping up your healthy tuna salad a breeze!

Make Ahead: This salad can be stored in an airtight container for up to 3-4 days, making it perfect for meal prep and quick lunches.

Make Ahead Options

These Healthy Tuna Salad preparations are perfect for meal prep enthusiasts looking to simplify their week! You can mix the Greek yogurt dressing (combining Greek yogurt, lemon juice, Dijon mustard, salt, pepper, and herbs) up to 24 hours in advance, refrigerating it to maintain its vibrant flavor. Additionally, chopping the celery and red onion can be done ahead of time; simply store them in an airtight container for up to 3 days. When you’re ready to serve, gently fold in the drained tuna and the prepped vegetables, ensuring the salad retains its delightful crunch. With these make-ahead tips, you’ll have a delicious and nutritious Healthy Tuna Salad ready at a moment’s notice!

Healthy Tuna Salad Variations

Feel free to get creative with this delicious recipe and make it your own!

  • Dairy-Free: Substitute Greek yogurt with coconut yogurt for a creamy, dairy-free delight. You’ll end up with a tropical twist that’s still refreshing.

  • Spicy Kick: Add diced jalapeños or a splash of hot sauce for an extra layer of heat. This will spice things up and awaken your taste buds.

  • Crunchy Add-ins: Toss in some roasted chickpeas or sunflower seeds for added texture and crunch. This makes every bite a delightful surprise!

  • Different Proteins: Replace the tuna with canned chicken or chickpeas for a protein-rich vegetarian option. This change opens the door to new flavor profiles!

  • Herb Variations: Swap dill and parsley with basil or cilantro for a completely different flavor. The freshness of these herbs brings a whole new vibe to the salad.

  • Flavor Boosters: Mix in some chopped dill pickles or capers for a tangy twist. These little gems enhance the overall flavor profile beautifully.

  • Veggie Power: Incorporate finely chopped bell peppers, cucumbers, or even shredded carrots. This not only adds color but brings extra nutrients to your meal.

  • Savory Additions: A sprinkle of feta cheese or crumbled bacon can enhance the savory depth of flavor. It’s indulgent yet delicious!

With these variations, your healthy tuna salad will never get boring! Don’t forget, if you’re looking for yet more fresh ideas, check out the refreshing Inside Out Option or indulge in a satisfying Blt Chicken Salad. Enjoy your culinary journey!

What to Serve with Healthy Greek Yogurt Tuna Salad

Pairing this delightful salad with complementary sides can elevate your meal!

  • Lightly Toasted Whole-Grain Bread: A satisfying crunch that pairs well with the creamy salad, providing a hearty base for your nutritious scoop.

  • Mixed Green Salad: Fresh greens with a simple lemon vinaigrette offer a refreshing contrast, enhancing the bright flavors of the tuna salad.

  • Crispy Sweet Potato Fries: This sweet and savory combo not only adds a delightful crunch but also brings a comforting element to your dish.

  • Sliced Avocado: Creamy, rich, and full of healthy fats, avocado rounds out the meal while enhancing its nutritional profile.

  • Fresh Vegetable Sticks: Carrots, cucumbers, or bell pepper strips lend a satisfying crunch and freshness, making for a perfect dipping option.

  • Chilled Sparkling Water with Lemon: A refreshing drink to cleanse the palate, its slight fizz complements the vibrant flavors of the salad beautifully.

  • Fruit Salad: A medley of seasonal fruits adds a sweet and zesty finish, balancing the savory tuna salad and rounding out your meal.

Feel free to mix and match these options for a diverse, mouthwatering meal experience!

Storage Tips for Healthy Tuna Salad

Fridge: Keep your healthy tuna salad in an airtight container for freshness, where it will last up to 3-4 days. Enjoy it as a quick meal throughout the week!

Freezer: While freezing is not ideal due to the texture, if you must, portion it into freezer-safe bags, and it can be stored for up to 1 month. Thaw in the fridge overnight.

Reheating: If you’ve frozen the salad, allow it to thaw completely, then drain any excess moisture before serving. Mix gently to retain the perfect texture of your healthy tuna salad.

Serving Suggestions: Serve chilled or at room temperature. It’s delightful atop a fresh salad or in a sandwich, making it as versatile as it is delicious!

Healthy Tuna Salad Recipe FAQs

How do I choose the best Greek yogurt for my Healthy Tuna Salad?
Absolutely! When selecting Greek yogurt, opt for plain, unsweetened varieties to avoid added sugars. Look for a thick consistency, which will give your salad a creamy texture without the calories of mayonnaise. If you prefer a tangy flavor, full-fat Greek yogurt is excellent, but fat-free or low-fat options work just as well!

What is the best way to store Healthy Tuna Salad?
To maintain optimal freshness, keep your Healthy Tuna Salad in an airtight container in the refrigerator, where it will last for 3-4 days. If you notice any dark spots or changes in smell, it’s time to discard it. This makes it perfect for meal prepping, ensuring you have a healthy option ready when hunger strikes.

Can I freeze Healthy Tuna Salad?
While freezing is not the best option for maintaining texture, if you choose to do so, portion the salad into freezer-safe bags and store it in the freezer for up to 1 month. Thaw it in the refrigerator overnight, then be sure to drain any excess moisture. Gently mix before serving, but be prepared for a slightly softer texture.

What should I do if my Healthy Tuna Salad is too watery?
If you find your salad is too watery, it could be due to excess moisture from the tuna or vegetables. To fix it, start by draining the tuna more thoroughly before mixing. If it’s already mixed, try adding a bit more Greek yogurt or some crushed crackers to absorb the excess liquid. Alternatively, let the salad chill in the fridge for about 30 minutes, as this can help the flavors meld and thicken it up.

Are there any dietary considerations for pets or allergies with this recipe?
Absolutely! If you have pets, it’s best to avoid sharing tuna salad with them, especially if it contains seasonings like onion or garlic, which can be harmful. For allergies, always check the ingredients—particularly with mustard, yogurt, or any added herbs. If necessary, adapt the recipe by excluding these items or substituting them. For those avoiding gluten, this salad is naturally gluten-free, but ensure any bread or wraps used are certified gluten-free as well.

healthy tuna salad

Delicious Healthy Tuna Salad with Greek Yogurt Twist

Enjoy a healthy tuna salad with Greek yogurt, offering a nutritious twist on a classic dish, perfect for light meals.
Prep Time 10 minutes
Total Time 10 minutes
Servings: 4 servings
Course: Salad
Cuisine: American
Calories: 115

Ingredients
  

For the Salad
  • 1 cup Greek Yogurt or regular yogurt
  • 2 tablespoons Lemon Juice fresh is preferable
  • 1 tablespoon Dijon Mustard yellow mustard can be used
  • to taste Salt adjust based on dietary restrictions
  • to taste Black Pepper freshly ground is best
  • 2 tablespoons Dill or Parsley or any preferred herbs
  • 1 can Albacore Tuna well-drained
  • 1 stalk Celery finely chopped

Equipment

  • Mixing Bowl
  • whisk
  • spatula
  • Fork

Method
 

Step-by-Step Instructions
  1. In a medium mixing bowl, combine Greek yogurt, lemon juice, and Dijon mustard. Whisk until smooth and creamy, about 1–2 minutes.
  2. Add salt, black pepper, and fresh herbs to the yogurt mixture. Stir well with a spatula for another 1–2 minutes.
  3. Drain the albacore tuna and flake into the bowl. Combine gently with a fork.
  4. Finely chop celery and red onion; add to the tuna mixture. Fold everything together with a spatula.
  5. Taste the salad and adjust seasoning with lemon juice, salt, and pepper as needed.
  6. Serve immediately or store in an airtight container in the fridge for 3-4 days.

Nutrition

Serving: 1servingCalories: 115kcalCarbohydrates: 6gProtein: 20gFat: 2gSaturated Fat: 0.5gMonounsaturated Fat: 0.5gCholesterol: 40mgSodium: 200mgPotassium: 300mgFiber: 1gSugar: 1gVitamin A: 500IUVitamin C: 10mgCalcium: 30mgIron: 1mg

Notes

Use fresh herbs and veggies for the best flavor and crunch. Avoid over-mixing after adding tuna and veggies for a delightful texture.

Tried this recipe?

Let us know how it was!

Cheesy Egg Toast Bliss: Quick, Customizable Breakfast Delight

The aroma of freshly toasted bread wafts through the kitchen as I eagerly anticipate my favorite morning ritual: Cheesy Egg Toast. This delightful dish effortlessly transforms breakfast into a comforting experience with its harmony of crispy edges, soft cheese, and fluffy eggs. Perfect for anyone who craves a quick breakfast that’s both satisfying and uncomplicated, this recipe is a game-changer for busy mornings or leisurely weekends. Versatile and customizable, you can easily switch up the flavors—from a savory medley of herbs to a dash of sweetness with honey and fruit. Imagine impressing friends and family with your new go-to breakfast that’s not only delicious but also vegetarian-friendly. Ready to dig into a plate of Cheesy Egg Toast and explore its endless possibilities? Let’s get cooking!

Why is Cheesy Egg Toast So Awesome?

Simplicity at its finest: This recipe comes together in just a few easy steps, making it perfect for all home cooks, whether you’re a seasoned chef or just starting out.

Versatile Flavors: Customize it to match your taste—add your favorite cheeses or fresh herbs for unbeatable richness.

Quick and Easy: With both oven and air fryer options, you can whip up this delicious meal in under 15 minutes.

Healthy Choice: It’s loaded with protein from eggs and offers a vegetarian option, ensuring you start your day right.

Crowd-Pleaser: Perfect for brunches or family breakfasts, everyone will adore this delightful dish. Don’t forget to check out my Cheesy Protein Egg or Cheesy Spinach Artichoke for more cheesy delights!

Cheesy Egg Toast Ingredients

For the Base
Bread – Thicker slices like sourdough or whole grain provide a sturdy foundation for your Cheesy Egg Toast.

For the Egg Mixture
Eggs – Essential for protein and a creamy texture; consider using egg substitutes for a vegan delight.
Cheese – Choose your favorite like cheddar or mozzarella for a rich and melty experience.
Fresh Herbs – Add vibrant flavor with options like parsley, chives, or basil for a fresh twist.
Salt & Pepper – Key seasonings to enhance the overall taste; adjust as you prefer.
Cayenne Pepper (optional) – Sprinkle in some heat to kick your taste buds into gear!

Step‑by‑Step Instructions for Cheesy Egg Toast

Step 1: Prepare Toast
Begin by lightly toasting your chosen bread slices in the oven or under the broiler for 1-2 minutes until they’re slightly crispy but not browned. This initial crisp will help the bread hold up as you layer in the delicious egg mixture, ensuring that each bite of your Cheesy Egg Toast has the perfect texture.

Step 2: Preheat Oven/Air Fryer
While the bread toasts, preheat your oven to 400°F (200°C) or your air fryer to 340°F (170°C). It’s important to have your cooking equipment ready, as this will help the egg mixture cook evenly and thoroughly, resulting in a beautifully puffed and golden Cheesy Egg Toast that is both visually appealing and tasty.

Step 3: Prepare Egg Mixture
In a mixing bowl, crack the eggs and beat them until well combined. Stir in your choice of cheese, chopped fresh herbs, and a sprinkle of salt and pepper. If you enjoy a kick, add a pinch of cayenne pepper. This creamy mixture will become the star component of your Cheesy Egg Toast, adding richness and flavor.

Step 4: Spread Mixture
Once your bread is toasted, evenly distribute the egg and cheese mixture over the prepared slices, making sure to cover them thoroughly. The key is to spread it out well, allowing the deliciousness to seep into the bread, which will help create a wonderful blend of textures when baked.

Step 5: Cook
Now it’s time to cook your Cheesy Egg Toast! If using the oven, place the baking sheet with the prepared toasts inside and bake for 10-12 minutes, or until puffed and golden. For the air fryer, arrange the toast in a single layer and cook for 8-10 minutes, checking for that perfect golden color that indicates they are ready to enjoy.

Step 6: Serve
Once your Cheesy Egg Toast is done cooking, remove it from the oven or air fryer and let it cool for a minute. Serve immediately as is, or pair it with fresh fruit, a light salad, or crispy bacon for a complete breakfast experience. Enjoy this delightful dish and feel free to experiment with flavors or toppings!

What to Serve with Cheesy Egg Toast?

Transform your breakfast spread with delightful accompaniments that perfectly complement the rich flavors of Cheesy Egg Toast.

  • Fresh Fruit Salad: A vibrant mix of berries, melon, and citrus brightens up your plate, adding a refreshing contrast to the creamy toast.

  • Crispy Bacon: The smoky crunch of crispy bacon adds savory satisfaction, making every bite even more indulgent and heartwarming.

  • Mixed Greens Salad: A light, peppery arugula salad with a simple lemon vinaigrette brings a crisp texture that balances the richness of your toast.

  • Herb-Infused Yogurt: A cool dollop of yogurt mixed with fresh herbs gives a tangy twist, enhancing the flavors of the Cheesy Egg Toast beautifully.

  • Avocado Slices: Creamy avocado adds healthy fats, and its mild flavor harmonizes perfectly with the cheese and eggs, enriching your meal.

  • Smoothie Delight: Pair with a banana and spinach smoothie for a nutrient boost, creating a well-rounded breakfast that feels good and tastes amazing.

Indulge in these pairings for a breakfast experience that’s not just satisfying but truly delightful!

How to Store and Freeze Cheesy Egg Toast

Fridge: Store any leftovers of your Cheesy Egg Toast in an airtight container for up to 2 days. This preserves its delicious flavors while keeping it fresh.

Freezer: For longer storage, freeze the egg mixture (without bread) in a freezer-safe bag for up to 3 months. Thaw in the fridge before cooking for best results.

Reheating: Reheat in the oven at 350°F (175°C) for about 10-15 minutes to revive its crispy texture, or microwave for quick warming—just note that the bread may not be as crispy.

Assembly Tip: Avoid freezing assembled toasts as they can become soggy; instead, prepare the egg mixture in advance and prepare fresh toast when you’re ready to enjoy!

Tips for the Best Cheesy Egg Toast

  • Choose Quality Bread: Thicker, artisanal bread like sourdough or whole grain not only prevents sogginess but enhances the overall flavor and texture of your Cheesy Egg Toast.

  • Whip Eggs Well: Beating the eggs until fully combined gives your toast a fluffy, airy texture. This crucial step enhances the creamy filling and ensures even cooking.

  • Don’t Skip Preheating: Always preheat your oven or air fryer before cooking. This leads to a beautifully puffed and golden Cheesy Egg Toast, rather than a sad, undercooked version.

  • Customize Wisely: Feel free to add your favorite herbs and cheeses, but remember that strong flavors may overpower the dish. Aim for balanced additions to enhance the overall taste.

  • Check for Doneness: Cooking times can vary with different appliances, so keep an eye on your Cheesy Egg Toast. Look for a golden-brown crust for the perfect finish!

Make Ahead Options

Cheesy Egg Toast is a fantastic choice for meal prep enthusiasts looking to save time during busy mornings! You can prepare the egg mixture—just beat the eggs and mix them with cheese, herbs, salt, and pepper—up to 24 hours in advance. Simply store it in an airtight container in the refrigerator to keep it fresh. When you’re ready to enjoy your delicious toast, spread the mixture over the pre-toasted bread slices and bake or air fry as directed. This approach ensures that your Cheesy Egg Toast maintains its delightful flavors and textures, allowing you to enjoy a comforting breakfast with minimal effort and maximum taste!

Cheesy Egg Toast Variations

Feel free to unleash your creativity in the kitchen and customize your Cheesy Egg Toast to fit your taste preferences!

  • Dairy-Free: Swap traditional cheese for almond or cashew cheese to enjoy a creamy, plant-based delight. This ensures everyone can dig in, regardless of dietary restrictions!

  • Herb Delight: Add a handful of spinach or kale to the egg mixture for a pop of color and added nutrients. Not only does this enhance the flavor, but it also makes your toast vibrantly appealing.

  • Spicy Kick: Toss in some diced jalapeños or chili flakes for a spicy twist. This variation turns your breakfast into a flavorful experience that’ll wake up your taste buds!

  • Sweet Interest: Add thin apple or pear slices and a drizzle of honey for a sweet and savory delight. This unique twist brightens the traditional dish into something special for brunch or even dessert.

  • Cheese Variety: Experiment with brie or feta in place of cheddar for a gourmet touch. The creaminess of brie or the tangy flavor of feta can elevate your Cheesy Egg Toast to a whole new level.

  • Peppers & Onions: Sauté bell peppers and onions and fold them into the egg mixture for added texture and flavor. These ingredients introduce a satisfying crunch that pairs beautifully with the creamy cheese.

  • Football Feast: Top your toast with crispy bacon or sausage bits for a hearty breakfast treat. This meaty addition is sure to satisfy any breakfast lover!

Don’t forget to pair your toast with a refreshing drink or side like a smoothie or a serving of fresh fruit! For more cheesy inspiration, dive into my Cheesy Garlic Chicken or my Blueberry French Toast recipes!

Cheesy Egg Toast Recipe FAQs

What type of bread is best for Cheesy Egg Toast?
Thicker slices of bread like sourdough or whole grain are ideal for Cheesy Egg Toast. They hold up better against the egg mixture, preventing sogginess and enhancing the overall texture.

How should I store leftovers of Cheesy Egg Toast?
Store any leftover Cheesy Egg Toast in an airtight container in the fridge for up to 2 days. This helps maintain its flavors and ensures a delightful breakfast the next morning!

Can I freeze the Cheesy Egg Toast?
While it’s best to avoid freezing the assembled toast, you can freeze the egg mixture on its own. Simply place the mixture in a freezer-safe bag and store it for up to 3 months. When you’re ready to enjoy, thaw the mixture in the fridge overnight and prepare fresh toast.

What if my Cheesy Egg Toast is soggy?
If your toast turns out soggy, you might want to try using thicker bread next time or ensuring that your bread is adequately toasted before adding the egg mixture. Additionally, watch that the cooking time is sufficient, checking for a golden-brown crust to signal doneness.

Are there any dietary considerations for Cheesy Egg Toast?
Absolutely! This dish can easily be made vegetarian by using cheese and egg alternatives. For a vegan version, substitute eggs with an appropriate vegan egg alternative and use dairy-free cheese. Always double-check for any specific allergies related to ingredients!

Can I make variations to the Cheesy Egg Toast?
Very much! Cheesy Egg Toast is highly customizable. You can mix up the cheeses, add fresh herbs, or even introduce ingredients like sautéed vegetables or spices to enhance flavors to your liking!

Cheesy Egg Toast

Cheesy Egg Toast Bliss: Quick, Customizable Breakfast Delight

Cheesy Egg Toast is a quick and customizable breakfast delight that transforms your morning experience into a comforting one.
Prep Time 5 minutes
Cook Time 10 minutes
Total Time 15 minutes
Servings: 2 pieces
Course: Breakfast
Cuisine: Vegetarian
Calories: 250

Ingredients
  

For the Base
  • 2 slices Bread Thicker slices like sourdough or whole grain
For the Egg Mixture
  • 2 large Eggs Consider using egg substitutes for a vegan delight
  • 1/2 cup Cheese Your favorite cheese like cheddar or mozzarella
  • 1 tablespoon Fresh Herbs Chopped parsley, chives, or basil
  • 1/4 teaspoon Salt Adjust to taste
  • 1/4 teaspoon Pepper Adjust to taste
  • 1/4 teaspoon Cayenne Pepper Optional for added heat

Equipment

  • Oven
  • Air Fryer
  • Mixing Bowl
  • Baking Sheet

Method
 

Step-by-Step Instructions
  1. Begin by lightly toasting your chosen bread slices in the oven or under the broiler for 1-2 minutes until they’re slightly crispy but not browned.
  2. While the bread toasts, preheat your oven to 400°F (200°C) or your air fryer to 340°F (170°C).
  3. In a mixing bowl, crack the eggs and beat them until well combined. Stir in your choice of cheese, chopped fresh herbs, and a sprinkle of salt and pepper. If you enjoy a kick, add a pinch of cayenne pepper.
  4. Once your bread is toasted, evenly distribute the egg and cheese mixture over the prepared slices.
  5. If using the oven, place the baking sheet with the prepared toasts inside and bake for 10-12 minutes. For the air fryer, arrange the toast in a single layer and cook for 8-10 minutes.
  6. Once your Cheesy Egg Toast is done cooking, remove it from the oven or air fryer and let it cool for a minute. Serve immediately.

Nutrition

Serving: 1pieceCalories: 250kcalCarbohydrates: 30gProtein: 12gFat: 10gSaturated Fat: 4gPolyunsaturated Fat: 1gMonounsaturated Fat: 4gCholesterol: 150mgSodium: 500mgPotassium: 200mgFiber: 2gSugar: 1gVitamin A: 300IUVitamin C: 1mgCalcium: 200mgIron: 1mg

Notes

Feel free to experiment with flavors or toppings as desired. Serve with fresh fruit or crispy bacon for added enjoyment.

Tried this recipe?

Let us know how it was!

Grilled Thai Coconut Chicken Skewers: Sweet & Savory Delight

The tantalizing aroma of smoky grilled chicken fills the air, transporting me straight to bustling Thai street markets. With each skewer of Grilled Thai Coconut Chicken Skewers, I’m reminded of the vibrant flavors that make Thai cuisine so irresistible. This easy recipe combines luscious coconut cream, aromatic ginger, and savory garlic, turning simple chicken into a show-stopping dish that’s quick to prepare and perfect for feeding a crowd. Plus, these skewers are versatile enough to swap out chicken for pork, letting your creativity shine in the kitchen. Ready to impress your guests with an unforgettable bite of Thailand? Let’s dive into this flavorful journey together!

Why are Thai Coconut Chicken Skewers so special?

Bold flavors: The unique blend of coconut cream, ginger, and garlic creates an explosion of taste that can elevate any meal.
Crowd-pleaser: Perfect for gatherings, everyone will love the smoky, sweet, and savory profile that’s hard to resist.
Quick and easy: With a few simple steps, you can whip up an impressive dish without spending hours in the kitchen.
Versatile options: Feel free to swap chicken for pork or mix in colorful veggies for a delightful twist.
Perfect pairing: Serve with a side of jasmine rice or a vibrant salad for a complete culinary experience, much like our tasty Blt Chicken Salad.

Grilled Thai Coconut Chicken Skewers Ingredients

• These flavorful skewers are packed with vibrant Thai taste!

For the Marinade

  • Chicken (dark meat preferred) – Main protein source providing flavor and juiciness. Substitute with pork if desired.
  • Ginger (4-5 slices) – Adds warmth and depth; fresh ginger is preferred for optimal flavor.
  • Garlic (2 cloves) – Enhances the aroma and taste; freshly minced is best.
  • Soy Sauce (2 tablespoons) – Provides essential saltiness and umami; use low-sodium option for less salt.
  • Dark Soy Sauce (1 tablespoon) – Adds a richer color and deeper flavor than regular soy sauce; light soy can be used as a substitute.
  • Coconut Cream (2 tablespoons in marinade + 6 tablespoons for glaze) – Contributes creaminess and a tropical sweetness; can be replaced with full-fat coconut milk if necessary.
  • Sugar (2 tablespoons) – Balances the savory elements; brown sugar can be a flavorful alternative.
  • Oyster Sauce (1 tablespoon) – Enhances the umami flavor; can be substituted with soy sauce mixed with a pinch of sugar if unavailable.
  • Honey (1.5 tablespoons in glaze) – Adds a sticky sweetness; maple syrup will work as an alternative.

For the Glaze

  • Coconut Cream (6 tablespoons) – Brushed on during grilling for added sweetness and a beautiful caramelization.

Feel free to dive into making these grilled Thai coconut chicken skewers that are just the right mix of sweet, smoky, and savory!

Step‑by‑Step Instructions for Grilled Thai Coconut Chicken Skewers

Step 1: Prepare Marinade
Start by mincing 4-5 slices of fresh ginger and 2 cloves of garlic. In a mixing bowl, combine the minced ginger and garlic with 2 tablespoons of soy sauce, 1 tablespoon of dark soy sauce, 2 tablespoons of coconut cream, 2 tablespoons of sugar, and 1 tablespoon of oyster sauce. Mix until well blended, ensuring a smooth consistency for the marinade that will coat your chicken.

Step 2: Marinate Chicken
Cut 1 pound of dark meat chicken into 1-inch cubes, ensuring even cooking during grilling. Place the chicken pieces in the bowl with the marinade, coating them thoroughly. Cover the bowl with plastic wrap and let the chicken marinate in the refrigerator for at least 2 hours; for the best flavor, marinate overnight if time allows.

Step 3: Skewer Chicken
Half an hour before grilling, soak wooden skewers in water to prevent them from burning. Once soaked, thread the marinated chicken onto the skewers, ensuring the pieces are packed tightly but without overcrowding to allow even cooking. Aim for 4-5 pieces of chicken per skewer, creating well-formed Grilled Thai Coconut Chicken Skewers.

Step 4: Preheat Grill
Prepare your grill for high heat cooking by preheating it to about 500°F. Ensure the grill grates are clean and lightly oiled to prevent sticking. This preheat will give your skewers that perfect char while sealing in the juices, contributing to the wonderful smoky flavor of the grilled Thai coconut chicken skewers.

Step 5: Grill Chicken
Place the skewers on the grill over direct heat, cooking them for about 15-18 minutes. Flip the skewers every 2-3 minutes, watching closely for a nice golden-brown color on all sides. Ensure the chicken is cooked through, reaching an internal temperature of 165°F, and that a slight char develops to enhance flavors.

Step 6: Glaze Chicken
During the final 2-3 minutes of grilling, brush a mixture of 6 tablespoons of coconut cream with 1.5 tablespoons of honey onto the skewers. This glaze will caramelize beautifully, adding a sticky sweetness to the grilled Thai coconut chicken skewers while preventing the coconut cream from burning.

Step 7: Serve
Once the skewers are grilled to perfection, remove them from the grill and let rest briefly. Plate the skewers over a bed of mixed greens, and consider serving with a side of peanut sauce for dipping. The combination of flavors and textures in these Grilled Thai Coconut Chicken Skewers will surely impress your family and friends!

How to Store and Freeze Grilled Thai Coconut Chicken Skewers

Fridge: Store leftover grilled Thai coconut chicken skewers in an airtight container for up to 3-4 days for optimal freshness.

Freezer: If you need to freeze them, wrap skewers tightly in plastic wrap and then place in a freezer-safe bag. They can be stored for up to 2 months.

Reheating: To reheat, grill or bake the skewers in a preheated oven at 350°F for about 10-15 minutes until warmed through. This method helps retain the juicy flavors.

Thawing: For frozen skewers, thaw in the refrigerator overnight before reheating for best results.

Make Ahead Options

These Grilled Thai Coconut Chicken Skewers are perfect for meal prep enthusiasts! You can prepare the marinade and marinate the chicken up to 24 hours in advance, ensuring the flavors soak through for a richer taste. Simply mix together the marinade and coat the chicken pieces, then cover and refrigerate. To save even more time on cooking day, you can thread the chicken onto soaking skewers a few hours prior to grilling, storing them in the refrigerator until you’re ready to cook. When you’re set to serve, preheat the grill and cook the skewers for about 15-18 minutes, brushing on the coconut cream glaze during the last few minutes for that delicious caramelized finish. This approach will have you enjoying delicious grilled thai coconut chicken skewers with minimal effort!

Expert Tips for Grilled Thai Coconut Chicken Skewers

  • Marinate Longer: Allow the chicken to marinate overnight for maximized flavor absorption, making your grilled Thai coconut chicken skewers irresistible.
  • Use Thighs: Opt for boneless chicken thighs instead of breasts—they stay juicier and are less likely to dry out during grilling.
  • Don’t Skip Soaking: Soak wooden skewers in water for at least 30 minutes to prevent burning while grilling.
  • Watch the Heat: Keep an eye on the grill temperature and avoid high flames, especially when applying the glaze, to prevent burning.
  • Check Internal Temp: Ensure the chicken reaches an internal temperature of 165°F for safe and perfectly cooked skewers.

Variations & Substitutions for Grilled Thai Coconut Chicken Skewers

Feel free to let your culinary creativity flow as you customize these delightful skewers to suit your taste buds!

  • Vegetable Skewers: Mix your chicken with vibrant bell peppers, zucchini, or cherry tomatoes for a colorful and nutritious twist. This not only adds flavor but also an appealing visual aspect to your dish.

  • Pork Replacement: Swap the chicken for tender pork shoulder to enjoy a different protein profile that pairs beautifully with the tropical flavors of the marinade. The richness of pork enhances the sweetness of coconut cream, creating a harmonious balance.

  • Spicy kick: Add red pepper flakes, sriracha, or even fresh chopped chilies to the marinade for an exciting fiery flavor that wakes up your taste buds. Don’t be shy—let the heat transform your skewers into a spicy sensation!

  • Peanut Sauce Glory: Drizzle a creamy homemade peanut sauce over your skewers. Simply combine natural peanut butter with rice vinegar and a hint of chili oil for a delightful dipping option that takes the dish to another level. It’s a perfect companion to the coconut flavors.

  • Soy Sauce Alternatives: If you’re out of soy sauce, try using tamari for a gluten-free option or coconut aminos for a sweeter touch. This will keep the umami richness intact while accommodating different dietary needs.

  • Addition of Fruits: For a surprising sweet and savory combination, add chunks of fresh pineapple or mango to your skewers. Grilling fruits caramelizes their sugars, enhancing the flavor and adding a refreshing contrast to the savory marinated chicken.

  • Herb Infusion: Embrace fresh herbs by adding chopped cilantro or Thai basil right into the marinade. This will infuse each skewer with aromatic freshness, elevating your overall dish.

These variations blur the lines between tradition and creativity, providing you the flexibility to customize your Grilled Thai Coconut Chicken Skewers. They are sure to please any crowd, just like these other crowd-pleasers: Chilli Chicken Takeout or Sizzling Chicken Pepper. Enjoy experimenting with these delicious ideas!

What to Serve with Grilled Thai Coconut Chicken Skewers?

Looking to create an unforgettable meal that perfectly complements these vibrant skewers?

  • Jasmine Rice: The fluffy, subtly aromatic rice absorbs the flavors of the skewers, providing a forgiving backdrop to the rich tastes.
  • Crisp Asian Salad: A refreshing mix of leafy greens, cucumbers, and sesame dressing offers a crunchy contrast that balances the savory chicken.
  • Sweet Chili Sauce: This delightful dip enhances the sweetness of the coconut, adding a tangy heat that elevates every bite of the skewers.
  • Grilled Vegetables: Smoky bell peppers, zucchini, and mushrooms add a colorful, nutritious side that pairs beautifully with the chicken’s flavors.
  • Peanut Sauce: A creamy, nutty sauce not only enriches the dish but also brings an authentic Thai touch that’s irresistible.
  • Mango Salad: Sweet, juicy mango paired with lime juice adds a tropical flair, harmonizing wonderfully with the coconut chicken’s sweetness.
  • Thai Iced Tea: This refreshing, creamy beverage provides a cooling effect against the skewers’ warmth, enhancing your dining experience.
  • Coconut Rice: Infuse your rice with coconut milk for an added layer of flavor that complements the skewers beautifully.
  • Fruit Skewers: A side of grilled pineapple or watermelon adds a refreshing sweetness that cleanses the palate between bites.

Grilled Thai Coconut Chicken Skewers Recipe FAQs

What type of chicken should I use for these skewers?
I recommend using dark meat chicken, like thighs, for the best flavor and juiciness. If you prefer, pork can be substituted to suit your taste, giving you a different flavor profile while still absorbing the delicious marinade.

How should I store leftover skewers?
Leftover grilled Thai coconut chicken skewers can be stored in an airtight container in the refrigerator for up to 3-4 days. This way, they can stay fresh and ready for a quick meal or snack when cravings hit!

Can I freeze cooked skewers?
Absolutely! To freeze your grilled skewers, wrap them tightly in plastic wrap—this ensures they stay fresh and protected from freezer burn. Then, place the wrapped skewers inside a freezer-safe bag or container. They can be stored for up to 2 months.

How do I reheat the skewers properly?
For reheating, the best method is to grill or bake the skewers in a preheated oven at 350°F for about 10-15 minutes until they are warmed through. This method keeps the chicken juicy and delicious, just like when they were freshly grilled.

Is this dish suitable for people with allergies?
When preparing these grilled Thai coconut chicken skewers, it’s essential to consider individual allergies. The main allergens in this recipe include soy and coconut. Always check for specific dietary restrictions and feel free to adjust the ingredients accordingly, like using gluten-free soy sauce or a coconut alternative if needed.

How do I adjust the spice level if I want more heat?
If you’re looking to add some heat to your skewers, consider incorporating red pepper flakes or sriracha into the marinade. Start with a small amount and adjust to your preferred spice level—after all, the more the merrier when it comes to flavor!

grilled thai coconut chicken skewers

Grilled Thai Coconut Chicken Skewers: Sweet & Savory Delight

Savor the vibrant flavors of grilled Thai coconut chicken skewers with a delicious blend of coconut cream, ginger, and garlic.
Prep Time 30 minutes
Cook Time 18 minutes
Marinating Time 2 hours
Total Time 2 hours 48 minutes
Servings: 4 skewers
Course: Appetizers
Cuisine: Thai
Calories: 250

Ingredients
  

For the Marinade
  • 1 lb dark meat chicken cut into 1-inch cubes
  • 4-5 slices ginger fresh, minced
  • 2 cloves garlic freshly minced
  • 2 tablespoons soy sauce low-sodium recommended
  • 1 tablespoon dark soy sauce can substitute with light soy
  • 2 tablespoons coconut cream for marinade
  • 2 tablespoons sugar brown sugar can substitute
  • 1 tablespoon oyster sauce or soy sauce mixed with sugar
  • 1.5 tablespoons honey for glaze; maple syrup is an alternative
For the Glaze
  • 6 tablespoons coconut cream brushed on during grilling

Equipment

  • Grill
  • Mixing Bowl
  • wooden skewers

Method
 

Step-by-Step Instructions
  1. Prepare Marinade: Mince ginger and garlic. Combine all marinade ingredients in a bowl until smooth.
  2. Marinate Chicken: Cut chicken into cubes, coat with marinade, cover, and refrigerate for at least 2 hours.
  3. Skewer Chicken: Soak skewers for 30 minutes. Thread marinated chicken onto skewers.
  4. Preheat Grill: Preheat your grill to high heat (about 500°F) and oil the grates.
  5. Grill Chicken: Cook skewers on the grill for 15-18 minutes, flipping every 2-3 minutes until golden brown.
  6. Glaze Chicken: Brush coconut cream and honey mixture on skewers during the last 2-3 minutes of grilling.
  7. Serve: Let skewers rest briefly, then serve over mixed greens with peanut sauce if desired.

Nutrition

Serving: 1skewerCalories: 250kcalCarbohydrates: 12gProtein: 18gFat: 15gSaturated Fat: 9gPolyunsaturated Fat: 0.5gMonounsaturated Fat: 4gCholesterol: 80mgSodium: 600mgPotassium: 400mgFiber: 1gSugar: 6gVitamin A: 150IUVitamin C: 2mgCalcium: 20mgIron: 2mg

Notes

Maximize flavor by marinating overnight and using boneless chicken thighs. For best results, soak wooden skewers for at least 30 minutes prior to grilling.

Tried this recipe?

Let us know how it was!

Greek Chicken Meatballs with Lemon Orzo that Wow Your Tastebuds

As I ladled the bright, lemony broth over a steaming pile of orzo, the aroma wafted through my kitchen, instantly transporting me to a sun-kissed terrace in Greece. This recipe for Greek Chicken Meatballs with Lemon Orzo is not just a dish; it’s a joyful gathering for family and friends, celebrating flavors that are both refreshing and comforting. With the lean protein of chicken and the zesty notes of lemon and herbs, these meatballs are not only a crowd-pleaser but also perfect for meal prep—making your weeknight dinners a breeze. I can’t wait for you to try this delightful recipe, because who doesn’t want a little Mediterranean magic on their plate? Are you ready to embark on this culinary journey?

Why Are These Meatballs So Special?

Flavorful Fusion: The harmonious blend of lemon and herbs elevates these meatballs, creating a mouthwatering Mediterranean escape.
Nutritious & Wholesome: Packed with lean protein and vibrant veggies, they embody healthy eating while being deliciously satisfying.
Family-Friendly: Kids and adults alike will savor this recipe, making it a unified favorite at the dinner table.
Meal Prep Perfection: Easily portioned for the week, these meatballs are a convenient choice for busy schedules. Serve them with a side of Greek salad for a refreshing pairing!
Quick & Easy: With a simple preparation time, you’ll have a delightful meal ready in no time, keeping your evenings stress-free.

Greek Chicken Meatballs with Lemon Orzo Ingredients

• Here’s everything you need for an unforgettable experience!

For the Meatballs

  • Ground Chicken – the main protein source, keeping your Greek Chicken Meatballs lean and tender.
  • Breadcrumbs – adds necessary texture; whole wheat or panko can provide different twists.
  • Parmesan Cheese – enhances flavor richness; freshly grated for the best results.
  • Fresh Parsley – adds a pop of color and freshness; cilantro can be a delightful alternative.
  • Red Onion – brings sweetness and moisture; finely chop to blend perfectly.
  • Garlic – offers robust aroma; fresh cloves elevate the taste significantly.
  • Egg – crucial for binding the mixture together.
  • Dried Oregano – imparts a peppery note typical of Greek cuisine.
  • Salt and Black Pepper – essential for making flavors sing.
  • Lemon Zest – infuses a bright citrus flavor that steals the show.

For the Lemon Orzo

  • Orzo Pasta – absorbs flavors beautifully; you could substitute with risotto or couscous if desired.
  • Broth (Chicken or Vegetable) – enhances orzo flavor greatly, making it richer than using plain water.
  • Olive Oil – adds depth and richness; consider avocado oil if preferred.
  • Feta Cheese – brings tangy creaminess; goat cheese can be a nice substitute.
  • Lemon Juice – adds zest and elevates the flavor profile.

Now that you have all the ingredients, get ready for a culinary adventure that will surely wow your taste buds!

Step‑by‑Step Instructions for Greek Chicken Meatballs with Lemon Orzo

Step 1: Preheat the Oven
Begin by preheating your oven to 400°F (200°C). While the oven warms up, line a baking sheet with parchment paper to ensure easy cleanup and prevent the meatballs from sticking. This crucial step sets the stage for perfectly cooked Greek Chicken Meatballs, ensuring a delightful crisp exterior.

Step 2: Mix the Meatball Ingredients
In a large mixing bowl, combine the ground chicken, breadcrumbs, freshly grated Parmesan cheese, finely chopped red onion, minced garlic, egg, fresh parsley, dried oregano, lemon zest, and a pinch of salt and pepper. Mix gently but thoroughly, using your hands to blend the ingredients until well combined, being careful not to overmix, which can make the meatballs tough.

Step 3: Shape the Meatballs
With your hands, form the chicken mixture into 1.5-inch meatballs, ensuring they are uniformly sized for even cooking. Place each meatball on the prepared baking sheet, leaving a bit of space between each one. The uniformity will help all the Greek Chicken Meatballs cook evenly and achieve that juicy, tender consistency you crave.

Step 4: Bake the Meatballs
Slide the baking sheet into the preheated oven and bake the meatballs for 20-25 minutes. Keep an eye on them, and they should emerge golden brown, with an internal temperature of 165°F (74°C) when perfectly cooked. This baking method ensures a lovely crust while keeping the insides juicy and flavorful.

Step 5: Cook the Orzo
While the meatballs are baking, bring a pot of chicken or vegetable broth to a rolling boil. Add the orzo pasta and cook for about 8-10 minutes, stirring occasionally, until it reaches an al dente texture. Once done, drain the orzo and rinse it briefly under cold water to halt the cooking process and prevent sticking.

Step 6: Combine the Orzo Ingredients
In a large bowl, mix the cooked orzo with a drizzle of olive oil, crumbled feta, fresh parsley, and a splash of lemon juice. Toss everything until well combined, and season gently with salt and pepper. The zesty combination will beautifully complement the Greek Chicken Meatballs, tying both elements together in delightful harmony.

Step 7: Serve and Garnish
To serve, plate a generous scoop of lemon orzo alongside a few of your golden-brown Greek Chicken Meatballs. Garnish with extra parsley and lemon slices for a bright, inviting presentation. This dish not only looks stunning but also bursts with Mediterranean flavors that will leave your family asking for seconds.

Make Ahead Options

These Greek Chicken Meatballs with Lemon Orzo are perfect for meal prep enthusiasts looking to save time during busy weeknights! You can prepare the meatball mixture and shape the meatballs up to 24 hours in advance; simply cover and refrigerate them to maintain freshness and prevent browning. The cooked orzo can also be made ahead and stored in an airtight container for up to 3 days. When you’re ready to serve, bake the meatballs directly from the fridge—there’s no need to thaw! Just ensure they achieve an internal temperature of 165°F (74°C) after a few extra minutes in the oven. With these make-ahead options, you’ll enjoy delicious, hassle-free meals with minimal effort!

Greek Chicken Meatballs with Lemon Orzo Variations

Get creative while preparing this recipe and discover exciting ways to customize your Greek Chicken Meatballs with Lemon Orzo!

  • Turkey Option: Swap ground chicken for ground turkey for a slightly richer flavor while keeping it lean.

  • Vegan Delight: Use lentils or chickpeas for the meatballs, creating a wonderful plant-based option with Mediterranean vibes.

  • Herb Twist: Replace parsley with fresh dill or mint for an aromatic twist that adds a unique flavor profile to your dish.

  • Extra Zing: Add a sprinkle of red pepper flakes or a dash of hot sauce to the meatball mixture to give your dish a delightful kick.

  • Whole Grain Goodness: Substitute orzo with quinoa or farro for a hearty grain filling; both provide excellent nutrition that complements the meatballs beautifully.

  • Creamy Variation: Stir in a dollop of Greek yogurt or sour cream into the orzo for a creamy texture that balances the zesty flavors of lemon.

  • Zesty Roasted Veggies: Serve alongside a medley of roasted Mediterranean vegetables like zucchini and bell peppers for added nutrition and color.

  • Elevated Cheese: Instead of feta, try a mix of feta and creamy goat cheese for a luxurious touch that enhances the flavor experience.

With these variations, you can tailor this dish to your taste while keeping the essence of Mediterranean magic intact. If you’re looking for more delightful Mediterranean ideas, check out my recipe for Tuscan Chicken Soup or Korean BBQ Meatballs for a twist on your next meal!

What to Serve with Greek Chicken Meatballs with Lemon Orzo

Create a vibrant Mediterranean meal experience that your loved ones will cherish.

  • Greek Salad: Fresh cucumber, tomato, and feta create a crisp contrast, balancing the flavors of meatballs perfectly.

  • Tzatziki Sauce: The cooling yogurt and cucumber dip adds a refreshing zing, enhancing the overall meal with creamy goodness.

  • Roasted Vegetables: A mix of colorful bell peppers and zucchini brings a smoky sweetness, providing a delightful texture alongside the dish.

  • Pita Bread: Soft, warm pita is perfect for scooping up meatballs and orzo, adding a nice, chewy element to each bite.

  • Lemon-Herb Quinoa: This nutritious side reinforces the lemony theme of your main dish, offering a wholesome and hearty addition to the table.

  • Souvlaki Skewers: Grilled veggies or chicken skewers give a delicious charred taste, enhancing the Mediterranean feast and complementing the meatballs beautifully.

  • Herbal Iced Tea: A light and refreshing drink, infused with mint or lemon, echoes the zesty flavors and makes for a lovely dining experience.

  • Baklava: Finish your meal with a touch of sweetness; the flaky pastry and honey layers create a perfect, indulgent dessert to complement the savory main.

Tips for the Best Greek Chicken Meatballs

  • Mixing Technique: Use your hands for mixing to ensure all ingredients are well combined, but avoid overmixing to prevent tough meatballs.
  • Uniform Size: Aim for consistent 1.5-inch meatballs; this guarantees even cooking and perfect texture for your Greek Chicken Meatballs with Lemon Orzo.
  • Check Temperature: Use an instant-read thermometer to check that meatballs reach 165°F (74°C) internally for optimal safety and juiciness.
  • Preheat Correctly: Ensure your oven is fully preheated before baking to secure a crisp exterior while keeping the insides moist.
  • Flavor Infusion: Don’t skip the lemon zest and juice; they elevate the dish, complementing the meatballs and orzo perfectly with bright, zesty notes.

Storage Tips for Greek Chicken Meatballs with Lemon Orzo

Fridge: Store leftovers in an airtight container for up to 3 days to keep your Greek Chicken Meatballs fresh and flavorful.

Freezer: For longer storage, you can freeze the meatballs for up to 3 months. Make sure to lay them flat in a single layer on a tray before transferring to a freezer bag.

Reheating: When ready to enjoy, reheat the meatballs and lemon orzo in the microwave or oven until heated through, ensuring they reach an internal temperature of 165°F (74°C).

Separation: To maintain texture, consider freezing the meatballs and orzo separately, allowing for more flexibility in meal planning.

Greek Chicken Meatballs with Lemon Orzo Recipe FAQs

How do I choose the best ground chicken for the meatballs?
Absolutely! When selecting ground chicken, look for a package labeled as “lean” to ensure you have the ideal fat content. Ground chicken should be pink with no discoloration, and avoid any packaging with dark spots or an off smell. If possible, buy it freshly ground from the butcher’s section for the best flavor and texture.

What’s the best way to store leftover meatballs and orzo?
Very! Once cooled, store any leftovers in an airtight container in your refrigerator for up to 3 days. For longer storage, you can freeze the meatballs and orzo separately for up to 3 months. Make sure the meatballs are arranged in a single layer on a baking sheet before freezing to prevent them from sticking together. After they’re frozen solid, transfer them to a freezer bag, removing as much air as possible for optimal freshness.

Can I freeze Greek Chicken Meatballs and how?
Absolutely! To freeze, first let the baked meatballs cool completely. Then, arrange them in a single layer on a baking sheet and freeze for about 1-2 hours until firm. Once frozen, transfer the meatballs into a freezer-safe container or a resealable plastic bag, separating layers with parchment paper if necessary to prevent sticking. They can be stored this way for up to 3 months while maintaining their taste and texture.

What if my meatballs are too dry or tough?
Don’t worry, it happens! If your meatballs turn out too dry, be sure to check your mixing process next time. Overmixing can lead to a tough texture, so gently combine the ingredients just until mixed. If they do come out dry, a simple fix is to add a touch of olive oil or a small amount of chicken broth when reheating to add moisture. Also, using ground chicken with a bit more fat can help maintain juiciness.

Are there any dietary considerations for Greek Chicken Meatballs?
Yes, indeed! If you’re preparing this dish for someone with dietary restrictions, you can easily accommodate them. Substitute the breadcrumbs with gluten-free options or omit them entirely for those avoiding gluten. For allergies, replacing feta cheese with a dairy-free alternative or simply leaving it out ensures everyone can enjoy the meal. If you’re cooking for kids or picky eaters, feel free to adjust seasoning levels to their taste preference!

What herbs can I substitute if I can’t find fresh parsley?
The more, the merrier! If you can’t find fresh parsley, don’t fret. Fresh cilantro works beautifully as an alternative, providing a vibrant flavor. Alternatively, dried herbs can work in a pinch; just remember to use less since they are more concentrated than fresh herbs—about one-third of the amount recommended for fresh should do. Enjoy experimenting with different herb combinations to make it your own!

Greek Chicken Meatballs with Lemon Orzo

Greek Chicken Meatballs with Lemon Orzo that Wow Your Tastebuds

A delightful recipe for Greek Chicken Meatballs with Lemon Orzo, combining refreshing flavors and comforting textures.
Prep Time 15 minutes
Cook Time 30 minutes
Total Time 45 minutes
Servings: 4 servings
Course: Dinner
Cuisine: Mediterranean
Calories: 400

Ingredients
  

For the Meatballs
  • 1 pound Ground Chicken
  • 1/2 cup Breadcrumbs whole wheat or panko
  • 1/4 cup Parmesan Cheese freshly grated
  • 1/4 cup Fresh Parsley finely chopped
  • 1/2 medium Red Onion finely chopped
  • 3 cloves Garlic minced
  • 1 large Egg
  • 1 teaspoon Dried Oregano
  • 1 teaspoon Salt
  • 1/2 teaspoon Black Pepper
  • 1 tablespoon Lemon Zest
For the Lemon Orzo
  • 1 cup Orzo Pasta
  • 4 cups Broth (Chicken or Vegetable)
  • 2 tablespoons Olive Oil
  • 1/2 cup Feta Cheese crumbled
  • 2 tablespoons Lemon Juice

Equipment

  • Oven
  • Mixing Bowl
  • Baking Sheet
  • Pot

Method
 

Step‑by‑Step Instructions
  1. Preheat your oven to 400°F (200°C) and line a baking sheet with parchment paper.
  2. In a large mixing bowl, combine the ground chicken, breadcrumbs, Parmesan cheese, red onion, garlic, egg, fresh parsley, dried oregano, lemon zest, salt, and pepper. Mix gently but thoroughly.
  3. Form the chicken mixture into 1.5-inch meatballs, placing them on the prepared baking sheet.
  4. Bake the meatballs for 20-25 minutes until golden brown and cooked to an internal temperature of 165°F (74°C).
  5. While the meatballs bake, bring a pot of broth to a boil. Add orzo and cook for 8-10 minutes until al dente. Drain and rinse under cold water.
  6. Mix cooked orzo with olive oil, feta, parsley, and lemon juice. Season with salt and pepper.
  7. Serve a scoop of lemon orzo alongside the meatballs, garnished with parsley and lemon slices.

Nutrition

Serving: 1servingCalories: 400kcalCarbohydrates: 45gProtein: 30gFat: 15gSaturated Fat: 5gPolyunsaturated Fat: 2gMonounsaturated Fat: 8gCholesterol: 100mgSodium: 600mgPotassium: 300mgFiber: 3gSugar: 2gVitamin A: 500IUVitamin C: 5mgCalcium: 200mgIron: 2mg

Notes

Use hands for mixing to avoid tough meatballs. Ensure even sizing for optimal cooking. Use lemon zest and juice for flavor infusion.

Tried this recipe?

Let us know how it was!

Melt-in-Your-Mouth Baked Ham and Cheese Croissants

As I pulled a tray of Baked Ham and Cheese Croissants from the oven, the warm, buttery aroma enveloped my kitchen like a cozy hug. These delightful pastries are not just a quick breakfast option; they’re perfect for lunch or a charming brunch gathering. The flaky croissants cradle layers of savory ham and creamy cheese, making them a comfort food classic that everyone will adore. With just a few ingredients and minimal prep time, they’re an easy way to elevate your cooking game and impress your loved ones. Plus, they can be easily personalized with your favorite cheeses or additional fillings! Are you ready to bring a touch of French café charm to your home?

Why are these croissants a must-try?

Irresistibly Flaky: The buttery croissants create a crisp exterior that gives way to a soft, fluffy center.

Melt-in-Your-Mouth Goodness: Melting cheese melds beautifully with savory ham, delivering flavors that satisfy your cravings.

Quick & Easy: Minimal prep time means you can whip these up for breakfast, lunch, or even a last-minute brunch.

Customizable: Feel free to mix different cheeses or add your favorite twist like spinach or roasted peppers.

Crowd-Pleasing Delight: These treats are perfect for family gatherings or simple weeknight dinners, ensuring everyone leaves happy.

With the delicious appeal of these Baked Ham and Cheese Croissants, you won’t want to skip making them! Pair them with a fresh salad or some fruit to turn a quick snack into a delicious meal. Check out my Banana Grilled Cheese for another tasty twist!

Baked Ham and Cheese Croissants Ingredients

For the Croissants
Croissants – The key to flaky perfection; mini croissants can make for delightful bite-sized treats.

For the Filling
Deli Ham – Provides savory depth; opt for black forest ham for a richer flavor, but any thinly sliced deli ham works well.
Muenster Cheese – Adds creamy texture; feel free to substitute with Havarti, Cheddar, or Swiss cheese to suit your taste.
Mayonnaise – Introduces moisture and creaminess; adjust or replace according to your preferences for a lighter option.
Stoneground Mustard – Offers a tangy flavor boost; tweak the amount based on your spice tolerance.

Optional Garnish
Fresh Chives – An optional sprinkle that enhances flavor; use them for added brightness, though they can be omitted easily.

These Baked Ham and Cheese Croissants are a heartfelt way to bring a taste of comfort into your home meals!

Step‑by‑Step Instructions for Baked Ham and Cheese Croissants

Step 1: Preheat the Oven
Begin by preheating your oven to 350°F (175°C). This important step ensures your Baked Ham and Cheese Croissants bake evenly and puff up beautifully. As the oven warms up, gather your ingredients and set up your workspace, making it easy to access everything as you prepare the filling.

Step 2: Prepare the Croissants
Once the oven is ready, take your croissants and slice them in half lengthwise. Lay each half flat on a clean baking sheet, cut side up. This will create the perfect pocket for your delicious filling, allowing the cheese and ham to meld seamlessly with the flaky croissant layers.

Step 3: Mix the Spreads
In a small bowl, combine mayonnaise and stoneground mustard until well blended. This tangy spread adds moisture and flavor to your Baked Ham and Cheese Croissants, enhancing every bite. Use a spatula or knife to evenly spread the mixture onto the inside of each croissant half, covering the surface completely for maximum flavor.

Step 4: Layer the Filling
Next, it’s time to layer the fillings! Take thin slices of deli ham and place them on one half of each croissant, ensuring a generous coverage. Follow the ham with slices of Muenster cheese, or your preferred cheese. The cheese will melt beautifully during baking, creating a gooey, delicious contrast to the savory ham.

Step 5: Assemble the Croissants
Carefully close the croissants by placing the other half on top of the filled side. Gently press down to secure the filling inside. Place the assembled croissants on the prepared baking sheet, cut side up. This arrangement allows the tops to crisp up beautifully while the insides become perfectly melty.

Step 6: Bake to Perfection
Pop your baking sheet into the preheated oven and bake for 10 to 15 minutes. Keep an eye on them as they bake! You’re looking for a golden, crisp exterior and melted cheese oozing from the sides. The aroma of your Baked Ham and Cheese Croissants will fill your kitchen and make it hard to resist.

Step 7: Garnish and Serve
Once the croissants are golden and the cheese is bubbling, remove them from the oven. For an added burst of flavor, sprinkle freshly chopped chives on top before serving. These delightful Baked Ham and Cheese Croissants are now ready to be enjoyed, either on their own or alongside a fresh salad or seasonal fruit.

What to Serve with Baked Ham and Cheese Croissants

A cozy kitchen deserves a well-rounded meal to elevate your baked ham and cheese croissants into an unforgettable feast.

  • Simple Green Salad: A refreshing mix of greens balances the richness of the croissants, offering a light, crisp contrast.
  • Fresh Fruit Bowl: The sweetness of seasonal fruits cuts through the savory flavors, providing a delightful and colorful side.
  • Roasted Veggies: Caramelized veggies add depth and a hint of smokiness that pairs beautifully with the creamy, cheesy croissants.
  • Creamy Tomato Soup: A warm bowl of tomato soup offers a classic combination that melds perfectly with the flaky pastry.
  • Potato Wedges: Crispy, seasoned wedges add a satisfying crunch while complementing the melt-in-your-mouth texture of your croissants.
  • Iced Tea or Lemonade: Quench your thirst with a chilled drink that refreshes the palate and enhances the meal with a zesty kick.
  • Chocolate Mousse: For a sweet finish, this light and airy dessert is a luxurious way to conclude your delightful dining experience.

Serve one or more of these options alongside your baked ham and cheese croissants for an inviting and satisfying meal that everyone will love!

Make Ahead Options

These Baked Ham and Cheese Croissants are perfect for meal prep, allowing you to enjoy their deliciousness with minimal effort on busy days! You can assemble the croissants up to 24 hours in advance. Simply prep your croissants, layer the ham and cheese, and spread your mayonnaise-mustard mixture as instructed. After assembling, tightly cover the baking sheet with plastic wrap and refrigerate. When you’re ready to enjoy them, just remove the wrapping and bake directly from the fridge, adding a couple of extra minutes to ensure they’re heated through. This way, you’ll have flaky, melty croissants that taste just as delightful as when freshly made!

Baked Ham and Cheese Croissants Variations

Feel free to make these croissants your own with delicious twists and substitutes that will surprise and delight your taste buds!

  • Turkey Swap: Replace ham with sliced turkey for a leaner option that still packs flavor. It pairs wonderfully with Muenster cheese too.

  • Veggie Delight: Go vegetarian by filling croissants with roasted vegetables like bell peppers and zucchini, paired with mozzarella for a creamy finish. This adds colorful flair and freshness!

  • Spicy Kick: Mix in a dash of hot sauce or sliced jalapeños to the filling for an extra spicy layer. A hint of heat can elevate the comfort to a whole new level!

  • Cheese Lovers: Experiment with alternative cheeses like Havarti or a sharp Cheddar for a different flavor profile. Each cheese brings its own unique character that transforms the dish.

  • Herb Infusion: Add fresh herbs like dill or parsley to your spread for an aromatic touch. This subtle addition allows you to change the whole dynamic of flavor effortlessly.

  • Sweet Twist: Blend in a layer of apple slices and a sprinkle of cinnamon sugar for a delightful sweet-savory combination that’s perfect for brunch. It’s a surprising twist everyone will adore.

  • French Onion: Incorporate caramelized onions into the filling for richness and oodles of flavor. Add a little Gruyère cheese, and you’ll be dreaming of cozy French bistros!

By trying these customizations, your Baked Ham and Cheese Croissants will endlessly surprise, creating a wonderful meal for any occasion. If you’re in the mood for something equally delightful, consider trying my Strawberry Cheesecake Dump Cake for dessert or a savory Garlic Butter Baked Chicken alongside your croissants!

Expert Tips for Baked Ham and Cheese Croissants

Watch the Oven: Keep an eye on the croissants as they bake to prevent over-browning. Aim for a golden top and melted cheese inside.

Layer Wisely: Don’t overstuff your croissants. A thin layer of ham and cheese allows for even melting and prevents spills while baking.

Mix Cheeses: Experiment with different cheese varieties like Havarti or Swiss for unique flavor combinations that cater to your taste buds.

Use Fresh Ingredients: Fresh chives add a burst of flavor to your baked ham and cheese croissants, but dried herbs can work if fresh isn’t available.

Make Ahead: You can prepare the croissants ahead of time and refrigerate them unbaked. This makes for a quick morning meal or snack ready to pop in the oven.

With these expert tips in hand, you’re all set to create delicious Baked Ham and Cheese Croissants that will impress everyone around your table!

How to Store and Freeze Baked Ham and Cheese Croissants

Room Temperature: Allow croissants to cool completely before leaving them out at room temperature for up to 2 hours. Keep them covered with a clean kitchen towel to prevent dryness.

Fridge: Store any leftovers in an airtight container in the refrigerator for up to 2 days. Reheat in the oven or microwave to restore their flaky texture.

Freezer: Place baked croissants in a freezer-safe bag or container, separating layers with parchment paper. They can be frozen for up to 2 months for a quick snack or meal.

Reheating: For best results, reheat frozen or refrigerated Baked Ham and Cheese Croissants in a preheated oven at 350°F (175°C) for 10-15 minutes, until heated through and crispy.

Baked Ham and Cheese Croissants Recipe FAQs

What type of croissants should I use for the recipe?
Absolutely! While traditional large croissants work beautifully, I often recommend using mini croissants for bite-sized treats. They are perfect for entertaining or serving as appetizers, giving guests the chance to enjoy smaller portions without sacrificing flavor.

How should I store leftover croissants?
To keep your Baked Ham and Cheese Croissants fresh, store any leftovers in an airtight container in the refrigerator for up to 2 days. For the best texture when reheating, pop them back in a preheated oven at 350°F (175°C) for about 10 minutes. This method ensures they regain their crispy exterior and melty cheese texture!

Can I freeze Baked Ham and Cheese Croissants?
Definitely! To freeze them, first, allow your croissants to cool completely. Then, place them in a freezer-safe bag or container, making sure to separate layers with parchment paper to prevent sticking. They can be frozen for up to 2 months. When you’re ready to enjoy, reheat them straight from the freezer in a preheated oven at 350°F (175°C) for 15-20 minutes, until heated through and crisp.

What if the cheese doesn’t melt during baking?
Very! If your cheese isn’t melting properly, it may be due to the type of cheese used or the oven temperature. Make sure to slice your cheese thinly; cheeses like Muenster, Havarti, or even Cheddar melt beautifully. It’s important to bake at the right temperature too—350°F is optimal for achieving that gooey, melting effect without burning the croissant.

Are there any allergy concerns with this recipe?
Absolutely! Always be sure to check the labels on your ingredients for allergens. For example, the mayonnaise can often contain eggs, and some cheeses may not be suitable for lactose-intolerant individuals. If you’re making these for a group, it’s best to ask about any dietary restrictions or preferences ahead of time. You can also easily substitute the ham with turkey for a lighter option or use dairy-free cheese alternatives for lactose-free diets.

How can I customize the fillings in these croissants?
The more the merrier! Get creative with your ingredients. Replace the ham with turkey or roast vegetables for a vegetarian option, and feel free to intro different types of mustard or include additional fillings such as sautéed spinach or roasted red peppers. This is where your culinary flair can really shine, making each batch uniquely yours!

Baked Ham and Cheese Croissants Recipe FAQs

Baked Ham and Cheese Croissants

Melt-in-Your-Mouth Baked Ham and Cheese Croissants

These Baked Ham and Cheese Croissants are deliciously flaky and filled with savory ham and melted cheese, perfect for any meal.
Prep Time 15 minutes
Cook Time 15 minutes
Total Time 30 minutes
Servings: 8 croissants
Course: Breakfast
Cuisine: French
Calories: 250

Ingredients
  

For the Croissants
  • 8 pieces Mini Croissants The key to flaky perfection
For the Filling
  • 8 slices Deli Ham Opt for black forest ham for richer flavor
  • 8 slices Muenster Cheese Feel free to substitute with Havarti, Cheddar, or Swiss
  • 2 tablespoons Mayonnaise Adjust according to preferences for a lighter option
  • 2 teaspoons Stoneground Mustard Tweak based on your spice tolerance
Optional Garnish
  • 2 tablespoons Fresh Chives Adds flavor and brightness

Equipment

  • Oven
  • Baking Sheet
  • Mixing Bowl

Method
 

Step-by-Step Instructions for Baked Ham and Cheese Croissants
  1. Preheat your oven to 350°F (175°C). Gather your ingredients for easy access.
  2. Slice your croissants in half lengthwise and lay them flat on a baking sheet.
  3. Mix mayonnaise and stoneground mustard in a bowl until blended. Spread on each croissant half.
  4. Layer thin slices of deli ham on one half of each croissant, followed by slices of cheese.
  5. Close the croissants and press gently. Place them cut side up on the baking sheet.
  6. Bake for 10 to 15 minutes until golden and cheese is melted.
  7. Remove from oven and sprinkle with fresh chives before serving.

Nutrition

Serving: 1croissantCalories: 250kcalCarbohydrates: 20gProtein: 10gFat: 15gSaturated Fat: 8gPolyunsaturated Fat: 0.5gMonounsaturated Fat: 5gCholesterol: 30mgSodium: 600mgPotassium: 150mgFiber: 1gSugar: 1gVitamin A: 5IUVitamin C: 2mgCalcium: 15mgIron: 6mg

Notes

These croissants can be personalized with additional fillings like spinach or roasted peppers. Pair them with a fresh salad or fruit for a complete meal.

Tried this recipe?

Let us know how it was!

Crispy and Healthy: The Best Air Fryer Broccoli You’ll Love

As I stood in my kitchen, the tantalizing aroma of garlic wafted through the air, instantly transporting me to summer picnics and family gatherings. That’s when I knew it was time to whip up The Best Air Fryer Broccoli! This vibrant, healthy side dish transforms ordinary broccoli into tender, crispy florets, all while saving precious time compared to traditional roasting methods. In just minutes, you can enjoy a guilt-free yet delicious addition to any meal—perfect for those looking to embrace a vegetarian lifestyle or anyone searching for quick, wholesome options. With a light sprinkle of garlic powder and olive oil, it’s bursting with flavor while being gluten-free and low-carb. Ready to discover a new favorite that’s not just nutritious but easy to make? Let’s dive into the magic of air frying!

Why Is Air Fryer Broccoli Amazing?

Crispy Perfection: Air frying gives you that delightful crunch without excessive oil, making each bite addictive.
Quick and Easy: In just 10 minutes, you can serve this nutritious side dish alongside grilled meats or toss it in a refreshing salad.
Flavor Burst: A simple blend of garlic powder and olive oil elevates broccoli to new heights, perfect for even the pickiest of eaters!
Versatile: Swap in your favorite veggies like cauliflower or Brussels sprouts for a delicious twist on your dinner plate.
Healthy Choice: With no gluten, low carbs, and only 91 calories per serving, it’s the perfect guilt-free option for any meal. Enjoy this alongside your favorite comforting dishes like Cozy Broccoli Cheddar or our delightful Bacon Soup Smoky!

The Best Air Fryer Broccoli Ingredients

For the Broccoli
Fresh Broccoli Florets – Tenderness and nutrition booster; use evenly-sized florets for even cooking. Frozen broccoli can be used; thaw and dry well before cooking.
Extra Virgin Olive Oil – Helps achieve crispy texture; can substitute with avocado oil for a similar effect.

For Seasoning
Garlic Powder – Provides flavor without the risk of burning like fresh garlic; a simple yet effective seasoning agent for The Best Air Fryer Broccoli.
Salt – Enhances overall flavor; adjust to taste depending on dietary needs.
Freshly Cracked Black Pepper – Adds a minor kick; adjust quantity to your preference.

Optional Enhancements
Lemon Zest – For brightness and aromatic enhancement when garnishing.
Freshly Grated Parmesan Cheese – Adds creaminess and a cheesy flavor; omit for dairy-free or paleo diets.

Step‑by‑Step Instructions for The Best Air Fryer Broccoli

Step 1: Preheat Your Air Fryer
Start by preheating your air fryer to 320°F (160°C). This step is essential for achieving perfectly cooked broccoli. Give it about 5 minutes to reach the desired temperature while you prepare the florets. You’ll know it’s ready when the air fryer begins to emit a gentle heat, setting the stage for crispy and tender results.

Step 2: Prepare the Broccoli Florets
In a large mixing bowl or zippered bag, combine fresh broccoli florets with extra virgin olive oil, garlic powder, salt, and freshly cracked black pepper. Toss them thoroughly until each floret is evenly coated. This step ensures that the flavors blend beautifully in The Best Air Fryer Broccoli. The florets should glisten lightly with oil, ready for the heat of the air fryer.

Step 3: Arrange in the Air Fryer
Carefully place the seasoned broccoli florets in a single layer in the air fryer basket. Avoid overcrowding, as this can lead to uneven cooking and soggy textures. You want each floret to have enough space for the hot air to circulate and create that delightful crunch. The vibrant green of the broccoli should be the first thing you see, signaling freshness and flavor.

Step 4: Initial Cooking Phase
Cook the broccoli at 320°F for 6 minutes. As it cooks, the lovely aroma of garlic will fill your kitchen. Halfway through, you may want to give the basket a gentle shake to ensure even cooking. At the end of this phase, the broccoli should be tender and bright green but not yet crispy.

Step 5: Increase Temperature for Crispiness
After the initial cooking time, increase the air fryer temperature to 400°F (200°C) and cook the broccoli for an additional 3 to 4 minutes. This high-heat blast will give the florets a golden, crispy edge while keeping the insides tender. Keep an eye on them; you want that perfect crispy outer layer without burning.

Step 6: Final Touches and Serving
Once the broccoli is cooked to crispy perfection, carefully remove it from the air fryer. For a fresh flavor boost, garnish your The Best Air Fryer Broccoli with a sprinkle of lemon zest and grated Parmesan cheese, if desired. Serve immediately while it’s warm, and enjoy the delightful crunch and vibrant taste in every bite.

The Best Air Fryer Broccoli Variations

Feel free to unleash your creativity in the kitchen and make this recipe uniquely yours!

  • Spicy Kick: Add red pepper flakes to the seasoning for a deliciously fiery flavor that will awaken your taste buds.

  • Cheesy Delight: Swap the Parmesan for nutritional yeast to give your broccoli a cheesy taste, perfect for those following a dairy-free diet.

  • Veggie Mix-Up: Substitute the broccoli with cauliflower or Brussels sprouts for a fun twist. Each vegetable brings its own unique texture and flavor!

  • Herb Infusion: Mix in fresh herbs like thyme or rosemary for an aromatic touch. This will elevate the dish while adding a delightful herbal note.

  • Zesty Boost: Try adding a splash of balsamic vinegar after air frying for a tangy, sweet finish that complements the natural flavor of the broccoli.

  • Garlicky Goodness: If you’re a garlic lover, feel free to toss in some garlic powder along with roasted garlic cloves for an extra layer of richness.

  • Nutty Crunch: After cooking, sprinkle chopped toasted almonds or walnuts over the broccoli for an added crunch and a nutty flavor.

  • Lemon Herb Medley: Finish with a drizzle of lemon juice and a sprinkle of fresh dill or parsley for a refreshing touch. This is the perfect final flourish that captures the essence of fresh garden flavors.

With these simple variations, you can create a delightful array of flavors that let you enjoy the best air fryer broccoli in countless ways. Whether you prefer it spicy, savory, or nutty, there’s a version here for everyone. Enjoy discovering your favorites!

Make Ahead Options

These The Best Air Fryer Broccoli are ideal for meal prep enthusiasts! You can wash and chop the fresh broccoli florets, then toss them in olive oil, garlic powder, salt, and pepper up to 24 hours in advance. Store the seasoned florets in an airtight container in the refrigerator to maintain freshness and prevent browning. When you’re ready to serve, simply preheat your air fryer, arrange the broccoli in a single layer, and cook at 320°F for 6 minutes before increasing the temperature to 400°F for another 3-4 minutes. This way, you can enjoy a quick, nutritious, and crispy side dish without the hassle on busy weeknights!

Storage Tips for The Best Air Fryer Broccoli

Fridge: Store leftover broccoli in an airtight container in the refrigerator for up to 2-3 days. Ensure it’s completely cool before sealing to maintain freshness.

Freezer: For longer storage, freeze the cooled air fryer broccoli in a single layer on a baking sheet. Once frozen, transfer to a freezer-safe bag or container for up to 2 months.

Reheating: To reheat, place the broccoli back in the air fryer for a few minutes at 320°F (160°C) to restore its crispiness. Avoid microwaving, as it may turn the broccoli soggy.

Best Enjoyed Fresh: Although you can store leftovers, the best air fryer broccoli is best enjoyed immediately after cooking for maximum flavor and crunch!

What to Serve with The Best Air Fryer Broccoli

Nothing complements a delicious meal quite like perfectly paired sides that make your taste buds dance and your stomach sing!

  • Grilled Chicken: The juicy, smoky flavor of grilled chicken enhances the vibrant taste of air fryer broccoli, crafting a well-rounded plate.

  • Quinoa Salad: A light quinoa salad with cherry tomatoes and cucumbers offers a refreshing contrast to the crispy broccoli, adding a beautiful balance of textures.

  • Garlic Herb Shrimp: Tender shrimp sautéed in garlic and herbs pair wonderfully with broccoli, creating a seafood dish that excites the palate and makes every bite delightful.

  • Whole Grain Pasta: Toss air fryer broccoli with whole grain pasta and a light olive oil dressing for a wholesome meal that satiates without heaviness.

  • Crispy Tofu: For a vegan twist, serve crispy tofu alongside air fryer broccoli for a protein-packed dish that brings texture and flavor harmony to the table.

  • Roasted Red Peppers: Charred and sweet roasted red peppers complement the earthy flavors of broccoli, adding a touch of color and sweetness to your plate.

  • Lemon Basil Pasta: The bright flavors of lemon and fresh basil in pasta dish elevate the air fryer broccoli, reinforcing the lemon zest garnish beautifully.

  • Sparkling Water: Pair a refreshing glass of sparkling water with a splash of lemon for a light beverage that cleanses the palate between bites.

  • Chocolate Mousse: End your meal on a sweet note with a rich chocolate mousse that contrasts the savory notes of your dinner while providing a luxurious finish.

Expert Tips for The Best Air Fryer Broccoli

  • Dry Well: Ensure the broccoli florets are dried thoroughly before oiling; moisture can hinder achieving the crispy texture you desire.
  • Temperature Matters: Follow the two-temperature cooking method precisely to prevent burning and ensure even cooking for perfect florets in The Best Air Fryer Broccoli.
  • Single Layer: Arrange the broccoli in a single layer in the air fryer basket to promote even cooking; overcrowded florets may become soggy instead of crispy.
  • Check on It: Keep an eye on the broccoli during the high-heat phase; cook until edges are golden for that delightful crunch without overcooking.
  • Flavor Variations: Get creative! Add red pepper flakes for spice or use nutritional yeast in place of Parmesan for a dairy-free option.

The Best Air Fryer Broccoli Recipe FAQs

How do I choose the best broccoli?
Absolutely! When selecting fresh broccoli, look for vibrant green florets with tight, compact heads. Avoid any with yellowing or dark spots, as this indicates age. If you opt for frozen, make sure it’s high-quality; thaw and dry thoroughly for the best results.

What is the best way to store leftover air fryer broccoli?
For sure! Store leftover The Best Air Fryer Broccoli in an airtight container in the refrigerator for 2-3 days. Allow it to cool completely before sealing to preserve freshness, and always reheat in the air fryer to regain that delightful crispiness!

Can I freeze air fryer broccoli?
Yes, you can! To freeze leftover broccoli, first cool it down completely, then arrange it in a single layer on a baking sheet. Freeze until solid, about 2 hours, then transfer to a freezer-safe bag or container. It can be stored for up to 2 months. When ready to enjoy, reheat directly in the air fryer at 320°F until warmed through.

How can I fix soggy air fryer broccoli?
Very good question! If your broccoli turns out soggy, it’s likely due to excess moisture. To avoid this, ensure that the florets are thoroughly dried before adding oil. If it happens, you can cook it again in the air fryer for a few extra minutes at a higher temperature to crisp it back up.

Is air fryer broccoli suitable for all diets?
Absolutely! The Best Air Fryer Broccoli is gluten-free, low-carb, and vegetarian-friendly. If you’re lactose intolerant or following a dairy-free diet, simply omit the Parmesan cheese or substitute with nutritional yeast for a cheesy flavor without dairy. Always check seasonings for specific dietary allergies!

Can I use other vegetables in the air fryer?
Very much! Feel free to get creative. You can absolutely substitute broccoli with vegetables like cauliflower or Brussels sprouts. Just adjust the cooking time slightly, as denser vegetables may require a few extra minutes to reach that perfect crispy goodness. Enjoy experimenting!

The Best Air Fryer Broccoli

Crispy and Healthy: The Best Air Fryer Broccoli You’ll Love

Transform ordinary broccoli into crispy, tender florets with minimal oil in just minutes. A healthy, flavorful side dish perfect for any meal!
Prep Time 5 minutes
Cook Time 10 minutes
Total Time 15 minutes
Servings: 4 servings
Course: Dinner
Cuisine: Vegetarian
Calories: 91

Ingredients
  

For the Broccoli
  • 4 cups Fresh Broccoli Florets Use evenly-sized florets for even cooking.
  • 2 tablespoons Extra Virgin Olive Oil Can substitute with avocado oil.
For Seasoning
  • 1 teaspoon Garlic Powder Provides flavor without risk of burning.
  • 1 teaspoon Salt Adjust to taste depending on dietary needs.
  • 1/2 teaspoon Freshly Cracked Black Pepper Adjust quantity to your preference.
Optional Enhancements
  • 1 teaspoon Lemon Zest For brightness.
  • 1/4 cup Freshly Grated Parmesan Cheese Omit for dairy-free or paleo diets.

Equipment

  • Air Fryer

Method
 

Step-by-Step Instructions for The Best Air Fryer Broccoli
  1. Preheat your air fryer to 320°F (160°C) for about 5 minutes.
  2. In a large mixing bowl, combine fresh broccoli florets with extra virgin olive oil, garlic powder, salt, and black pepper. Toss until evenly coated.
  3. Carefully place the seasoned broccoli florets in a single layer in the air fryer basket.
  4. Cook the broccoli at 320°F for 6 minutes. Shake the basket halfway through for even cooking.
  5. Increase the air fryer temperature to 400°F (200°C) and cook for an additional 3 to 4 minutes until crispy.
  6. Remove from air fryer, garnish with lemon zest and grated Parmesan cheese if desired, and serve warm.

Nutrition

Serving: 1cupCalories: 91kcalCarbohydrates: 6gProtein: 4gFat: 7gSaturated Fat: 1gPolyunsaturated Fat: 0.5gMonounsaturated Fat: 5gSodium: 100mgPotassium: 460mgFiber: 2gSugar: 2gVitamin A: 900IUVitamin C: 100mgCalcium: 100mgIron: 1mg

Notes

Ensure broccoli florets are dried well before oiling for the best texture. Store leftovers in an airtight container for up to 2-3 days, or freeze for up to 2 months.

Tried this recipe?

Let us know how it was!

Irresistible Spinach and Ricotta Stuffed Shells Recipe

As the rich aroma of marinara sauce fills the kitchen, I can’t help but feel a wave of nostalgia wash over me, transporting me to cozy Italian family dinners. Today, I’m thrilled to share my recipe for Creamy Spinach and Ricotta Stuffed Shells, a delightful blend of tender jumbo pasta shells packed with a savory mixture of creamy cheese and fresh spinach. This vegetarian dish is not only comfort food at its finest, but it’s also a crowd-pleaser that can be whipped up in under an hour—perfect for those busy weeknights! Whether you’re looking to impress guests or simply treat yourself, these stuffed shells offer a satisfying meal that’s as nurturing as it is delicious. So, are you ready to embark on this delicious journey and fill your table with warmth and flavor?

Why Are These Stuffed Shells Irresistible?

Comforting Texture: Imagine sinking your fork into creamy, cheesy goodness wrapped in tender pasta shells—pure bliss!
Quick to Prepare: Ready in under an hour, this recipe is perfect for busy weeknights when you crave homemade flavors without the fuss.
Crowd-Pleasing Dish: Whether you’re hosting family or friends, expect compliments all around! Pair with a hearty green salad or homemade garlic bread for a complete meal.
Endless Variations: Feel free to swap spinach for kale or mix in some sautéed mushrooms for a twist on flavor. You can even personalize the cheese blend to match your taste!
Rich Nutrition: Packed with calcium and protein, these stuffed shells offer a wholesome vegetarian option that doesn’t compromise on taste. Experience comfort food that nourishes both body and spirit!

Spinach and Ricotta Stuffed Shells Ingredients

Here’s everything you need to create those luscious Spinach and Ricotta Stuffed Shells!

For the Filling

  • Jumbo Pasta Shells – The perfect vessel for your creamy filling; cook until al dente to avoid tearing.
  • Fresh Spinach – Adds a pop of color and nutrition; frozen spinach works well if you’re pressed for time.
  • Ricotta Cheese – Delivers that luscious creaminess; cottage cheese can be a lighter substitute.
  • Mozzarella Cheese – Melts beautifully for that gooey, cheesy texture; feel free to choose provolone for a bit more flavor.
  • Parmesan Cheese – Injects rich umami notes; Grana Padano serves as a good alternative.
  • Garlic – A flavor powerhouse; fresh garlic is the best choice, but garlic powder can save a step in a pinch.
  • Basil – Adds a delightful herbal note; if you’re out of fresh, an Italian seasoning blend will do.
  • Egg – Acts as a binder for the filling; skip it for a vegan version, although the texture will be slightly different.

For the Sauce

  • Marinara Sauce – The flavorful base that brings it all together; either homemade or store-bought works perfectly.

For Seasoning

  • Seasonings (Salt, Pepper, Nutmeg) – Vital for elevating all those beautiful flavors; adjust to your personal taste!

Get ready to fill your kitchen with the irresistible scent of these Spinach and Ricotta Stuffed Shells and make memories over a delightful homemade meal!

Step‑by‑Step Instructions for Spinach and Ricotta Stuffed Shells

Step 1: Preheat the Oven
Begin by preheating your oven to 375°F (190°C). This ensures that it’s hot and ready for the Spinach and Ricotta Stuffed Shells as soon as you assemble them. Set a timer so you can focus on preparing the shells without worry.

Step 2: Cook the Pasta Shells
In a large pot, bring salted water to a boil and add the jumbo pasta shells. Cook them for about 9–11 minutes, or until they are al dente—slightly firm to the bite. Once cooked, drain the shells and set them aside on a clean kitchen towel to cool slightly, making them easier to handle when stuffing.

Step 3: Sauté the Spinach and Garlic
While the shells are cooling, heat a skillet over medium heat and add a splash of oil. Sauté minced garlic for about 1 minute until fragrant, then toss in the fresh spinach. Cook for an additional 3–4 minutes, stirring occasionally until the spinach has wilted. Remove the skillet from heat and let the mixture cool slightly.

Step 4: Prepare the Cheese Filling
In a mixing bowl, combine the sautéed spinach and garlic with ricotta, mozzarella, Parmesan, egg, basil, nutmeg, salt, and pepper. Stir until all the ingredients are well incorporated, resulting in a creamy filling that’s bursting with flavor. Adjust seasoning to your taste for the perfect balance.

Step 5: Stuff the Pasta Shells
Take each cooled pasta shell and carefully fill it with the spinach and cheese mixture using a spoon. Make sure to pack the filling well but be gentle to avoid tearing the shells. Place each filled shell upright in a greased baking dish, fitting them snugly together for support.

Step 6: Add Marinara Sauce
Pour the marinara sauce evenly over the stuffed shells, ensuring that they’re well covered to keep them moist while baking. Use a spoon to gently spread the sauce, filling in any gaps and securing the shells. This delicious sauce will elevate the flavors of the Spinach and Ricotta Stuffed Shells even more!

Step 7: Bake the Stuffed Shells
Cover the baking dish with foil and place it in the preheated oven. Bake for 25 minutes until heated through. After that, remove the foil and bake for an additional 10 minutes until the cheese is bubbly and slightly golden. Keep an eye on them to prevent over-browning.

Step 8: Serve and Enjoy
Once done, carefully remove the Spinach and Ricotta Stuffed Shells from the oven and let them cool for a few minutes before serving. Garnish with fresh basil or a sprinkle of Parmesan if desired. These shells are now ready to delight your family and friends with their comforting, creamy goodness!

Spinach and Ricotta Stuffed Shells Variations

Feel free to put your own spin on this delightful dish and let your creativity shine in the kitchen!

  • Kale Substitute: Swap fresh spinach for kale for a heartier texture and slightly different flavor profile; just sauté it well!

  • Mushroom Medley: Add sautéed mushrooms to the cheese filling for an earthy depth that amplifies the comfort of the dish. Each bite will be a delicious surprise!

  • Zucchini Twist: Incorporate finely chopped zucchini into the filling for a mild, lovely crunch, elevating the overall texture of the dish. It’s an easy way to sneak in more veggies!

  • Cheese Blend: Experiment with a cheese mix by combining ricotta with tangy feta or creamy goat cheese for a punch of flavor. Don’t be afraid to play around!

  • Nut-Free Option: If you’re looking to avoid nuts, simply omit them and replace with seeds like sunflower seeds for an added crunch without allergens.

  • Spice It Up: Introduce a hint of heat by adding crushed red pepper flakes directly into the cheese mixture; it’ll bring a delightful kick that ignites your taste buds!

  • Flavorful Marinara: Try your hand at homemade marinara sauce for a personal touch; this simple swap can elevate the dish from comforting to completely unforgettable. You might find a new favorite sauce recipe!

For even more delicious pasta dishes, consider exploring Potato and Bacon Soup: The Ultimate Creamy and Smoky Comfort Food alongside your stuffed shells for a cozy pairing, or try these delightful Cheesy Spinach Artichoke bites as an appetizer!

The possibilities are endless, so let your taste buds lead the way!

Expert Tips for Spinach and Ricotta Stuffed Shells

  • Perfect Pasta: Ensure you cook the jumbo shells al dente so they hold up when stuffed and baked, preventing tears during filling.
  • Cool Before Stuffing: Allow pasta shells to cool before filling to avoid burning your fingers and to maintain shell integrity.
  • Flavor Boost: Adding a pinch of red pepper flakes to the marinara sauce enhances the dish’s flavor profile without overwhelming the cheesy filling.
  • Bake with Care: Don’t overbake—keep an eye on the cheese; it should be bubbly and golden, not burnt for perfect Spinach and Ricotta Stuffed Shells.
  • Make-Ahead Magic: Assemble and refrigerate the shells a day in advance, then simply pop them in the oven when you’re ready to enjoy a comforting meal.

Make Ahead Options

These Creamy Spinach and Ricotta Stuffed Shells are perfect for busy weeknights when you want a homemade meal without the last-minute rush! You can prepare the entire dish up to 24 hours in advance—simply assemble the stuffed shells and cover them with marinara sauce. Refrigerate until you’re ready to bake. When it’s time to get dinner on the table, preheat the oven, and bake straight from the fridge; just add a few extra minutes to the cooking time to ensure they heat through. For even longer storage, you can freeze the unbaked shells for up to three months. This way, you can enjoy restaurant-quality results with minimal effort!

What to Serve with Creamy Spinach and Ricotta Stuffed Shells

Crafting the perfect meal means pairing your dishes with sides and drinks that elevate the experience.

  • Garlic Bread: This classic companion offers a crunchy texture and buttery flavor, perfect for scooping up marinara sauce.
  • Simple Green Salad: Fresh greens dressed in a light vinaigrette provide a refreshing contrast, balancing the rich cheesy flavors of the stuffed shells.
  • Roasted Vegetables: Colorful seasonal veggies add depth and sweetness to your plate, making it a wholesome choice that pleases both the eye and the palate.
  • Caprese Salad: With fresh tomatoes, mozzarella, and basil, this vibrant dish enhances the Italian essence of your meal while adding a burst of freshness.
  • Mimosas: For a festive touch, serve these refreshing cocktails; their citrusy brightness beautifully complements the creamy dish.
  • Lemon Sorbet: End your meal on a zesty note with this light dessert that cleanses the palate after indulging in cheesy goodness.
  • Wine Pairing: A glass of light white wine, like Pinot Grigio, harmonizes with the flavors, enhancing your dining experience.
  • Herb Focaccia: Soft, fluffy bread infused with herbs enriches your meal, making it even more satisfying. Perfect for dipping into extra marinara!
  • Steamed Asparagus: Tender asparagus drizzled with olive oil adds elegance, providing a lovely green counterpart to the stuffed shells’ richness.

How to Store and Freeze Spinach and Ricotta Stuffed Shells

Fridge: Store any leftover Spinach and Ricotta Stuffed Shells in an airtight container for up to 3 days. Reheat in the oven or microwave until heated through.

Freezer: For longer storage, freeze uncooked stuffed shells in a single layer on a baking sheet for up to 3 months, then transfer to an airtight container. Bake directly from frozen, adding an extra 10-15 minutes to the cooking time.

Make-Ahead: You can prepare and assemble the stuffed shells a day in advance and refrigerate before baking. When ready to serve, pop them in the oven for a comforting meal!

Reheating: When reheating leftovers, add a splash of marinara sauce to help maintain moisture and enhance flavor. Enjoy that delicious taste again!

Spinach and Ricotta Stuffed Shells Recipe FAQs

How do I choose the best spinach for this recipe?
Absolutely! Fresh spinach should be vibrant green with no dark spots or wilting. If you’re opting for frozen, make sure it is fully thawed and drained to avoid excess moisture in your filling.

How should I store leftovers of Spinach and Ricotta Stuffed Shells?
You can store any leftover stuffed shells in an airtight container in the fridge for up to 3 days. Just reheat them in the oven or microwave until they’re nice and warm, ensuring comfort food is just a few minutes away!

Can I freeze Spinach and Ricotta Stuffed Shells?
Yes, indeed! For freezing, place the uncooked stuffed shells in a single layer on a baking sheet for up to 3 months. Once frozen, move them to an airtight container. When you’re ready to bake, you can cook them directly from frozen by adding an extra 10 to 15 minutes to the baking time.

What if my stuffed shells are tearing while I fill them?
Very! If you find that the shells are tearing, it may be due to cooking them past the al dente stage. To fix this, ensure the pasta is slightly undercooked and let it cool down before filling. Handling them gently during the filling process will also help prevent any unfortunate rips.

Are there any dietary considerations I should be aware of?
Absolutely! This recipe is vegetarian, but if you’re making it for someone with dietary restrictions, note that the recipe does contain dairy and eggs. For a vegan variation, simply omit the egg and use a plant-based cheese instead, maintaining the creamy, flavorful essence of the dish without compromising on taste.

Spinach and Ricotta Stuffed Shells

Irresistible Spinach and Ricotta Stuffed Shells Recipe

Delight in these Spinach and Ricotta Stuffed Shells, a comforting vegetarian dish filled with creamy cheese and fresh spinach.
Prep Time 20 minutes
Cook Time 35 minutes
Total Time 55 minutes
Servings: 4 servings
Course: Pasta
Cuisine: Italian
Calories: 350

Ingredients
  

Filling
  • 12 oz Jumbo Pasta Shells Cook until al dente
  • 5 oz Fresh Spinach Can substitute frozen
  • 15 oz Ricotta Cheese Can substitute cottage cheese
  • 8 oz Mozzarella Cheese Can substitute provolone
  • 1/2 cup Parmesan Cheese Grana Padano can be substituted
  • 2 cloves Garlic Minced
  • 1 tbsp Basil Fresh or Italian seasoning
  • 1 large Egg Optional for vegan version
Sauce
  • 24 oz Marinara Sauce Homemade or store-bought
Seasoning
  • to taste Salt
  • to taste Pepper
  • to taste Nutmeg

Equipment

  • Large pot
  • Skillet
  • Mixing Bowl
  • baking dish
  • Oven

Method
 

Preparation
  1. Preheat the oven to 375°F (190°C).
  2. Cook jumbo pasta shells in salted boiling water for about 9–11 minutes until al dente. Drain and set aside.
  3. In a skillet, sauté minced garlic in oil for 1 minute, then add spinach and cook until wilted.
  4. In a mixing bowl, combine sautéed spinach and garlic with ricotta, mozzarella, Parmesan, egg, basil, nutmeg, salt, and pepper.
  5. Stuff each pasta shell with the spinach and cheese mixture and place in greased baking dish.
  6. Pour marinara sauce over the stuffed shells.
  7. Cover with foil and bake for 25 minutes. Then remove foil and bake for another 10 minutes until cheese is bubbly.
  8. Let cool briefly before serving. Garnish with fresh basil or Parmesan if desired.

Nutrition

Serving: 1servingCalories: 350kcalCarbohydrates: 35gProtein: 20gFat: 15gSaturated Fat: 8gPolyunsaturated Fat: 1gMonounsaturated Fat: 4gCholesterol: 60mgSodium: 800mgPotassium: 300mgFiber: 3gSugar: 4gVitamin A: 1500IUVitamin C: 10mgCalcium: 350mgIron: 2mg

Notes

These stuffed shells can be prepared a day in advance and refrigerated before baking.

Tried this recipe?

Let us know how it was!

Peach Cobbler Cinnamon Rolls: Comfort in Every Sweet Bite

As I stood in my kitchen, the sweet aroma of ripe peaches filled the air, whisking me away to a sun-drenched orchard of summertime bliss. It’s this enchanting scent that inspires my latest creation: Peach Cobbler Cinnamon Rolls. These delightful rolls marry the fluffy softness of homemade dough with luscious, jammy peach filling, making them the ultimate comfort food. What’s more, they’re surprisingly quick to whip up—perfect for those weekend brunches when you want to impress friends or simply indulge yourself. Topped with a buttery brown sugar crumb and a creamy glaze, every bite is a warm hug that promises to brighten any morning. Ready to take your taste buds on a fruity adventure? Let’s dive into the deliciousness of Peach Cobbler Cinnamon Rolls!

Why Will You Adore This Recipe?

Irresistible Flavors: The combination of sweet, ripe peaches paired with rich cream cheese glaze creates a taste sensation you won’t soon forget.
Quick and Easy: Perfectly tailored for those busy weekends, you’ll whip these up in no time without sacrificing flavor or quality.
Versatile Options: Don’t hesitate to experiment—try adding berries or nuts for a delightful twist, or swap in a simple vanilla glaze.
Crowd-Pleaser: Serve these rolls warm at brunch, and watch as family and friends gather around for their share of this cozy delight! For an alternative treat, check out these Foster Cinnamon Rolls and Apple Crisp Cinnamon recipes for even more sweet inspiration.
Comfort Food at Its Best: These rolls are more than just a breakfast item; they’re a heartfelt embrace of homemade goodness, perfect for any occasion!

Peach Cobbler Cinnamon Rolls Ingredients

Get ready to bake the sweetest rolls you’ve ever tasted!

For the Peach Filling

  • Fresh Ripe Peaches – Use very ripe peaches for the best flavor and natural sweetness.
  • Granulated Sugar – Enhances sweetness; for a deeper flavor, consider using brown sugar.
  • Lemon Juice – Balances the sweetness beautifully and prevents browning; always use fresh if possible.
  • Cornstarch – Thickens the peach jam for a perfect spreadable consistency; you can substitute it with tapioca starch if needed.
  • Water – An essential ingredient for making the peach jam and tangzhong.

For the Dough

  • Bread Flour – Provides structure and chewiness; all-purpose flour can work but may change the texture.
  • Instant Yeast – Ensures your rolls are light and airy.
  • Fine Sea Salt – A crucial ingredient that enhances the overall flavor.
  • Whole Milk & Heavy Cream – Adds richness and moisture to your dough; feel free to use dairy-free alternatives.
  • Large Egg – Helps bind the dough and adds moisture; a flax egg can serve as a vegan substitute.
  • Vanilla Paste/Extract – Gives a lovely, aromatic flavor to the dough.
  • Unsalted Butter – Adds richness and flavor; you can substitute with margarine if necessary.

For the Filling & Topping

  • Brown Sugar – Contributes sweetness and depth; can be replaced with granulated sugar if you prefer.
  • Ground Cinnamon – Adds a warm, inviting spice that enhances the flavor profile.
  • All-Purpose Flour – Used in the crumb topping for structure.

For the Cream Cheese Glaze

  • Cream Cheese – The base of the creamy glaze; try dairy-free cream cheese for a vegan version.
  • Powdered Sugar – Sweetens the glaze perfectly; you can use brown sugar, but it will change the color slightly.
  • Heavy Cream – Adds a smooth texture to your glaze.

Now that you have all the ingredients ready, let’s turn these delightful components into your new favorite Peach Cobbler Cinnamon Rolls!

Step‑by‑Step Instructions for Peach Cobbler Cinnamon Rolls

Step 1: Make Peach Jam
Start by peeling and chopping fresh ripe peaches, then combine them in a saucepan with granulated sugar and lemon juice. Cook over medium heat for about 10 minutes, stirring occasionally, until the peaches soften and release their juices. In a separate bowl, mix cornstarch with a bit of water to create a slurry. Pour this into the peach mixture and cook for an additional 2-3 minutes until thickened. Allow the peach jam to cool completely.

Step 2: Prepare Tangzhong
In a small pot, whisk together ¼ cup of water and ¼ cup of bread flour. Place the pot over medium heat and continuously stir until the mixture thickens to a pudding-like consistency, about 3-5 minutes. Remove from heat and set the tangzhong aside to cool while you prepare the dough, ensuring it’s room temperature before mixing into your Peach Cobbler Cinnamon Rolls.

Step 3: Make Dough
In a large mixing bowl, combine 4 cups of bread flour, ¼ cup of granulated sugar, 2 teaspoons of instant yeast, and 1 teaspoon of fine sea salt. Pour in ½ cup of whole milk, ¼ cup of heavy cream, 1 large egg, 1 teaspoon of vanilla extract, and the cooled tangzhong. Mix until a rough dough forms; it should be slightly sticky but manageable. Knead the dough on a floured surface for 5-7 minutes until it’s smooth and elastic.

Step 4: Knead and Rest Dough
Gradually add ½ cup of softened unsalted butter to the dough, kneading for another 5 minutes until fully incorporated. Form the dough into a ball and place it in a lightly greased bowl, covering it with a damp cloth. Allow the dough to rest in a warm place for about 30 minutes, or until it has doubled in size. This resting period is essential for your Peach Cobbler Cinnamon Rolls to become soft and fluffy.

Step 5: Roll and Fill
Once the dough has risen, turn it out onto a floured surface and roll it into a rectangle about ¼ inch thick. Spread a mixture of ½ cup brown sugar and 2 tablespoons of ground cinnamon evenly over the surface. Spoon your cooled peach jam across the dough, leaving a small border around the edges. For an extra touch, layer thin slices of fresh peaches on top of the jam.

Step 6: Shape Rolls
Starting from the long edge, gently roll the dough tightly into a log. Use a sharp knife to cut the log into 12 equal slices. Place each roll, cut side up, in a parchment-lined baking pan, leaving some space between each one. Cover the pan with plastic wrap and let the rolls rise again in a warm spot for 1-2 hours, or until they have doubled in size and look puffy.

Step 7: Prepare Topping and Bake
Preheat your oven to 325°F (163°C). While the rolls are rising, prepare the crumb topping by mixing together ½ cup of all-purpose flour, ¼ cup of brown sugar, and ¼ cup of cold, diced butter in a bowl. Use a fork to combine until it resembles coarse crumbs. Sprinkle the topping generously over the risen rolls. Bake the Peach Cobbler Cinnamon Rolls in the preheated oven for 30-40 minutes, until they are golden and the tops are firm to the touch.

Step 8: Make Cream Cheese Glaze
While the rolls are baking, beat together 4 ounces of softened cream cheese, 2 tablespoons of unsalted butter, 1 cup of powdered sugar, and 2 tablespoons of heavy cream in a mixing bowl until smooth and creamy. Once the rolls are out of the oven and still warm, drizzle this luscious glaze generously over them. Each bite of your homemade Peach Cobbler Cinnamon Rolls is now ready to bring joy!

Peach Cobbler Cinnamon Rolls Variations

There’s nothing better than putting your own twist on a classic recipe, so feel free to explore these delightful ideas!

  • Berry Bliss: Use fresh strawberries or blueberries in place of peaches for a vibrant, fruity filling. The tangy berries add a refreshing twist that complements the sweet dough beautifully.

  • Nutty Delight: Add chopped pecans or walnuts into the filling for an extra crunch. They add a delightful texture and a warm nuttiness that will have everyone coming back for seconds.

  • Fruit Medley: Don’t limit yourself to just one fruit! Combine peaches with raspberries or blackberries for a colorful mix full of flavor. Each bite will be a burst of sweet and tart.

  • Dairy-Free: Swap whole milk and heavy cream for almond or oat milk, and use a dairy-free cream cheese for the glaze. Enjoy the same delicious flavors while catering to dairy-free dietary needs.

  • Maple Bacon Twist: For a savory twist, incorporate crumbled bacon and a hint of maple syrup into the filling. The sweet and salty combo takes your rolls to a whole new level of deliciousness!

  • Citrus Zing: Add lemon or orange zest to the dough or glaze for a bright, citrusy flavor that complements the sweetness of the peaches. This variation elevates the rolls to a refreshing treat!

  • Spicy Kick: Sprinkle in some cayenne pepper or nutmeg in the filling for a gently spiced contrast to the sweetness. It’s a surprising blend that will intrigue your palate.

  • Glaze Variations: Swap the cream cheese glaze for a simple vanilla icing or a zesty lemon glaze for a fresh finish. A citrusy glaze pairs beautifully with the sweetness of the peaches, enhancing the overall experience.

Every twist will create a lovely new way to enjoy these Peach Cobbler Cinnamon Rolls. And when you’re in the mood for different flavors, consider whipping up these Foster Cinnamon Rolls or trying out some Apple Crisp Cinnamon with your loved ones!

What to Serve with Peach Cobbler Cinnamon Rolls

Indulge in a delightful brunch experience with the perfect pairings for your fluffy, peachy treats.

  • Rich Vanilla Ice Cream: A scoop of creamy vanilla ice cream melts into the warm rolls, creating a delectable contrast between temperature and texture.
  • Fresh Fruit Salad: A vibrant medley of seasonal fruits refreshes the palate and adds a burst of color to your plate. Toss in some berries for a sweet and tangy balance against the rich cinnamon rolls.
  • Maple Syrup Drizzle: A light drizzle of maple syrup adds an extra layer of sweetness that harmonizes beautifully with the buttery crumb topping.
  • Pecans or Walnuts: Chopped nuts bring a delightful crunch and nutty flavor, enhancing the rolls’ soft, chewy texture.
  • Spiced Coffee or Tea: A warm cup of spiced coffee or tea provides a cozy, aromatic complement, making your breakfast experience even more comforting.
  • Lemonade or Iced Tea: On warmer days, a refreshing glass of lemonade or iced tea adds a zesty touch that cuts through the richness of the rolls.
  • Creamy Yogurt: A dollop of Greek yogurt offers a tangy creaminess, balancing the sweetness of the peach filling while adding protein.
  • Chocolate Drizzle: For those with a sweet tooth, a light drizzle of chocolate sauce can elevate these rolls to a decadent dessert-like treat.
  • Buttermilk Pancakes: Serving mini buttermilk pancakes alongside gives your brunch a fluffed-up vibe, perfect for a leisurely weekend gathering.
  • Cinnamon Coffee Cake: Embrace the cozy flavors by pairing your rolls with a slice of cinnamon coffee cake that echoes the warm spices found in the rolls.

Expert Tips for Peach Cobbler Cinnamon Rolls

  • Measure Flour Accurately: Use the spoon and level method for flour measurement to avoid a dry dough, ensuring your Peach Cobbler Cinnamon Rolls are fluffy and tender.

  • Cool Peach Jam Completely: Allow your peach jam to cool before spreading it on the dough; this helps prevent the dough from getting soggy and ensures a perfect filling consistency.

  • Roll Dough Evenly: Aim for a uniform thickness when rolling out the dough. This ensures even cooking and helps keep the rolls from tearing when filled.

  • Let Rolls Rise Properly: Don’t rush the second rise; let the rolls double in size to achieve that soft, pillowy texture everyone will crave.

  • Use Fresh Peaches: Opt for very ripe, fresh peaches for the filling. They lend a natural sweetness and juicy flavor that truly elevates your Peach Cobbler Cinnamon Rolls.

  • Glaze while Warm: Drizzling the cream cheese glaze over the rolls while they’re still warm allows it to melt slightly, creating a delightful, gooey topping that enhances each bite.

Make Ahead Options

Prepare your Peach Cobbler Cinnamon Rolls with ease by making components ahead of time! You can prepare the peach jam and dough up to 24 hours in advance. Simply make the peach jam and allow it to cool, then store it in an airtight container in the refrigerator. For the dough, knead it as instructed, then cover it with plastic wrap and refrigerate overnight to develop the flavors. When you’re ready to enjoy, let the dough come to room temperature, roll, fill, and shape the rolls before letting them rise for about 1-2 hours. This prepping method saves you time while ensuring your rolls are just as delicious and fluffy when baked fresh!

How to Store and Freeze Peach Cobbler Cinnamon Rolls

Room Temperature: Store leftover rolls in an airtight container for up to 3 days. Keep them on the counter to maintain their softness.

Fridge: For longer storage, you can refrigerate them for up to 5 days. Make sure they are well-wrapped to prevent drying out.

Freezer: If you want to save them for later, freeze the rolls before glazing for up to 2 months. Wrap each roll tightly in plastic wrap and aluminum foil.

Reheating: To enjoy that fresh-baked taste, reheat rolls in the microwave for 20-30 seconds or in an oven preheated to 350°F (175°C) until warmed through.

Peach Cobbler Cinnamon Rolls Recipe FAQs

What type of peaches should I use for the filling?
Absolutely use very ripe, fresh peaches! They provide the best natural sweetness and moisture for your peach filling. Look for peaches with a fragrant aroma and a slight give when squeezed gently, indicating ripeness.

How should I store leftover Peach Cobbler Cinnamon Rolls?
Store any leftovers in an airtight container at room temperature for up to 3 days. For longer freshness, you can refrigerate them for up to 5 days; just ensure they’re well-wrapped to prevent drying out.

Can I freeze Peach Cobbler Cinnamon Rolls?
Yes, you can! I recommend freezing the rolls before glazing for the best results. Wrap each roll tightly in plastic wrap and then in aluminum foil, ensuring they are sealed well to prevent freezer burn. They can be kept in the freezer for up to 2 months.

How do I reheat refrigerated or frozen rolls?
To reheat, simply place a roll in the microwave for 20-30 seconds until warmed through. If you’re reheating from frozen, let them thaw overnight in the fridge first. Alternatively, you can reheat them in a preheated oven at 350°F (175°C) for about 10-15 minutes until warm.

Why are my rolls turning out dense?
There are a couple of possible reasons for dense rolls. First, ensure your yeast is fresh and active; expired yeast won’t rise effectively. Additionally, be careful not to over-knead the dough—this can develop too much gluten, leading to a tougher texture. Always measure your flour accurately, as too much flour can also contribute to density.

Are there any dietary considerations for these rolls?
If you’re concerned about allergies or dietary preferences, you can make a few substitutions. For a dairy-free version, swap whole milk and heavy cream for almond, oat, or coconut milk, and use dairy-free cream cheese in the glaze. Additionally, replace the egg with a flax egg (1 tablespoon ground flaxseed mixed with 2.5 tablespoons water) for a vegan option.

Peach Cobbler Cinnamon Rolls

Peach Cobbler Cinnamon Rolls: Comfort in Every Sweet Bite

Savor the delightful Peach Cobbler Cinnamon Rolls, a perfect blend of fluffy dough and sweet peach filling, ideal for brunch.
Prep Time 45 minutes
Cook Time 40 minutes
Resting Time 30 minutes
Total Time 1 hour 55 minutes
Servings: 12 rolls
Course: Dessert
Cuisine: American
Calories: 350

Ingredients
  

For the Peach Filling
  • 4 cups Fresh Ripe Peaches Use very ripe peaches for the best flavor.
  • 1 cup Granulated Sugar Use brown sugar for a deeper flavor.
  • 2 tablespoons Lemon Juice Use fresh if possible.
  • 2 tablespoons Cornstarch Can substitute with tapioca starch.
  • 1 cup Water
For the Dough
  • 4 cups Bread Flour All-purpose flour can be used but may alter texture.
  • 2 teaspoons Instant Yeast
  • 1 teaspoon Fine Sea Salt
  • 1/2 cup Whole Milk Dairy-free alternatives can be used.
  • 1/4 cup Heavy Cream Dairy-free alternatives can be used.
  • 1 large Egg A flax egg can serve as a vegan substitute.
  • 1 teaspoon Vanilla Paste/Extract
  • 1/2 cup Unsalted Butter Margarine can be substituted.
For the Filling & Topping
  • 1/2 cup Brown Sugar Can be replaced with granulated sugar.
  • 2 tablespoons Ground Cinnamon
  • 1/2 cup All-Purpose Flour Used in crumb topping.
For the Cream Cheese Glaze
  • 4 ounces Cream Cheese Dairy-free cream cheese for a vegan version.
  • 2 tablespoons Powdered Sugar Brown sugar can be used but will change color.
  • 2 tablespoons Heavy Cream

Equipment

  • Saucepan
  • Mixing Bowl
  • Rolling Pin
  • Baking Pan
  • spatula

Method
 

Step-by-Step Instructions
  1. Start by peeling and chopping fresh ripe peaches, then combine them in a saucepan with granulated sugar and lemon juice. Cook over medium heat for about 10 minutes, stirring occasionally, until the peaches soften and release their juices. In a separate bowl, mix cornstarch with a bit of water to create a slurry. Pour this into the peach mixture and cook for an additional 2-3 minutes until thickened. Allow the peach jam to cool completely.
  2. In a small pot, whisk together 1/4 cup of water and 1/4 cup of bread flour. Place the pot over medium heat and continuously stir until the mixture thickens to a pudding-like consistency, about 3-5 minutes. Remove from heat and set the tangzhong aside to cool.
  3. In a large mixing bowl, combine 4 cups of bread flour, 1/4 cup of granulated sugar, 2 teaspoons of instant yeast, and 1 teaspoon of fine sea salt. Pour in 1/2 cup of whole milk, 1/4 cup of heavy cream, 1 large egg, 1 teaspoon of vanilla extract, and the cooled tangzhong. Mix until a rough dough forms. Knead the dough on a floured surface for 5-7 minutes until it’s smooth and elastic.
  4. Gradually add 1/2 cup of softened unsalted butter to the dough, kneading for another 5 minutes until fully incorporated. Form the dough into a ball and place it in a lightly greased bowl, covering it with a damp cloth. Allow the dough to rest in a warm place for about 30 minutes, or until it has doubled in size.
  5. Once the dough has risen, turn it out onto a floured surface and roll it into a rectangle about 1/4 inch thick. Spread a mixture of 1/2 cup brown sugar and 2 tablespoons of ground cinnamon evenly over the surface. Spoon your cooled peach jam across the dough, leaving a small border around the edges.
  6. Starting from the long edge, gently roll the dough tightly into a log. Use a sharp knife to cut the log into 12 equal slices. Place each roll, cut side up, in a parchment-lined baking pan, leaving some space between each one. Cover the pan with plastic wrap and let the rolls rise again in a warm spot for 1-2 hours, until they have doubled in size.
  7. Preheat your oven to 325°F (163°C). While the rolls are rising, prepare the crumb topping by mixing together 1/2 cup of all-purpose flour, 1/4 cup of brown sugar, and 1/4 cup of cold, diced butter in a bowl. Sprinkle the topping generously over the risen rolls. Bake the Peach Cobbler Cinnamon Rolls for 30-40 minutes, until they are golden and the tops are firm to the touch.
  8. While the rolls are baking, beat together 4 ounces of softened cream cheese, 2 tablespoons of unsalted butter, 1 cup of powdered sugar, and 2 tablespoons of heavy cream in a mixing bowl until smooth. Once the rolls are out of the oven and still warm, drizzle this glaze generously over them.

Nutrition

Serving: 1rollCalories: 350kcalCarbohydrates: 50gProtein: 5gFat: 15gSaturated Fat: 8gCholesterol: 50mgSodium: 300mgPotassium: 200mgFiber: 2gSugar: 20gVitamin A: 500IUVitamin C: 6mgCalcium: 80mgIron: 1mg

Notes

For optimal flavor, measure flour accurately, cool peach jam completely, and let rolls rise properly for a tender texture.

Tried this recipe?

Let us know how it was!

Savory Ground Chicken Skillet with Olives and Feta Delight

As the sizzling sound of ground chicken fills the kitchen, I’m transported to sun-drenched Mediterranean shores, where dishes burst with color and flavor. The star of this cozy evening is my Mediterranean Keto Ground Chicken Skillet with Olives and Feta, a vibrant dish that comes together in just 30 minutes. Perfect for those of us juggling busy schedules, this quick dinner is not only delicious but also gluten-free and beginner-friendly, making it an ideal choice for anyone looking to escape the fast-food rut. With juicy chicken mingling with tangy feta and briny olives, each bite offers an enticing combination of textures and tastes. Who could resist? So, what are you waiting for? Let’s dive into this flavor-packed culinary adventure that will have your family asking for seconds!

Why Make Ground Chicken Skillet Tonight?

Quick and Easy: This dish comes together in just 30 minutes, making it ideal for a weeknight dinner when time is tight.

Bursting with Flavor: With the rich combination of tangy feta, briny olives, and vibrant spices, every bite is packed with Mediterranean goodness.

Family-Friendly: It’s a meal everyone will love, drawing even picky eaters to the table.

Versatile Ingredients: Feel free to swap in ground turkey or beef, or toss in some spinach for added greens!

Gluten-Free Goodness: Enjoy a dish that fits perfectly into a gluten-free lifestyle without sacrificing taste.

Looking for more quick ideas? Try out my Chicken Gnocchi Skillet or the refreshing Tuscan Chicken Soup for cozy nights!

Ingredients for Ground Chicken Skillet with Olives and Feta

For the Skillet

  • Olive Oil – Provides fat for cooking and enhances flavor; avocado oil is a fine substitute.
  • Ground Chicken – Main protein source that keeps the dish lean; ground turkey or lean beef can also be used for variation.
  • Onion – Adds sweetness and depth of flavor; substitute with shallots for a gentler taste.
  • Garlic – Infuses an aromatic quality; fresh cloves elevate the dish, while powdered garlic can work in a pinch.
  • Bell Pepper – Introduces texture and sweetness; any color works, or try zucchini for a lower-carb option.
  • Dried Oregano – Offers classic Mediterranean flavor; can be swapped with Italian seasoning if needed.
  • Smoked Paprika – Enhances the dish’s smokiness; regular paprika is a suitable alternative.
  • Ground Cumin – Contributes a warm, earthy flavor; coriander is a lighter substitute if desired.
  • Salt and Pepper – Essential for seasoning; adjust to taste according to preference.
  • Cherry Tomatoes – Provide juiciness and sweetness; diced canned tomatoes are a good substitute if fresh isn’t available.
  • Kalamata Olives – Add brininess and depth; you may use any pitted olives as a substitute.
  • Feta Cheese – Delivers creaminess and tang; crumbled goat cheese makes for a flavorful alternative.
  • Fresh Parsley – Brightens the dish with freshness; cilantro can be used for a unique flavor twist.
  • Lemon Juice – Adds acidity to balance flavors; lime juice is an excellent alternative as well.

Bring these ingredients together for your Ground Chicken Skillet with Olives and Feta, and enjoy a hearty, wholesome meal in no time!

Step‑by‑Step Instructions for Ground Chicken Skillet with Olives and Feta

Step 1: Heat the Oil
In a large skillet, heat 2 tablespoons of olive oil over medium heat. Once the oil shimmers, add 1 pound of ground chicken, using a wooden spoon to break it apart. Cook for about 6-8 minutes, stirring occasionally until the chicken is browned and no longer pink, giving your dish a vital depth of flavor.

Step 2: Sauté Aromatics
Add 1 chopped onion and 3 minced garlic cloves to the skillet. Sauté for 2-3 minutes, stirring occasionally, until the onion turns translucent and fragrant. This step lays the foundation for the rich flavor profile of your Ground Chicken Skillet with Olives and Feta.

Step 3: Add Vegetables and Spices
Stir in 1 chopped bell pepper, 1 teaspoon of dried oregano, 1 teaspoon of smoked paprika, 1 teaspoon of ground cumin, along with salt and pepper to taste. Continue cooking for 3-4 minutes until the bell pepper softens, allowing the spices to meld and infuse the chicken with Mediterranean goodness.

Step 4: Incorporate Tomatoes and Olives
Next, add 1 cup of halved cherry tomatoes and 1/2 cup of sliced Kalamata olives to the skillet. Cook for an additional 5 minutes, stirring gently. The tomatoes will begin to soften, releasing their juices to create a luscious sauce that beautifully coats the ground chicken.

Step 5: Add the Feta
Sprinkle 1 cup of crumbled feta cheese over the skillet mixture, letting it sit for a minute to warm and slightly melt into the dish. This creamy addition elevates the overall texture and flavor, making your Ground Chicken Skillet with Olives and Feta irresistibly delicious.

Step 6: Final Touches
Remove the skillet from heat, and fold in 1/4 cup of fresh chopped parsley and the juice of half a lemon. This brightens the dish and balances the flavors beautifully. Adjust the seasoning with salt and pepper to taste, readying your meal for serving.

Step 7: Serve Warm
Serve the Ground Chicken Skillet with Olives and Feta warm, either on its own or alongside a fresh green salad. Enjoy this quick dinner packed with vibrant Mediterranean flavors and delightful textures, perfect for any night of the week!

How to Store and Freeze Ground Chicken Skillet with Olives and Feta

Fridge: Store leftovers in an airtight container for up to 3 days. Keeping it refrigerated helps maintain the dish’s vibrant flavors and ensures freshness.

Freezer: For longer storage, freeze the skillet in airtight containers for up to 2 months. Thaw in the fridge overnight before reheating to enjoy later.

Reheating: To reheat, warm gently on the stove over low heat, adding a splash of water if needed to regain moisture. The ground chicken skillet with olives and feta is best enjoyed fresh!

Make-Ahead: Preparing this dish ahead of time is a treat! Simply store pre-cooked portions in the fridge or freezer for quick meal solutions during busy weeks.

Expert Tips for Ground Chicken Skillet

Maximize Flavor: Ensure the chicken is browned well; this step deepens the flavor and enhances the overall dish.

Garlic Caution: Watch the garlic closely while sautéing; overcooked garlic can turn bitter. Aim for fragrant and lightly golden.

Ingredient Substitutions: Explore variations by swapping ground chicken with turkey or beef, or introduce extra greens like spinach for added nutrition.

Storage Savvy: Leftovers can be refrigerated in an airtight container for up to 3 days. Reheat gently to preserve the texture and flavor.

Seasoning Adjustments: Taste before serving! Adjust salt and pepper as needed to ensure the ground chicken skillet with olives and feta has the perfect balance.

Make Ahead Options

These Mediterranean Keto Ground Chicken Skillet with Olives and Feta are perfect for meal prep enthusiasts! You can chop the vegetables (onion, bell pepper, and garlic) and store them in an airtight container in the refrigerator up to 3 days in advance, which will save you precious time during busy weeknights. The ground chicken can also be browned ahead of time; simply cool it and refrigerate for 24 hours. When you’re ready to serve, just heat the skillet, add in the prepped ingredients, incorporate the olives and cherry tomatoes, and sprinkle feta on top. With these make-ahead steps, you’ll have a savory dish that’s just as delicious with minimal effort!

Ground Chicken Skillet with Olives and Feta Variations

Customize your dish and elevate the flavors with these delightful twists that burst with personality and zing!

  • Ground Turkey: Substitute ground chicken with turkey for a leaner option, while still keeping the taste deliciously tender.

  • Spinach Boost: Add a handful of fresh spinach or another leafy green into the skillet for an easy nutrient boost—it’s a quick way to add color and vitality to your meal!

  • Zucchini Noodles: Swap out traditional sides and serve it over zucchini noodles for a fun, low-carb alternative that soaks up all the savory goodness.

  • Heat It Up: Sprinkle in red chili flakes or toss in diced jalapeños for an extra kick of heat; it’s a simple way to spice things up without overpowering the dish.

  • Herb Variations: Play around with fresh herbs like basil or mint instead of parsley to bring a new depth of flavor that transports you to the Mediterranean with every bite.

  • Cheese Alternatives: If feta isn’t your favorite, try crumbled goat cheese or a sprinkle of Parmesan for a different creamy texture that still enhances the dish’s overall richness.

  • Mediterranean Veggie Mix: Incorporate a medley of other Mediterranean veggies like artichokes or roasted red peppers to amp up the flavor profile and make the dish even more filling.

  • Citrus Twist: Experiment with lime juice instead of lemon to brighten the dish with a slightly different zing—it’s fresh and invigorating!

These variations not only cater to different diets, but they also keep things exciting at the dinner table! Looking for more inspiration? Try out my easy Oven Chicken Rice or enjoy a comforting bowl of Korean Ground Beef for something a little different!

What to Serve with Mediterranean Keto Ground Chicken Skillet with Olives and Feta

Transform your delicious skillet into a memorable meal by pairing it with these delightful sides.

  • Fresh Green Salad: Crisp greens tossed with a light vinaigrette offer a refreshing contrast to the warm, savory skillet dish. The crunch balances perfectly, enhancing every bite.

  • Cauliflower Rice: This low-carb alternative adds a delightful texture while soaking up the flavorful juices from the skillet. It’s a fantastic way to keep your meal light and satisfying.

  • Greek Yogurt Sauce: A dollop of creamy Greek yogurt drizzled with lemon juice adds a tangy brightness that complements the richness of the feta. This cooling element enhances the overall flavor experience.

  • Zucchini Noodles: Spiralized zucchini provides a great base for this dish, adding a light and fresh touch. Their mild flavor pairs seamlessly with the Mediterranean spices, perfect for a keto-friendly option.

  • Herbed Quinoa: Nutty quinoa seasoned with fresh herbs brings a unique texture and complements the dish’s Mediterranean flair. It adds a wholesome element while providing a protein boost.

  • Tzatziki Sauce: This refreshing cucumber-yogurt sauce is a classic pairing, offering a cool contrast to the warm skillet. Its garlic and dill notes perfectly echo the Mediterranean theme while keeping things vibrant.

  • Roasted Vegetables: A medley of seasonal roasted veggies brings essential nutrients and a caramelized sweetness, accentuating the dish’s savory flavors and creating a balanced meal.

  • Chilled White Wine: A chilled glass of crisp Sauvignon Blanc elevates the meal, enhancing the Mediterranean vibe and complementing the dish’s flavors effortlessly.

Pairing your Ground Chicken Skillet with these sides transforms your dining experience into a delightful culinary adventure!

Ground Chicken Skillet with Olives and Feta Recipe FAQs

What type of ground chicken should I use?
I recommend using lean ground chicken for this recipe to keep it healthy, but you can also use ground turkey or lean beef if you prefer. Just remember that different meats may result in slightly varying flavors and textures, so choose what you love best!

How should I store leftovers of the Ground Chicken Skillet?
Store any leftovers in an airtight container in the refrigerator for up to 3 days. This not only helps maintain the vibrant flavors but also keeps the dish fresh and ready for your next meal. When reheating, I suggest warming it gently on the stove over low heat to preserve the texture.

Can I freeze the Ground Chicken Skillet with Olives and Feta?
Absolutely! You can freeze the skillet in airtight containers for up to 2 months. To freeze, let the dish cool completely first, then portion it out and seal tightly. To enjoy later, simply thaw it overnight in the fridge, then reheat on the stovetop over low heat, adding a splash of water if needed to regain moisture.

What if I can’t find Kalamata olives?
No worries! Any pitted olives will work as a substitute in the Ground Chicken Skillet. You can use green olives for a different flavor profile or even skip them altogether if you prefer a simpler taste.

How can I make this dish vegetarian-friendly?
To adapt this dish for a vegetarian option, substitute the ground chicken with crumbled tofu or tempeh. Additionally, add extra vegetables like spinach or zucchini to create a hearty, satisfying meal. Just be mindful of adjusting the cooking times accordingly for the plant-based proteins.

Could I modify the spice level of the Ground Chicken Skillet?
Certainly! If you prefer a little heat, feel free to add red chili flakes or diced jalapeños when you add the bell pepper. Start with a small amount, taste, and adjust as needed! The more the merrier when it comes to flavors!

Ground Chicken Skillet with Olives and Feta

Savory Ground Chicken Skillet with Olives and Feta Delight

This Ground Chicken Skillet with Olives and Feta is a vibrant Mediterranean dish that's quick, gluten-free and beginner-friendly.
Prep Time 10 minutes
Cook Time 20 minutes
Total Time 30 minutes
Servings: 4 servings
Course: Dinner
Cuisine: Mediterranean
Calories: 350

Ingredients
  

For the Skillet
  • 2 tablespoons Olive Oil Avocado oil is a fine substitute.
  • 1 pound Ground Chicken Can substitute with ground turkey or lean beef.
  • 1 medium Onion Shallots can be used for a gentler taste.
  • 3 cloves Garlic Fresh cloves elevate the dish.
  • 1 medium Bell Pepper Any color works; zucchini is a lower-carb option.
  • 1 teaspoon Dried Oregano Can swap with Italian seasoning.
  • 1 teaspoon Smoked Paprika Regular paprika is a suitable alternative.
  • 1 teaspoon Ground Cumin Coriander is a lighter substitute.
  • Salt and Pepper Essential for seasoning; adjust to taste.
  • 1 cup Cherry Tomatoes Diced canned tomatoes are a substitute if needed.
  • 1/2 cup Kalamata Olives Any pitted olives can be used.
  • 1 cup Feta Cheese Crumbled goat cheese makes for a flavorful alternative.
  • 1/4 cup Fresh Parsley Cilantro can be used for a unique flavor.
  • 1/2 tablespoon Lemon Juice Lime juice is an excellent alternative.

Equipment

  • Skillet

Method
 

Step-by-Step Instructions
  1. Heat 2 tablespoons of olive oil in a large skillet over medium heat. Add 1 pound of ground chicken, breaking it apart. Cook for 6-8 minutes until browned.
  2. Add 1 chopped onion and 3 minced garlic cloves. Sauté for 2-3 minutes until the onion is translucent.
  3. Stir in 1 chopped bell pepper, 1 teaspoon dried oregano, 1 teaspoon smoked paprika, 1 teaspoon ground cumin, and salt and pepper to taste. Cook for 3-4 minutes.
  4. Add 1 cup halved cherry tomatoes and 1/2 cup sliced Kalamata olives. Cook for 5 minutes until the tomatoes soften.
  5. Sprinkle 1 cup crumbled feta cheese over the mixture. Let sit for a minute to melt slightly.
  6. Remove from heat. Fold in 1/4 cup fresh chopped parsley and 1/2 tablespoon lemon juice. Adjust seasoning with salt and pepper.
  7. Serve warm, on its own or with a fresh green salad.

Nutrition

Serving: 1servingCalories: 350kcalCarbohydrates: 10gProtein: 28gFat: 22gSaturated Fat: 7gPolyunsaturated Fat: 2gMonounsaturated Fat: 10gCholesterol: 95mgSodium: 750mgPotassium: 600mgFiber: 3gSugar: 3gVitamin A: 500IUVitamin C: 30mgCalcium: 200mgIron: 2mg

Notes

Maximize flavor by browning the chicken well. Adjust seasoning before serving for the best taste.

Tried this recipe?

Let us know how it was!

Delicious Turkey Meatballs That Are Juicy and Guilt-Free

As I stood in my kitchen, the scent of garlic and fresh herbs wafted through the air, instantly transporting me to my favorite Italian bistro. Today, I’m excited to share my recipe for Juicy Turkey Meatballs, a healthy twist on a classic dish that truly satisfies. These protein-packed delights boast a moist interior that rivals traditional beef meatballs, making them a perfect solution for those craving comfort food without the heaviness. Whip them up in no time and enjoy their versatility—from a delightful pasta dish to a fun wrap or grain bowl. Curious about how these flavorful little gems can transform your weeknight meals? Let’s dive in!

Why Are Turkey Meatballs So Delightful?

Juiciness Guaranteed: Each turkey meatball is crafted to stay moist, with the perfect balance of lean meat and flavorful ingredients.

Flavor Explosion: Aromatic garlic, fresh herbs, and rich Parmesan unite for a savory taste experience that lingers.

Flexible Ingredients: With substitutions like Greek yogurt or different herbs, you can customize these meatballs to suit your pantry and taste preferences.

Quick Preparation: These juicy meatballs can go from prep to plate in under 30 minutes, making them ideal for busy weeknights.

Crowd-Pleaser: Whether served over spaghetti, in a wrap, or with sides like Korean Bbq Meatballs, they’ll impress family and friends alike!

Turkey Meatballs Ingredients

For the Meatballs
Ground Turkey – Choose 93% lean for maximum moisture.
Small Yellow Onion – Grate for optimal moisture and flavor infusion.
Egg – Acts as a binder to keep meatballs from falling apart.
Plain Greek Yogurt – Adds juiciness; can be swapped with milk for a lighter option.
Panko Breadcrumbs – Lightens the texture while providing structure; use regular breadcrumbs if preferred.
Freshly Grated Parmesan Cheese – Enhances depth of flavor with its salty richness.
Garlic – Fresh cloves give the best flavor; don’t hesitate to use garlic powder if you’re in a pinch.
Fresh Herbs (Basil, Parsley, Rosemary) – Elevate the taste; dry variants work in a pinch.
Dried Oregano – Essential for that Italian flair.
Granulated Beef Bouillon (optional) – Adds umami intensity; use sparingly for lower sodium options.
Salt & Pepper – Key seasonings that uplift all other flavors.
Olive Oil – Ensures even cooking and prevents sticking if you’re baking.

Each ingredient plays a vital role in making these turkey meatballs a flavorful, healthy delight for your next family dinner!

Step‑by‑Step Instructions for Juicy Herb Turkey Meatballs

Step 1: Prep Oven or Skillet
Begin by preheating your oven to 400°F if you plan to bake the juicy turkey meatballs. Alternatively, pour a generous amount of olive oil into a skillet and heat it over medium heat, allowing it to warm up while you prepare the rest of your ingredients.

Step 2: Grate Onion
Grate a small yellow onion into a mixing bowl, collecting all the juices that flow out. This will maximize the moisture and flavor in your turkey meatballs, lending them a savory depth. Make sure to have the grated onion ready for the next step to enhance the mixture.

Step 3: Mix Ingredients
In the bowl with the grated onion, combine panko breadcrumbs, freshly grated Parmesan cheese, minced garlic, and your choice of fresh herbs. Add a touch of dried oregano, along with salt and pepper to taste. Mix well to ensure the flavors meld beautifully before you move on to the turkey.

Step 4: Add Turkey
Gently incorporate the ground turkey into the mixture, using your hands or a spoon. Be careful not to overmix, as this can lead to tough meatballs. Ensure that all ingredients are evenly distributed for a flavorful bite in each juicy meatball.

Step 5: Form Meatballs
Wet your hands to prevent sticking, then use a cookie scoop or your hands to form small meatballs. Roll them gently to maintain a light texture and ensure they cook evenly. Aim for about 1 to 1.5 inches in diameter to achieve the perfect size for cooking.

Step 6: Bake or Fry
If you’re baking, place the meatballs on a wire rack set over a baking sheet and pop them in the oven for 16-21 minutes, or until they reach an internal temperature of 160°F. For pan-frying, add the meatballs to the hot skillet in batches, cooking for about 5-7 minutes until browned and cooked through, watching for a lovely golden crust.

Step 7: Rest
Once cooked, let your juicy turkey meatballs rest for about 5 minutes before serving. This resting period ensures that the juices redistribute throughout the meatballs, keeping them moist and flavorful for your family dinner or meal prep!

Make Ahead Options

These Juicy Turkey Meatballs are perfect for meal prep enthusiasts! You can mix all the ingredients and form the meatballs up to 24 hours in advance, storing them covered in the refrigerator to maintain their moistness. This prepped batch means that on a busy night, all you have to do is bake or pan-fry them when you’re ready to eat. For even longer storage, you can freeze unbaked meatballs for up to 3 months; just place them in a single layer on a baking sheet to freeze, then transfer to a freezer bag. Simply cook from frozen, adjusting the cooking time as needed, and you’ll have delicious, homemade turkey meatballs served with ease!

How to Store and Freeze Turkey Meatballs

Fridge: Store cooked turkey meatballs in an airtight container for up to 4-5 days. Ensure they’re completely cooled before sealing to prevent condensation.

Freezer: For longer storage, freeze cooked meatballs in a single layer on a baking sheet. Once solid, transfer them to a freezer bag for up to 3 months.

Reheating: Reheat frozen turkey meatballs in the oven at 350°F for about 20-25 minutes or in the microwave until heated through, ensuring they reach a safe internal temperature of 165°F.

Raw Meatballs: Uncooked turkey meatballs can be refrigerated for 3-4 days or frozen before baking. When ready to cook, bake them directly from frozen, adjusting your cooking time as needed.

Turkey Meatballs Variations & Substitutions

Feel free to mix things up and personalize these turkey meatballs to suit your family’s taste buds and dietary needs!

  • Herb Swaps: Try using dried thyme, sage, or even a zesty chili blend. These alternatives add unique flavor profiles that can transform your dish.

  • Dairy-Free Option: Substitute Greek yogurt with coconut yogurt or a non-dairy sour cream. This keeps the moisture intact while catering to dairy-free diets.

  • Veggie Boost: Add finely chopped spinach or bell peppers to the mixture for extra nutrients and a vibrant twist. It gives a lovely crunch and makes these meatballs even healthier.

  • Spicy Kick: Incorporate red pepper flakes or diced jalapeños for a touch of heat. Perfect for those who love to turn up the flavor dial!

  • Whole Grain Breadcrumbs: Swap panko for whole grain breadcrumbs for added fiber without compromising the meatballs’ structure. It’s a small change that makes a big difference in nutrition!

  • Gluten-Free Version: Use gluten-free breadcrumbs or oat flour instead of regular breadcrumbs. Your turkey meatballs will still be delicious and satisfying for everyone.

  • Additional Flavor Punch: Mix in a tablespoon of Dijon mustard or Worcestershire sauce for an umami boost. You won’t believe the depth of flavor these tiny tweaks can create!

If you’re in the mood for a different twist, consider pairing these meatballs with Korean BBQ Meatballs for a fusion meal that will excite your taste buds. Enjoy every bite!

What to Serve with Juicy Ground Turkey Meatballs

Create a heartwarming meal experience that brings families together and tantalizes taste buds!

  • Creamy Mashed Potatoes: These fluffy potatoes provide a comforting base that perfectly balances the savory flavors of the turkey meatballs.

  • Zesty Marinara Sauce: A classic pairing, this rich marinara adds a delightful tang that elevates every bite while ensuring maximum flavor satisfaction.

  • Garlicky Roasted Vegetables: Roasting brings out their natural sweetness and crunch, complementing the moistness of the meatballs and creating a rainbow of flavors on your plate.

  • Fresh Salad with Citrus Dressing: A light salad with a zingy citrus dressing refreshes the palate, making it a perfect accompaniment to these hearty meatballs.

  • Whole Wheat Pasta: A healthier twist on tradition, whole wheat pasta adds a nutty flavor that pairs beautifully with the turkey meatballs, making dinner feel both hearty and wholesome.

  • Grain Bowl with Quinoa: Serve the meatballs on a bed of protein-packed quinoa, topped with fresh veggies, for a nourishing meal that feels both indulgent and nutritious.

  • Italian Herb Focaccia: Soft and fragrant, homemade focaccia bread alongside your turkey meatballs adds a wonderful texture and is perfect for soaking up extra sauce.

  • Sparkling Water with Lemon: For a refreshing drink, sparkling water with a slice of lemon enhances the meal experience without overshadowing the flavors of the meatballs.

Consider these combinations to elevate your Juicy Ground Turkey Meatballs into a delightful feast that everyone will love!

Tips for the Best Turkey Meatballs

Cook to Temperature: Use an instant-read thermometer to check that the internal temperature reaches 160°F for safe and juicy turkey meatballs.

Gentle Mixing: Avoid over-mixing the turkey with ingredients; this keeps the meatballs tender instead of tough.

Resting Time: Always let the meatballs rest for 5 minutes before serving; this helps retain moisture and flavor.

Consistent Sizing: Use a cookie scoop to create evenly sized meatballs for even cooking, ensuring each bite is just as delicious as the last.

Flavor Customization: Don’t hesitate to experiment with herbs and spices based on what you have on hand; this can elevate your healthy turkey meatballs to a new level!

Juicy Herb Turkey Meatballs Recipe FAQs

How do I choose ripe ingredients for my turkey meatballs?
Absolutely! Select fresh ingredients for the best outcome. When choosing your ground turkey, opt for 93% lean to ensure moisture without excess fat. For the onion, a small yellow onion works wonders—grate it fresh to enhance flavor. Fresh herbs should appear vibrant and fragrant; avoid any that look wilted. And don’t skip on the garlic! Fresh cloves will provide the most flavor, although garlic powder is a decent substitute in a hurry.

How can I store my cooked turkey meatballs?
Very simple! Once your turkey meatballs are fully cooked, let them cool completely before storing. Place them in an airtight container and they’ll stay fresh in the fridge for up to 4-5 days. For convenience, label your container with the date so you remember how long they’ve been there.

Can I freeze turkey meatballs and how?
Absolutely! To freeze your cooked meatballs, first arrange them in a single layer on a baking sheet. Place the baking sheet in the freezer for about 1-2 hours until the meatballs are solid. Then transfer them to a freezer bag or airtight container. They will last up to 3 months frozen. To reheat, just pop them in the oven at 350°F for about 20-25 minutes or warm them in the microwave until heated through.

What if my turkey meatballs turn out tough?
Don’t worry! If your meatballs are tough, it’s likely due to over-mixing the turkey with the other ingredients. When mixing, gently incorporate the turkey without overworking it. If you find they are still dense, next time try adding a touch more Greek yogurt or grated onion for extra moisture. And remember, letting the meatballs rest after cooking can also help keep them juicy!

Are there any dietary considerations I should be aware of?
Absolutely! While turkey is generally a healthy choice for most, be mindful of allergies. If you’re serving guests, double-check for egg allergies, as the egg acts as a binder. For gluten-free options, replace panko breadcrumbs with gluten-free breadcrumbs or ground oats. And if pets are watching, remember to keep the garlic and onions well out of reach, as these can be harmful to them!

How long can I keep raw turkey meatballs in the fridge?
You can store raw turkey meatballs in your refrigerator for up to 3-4 days. Make sure they are covered tightly to prevent any contamination. If you plan to freeze them, do so before baking. You can cook them straight from frozen—just add a few extra minutes to the cooking time for perfectly juicy flavors!

Turkey Meatballs

Delicious Turkey Meatballs That Are Juicy and Guilt-Free

These juicy turkey meatballs are a healthy twist on a classic dish, perfect for a guilt-free dinner.
Prep Time 10 minutes
Cook Time 20 minutes
Resting Time 5 minutes
Total Time 35 minutes
Servings: 4 meatballs
Course: Dinner
Cuisine: Italian
Calories: 250

Ingredients
  

For the Meatballs
  • 1 lb Ground Turkey Choose 93% lean for maximum moisture.
  • 1 small Yellow Onion Grate for optimal moisture and flavor infusion.
  • 1 Egg Acts as a binder to keep meatballs from falling apart.
  • 1/2 cup Plain Greek Yogurt Can be swapped with milk for a lighter option.
  • 1/2 cup Panko Breadcrumbs Lightens the texture; use regular breadcrumbs if preferred.
  • 1/4 cup Freshly Grated Parmesan Cheese Enhances depth of flavor.
  • 2 cloves Garlic Use fresh cloves for best flavor.
  • 1/4 cup Fresh Herbs Basil, Parsley, Rosemary; dry variants work in a pinch.
  • 1 tsp Dried Oregano Essential for that Italian flair.
  • 1 tsp Granulated Beef Bouillon Optional, use sparingly for lower sodium options.
  • to taste Salt Key seasoning.
  • to taste Pepper Key seasoning.
  • 2 tbsp Olive Oil Prevents sticking if baking.

Equipment

  • Oven
  • Skillet
  • Mixing Bowl
  • Cookie Scoop

Method
 

Step‑by‑Step Instructions
  1. Preheat your oven to 400°F or heat olive oil in a skillet over medium heat.
  2. Grate a small yellow onion into a mixing bowl.
  3. Combine panko breadcrumbs, Parmesan cheese, minced garlic, fresh herbs, dried oregano, salt, and pepper in the bowl.
  4. Gently incorporate ground turkey into the mixture.
  5. Form small meatballs, aiming for about 1 to 1.5 inches in diameter.
  6. Bake for 16-21 minutes or pan-fry for 5-7 minutes until browned and cooked through.
  7. Let the meatballs rest for about 5 minutes before serving.

Nutrition

Serving: 2meatballsCalories: 250kcalCarbohydrates: 15gProtein: 30gFat: 10gSaturated Fat: 3gPolyunsaturated Fat: 2gMonounsaturated Fat: 5gCholesterol: 120mgSodium: 500mgPotassium: 600mgFiber: 1gSugar: 1gVitamin A: 10IUVitamin C: 15mgCalcium: 8mgIron: 15mg

Notes

These turkey meatballs are perfect for meal prep and can be served in various ways to suit your taste.

Tried this recipe?

Let us know how it was!

Stay Connected

Get recipes via email: