Get my cookbooks

Irresistibly Moist Banana Cake Recipe for Any Occasion

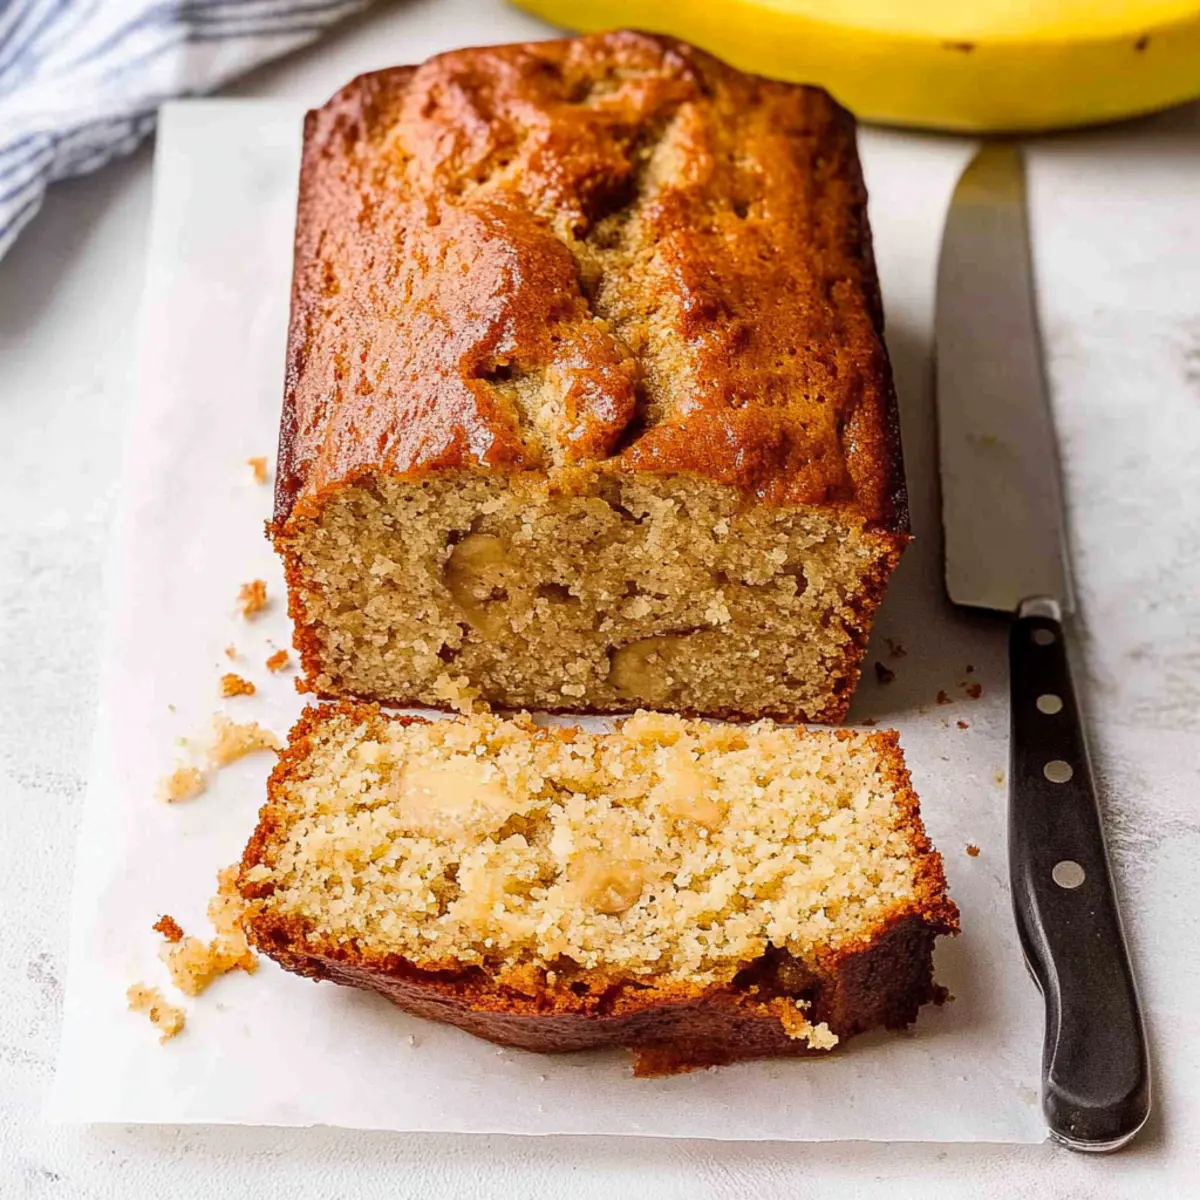
I was rummaging through my kitchen when I stumbled upon a bunch of sad, brown bananas waiting to be rescued. That’s when it hit me: it’s the perfect moment to whip up my simple and delicious Banana Cake! This recipe transforms those neglected bananas into a family-friendly delight, ensuring everyone, including the kids, is excited to dig in. Not only is this cake easy to make with just one bowl, but it also promises a mouthwatering moist texture that melts in your mouth. It’s a fantastic way to avoid food waste while indulging in a homemade treat that brings smiles all around. Ready to bring that ripe fruit to life? Let’s get started!

Why is this Banana Cake a must-try?

Simplicity at its Finest: With just one bowl needed, this recipe is incredibly easy, making it perfect for novice bakers. Mouthwatering Moisture: Thanks to the ripe bananas, this cake delivers a delightful, melt-in-your-mouth experience every time. Kid-Approved: The sweet flavor and soft texture make it an instant hit with kids and adults alike. Versatile Variations: Feel free to mix in chocolate chips or spices to customize the flavor to your liking! And if you’re in the mood for more banana goodness, try my Banana Blueberry Breakfast cookies or Bananas Foster Cinnamon rolls for a tasty treat.

Banana Cake Ingredients

For the Batter

  • Butter – Greasing the tin and adds moisture to the cake. Preferably use unsalted butter for better flavor control.
  • Caster Sugar – Provides sweetness and aids in browning; can be substituted with blitzed raw sugar for a similar texture.
  • Eggs – Adds structure and richness; go for medium free-range eggs for the best results.
  • Self-Raising Flour – Forms the base of the cake, ensuring it rises; can replace it with all-purpose flour mixed with baking powder.
  • Very Ripe Bananas – The key to the signature flavor and moisture; seek out soft bananas with brown or black speckles for the best outcome.

Feel free to whisk this delicious Banana Cake up in your kitchen today and savor every bite!

Step‑by‑Step Instructions for Banana Cake

Step 1: Preheat and Prepare
Preheat your oven to 180°C (350°F). While that heats up, take a 23x13cm (2lb) loaf tin and generously grease it with unsalted butter, ensuring every corner is covered to prevent sticking. This initial preparation sets the stage for your irresistible Banana Cake to bake evenly and release smoothly later on.

Step 2: Combine Ingredients
In a large mixing bowl, add two medium free-range eggs, 100g melted butter, 200g caster sugar, 250g self-raising flour, and 3 very ripe bananas, mashed until smooth. This is where the fun begins! Use a sturdy whisk or electric mixer to blend these ingredients thoroughly, ensuring they come together in a creamy, unified batter that spells sweetness and moisture.

Step 3: Transfer to Tin
Once your batter is well-mixed and looks luscious, pour it into the prepared loaf tin. With a spatula, gently smooth out the top, creating an even surface to ensure your Banana Cake rises beautifully. As you smooth the mixture, feel confident that you are just moments away from a delightful treat that the whole family will love.

Step 4: Bake the Cake
Place the filled loaf tin in your preheated oven and bake for 40 to 50 minutes. Keep a watchful eye on the cake during the last 10 minutes of baking—when the top is golden-brown and a toothpick inserted into the center comes out clean, your Banana Cake is ready to be pulled from the oven, filling your kitchen with a sweet aroma.

Step 5: Cool and Serve
Allow the Banana Cake to cool in the tin for about 10 to 15 minutes, giving it a chance to set slightly. After that, gently turn it out onto a wire rack to cool completely. This crucial step ensures the cake retains its soft, moist texture, making it the perfect treat for an afternoon snack or lunchbox delight.

Expert Tips for Banana Cake

  • Choose Ripe Bananas: The riper your bananas, the sweeter and more flavorful your Banana Cake will be. Look for those with brown or black spots.
  • Doneness Check: Avoid underbaking by checking that a skewer comes out clean before removing the cake from the oven. This ensures a perfectly baked treat.
  • Adjust Baking Time: Oven temperatures can vary, so keep an eye on your cake towards the end of baking. If it’s browning too quickly, tent it with foil.
  • Storage Smartly: To keep your cake fresh, store it in an airtight container. It stays moist for up to a week, and you can even freeze slices for later enjoyment!
  • Mix It Up: Personalize your Banana Cake by adding chocolate chips or nuts; it elevates the flavor and adds irresistible texture!

Make Ahead Options

These Banana Cake preparations are a game changer for busy home cooks looking to save time while still enjoying a homemade treat! You can easily pre-assemble the batter and refrigerate it for up to 24 hours in advance, ensuring the cake is just as delicious when baked later. Simply mix together the melted butter, sugar, eggs, self-raising flour, and mashed bananas in a bowl, then store it tightly covered in the fridge. For the best quality, avoid adding the batter to the tin until you’re ready to bake, which prevents any potential loss of rise. When it’s time to bake, just pour the chilled batter into your greased loaf tin, let it come to room temperature for about 15-20 minutes, and pop it in the oven for that perfect, mouthwatering Banana Cake!

How to Store and Freeze Banana Cake

Fridge: Keep your banana cake in an airtight container in the refrigerator for up to 1 week to maintain its delicious moisture and freshness.

Freezer: For longer storage, slice your banana cake and wrap each piece in plastic wrap followed by foil. It can be frozen for up to 3 months.

Room Temperature: If you plan to enjoy it within a few days, store the banana cake at room temperature in a tightly sealed container, keeping it fresh for up to 3 days.

Reheating: To enjoy cold slices, simply pop them in the microwave for about 10-15 seconds to warm up, enhancing the inviting flavors of your banana cake!

Banana Cake Variations & Substitutions

Feel free to get creative and customize this Banana Cake to suit your taste buds and dietary preferences.

  • Nutty Bliss: Add chopped walnuts or pecans for a delightful crunch that complements the moist texture of the cake. Nuts not only enhance flavor but add wonderful nutrition too!

  • Choco-Lover’s Delight: Stir in chocolate chips for a decadent twist. The rich chocolate flavor pairs beautifully with bananas and makes for a truly indulgent dessert experience.

  • Honey-Sweetened: Replace half of the caster sugar with honey or maple syrup for a warm, earthy sweetness. This swap creates a unique flavor that elevates the classic recipe to new heights.

  • Spiced Up: Incorporate ground cinnamon or nutmeg to add a cozy, warm aroma to your cake. A hint of spice can transform your ordinary banana cake into something extraordinary!

  • Dairy-Free Option: Use coconut oil instead of butter and almond milk instead of eggs for a plant-based version. This makes your cake friendly for those following a dairy-free lifestyle while keeping the flavor intact.

  • Gluten-Free Choice: Swap self-raising flour with a gluten-free all-purpose blend for a delicious cake that everyone can enjoy. Just make sure the blend contains a binding agent like xanthan gum to maintain structure.

  • Tropical Twist: Add shredded coconut and pineapple chunks for a refreshing, island-inspired spin. This brings a touch of paradise to your cake, perfect for summer gatherings!

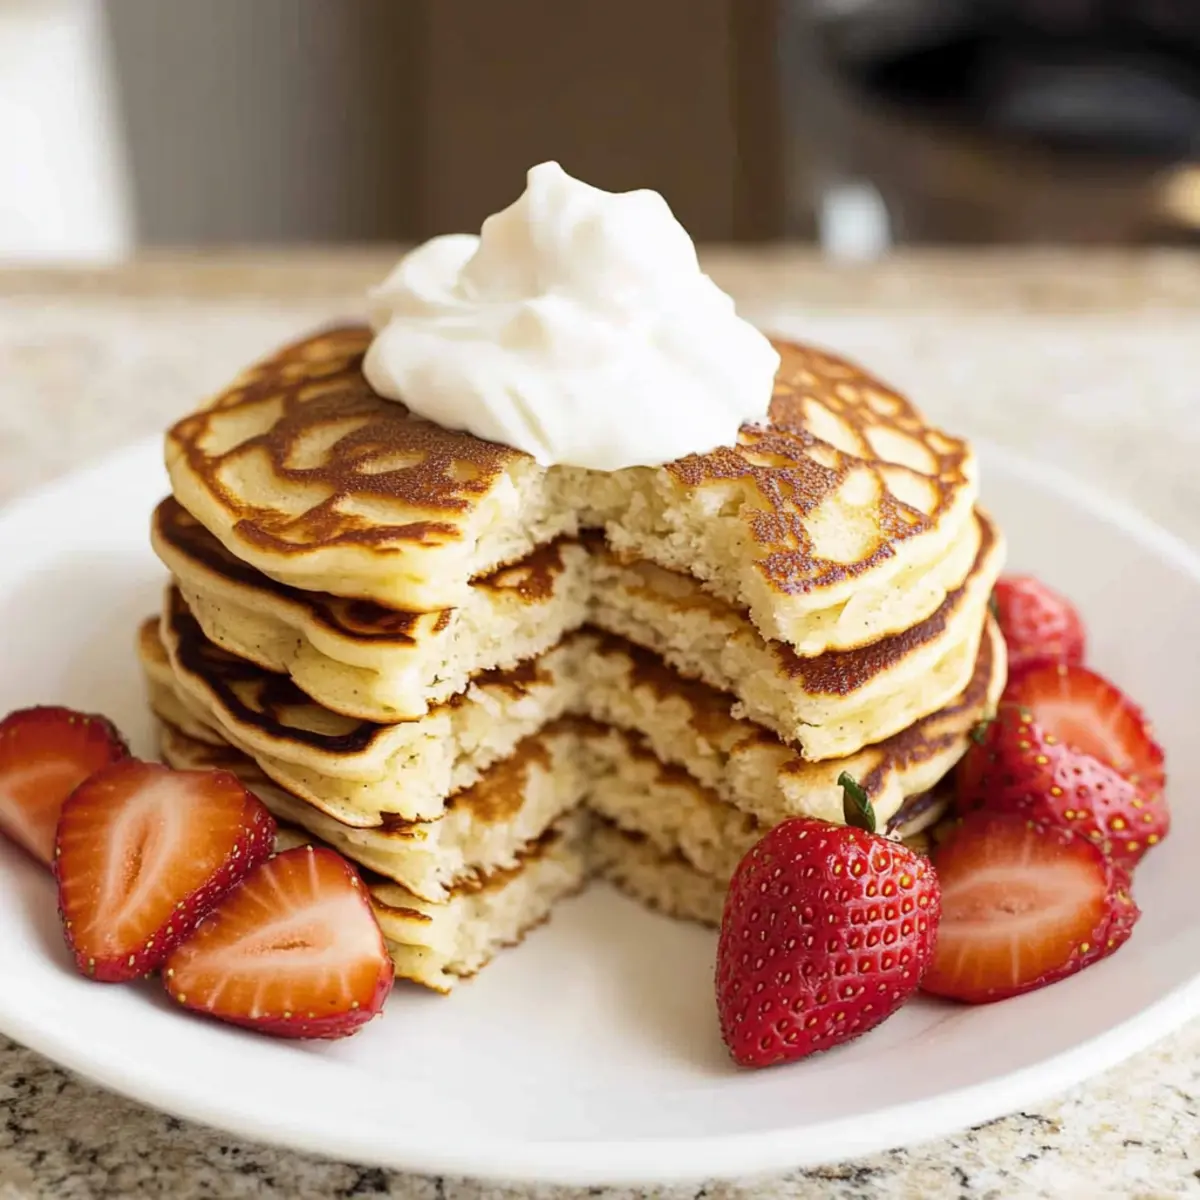
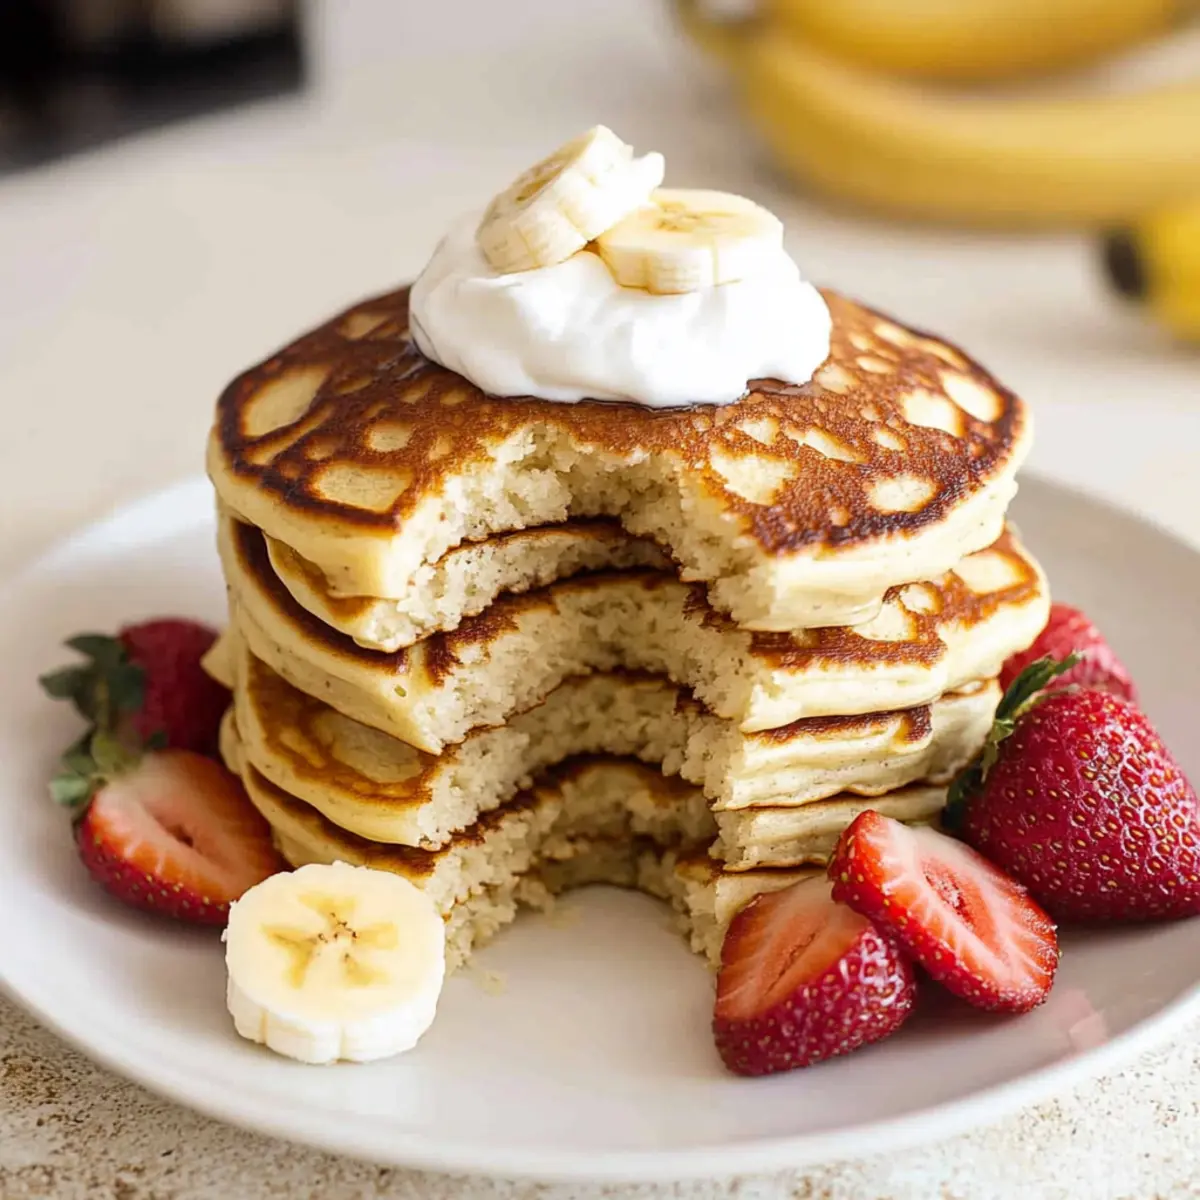
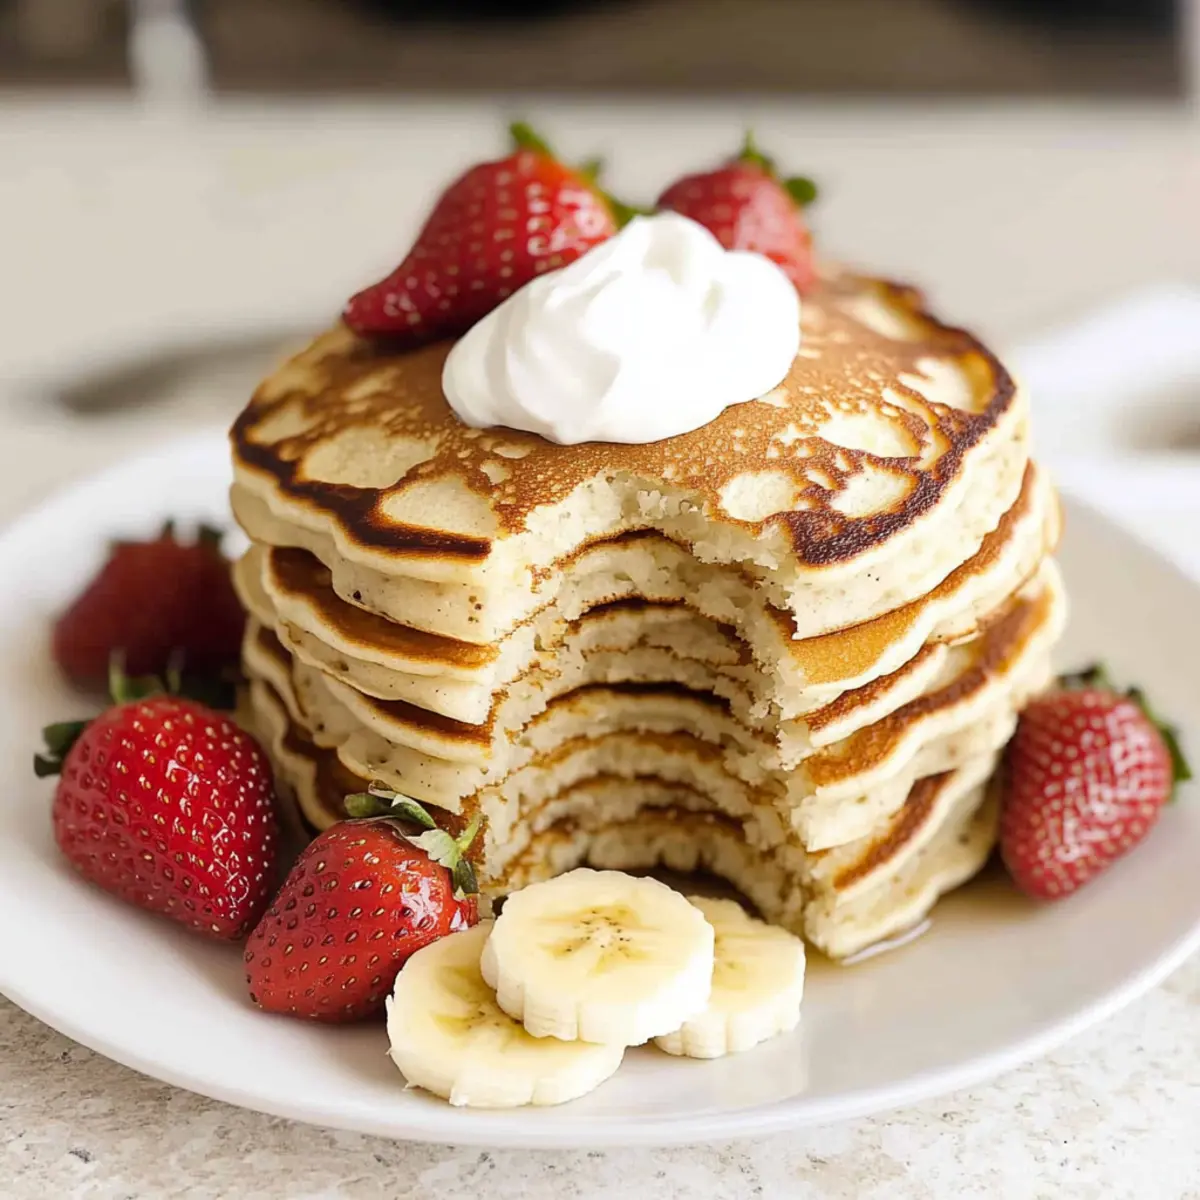
  • Banana Pudding Fusion: Layer slices of banana in between the cake and top with whipped cream for a banana pudding vibe. This combination delights the senses and adds a beautiful presentation for special occasions.

These variations spice up your banana cake experience and ensure there’s something for everyone! If you’re keen on exploring more banana-inspired recipes, check out my Easter Poke Cake or the delectable Honeybun Carrot Cake for even more delicious ideas.

What to Serve with Foolproof One-Bowl Banana Cake?

Indulging in a slice of this moist banana cake is just the beginning—let’s elevate your meal experience with some delicious pairings!

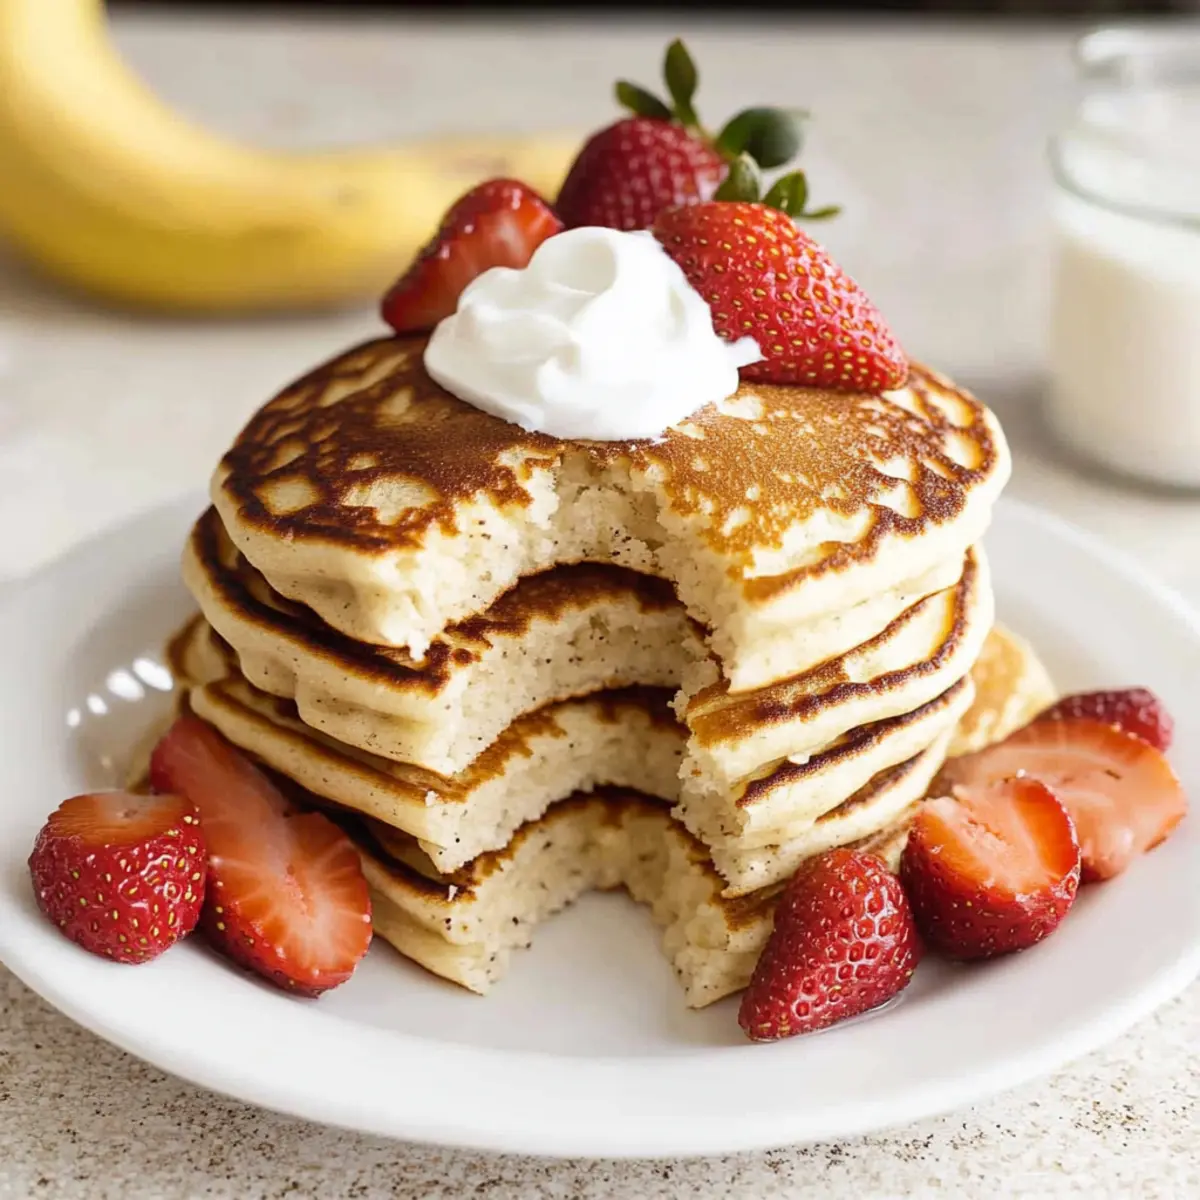
  • Creamy Yogurt: A dollop of Greek yogurt adds a rich tang that beautifully balances the cake’s sweetness.

  • Fresh Fruit Salad: A vibrant mix of seasonal fruits refreshes the palate, enhancing the cake’s comforting flavors.

  • Classic Vanilla Ice Cream: The creamy, cold nature of vanilla ice cream is a dreamy contrast to the warm, moist cake.

  • Nutty Granola: Sprinkle some crunchy granola over the cake or alongside it for a delightful combo of textures.

  • Warm Spiced Tea: Enjoying a cup of chai or cinnamon tea brings out the cozy warmth of the banana cake.

  • Chocolate Drizzle: A light drizzle of melted chocolate offers an indulgent touch that pairs perfectly with the banana flavor.

  • Whipped Coconut Cream: Light and airy, coconut cream adds a tropical flair that complements the bananas beautifully.

Each of these accompaniments encourages a delightful exploration of flavors, turning your banana cake into a memorable occasion for family and friends!

Banana Cake Recipe FAQs

How do I choose the right bananas for this Banana Cake?
Absolutely! The best bananas to use are very ripe ones. Look for bananas that have brown or black spots on the peel, as this indicates increased sweetness and flavor. The softer, the better! If they’re not quite ready, leave them at room temperature until they’re perfectly overripe to achieve that rich banana taste in your cake.

How should I store my Banana Cake for maximum freshness?
To keep your Banana Cake fresh, store it in an airtight container at room temperature for up to 3 days. If you want to preserve it for longer, you can place it in the refrigerator, where it can last up to a week. Just remember to bring it back to room temperature when you’re ready to serve for the best flavor!

Can I freeze Banana Cake, and if so, how?
Very! To freeze your Banana Cake, let it cool completely after baking. Then, slice it into individual portions. Wrap each slice tightly in plastic wrap and then in aluminum foil to prevent freezer burn. It can stay in the freezer for up to 3 months. When you’re ready to enjoy, simply thaw overnight in the fridge or at room temperature, or warm it for a few seconds in the microwave.

What should I do if my Banana Cake is too dense or doesn’t rise properly?
No worries! If your Banana Cake turns out too dense, it’s often due to overmixing the batter. Mix just until the ingredients are combined for a lighter texture. Make sure your self-raising flour is fresh and not expired, as this can also impact the cake’s ability to rise. If the cake on top is browning too quickly, you can place a piece of aluminum foil over it during the last few minutes of baking to prevent burning while allowing it to bake through.

Is this Banana Cake suitable for those with dietary restrictions, like gluten allergies?
Yes, to an extent! This Banana Cake can be made gluten-free by substituting the self-raising flour with a gluten-free all-purpose mix. Just be sure to also check that any other ingredients you use, like baking powder if you’re making it from scratch, are gluten-free. Always check for any potential allergens or modifications necessary if serving guests with specific dietary needs.

Can I add different ingredients for variety?
The more the merrier! Feel free to mix in some chocolate chips, chopped nuts like walnuts, or a sprinkle of cinnamon for a delightful twist. You can also swap half the sugar with honey or maple syrup for a unique sweetness profile. Just remember, if you add any extra ingredients, it might affect baking time slightly, so keep an eye on the oven!

Banana Cake Recipe FAQs

Banana Cake

Irresistibly Moist Banana Cake Recipe for Any Occasion

This delicious Banana Cake is easy to make and ensures everyone, including kids, is excited to dig in.
Prep Time 10 minutes
Cook Time 45 minutes
Cooling Time 15 minutes
Total Time 1 hour 10 minutes
Servings: 8 slices
Course: Dessert
Cuisine: Baking
Calories: 200

Ingredients
  

For the Batter
  • 100 g Unsalted Butter For greasing and moisture
  • 200 g Caster Sugar Can be substituted with blitzed raw sugar
  • 2 medium Eggs Preferably free-range
  • 250 g Self-Raising Flour Can replace with all-purpose flour mixed with baking powder
  • 3 Very Ripe Bananas Look for soft bananas with brown or black speckles

Equipment

  • Mixing Bowl
  • Whisk or electric mixer
  • Loaf tin
  • spatula
  • Microwave

Method
 

Step-by-Step Instructions for Banana Cake
  1. Preheat your oven to 180°C (350°F) and grease a 23x13cm loaf tin with unsalted butter.
  2. In a large mixing bowl, combine the eggs, melted butter, caster sugar, self-raising flour, and mashed bananas.
  3. Pour the batter into the prepared loaf tin and smooth out the top with a spatula.
  4. Bake for 40 to 50 minutes, checking for doneness with a toothpick.
  5. Allow the cake to cool in the tin for 10 to 15 minutes before turning it out onto a wire rack.

Nutrition

Serving: 1sliceCalories: 200kcalCarbohydrates: 30gProtein: 3gFat: 8gSaturated Fat: 5gPolyunsaturated Fat: 1gMonounsaturated Fat: 2gCholesterol: 50mgSodium: 150mgPotassium: 200mgFiber: 1gSugar: 15gVitamin A: 200IUVitamin C: 5mgCalcium: 20mgIron: 1mg

Notes

Ripe bananas enhance sweetness. Store the cake in an airtight container to keep it fresh.

Tried this recipe?

Let us know how it was!

Decadent White Chocolate Raspberry Muffins for Breakfast Bliss

As I stood in my kitchen one sunny morning, the enticing aroma of freshly baked muffins wafted through the air, instantly brightening my mood. These Fluffy White Chocolate Raspberry Muffins are not just a treat; they’re a harmonious blend of sweetness and tartness that dance together in every bite. With a quick prep time of under ten minutes, this recipe is perfect for busy mornings or satisfying snack cravings without the guilt of takeout. The fluffy texture, complemented by melted white chocolate and juicy raspberries, has captivated brunch lovers and dessert aficionados alike. Imagine serving these delightful muffins with a side of warm coffee or tea; they make any gathering feel special. Ready to elevate your breakfast game? Let’s dive into the recipe and bring that blissful aroma to your kitchen!

Why Are These Muffins So Irresistible?

Fluffy Texture: Each muffin boasts a light, airy crumb, ensuring every bite is a delightful experience.
Sweet and Tart Delight: The harmonious blend of white chocolate’s sweetness with fresh raspberries’ tartness creates a flavor explosion.
Quick Prep Time: With just under ten minutes of prep, you can easily whip up these muffins fresh.
Versatile Enjoyment: Perfect for breakfast, snacks, or even dessert, these muffins fit any occasion. Pair them with a warm drink for a cozy touch!
Crowd-Pleasing Treat: Bring joy to your gatherings—these muffins are sure to impress friends and family alike, just like my easy Chocolate Fudge Cupcakes or Easter Chocolate Lasagna.

White Chocolate Raspberry Muffin Ingredients

• These mouthwatering muffins use fresh and rich ingredients to achieve the perfect balance of flavors.

For the Batter

  • Flour – Provides structure; aerate before measuring for the best results.
  • Salt – Enhances flavor; don’t skip it, as it balances the sweetness of the muffins.
  • Baking Powder – Helps the muffins rise to achieve that fluffy texture you love.
  • Granulated Sugar – Adds sweetness; consider sprinkling extra on raspberries to counteract their tartness.
  • Eggs – Binds ingredients and adds moisture; using room temperature eggs ensures fluffiness.
  • Unsalted Butter – Adds richness and flavor; let it cool after melting for best results.
  • Whole Milk – Contributes moisture; use room temperature milk for a smooth batter consistency.
  • Vanilla Extract – Enriches the overall flavor profile, making each bite deliciously memorable.

For the Fruit & Chocolate

  • Raspberries – The star ingredient that adds tartness and beautiful color; adjust sweetness with sugar if they are sour.
  • White Chocolate Chips – Provides sweet creaminess that melts beautifully into the batter for a decadent taste.

For the Topping

  • Coarse Sugar (optional) – Adds a delightful crunchy texture to each muffin’s surface, making them even more irresistible.

These White Chocolate Raspberry Muffins are designed to be enjoyed fresh from the oven, perfect for breakfast or as an afternoon snack. Happy baking!

Step‑by‑Step Instructions for White Chocolate Raspberry Muffins

Step 1: Preheat Your Oven
Begin by preheating your oven to 375°F (190°C). This ensures that your muffins bake evenly and achieve a golden-brown top. While the oven heats up, take a moment to gather all your ingredients and equipment, such as mixing bowls, a whisk, and a muffin pan lined with paper liners.

Step 2: Mix Dry Ingredients
In a small bowl, whisk together the flour, baking powder, granulated sugar, and salt. This step helps to aerate the flour, ensuring a light and fluffy texture for your White Chocolate Raspberry Muffins. Set this bowl aside once everything is thoroughly combined, as you will soon blend it with the wet ingredients.

Step 3: Combine Wet Ingredients
In a separate bowl, whisk together the eggs, melted unsalted butter (cooled), vanilla extract, and whole milk until fully incorporated. Using room temperature ingredients will help create a smooth, cohesive batter. This combination is crucial for achieving moisture and richness in your muffins, so mix well to ensure all components are evenly blended.

Step 4: Combine Wet and Dry Ingredients
Gently fold the dry ingredients into the wet mixture using a spatula or wooden spoon. Take care not to overmix; you’ll want to stop as soon as there’s no dry flour visible. This method prevents dense muffins and maintains the delightful fluffy texture. The batter should be slightly lumpy but well combined.

Step 5: Fold in Raspberries and Chocolate
Carefully fold in the fresh raspberries and white chocolate chips, ensuring the berries remain mostly intact for those lovely bursts of flavor in your muffins. The sweet creaminess of the white chocolate paired with the tart raspberries is what makes these muffins truly special. Make sure every scoop of batter contains both!

Step 6: Prepare Muffin Pan
Line a muffin pan with paper liners to prevent sticking and make for easier cleanup. Using a scoop or measuring cup, evenly distribute the batter into 12 muffin cups, filling each about two-thirds full. If desired, sprinkle the tops with coarse sugar for added texture and sweetness—a delightful touch to your White Chocolate Raspberry Muffins.

Step 7: Bake the Muffins
Place the muffin pan in your preheated oven and bake for 19 to 22 minutes. Keep an eye on them, and check for doneness by inserting a toothpick into the center of a muffin; it should come out clean. The tops should be golden and slightly springy to the touch—a perfect indication that your muffins are ready to come out!

Step 8: Cool and Serve
Allow your muffins to cool in the pan for about 5 minutes before transferring them to a wire rack. This cooling period helps them set perfectly, preventing any sticking to the liners. Once cooled, serve your delectable White Chocolate Raspberry Muffins warm or at room temperature for a delightful treat any time of day!

White Chocolate Raspberry Muffins Variations

Feel free to get creative and customize these muffins to suit your tastebuds and dietary needs!

  • Berry Swap: Substitute raspberries with blueberries or cranberries for a different fruity burst. Each swap brings its unique flavor while maintaining the delightful freshness of the muffins.

  • Chocolate Variation: Use semi-sweet chocolate chips instead of white chocolate for a rich contrast. This simple change can transform the flavor profile into something irresistibly indulgent, perfect for chocolate lovers!

  • Gluten-Free Option: Replace all-purpose flour with a 1:1 gluten-free blend to cater to gluten sensitivities. This way, everyone can enjoy the fluffy goodness of these muffins without missing out.

  • Nutty Twist: Add chopped pecans or walnuts to the batter for a crunchy texture. Nuts not only enhance the muffins’ nutritional value but also add a lovely, hearty bite.

  • Zesty Kick: Incorporate lemon or orange zest into the batter to elevate the flavor with a refreshing citrus note. This brightens the muffins and complements the sweetness beautifully.

  • Vegan Friendly: Use flax eggs instead of regular eggs and substitute the milk with plant-based options like almond or coconut milk. This makes the recipe inclusive for your vegan friends!

  • Spicy Delight: Add a pinch of cinnamon or nutmeg to the dry mix for a warm, comforting flavor that’s perfect for chilly mornings. A little spice can make a world of difference!

  • Toppings Galore: Experiment with different toppings like a drizzle of white chocolate or a sprinkle of powdered sugar for a fancy finish. Fancy muffin decor adds a visual appeal perfect for brunch gatherings.

These delightful variations can make your muffin-making adventure unique and exciting! And while you’re at it, why not pair these muffins with a warm cup alongside my easy Chocolate Chip Pancakes for a delightful breakfast feast?

What to Serve with Fluffy White Chocolate Raspberry Muffins

Delight in a scrumptious breakfast spread that elevates the sweet experience of these luscious muffins.

  • Fresh Fruit Salad: A medley of seasonal fruits adds a refreshing juiciness that balances the rich flavors of the muffins. The vibrant colors on your plate will make breakfast feel extra special.

  • Greek Yogurt Parfait: Creamy yogurt layered with granola and berries provides a lovely contrast in texture. It’s a wholesome addition that enhances the muffin’s indulgent sweetness with a tangy flair.

  • Coffee or Tea: A steaming cup of coffee or tea complements the muffins beautifully, with rich or herbal notes that harmonize with the white chocolate and raspberries, making every bite a cozy affair.

  • Honey Drizzle: A light drizzle of honey over the muffins adds a touch of floral sweetness that enhances their flavor profile while providing a delightful moist texture.

  • Whipped Cream: Elevate your muffins to dessert status with a dollop of freshly whipped cream. The airy contrast is heavenly, making these muffins a treat for any time of day.

  • Chocolate Milkshake: Indulge in a chocolate milkshake, or even a vanilla one, to bring in creamy decadence, balancing the tartness of the raspberries with smooth, rich flavors that’s kid-approved!

  • Vanilla Ice Cream: For a sweet twist, serve warm muffins with a scoop of vanilla ice cream. The melting creaminess sets off the warm, gooey white chocolate, transforming them into an unforgettable dessert.

  • Sparkling Lemonade: A refreshing glass of sparkling lemonade brightens the meal, cutting through the richness of the muffins while adding a zesty kick that pairs surprisingly well!

With these delightful options, your breakfast spread will be a true feast that leaves everyone smiling!

How to Store and Freeze White Chocolate Raspberry Muffins

Room Temperature: Store muffins in an airtight container at room temperature for up to 3-4 days. This keeps them fresh and delicious for your daily breakfast or snack.

Fridge: If you need to keep them longer, refrigerate the muffins for up to a week in an airtight container, though they’ll lose some of their fluffiness.

Freezer: For longer storage, freeze the muffins individually. Wrap each muffin tightly in plastic wrap or foil, and place them in a freezer-safe bag for up to 3 months.

Reheating: Thaw frozen muffins overnight in the fridge or at room temperature. Reheat in the microwave for about 15-20 seconds, or warm them in a 350°F (175°C) oven for 10 minutes for a fresh-out-of-the-oven experience!

Expert Tips for White Chocolate Raspberry Muffins

  • Room Temperature Ingredients: Using eggs and milk at room temperature enhances fluffiness, ensuring your muffins rise perfectly.
  • No Overmixing: Be gentle! Stirring too much can lead to dense muffins—stop mixing as soon as no dry ingredients remain.
  • Fresh Raspberries: If you have large raspberries, consider breaking some in half for better flavor distribution while folding them into the batter.
  • Adjust Sweetness: Depending on your raspberries’ tartness, sprinkle a little extra sugar on them before adding to the batter for a balanced taste.
  • Cool Butter: Make sure melted butter has cooled to room temperature before adding to the batter to avoid cooking the eggs accidentally.

Make Ahead Options

These Fluffy White Chocolate Raspberry Muffins are perfect for meal prep enthusiasts looking to save time on busy mornings! You can prepare the muffin batter up to 24 hours in advance by mixing the dry and wet ingredients separately and storing them in the refrigerator. Combine them just before baking to ensure freshness. Additionally, you can measure out your raspberries and white chocolate chips and refrigerate them in a sealed container for up to 3 days. When you’re ready to bake, simply fold the components together, scoop into the muffin liners, and bake for 19-22 minutes. This way, you’ll enjoy warm, delicious muffins that are just as fluffy and delightful as if they’d been freshly made!

White Chocolate Raspberry Muffins Recipe FAQs

How do I choose the best raspberries for this recipe?
Absolutely! Look for fresh raspberries that are bright in color and plump, with no dark spots or signs of mushiness. If you can find them at a local farmer’s market, even better! If they are very tart, don’t hesitate to sprinkle a bit of granulated sugar on them before folding them into your batter—this will ensure a delightful balance of flavor in your muffins.

What’s the best way to store leftover muffins?
Very simple! Store your White Chocolate Raspberry Muffins in an airtight container at room temperature for about 3-4 days. If you prefer them to last longer, you can refrigerate them for up to a week, although they may lose a touch of their fluffiness.

Can I freeze the muffins?
Absolutely! To freeze your muffins, wrap each one tightly in plastic wrap or aluminum foil, making sure to seal them well to prevent freezer burn. Place the wrapped muffins in a freezer-safe bag and store them for up to 3 months. When you’re ready to enjoy them, simply thaw overnight in the fridge or at room temperature. Reheat in the microwave for about 15-20 seconds for that fresh-out-of-the-oven taste!

What could cause my muffins to be dense?
Ah, this happens to the best of us! The most common reason for dense muffins is overmixing the batter. When you combine wet and dry ingredients, mix gently until just combined, and stop as soon as there are no dry clumps. Using room temperature ingredients like eggs and milk can also help achieve that fluffy, airy texture.

Are these muffins safe for kids and those with allergies?
Of course! These muffins are generally safe for kids, but always check for potential allergies, especially to eggs, dairy, and gluten. For a gluten-free option, simply swap the all-purpose flour with a 1:1 gluten-free baking blend. Always consult your pediatrician or a dietitian if you have concerns about specific food allergies.

Can I use sugar alternatives in this recipe?
Certainly! You can substitute granulated sugar with natural sweeteners like honey, agave syrup, or even coconut sugar. Just keep in mind that sugar alternatives may affect the texture or moisture levels slightly, so you might need to adjust the liquid ingredients accordingly. Always taste the batter as you go to reach your perfect sweetness!

White Chocolate Raspberry Muffins

Decadent White Chocolate Raspberry Muffins for Breakfast Bliss

These White Chocolate Raspberry Muffins blend sweetness and tartness, perfect for breakfast or snacks.
Prep Time 10 minutes
Cook Time 22 minutes
Cooling Time 5 minutes
Total Time 37 minutes
Servings: 12 muffins
Course: Dessert
Cuisine: American
Calories: 200

Ingredients
  

For the Batter
  • 2 cups all-purpose flour Aerate before measuring for best results
  • 1 teaspoon salt Enhances flavor, balances sweetness
  • 2 teaspoons baking powder Helps muffins rise
  • 3/4 cup granulated sugar Add extra on raspberries if desired
  • 2 large eggs Use room temperature
  • 1/2 cup unsalted butter Melt and cool before using
  • 1 cup whole milk Use room temperature
  • 1 teaspoon vanilla extract Enriches flavor
For the Fruit & Chocolate
  • 1 cup fresh raspberries Adjust sweetness with sugar if tart
  • 1 cup white chocolate chips Provides rich creaminess
For the Topping
  • 2 tablespoons coarse sugar Optional for added crunch

Equipment

  • muffin pan
  • Mixing bowls
  • whisk
  • spatula
  • paper liners

Method
 

Step-by-Step Instructions
  1. Preheat your oven to 375°F (190°C). Gather all ingredients and equipment.
  2. In a bowl, whisk together flour, baking powder, granulated sugar, and salt.
  3. In a separate bowl, mix eggs, melted butter, vanilla extract, and milk until combined.
  4. Gently fold dry ingredients into wet mixture until just combined.
  5. Fold in raspberries and white chocolate chips, keeping berries intact.
  6. Line a muffin pan with paper liners and distribute batter evenly among 12 cups.
  7. Bake for 19 to 22 minutes or until a toothpick comes out clean.
  8. Cool muffins in the pan for 5 minutes, then transfer to a wire rack to cool.

Nutrition

Serving: 1muffinCalories: 200kcalCarbohydrates: 30gProtein: 3gFat: 9gSaturated Fat: 5gPolyunsaturated Fat: 0.5gMonounsaturated Fat: 3gCholesterol: 40mgSodium: 150mgPotassium: 100mgFiber: 1gSugar: 12gVitamin A: 300IUVitamin C: 3mgCalcium: 50mgIron: 1mg

Notes

Serve warm or at room temperature. Enjoy fresh or store appropriately.

Tried this recipe?

Let us know how it was!

Comforting Chicken Pot Pie with Biscuits for Cozy Nights

There’s a certain magic that happens when the air turns crisp, and you crave something warm and satisfying. That’s when I reach for my trusty recipe for Easy Chicken Pot Pie with Flaky Biscuits. This comforting dish combines tender, shredded chicken with vibrant veggies, all enveloped in a rich, creamy sauce, topped with golden, fluffy biscuits. Not only is it a heartfelt, budget-friendly meal perfect for feeding a family, but it also comes together quickly, making it an ideal choice for those busy weeknights. Imagine cozy dinners where you can savor every bite, leaving fast food behind for good. Ready to dive into a bowl of happiness this evening?

Why is Chicken Pot Pie a favorite?

Comforting and Hearty: This Chicken Pot Pie with Biscuits delivers a warm, cozy meal that feels like a hug in a bowl on chilly evenings.

Quick to Prepare: You can whip this dish up in no time, perfect for those bustling weeknights when cooking traditional pie crust feels overwhelming.

Flaky Biscuit Topping: The fluffy, golden biscuits add a delightful contrast to the creamy filling, transforming each bite into pure bliss.

Versatile and Adaptable: Customize with your favorite veggies or proteins; try it with turkey or fresh herbs to match your family’s preferences.

Budget-Friendly Delight: Utilizing rotisserie chicken and frozen veggies makes this dish affordable without compromising flavor.

If this sounds like the comforting meal you’ve been craving, make sure to check out my Parmesan Chicken Potatoes for another easy weeknight feast!

Chicken Pot Pie with Biscuits Ingredients

For the Filling
Cooked Shredded Chicken – Use rotisserie chicken for convenience and delicious flavor.
Cream of Chicken Soup – Acts as a creamy base for the filling; you can substitute with homemade for a fresh twist.
Frozen Vegetables – Adds nutritional value and vibrant color; fresh veggies can elevate this Chicken Pot Pie with Biscuits even more.
Minced Garlic – Enhances the overall taste; fresh garlic delivers a stronger, more aromatic flavor.
Ground Black Pepper – Adds warmth; adjust according to your taste, or omit for milder flavor.
Shredded Mild Cheddar Cheese – Provides creaminess and a savory touch; swap with your favorite melting cheese if desired.
Shredded Mozzarella Cheese – Adds delightful stretch; feel free to substitute with gouda or gruyere for variation.

For the Biscuit Topping
Canned Biscuits – Serves as the easy, fluffy topping; buttermilk biscuits yield the best results.
Melted Butter – Brushed on top for extra flavor and that golden-brown finish.

Feel the warmth and nostalgia with every bite of Chicken Pot Pie with Biscuits that takes you back to your cozy family dinners!

Step‑by‑Step Instructions for Easy Chicken Pot Pie with Flaky Biscuits

Step 1: Preheat the Oven
Begin by preheating your oven to 375°F (190°C). This temperature ensures your chicken pot pie with biscuits bakes evenly, creating a perfect golden crust. Using an oven thermometer can help confirm that the heat is just right, setting the stage for a comforting dish.

Step 2: Prepare the Baking Dish
While the oven warms up, spray a 13×9-inch baking dish with nonstick spray. This step is crucial to prevent the pie from sticking as it bakes, allowing you to serve your chicken pot pie with biscuits without any hassle. Ensure the dish is evenly coated for best results.

Step 3: Mix the Filling Ingredients
In a large mixing bowl, combine the cooked shredded chicken, cream of chicken soup, frozen vegetables, minced garlic, and shredded cheeses. Stir well until all ingredients are fully mixed and coated in the creamy sauce. You should have a colorful, thick filling ready to fill your prepared baking dish.

Step 4: Prepare the Biscuits
Open the canned biscuits and cut each one into quarters. Place the biscuit pieces in a separate bowl, drizzle with melted butter, and toss gently to coat. This will add flavor and help achieve a delightful golden finish on top of your chicken pot pie with biscuits.

Step 5: Pre-bake Biscuits (Optional)
If you’d like to ensure a crispier biscuit topping, spread the quartered biscuits evenly on a lightly greased baking sheet and bake for 5-7 minutes. This pre-baking step can help prevent sogginess in your final dish, leading to a better texture when mixed with the filling.

Step 6: Assemble and Bake
Pour the prepared chicken mixture into your sprayed baking dish, spreading it out evenly. Next, arrange the tossed biscuit pieces on top of the filling. Bake the dish uncovered for 20-25 minutes, until the biscuits turn golden brown and the filling starts bubbling, creating a comforting aroma throughout your kitchen.

Step 7: Cool and Serve
Once baked, remove the dish from the oven and allow your easy chicken pot pie with flaky biscuits to cool for a few minutes. This cooling period helps the filling to set slightly, making it easier to serve. Slice generously and enjoy this heartwarming meal with your family!

Expert Tips for Chicken Pot Pie with Biscuits

Avoid Soggy Biscuits: Pre-bake the biscuit pieces to get a nice crunch and prevent them from turning soggy after baking with the filling.

Customize Wisely: Feel free to swap vegetables, but keep a balance of colors and textures for an appealing dish that everyone loves.

Shredded Chicken Shortcut: Use pre-cooked rotisserie chicken for convenience and maximum flavor; it saves time without sacrificing quality.

Watch Baking Time: Keep an eye on the baking time to avoid overcooking the biscuits. If they start to brown too quickly, cover loosely with foil.

Keep It Simple: For quick cleanup, line your baking dish with parchment paper. This makes serving your Chicken Pot Pie with Biscuits a breeze!

Chicken Pot Pie with Biscuits Variations

Feel free to let your creativity shine while preparing this delightful dish, as there are so many delicious ways to put your unique spin on it!

  • Turkey Swap: Replace chicken with shredded turkey for a festive twist, especially perfect after Thanksgiving!
  • Fresh Veggies: Use fresh vegetables like carrots, peas, or green beans to brighten the filling and enhance flavor.
  • Herb Infusion: Incorporate fresh herbs like thyme or rosemary to elevate the taste with aromatic notes that warm your heart.
  • Spicy Kick: Add a dash of cayenne pepper or diced jalapeños for a flavorful heat that makes each bite exciting.
  • Creamy Upgrade: Substitute the cream of chicken soup with a homemade version for a fresher, richer base.
  • Cheese Variations: Experiment with cheeses like gouda or gruyere for a different flavor profile that takes comfort food to new heights.
  • Crescent Roll Twist: Try using crescent roll dough instead of biscuits for a unique texture and an easy, flaky topping.
  • Gluten-Free Option: Use gluten-free biscuits to cater to dietary needs without losing the scrumptiousness of this dish.

And if you’re ever in the mood for another delightful dish that warms your soul, give a try to my scrumptious Tuscan Chicken Soup or my comforting BBQ Chicken Grilled Cheese Sandwich. Enjoy the culinary journey!

Make Ahead Options

These Chicken Pot Pie with Biscuits make-ahead tips will save you precious time on busy weeknights! You can prepare the filling (shredded chicken, cream of chicken soup, frozen vegetables, garlic, and cheeses) up to 24 hours in advance; simply refrigerate it in an airtight container. For the biscuits, cut and toss them in melted butter within the same timeframe for optimal freshness. When you’re ready to bake, spread the filling in your prepared dish, top with the biscuit pieces, and bake as directed. This way, you’ll have a hearty, comforting meal that’s just as delicious with minimal effort—perfect for those who want homemade goodness without the fuss!

Storage Tips for Chicken Pot Pie with Biscuits

Fridge: Store leftovers in an airtight container for up to 3 days. This way, you can enjoy the comforting flavors of Chicken Pot Pie with Biscuits again without losing quality.

Freezer: Assemble the dish but do not bake it. Wrap tightly in plastic wrap or aluminum foil, and it will stay fresh for up to 3 months.

Reheating: To reheat, simply bake your previously frozen Chicken Pot Pie with Biscuits in a preheated oven at 350°F (175°C) for 30-40 minutes or until heated through.

Thawing: If frozen, allow the dish to thaw in the refrigerator overnight for best results before baking. This ensures even reheating and a delightful texture.

What to Serve with Chicken Pot Pie with Biscuits

There’s nothing like a comforting Chicken Pot Pie to warm your soul; let’s create the perfect meal experience to accompany it.

  • Mixed Green Salad: A light, refreshing salad balances the richness of the pot pie, adding crunch and freshness. Toss in some cherry tomatoes and a tangy vinaigrette for a pop of flavor that’s uplifting.

  • Garlic Breadsticks: Warm, buttery breadsticks infused with garlic are ideal for sopping up any creamy goodness left on your plate. Their crunchy exterior and soft center complement the hearty dish beautifully.

  • Roasted Seasonal Vegetables: Sweet and savory roasted veggies bring a colorful, nutrition-packed element to your meal. The caramelized edges enhance the meal’s comfort factor while providing a lovely contrast in texture.

  • Coleslaw: A creamy coleslaw brings a delightful crunch and a hint of acidity that works wonders to cut through the richness of the Chicken Pot Pie with Biscuits.

  • Herbed Rice Pilaf: Fluffy rice studded with herbs creates a lovely base for any excess filling, soaking up flavors while staying light and airy.

  • Sweet Cornbread: A slice of sweet cornbread rounds out the meal, offering a touch of sweetness that complements the savory pie. Each bite is a warm embrace, making dinner feel even more comforting.

  • Apple Crisp: For dessert, serve warm apple crisp drizzled with caramel sauce; its sweet, spiced flavors tie the whole meal together and leave everyone with sweet memories.

Chicken Pot Pie with Biscuits Recipe FAQs

What type of chicken should I use for Chicken Pot Pie with Biscuits?
I recommend using cooked shredded chicken, and for convenience, rotisserie chicken works perfectly! It adds great flavor and saves you time. You can also use leftover turkey if you have it on hand.

How should I store leftovers for Chicken Pot Pie with Biscuits?
Store any leftovers in an airtight container in the refrigerator for up to 3 days. This way, you can savor those comforting flavors again! Just reheat in the microwave or oven until warmed through for best results.

Can I freeze Chicken Pot Pie with Biscuits?
Yes, absolutely! To freeze, assemble the dish but do not bake it. Wrap it tightly in plastic wrap or aluminum foil and freeze for up to 3 months. When you’re ready to enjoy, thaw it in the fridge overnight, then bake as instructed.

What if my biscuits turn out soggy?
If your biscuits turn out soggy, it’s often due to overcrowding or not pre-baking them. To avoid this, make sure the biscuit pieces are well-spread when placed on top, and consider pre-baking them for 5-7 minutes before assembly to ensure a delightful crunch!

Are there any dietary considerations for Chicken Pot Pie with Biscuits?
Yes, if you or your family have specific dietary needs, feel free to adapt! You can use low-fat cream of chicken soup and reduced-fat cheese for lighter options. Additionally, you can replace the chicken with tofu or legumes for a vegetarian version.

How do I know when Chicken Pot Pie with Biscuits is done?
You’ll know it’s ready when the biscuits are golden brown and the filling is bubbling around the edges. This typically takes about 20-25 minutes at 375°F (190°C). Keep an eye on it to ensure those biscuits are the perfect shade of golden!

Chicken Pot Pie with Biscuits

Comforting Chicken Pot Pie with Biscuits for Cozy Nights

This Chicken Pot Pie with Biscuits is a warm and hearty dish featuring tender chicken and vibrant veggies, perfect for quick, cozy dinners.
Prep Time 15 minutes
Cook Time 25 minutes
Cooling Time 5 minutes
Total Time 45 minutes
Servings: 6 servings
Course: Dinner
Cuisine: American
Calories: 370

Ingredients
  

Filling
  • 2 cups Cooked Shredded Chicken Use rotisserie chicken for convenience and flavor.
  • 10.5 ounces Cream of Chicken Soup Acts as a creamy base for the filling.
  • 2 cups Frozen Vegetables Adds nutritional value and vibrancy.
  • 2 cloves Minced Garlic Enhances the flavor; fresh is recommended.
  • 1 teaspoon Ground Black Pepper Adjust according to taste.
  • 1 cup Shredded Mild Cheddar Cheese Provides creaminess; can swap cheese.
  • 1 cup Shredded Mozzarella Cheese Adds stretch; alternatives include gouda or gruyere.
Biscuit Topping
  • 1 can Canned Biscuits Buttermilk biscuits yield the best results.
  • 2 tablespoons Melted Butter Brushed on top for extra flavor.

Equipment

  • Oven
  • baking dish
  • Mixing Bowl
  • Baking Sheet

Method
 

Preparation Steps
  1. Preheat your oven to 375°F (190°C).
  2. Spray a 13x9-inch baking dish with nonstick spray.
  3. In a large mixing bowl, combine cooked shredded chicken, cream of chicken soup, frozen vegetables, minced garlic, and shredded cheeses. Stir well until fully mixed.
  4. Open the canned biscuits and cut each one into quarters, drizzle with melted butter, and toss to coat.
  5. Optionally, pre-bake the quartered biscuits on a greased baking sheet for 5-7 minutes.
  6. Pour the chicken mixture into the baking dish and arrange the biscuit pieces on top. Bake uncovered for 20-25 minutes.
  7. Allow to cool for a few minutes before serving.

Nutrition

Serving: 1servingCalories: 370kcalCarbohydrates: 28gProtein: 19gFat: 22gSaturated Fat: 10gPolyunsaturated Fat: 1gMonounsaturated Fat: 9gCholesterol: 61mgSodium: 800mgPotassium: 421mgFiber: 2gSugar: 3gVitamin A: 650IUVitamin C: 6mgCalcium: 250mgIron: 2mg

Notes

Feel free to customize by swapping ingredients to match your family's taste, ensuring a balance of colors and textures.

Tried this recipe?

Let us know how it was!

Delightful Lemon Quinoa & Chickpea Salad for Quick Meals

The first taste of spring can often be found in a simple, vibrant bowl of Lemon Quinoa & Chickpea Salad. As the days grow warmer, I crave dishes that are not just quick and easy but also packed with nutrition. This salad effortlessly combines protein-rich quinoa and hearty chickpeas with the zesty brightness of fresh lemon juice. It’s a delightful dish that’s perfect for busy weeknights or leisurely weekend lunches, making it ideal for both meal prep and satisfying cravings. Plus, it’s naturally vegan and gluten-free, so it fits effortlessly into a variety of dietary needs. Curious about how you can mix it up and customize this salad to suit your taste buds? Let’s get chopping!

Why is This Salad So Special?

Bright, Zesty Flavor: The fresh lemon juice elevates this salad, providing a refreshing kick that brings all the ingredients together in harmony.
Nutrient-Packed: With protein from quinoa and chickpeas, this dish keeps you full and satisfied.
Versatile Base: Use it as a fantastic side or main dish; it’s perfect any time! You can even customize it with ingredients like avocado or olives for added flair.
Quick Prep: In just 30 minutes, you can have a vibrant meal ready, ideal for busy nights or last-minute potlucks.
Meal Prep Friendly: Store it for up to three days in the fridge, and enjoy intensified flavors, making it perfect for meal prep. Try pairing it with a refreshing Lemon Blueberry Summery dessert for a complete meal.

Lemon Quinoa & Chickpea Salad Ingredients

For the Salad

  • Quinoa – A fantastic source of plant-based protein, use tri-color quinoa for a vibrant look.
  • Chickpeas – Provides heartiness and protein; canned chickpeas save time—just rinse them before adding.
  • Carrots – Adds a hint of sweetness and crunch; finely diced allows for even distribution in your salad.
  • Cucumber – Freshness and hydration in every bite; opt for English cucumber to reduce seeds.
  • Yellow Bell Pepper – Brings sweetness and color; try swapping with red or orange for a different flavor twist.
  • Scallions – Imparts mild onion flavor and crunch; red onion can be used as a flavorful substitute.
  • Parsley – Freshens up the dish with a herbal note; this can be substituted with cilantro or left out entirely.

For the Dressing

  • Lemon Juice – Brightens the salad with zesty acidity; freshly squeezed lemon juice ensures the best flavor.
  • Garlic Powder – Enhances flavor depth effectively; fresh garlic can be used for a stronger aroma but will change the texture.
  • Red Pepper Flakes – Adds a touch of heat; adjust according to your spice preference.
  • Mineral Salt & Pepper – Essential to balance flavors; season to taste for the perfect finish.

Step‑by‑Step Instructions for Lemon Quinoa & Chickpea Salad

Step 1: Rinse and Prepare Quinoa
Start by placing 1 cup of quinoa in a fine mesh sieve. Rinse it thoroughly under cool running water for about 1-2 minutes to remove the saponins, which can give it a bitter taste. This step ensures your Lemon Quinoa & Chickpea Salad has a pleasant flavor. Set the rinsed quinoa aside to drain while you prepare to cook it.

Step 2: Cook Quinoa
In a large pot, combine the rinsed quinoa with 2 cups of water and 1 teaspoon of garlic powder. Bring the mixture to a boil over medium-high heat. Once boiling, cover the pot, reduce the heat to low, and let it simmer for 15 minutes. After 15 minutes, remove the pot from heat and let it sit, covered, for an additional 10-15 minutes until the water is absorbed and the quinoa is fluffy.

Step 3: Chop Vegetables
While your quinoa is cooking, prepare the fresh vegetables. Dice 1 medium carrot, 1 cucumber (preferably an English cucumber), and 1 yellow bell pepper into small pieces for even distribution. Slice 2-3 scallions, and chop a handful of fresh parsley. These vibrant toppings will bring your Lemon Quinoa & Chickpea Salad to life with their color and crunch.

Step 4: Combine Ingredients
In a large mixing bowl, add the cooked and fluffed quinoa, drained chickpeas, and all the chopped vegetables from the previous step. Pour in the juice of 1-2 fresh lemons, and season with salt, pepper, and red pepper flakes to taste. Mix everything together gently yet thoroughly, ensuring that the flavors meld beautifully in your salad.

Step 5: Serve and Enjoy
Your Lemon Quinoa & Chickpea Salad can be enjoyed right away while warm, or let it cool to room temperature for a refreshing side dish. It also tastes great after chilling in the refrigerator for a while, allowing the flavors to deepen. Drizzle with extra lemon juice or add slices of avocado just before serving for a delightful finishing touch.

Make Ahead Options

These Lemon Quinoa & Chickpea Salad are perfect for meal prep enthusiasts! You can cook the quinoa and chop the vegetables up to 3 days in advance, storing them separately in airtight containers in the refrigerator to maintain freshness. When you’re ready to serve, simply combine the cooked quinoa, chickpeas, and prepped veggies, then drizzle with freshly squeezed lemon juice and your desired seasonings. This not only saves you time on busy weeknights but also allows the flavors to meld beautifully, making your salad even more delicious! Remember to refrigerate the salad after mixing it, and enjoy it for a quick, satisfying meal.

Expert Tips for Lemon Quinoa & Chickpea Salad

  • Rinse Thoroughly: To eliminate bitter saponins, always rinse quinoa under cool running water before cooking—this ensures a pleasant taste in your salad.
  • Customize Ingredients: Feel free to swap veggies or add ingredients like avocado and feta; this adds layers to your Lemon Quinoa & Chickpea Salad.
  • Flavor Intensity: For even richer flavor, consider seasoning your quinoa while it’s cooking; try adding vegetable broth instead of plain water.
  • Storage Know-How: Keep any leftovers in an airtight container in the fridge for up to three days; flavors intensify with marination!
  • Perfect Texture: Avoid overcooking the quinoa—fluff it gently with a fork to maintain a light, airy texture in your salad.

Storage Tips for Lemon Quinoa & Chickpea Salad

Fridge: Store any leftovers in an airtight container for up to 3 days; the flavors will deepen over time, making it ideal for meal prep.

Freezer: While best enjoyed fresh, you can freeze the salad for up to 2 months. Just make sure to leave out fresh vegetables like cucumbers to maintain texture.

Reheating: If you prefer your salad warm, gently heat it in a skillet over low heat, adding a splash of lemon juice to refresh its zesty flavor.

Assembly Note: For optimal enjoyment, it’s best to store the dressing separately if you’re packing it for later; combine everything just before serving for a crisp, vibrant dish.

What to Serve with Easy Vegan Lemon Quinoa & Chickpea Salad

Ready to transform your Lemon Quinoa & Chickpea Salad into a deliciously complete meal? Let’s explore some delightful pairings that will round out your dining experience.

  • Creamy Avocado Toast: Smooth, rich avocado complements the salad’s crunch, elevating your meal with a touch of decadence.
  • Garlic Roasted Vegetables: The earthy flavors of roasted carrots, zucchini, and bell peppers provide a savory contrast that balances the fresh notes of your salad.

For an unforgettable dinner, serve the salad alongside a plate of roasted veggies, harmonizing the warmth of the meal with the brightness of your salad.

  • Crispy Sweet Potato Fries: The sweetness and crunch of homemade sweet potato fries create a delightful contrast to the zesty flavors of the salad, enhancing each bite.
  • Zesty Lemonade: A glass of refreshing lemonade echoes the lemony notes in the salad, providing a revitalizing sip that’s perfect for a sunny day.
  • Grilled Tofu Skewers: Marinated and grilled tofu skewers add protein and a smoky flavor, perfect for pairing with the nutty quinoa and chickpeas.

Pairing your Lemon Quinoa & Chickpea Salad with these options brings an engaging variety of textures and tastes, creating a colorful, nourishing feast!

Lemon Quinoa & Chickpea Salad Variations

Feel inspired to make this delightful salad your own! Here are some fun and flavorful ideas you can try.

  • Creamy Avocado: Add diced avocado for a rich, creamy texture that balances the zesty lemon.
  • Roasted Vegetables: Toss in some roasted zucchini or bell peppers for a warm, caramelized flavor boost.
  • Feta Cheese: Crumble in some feta for a tangy twist that complements the salad perfectly.
  • Spicy Upgrade: Increase the heat by adding diced jalapeños or a dash of sriracha to elevate the flavor.
  • Citrus Burst: Mix in segments of orange or grapefruit for a fresh, juicy explosion of flavor.
  • Herb Swap: Replace parsley with fresh mint or basil for a fragrant and refreshing twist.
  • Bean Alternatives: Swap chickpeas for black beans or lentils to change up the protein source for variety.
  • Nuts for Crunch: Add a handful of toasted pine nuts or slivered almonds to create a delightful crunch.

Each variation opens up a world of possibilities! You might even want to pair this salad with a light dish like a Blt Chicken Salad for a fantastic meal. Feel free to experiment and find your perfect combination!

Lemon Quinoa & Chickpea Salad Recipe FAQs

What type of quinoa is best for this salad?
Absolutely! I recommend using tri-color quinoa for its vibrant appearance and nutty flavor. However, you can use any variety such as white, red, or black quinoa—each brings its unique texture and richness to your Lemon Quinoa & Chickpea Salad.

How should I store leftovers of the Lemon Quinoa & Chickpea Salad?
You can store any leftovers in an airtight container in the refrigerator for up to 3 days. Just remember that the flavors will deepen as it marinates, making it perfect for meal prep. Enjoy it right out of the fridge, at room temperature, or reheat it lightly on the stove with a splash of lemon juice.

Can I freeze the Lemon Quinoa & Chickpea Salad?
Yes, you can freeze it for up to 2 months! To do this, prepare the salad without fresh vegetables like cucumbers and scallions as they do not freeze well. Place the salad in a freezer-safe container, leaving a bit of space for expansion. When ready to enjoy, thaw in the fridge overnight, and add fresh components just before serving.

What if my quinoa turns out mushy?
If your quinoa ends up mushy, it might be due to overcooking or using too much water. For the perfect texture, ensure you use the right ratio of water to quinoa—2 cups of water for every 1 cup of quinoa. After cooking, let it sit covered for an additional 10-15 minutes, then fluff it with a fork to separate the grains.

Is this salad suitable for people with dietary restrictions?
Very! This Lemon Quinoa & Chickpea Salad is naturally vegan and gluten-free, making it a fantastic choice for various dietary needs. Just be cautious with seasonings if you have allergies; you can always adjust and taste as you go to ensure it suits your preferences.

How can I customize this recipe?
Fantastic question! You can customize your Lemon Quinoa & Chickpea Salad in numerous ways. Try adding diced avocado for creaminess or roasted vegetables for a different texture. You can also swap chickpeas for black beans or lentils for varied protein sources. Plus, feel free to experiment with different herbs or citrus to keep this dish exciting!

Lemon Quinoa & Chickpea Salad

Delightful Lemon Quinoa & Chickpea Salad for Quick Meals

Enjoy a nutritious and vibrant Lemon Quinoa & Chickpea Salad that’s perfect for quick meals and customizable to your taste.
Prep Time 30 minutes
Cook Time 15 minutes
Cooling Time 15 minutes
Total Time 1 hour
Servings: 4 servings
Course: Salad
Cuisine: Gluten-Free, Vegan
Calories: 250

Ingredients
  

For the Salad
  • 1 cup quinoa tri-color for vibrancy
  • 1 can chickpeas rinsed
  • 1 medium carrot finely diced
  • 1 medium cucumber English preferred
  • 1 medium yellow bell pepper can swap with red or orange
  • 2-3 stalks scallions sliced
  • 1 cup parsley fresh, can substitute with cilantro
For the Dressing
  • 2 tablespoons lemon juice freshly squeezed
  • 1 teaspoon garlic powder or fresh garlic
  • 1/2 teaspoon red pepper flakes to taste
  • 1 teaspoon mineral salt or to taste
  • to taste pepper

Equipment

  • fine mesh sieve
  • Large pot
  • Mixing Bowl
  • Knife
  • Cutting board

Method
 

Step-By-Step Instructions
  1. Rinse quinoa thoroughly under cool running water for 1-2 minutes.
  2. In a pot, cook quinoa with water and garlic powder for 15 minutes.
  3. Chop vegetables: carrot, cucumber, bell pepper, scallions, and parsley.
  4. In a bowl, mix cooked quinoa, chickpeas, and chopped vegetables with lemon juice, salt, pepper, and red pepper flakes.
  5. Serve immediately or let cool to enjoy later.

Nutrition

Serving: 1cupCalories: 250kcalCarbohydrates: 40gProtein: 8gFat: 6gSaturated Fat: 1gPolyunsaturated Fat: 2gMonounsaturated Fat: 2gSodium: 300mgPotassium: 300mgFiber: 8gSugar: 4gVitamin A: 200IUVitamin C: 20mgCalcium: 40mgIron: 2mg

Notes

Store in an airtight container in the fridge for up to 3 days. Drizzle with extra lemon juice or add avocado before serving for extra flavor.

Tried this recipe?

Let us know how it was!

Red Wine Braised Beef Short Ribs: A Luxurious Comfort Feast

As the sun dips below the horizon, I can’t help but smile at the comforting aroma wafting through my kitchen—red wine braised beef short ribs are simmering away. This dish captures the essence of cozy gatherings and indulgent evenings, where each bite offers a melt-in-your-mouth experience wrapped in a rich, savory sauce. Not only is it an impressive centerpiece for family dinners or casual get-togethers, but it also allows you to savor the simple yet luxurious flavors of French cuisine without spending hours in the kitchen. Plus, the beauty of this recipe lies in its forgiving nature: you can prepare it ahead of time and let it build flavor overnight. Are you ready to dive into this hearty delight?

Why Are These Short Ribs So Irresistible?

Melt-in-Your-Mouth: The beef short ribs become outrageously tender after simmering in a luscious red wine sauce, offering a decadent experience with every forkful.

Rich, Savory Sauce: The blend of red wine, garlic, and herbs creates an unforgettable sauce that clings beautifully to the ribs—perfect for pairing with creamy mashed potatoes or a crusty loaf for soaking up those delightful flavors.

Impress Your Guests: Elevate your dinner parties or family gatherings effortlessly with this crowd-pleaser that tastes gourmet yet is simple to prepare.

Make-Ahead Magic: The flavors only improve when made a day in advance, making it a convenient option for stress-free entertaining—just reheat and serve!

Versatility: With the option to swap beef for pork or add your favorite vegetables, this recipe adapts smoothly to your culinary whims, providing endless possibilities!

Get ready to indulge in a dish that warms the soul and delights the palate!

Red Wine Braised Beef Short Ribs Ingredients

For the Ribs

  • Beef Short Ribs – Select well-marbled cuts for maximum tenderness; the heart of this luxurious dish.
  • Salt and Black Pepper – Essential seasoning to enhance the flavors; adjust to your preference.
  • Olive Oil – Ideal for searing the ribs; it contributes depth and richness.

For the Aromatics

  • Onion (1 large) – An aromatic base that elevates the dish’s savory profile; shallots are a great substitute.
  • Carrots (2) – Introduces natural sweetness and color; parsnips can be used for a different twist.
  • Celery (2 stalks) – Adds freshness and complements the mirepoix; fennel is a unique alternative.
  • Garlic (4 cloves, minced) – Infuses the dish with its beloved aroma; feel free to add more for a punchier taste.

For the Sauce

  • Tomato Paste (2 tbsp) – Boosts umami for a rich sauce.
  • Red Wine (2 cups) – A core component for braising that infuses unforgettable flavor; opt for a dry red like Cabernet Sauvignon or Merlot for best results.
  • Beef Broth (2 cups) – Enriches the braising liquid; low-sodium or homemade is preferable.
  • Fresh Thyme (2 sprigs) – Adds lovely herbal notes; dried thyme is a convenient substitute.
  • Fresh Rosemary (2 sprigs) – Imparts a fragrant layer; use sparingly as it can be potent.
  • Bay Leaves (2) – Deepens the flavor during the braising process.
  • Worcestershire Sauce (1 tbsp) – An umami enhancer; optional if you prefer a cleaner flavor.
  • Balsamic Vinegar (1 tbsp) – Balances richness with a touch of acidity.

For Garnish

  • Fresh Parsley – A lovely finishing touch that boosts visual appeal and adds freshness; optional but highly recommended for presentation.

With these ingredients, you’re well on your way to creating delicious Red Wine Braised Beef Short Ribs that will warm hearts and fill tummies!

Step‑by‑Step Instructions for Red Wine Braised Beef Short Ribs

Step 1: Preheat the Oven
Start by preheating your oven to 325°F (165°C). This ensures the perfect environment for braising your beef short ribs to tender perfection. While the oven heats up, gather all your ingredients to streamline the cooking process and create a warm, inviting atmosphere in your kitchen.

Step 2: Season and Sear Ribs
Generously season the beef short ribs with salt and black pepper, allowing the flavors to penetrate the meat. In a large Dutch oven, heat 2 tablespoons of olive oil over medium-high heat. Sear the ribs for about 8-10 minutes, browning them on all sides. Once beautifully caramelized, remove them from the pot and set aside.

Step 3: Sauté Vegetables
In the same pot, add 1 large chopped onion, 2 sliced carrots, and 2 chopped celery stalks. Sauté these aromatics for around 5-7 minutes, until they soften and release their fragrant essence. Stir in 4 minced garlic cloves and 2 tablespoons of tomato paste, cooking for an additional 2 minutes to deepen the flavors in your Red Wine Braised Beef Short Ribs.

Step 4: Deglaze with Wine
Pour in 2 cups of dry red wine, scraping the bottom of the pot with a wooden spoon to release the delicious browned bits. Bring the mixture to a simmer and allow it to reduce for about 5 minutes. The wine will concentrate the flavors, setting the stage for the luxurious braising liquid that will envelop your beef.

Step 5: Add Broth and Herbs
Next, incorporate 2 cups of beef broth, along with 2 sprigs of fresh thyme, 2 sprigs of fresh rosemary, and 2 bay leaves into the pot. Add 1 tablespoon of Worcestershire sauce and 1 tablespoon of balsamic vinegar for additional depth. Carefully return the ribs to the pot, ensuring they are submerged in the rich, flavorful liquid, ready for the braise.

Step 6: Braise Ribs
Cover the Dutch oven with a lid and transfer it to the preheated oven. Braise the ribs for 2.5 to 3 hours, or until the meat becomes fork-tender and the aromas fill your kitchen with warmth. The long, slow cooking process allows the flavors to meld beautifully, creating a comforting dish that truly embodies the essence of home-cooked goodness.

Step 7: Serve and Garnish
Once the ribs are perfectly tender, remove the pot from the oven and let them rest for a few minutes. Skim any excess fat from the surface of the sauce, then serve the braised short ribs garnished with fresh parsley. This final touch elevates the dish, making your Red Wine Braised Beef Short Ribs not only delicious but also visually stunning.

Red Wine Braised Beef Short Ribs Variations

Unleash your creativity in the kitchen and personalize these mouthwatering short ribs to suit your taste!

  • Pork Short Ribs: Swap beef for pork short ribs for a slightly sweeter and equally tender alternative. It’s a delightful twist that brings a new flavor experience to the table.

  • Herb Medley: Experiment with different herbs such as oregano or marjoram for a unique spin. Their aromatic qualities can transform this classic dish into a new favorite.

  • Earthy Mushrooms: Consider adding mushrooms during the sauté step for a rich, earthy note. Their umami flavor complements the beef beautifully, creating a heartier dish.

  • Sweet Root Veggies: Toss in parsnips instead of carrots for a subtle sweetness that balances the savory elements perfectly. A simple change that elevates the depth of flavor.

  • Spicy Kick: Want some heat? Add a pinch of red pepper flakes or diced jalapeño while simmering to infuse a warm, spicy note that will awaken your taste buds.

  • Wine Variations: Feel free to try different varieties of dry red wine, like Pinot Noir for a lighter touch, or Malbec for an intense flavor profile. Each will create its own distinct braising experience.

  • Balsamic Replacement: Swap the balsamic vinegar for apple cider vinegar to introduce a zingy brightness that cuts through the richness of the dish.

  • Vegetarian Version: For a plant-based twist, substitute beef: use hearty vegetables like jackfruit or mushrooms along with vegetable broth and wine for a satisfying alternative that still delivers on flavor.

These variations are sure to keep mealtime exciting and allow you to tailor this luxurious dish to your unique palate! Don’t forget to explore other delicious recipes such as Sticky Beef Noodles or Chilli Beef Experience for more comforting delights!

How to Store and Freeze Red Wine Braised Beef Short Ribs

  • Fridge: Store leftover Red Wine Braised Beef Short Ribs in an airtight container for up to 3 days. This keeps the flavors intact and ready to be enjoyed again.

  • Freezer: If you want to save them for longer, freeze the ribs in an airtight container for up to 3 months. Thaw in the refrigerator before reheating.

  • Reheating: To reheat, warm on the stovetop over low heat until heated through, or microwave in short intervals, adding a splash of broth to maintain moisture.

  • Serving: Allow the ribs to rest for a few minutes after reheating to retain their juices; serve with your favorite sides for a comforting meal.

Expert Tips for Red Wine Braised Beef Short Ribs

  • Choose Quality Wine: Using a high-quality dry red wine like Cabernet Sauvignon enhances the flavors significantly—don’t skimp here!

  • Thicken the Sauce: If you prefer a thicker sauce, remove the ribs after braising and simmer the sauce on the stovetop until it reaches your desired consistency.

  • Make Ahead: Preparing the dish a day in advance improves the taste as the flavors develop overnight—just reheat before serving and enjoy!

  • Perfect Searing: Ensure the ribs are well-seared before braising to achieve rich color and deepen the overall flavor of your Red Wine Braised Beef Short Ribs.

  • Don’t Skip the Resting: After braising, let the meat rest for a few minutes before serving. This helps retain juices, ensuring each bite is succulent and delicious.

What to Serve with Red Wine Braised Beef Short Ribs

Create a cozy dining experience alongside your delicious braised masterpiece with these delightful pairings.

  • Creamy Mashed Potatoes: The buttery texture of mashed potatoes soaks up the rich sauce beautifully, creating a comforting harmony of flavors. They offer a smooth and luscious contrast to the tender beef.

  • Herb-Infused Polenta: This creamy, cornmeal dish is a great foundation for the meat and its sauce, adding a touch of rustic charm and delightful creaminess to the plate.

  • Garlicky Green Beans: Crisp-tender green beans sprinkled with minced garlic add a fresh crunch, balancing the richness and enhancing the overall meal’s vibrancy.

  • Roasted Root Vegetables: Caramelized carrots, parsnips, and sweet potatoes bring sweetness and earthiness to complement the hearty ribs. Their natural sugars meld beautifully with the savory notes of the beef.

  • Crusty Baguette: Perfect for mopping up that luxurious sauce, a warm, crusty baguette is an effortless choice that invites diners to linger and savor each bite.

  • Red Wine: Continue the indulgence with a glass of the same dry red wine you used for braising. It enhances the meal’s flavors and enriches the dining experience.

  • Chocolate Fondant: End the meal on a sweet note with this luxurious dessert. The rich chocolate texture and flavors provide a heavenly contrast to the savory beef, ensuring a truly decadent dining experience.

Make Ahead Options

Red Wine Braised Beef Short Ribs are an excellent choice for meal prep, allowing you to enjoy the rich flavors without the last-minute rush. You can sear and prepare the ribs up to 24 hours in advance; simply store them in the refrigerator after browning. The aromatic vegetables and braising liquid can also be prepped in advance and refrigerated for up to 3 days. To maintain that delicious quality, be sure to let everything cool before sealing it in airtight containers. When you’re ready to serve, combine all the ingredients in your Dutch oven and braise as directed, allowing the flavors to meld as you finish cooking. You’ll have a gourmet meal ready with minimal effort—perfect for busy weeknights!

Red Wine Braised Beef Short Ribs Recipe FAQs

How do I select the best beef short ribs?
Absolutely! When choosing beef short ribs, look for cuts that are well-marbled with fat, as this will enhance the flavor and tenderness of the meat. Opt for those that have a nice pinkish-red color without any dark spots, as this indicates freshness. If possible, ask your butcher for advice to find the perfect ribs for your recipe.

How should I store leftover Red Wine Braised Beef Short Ribs?
Very! To store your leftovers, let them cool completely before placing them in an airtight container. In the refrigerator, they will stay fresh for up to 3 days. For longer storage, consider freezing them; just put them in a freezer-safe container, and they can last for up to 3 months without losing flavor or texture.

Can I freeze Red Wine Braised Beef Short Ribs?
Yes, you can! To freeze, first let the short ribs cool completely. Then, pack them in airtight containers or heavy-duty freezer bags, ensuring to remove as much air as possible to prevent freezer burn. When you’re ready to enjoy them, thaw them in the refrigerator overnight before reheating.

What should I do if the sauce is too thin?
If you find that the sauce is thinner than desired, don’t worry! After braising, remove the ribs from the pot. Place the pot back on the stove over medium heat, allowing the sauce to simmer. Stir occasionally and let it reduce for about 10-15 minutes until it thickens to your liking. This technique enhances the sauce’s flavor and creates a velvety texture.

Are Red Wine Braised Beef Short Ribs suitable for certain dietary restrictions?
Certainly! If you’re cooking for someone with dietary concerns, try substituting beef with pork short ribs for a different flavor profile. For gluten-free needs, ensure that your Worcestershire sauce is gluten-free. Always check labels for any allergens, especially if serving to guests. This dish is best enjoyed with loved ones, so feel free to customize for everyone’s preferences!

Red Wine Braised Beef Short Ribs

Red Wine Braised Beef Short Ribs: A Luxurious Comfort Feast

Red Wine Braised Beef Short Ribs are an impressive centerpiece for gatherings, offering melt-in-your-mouth tenderness and a rich, savory sauce.
Prep Time 30 minutes
Cook Time 2 hours 30 minutes
Resting Time 10 minutes
Total Time 3 hours 10 minutes
Servings: 6 ribs
Course: Dinner
Cuisine: French
Calories: 480

Ingredients
  

For the Ribs
  • 3 lbs Beef Short Ribs Select well-marbled cuts for maximum tenderness
  • 1 tbsp Salt Adjust to your preference
  • 1 tbsp Black Pepper Adjust to your preference
  • 2 tbsp Olive Oil Ideal for searing the ribs
For the Aromatics
  • 1 large Onion Shallots are a great substitute
  • 2 Carrots Parsnips can be used for a different twist
  • 2 Celery stalks Fennel is a unique alternative
  • 4 cloves Garlic Feel free to add more for taste
For the Sauce
  • 2 tbsp Tomato Paste Boosts umami for a rich sauce
  • 2 cups Red Wine Opt for a dry red like Cabernet Sauvignon or Merlot
  • 2 cups Beef Broth Low-sodium or homemade is preferable
  • 2 sprigs Fresh Thyme Dried thyme is a convenient substitute
  • 2 sprigs Fresh Rosemary Use sparingly as it can be potent
  • 2 Bay Leaves Deepens flavor during the braising process
  • 1 tbsp Worcestershire Sauce Optional for a cleaner flavor
  • 1 tbsp Balsamic Vinegar Balances richness with acidity
For Garnish
  • 1 Fresh Parsley Optional but highly recommended for presentation

Equipment

  • Dutch oven

Method
 

Step‑By‑Step Instructions
  1. Preheat your oven to 325°F (165°C) while gathering all your ingredients.
  2. Season the beef short ribs with salt and black pepper. Sear in olive oil over medium-high heat for 8-10 minutes.
  3. Sauté chopped onion, sliced carrots, and chopped celery in the same pot for 5-7 minutes, then add minced garlic and tomato paste for another 2 minutes.
  4. Deglaze with red wine, scraping the pot's bottom and simmering for 5 minutes.
  5. Add beef broth, thyme, rosemary, bay leaves, Worcestershire sauce, and balsamic vinegar. Return the ribs to the pot and ensure they are submerged.
  6. Cover the Dutch oven and braise in the oven for 2.5 to 3 hours until fork-tender.
  7. Remove the pot from the oven, skim excess fat from the sauce, and serve garnished with fresh parsley.

Nutrition

Serving: 1ribsCalories: 480kcalCarbohydrates: 8gProtein: 40gFat: 31gSaturated Fat: 12gPolyunsaturated Fat: 1gMonounsaturated Fat: 12gCholesterol: 100mgSodium: 600mgPotassium: 800mgFiber: 2gSugar: 3gVitamin A: 100IUVitamin C: 5mgCalcium: 40mgIron: 3mg

Notes

Using high-quality dry red wine enhances the flavors significantly. For a thicker sauce, simmer post-braising until desired consistency.

Tried this recipe?

Let us know how it was!

Crispy Bang Bang Salmon Bites Bowls for a Flavorful Feast

The sizzle of salmon hitting a hot skillet instantly transforms the kitchen into a hub of anticipation. With this recipe for Crispy Bang Bang Salmon Bites Bowls, I’ve discovered a delightful way to turn a simple dinner into an exciting culinary adventure. These protein-packed bowls are not only quick to prepare—perfect for those busy weeknights—but they also boast a satisfying crunch paired with a creamy and slightly spicy bang bang sauce that will leave everyone asking for seconds. Imagine fluffy brown rice carrying a medley of vibrant toppings like crunchy broccoli, creamy avocado, and a refreshing cucumber salad. It’s a healthy dinner option that brings balance and joy to the table. So, are you ready to elevate your weeknight meals with this delicious recipe?

Why Choose Bang Bang Salmon Bites?

Irresistible Flavor: Crispy salmon bites coated in a sweet and spicy bang bang sauce create an explosion of taste in each bite.

Healthy and Nutritious: Packed with protein and healthy fats, this recipe gives you the nourishment you need without sacrificing flavor!

Quick to Prepare: Perfect for busy weeknights, this meal can be ready in under 30 minutes, making dinner stress-free.

Endless Variations: Customize your bowls with favorite toppings like kimchi, edamame, or mango salsa for a personal touch.

Family-Friendly Appeal: Everyone will love this dish, and it’s a great way to introduce healthy eating to your family, all while enjoying a delicious meal together.

You might also enjoy our Crispy Chicken Katsu Bowls for another satisfying dinner option!

Crispy Bang Bang Salmon Bites Bowls Ingredients

For the Bang Bang Sauce

  • Plain Greek Yogurt or Mayonnaise – Creaminess and base for the sauce; substitute with low-fat yogurt for fewer calories.
  • Sweet Chili Sauce – Provides sweetness; no substitutions recommended for flavor.
  • Sriracha – Adds heat; omit for a milder sauce.

For the Salmon

  • Avocado Oil – High smoke point oil for cooking; substitute with canola or grapeseed oil if unavailable.
  • Salmon Filet – Main protein source; should be fresh for best flavor—consider wild-caught salmon.
  • Coconut Aminos – Umami flavor and seasoning; substitute with low-sodium soy sauce mixed with maple syrup.
  • Rice Vinegar – Brightness and acidity; no substitutions recommended.
  • Garlic – Aromatic flavor; fresh garlic is preferred for optimal taste.
  • Toasted Sesame Oil (optional) – Adds nutty flavor; omit if unavailable.

For the Bowl Assembly

  • Steamed Brown Rice – Base for the bowls; alternative: use cauliflower rice for a low-carb option.
  • Broccoli – Provides fiber and vitamins; substitute with other green vegetables like green beans.
  • Ripe Avocado – Creaminess and healthy fats; substitute with hummus for a similar texture.
  • Asian Cucumber Salad – Adds freshness and crunch; pre-made options can be used for efficiency.

These Crispy Bang Bang Salmon Bites Bowls are sure to become a flavorful favorite in your home!

Step‑by‑Step Instructions for Crispy Bang Bang Salmon Bites Bowls

Step 1: Prepare the Cucumber Salad
Start by mixing your cucumber salad ingredients in a bowl. Allow it to sit for at least 15 minutes; this lets the flavors meld together while you focus on the rest of the Crispy Bang Bang Salmon Bites Bowls. You’ll want the cucumbers to be crisp and refreshing, complementing the warm salmon perfectly.

Step 2: Cook the Brown Rice
Cook 1 cup of dry brown rice according to package instructions, usually bringing 2 cups of water to a boil. Once boiling, reduce the heat to low, cover, and simmer for about 40-45 minutes until fluffy and all water is absorbed. This will give a hearty base for your bowls, ensuring a filling and nutritious meal.

Step 3: Make the Bang Bang Sauce
In a small bowl, combine the Greek yogurt or mayonnaise, sweet chili sauce, and sriracha for your bang bang sauce. Mix well until smooth and creamy, then refrigerate it while you prepare the rest of the ingredients. The chilling process enhances the flavors, making your sauce utterly irresistible.

Step 4: Prepare the Broccoli
While the rice is cooking, chop the broccoli into bite-sized pieces. Steam, sauté, or roast it according to your preference, aiming for 5-7 minutes until tender but still vibrant green. This will add a fresh crunch to your Crispy Bang Bang Salmon Bites Bowls, balancing out the textures beautifully.

Step 5: Cut the Salmon
Take your salmon filet and cut it into bite-sized cubes, ensuring uniform pieces for even cooking. If your salmon has skin, feel free to remove it, though leaving a small amount can add extra flavor. Having well-prepared salmon bites is essential for that crispy finish in your bowls.

Step 6: Heat the Skillet
In a large skillet, heat 1 tablespoon of avocado oil over medium-high heat until shimmering. This should take about 2 minutes. You’ll know it’s ready when you can see the oil glistening. A hot skillet ensures a crispy exterior on your salmon bites, bringing out all the delicious flavors.

Step 7: Cook the Salmon
Carefully place the salmon cubes into the skillet, skin-side down if applicable. Cook for about 2-3 minutes without disturbing them until they turn golden brown. Then, gently flip the pieces to cook for another 1-2 minutes. The salmon should be cooked through but still juicy, ready to be glazed with your bang bang sauce.

Step 8: Glaze the Salmon
Pour the prepared bang bang sauce into the skillet over the cooked salmon. Allow it to bubble and thicken for about 4-5 minutes, gently coating each piece of salmon. The salmon bites will become beautifully glazed, giving a shiny finish that adds to the dish’s appeal.

Step 9: Assemble the Bowls
To build your Crispy Bang Bang Salmon Bites Bowls, start by adding a generous scoop of cooked brown rice to each bowl. Layer on the sautéed broccoli, a portion of the cucumber salad, and sliced avocado on top. Finally, place the crispy salmon bites prominently and drizzle them with any remaining bang bang sauce for extra flavor.

Step 10: Serve Immediately
Served while warm, these bowls deliver the ultimate flavor experience. For the best texture, enjoy your Crispy Bang Bang Salmon Bites Bowls right away, savoring each bite of crispy salmon, creamy avocado, and crunchy veggies.

Expert Tips for Crispy Bang Bang Salmon Bites Bowls

  • Fresh Salmon: Always opt for fresh salmon over frozen for the best texture and flavor in your crispy Bang Bang Salmon Bites.

  • Hot Skillet: Preheat your skillet adequately before adding salmon to ensure a perfect crispy exterior while cooking.

  • Monitor Sauce: Keep an eye on the sauce consistency while cooking. If it evaporates too quickly, reduce the heat to prevent burning.

  • Perfect Temperature: Use a meat thermometer to ensure the salmon reaches an internal temperature of 145°F for optimal doneness.

  • Customize Toppings: Feel free to explore variations with toppings like edamame or mango salsa, adding a personal twist to the Crispy Bang Bang Salmon Bites Bowls!

Crispy Bang Bang Salmon Bites Bowls Variations

Feel free to get creative with these delicious variations and make the recipe your own!

  • Dairy-Free: Substitute Greek yogurt with avocado or cashew cream for a creamy, dairy-free version.
  • Whole Grain Swap: Use quinoa or farro instead of brown rice for a nutty flavor and added protein.
  • Veggie Boost: Toss in some shredded carrots or bell peppers to the cucumber salad for extra crunch and color.
  • Sriracha-Free: If you prefer a milder sauce, try omitting the sriracha or using a sweeter chili sauce for a gentle heat.
  • Crispy Additions: Top your bowls with crispy shallots or fried onions for an extra layer of texture and flavor.
  • Zesty Twist: Add some lime juice to the cucumber salad to brighten up the flavors and add a refreshing zing.
  • Tropical Flair: Incorporate diced mango or pineapple into your bowls—a fantastic complement to the savory salmon!
  • Protein Power: For a nutrient boost, add edamame or chickpeas for a delightful crunch and additional protein.

These variations are not just tasty; they’re a wonderful way to explore different flavors and ingredients. For more delicious inspiration, check out our Herb Crusted Salmon or try some Honey Butter Salmon as a different twist on salmon!

How to Store and Freeze Crispy Bang Bang Salmon Bites Bowls

Fridge: Store leftovers in airtight containers for up to 5 days. While the flavors will still be tasty, keep in mind that the salmon is best enjoyed fresh.

Freezer: For longer storage, freeze the assembled bowls without the avocado and cucumber salad for up to 2 months. Thaw overnight in the fridge before reheating.

Reheating: Warm the bowls in the microwave on medium power, stirring occasionally, until heated through—about 2-3 minutes. Add fresh toppings like avocado and cucumber after reheating for the best texture.

Room Temperature: Do not leave the Crispy Bang Bang Salmon Bites Bowls out at room temperature for over 2 hours to ensure food safety and quality.

What to Serve with Crispy Bang Bang Salmon Bites Bowls

Elevate your dinner experience by complementing these flavorful salmon bowls with delicious sides that enhance their vibrant tastes.

  • Creamy Mashed Potatoes: The buttery richness balances the spice of the bang bang sauce while adding comfort to your meal.
  • Garlic Roasted Asparagus: These tender, garlic-infused spears provide a crunchy texture, adding freshness and sophistication to your bowl.
  • Miso Soup: A warm bowl of miso soup serves as a soothing starter, enhancing the umami flavors already present in your dish.
  • Crispy Spring Rolls: A side of these golden, crunchy bites offers a delightful contrast to the bowl’s creaminess while staying true to Asian-inspired flavors.
  • Sautéed Bok Choy: Lightly seasoned bok choy adds a lovely crunch and earthy flavor, complementing the salmon without overpowering it.
  • Fruit Infused Sparkling Water: Pair your meal with a refreshing drink, like sparkling water with slices of citrus, to cleanse your palate and balance the richness.

Make Ahead Options

These Crispy Bang Bang Salmon Bites Bowls are perfect for busy home cooks looking to save time on meal prep! You can prepare the bang bang sauce and cucumber salad up to 24 hours in advance; just make sure to refrigerate them in airtight containers for maximum freshness. Additionally, the steamed broccoli can be prepped up to 3 days ahead; simply refrigerate it and reheat when you’re ready to assemble your bowls. When you’re ready to enjoy, cook the salmon bites fresh for the best texture and crispiness. Assemble the bowls with all components, drizzle with extra bang bang sauce, and you’ll have a delicious, restaurant-quality meal ready in no time!

Crispy Bang Bang Salmon Bites Bowls Recipe FAQs

What type of salmon should I use for the recipe?
I recommend using fresh salmon for the Crispy Bang Bang Salmon Bites Bowls, as it provides optimal flavor and texture. If you can find wild-caught salmon, it often adds a richer taste. If fresh isn’t available, frozen salmon can work—just ensure it’s completely thawed before cooking.

How should I store my leftovers?
Leftovers of the Crispy Bang Bang Salmon Bites Bowls can be stored in airtight containers in the refrigerator for up to 5 days. While the dish remains delicious reheated, the salmon is best when enjoyed fresh. Just remember to keep the toppings like avocado and cucumber separate until ready to serve to maintain their texture.

Can I freeze the salmon bowls?
Absolutely! To freeze your Crispy Bang Bang Salmon Bites Bowls, assemble the bowls without the avocado and cucumber salad. They can be stored in the freezer for up to 2 months. When ready to eat, thaw them in the refrigerator overnight and reheat in the microwave on medium power, stirring occasionally, for about 2-3 minutes. Add fresh toppings after reheating for the best flavor!

How can I troubleshoot if the salmon isn’t cooking evenly?
If you find that your salmon isn’t cooking evenly, the first step is to ensure you have a hot skillet! Preheat your skillet for 2 minutes before adding the salmon. When the salmon bites are placed in the skillet, give them enough space—avoid crowding the pan since that can cause steaming instead of searing. For thicker pieces, a meat thermometer can help; aim for an internal temperature of 145°F.

What can I do if I have dietary allergies?
If you have allergies, substitutions can be made! For those sensitive to dairy, use cashew cream or tahini instead of Greek yogurt or mayonnaise for the bang bang sauce. You can also adjust the sauce by omitting sriracha for a milder flavor. If soy is an issue, coconut aminos or seed-based sauces can be excellent alternatives while keeping the dish delicious. Always check labels on pre-made ingredients, especially for hidden allergens.

Are there any recommended toppings or variations?
Yes! Feel free to customize your Crispy Bang Bang Salmon Bites Bowls with various toppings. Add edamame for extra protein, kimchi for a spicy kick, or mango salsa for a sweet twist. You could even switch out the brown rice for quinoa or cauliflower rice if you’re looking for a healthier alternative. Experimenting is the key to making the dish truly your own!

Crispy Bang Bang Salmon Bites Bowls

Crispy Bang Bang Salmon Bites Bowls for a Flavorful Feast

Crispy Bang Bang Salmon Bites Bowls offer a delightful blend of protein and flavor, perfect for busy dinners.
Prep Time 15 minutes
Cook Time 30 minutes
Total Time 45 minutes
Servings: 4 bowls
Course: Dinner
Cuisine: American, Asian
Calories: 450

Ingredients
  

Bang Bang Sauce
  • 1 cup Plain Greek Yogurt or Mayonnaise Substitute with low-fat yogurt for fewer calories.
  • 1 cup Sweet Chili Sauce No substitutions recommended for flavor.
  • 2 tablespoons Sriracha Omit for a milder sauce.
For the Salmon
  • 1 tablespoon Avocado Oil Substitute with canola or grapeseed oil if unavailable.
  • 1 pound Salmon Filet Fresh for best flavor; consider wild-caught.
  • 2 tablespoons Coconut Aminos Substitute with low-sodium soy sauce mixed with maple syrup.
  • 1 tablespoon Rice Vinegar No substitutions recommended.
  • 2 cloves Garlic Fresh garlic is preferred.
  • 1 teaspoon Toasted Sesame Oil Optional; omit if unavailable.
For the Bowl Assembly
  • 2 cups Steamed Brown Rice Alternatively, use cauliflower rice for a low-carb option.
  • 1 cup Broccoli Substitute with other green vegetables like green beans.
  • 1 ripe Avocado Substitute with hummus for a similar texture.
  • 1 cup Asian Cucumber Salad Pre-made options can be used for efficiency.

Equipment

  • Skillet
  • Mixing Bowl
  • Pot for Rice

Method
 

Preparation Steps
  1. Prepare the Cucumber Salad by mixing ingredients in a bowl. Let sit for at least 15 minutes.
  2. Cook the Brown Rice according to package instructions, usually boiling 2 cups of water and simmering for 40-45 minutes.
  3. Make the Bang Bang Sauce by combining Greek yogurt or mayonnaise, sweet chili sauce, and sriracha in a small bowl until smooth. Refrigerate.
  4. Prepare the Broccoli by chopping it into bite-sized pieces and steaming, sautéing, or roasting for 5-7 minutes.
  5. Cut the Salmon into bite-sized cubes, removing skin if desired.
  6. Heat the Skillet with 1 tablespoon of avocado oil over medium-high heat until shimmering.
  7. Cook the Salmon cubes in the skillet for about 2-3 minutes until golden brown, then flip and cook for another 1-2 minutes.
  8. Glaze the Salmon with the prepared Bang Bang Sauce, allowing it to bubble and thicken for about 4-5 minutes.
  9. Assemble the Bowls with a base of brown rice, topped with broccoli, cucumber salad, sliced avocado, and crispy salmon bites.
  10. Serve Immediately while warm for the best texture.

Nutrition

Serving: 1bowlCalories: 450kcalCarbohydrates: 30gProtein: 30gFat: 20gSaturated Fat: 3gPolyunsaturated Fat: 5gMonounsaturated Fat: 10gCholesterol: 70mgSodium: 900mgPotassium: 800mgFiber: 6gSugar: 8gVitamin A: 500IUVitamin C: 35mgCalcium: 40mgIron: 2mg

Notes

Store leftovers in airtight containers for up to 5 days. For freezing, omit avocado and cucumber salad.

Tried this recipe?

Let us know how it was!

Pioneer Woman Chicken Noodle Casserole: Comforting Delight

As the aroma of something baking wafts through the house, I can’t help but feel transported back to my childhood kitchen. Today, I’m excited to share my take on the Easy Pioneer Woman Chicken Noodle Casserole, a dish that embodies the warmth of home-cooked goodness. This family-friendly recipe pairs wide egg noodles with creamy chicken soup and tender vegetables, creating a hearty meal that’s both comforting and fulfilling. What I love most is how quick it is to prepare — perfect for those busy weeknights! Plus, it’s a guaranteed crowd-pleaser that warms bellies and hearts alike. Are you ready to dive into this creamy, savory delight?

Why is this casserole a must-try?

Simplicity at its core: With straightforward steps, anyone can whip this up with minimal effort.

Hearty and satisfying: This dish combines the perfect blend of creamy chicken soup and tender noodles, offering every bite a comforting embrace.

Customizable to fit any palate: Whether you prefer a milder flavor with a different cheese or want to swap in turkey or veggies, you can easily tailor it to your family’s tastes.

Crowd-Pleasing comfort food: It’s bound to be a hit at dinner parties or family gatherings, leaving everyone asking for seconds!

Perfectly textures: The contrast of the crispy cracker topping with the creamy casserole creates an irresistible experience, reminiscent of cozy nights and warm kitchens.

For another comforting dish with just as much family appeal, check out my recipe for Crack Chicken Noodle or explore the flavors of Sizzling Chicken Pepper.

Pioneer Woman Chicken Noodle Casserole Ingredients

For the Casserole

  • Wide Egg Noodles – The delightful base that holds everything together; you can try swapping in regular egg noodles or even penne for a different twist.
  • Cream of Chicken Soup – The creamy heart of the dish; opt for a dairy-free version like vegan mushroom if preferred.
  • Whole Milk – Adds to the creaminess; feel free to use plant-based milk for a lighter choice.
  • Shredded Sharp Cheddar Cheese – This rich cheese elevates the flavor; substitute with a milder cheese if desired.
  • Ground Black Pepper – Essential for seasoning; adjust to your taste for just the right amount of kick.
  • Kosher Salt – Key for flavor balancing; sea salt works nicely here for a different flavor profile.
  • Cooked Shredded Chicken – The protein star of this casserole; a rotisserie chicken makes for a convenient option.
  • Finely Chopped Yellow Onion – Brings a sweet aroma; skip it for a more gentle flavor.
  • Finely Chopped Celery – Adds a delightful crunch; you can swap it for bell peppers for added color.
  • Frozen Peas and Carrots – Provide vibrant color and nutrition; using fresh veggies will brighten it up too.
  • Coarsely Crushed Butter Crackers – Creates a crispy topping; gluten-free crackers are a fantastic swap if needed.
  • Unsalted Butter – Blends beautifully with the cracker topping for a golden finish; margarine can be used instead.
  • Chopped Parsley – For that fresh garnish touch; feel free to omit it if you’re in a hurry.

Each ingredient plays a vital role in making this Pioneer Woman Chicken Noodle Casserole a comforting, heartwarming dish your family will adore!

Step‑by‑Step Instructions for Pioneer Woman Chicken Noodle Casserole

Step 1: Preheat the Oven
Begin by preheating your oven to 350°F (175°C). While the oven warms up, prepare a 9×13 inch baking dish by lightly greasing it with cooking spray or butter. This ensures that your Pioneer Woman Chicken Noodle Casserole doesn’t stick as it bakes, allowing for easy serving later on.

Step 2: Cook the Noodles
In a large pot, bring salted water to a boil over high heat. Add the wide egg noodles and cook them according to package instructions until they are al dente, typically around 7–9 minutes. Once done, drain the noodles, rinse them under cool water briefly, and set them aside in a large mixing bowl.

Step 3: Mix the Casserole Filling
In the same bowl, combine the cream of chicken soup and whole milk, stirring until smooth. Next, add the cooked shredded chicken, finely chopped yellow onion, celery, frozen peas, and carrots. Season this mixture with kosher salt and ground black pepper, ensuring everything is evenly coated in the creamy sauce.

Step 4: Combine Noodles and Filling
Gently fold the cooked egg noodles into the soup mixture, making sure the noodles are well coated with the filling. This step is crucial as it melds all the wonderful flavors together. Once incorporated, pour the entire mixture into your prepared baking dish, spreading it evenly with a spatula.

Step 5: Add the Topping
In a small bowl, mix the coarsely crushed butter crackers with melted unsalted butter until the crumbs are fully coated. Sprinkle this mixture evenly atop the casserole, creating a crispy layer that will bake beautifully. This crunchy topping adds a delightful texture to your Pioneer Woman Chicken Noodle Casserole.

Step 6: Bake the Casserole
Place the baking dish in your preheated oven and bake uncovered for 30 to 40 minutes. You want your casserole to be hot and bubbly, with the topping turning a golden brown. Keep an eye on it, especially towards the end, to ensure the cracker topping doesn’t burn.

Step 7: Broil for Extra Crispiness
If you desire an extra crispy texture, switch to the broiler for the last 3 to 5 minutes of cooking. Watch closely, as broiling can quickly go from golden to burnt. Once you see a lovely brown color on top, remove the casserole from the oven and let it cool for a few minutes.

Step 8: Garnish and Serve
Before serving, sprinkle chopped parsley over the top of the Pioneer Woman Chicken Noodle Casserole for a fresh touch. This final flourish not only adds color but also enhances the dish’s appeal. Scoop out generous portions and enjoy the savory flavors of this comforting family meal!

Make Ahead Options

These Pioneer Woman Chicken Noodle Casserole is perfect for those busy weeknights! You can assemble the casserole without the cracker topping up to 24 hours in advance; simply cover it tightly with foil and refrigerate. This allows the flavors to meld beautifully while keeping everything fresh. When you’re ready to enjoy, just add the cracker topping and bake as directed — this step ensures that the topping remains crispy and delicious. If you’re planning to meal prep for the week, consider preparing the mixture up to 3 days ahead, and then bake it after work for a comforting family dinner that’s just as delightful as when it’s freshly made!

Pioneer Woman Chicken Noodle Casserole Variations

Feel free to explore delightful twists that elevate this comforting dish to your desired taste!

  • Whole Wheat Noodles: Swap wide egg noodles for whole wheat varieties for added fiber and a nuttier flavor.

  • Gluten-Free Option: Use gluten-free pasta or noodles to cater to dietary needs while maintaining the casserole’s richness.

  • Plant-Based Protein: For a vegetarian or vegan option, replace shredded chicken with cooked lentils or chickpeas to keep it hearty and satisfying.

  • Rich Mushroom Flavor: Enhance the dish with sautéed mushrooms for a deep umami profile; their earthy taste elevates the creamy sauce beautifully.

  • Creamy Spinach Surprise: Mix in a handful of wilted spinach for a pop of color and nutrition; it blends seamlessly into the casserole.

  • Spicy Kick: Add diced jalapeños or a sprinkle of cayenne pepper to bring some heat. The warmth will surprise your taste buds while adding a delightful contrast.

  • Cheesy Varieties: Experiment with different cheeses like mozzarella or Gruyère for a molten, gooey texture. Each cheese brings its own unique character to the casserole.

  • Vegetable Medley: Swap out the peas and carrots for other veggies like bell peppers or zucchini. This change adds freshness and creates an exciting visual appeal.

For other comforting chicken recipes that your family will love, don’t miss my mouthwatering BLT Chicken Salad or the rich flavors of Tuscan Chicken Soup. Enjoy your culinary adventure!

Expert Tips for Pioneer Woman Chicken Noodle Casserole

  • Prep Ahead: Make life easier by assembling the casserole without the topping a day prior. Just refrigerate it and add the topping before baking for a crispy finish.

  • Avoid Soggy Topping: Always bake uncovered! Covering can trap moisture, preventing the cracker topping from getting that delightful crunch we all love.

  • Watch the Broil: When broiling for extra crispiness, don’t walk away! Keep an eye on it to avoid any burning — it can happen quickly!

  • Custom Flavoring: Consider adding a dash of garlic powder or a pinch of paprika to the filling for an extra burst of flavor in your Pioneer Woman Chicken Noodle Casserole.

  • Chalky Noodles: Make sure your egg noodles are al dente before mixing them in. Overcooked noodles will become mushy in the casserole, so stick to the package cooking time!

How to Store and Freeze Pioneer Woman Chicken Noodle Casserole

  • Fridge: Store leftovers in an airtight container for up to 3-4 days. Make sure to let the casserole cool completely before sealing to preserve its creamy texture.

  • Freezer: For long-term storage, freeze unbaked or baked casserole in a freezer-safe dish for up to 3 months. Wrap tightly with plastic wrap, then foil, to prevent freezer burn.

  • Reheating: To reheat, thaw in the fridge overnight if frozen. Bake at 350°F (175°C) for about 25-30 minutes until heated through, adding a few minutes of broiling for extra crispiness on top.

  • Portioning: Consider freezing individual portions for quick meals. This makes it easy to grab a comforting serving of the Pioneer Woman Chicken Noodle Casserole whenever you’re craving something delicious!

What to Serve with Pioneer Woman Chicken Noodle Casserole

This delightful casserole creates a comforting meal that’s perfect for family gatherings, and it pairs beautifully with a variety of sides.

  • Garlic Bread: The buttery, garlicky crunch is an incredible contrast to the creamy casserole, making each bite even more satisfying.
  • Fresh Garden Salad: A crisp salad with mixed greens, tomatoes, and cucumbers offers a refreshing balance to the rich, hearty dish. Drizzle with a light vinaigrette for an extra zing.
  • Steamed Broccoli: Tender, vibrant green florets deliver a nutritious pop of color and a herby flavor that complements the savory casserole beautifully.
  • Roasted Brussels Sprouts: With their crispy outside and tender insides, these roasted vegetables provide a delightful texture and earthy flavor that enhances the overall meal experience.
  • Cheesy Biscuits: Warm, flaky biscuits slathered in butter create a cozy vibe, perfect for scooping up that creamy goodness.
  • Apple Crisp: Finish with a touch of sweetness by serving a warm apple crisp. The fruity dessert’s warm spices and crunchy topping provide a lovely contrast to the savory casserole.
  • Lemonade or Iced Tea: Quench your thirst with a refreshing glass of homemade lemonade or iced tea — the perfect drink to pair with all that creamy comfort!

These sides will elevate your Pioneer Woman Chicken Noodle Casserole experience, making it a memorable meal for you and your loved ones.

Pioneer Woman Chicken Noodle Casserole Recipe FAQs

What type of egg noodles should I use for the casserole?
Absolutely! Wide egg noodles work best for this casserole, providing the perfect structure and texture. However, if you’re looking for a change, regular egg noodles, fusilli, or even penne can be great alternatives, offering a different bite and feel.

How should I store leftovers from the casserole?
Leftovers can be kept in an airtight container for up to 3-4 days in the refrigerator. It’s important to let the casserole cool completely before sealing it to help maintain its creamy texture. Just reheat it in the oven at 350°F (175°C) for about 10-15 minutes or until heated through.

Can I freeze the Pioneer Woman Chicken Noodle Casserole?
Yes! You can definitely freeze the casserole either before baking or after it’s cooked. Wrap it in plastic wrap and then foil to prevent freezer burn, storing it for up to 3 months. If you choose to bake it, let it cool completely before freezing. When you’re ready to enjoy it, thaw overnight in the fridge and reheat as mentioned above.

What can I do if the topping becomes soggy?
To avoid a soggy topping, always bake the casserole uncovered. This allows moisture to escape, ensuring your cracker topping remains crispy. If you have leftovers, storing them with the topping separate or under in a different container can help maintain that crunchiness for reheating.

Are there any dietary considerations I should keep in mind for this casserole?
It’s a family-friendly meal, but if you or someone you’re serving has allergies, you can swap out certain ingredients. For instance, use gluten-free crackers and dairy-free cream soups to adapt it to those with gluten sensitivity or dairy allergies. Always adjust seasonings and ingredients according to your dietary needs to make everyone feel included!

Can I make this casserole ahead of time?
Certainly! You can prepare the casserole the day before baking. Just assemble it without the cracker topping, cover tightly, and refrigerate. When you’re ready to bake it, add the cracker topping just before placing it in the oven for that perfect crispy finish!

Pioneer Woman Chicken Noodle Casserole

Pioneer Woman Chicken Noodle Casserole: Comforting Delight

Pioneer Woman Chicken Noodle Casserole is a comforting delight that combines creamy chicken soup and tender vegetables with wide egg noodles, perfect for satisfying meals.
Prep Time 15 minutes
Cook Time 40 minutes
Cooling Time 5 minutes
Total Time 1 hour
Servings: 6 servings
Course: Casserole
Cuisine: American
Calories: 350

Ingredients
  

For the Casserole
  • 12 oz Wide Egg Noodles can substitute regular egg noodles or penne
  • 10.5 oz Cream of Chicken Soup dairy-free version available
  • 1 cup Whole Milk can use plant-based milk
  • 2 cups Shredded Sharp Cheddar Cheese substitute with milder cheese if desired
  • 1/2 tsp Ground Black Pepper adjust to taste
  • 1 tsp Kosher Salt sea salt works as an alternative
  • 2 cups Cooked Shredded Chicken rotisserie chicken can be used
  • 1 medium Finely Chopped Yellow Onion can omit for a gentler flavor
  • 1 stalk Finely Chopped Celery bell peppers can be used instead
  • 1 cup Frozen Peas and Carrots fresh veggies are a great substitute
  • 1 cup Coarsely Crushed Butter Crackers gluten-free option available
  • 1/4 cup Unsalted Butter margarine can be used as an alternative
  • 2 tbsp Chopped Parsley can omit if in a hurry

Equipment

  • 9x13 inch baking dish
  • Large pot
  • Mixing Bowl
  • spatula
  • small bowl

Method
 

Step-by-Step Instructions
  1. Preheat your oven to 350°F (175°C) and prepare a 9x13 inch baking dish by lightly greasing it with cooking spray or butter.
  2. Bring salted water to a boil in a large pot. Add the wide egg noodles and cook until al dente, about 7-9 minutes. Drain and set aside.
  3. In a mixing bowl, combine cream of chicken soup and whole milk until smooth. Add cooked chicken, onion, celery, peas, and carrots. Season with salt and pepper.
  4. Fold the cooked egg noodles into the soup mixture until well coated. Pour into prepared baking dish, spreading evenly.
  5. In a small bowl, mix crushed crackers with melted butter until coated. Sprinkle evenly on top of the casserole.
  6. Bake uncovered for 30-40 minutes until bubbly and the topping is golden brown.
  7. For extra crispiness, broil for an additional 3-5 minutes while monitoring closely.
  8. Garnish with parsley before serving and enjoy!

Nutrition

Serving: 1sliceCalories: 350kcalCarbohydrates: 45gProtein: 25gFat: 14gSaturated Fat: 8gPolyunsaturated Fat: 1gMonounsaturated Fat: 5gCholesterol: 70mgSodium: 800mgPotassium: 500mgFiber: 3gSugar: 2gVitamin A: 800IUVitamin C: 4mgCalcium: 250mgIron: 2mg

Notes

This casserole is easy to prepare, customizable, and perfect for family gatherings. Store leftovers in an airtight container for 3-4 days.

Tried this recipe?

Let us know how it was!

Delicious Banana Protein Pancakes in Just 3 Ingredients

On a sleepy Sunday morning, when the aroma of freshly brewed coffee mingles with the anticipation of a delicious breakfast, I stumbled upon a recipe that completely transformed my pancake game: 3-ingredient banana protein pancakes. Not only do these delightful treats promise a healthy start to your day with 31 grams of protein per serving, but they’re also gluten-free and remarkably easy to whip up. Trust me, whether you’re a seasoned chef or just looking to break free from the fast food routine, this recipe is a game changer. Sweetened naturally with ripe bananas, they have a light, crepe-like texture that’s simply irresistible. Are you ready to elevate your breakfast experience and indulge in a guilt-free delight? Let’s get started!

Why are these pancakes a game changer?

Simplicity at Its Best: With just three ingredients, these pancakes are incredibly easy to prepare, making them perfect for busy mornings or lazy weekends.

Nutritious Boost: Enjoy a whopping 31 grams of protein per serving, helping you stay full and energized.

Gluten-Free Goodness: Ideal for those with dietary restrictions, these pancakes deliver flavor without the gluten.

Versatile Flavor: Customize your batch by adding optional cinnamon or even mixing in nuts and berries for added texture.

Crowd-Pleasing Delight: Whether cooking for family or friends, these pancakes are sure to impress and keep everyone coming back for more! For a delightful twist, consider pairing them with some fresh berries like in my Banana Blueberry Breakfast Cookies for a bright flavor combination.

Banana Protein Pancakes Ingredients

• Here’s what you’ll need to whip up these delicious pancakes!

For the Batter

  • Ripe Banana – Choose the ripest bananas for the best natural sweetness.
  • Large Eggs – Essential for binding and adding fluffiness to your pancakes.
  • Vanilla Whey Protein Powder – Increases protein content significantly; adjust based on desired thickness.
  • Optional Cinnamon – Use for a warm flavor boost; omit if preferred.

Step‑by‑Step Instructions for 3-Ingredient Banana Protein Pancakes

Step 1: Blend the Ingredients
Start by peeling your ripe bananas and placing them in a blender along with the large eggs and vanilla whey protein powder. If you’re adding cinnamon, toss that in too! Blend the mixture until it reaches a smooth, creamy consistency, which should take about 30-45 seconds. This batter is the foundation for your delicious Banana Protein Pancakes.

Step 2: Preheat the Skillet
Set your stovetop to medium-low heat and place a nonstick skillet on top. Allow it to preheat for 2-3 minutes; you want it hot but not smoking. A well-preheated skillet ensures even cooking and prevents sticking, helping your pancakes cook perfectly and achieve that desirable golden color.

Step 3: Grease the Pan
Once your skillet is hot, carefully add a small amount of olive oil or butter, swirling it around to coat the bottom evenly. This should take about 10-15 seconds. Ensure it’s coated well to create a lovely, nonstick surface for your Banana Protein Pancakes, which will help them flip easily without tearing.

Step 4: Pour and Cook
Using a ladle or measuring cup, pour 3-4 tablespoons of batter into the skillet for each pancake. Cook for about 1-2 minutes, or until bubbles start forming at the edges and the bottom appears golden brown. These visual cues indicate that it’s time to flip your pancakes and enjoy this delicious breakfast treat!

Step 5: Flip the Pancakes
Gently slide a wide spatula underneath one pancake and carefully flip it over. Cook for an additional minute, until the second side is golden brown as well. Keep an eye on them to avoid burning; these Pancakes may be lighter and thinner, resembling a crepe but should still have a beautiful, tender finish.

Step 6: Repeat and Serve
Continue this process with the remaining batter, greasing the skillet as needed. Once all pancakes are cooked, stack them on a plate. These 3-Ingredient Banana Protein Pancakes are perfect served warm and can be dressed up with fresh berries, a drizzle of maple syrup, or a dollop of Greek yogurt. Enjoy lavishly!

What to Serve with 3-Ingredient Banana Protein Pancakes

Imagine transforming your breakfast table into a delightful spread that satisfies every craving while keeping things healthy.

  • Fresh Berries: A medley of strawberries, blueberries, and raspberries adds vibrant color and natural sweetness, creating a refreshing bite with each pancake.

  • Greek Yogurt: Creamy and tangy, Greek yogurt serves as a perfect topping, providing a protein boost and luscious creaminess that pairs beautifully with the pancakes.

  • Maple Syrup: A drizzle of pure maple syrup adds just the right amount of sweetness, enhancing the natural flavors of the pancakes without overwhelming them.

  • Almond Butter: Spread a thin layer of almond butter for a nutty twist; its rich texture complements the soft pancakes while delivering healthy fats.

  • Cinnamon Apples: Sautéing thin apple slices in cinnamon enhances the flavors and provides a warm, spiced topping that feels like a cozy hug on a plate.

  • Chia Seed Pudding: This makes for a unique texture contrast and a nutrient-rich side, offering a refreshing and slightly sweet accompaniment that balances the pancakes delightfully.

  • Coffee or Herbal Tea: Pairing your meal with a warm cup of coffee or a soothing herbal tea enhances the cozy ambiance, making breakfast feel special.

These pairings will elevate your 3-ingredient banana protein pancakes into a full-fledged breakfast feast that everyone will love!

Expert Tips for Banana Protein Pancakes

  • Choose Ripe Bananas: Ensure your bananas are very ripe for optimal sweetness. The riper the banana, the better the flavor of your pancakes.

  • Monitor Heat: Maintain a medium-low heat while cooking. Using high heat can burn the outside and leave the inside raw, affecting the texture.

  • Adjust Consistency: If the batter looks too thin, add a bit more protein powder. Start with one scoop (22 g) to achieve the perfect thickness for your Banana Protein Pancakes.

  • Use a Wide Spatula: For flipping, a wide spatula will provide stability and lower the risk of tearing the pancakes during the flip, ensuring they maintain their shape.

  • Experiment with Mix-Ins: Feel free to add in bits of fruit or nuts. This not only enhances flavor but also adds interesting textures to your pancakes!

How to Store and Freeze Banana Protein Pancakes

Fridge: Store leftover pancakes in an airtight container in the refrigerator for up to 3 days. This helps maintain their freshness and flavor, making them easy to enjoy later.

Freezer: For longer storage, freeze pancakes by placing them in a single layer on a baking sheet. Once frozen, transfer them to a freezer-safe bag for up to 2 months.

Reheating: To reheat, simply pop them in the microwave for 30-45 seconds, or warm them on a skillet over low heat for a few minutes. Enjoy perfectly fluffy banana protein pancakes any time!

Make Ahead Options

These 3-Ingredient Banana Protein Pancakes are perfect for meal prep enthusiasts looking to simplify their mornings! You can prepare the pancake batter up to 24 hours in advance by blending the ripe bananas, eggs, and protein powder together. Simply refrigerate the mixture in an airtight container to keep it fresh and ready for cooking. When you’re ready to enjoy your pancakes, just give the batter a quick stir, as it may thicken slightly overnight. For even more convenience, you can cook the pancakes ahead of time and store them in the fridge for up to 3 days. Just reheat them in a skillet or microwave before serving for delicious, quick breakfasts that taste just as delightful as when freshly made!

Banana Protein Pancakes Variations

Feel free to explore and customize these pancakes to suit your taste buds!

  • Flourless Twist: Substitute almond flour for a portion of the protein powder for added texture. This swap adds richness and a delightful nutty flavor.
  • Add Some Heat: Stir in a dash of cayenne or chili powder for a spicy kick. The heat beautifully contrasts with the sweet banana, creating a complex flavor experience.
  • Chocolate Delight: Use chocolate-flavored protein powder instead of vanilla for a dessert-like twist. These pancakes turn into a decadent treat that feels indulgent yet healthy!
  • Nutty Crunch: Toss in a handful of chopped nuts or seeds to the batter for an added crunch and nutritional boost. Whether you opt for walnuts or sunflower seeds, the texture will elevate your pancakes.
  • Berry Bliss: Fold in fresh or frozen blueberries for bursts of sweetness. They not only enhance the flavor but also provide a pop of color that’s delightful to the eye!
  • Banana-Foster Style: Drizzle with caramel sauce and top with sautéed bananas to create a heavenly dessert-inspired pancake. This is a fun weekend indulgence that your family will adore!
  • Greek Yogurt Topping: Consider serving with a dollop of Greek yogurt and a sprinkle of cinnamon for a creamier texture. This not only adds protein but also brings a tangy flavor that balances the sweetness of the pancakes.

For even more yummy breakfast inspiration, check out my Nutella Pancakes Blend or try serving these delicious pancakes with fresh berries like in the Banana Blueberry Breakfast Cookies for an extra special treat!

3-Ingredient Banana Protein Pancakes Recipe FAQs

What type of bananas should I use?
Absolutely! Choose very ripe bananas for your pancakes. These bananas should have lots of brown spots, which indicate maximum sweetness and flavor. Overly ripe bananas can add a richer taste and moisture, elevating your Banana Protein Pancakes to the next level.

How should I store leftover pancakes?
Leftover pancakes can be stored in an airtight container in the refrigerator for up to 3 days. This method ensures they maintain their flavor and texture. When you’re ready to enjoy them, simply reheat in the microwave for 30-45 seconds, or warm them up in a skillet for a couple of minutes.

Can I freeze Banana Protein Pancakes?
Yes, you can freeze these pancakes! To do so, first place them in a single layer on a baking sheet, ensuring they don’t touch each other. Freeze for about 1 hour, then transfer them to a freezer-safe bag or container. They will stay fresh for up to 2 months. When you’re ready to enjoy them, just pop them in the microwave or in a skillet to reheat.

What if the batter is too thick or too thin?
No worries! If your batter is too thick, gradually add a little water or milk until you reach your preferred consistency. Conversely, if it’s too thin, simply add more protein powder, starting with a scoop (22 g). Remember, the goal is to have a batter that pours easily but isn’t runny.

Are there any dietary considerations for these pancakes?
Very! This recipe is naturally gluten-free as it doesn’t contain flour, making it a safe choice for those with gluten sensitivity. However, if you have specific allergies (like eggs or dairy in protein powder), consider substituting with alternatives such as a plant-based protein powder or flax eggs (1 tablespoon ground flaxseed mixed with 2.5 tablespoons water per egg). Always check your protein powder labels for allergens as well!

Can I add flavor variations to the pancakes?
Absolutely! Feel free to experiment by adding a teaspoon of cinnamon for extra warmth or even toss in some fresh berries or nuts for added flavor and texture. I often mix in blueberries which complement the banana perfectly, creating a delightful breakfast experience!

Banana Protein Pancakes

Delicious Banana Protein Pancakes in Just 3 Ingredients

These Banana Protein Pancakes are a guilt-free breakfast with 31 grams of protein per serving, gluten-free, and made with only three ingredients.
Prep Time 5 minutes
Cook Time 10 minutes
Total Time 15 minutes
Servings: 2 pancakes
Course: Breakfast
Cuisine: American
Calories: 120

Ingredients
  

For the Batter
  • 2 bananas Ripe Banana Choose the ripest bananas for the best natural sweetness.
  • 2 large Large Eggs Essential for binding and adding fluffiness.
  • 1 scoop Vanilla Whey Protein Powder Adjust based on desired thickness.
  • 1/2 teaspoon Optional Cinnamon Use for a warm flavor boost.

Equipment

  • blender
  • Nonstick skillet
  • spatula

Method
 

Step-by-Step Instructions
  1. Blend the Ingredients: Peel bananas and place them in a blender with eggs and protein powder. Blend until smooth, about 30-45 seconds.
  2. Preheat the Skillet: Set stovetop to medium-low heat and preheat a nonstick skillet for 2-3 minutes.
  3. Grease the Pan: Add a small amount of olive oil or butter to the hot skillet and swirl to coat.
  4. Pour and Cook: Pour 3-4 tablespoons of batter into the skillet per pancake. Cook for 1-2 minutes until bubbles form and bottoms are golden.
  5. Flip the Pancakes: Slide a wide spatula under the pancake and flip it over. Cook for an additional minute until golden brown.
  6. Repeat and Serve: Continue cooking the remaining batter, greasing the skillet as needed, and serve warm.

Nutrition

Serving: 1pancakeCalories: 120kcalCarbohydrates: 15gProtein: 31gFat: 2gSaturated Fat: 0.5gPolyunsaturated Fat: 1gMonounsaturated Fat: 0.5gCholesterol: 186mgSodium: 80mgPotassium: 300mgFiber: 3gSugar: 6gVitamin A: 500IUVitamin C: 10mgCalcium: 100mgIron: 1mg

Notes

For a delightful twist, serve with fresh berries or maple syrup. Monitor heat to avoid burning, and experiment with mix-ins like nuts and fruits.

Tried this recipe?

Let us know how it was!

Crispy Bang Bang Shrimp with Sweet and Spicy Sauce Magic

The moment that crispy shrimp hits the hot oil, a wave of excitement fills the kitchen. As I prepare to create my favorite appetizer, Bang Bang Shrimp, I can already envision the delightful crunch of each bite. This easy-to-make dish pairs perfectly with a creamy, sweet, and spicy Thai chili sauce that has everyone coming back for seconds. Not only is it a fantastic crowd-pleaser for game nights or parties, it also lends itself beautifully to a cozy night in when you crave something special at home. Whether you’re in the mood for an impressive starter or an exciting side dish, this recipe will help you achieve just that. Curious to learn the secrets behind that perfect crunch and tantalizing sauce? Let’s dive in!

Why is Bang Bang Shrimp a Must-Try?

Irresistible Flavor: The sweet and spicy sauce brings a burst of flavor that tantalizes the taste buds and is sure to leave you craving more.

Crispy Perfection: Every bite is a delightful crunch, thanks to the expert coating of flour and cornstarch that locks in juiciness while keeping the shrimp crisp.

Quick and Easy: This recipe is straightforward, perfect for busy weeknights or spontaneous gatherings without sacrificing taste.

Versatile Pairing: Serve it as a show-stopping appetizer or complement it with a refreshing salad or rice for a satisfying meal. For more seafood inspiration, check out our amazing Shrimp Avocado Bowls or Parmesan Roasted Shrimp.

Crowd-Pleaser: Whether you’re hosting a game night or enjoying a cozy evening, everyone will love this fun dish—perfect for sharing!

Bang Bang Shrimp Ingredients

For the Shrimp
Raw Shrimp – Use large or jumbo, deveined & peeled for the best texture and flavor.

For the Sauce
Mayonnaise – Forms the creamy base of the sauce, but substitute with Greek yogurt for a lighter version.
Thai Sweet Chili Sauce – This essential ingredient provides the sweet and spicy profile of the Bang Bang Shrimp.
Minced Garlic – Adds depth to the sauce’s flavor.
Sriracha – Adjust to taste for your desired level of spice.

For Dredging
Whole Milk – Mixes with sour cream and lemon juice for a moist shrimp coating.
Sour Cream – Contributes tanginess and creaminess to the dredging mix.
Lemon Juice – Brightens the flavor profile in the mixture.
All-Purpose Flour – Coats the shrimp for that coveted crispy exterior.
Corn Starch – Enhances the crunch when frying.
Salt, Black Pepper, Paprika – Use to season the mixture and elevate flavors.

For Frying
Oil – Canola, olive, or avocado oil is best for frying; maintain the temperature at around 325°F for optimal crispiness.

Step‑by‑Step Instructions for Bang Bang Shrimp

Step 1: Prep the Shrimp
Begin by peeling and deveining your raw shrimp, ensuring they are clean and free of any shell debris. Pat them dry with a paper towel to remove excess moisture; this is key for achieving that crispy texture later on. Set your prepared shrimp aside as you gather the remaining ingredients for this delightful Bang Bang Shrimp recipe.

Step 2: Make the Milk Mixture
In a medium bowl, combine whole milk, sour cream, and fresh lemon juice. Whisk these ingredients together until smooth, ensuring that the sour cream fully incorporates into the mixture. This creamy concoction not only adds moisture to the shrimp but also helps the coating adhere nicely in the next steps.

Step 3: Prepare the Flour Mixture
In a separate bowl, stir together all-purpose flour, cornstarch, salt, black pepper, and paprika. Mix these dry ingredients thoroughly to ensure even seasoning, as this will be the crunchy coating for your Bang Bang Shrimp. The cornstarch will provide extra crispness during frying, setting the stage for that irresistible texture.

Step 4: Dredge the Shrimp
Take each cleaned shrimp and first dip it into the milk mixture, allowing any excess to drip off. Next, transfer the shrimp to the flour mixture, coating each piece evenly and thoroughly. After coating, arrange the shrimp on a platter, ensuring they are not touching each other, creating a perfect assembly line for frying.

Step 5: Heat the Oil
In a large skillet, pour in enough oil to reach about 1 to 1½ inches deep, and heat it to 325°F. Use an oil thermometer to monitor the temperature closely, as maintaining this heat is crucial for achieving a golden brown exterior. Wait patiently as the oil heats, preparing for the next exciting phase of your Bang Bang Shrimp journey.

Step 6: Fry the Shrimp
Once the oil reaches 325°F, carefully add a batch of shrimp to the skillet, ensuring not to overcrowd the pan. Fry the shrimp for approximately 2-3 minutes on each side or until they are golden brown and crispy. Use tongs to gently flip them for even cooking, and keep an eye on the temperature to maintain that perfect crispness.

Step 7: Coat with Sauce
Once the shrimp are cooked, remove them from the skillet and place them on a plate lined with paper towels to absorb excess oil. In a separate bowl, combine mayonnaise, Thai sweet chili sauce, minced garlic, and sriracha. Toss the hot shrimp gently in this sauce until each piece is beautifully coated with the luscious Bang Bang flavor.

Step 8: Serve Hot
To ensure the best texture and flavor, serve your Bang Bang Shrimp immediately after coating them with the sauce. This dish is best enjoyed hot, highlighting the crispy texture and sweet-spicy sauce that will have everyone reaching for seconds. Pair it with a fresh salad or rice for a complete meal experience.

Expert Tips for Bang Bang Shrimp

Oil Temperature: Ensure your oil is at a consistent 325°F using a thermometer. This is crucial for getting that perfect crispy texture without overcooking the shrimp.

Batch Frying: If you’re frying in batches, keep the cooked shrimp warm in an oven set to 250°F. This ensures they stay crispy while you finish cooking the rest.

Choose Larger Shrimp: Opt for large or jumbo shrimp to prevent overcooking. Smaller shrimp can dry out more quickly, compromising that juicy bite.

Spice Adjustment: Feel free to customize the level of heat in your Bang Bang sauce by adjusting the amount of sriracha. Start with less and add more as needed to suit your taste preference.

Drain Excess Oil: Place finished shrimp on a paper towel-lined plate to absorb excess oil after frying. This step helps maintain their crunchiness.

Make Ahead Options

These Bang Bang Shrimp are perfect for meal prep enthusiasts! You can fully coat the shrimp in the milk and flour mixtures up to 24 hours in advance, keeping them covered in the refrigerator to maintain their crispiness. Additionally, the Bang Bang sauce can be prepared and stored in an airtight container for up to 3 days, allowing the flavors to meld beautifully. When you’re ready to serve, simply fry the shrimp until golden brown, toss them in the sauce, and enjoy the same delicious crunch as if they were freshly made. This make-ahead approach makes your busy weeknights stress-free while still delivering restaurant-quality results!

How to Store and Freeze Bang Bang Shrimp

Fridge: Store any leftover Bang Bang Shrimp in an airtight container for up to 3 days. Make sure they are cooled before sealing to prevent moisture buildup.

Freezer: For longer storage, freeze the shrimp without sauce in a single layer on a baking sheet. Once frozen, transfer to a freezer bag and keep for up to 3 months.

Reheating: Reheat in the oven at 350°F for about 10-15 minutes until heated through for the best texture. Avoid microwaving, as it can make the shrimp soggy.

Serving Reminder: For maximum crunch, enjoy your Bang Bang Shrimp fresh and crispy, but these storage tips ensure you can savor them longer!

Bang Bang Shrimp Variations & Substitutions

Get ready to unleash your creativity in the kitchen! These variations will let you customize your Bang Bang Shrimp to suit your taste buds perfectly.

  • Healthier Twist: Try air-frying the shrimp instead of deep-frying for a lighter option that still delivers crunch.
  • Dairy-Free: Swap out mayonnaise with a dairy-free alternative or avocado to keep the creaminess without the dairy.
  • Extra Spicy: Add a sprinkle of cayenne pepper to the flour mix for an extra kick that heat lovers will adore.
  • Tex-Mex Flavor: Experiment by adding taco seasoning to the flour dredge for a fun twist that brings a new flavor profile.
  • Sweet and Tangy: Mix in a bit of honey with the sauce for those who enjoy a sweeter taste with a touch of tang.
  • Savory Herbaceous: Combine fresh chopped herbs like cilantro or parsley into the sauce for a refreshing burst of flavor with each bite.
  • Veggie Delight: For a vegetarian option, try this coating technique on zucchini or eggplant slices, providing a tasty and crispy alternative.
  • Global Influences: Replace Thai sweet chili with Korean gochujang sauce for a rich and spicy flavor twist—this will take your taste buds on a culinary adventure!

No matter the variation you choose, the joy of creating and enjoying this dish will surely shine through, so have fun experimenting! For more delicious seafood ideas, check out our fantastic Steak Shrimp Kabobs or try the creamy goodness of our Marry Shrimp Pasta.

What to Serve with Bang Bang Shrimp

Delight your senses with a well-rounded meal that complements the irresistible crunch and tangy sweetness of the Bang Bang Shrimp.

  • Creamy Coleslaw: This crunchy, tangy side offers a refreshing balance to the shrimp’s spiciness, making each bite feel like a flavor party.

  • Coconut Rice: The subtly sweet and creamy flavor of coconut rice pairs beautifully, mellowing out the boldness of the Bang Bang sauce.

  • Garlic Noodles: A quick toss of al dente noodles in garlic and butter provides a deliciously rich backdrop to the flavorful shrimp.

  • Crispy Spring Rolls: Add another crunch! These light, vegetable-packed rolls bring delightful texture and a hint of freshness alongside your shrimp.

  • Mango Salsa: The sweetness of fresh mango with cilantro and lime creates a vibrant contrast, enhancing the shrimp’s spicy profile.

  • Chilled Cucumber Salad: Refreshing cucumbers dressed with vinegar and a touch of sesame oil cool down the palate and beautifully contrast the shrimp’s warmth.

  • Pineapple Mojito: A refreshing cocktail with mint and lime infuses a tropical twist, making each sip a wonderful companion to the flavorful shrimp.

  • Chocolate Lava Cake: Round off the meal with something sweet! The rich, melty chocolate cake provides a decadent ending to the culinary journey you’ve embarked on.

Bang Bang Shrimp Recipe FAQs

What type of shrimp should I use for Bang Bang Shrimp?
Opt for large or jumbo raw, deveined, and peeled shrimp. They provide better texture and flavor, while smaller shrimp can easily overcook and become rubbery. I often recommend checking the shrimp for freshness; if they smell fishy or have dark spots, it’s best to choose another batch!

How can I store leftover Bang Bang Shrimp?
Store any leftover Bang Bang Shrimp in an airtight container in the refrigerator for up to 3 days. Make sure they are completely cooled before sealing to prevent moisture buildup, which can make them soggy over time.

Can I freeze Bang Bang Shrimp?
Absolutely! To freeze, arrange the fried shrimp in a single layer on a baking sheet and freeze until solid. Afterward, transfer them to a freezer bag or airtight container and store them for up to 3 months. When ready to enjoy, reheat them in the oven at 350°F for about 10-15 minutes until they’re heated through and crispy.

What if my Bang Bang Shrimp isn’t crispy?
If your shrimp don’t turn out crispy, there could be a few reasons. Ensure the oil is hot enough (325°F) before frying; if it’s too cool, the shrimp will absorb oil and become soggy. Additionally, avoid overcrowding the skillet, as this causes the temperature to drop. I usually find that frying in small batches really helps maintain that perfect crunch!

Is there a way to lighten the Bang Bang Shrimp recipe?
Yes, you can definitely lighten it up! Swap the mayonnaise for Greek yogurt in the sauce for a tangy twist. Moreover, consider air frying or baking the shrimp instead of deep frying to reduce oil usage while still achieving delicious flavor and texture.

Can pets eat Bang Bang Shrimp?
It’s best to keep Bang Bang Shrimp away from pets. While shrimp itself is safe in moderation, the sauce contains ingredients like sriracha and mayonnaise that can be harmful to pets. If you’re thinking about sharing, it’s always wise to consult with your veterinarian first!

Bang Bang Shrimp

Crispy Bang Bang Shrimp with Sweet and Spicy Sauce Magic

This Bang Bang Shrimp recipe delivers crispy shrimp paired with a sweet and spicy sauce, perfect for appetizers or a cozy night in.
Prep Time 15 minutes
Cook Time 15 minutes
Total Time 30 minutes
Servings: 4 servings
Course: Appetizers
Cuisine: Thai
Calories: 350

Ingredients
  

For the Shrimp
  • 1 pound Raw Shrimp Large or jumbo, deveined & peeled
For the Sauce
  • 1/2 cup Mayonnaise Can substitute with Greek yogurt
  • 1/2 cup Thai Sweet Chili Sauce
  • 2 cloves Minced Garlic
  • 1 tablespoon Sriracha Adjust to taste
For Dredging
  • 1/2 cup Whole Milk
  • 1/2 cup Sour Cream
  • 1 tablespoon Lemon Juice
  • 1 cup All-Purpose Flour
  • 1/4 cup Corn Starch
  • 1 teaspoon Salt
  • 1 teaspoon Black Pepper
  • 1 teaspoon Paprika
For Frying
  • 1 cup Oil Canola, olive, or avocado oil

Equipment

  • Large skillet
  • medium bowl
  • whisk
  • Tongs
  • Oil Thermometer

Method
 

Step-by-Step Instructions for Bang Bang Shrimp
  1. Begin by peeling and deveining your raw shrimp, ensuring they are clean and free of any shell debris. Pat them dry with a paper towel to remove excess moisture.
  2. In a medium bowl, combine whole milk, sour cream, and fresh lemon juice. Whisk these ingredients together until smooth.
  3. In a separate bowl, stir together all-purpose flour, cornstarch, salt, black pepper, and paprika. Mix these dry ingredients thoroughly.
  4. Take each cleaned shrimp and first dip it into the milk mixture, letting any excess drip off, then transfer them to the flour mixture.
  5. In a large skillet, pour in enough oil to reach about 1 to 1½ inches deep, and heat it to 325°F.
  6. Once the oil reaches 325°F, carefully add a batch of shrimp to the skillet and fry for approximately 2-3 minutes on each side.
  7. Remove the cooked shrimp from the skillet and place them on a plate lined with paper towels. In a separate bowl, combine mayonnaise, Thai sweet chili sauce, minced garlic, and sriracha.
  8. Toss the hot shrimp gently in the sauce until each piece is beautifully coated. Serve immediately.

Nutrition

Serving: 1mealCalories: 350kcalCarbohydrates: 20gProtein: 15gFat: 25gSaturated Fat: 3gPolyunsaturated Fat: 5gMonounsaturated Fat: 10gCholesterol: 150mgSodium: 800mgPotassium: 300mgFiber: 1gSugar: 5gVitamin A: 500IUVitamin C: 2mgCalcium: 50mgIron: 1mg

Notes

For maximum crunch, enjoy your Bang Bang Shrimp fresh and crispy. Store any leftovers in an airtight container for up to 3 days.

Tried this recipe?

Let us know how it was!

Creamy Hamburger Stroganoff That’s Dinner in 30 Minutes

As I rummaged through my kitchen pantry—mismatched spices and half-empty sauce jars staring back at me—a culinary epiphany struck: Hamburger Stroganoff was just what we needed. This comforting, budget-friendly dish is a lifesaver when I want to whip up something quick and satisfying, and the best part? It comes together in just 30 minutes! Perfect for busy weeknights, this homemade version skips the canned soup and showcases a creamy sauce made with love, captivating my family’s taste buds every time. With its creamy texture and rich flavors, it turns ordinary dinners into delightful experiences. Curious about how you can elevate your weeknight meals? Let’s dive into this delicious recipe!

Why Try Homemade Hamburger Stroganoff?

Quick and Easy: You’ll love how this recipe is ready in just 30 minutes, making it a go-to for busy weeknights.

Homemade Goodness: Say goodbye to canned soups! This creamy sauce is crafted from scratch, ensuring a freshness that’s unmatched.

Family Favorite: With its rich flavor and comforting texture, it’s a dish that both kids and adults adore—guaranteeing seconds around the table.

Versatile Ingredients: You can easily swap in turkey or even plant-based ground options for a lighter take, making it a flexible dish for all diets.

Budget-Friendly: This recipe uses simple, cost-effective ingredients that won’t break the bank—perfect for any home cook!

And if you enjoy comforting meals, don’t forget to check out Cheesy Hamburger Potato for another delightful option or Hamburger Steak Country for a classic twist!

Hamburger Stroganoff Ingredients

• Your journey to a cozy dinner begins here with these wholesome ingredients.

For the Pasta

  • Egg Noodles – Essential for holding the creamy sauce and providing that comforting base—stick to 6 ounces for the best coat.

For the Meat

  • Ground Beef – A hearty protein choice that brings rich flavors; feel free to substitute with ground turkey for a leaner option.

For the Sauce

  • Butter – Adds a delightful richness while sautéing; olive oil works too if you’re looking for a lighter touch.
  • Flour – This thickens the sauce to creamy perfection; cornstarch is a great gluten-free alternative.
  • Beef Broth – Vital for developing deep flavor; if unavailable, chicken broth is a suitable substitute.
  • Milk – Gives the sauce its creamy texture; opt for non-dairy milk if you need a lactose-free version.
  • Garlic Powder – Enhances the overall flavor profile; fresh minced garlic brings an even brighter taste.
  • Onion Powder – Offers savoriness to the dish; finely chopped onions can create a fresh twist instead.
  • Pepper and Salt – Simple seasonings that elevate the flavor; adjust according to your taste preferences.
  • Sour Cream – The star of the sauce for smoothness and a hint of tang; Greek yogurt can lighten things up nicely.

Feel free to experiment with different ingredient swaps to make this homemade Hamburger Stroganoff your own and embrace the joy of home cooking!

Step‑by‑Step Instructions for Hamburger Stroganoff

Step 1: Cook the Noodles
Start by bringing a large pot of salted water to a boil. Add 6 ounces of egg noodles and cook them for 2 minutes less than the package directions, which typically takes about 8-10 minutes. Once al dente, drain the noodles and set them aside; they will later soak up the delicious sauce for the Hamburger Stroganoff.

Step 2: Brown the Beef
In a large skillet, heat over medium high and add a pound of ground beef. Cook for about 6-8 minutes, stirring frequently, until it’s browned and no longer pink. Make sure to break it into smaller pieces as it cooks for even browning. Once done, drain any excess fat, leaving just a touch for flavor, and remove the beef from the skillet to keep warm.

Step 3: Create the Roux
In the same skillet, melt 2 tablespoons of butter over medium heat. Whisk in 2 tablespoons of flour, cooking for about 2 minutes until the mixture is bubbling and golden. This roux is vital for thickening the creamy sauce that will envelop your Hamburger Stroganoff, so be attentive to its color and consistency.

Step 4: Add the Liquids
Slowly whisk in 2 cups of beef broth to the roux, ensuring it blends smoothly. As the mixture thickens after about 3-4 minutes, add in 1 cup of milk, stirring continuously until the sauce becomes rich and creamy—this will take about 5-7 minutes. Look for a velvety texture that clings to your spoon.

Step 5: Season the Sauce
Now, sprinkle in 1 teaspoon of garlic powder, 1 teaspoon of onion powder, and a pinch of salt and pepper to elevate the flavor of your Hamburger Stroganoff. Stir well to combine all the spices, allowing them to infuse into the sauce. Let it simmer for a minute, releasing those comforting aromas.

Step 6: Combine Everything
Reduce the heat to low and gently stir in the cooked noodles and browned beef back into the creamy sauce. Toss everything together thoroughly for about 2-3 minutes until all the ingredients are evenly coated and heated through. This step ensures each bite of your Hamburger Stroganoff is delightful and satisfying.

Step 7: Add the Creamy Touch
Remove the skillet from heat and fold in 1 cup of sour cream. Stir gently to integrate the sour cream without boiling, maintaining that silky texture. This will transform your sauce, giving it a perfect creamy finish that complements the hearty components beautifully.

Step 8: Serve and Enjoy
Dish out your flavorful Hamburger Stroganoff onto plates while it’s still warm. Pair it with a side of steamed vegetables or garlic toast for a complete meal. Enjoy the rich flavors and creamy texture, knowing you’ve created a comforting dinner in just 30 minutes!

Hamburger Stroganoff Variations & Substitutions

Customize your Hamburger Stroganoff to suit your taste buds and dietary needs with these delightful tweaks!

  • Dairy-Free: Swap the sour cream and milk with coconut milk and dairy-free yogurt for a creamy yet plant-based version.
  • Gluten-Free: Use gluten-free pasta and cornstarch instead of flour to achieve that perfect thick sauce without the gluten!
  • Vegetarian: Replace ground beef with lentils or mushrooms—these alternatives provide a hearty texture while keeping the dish filling.
  • Spicy Kick: Add a teaspoon of red pepper flakes or diced jalapeños to the sauce for a spicy twist that will awaken your senses.
  • Extra Veggies: Toss in some sautéed mushrooms, spinach, or bell peppers for vibrant color and added nutrition in every irresistible bite.
  • Texture Twist: Try including crispy fried onions or crushed crackers on top just before serving for that satisfying crunch against the creamy sauce.
  • Pasta Variety: Switch up the pasta with wide egg noodles, pappardelle, or even zoodles for a unique touch that keeps things interesting.
  • Creamy Dream: For an ultra-rich sauce, add a dollop of cream cheese or a splash of heavy cream along with the sour cream.

If you’re looking for more comforting meals, check out Cheesy Hamburger Potato or enjoy a delightful twist with Hamburger Steak Country. Happy cooking!

Make Ahead Options

These Homemade Ground Beef Stroganoff preparations are perfect for busy cooks looking to save time during the week! You can easily prep the beef and sauce components up to 3 days in advance. Simply cook the ground beef, whip up the creamy sauce, and store them separately in airtight containers in the refrigerator. To maintain the quality, let the sauce cool before refrigerating to prevent condensation. When you’re ready to enjoy your meal, just reheat the beef and sauce in a skillet, then stir in freshly cooked egg noodles. This way, you can have a delicious and satisfying dinner on the table with minimal effort, keeping mealtime stress at bay!

What to Serve with 30-Minute Homemade Ground Beef Stroganoff

A warm bowl of homemade comfort brings the family together, but what delightful sides will elevate this culinary experience?

  • Steamed Broccoli: The crisp texture and earthy flavor of broccoli provide a fresh contrast to the creamy sauce, balancing the richness beautifully.

  • Garlic Bread: A loaf of crusty garlic bread is perfect for soaking up every last drop of that savory sauce, making it a family favorite.

  • Green Salad: A light, vibrant salad with mixed greens and a tangy vinaigrette adds freshness and a refreshing crunch to round out the meal.

  • Roasted Carrots: With their natural sweetness, roasted carrots are a colorful complement that enhances the comforting aspects of the stroganoff.

  • Mashed Potatoes: Creamy mashed potatoes are an iconic pairing, providing an extra layer of comfort that’s hard to resist, especially for those chilly nights.

  • Crisp White Wine: A chilled glass of Sauvignon Blanc or Pinot Grigio cuts through the richness of the stroganoff, providing a refreshing palate cleanse.

  • Chocolate Mousse: For dessert, a silky chocolate mousse will end the meal on a sweet note, perfectly contrasting the creamy flavors of your dish.

Each of these pairings enhances the flavors of your homemade Hamburger Stroganoff, ensuring an unforgettable dining experience that’s both nourishing and delightful!

Expert Tips for Hamburger Stroganoff

  • Perfect Pasta: Cook egg noodles just until al dente; overcooking can lead to mushy noodles that won’t hold the creamy sauce well.

  • Flavor Boost: Don’t skip the garlic and onion powders; they add depth to your Hamburger Stroganoff. Fresh options can amplify the flavor even more.

  • Roux Wisely: Take care to cook the flour until golden but not burnt; this is crucial for achieving that rich, creamy sauce texture.

  • Add Cream Slowly: Incorporate the sour cream off the heat to maintain its creaminess; boiling can cause it to curdle.

  • Veggie Variations: Feel free to customize by adding sautéed mushrooms or peas—these can elevate the nutrition and texture of your meal.

  • Store Right: Keep leftovers in an airtight container for up to 4 days. Adding a splash of milk during reheating can restore creaminess wonderfully in your Hamburger Stroganoff.

How to Store and Freeze Hamburger Stroganoff

Fridge: Store in an airtight container for up to 4 days. Reheat gently on the stove, adding a splash of milk to restore the creamy texture.

Freezer: For longer storage, freeze in a tight-sealing container for up to 3 months. Thaw overnight in the fridge before reheating a portion in a skillet or microwave.

Reheating: When reheating your Hamburger Stroganoff, do so over medium heat, stirring regularly until warmed through. Adding a little milk can enhance the creaminess after freezing.

Leftovers: This is a fantastic make-ahead meal, perfect for busy weeknights or family gatherings, ensuring everyone enjoys comforting flavors even on the go!

Hamburger Stroganoff Recipe FAQs

How do I choose the right egg noodles for Hamburger Stroganoff?
Absolutely! For the best results, opt for wide egg noodles as they hold the creamy sauce well. Ensure you stick to about 6 ounces, which will perfectly coat the noodles without overwhelming the dish. Feel free to try other pasta types if you prefer, just adjust the cooking time accordingly.

What’s the best way to store leftover Hamburger Stroganoff?
You can easily store your Hamburger Stroganoff in an airtight container in the fridge for up to 4 days. Ensure it’s cooled before sealing; this keeps it fresh. When reheating, add a splash of milk to help restore that luscious creaminess that makes this dish so delightful!

Can I freeze Hamburger Stroganoff?
Absolutely! To freeze, transfer the cooled Hamburger Stroganoff into a tightly-sealing container. It can last for up to 3 months in the freezer. When you’re ready to enjoy it, thaw overnight in the fridge, and then reheat gently in a skillet or microwave. Remember, a little extra milk can bring back its creamy texture!

What common mistakes should I avoid while making Hamburger Stroganoff?
One common mistake is overcooking the egg noodles, which leads to mushy pasta. Cook them just until al dente as they will continue to soften when mixed into the sauce. Also, remember to add the sour cream off the heat to prevent curdling. Keep an eye on your roux as well; it should be golden, not burnt, to create that beautiful creamy sauce.

Is Hamburger Stroganoff a good option for those with dietary restrictions?
Certainly! If you or someone in your family is looking for alternative proteins, you can substitute the ground beef with turkey or plant-based options, making it a versatile dish. For dairy-free versions, use non-dairy milk and yogurt. Always adjust seasonings to accommodate dietary preferences and avoid any allergens.

How long does Homemade Hamburger Stroganoff usually last in the fridge?
When stored correctly in an airtight container, your delicious Homemade Hamburger Stroganoff will last about 3 to 4 days in the refrigerator. Make sure it’s cooled before sealing, and when you reheat it, adding a splash of milk can help maintain that creamy consistency!

Hamburger Stroganoff

Creamy Hamburger Stroganoff That’s Dinner in 30 Minutes

This Hamburger Stroganoff is a comforting, budget-friendly dish that comes together in just 30 minutes, perfect for busy weeknights.
Prep Time 10 minutes
Cook Time 20 minutes
Total Time 30 minutes
Servings: 4 servings
Course: Dinner
Cuisine: American
Calories: 450

Ingredients
  

For the Pasta
  • 6 ounces Egg Noodles Essential for holding the creamy sauce.
For the Meat
  • 1 pound Ground Beef A hearty protein choice.
For the Sauce
  • 2 tablespoons Butter Adds richness.
  • 2 tablespoons Flour Thickens the sauce.
  • 2 cups Beef Broth Vital for flavor.
  • 1 cup Milk For creamy texture.
  • 1 teaspoon Garlic Powder Enhances flavor.
  • 1 teaspoon Onion Powder Adds savoriness.
  • to taste Pepper Adjust according to taste.
  • to taste Salt Adjust according to taste.
  • 1 cup Sour Cream For smoothness and tang.

Equipment

  • Large pot
  • Skillet
  • whisk

Method
 

Directions
  1. Start by bringing a large pot of salted water to a boil. Add egg noodles and cook them for 2 minutes less than the package directions, about 8-10 minutes. Drain and set aside.
  2. In a large skillet, heat over medium high and add ground beef. Cook for about 6-8 minutes, stirring frequently, until it’s browned and no longer pink. Drain excess fat.
  3. In the same skillet, melt butter over medium heat. Whisk in flour, cooking until bubbling and golden for about 2 minutes.
  4. Slowly whisk in beef broth to the roux, ensuring it blends smoothly. After about 3-4 minutes, add milk and stir continuously until the sauce is rich and creamy.
  5. Add garlic powder, onion powder, and a pinch of salt and pepper. Stir well and let it simmer for a minute.
  6. Reduce the heat to low and stir in the cooked noodles and browned beef. Toss everything for about 2-3 minutes.
  7. Remove from heat and fold in sour cream, stirring gently to integrate.
  8. Serve warm with a side of steamed vegetables or garlic toast.

Nutrition

Serving: 1servingCalories: 450kcalCarbohydrates: 40gProtein: 25gFat: 20gSaturated Fat: 10gPolyunsaturated Fat: 1gMonounsaturated Fat: 9gCholesterol: 80mgSodium: 800mgPotassium: 600mgFiber: 2gSugar: 4gVitamin A: 10IUVitamin C: 2mgCalcium: 6mgIron: 15mg

Notes

This recipe is versatile; feel free to swap in turkey or plant-based options. Store leftovers in an airtight container for up to 4 days.

Tried this recipe?

Let us know how it was!

Stay Connected

Get recipes via email: