Get my cookbooks

Savory Shrimp Con Queso: A Quick Keto Delight at Home

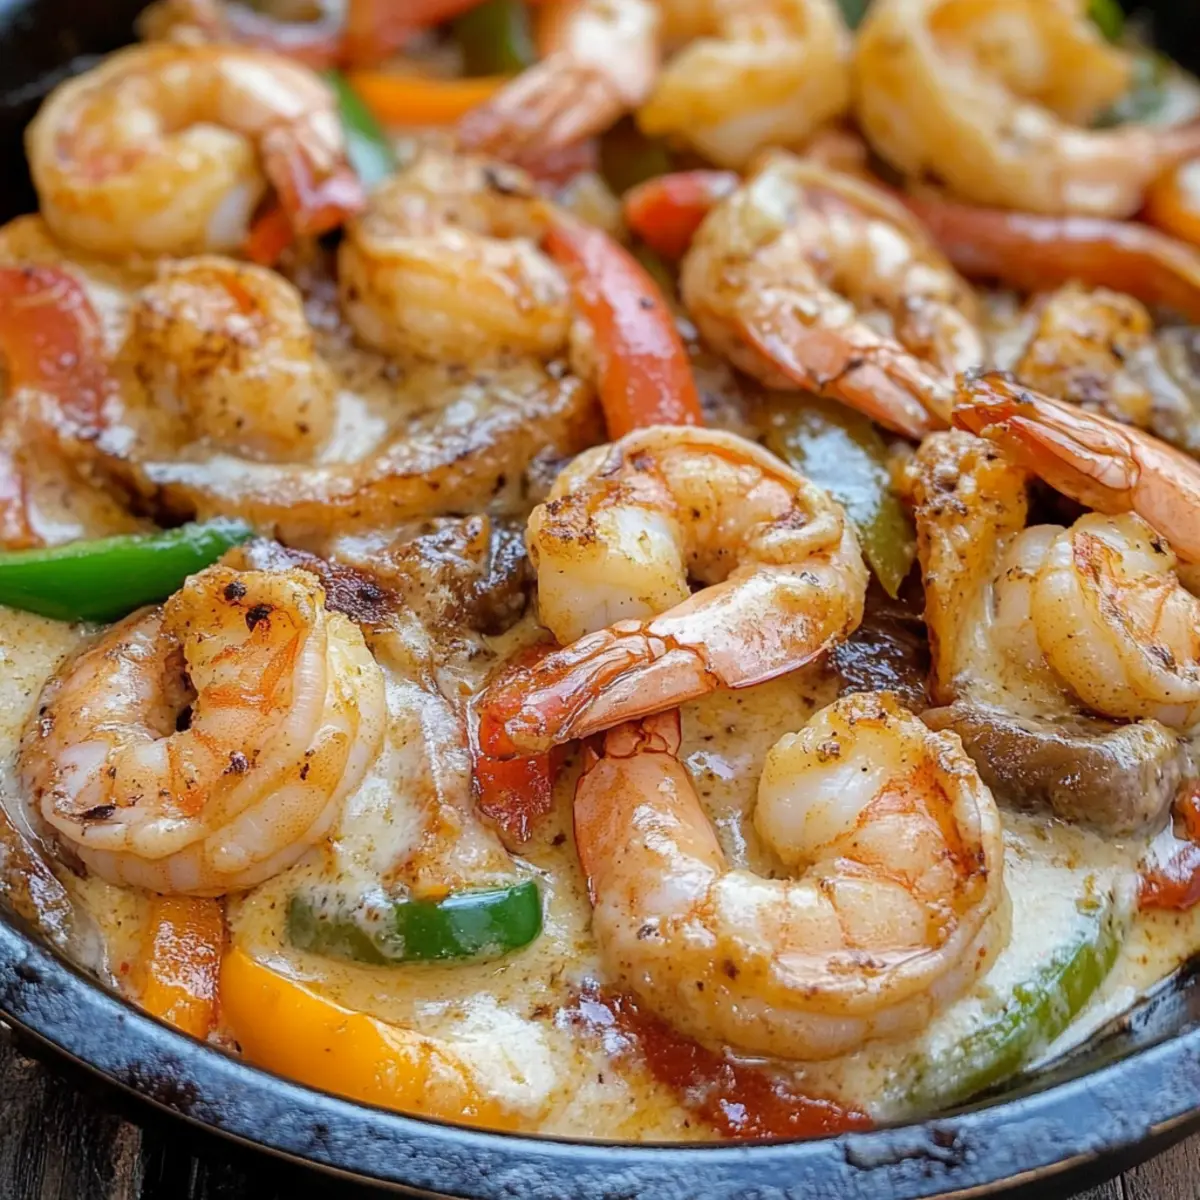
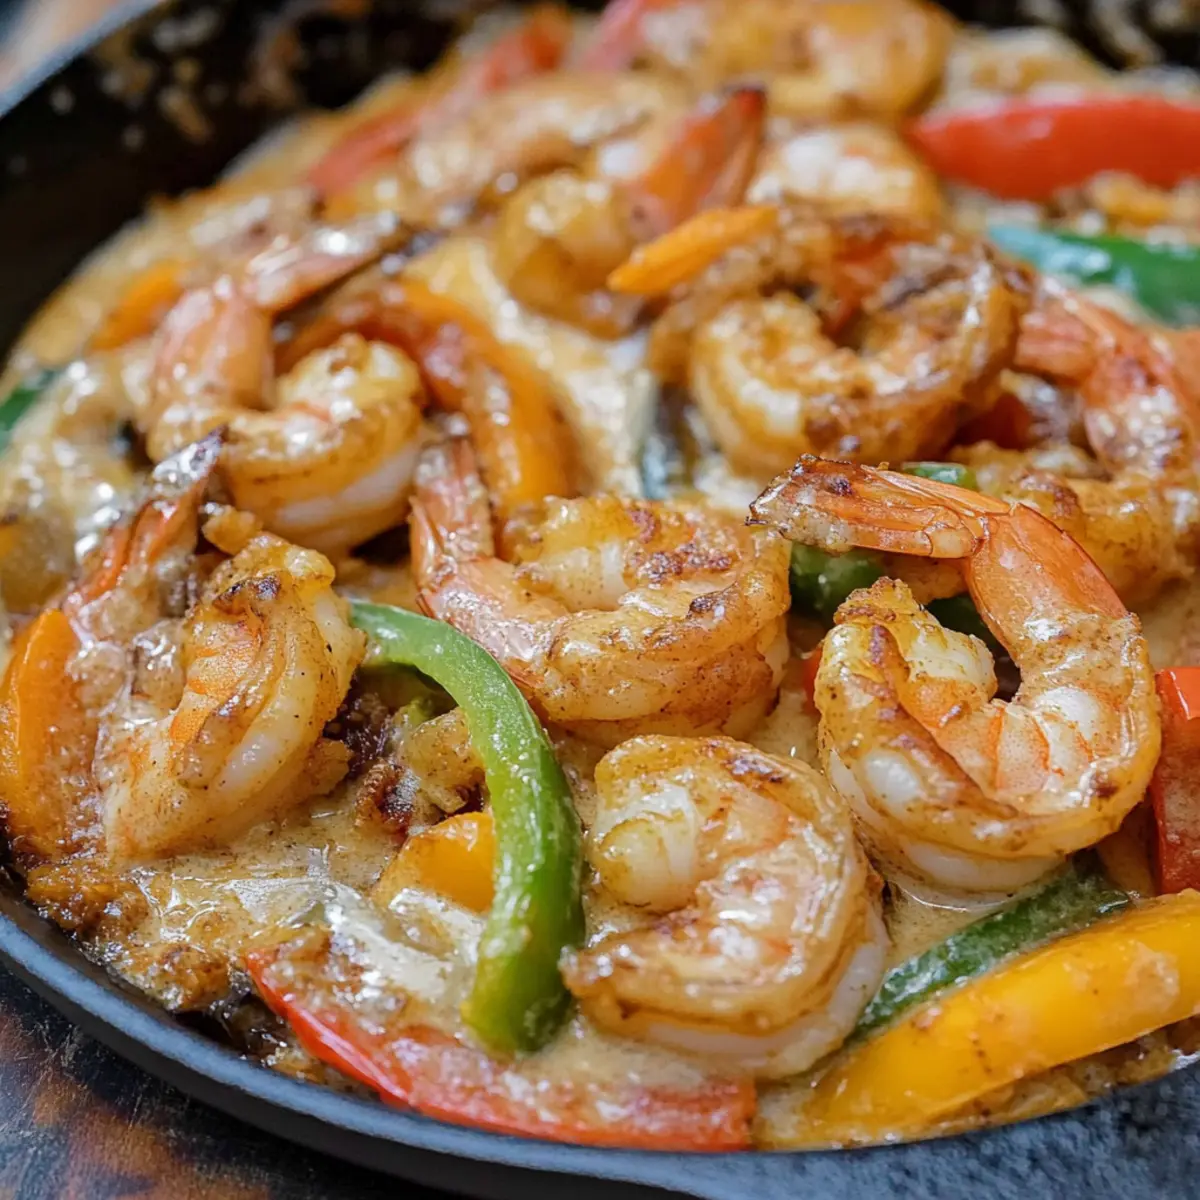
In just 20 minutes, your kitchen can transform into a vibrant fiesta with the delightful aromas of Shrimp Con Queso wafting through the air. This one-pan wonder features juicy shrimp, colorful vegetables, and a rich, creamy queso sauce that’s as comforting as it is satisfying. Not only does this dish cater to your low-carb needs, but it also impresses with its gourmet appeal—perfect for those weeknight dinners or special gatherings. Plus, its quick prep time makes it a go-to for busy weeknights, leaving you more time to savor culinary triumphs with loved ones. Are you ready to discover how easily you can whip up this crowd-pleaser?

Why is Shrimp Con Queso a Must-Try?

Quick Preparation: In just 20 minutes, you can create a dish that rivals your favorite restaurant offerings, perfect for weeknight meals.

One-Pan Wonder: Minimal cleanup is required, making it a breather for busy chefs who value their time in the kitchen.

Keto-Friendly: Low-carb ingredients mean you can enjoy this creamy delight without sacrificing your diet.

Crowd-Pleasing Flavor: Satisfy your guests with rich queso and perfectly cooked shrimp, creating a hearty meal everyone will love.

Versatile Options: Mix it up by incorporating additional veggies for added nutrients or serve with cauliflower rice for a satisfying low-carb pairing.

Looking for more delicious shrimp ideas? Don’t miss trying Shrimp Avocado Bowls or Parmesan Roasted Shrimp for a delightful twist!

Shrimp Con Queso Ingredients

For the Queso Sauce

  • Olive Oil – Great for sautéing; substitute with any neutral oil like canola or avocado oil if needed.
  • Heavy Cream – Adds richness to the queso; can use half-and-half or milk for a lighter version.
  • Cream Cheese – Creates a creamy texture; no direct substitutes but Greek yogurt can be a lower-fat alternative.
  • Shredded Pepper Jack Cheese – Offers a spicy kick; swap with cheddar or a milder cheese if preferred.
  • White American Cheese – Enhances creaminess; can be replaced with more pepper jack or any melting cheese.

For the Vegetables and Protein

  • Bell Peppers – Adds sweetness and color; use mixed colored bell peppers for vibrancy.
  • Red Onion – Provides sharpness and depth of flavor; substitute with yellow onion if unavailable.
  • Mushrooms – Contributes umami and texture; can use white button or cremini mushrooms.
  • Thawed Shrimp – The main protein; ensure they are deveined and shelled; fresh or frozen can be used (thawed).
  • Taco Seasoning – A blend of spices for flavor; substitute with a homemade mix of chili powder, cumin, garlic powder, and paprika if necessary.

Get ready to dive into the creamy, cheesy world of Shrimp Con Queso that’s both satisfying and quick to make!

Step‑by‑Step Instructions for Shrimp Con Queso

Step 1: Sauté Vegetables
Begin by heating a large skillet over medium heat. Add a drizzle of olive oil, allowing it to warm for about 1 minute. Toss in the mixed bell peppers, red onion, and mushrooms, sautéing until they become tender and slightly caramelized, which should take about 5-6 minutes. Stir occasionally to ensure even cooking and bring out the vibrant colors.

Step 2: Cook Shrimp
Next, add in the thawed shrimp along with taco seasoning, tossing everything together so that the shrimp is evenly coated. Cook for about 2-3 minutes, or until the shrimp turn pink and opaque, signaling they are fully cooked. Once done, remove the shrimp and vegetable mixture from the skillet, setting them aside temporarily while you prepare the queso.

Step 3: Prepare Queso Sauce
Lower the heat to low and return the skillet to the stove. Add cream cheese and heavy cream, stirring gently until the mixture becomes smooth with few clumps. This should take about 2-3 minutes, creating a luscious base for your cheese sauce. Gradually incorporate the shredded Pepper Jack cheese, stirring continuously to ensure it melts evenly and becomes creamy.

Step 4: Combine
Once the queso is smooth and creamy, bring back the cooked shrimp and sautéed vegetables into the skillet. Carefully fold them into the queso sauce, ensuring everything is well-coated and heated through, which should take another 1-2 minutes. The Shrimp Con Queso is now ready to serve hot, a comforting dish full of rich flavors.

Make Ahead Options

These Shrimp Con Queso are perfect for meal prep enthusiasts seeking to save time during busy weeknights! You can chop the vegetables and measure out the shrimp and taco seasoning up to 24 hours in advance. Simply refrigerate them in airtight containers to maintain their freshness. The creamy queso sauce can also be prepared ahead of time—just store it in the fridge for up to 3 days. When you’re ready to serve, reheat the queso gently on low heat, then add the sautéed vegetables and shrimp, stirring until everything is heated through. This way, you can enjoy the same rich flavors and creamy texture with minimal effort!

What to Serve with Shrimp Con Queso

Elevate your dining experience by pairing this creamy, zesty dish with delightful sides that complement its vibrant flavors.

  • Crispy Cauliflower Rice: Light and fluffy, this low-carb option absorbs the queso beautifully, making the perfect base for your shrimp.
  • Homemade Guacamole: The cool creaminess of smashed avocado balances the spice in the quesos, adding a fresh, buttery touch.
  • Zesty Cilantro Lime Rice: The brightness of lime cuts through the richness, while cilantro adds a refreshing note enhancing the entire meal.
  • Corn Tortilla Chips: Crunchy and salty, these are perfect for scooping up that luscious queso, bringing a delightful textural contrast.
  • Fresh Garden Salad: Crisp greens with a tangy vinaigrette help cleanse the palate, making every bite of the shrimp and queso feel even more satisfying.
  • Sliced Avocado: Simple yet satisfying, the richness of avocado adds creaminess without overwhelming the dish, providing a healthy fat boost.
  • Chilled White Sangria: This refreshing drink blends fruity flavors with a hint of acidity, making it a wonderful pairing for the warm, cheesy goodness.
  • Chocolate Avocado Mousse: For dessert, this indulgent yet healthy treat echoes the creamy theme, making it a sweet ending without breaking your keto goals.

Expert Tips for Shrimp Con Queso

  • Perfect Shrimp Cook: Ensure the shrimp are cooked just until they turn pink and opaque; overcooking can lead to a rubbery texture.

  • Silky Queso Sauce: Gradually add cheese to the cream mixture while stirring constantly to avoid lumps and achieve a smooth consistency in your queso.

  • Store Wisely: If you have leftovers, store them in an airtight container in the fridge for up to 3-4 days, but remember, the Shrimp Con Queso is best enjoyed fresh.

  • Reheat Gently: When reheating, do so on low heat to gently warm the dish without separating the sauce. Adding a splash of cream can help restore its silky texture.

  • Customization Options: Feel free to experiment with extra veggies or spices; this dish is versatile and can be adapted to suit various preferences while keeping it keto-friendly.

Shrimp Con Queso Adaptations

Feel free to unleash your culinary creativity and personalize this delightful dish to suit your taste preferences!

  • Extra Veggies: Boost nutrition by adding zucchini or spinach—both will blend beautifully into the creamy sauce and add some delightful color.
  • Cheese Swap: Prefer a different flavor? Replace Pepper Jack with sharp cheddar for a milder taste that’s still wonderfully cheesy.
  • Spice It Up: If you love heat, pile on the chili flakes or fresh jalapeños to your taco seasoning for an electrifying kick.
  • Creamy Alternative: To cut calories, substitute heavy cream with Greek yogurt for a tangy yet creamy twist, perfect for anyone watching their waistline.
  • Cauliflower Rice: Turn this dish into a complete low-carb meal by serving it over cauliflower rice, making for a hearty and satisfying base.
  • Snack Time Version: Transform it into a dip for parties by reducing the cooking time and serving it warm with tortilla chips or cucumber slices on the side.
  • Garnish Galore: A sprinkle of fresh cilantro or scallions on top will add freshness and an appealing burst of color to your presentation.
  • Mushroom Medley: Swap out or mix in various mushrooms, like shiitake or oyster, for an earthy flavor that takes the dish to new culinary heights.

Looking for more delicious shrimp ideas? Don’t miss trying the savory Shrimp Scampi Pasta or the mouthwatering Marry Shrimp Pasta for a delightful twist!

How to Store and Freeze Shrimp Con Queso

Fridge: Store leftovers in an airtight container for up to 3-4 days; the flavors will deepen over time, enhancing this delicious Shrimp Con Queso.

Freezer: If you want to freeze, it’s best to separate the sauce from the shrimp and veggies to prevent separation upon thawing; freeze for up to 2 months.

Reheating: When ready to enjoy, gently reheat on the stove over low heat, adding a splash of cream to restore creaminess—stir frequently for an even warmth.

Avoid Freezing with Cheese: Freezing the cheesy sauce is not recommended, as it may separate upon thawing, leading to a less appealing texture.

Shrimp Con Queso Recipe FAQs

How do I select ripe vegetables for my Shrimp Con Queso?
Absolutely! When choosing bell peppers, look for ones that are firm and free of blemishes or soft spots. The more vibrant the color, the sweeter the flavor! For mushrooms, opt for those that are plump and firm. A good rule of thumb is to check the packaging for the freshest options when picking frozen shrimp; they should be frozen solid without any freezer burn.

How should I store leftovers of Shrimp Con Queso?
Very straightforward! Place any leftovers in an airtight container and store them in the refrigerator for up to 3-4 days. Make sure to let it cool to room temperature before sealing to keep them fresh. When you’re ready to reheat, do so gently on the stove or in a microwave, stirring occasionally to avoid overheating the sauce.

Can I freeze Shrimp Con Queso?
Yes, but with caution! To freeze, it’s best to separate the cheese sauce from the shrimp and vegetables. Pour the sauce into a freezer-safe container and freeze for up to 2 months. Thaw it overnight in the fridge before reheating. Remember, the cheese sauce may separate upon thawing, so it’s a good idea to stir in a splash of cream while reheating for that smooth texture.

What if the sauce becomes too thick after refrigeration?
No worries! If you find your queso sauce has thickened too much upon storage, just add a splash of water or cream when reheating. Heat it over low heat while stirring continuously until the desired consistency is achieved. This will help restore that creamy goodness and make it delightful again!

Are there any dietary considerations I should keep in mind?
Absolutely! If you’re cooking for someone with dairy allergies, consider substituting the cream cheese with a dairy-free cheese alternative. Make sure to check the shrimp packaging for allergens if preparing for someone with shellfish allergies. Additionally, while this recipe is keto-friendly, always consult dietary guidelines if your guests have specific needs.

Can I add more vegetables to my Shrimp Con Queso?
Definitely, the more the merrier! Feel free to incorporate zucchini, spinach, or even diced tomatoes for added nutrients and flavor. Just remember to adjust your cooking time as needed to ensure everything is properly sautéed and flavorful!

Shrimp Con Queso

Savory Shrimp Con Queso: A Quick Keto Delight at Home

Enjoy a quick and creamy Shrimp Con Queso, perfect for keto diets and sure to impress your guests.
Prep Time 10 minutes
Cook Time 10 minutes
Total Time 20 minutes
Servings: 4 servings
Course: Appetizers
Cuisine: Mexican
Calories: 350

Ingredients
  

For the Queso Sauce
  • 2 tablespoons Olive Oil Can substitute with canola or avocado oil.
  • 1 cup Heavy Cream Can use half-and-half or milk for a lighter version.
  • 8 ounces Cream Cheese No direct substitutes, Greek yogurt can be a lower-fat alternative.
  • 1 cup Shredded Pepper Jack Cheese Can swap with cheddar or a milder cheese.
  • 4 ounces White American Cheese Can be replaced with more pepper jack or any melting cheese.
For the Vegetables and Protein
  • 1 cup Bell Peppers Use mixed colored bell peppers for vibrancy.
  • 1 medium Red Onion Can substitute with yellow onion.
  • 1 cup Mushrooms Can use white button or cremini mushrooms.
  • 1 pound Thawed Shrimp Ensure shrimp are deveined and shelled; can use fresh or frozen.
  • 2 tablespoons Taco Seasoning Substitute with a homemade mix if necessary.

Equipment

  • Large skillet

Method
 

Step-by-Step Instructions for Shrimp Con Queso
  1. Begin by heating a large skillet over medium heat. Add olive oil and warm for about 1 minute. Toss in bell peppers, red onion, and mushrooms. Sauté until tender and caramelized, about 5-6 minutes.
  2. Add the thawed shrimp and taco seasoning, tossing until shrimp is coated. Cook for 2-3 minutes until shrimp is pink and opaque. Remove from skillet and set aside.
  3. Lower heat to low, return skillet, and add cream cheese and heavy cream. Stir until smooth, about 2-3 minutes. Gradually add shredded Pepper Jack cheese while stirring until creamy.
  4. Fold cooked shrimp and vegetables back into the queso sauce, ensuring everything is well-coated and heated through, about 1-2 minutes. Serve hot.

Nutrition

Serving: 1servingCalories: 350kcalCarbohydrates: 8gProtein: 25gFat: 28gSaturated Fat: 15gMonounsaturated Fat: 10gCholesterol: 200mgSodium: 900mgPotassium: 400mgFiber: 2gSugar: 2gVitamin A: 600IUVitamin C: 80mgCalcium: 500mgIron: 2mg

Notes

Leftovers can be stored in an airtight container for up to 3-4 days. Best enjoyed fresh. Reheat gently on low heat, adding a splash of cream if needed.

Tried this recipe?

Let us know how it was!

Delicious Chicken Enchiladas Recipe for a Cozy Night In

In the midst of a hectic week, I stumbled upon a comforting tradition: high-protein chicken enchiladas with creamy white sauce. These delightful bundles, filled with tender chicken and wrapped snugly in soft tortillas, have quickly become my go-to for simple yet satisfying dinners. Not only are these chicken enchiladas versatile and easy to customize for any dietary need, they also pack a nutritious punch, making them perfect for nourishing both body and spirit. Whether you’re navigating a busy evening or just looking to elevate your weeknight fare, I promise this recipe streamlines the process while delivering a delectable result. What kind of twist will you add to make it your own? Dive in and let’s get cooking!

Why Are These Enchiladas a Must-Try?

Flavorful, these high-protein chicken enchiladas are loaded with tender fillings and topped with a creamy white sauce that will have everyone raving at your dinner table. Versatile for dietary needs, swap in gluten-free tortillas or add veggies like bell peppers to customize your meal. Quick and easy to prepare, they’re perfect for busy weeknights when you want something comforting yet nutritious. Impress your guests with a cozy dish that feels gourmet but requires minimal effort. For a balanced meal, serve with refreshing sides like guacamole or fresh salsa!

Chicken Enchiladas Recipe Ingredients

Here’s everything you need to whip up your own delicious chicken enchiladas!

For the Filling

  • Shredded Chicken – Main filling source; adds protein and tenderness. Use leftover roasted chicken or store-bought rotisserie for convenience.
  • Tortillas – Form the base; whole wheat enhances fiber content. Alternative: corn tortillas for a gluten-free option.

For the Sauce

  • Greek Yogurt – Creamy sauce base; provides protein and tanginess. Substitute with sour cream if preferred.
  • Milk – Adjusts sauce consistency; helps create a smooth texture. Use any non-dairy milk for a lactose-free option.
  • Olive Oil – Adds richness to the sauce. Can substitute with melted butter.
  • Garlic Powder – Enhances flavor profile. Fresh minced garlic can be used for a stronger taste.
  • Cumin, Salt, Pepper – Seasoning; essential for flavoring the chicken. Adjust spices to taste.

For Topping

  • Cheese (Monterey Jack/Cheddar) – Topping; provides melty texture. Opt for freshly shredded cheese to avoid anti-caking agents.

Step‑by‑Step Instructions for High-Protein Chicken Enchiladas with Creamy White Sauce

Step 1: Preheat the Oven
Begin by preheating your oven to 375°F (190°C). This ensures a perfectly cooked finish for your delicious chicken enchiladas. While the oven warms up, you can gather all your ingredients and enjoy the anticipation of the comforting meal you’re about to create.

Step 2: Prepare the Chicken Filling
In a large mixing bowl, combine the shredded chicken with garlic powder, cumin, salt, and pepper. Mix until the chicken is thoroughly coated with the seasonings for an evenly flavored filling. This aromatic blend will enhance the taste of your enchiladas, setting a flavorful foundation for this comforting dish.

Step 3: Soften the Tortillas
To make your tortillas pliable, wrap them in damp paper towels and microwave for about 30 seconds. This helps prevent cracking when you roll them. Warm tortillas are essential for easy handling and ensure your chicken enchiladas are perfectly rolled, keeping all that delicious filling tucked inside.

Step 4: Assemble the Enchiladas
Spoon a generous portion of the chicken mixture onto each warmed tortilla, and roll them tightly. Place each filled tortilla seam-side down in a greased 9×13 dish. This arrangement allows the enchiladas to stay together while they bake and absorb the delicious creamy white sauce that you will prepare next.

Step 5: Make the Creamy White Sauce
In a separate bowl, whisk together the Greek yogurt, milk, and olive oil until smooth and creamy. Adjust the sauce’s consistency by adding more milk or yogurt as needed; it should mimic the texture of melted ice cream. This luscious sauce will generously blanket your chicken enchiladas, adding a rich flavor profile.

Step 6: Pour Sauce Over Enchiladas
Once your sauce is ready, carefully pour it over the rolled enchiladas in the baking dish. Make sure to cover them evenly, ensuring that each enchilada is generously drenched in the creamy goodness. Then, sprinkle shredded cheese on top, allowing it to melt beautifully during baking.

Step 7: Bake to Perfection
Place the dish in the preheated oven and bake for 20 minutes. You know they’re done when the cheese is golden brown and the sauce is bubbling around the edges. Allowing the enchiladas to bake until bubbly creates that irresistible texture that seals in all the savory flavors of the chicken filling.

Step 8: Rest and Serve
After baking, let your chicken enchiladas rest for about 5 minutes before serving. This resting period allows the sauce to thicken slightly, making it easier to serve without spilling. Garnish with your favorite toppings, and enjoy this delightful, high-protein meal with friends and family!

Expert Tips for Chicken Enchiladas Recipe

  • Warm Tortillas: Prevent cracking by warming your tortillas in the microwave wrapped in damp paper towels. This ensures easy rolling and a perfect seal.

  • Consistent Sauce: Aim for a sauce texture similar to melted ice cream. Adjust thickness by adding milk or yogurt as needed for the perfect creamy white sauce that coats the enchiladas.

  • Cheese Melting: Broil the enchiladas for the last minute to achieve a bubbly cheese topping. Keep a close eye during broiling to avoid burning!

  • Resting Time: Allow the enchiladas to rest for 5 minutes after baking. This helps thicken the sauce and makes serving easier, so you avoid spills when plating.

  • Ingredient Flexibility: Feel free to adapt the chicken enchiladas recipe by substituting veggies, using different cheese, or even opting for whole wheat or gluten-free tortillas to suit your dietary needs.

What to Serve with High-Protein Chicken Enchiladas with Creamy White Sauce

To complete your cozy meal, consider these delightful pairings that enhance the flavors and textures of your enchiladas.

  • Fresh Guacamole: This creamy dip adds a refreshing contrast, with rich avocado complementing the savory enchiladas beautifully. A dash of lime elevates both flavors.

  • Zesty Salsa: A homemade or store-bought salsa brings a burst of freshness! The tangy tomatoes and cilantro brighten up every bite, making them ideal partners for the rich enchiladas.

  • Crispy Mexican Rice: Serve alongside fluffy, seasoned rice to soak up the luscious white sauce. The mild spice pairs perfectly with the enchiladas’ creamy flavor profile.

  • Black Bean Salad: This vibrant mix of black beans, corn, and bell peppers provides a protein boost while offering a crunchy texture. It’s refreshing and colorful on the plate!

  • Roasted Vegetables: Seasoned lightly and roasted until caramelized, vegetables like zucchini and bell peppers create a healthy balance, adding some earthy sweetness to your meal.

  • Cool Cucumber Salad: Crisp cucumbers tossed in a light vinaigrette cleanse the palate and add brightness. This crunchy side is perfect for a refreshing contrast to the warm, cheesy enchiladas.

  • Cornbread Muffins: A slightly sweet, buttery cornbread muffin pairs nicely with the savory enchiladas. These fluffy bites evoke comfort and make for a delightful side.

  • Pina Colada Mocktail: Sip on a refreshing mocktail made with coconut and pineapple juice. This fruity drink adds a fun twist and transports you to a sunny getaway with every sip.

  • Chocolate Flan: End the meal with a creamy, rich chocolate flan that offers a luxurious dessert. Its velvety texture beautifully contrasts the savory dishes.

Chicken Enchiladas Recipe Variations

Feel free to explore these mouthwatering twists to make your chicken enchiladas uniquely yours!

  • Gluten-Free: Use corn tortillas instead of whole wheat for a delightful gluten-free experience without sacrificing flavor.
  • Vegetarian: Replace chicken with cooked black beans or lentils for a protein-packed vegetarian alternative that’s still hearty and satisfying.
  • Cottage Cheese: Swap shredded chicken for cottage cheese for a creamy texture that balances perfectly with the enchiladas.
  • Add Veggies: Toss in diced bell peppers, zucchini, or spinach to the filling for extra nutrients and a pop of color that elevates the enchiladas.
  • Heat It Up: Spice things up with jalapeños or a dash of hot sauce in the filling to give your enchiladas a fiery kick. Everyone loves a little heat!
  • Cheese Variety: Experiment with different cheeses like pepper jack or queso fresco for a flavorful twist on the traditional cheddar topping, offering richness and depth.
  • Herb Infusion: Mix in some fresh cilantro or chopped green onions with the chicken filling for a burst of freshness that complements the creamy sauce beautifully.

For a delicious pairing, why not serve these with some Sweet Chili Chicken or vibrant guacamole? Each variation adds a personal touch, ensuring your meal is as comforting as it is versatile!

Storage Tips for Chicken Enchiladas

  • Fridge: Store cooled chicken enchiladas in an airtight container for up to 3 days. This keeps your meal fresh and ready for quick reheating.

  • Freezer: For longer storage, freeze individual enchiladas wrapped in plastic wrap and foil. They can be kept for up to 2 months while maintaining their delicious texture.

  • Reheating: Reheat enchiladas in the oven at 350°F (175°C) for about 20-25 minutes, or until heated through. This ensures the cheese melts beautifully and the sauce remains creamy.

  • Thawing: If frozen, thaw enchiladas in the fridge overnight before reheating for best results. Enjoy these high-protein chicken enchiladas at your leisure!

Make Ahead Options

These High-Protein Chicken Enchiladas with Creamy White Sauce are perfect for meal prep enthusiasts! You can assemble the enchiladas and prepare the creamy white sauce up to 24 hours in advance, refrigerating them tightly covered. For optimal quality, ensure the tortillas are wrapped well to prevent them from drying out. When you’re ready to enjoy, simply bake the enchiladas straight from the fridge for about 25-30 minutes—check for bubbly cheese and heated through filling. You can also freeze individual portions for up to 3 months; thaw overnight in the fridge before baking. With these make ahead tips, you’ll have a nourishing, comforting meal ready in no time!

High-Protein Chicken Enchiladas with Creamy White Sauce Recipe FAQs

What type of tortillas should I use for chicken enchiladas?
Absolutely! You can use whole wheat tortillas for a healthier option or corn tortillas if you’re looking for gluten-free. Whole wheat tortillas not only enhance the fiber content but also add a nice nutty flavor that complements the enchiladas perfectly.

How long can I store leftover chicken enchiladas in the fridge?
Very! You can keep cooled chicken enchiladas in an airtight container for up to 3 days. Just make sure they are well-wrapped to maintain their flavor and prevent drying out.

Can I freeze chicken enchiladas?
Definitely! To freeze, individually wrap each enchilada in plastic wrap and then in foil to prevent freezer burn. They can stay fresh for up to 2 months. When you’re ready to enjoy, thaw them in the fridge overnight and reheat in the oven for about 20-25 minutes at 350°F (175°C) until heated through and creamy.

What should I do if my sauce is too thick?
Don’t worry; this is an easy fix! If your sauce ends up too thick, simply whisk in a little more milk or Greek yogurt until you reach the desired creamy consistency. Aim for a texture similar to melted ice cream, which should pour easily over the enchiladas.

Can I alter the recipe for dietary restrictions?
Absolutely! This recipe is versatile and can easily be adjusted to suit various dietary needs. To make it vegetarian, substitute the chicken with cooked beans or sautéed vegetables like bell peppers and spinach. You can also use non-dairy yogurt and milk for a dairy-free version.

How do I know when my enchiladas are done baking?
Great question! Your enchiladas are done when the cheese is golden brown and the sauce is bubbling. This usually takes around 20 minutes at 375°F (190°C). Allowing them to rest for about 5 minutes post-baking helps the sauce thicken for an easy serving experience.

Chicken Enchiladas Recipe

Delicious Chicken Enchiladas Recipe for a Cozy Night In

Try this high-protein chicken enchiladas recipe for a comforting dinner that’s versatile and easy to customize.
Prep Time 30 minutes
Cook Time 20 minutes
Resting Time 5 minutes
Total Time 55 minutes
Servings: 4 enchiladas
Course: Dinner
Cuisine: Mexican
Calories: 350

Ingredients
  

Filling
  • 2 cups Shredded Chicken Use leftover roasted chicken or store-bought rotisserie for convenience.
  • 8 whole Tortillas Whole wheat enhances fiber content. Alternative: corn tortillas for a gluten-free option.
Sauce
  • 1 cup Greek Yogurt Substitute with sour cream if preferred.
  • 0.5 cups Milk Use any non-dairy milk for a lactose-free option.
  • 2 tablespoons Olive Oil Can substitute with melted butter.
  • 1 teaspoon Garlic Powder Fresh minced garlic can be used for a stronger taste.
  • 1 teaspoon Cumin Adjust spices to taste.
  • 1 teaspoon Salt Adjust spices to taste.
  • 1 teaspoon Pepper Adjust spices to taste.
Topping
  • 1 cup Cheese (Monterey Jack/Cheddar) Opt for freshly shredded cheese to avoid anti-caking agents.

Equipment

  • Oven
  • Microwave
  • Mixing Bowl
  • baking dish
  • whisk

Method
 

Preparation Steps
  1. Preheat the oven to 375°F (190°C).
  2. Combine shredded chicken with garlic powder, cumin, salt, and pepper in a large bowl and mix well.
  3. Wrap tortillas in damp paper towels and microwave for about 30 seconds to soften.
  4. Spoon chicken mixture onto each tortilla and roll tightly. Place seam-side down in a greased 9x13 dish.
  5. Whisk together Greek yogurt, milk, and olive oil until smooth and creamy. Adjust consistency as needed.
  6. Pour the creamy sauce over the rolled enchiladas and sprinkle with shredded cheese.
  7. Bake for 20 minutes until cheese is golden brown and sauce is bubbling.
  8. Let the enchiladas rest for 5 minutes before serving.

Nutrition

Serving: 1enchiladaCalories: 350kcalCarbohydrates: 45gProtein: 25gFat: 12gSaturated Fat: 4gPolyunsaturated Fat: 1gMonounsaturated Fat: 6gCholesterol: 60mgSodium: 800mgPotassium: 300mgFiber: 4gSugar: 2gVitamin A: 400IUVitamin C: 2mgCalcium: 200mgIron: 2mg

Notes

Feel free to adapt the recipe by substituting veggies, using different cheese, or opting for gluten-free tortillas.

Tried this recipe?

Let us know how it was!

Irresistible Southern Smothered Chicken for Cozy Dinners

The moment the rich aroma of Southern Smothered Chicken wafts through my kitchen, I’m instantly transported to my grandmother’s dining table, surrounded by family and laughter. This beloved dish merges juicy, marinated chicken pieces with a velvety onion and garlic gravy, creating a comforting meal that feels like a warm hug on a plate. Whether you’re looking for a quick weeknight dinner or an impressive centerpiece for a gathering, this recipe checks all the boxes. Plus, it’s gluten-free and easily adaptable to suit various dietary needs, making it a crowd-pleaser for everyone at the table. Ready to whip up some flavorful magic? Let’s dive into how to make this Southern favorite!

Why Is Southern Smothered Chicken So Special?

Comforting, Flavorsome Experience: This recipe’s comforting flavors and creamy texture make it a perfect meal for those cozy nights at home.
Easy to Customize: With gluten-free and various ingredient options, you can tailor this dish to fit everyone’s needs, making it truly versatile.
Quick Prep Time: In just under 30 minutes, you can create a stunning dish that rivals anything from a restaurant, freeing up time for what really matters—enjoying it with loved ones.
Perfect for Gatherings: Impress your guests with a crowd-pleaser that sparks conversation and smiles, just like Southern Fried Chicken does at any gathering.
Rich, Savory Gravy: The velvety gravy, rich in onion and garlic flavors, elevates the dish to another level, adding depth to every bite.
Serve over Favorites: Pair it with fluffy rice, creamy mashed potatoes, or flaky biscuits for a truly satisfying meal!

Southern Smothered Chicken Ingredients

Get ready to create a dish that’s truly unforgettable!

For the Chicken

  • Bone-in, skin-on chicken pieces – For maximum flavor and moisture; you can substitute with turkey thighs or vegetarian options like portobello mushrooms.

For the Seasoning

  • Smoked paprika – Adds depth and subtle smokiness; use regular paprika for a milder option.
  • Seasoning salt – Enhances flavor; swap with regular salt and onion powder if needed.
  • Black pepper – Provides a kick; adjust to your taste for a milder dish.

For the Cooking Base

  • Olive oil – Essential for searing the chicken; vegetable oil or butter works too.
  • Butter – Use to sauté onions for extra flavor; olive oil can be a dairy-free alternative.
  • Onion – Yellow or white onions preferred for their sweetness.
  • Garlic – Fresh garlic enriches the gravy; garlic powder is a good alternative in a pinch.

For the Gravy

  • Flour – Thickens the gravy; cornstarch is a gluten-free alternative.
  • Chicken stock – Forms the base of the gravy; opt for homemade or low-sodium store-bought stocks.
  • Heavy cream – Adds creaminess; you can swap it for half-and-half for a lighter option.
  • Thyme – Fresh thyme offers herbal notes; dried thyme works if fresh isn’t available.

This Southern Smothered Chicken recipe is sure to inspire your culinary creativity and satisfy your comfort food cravings!

Step‑by‑Step Instructions for Southern Smothered Chicken

Step 1: Marinate the Chicken
Begin by seasoning your bone-in, skin-on chicken pieces generously with smoked paprika, seasoning salt, black pepper, and garlic powder. Ensure each piece is fully coated, then cover and refrigerate for at least 3 hours, or overnight for maximum flavor infusion. This step is crucial for developing the bold tastes that make your Southern Smothered Chicken truly irresistible.

Step 2: Sear the Chicken
Heat a large skillet over medium-high heat and add olive oil. Once the oil is shimmering, carefully place the marinated chicken skin-side down in the skillet. Sear for 3–4 minutes until the skin is golden brown and crispy. This step caramelizes the skin, adding a deep flavor. Remove the chicken from the skillet and set it aside on a plate.

Step 3: Prepare the Gravy
In the same skillet, lower the heat to medium and add butter. Once melted, sauté the chopped yellow or white onions for 8–10 minutes until they become translucent and sweet-smelling, stirring occasionally. After that, introduce minced garlic and cook for an additional minute, allowing the garlic’s fragrant aroma to fill your kitchen, setting the stage for the flavorful gravy.

Step 4: Thicken the Gravy
Sprinkle flour over the onion-garlic mixture in the skillet, stirring well to combine. Gradually whisk in chicken stock, allowing the mixture to thicken for 2–3 minutes. Continuously stir until the gravy reaches a smooth consistency, free of lumps. The rich flavors from the onions and garlic will enrich your Southern Smothered Chicken’s sauce, making it irresistible.

Step 5: Finish the Gravy
Now, stir in the heavy cream and fresh thyme, reducing the heat to low. Let the gravy simmer gently, stirring occasionally until it’s creamy and well blended. This step transforms your sauce into a luxurious, velvety texture that will envelop the chicken beautifully, imparting a rich comfort to each bite of your Southern Smothered Chicken.

Step 6: Combine and Simmer
Return the seared chicken to the skillet, nestling it into the luscious gravy. Cover the skillet and let the chicken simmer on low heat for 10–15 minutes. This will allow the flavors to meld while ensuring the chicken is fully cooked, reaching an internal temperature of 165°F. You’ll know it’s done when the meat is tender and the gravy is bubbling around the edges.

Step 7: Serve the Dish
Once done, serve your Southern Smothered Chicken over fluffy rice, creamy mashed potatoes, or flaky biscuits to soak up the delicious gravy. Drizzle generously with the rich sauce, and watch as your family gathers eagerly at the table, drawn in by the enticing aroma of this comforting meal.

What to Serve with Juicy Southern Smothered Chicken

Create a delightful meal experience by adding complementary sides that elevate the comforting heartiness of this beloved dish.

  • Fluffy Rice: A classic pairing that effortlessly absorbs the rich gravy, providing a base that enhances every flavorful bite.

  • Creamy Mashed Potatoes: Their buttery softness makes a perfect canvas for the velvety gravy, allowing you to indulge in a truly satisfying meal.

  • Buttermilk Biscuits: Fluffy and flaky, these biscuits can scoop up gravy like no other, making each bite a comforting treat you won’t forget.

  • Steamed Green Beans: Crisp-tender green beans add a fresh, bright note to the meal, creating a lovely contrast to the rich chicken.

  • Sweet Cornbread: The subtle sweetness of cornbread balances the savory flavors of the chicken and gravy, making it a delightful addition to the table.

  • Coleslaw: A crunchy, tangy coleslaw brings refreshing crispness to the meal, cutting through the richness of the smothered chicken.

  • Peach Cobbler: The sweet, warm aromas of this dessert echo the Southern spirit, perfectly rounding out your comforting dinner experience.

Southern Smothered Chicken Variations

Invite your culinary creativity to shine as you customize this comforting dish to suit your tastes and dietary needs!

  • Gluten-Free: Substitute regular flour with cornstarch or a gluten-free flour blend to thicken your gravy seamlessly.

  • Dairy-Free: Replace heavy cream with creamy coconut milk for a luscious dairy-free version without sacrificing flavor.

  • Spicy Kick: Add a pinch of cayenne pepper or finely chopped jalapeños to the gravy, introducing a fiery twist that’ll awaken your taste buds.

  • Herb Infusion: Swap out thyme for fragrant rosemary or fresh parsley, giving your gravy an aromatic freshness that elevates the dish.

  • Vegetable Add-Ins: Toss in bell peppers or mushrooms while sautéing the onions for added nutrition and a delightful texture surprise in each bite.

  • Chicken Alternatives: For a healthier twist, swap out chicken for turkey thighs or even hearty portobello mushrooms for a vegetarian option. Both retain moisture and flavor beautifully.

  • Citrus Zing: Squeeze a bit of lemon juice into the gravy right before serving. This brightens the dish and complements the rich flavors splendidly.

  • Comforting Crust: Top with a layer of flaky biscuit dough and bake until golden for a Southern-style chicken pot pie upgrade that’s perfect for a cozy dinner.

Whatever your choice, each variation provides an opportunity to make this beloved dish your own. And while you’re at it, consider serving it alongside a classic Sizzling Chicken Pepper Stir-Fry or some comforting Blt Chicken Salad for a delightful meal that’s sure to please!

Expert Tips for Southern Smothered Chicken

  • Marination Matters: Always marinate your chicken overnight if possible. This deepens flavor infusion and ensures your Southern Smothered Chicken is bursting with taste.

  • Searing Technique: For perfect browning, make sure your skillet is hot enough before adding the chicken. This caramelization adds delicious depth to the overall dish.

  • Gravy Consistency: Adjust the thickness of the gravy by whisking in additional flour for a richer consistency or chicken stock for a lighter one.

  • Measuring Temperature: Use an instant-read thermometer to check that the chicken reaches an internal temperature of 165°F for safety and succulence.

  • Storing Leftovers: Store leftover gravy separately to preserve its creamy texture, making reheating more enjoyable without compromising quality.

  • Taste as You Go: Don’t forget to taste and adjust the seasoning! A pinch of salt or extra spices can elevate the flavors and make your dish truly unforgettable.

How to Store and Freeze Southern Smothered Chicken

Fridge: Store leftovers in an airtight container for up to 3 days. Make sure the chicken is completely cooled before sealing to avoid condensation.

Freezer: Portion leftovers in freezer-safe containers for up to 3 months. Ensure to wrap tightly to prevent freezer burn.

Reheating: Thaw overnight in the refrigerator before reheating. Gently warm in a skillet over low heat or in the microwave, adding a splash of chicken stock to maintain moisture.

Leftover Gravy: For best consistency, store gravy separately from the chicken and reheat in a saucepan, stirring occasionally to restore its creamy texture.

Make Ahead Options

These Southern Smothered Chicken are absolutely perfect for meal prep enthusiasts! You can marinate the chicken pieces up to 24 hours in advance, ensuring the flavors deeply infuse and become even more delicious. Additionally, you can prepare the gravy and refrigerate it for up to 3 days; simply let it cool before storing in an airtight container. When you’re ready to serve, reheat the gravy gently on the stove while adding a splash of chicken stock to maintain its silky texture. Once heated, return the marinated chicken to the skillet and simmer until fully cooked. This way, you’ll have a comforting meal ready with minimal effort, perfect for busy weeknights!

Southern Smothered Chicken Recipe FAQs

What type of chicken should I use?
I recommend using bone-in, skin-on chicken pieces to maximize flavor and moisture. If you’re looking for alternatives, turkey thighs or even portobello mushrooms can work beautifully, especially for a vegetarian twist!

How can I store leftovers?
Store your Southern Smothered Chicken in an airtight container in the refrigerator for up to 3 days. Ensure the chicken has completely cooled before sealing to avoid condensation inside the container, which can lead to spoilage.

Can I freeze Southern Smothered Chicken?
Absolutely! You can freeze your portioned Southern Smothered Chicken in freezer-safe containers for up to 3 months. Just wrap them tightly to prevent freezer burn. When you’re ready to enjoy it again, thaw overnight in the fridge and reheat gently in a skillet or the microwave, adding a splash of chicken stock to keep it moist.

What if my gravy is too thick?
If your gravy turns out thicker than desired, simply whisk in a little more chicken stock or water until you achieve your preferred consistency. This not only ensures it coats your chicken perfectly but also keeps it luscious and velvety!

Are there dietary considerations to keep in mind?
Yes! For a gluten-free option, substitute the flour with cornstarch when thickening the gravy. Additionally, if you have lactose intolerance, coconut milk works wonderfully in place of heavy cream, providing a delightful dairy-free alternative.

How do I know when the chicken is fully cooked?
Use an instant-read thermometer to check that the chicken reaches an internal temperature of 165°F. This guarantees not only safety but also ensures your Southern Smothered Chicken is juicy and tender—no one likes dry chicken!

Southern Smothered Chicken

Irresistible Southern Smothered Chicken for Cozy Dinners

Enjoy Southern Smothered Chicken, a comforting dish with juicy chicken and rich onion-garlic gravy, perfect for family gatherings.
Prep Time 30 minutes
Cook Time 30 minutes
Marination Time 3 hours
Total Time 9 hours
Servings: 4 servings
Course: Dinner
Cuisine: Southern
Calories: 450

Ingredients
  

For the Chicken
  • 4 pieces bone-in, skin-on chicken can substitute with turkey thighs or portobello mushrooms
For the Seasoning
  • 1 tablespoon smoked paprika use regular paprika for milder flavor
  • 1 teaspoon seasoning salt can swap with regular salt
  • 1/2 teaspoon black pepper adjust to taste
For the Cooking Base
  • 2 tablespoons olive oil vegetable oil or butter works too
  • 2 tablespoons butter olive oil can be dairy-free alternative
  • 1 medium onion yellow or white onions preferred
  • 3 cloves garlic fresh garlic enriches the gravy
For the Gravy
  • 1/4 cup flour cornstarch is a gluten-free alternative
  • 2 cups chicken stock opt for homemade or low-sodium
  • 1 cup heavy cream hal f-and-half can be used for lighter option
  • 1 teaspoon thyme use fresh or dried thyme

Equipment

  • Skillet
  • Measuring cups
  • Measuring spoons
  • whisk
  • Instant-read thermometer

Method
 

Step-by-Step Instructions
  1. Marinate the chicken with smoked paprika, seasoning salt, black pepper, and garlic powder. Cover and refrigerate for at least 3 hours.
  2. Heat olive oil in a skillet, sear chicken skin-side down for 3-4 minutes until golden brown.
  3. In the same skillet, sauté onions in butter for 8-10 minutes, then add minced garlic and cook for 1 minute.
  4. Sprinkle flour over onion-garlic mixture, whisk in chicken stock, and thicken for 2-3 minutes.
  5. Stir in heavy cream and thyme, simmer until creamy and well blended.
  6. Return chicken to skillet, cover, and simmer on low heat for 10-15 minutes until cooked.
  7. Serve over rice, mashed potatoes, or biscuits with gravy drizzled on top.

Nutrition

Serving: 1pieceCalories: 450kcalCarbohydrates: 10gProtein: 30gFat: 30gSaturated Fat: 15gPolyunsaturated Fat: 3gMonounsaturated Fat: 10gCholesterol: 120mgSodium: 800mgPotassium: 500mgFiber: 1gSugar: 2gVitamin A: 500IUVitamin C: 5mgCalcium: 50mgIron: 2mg

Notes

Marinate chicken overnight for deeper flavors. Ensure skillet is hot for perfect browning and adjust gravy thickness as needed.

Tried this recipe?

Let us know how it was!

Creamy Monterey Chicken Spaghetti for Cozy Family Dinners

As I stared down at my kitchen counter, a medley of ingredients awaited my culinary touch—chicken, vibrant bell peppers, and a hint of Monterey Jack cheese. In that moment, I knew I was just moments away from crafting something special: Creamy Monterey Chicken Spaghetti. This dish is an absolute lifesaver for busy weeknights, packing in delicious, comforting flavors while being incredibly easy to whip up. Not only can it be customized with your favorite veggies or proteins, but it’s also gluten-free adaptable, making it a crowd-pleaser for the whole family. If you’re looking to make a memorable meal that everyone will adore, keep reading to discover how to bring this delightful comfort food to your table!

Why is Monterey Chicken Spaghetti a Must-Try?

Comforting satisfaction: This creamy dish is an embrace in a bowl, making it an instant family favorite that warms the soul.
Quick prep time: You can enjoy a delicious homemade meal on the table in just 30 minutes, perfect for busy nights!
Customizable options: With various swap possibilities for proteins and veggies, you can cater to everyone’s tastes and dietary needs.
Crowd-pleasing flavors: The combination of melty cheeses and savory chicken guarantees to impress guests and family alike.
Gluten-free choice: Easily switch to gluten-free pasta for a wholesome version that accommodates diverse diets.
Pair it with garlic bread and a fresh salad for a perfect mealtime experience, and if you’re looking for more quick recipes, check out my Sizzling Chicken Pepper or Tuscan Chicken Soup for delightful options!

Monterey Chicken Spaghetti Ingredients

For the Base
Cooked Chicken (2 cups, shredded) – This is the main protein source; for convenience, you can substitute rotisserie chicken.
Spaghetti (8 oz) – This serves as the hearty backbone of the dish; feel free to substitute any pasta, including gluten-free options.
Cream of Chicken Soup (1 can, 10.5 oz) – This forms the creamy sauce base with rich flavors; a cream of mushroom soup can be used for a vegetarian alternative.

For the Flavor
Onion (1/2 cup, chopped) – This adds a natural sweetness and depth to the flavors.
Bell Pepper (1/2 cup, chopped) – Incorporate vibrant color and crunch; you can swap in your favorite veggies like zucchini.
Olive Oil (1 tablespoon) – Ideal for sautéing vegetables, although any cooking oil can work as a substitute.
Garlic Powder (1/2 teaspoon) – This enhances the dish’s flavor profile; fresh garlic can replace it for a more robust taste.
Onion Powder (1/2 teaspoon) – Complements the onion flavor beautifully.
Salt and Pepper (to taste) – Essential for enhancing overall flavors; season to your personal preference.

For Creaminess
Sour Cream (1 cup) – This contributes to the dish’s creamy texture; Greek yogurt can be a tangy substitute.
Monterey Jack Cheese (1 cup, shredded) – Gives a delightful meltiness; you may also use mozzarella or pepper jack for different flavors.
Cheddar Cheese (1/2 cup, shredded) – Adds a little sharpness; feel free to experiment with other varieties you love.
Milk (1/2 cup or chicken broth) – This helps adjust the sauce’s consistency; opting for broth creates a lighter dish.

For Garnish
Fresh Parsley (chopped, optional) – A lovely finishing touch that adds freshness and a pop of color.

With the steps laid out so clearly in this ingredient list, your cozy mealtime just got a whole lot easier! Embrace the warmth of homemade Monterey Chicken Spaghetti and enjoy a meal that feels like a hug.

Step‑by‑Step Instructions for Monterey Chicken Spaghetti

Step 1: Cook the Pasta
Begin by boiling a large pot of water over high heat. Once it’s bubbling, add 8 ounces of spaghetti and cook according to package instructions, usually around 8-10 minutes, until al dente. Drain the pasta in a colander and set aside, allowing any excess water to drip off before moving on to the next step.

Step 2: Sauté the Vegetables
In a large skillet, heat 1 tablespoon of olive oil over medium heat until shimmering. Add 1/2 cup chopped onion, 1/2 cup chopped bell pepper, and optional mushrooms if desired. Sauté the vegetables for about 5-7 minutes, stirring occasionally, until they are soft and lightly browned, creating a fragrant base for your creamy Monterey Chicken Spaghetti.

Step 3: Make the Creamy Sauce
Mix in one can of cream of chicken soup and 1 cup of sour cream to the sautéed vegetables. Stir in 1/2 teaspoon of garlic powder and 1/2 teaspoon of onion powder, followed by 1/2 cup of milk or chicken broth to achieve the desired consistency. Cook for about 2-3 minutes, stirring continuously until the sauce is smooth and heated through.

Step 4: Add Chicken and Cheese
Fold in 2 cups of shredded cooked chicken and 1/2 cup of Monterey Jack cheese into the creamy sauce. Continue to cook for an additional 2-3 minutes over low heat, stirring gently, until the cheese has melted completely and the chicken is warmed through, creating a rich and flavorful mixture for your Monterey Chicken Spaghetti.

Step 5: Combine with Pasta
Once the sauce is ready, carefully add the drained spaghetti to the skillet. Toss everything together until the pasta is well-coated with the creamy sauce. Ensure that each strand of spaghetti is enveloped in deliciousness and the mixture is heated through for about 1-2 minutes before moving to the next step.

Step 6: Bake (Optional)
If you wish for a baked version, preheat your oven to 350°F (175°C). Transfer the pasta mixture to a greased baking dish and sprinkle the remaining 1/2 cup of Monterey Jack cheese and 1/2 cup of cheddar cheese evenly on top. Bake for 20-25 minutes or until the cheese is bubbly and golden, creating a beautiful crust.

Step 7: Serve
Finally, remove the dish from the oven (if baked) and allow it to rest for a few minutes. Garnish with freshly chopped parsley, if desired, to add a pop of color. Serve your warm and comforting Monterey Chicken Spaghetti right away, and watch as smiles light up around the table.

Make Ahead Options

Preparing your Creamy Monterey Chicken Spaghetti in advance is a fantastic way to save time during hectic weeknights. You can assemble the entire dish without baking it up to 24 hours in advance. Simply combine the cooked chicken, sautéed vegetables, creamy sauce, and cooked spaghetti in a greased baking dish, then cover and refrigerate. To maintain the quality, make sure to cover it tightly to prevent drying out. When you’re ready to serve, preheat your oven to 350°F (175°C) and bake for 20-25 minutes until bubbly and golden. This way, you’ll have a comforting, delicious meal with minimal effort when it’s time to eat!

How to Store and Freeze Monterey Chicken Spaghetti

Fridge: Store leftovers in an airtight container for up to 3 days to maintain freshness and flavor.

Freezer: For longer storage, portion out your Monterey Chicken Spaghetti into freezer-safe containers, keeping them sealed properly. It can last up to 2 months in the freezer.

Thawing: When you’re ready to enjoy your frozen meal, transfer it to the fridge overnight to thaw.

Reheating: Reheat individual portions in the microwave or warm it in a skillet over medium heat until heated throughout, adding a splash of milk if necessary for creaminess.

What to Serve with Creamy Monterey Chicken Spaghetti

As you gather around the dinner table, the comforting aroma of Creamy Monterey Chicken Spaghetti wafts through the air, enticing everyone to dig in.

  • Garlic Bread: Perfect for sopping up that creamy sauce; warm and crusty with a hint of garlic will be a hit with every bite.
  • Simple Green Salad: A refreshing balance of greens, tomatoes, and cucumbers adds a crunchy texture that contrasts nicely with the creamy pasta.
  • Steamed Broccoli: This vibrant side gives a nutritious twist, providing a subtle crunch and bright color to the plate.
  • Roasted Asparagus: Drizzled with olive oil and roasted until tender, it offers a beautifully savory and slightly earthy complement.
  • Sweet Potatoes: Their natural sweetness helps to balance the savory flavors of the dish while adding a delightful contrasting texture.
  • Chilled White Wine: A crisp Sauvignon Blanc or a light Pinot Grigio perfectly enhances the flavors, making it a delightful companion.
  • Lemonade or Iced Tea: For a refreshing, non-alcoholic option, these drinks bring a bright, sweet taste that pairs exceptionally well with the dish.
  • Chocolate Chip Cookies: A warm, gooey dessert providing a sweet ending to the comforting meal; nothing feels better than a homemade treat!

Monterey Chicken Spaghetti Variations & Substitutions

Let your creativity flow and make this dish your own with these delightful variations!

  • Protein Swap: Use turkey or cooked ground beef instead of chicken for a hearty twist. Trust me, the different flavors will surprise you!
  • Vegetarian Version: Omit the chicken altogether and add more vegetables like zucchini, spinach, or even roasted red peppers. This way, you keep it vibrant and nutritious!
  • Different Pasta: Substitute spaghetti with delightful alternatives like penne, fettuccine, or gluten-free pasta, creating a new texture with each choice.
  • Cheese Variation: Try using Colby Jack, mozzarella, or pepper jack cheese for bold uniqueness. Each cheese introduces its own character and richness to the dish!
  • Creamy Alternative: Swap sour cream with Greek yogurt for a tangy finish. This change not only boosts nutrition but adds a delightful flavor complexity.
  • Spicy Kick: For a warm touch, toss in chopped jalapeños or a sprinkle of red pepper flakes when sautéing the veggies. It’s an exciting way to ignite your taste buds!
  • Crispiness Factor: Top your baked dish with panko breadcrumbs mixed with melted butter for an irresistible crunchy topping. Imagine the satisfying crunch as you dig in!
  • Herb Infusion: Add fresh herbs like basil or thyme in place of parsley for a fresh aroma and delightful flavor, creating more depth your family will love.

Embrace your inner chef and mix it up! Don’t forget to pair this meal with some garlic bread or a fresh salad like my Blt Chicken Salad for a well-rounded feast.

Expert Tips for Monterey Chicken Spaghetti

  • Mix and Match Proteins: Consider using turkey, ground beef, or even chickpeas for a vegetarian option; each substitute will provide a unique twist!
  • Veggie Boost: Don’t hesitate to add spinach or broccoli; this helps to incorporate more nutrients and adds vibrancy to your Monterey Chicken Spaghetti.
  • Avoid Overcooking: Be cautious when cooking the pasta; keep it al dente so it holds its texture well when mixed with the creamy sauce.
  • Add Spice: For those who enjoy some heat, throw in jalapeños or a sprinkle of red chili flakes while sautéing the veggies.
  • Make-Ahead Tips: Prepare the dish up to step 5, then cover and refrigerate for up to 24 hours. Bake when ready to serve for convenience!
  • Cheese Layering: For an extra cheesy bite, mix different cheeses into the sauce, but remember to save some for topping before baking.

Monterey Chicken Spaghetti Recipe FAQs

What is the best way to select ripe bell peppers for this recipe?
Absolutely! When choosing bell peppers, look for ones with smooth, shiny skin and without dark spots or wrinkles. A firm texture is key, and vibrant colors indicate ripeness. Opt for peppers that feel heavy for their size.

How should I store leftovers of Monterey Chicken Spaghetti?
To keep your leftover Monterey Chicken Spaghetti fresh, transfer it to an airtight container and store it in the refrigerator for up to 3 days. Make sure it cools to room temperature before sealing to avoid condensation that could affect texture.

Can I freeze Monterey Chicken Spaghetti and how do I do it?
Very! For freezing, portion the spaghetti into freezer-safe containers, ensuring they’re sealed tightly. It will last for up to 2 months. To thaw, simply move a container to the refrigerator overnight. When ready to serve, you can reheat it in the microwave or on the stove, adding a bit of milk to regain its creaminess!

What should I do if my sauce is too thick or too thin?
If your sauce is too thick, you can add a small amount of milk or chicken broth, stirring gently until you reach the desired consistency. On the other hand, if it’s too thin, let it simmer on low heat for a few more minutes to help thicken it up. Alternatively, incorporating a little more cream of chicken soup can stabilize the texture.

Are there any allergy considerations I should be aware of with this recipe?
Certainly! This recipe contains gluten (in traditional spaghetti), dairy (in cheese and sour cream), and chicken. For gluten-free options, use gluten-free pasta. To make it suitable for lactose intolerance, opt for lactose-free sour cream and cheese. If anyone has a chicken allergy, you can substitute with a plant-based protein or tofu for an equally delicious alternative.

Can I use frozen chicken instead of cooked chicken?
For sure! If you’re using frozen chicken, cook it thoroughly before shredding for this recipe. You can bake or boil it in advance; just ensure it’s fully cooked to an internal temperature of at least 165°F (75°C) for safety. Once shredded, proceed to mix it into your creamy sauce!

Monterey Chicken Spaghetti

Creamy Monterey Chicken Spaghetti for Cozy Family Dinners

Creamy Monterey Chicken Spaghetti is a comforting dish perfect for busy weeknights, customizable and gluten-free adaptable, sure to please the whole family.
Prep Time 10 minutes
Cook Time 30 minutes
Total Time 40 minutes
Servings: 6 servings
Course: Pasta
Cuisine: American
Calories: 450

Ingredients
  

For the Base
  • 2 cups Cooked Chicken, shredded Can substitute rotisserie chicken
  • 8 oz Spaghetti Any pasta, including gluten-free options
  • 1 can Cream of Chicken Soup 10.5 oz; can use cream of mushroom soup
For the Flavor
  • 1/2 cup Onion, chopped Adds sweetness
  • 1/2 cup Bell Pepper, chopped Swap in favorite veggies like zucchini
  • 1 tablespoon Olive Oil Any cooking oil can be used
  • 1/2 teaspoon Garlic Powder Fresh garlic can replace it
  • 1/2 teaspoon Onion Powder
  • Salt and Pepper To taste
For Creaminess
  • 1 cup Sour Cream Greek yogurt can be a substitute
  • 1 cup Monterey Jack Cheese, shredded Can use mozzarella or pepper jack
  • 1/2 cup Cheddar Cheese, shredded Experiment with other varieties
  • 1/2 cup Milk Or chicken broth to adjust consistency
For Garnish
  • Fresh Parsley, chopped Optional

Equipment

  • Large pot
  • Colander
  • Large skillet
  • spatula
  • baking dish

Method
 

Cooking Instructions
  1. Boil a large pot of water, add spaghetti and cook according to package instructions for 8-10 minutes. Drain and set aside.
  2. In a large skillet, heat olive oil, add onion and bell pepper, and sauté for 5-7 minutes until soft.
  3. Mix in cream of chicken soup and sour cream, add garlic powder, onion powder, and milk, cook for 2-3 minutes until smooth.
  4. Fold in chicken and Monterey Jack cheese, cooking for another 2-3 minutes until cheese is melted.
  5. Add drained spaghetti to skillet, tossing until well-coated with the sauce, heat through for 1-2 minutes.
  6. For baked version, preheat oven to 350°F, transfer to baking dish, top with remaining cheese, and bake for 20-25 minutes.
  7. Garnish with parsley if desired and serve warm.

Nutrition

Serving: 1servingCalories: 450kcalCarbohydrates: 40gProtein: 30gFat: 20gSaturated Fat: 10gPolyunsaturated Fat: 2gMonounsaturated Fat: 5gCholesterol: 80mgSodium: 700mgPotassium: 500mgFiber: 3gSugar: 2gVitamin A: 500IUVitamin C: 30mgCalcium: 350mgIron: 2mg

Notes

This cozy dish is easy to prepare and is customizable to suit different tastes. Perfect for busy weeknights!

Tried this recipe?

Let us know how it was!

One-Pan Bold Honey BBQ Chicken Rice for Easy Flavorful Nights

The aroma of sizzling chicken and sweet BBQ sauce filled the kitchen, turning a simple weeknight into a savory celebration. If you’re looking for a dinner that packs bold flavors while keeping cleanup to a minimum, look no further than my One-Pan Bold Honey BBQ Chicken Rice. This delightful dish combines juicy chicken—whether you prefer tender breasts or rich thighs—with fluffy rice, all harmoniously cooked together in just 35 minutes. Not only is it a quick dinner solution, but it also offers a comforting experience that feels like a warm hug after a long day. Perfect for meal prepping or making on busy nights, this recipe will leave you and your loved ones satisfied and coming back for seconds. Are you ready to whip up something delicious tonight? Let’s dive into the detailed steps!

Why Is This Recipe a Must-Try?

Simplicity at its finest: This one-pan meal doesn’t require advanced cooking skills, making it accessible for everyone—from seasoned chefs to beginners.

Versatility for all tastes: Whether you choose chicken breasts or thighs, this dish caters to your preferences, and can even adapt to veggies or shrimp for a delightful twist.

Bold, rich flavors: The sweet and smoky BBQ sauce dances through the juicy chicken and fluffy rice, delivering a comfort food experience that warms the soul.

Time-saving and hassle-free: In just 35 minutes, your dinner is ready to wow your family, perfect for those busy weeknights when you want to avoid fast food.

Perfect for meal prep: Made in one pan, it’s easy to store leftovers or enjoy the next day—just reheat and savor again! Check out my Oven Chicken Rice for more easy meal ideas!

One-Pan Bold Honey BBQ Chicken Rice Ingredients

• Discover everything you need for this flavorful dish!

For the Chicken

  • Chicken (breast or thighs) – Choose boneless, skinless cuts for a quick, juicy result.

For the Aromatics

  • Olive Oil – Ideal for sautéing; substitute with canola oil if needed.
  • Onion – Adds a sweet depth; shallots or green onions make great alternatives.
  • Garlic – Essential for rich flavor; fresh minced garlic works best.

For the Rice

  • Rice (long-grain) – Absorbs flavors perfectly; brown rice can be used but will require extra liquid.
  • Chicken Broth (or water) – Enhances moisture and flavor; use vegetable broth for a vegetarian option.

For the Glaze

  • BBQ Sauce – This dish’s star; opt for your favorite flavor, like honey BBQ for a delightful sweetness.

Step‑by‑Step Instructions for One-Pan Bold Honey BBQ Chicken Rice

Step 1: Prepare Chicken
Begin by cutting your chicken, whether breast or thighs, into bite-sized cubes. Season these morsels with salt and pepper for flavor enhancement, and if you desire, sprinkle in some garlic powder or smoked paprika for an extra kick. This will ensure your One-Pan Bold Honey BBQ Chicken Rice is packed with deliciousness from the start.

Step 2: Sear Chicken
In a large skillet, heat a drizzle of olive oil over medium-high heat. Once the oil shimmers, carefully add the seasoned chicken pieces. Sear the chicken for about 5-7 minutes, turning occasionally until it’s browned and cooked through. When ready, transfer the seared chicken to a plate and set aside for later, allowing those beautiful caramelized flavors to hold their own.

Step 3: Sauté Aromatics
Using the same skillet (add more oil if needed), toss in the chopped onion and sauté for about 2-3 minutes until it softens and becomes fragrant. Next, add the minced garlic, stirring for an additional minute until its aroma fills the kitchen. This step builds a savory base for your One-Pan Bold Honey BBQ Chicken Rice dish.

Step 4: Toast Rice
Once your aromatics are perfectly sautéed, stir in the long-grain rice, ensuring it gets well-coated with the oil and infused with the flavorful mixture. Pour in the chicken broth, bringing everything to a gentle simmer. Watch for the liquid to bubble, signaling that the rice is about to soak up all those mouthwatering flavors.

Step 5: Combine Ingredients
Return the seared chicken to the skillet and add a generous drizzle of your favorite BBQ sauce. Gently mix everything to ensure the chicken and rice are evenly coated. Lower the heat, cover the skillet tightly, and allow it to simmer for about 18-20 minutes. This will cook the rice perfectly and let the BBQ flavors meld beautifully into the dish.

Step 6: Final Touch
Once the rice has absorbed all the liquid and is tender, remove the lid and fluff the rice with a fork. Let it sit off the heat for a few minutes to allow the flavors to settle. For an extra touch of decadence, consider drizzling additional BBQ sauce over the top and broil briefly to achieve a lovely caramelized finish that makes your One-Pan Bold Honey BBQ Chicken Rice irresistible.

Expert Tips for One-Pan Bold Honey BBQ Chicken Rice

  • Chicken Size: Cut chicken into even, bite-sized pieces to ensure they cook uniformly throughout the dish, avoiding any undercooked bits.

  • Rice Rinsing: Rinse your rice before toasting it to remove excess starch. This helps prevent it from becoming too sticky as you create your One-Pan Bold Honey BBQ Chicken Rice.

  • Broth Adjustment: Keep an eye on the liquid levels during simmering; if the rice looks dry too soon, add a bit more chicken broth or water to keep it moist and flavorful.

  • Flavor Twists: Feel free to experiment with different BBQ sauce flavors! Sweet, spicy, or even smoky variations can elevate your One-Pan Bold Honey BBQ Chicken Rice to new heights.

  • Resting Time: Allow the dish to rest off the heat after cooking. This brief pause lets the flavors meld and the rice fluff up, enhancing the overall eating experience.

How to Store and Freeze One-Pan Bold Honey BBQ Chicken Rice

Fridge: Store leftovers in an airtight container for up to 3 days. Ensure it’s cooled before sealing to maintain moisture.

Freezer: This dish can be frozen for up to 3 months. Portion into freezer-safe containers and label with the date for easy tracking.

Reheating: When ready to enjoy, thaw overnight in the fridge before reheating. Microwave or warm on the stovetop until heated through, adding a splash of chicken broth if needed to rehydrate.

Leftovers Tip: For the best flavor, consider drizzleing a bit of fresh BBQ sauce over your One-Pan Bold Honey BBQ Chicken Rice before serving again!

What to Serve with One-Pan Bold Honey BBQ Chicken Rice

Imagine a cozy family dinner where each bite is bursting with comforting flavors. Complement your dish to elevate your meal experience!

  • Creamy Coleslaw: Adds a crunchy, refreshing contrast to the rich BBQ flavors, balancing the meal beautifully.

  • Garlic Bread: The buttery, garlicky bread is perfect for soaking up any leftover BBQ sauce, enhancing each delicious bite.

  • Corn on the Cob: Sweet, juicy corn pairs perfectly with BBQ, providing a classic summertime side that everyone loves.

  • Roasted Vegetables: A medley of seasonal veggies brings bright colors and healthy elements, making the meal more vibrant and nutritious.

  • Baked Sweet Potatoes: Their natural sweetness complements the bold and smoky chicken, creating a satisfying harmony of flavors.

  • Lemonade or Iced Tea: A refreshing drink can cleanse the palate, enhancing your dining experience after savoring the hearty rice dish.

  • Apple Crisp: End the meal on a sweet note with warm, spiced apple crisp that contrasts beautifully against the savory chicken. It’s the perfect comfort dessert!

Make Ahead Options

These One-Pan Bold Honey BBQ Chicken Rice are perfect for busy home cooks looking to streamline their meal prep! You can prepare the chicken by cutting it into bite-sized pieces and marinating it in BBQ sauce up to 24 hours in advance; this infuses great flavor. Additionally, you can chop the onions and garlic, storing them in an airtight container in the refrigerator for up to 3 days to keep them fresh. When you’re ready to serve, simply sauté the aromatics, add the rice and chicken mixture, and let it simmer away for a quick dinner experience. This way, you’ll not only save time but also enjoy the same delicious taste, making weeknight cooking a breeze!

One-Pan Bold Honey BBQ Chicken Rice Variations

Feel free to put your own spin on this recipe and make it uniquely yours!

  • Protein Swap: Replace chicken with firm tofu or shrimp for a different protein option that still packs flavor and satisfaction.
  • Veggie Boost: Toss in seasonal vegetables, like bell peppers or frozen peas, during the last few minutes of cooking to add color and nutrition. This adds a delightful crunch and freshness to the dish!
  • BBQ Sauce Variety: Opt for a spicy or smoky BBQ sauce to kick things up a notch. This simple twist can change the entire flavor profile and keep your taste buds excited.
  • Grain Upgrade: Use quinoa or barley instead of rice for a whole grain alternative, offering a nutty flavor and chewy texture.
  • Herb Infusion: Add fresh herbs like cilantro or parsley just before serving for a burst of freshness. Herbs can brighten up each bite, elevating the flavors beautifully.
  • Heat Level: For a spicy kick, mix in some red pepper flakes or sriracha into the BBQ sauce. This can turn your comforting dish into a fiery delight!
  • Broth Base: Swap chicken broth for coconut milk for a creamy, tropical version that complements the BBQ sauce. It’s a unique twist that merges different flavor profiles!
  • Additional Flavorings: Stir in a tablespoon of apple cider vinegar or lemon juice before serving to brighten the dish and enhance the sweet and savory balance.

As you explore these variations, also consider delicious pairings like warm, buttery bread or an enticing side of coleslaw! And if you’re looking for more one-pan meals, give my Garlic Parmesan Chicken a try for another family favorite!

One-Pan Bold Honey BBQ Chicken Rice Recipe FAQs

What type of chicken should I use for this recipe?
For the One-Pan Bold Honey BBQ Chicken Rice, I recommend using boneless, skinless chicken breasts or thighs. Breasts offer a leaner option, while thighs provide a richer flavor and tenderness. Choose whichever fits your taste preference!

How should I store leftovers?
Store any leftover One-Pan Bold Honey BBQ Chicken Rice in an airtight container in the refrigerator for up to 3 days. Be sure to let it cool down to room temperature before sealing it up to retain moisture and flavor.

Can I freeze this dish?
Absolutely! You can freeze the One-Pan Bold Honey BBQ Chicken Rice for up to 3 months. Simply portion it into freezer-safe containers, label with the date, and ensure it’s well sealed. For best results, defrost it in the fridge overnight before reheating.

What do I do if my rice is undercooked?
If you find that the rice is still a bit crunchy, don’t worry! You can add a splash of chicken broth or water to the pan, cover it tightly, and simmer for an additional 5-7 minutes. This allows the rice to absorb more moisture and cook evenly, ensuring a perfect texture.

Are there any dietary considerations I should keep in mind?
If you’re accommodating dietary restrictions, you can easily substitute chicken with tofu or shrimp for a delicious alternative. Also, for a vegetarian option, swapping chicken broth with vegetable broth works beautifully. Always double-check BBQ sauce labels to avoid allergens.

One-Pan Bold Honey BBQ Chicken Rice

One-Pan Bold Honey BBQ Chicken Rice for Easy Flavorful Nights

One-Pan Bold Honey BBQ Chicken Rice combines juicy chicken and fluffy rice in a quick, flavorful dish that’s perfect for busy nights.
Prep Time 10 minutes
Cook Time 25 minutes
Resting Time 5 minutes
Total Time 35 minutes
Servings: 4 servings
Course: Dinner
Cuisine: American
Calories: 450

Ingredients
  

For the Chicken
  • 1 pound boneless skinless chicken breasts or thighs
For the Aromatics
  • 2 tablespoons olive oil can substitute with canola oil
  • 1 onion can use shallots or green onions
  • 3 cloves garlic minced
For the Rice
  • 1 cup long-grain rice brown rice can be used but requires extra liquid
  • 2 cups chicken broth or water, for a vegetarian option use vegetable broth
For the Glaze
  • 1/2 cup BBQ sauce honey BBQ recommended for sweetness

Equipment

  • Large skillet

Method
 

Step-by-Step Instructions
  1. Begin by cutting your chicken, whether breast or thighs, into bite-sized cubes. Season these morsels with salt and pepper for flavor enhancement.
  2. In a large skillet, heat a drizzle of olive oil over medium-high heat. Once the oil shimmers, add the seasoned chicken pieces. Sear for about 5-7 minutes until browned and cooked through.
  3. Using the same skillet, toss in the chopped onion and sauté for about 2-3 minutes until soft. Add minced garlic and stir for an additional minute until fragrant.
  4. Stir in the long-grain rice, ensuring it is well-coated with the oil and infused with the mixture. Pour in chicken broth and bring to a gentle simmer.
  5. Return the seared chicken to the skillet and add a drizzle of BBQ sauce. Mix everything to coat evenly. Lower the heat and cover, simmering for about 18-20 minutes.
  6. Once the rice has absorbed all the liquid and is tender, fluff with a fork. Let it sit off the heat for a few minutes to allow flavors to settle.

Nutrition

Serving: 1servingCalories: 450kcalCarbohydrates: 50gProtein: 30gFat: 15gSaturated Fat: 3gPolyunsaturated Fat: 2gMonounsaturated Fat: 8gCholesterol: 80mgSodium: 800mgPotassium: 600mgFiber: 2gSugar: 10gVitamin A: 100IUVitamin C: 2mgCalcium: 30mgIron: 2mg

Notes

For extra flavor, drizzle additional BBQ sauce over before serving. Store leftovers in an airtight container for up to 3 days; can be frozen for up to 3 months.

Tried this recipe?

Let us know how it was!

One-Pan Sweet and Tangy BBQ Sausage Rice for Quick Comfort

As I stood in my kitchen one hectic evening, the sizzling sound of sausage filled the air, mixing with the sweet and tangy aroma of barbecue sauce. It struck me: the power of a simple one-pan meal like my One-Pan Sweet and Tangy BBQ Sausage Rice can transform any busy night into something special. Not only does this dish come together in under 30 minutes, making it a lifesaver for weeknight dinners, but it also offers a comforting bite that’s fully customizable with your favorite vegetables. Whether you’re feeding a family or just yourself, this recipe promises minimal cleanup and maximum satisfaction. Ready to explore how this delicious fusion of flavors can bring joy back to your cooking?

Why Is One-Pan Cooking So Appealing?

Simplicity at its finest: This One-Pan Sweet and Tangy BBQ Sausage Rice is a breeze to prepare, making it perfect for even the busiest of weeknights. Flavor-packed goodness: The smoky sausage and rich barbecue sauce blend beautifully, creating a taste sensation that will satisfy your comfort food cravings. Customizable to your taste: Feel free to throw in your favorite veggies like bell peppers or peas for a nutritious twist. Effortless clean-up: With everything cooked in one pan, you’ll save time on both cooking and cleaning – a true game-changer! Crowd-pleasing appeal: Whether entertaining or hosting a casual gathering, this dish will delight family and friends alike. Enjoy it with a fresh salad or coleslaw, or explore other quick meals like Sweet Savory Brown or Oven Chicken Rice to keep the flavors flowing!

One-Pan Sweet and Tangy BBQ Sausage Rice Ingredients

For the Sausage and Rice

  • Smoked Sausage – Adds richness and a bold flavor; can substitute with kielbasa or andouille for variety.
  • Long-Grain Rice – Provides the base; essential for texture. Substitute with short-grain, adjusting liquid ratios.
  • Onion – Adds sweetness and depth. Use yellow or white onions; red onions could be a milder alternative.
  • Garlic – Enhances aroma and flavor; fresh is best.
  • Chicken Broth – Infuses rice with savory flavor; substitute with vegetable broth for a vegetarian option.
  • Barbecue Sauce – Key for the sweet-tangy profile; consider hickory or brown sugar BBQ sauce for best results.
  • Soy Sauce (optional) – Adds umami; use tamari for gluten-free.
  • Salt and Pepper – To taste; adjustable based on preference.

For Cooking

  • Olive Oil – For sautéing and flavor; can use vegetable oil if needed.
  • Chopped Green Onions or Parsley (garnish) – Adds freshness and color; optional but recommended.

Feel free to get creative and customize your One-Pan Sweet and Tangy BBQ Sausage Rice with your favorite chopped vegetables!

Step‑by‑Step Instructions for One-Pan Sweet and Tangy BBQ Sausage Rice

Step 1: Sear the Sausage
Heat a large skillet over medium-high heat and add a splash of olive oil, allowing it to shimmer. Slice your smoked sausage and place the pieces into the hot skillet, browning them for about 3-4 minutes per side until they’re beautifully caramelized. Once done, transfer the sausage to a plate and set aside, leaving the flavorful drippings in the pan.

Step 2: Sauté the Aromatics
Reduce the heat to medium in the same skillet and add chopped onions, stirring occasionally. Cook until the onions become translucent, about 5 minutes, then add minced garlic, sautéing for an additional 30 seconds until fragrant. This creates a wonderful aromatic base for your One-Pan Sweet and Tangy BBQ Sausage Rice.

Step 3: Toast the Rice
Next, incorporate the uncooked long-grain rice into the skillet with the sautéed onions and garlic. Stir continuously for 2-3 minutes, allowing the rice to toast lightly until the edges turn golden. This step enhances the flavor and texture of the rice, making your dish even more delightful.

Step 4: Combine the Liquid
Pour in the chicken broth along with your chosen barbecue sauce, and if desired, a splash of soy sauce for umami. Stir everything well, ensuring the rice is evenly coated. Bring the mixture to a gentle simmer, which fills your kitchen with a mouthwatering aroma, signaling the next step in making your One-Pan Sweet and Tangy BBQ Sausage Rice.

Step 5: Simmer
Return the browned sausage to the pan, nestling it among the rice. Cover the skillet with a lid and reduce the heat to low, letting it simmer for 18-20 minutes. During this time, the rice will absorb the flavors and liquid, so stir gently halfway through to ensure even cooking and prevent sticking.

Step 6: Final Touches
After the time is up, remove the skillet from the heat and let it rest, covered, for an additional 5 minutes. This resting time allows the rice to steam and become perfectly fluffy. Finally, uncover and fluff the rice with a fork, seasoning to taste with salt and pepper if desired.

Step 7: Serve and Enjoy
To serve, garnish your One-Pan Sweet and Tangy BBQ Sausage Rice with freshly chopped green onions or parsley for a pop of color. This dish is best enjoyed straight from the pan while it’s warm, making it a cozy delight perfect for any mealtime.

Make Ahead Options

These One-Pan Sweet and Tangy BBQ Sausage Rice are a fantastic meal prep option for busy weeknights! You can prepare the sausage and rice components up to 24 hours in advance by sautéing the sausage and toasting the rice, then allowing them to cool before refrigerating in an airtight container. The flavor will develop beautifully and be just as delicious when ready to cook! When it’s time to serve, simply combine the components with the broth and barbecue sauce in your skillet and proceed with cooking as the recipe directs. This way, you’ll have a hearty and comforting meal with minimal effort whenever you need it!

Storage Tips for One-Pan Sweet and Tangy BBQ Sausage Rice

Fridge: Store leftovers in airtight containers for up to 4 days. Ensure the dish is cooled completely before sealing to maintain freshness.

Freezer: For longer storage, freeze the One-Pan Sweet and Tangy BBQ Sausage Rice in portions for up to 2 months. Use freezer-safe bags or containers for best results.

Reheating: Thaw overnight in the fridge before reheating on the stovetop or microwave. Add a splash of chicken broth or water while reheating to keep the rice moist and fluffy.

Room Temperature: Avoid leaving the dish at room temperature for more than 2 hours to prevent spoilage.

Expert Tips for One-Pan Sweet and Tangy BBQ Sausage Rice

Toasting Rice: Ensure rice is properly toasted for a nuttier and more complex flavor before adding your liquids.

Adjusting Liquid: If you substitute rice varieties, make sure to adjust the liquid amounts and cooking times accordingly to prevent undercooked rice.

Adding Veggies: For extra nutrition and texture, consider tossing in vegetables like bell peppers or peas during the sauté stage with the onions.

Sauce Selection: Choose a flavorful barbecue sauce; hickory or brown sugar varieties work exceptionally well for this One-Pan Sweet and Tangy BBQ Sausage Rice.

Resting Time: Don’t skip the resting step after cooking; it helps the rice steam and become fluffy, enhancing the overall texture of the dish.

One-Pan Sweet and Tangy BBQ Sausage Rice Variations

Feel free to customize your dish to match your family’s tastes and the ingredients you have on hand!

  • Spicy Sausage: Swap the smoked sausage for spicy andouille to kick up the heat, creating an exciting twist.

  • Vegetable Delight: Add bell peppers, peas, or corn during the sautéing stage for extra nutrition and color. The fresh ingredients will brighten the dish!

  • Gluten-Free Option: Use tamari instead of soy sauce to keep this meal gluten-free without sacrificing flavor.

  • Rice Variety: Substitute long-grain rice with jasmine or basmati for a fragrant twist that complements the BBQ sauce beautifully.

  • Different BBQ Sauces: Experiment with different BBQ sauce flavors such as hickory or applewood for a unique smoky profile. Each variation brings its own character to the dish!

  • Herb Garnish: For a fresh touch, sprinkle with chopped cilantro or basil instead of green onions for an herbaceous kick that elevates every bite.

  • Protein Swap: Use grilled chicken or tofu in place of sausage for a lighter option, especially if you’re feeding vegetarians or looking for a healthy choice.

  • Add Heat: If you enjoy some spice, drizzle in your favorite hot sauce just before serving for an extra layer of flavor.

These variations will not only keep things interesting but also allow you to cater to diverse palates. If you’re looking for more comforting one-pan meals, be sure to check out Oven Chicken Rice or explore other flavor-packed dishes like Comfort Sausage Rice. Happy cooking!

What to Serve with One-Pan Sweet and Tangy BBQ Sausage Rice

The perfect meal often begs for delightful companions that elevate every bite and enrich your dining experience.

  • Creamy Coleslaw: A cool, crunchy coleslaw balances the savory sausage, adding a refreshing crunch that invigorates each mouthful.
  • Garlic Breadsticks: These soft, buttery breadsticks are irresistible to dip into the savory glaze, adding a comforting touch to your meal.
  • Grilled Vegetables: Charred zucchini and bell peppers contribute smoky flavors and vibrant colors, enhancing the dish with fresh, healthy elements.
  • Corn on the Cob: Sweet, tender corn offers a playful pop that perfectly complements the sweet and tangy notes of your sausage rice.
  • Crispy Potato Wedges: Golden, crispy wedges provide a delightful crunch and a hearty satisfaction that pairs beautifully with the rich sausage.

For drinks, consider a Chilled Lemonade which adds a citrusy zest, cutting through the richness, or even a light Iced Tea for a refreshing thirst quencher after a satisfying meal. You can also enjoy a slice of Chocolate Cake for a sweet finish that feels like a warm hug after the savory feast.

One-Pan Sweet and Tangy BBQ Sausage Rice Recipe FAQs

What type of sausage is best for this recipe?
Absolutely! Smoked sausage is ideal for the One-Pan Sweet and Tangy BBQ Sausage Rice, providing a rich, bold flavor. If you prefer a different taste, you can substitute it with kielbasa or andouille sausage for a delightful variation!

How should I store leftover sausage rice?
Very simple! Store any leftovers in airtight containers in the fridge for up to 4 days. Ensure the dish has cooled completely before sealing it. This helps maintain its delicious flavors and quality for your next meal!

Can I freeze One-Pan Sweet and Tangy BBQ Sausage Rice?
Yes, indeed! For freezing, portion the rice into freezer-safe bags or containers. This dish can be frozen for up to 2 months. When ready to eat, simply thaw it overnight in the fridge, and reheat on the stovetop or in the microwave. To keep it moist, add a splash of chicken broth or water while reheating.

How can I customize the recipe with vegetables?
To boost both nutrition and flavor, consider adding vegetables like bell peppers, peas, or corn during the sautéing step with the onions. Simply chop them up and toss them in when the onions become translucent. This way, they’ll cook through and mingle beautifully with the sausage and rice!

Is this recipe suitable for those with dietary restrictions?
Very much so! The One-Pan Sweet and Tangy BBQ Sausage Rice can easily be adjusted for gluten-free diets by using tamari instead of regular soy sauce and opting for gluten-free barbecue sauce. Additionally, you can substitute vegetable broth for chicken broth to make it vegetarian-friendly. Always double-check labels to ensure safe consumption for allergies!

What should I do if the rice doesn’t cook properly?
If you find the rice is undercooked after the recommended simmering time, it may need a little more liquid or time to absorb the flavors. Simply add another ½ cup of broth or water, cover the pan, and continue cooking on low heat for an additional 5-10 minutes. Stir occasionally to prevent sticking, and taste for doneness before serving. Enjoy!

One-Pan Sweet and Tangy BBQ Sausage Rice

One-Pan Sweet and Tangy BBQ Sausage Rice for Quick Comfort

A delicious One-Pan Sweet and Tangy BBQ Sausage Rice recipe perfect for quick comfort meals.
Prep Time 10 minutes
Cook Time 20 minutes
Resting Time 5 minutes
Total Time 35 minutes
Servings: 4 servings
Course: Dinner
Cuisine: American
Calories: 400

Ingredients
  

For the Sausage and Rice
  • 1 lb Smoked Sausage Can substitute with kielbasa or andouille.
  • 1 cup Long-Grain Rice Substitute with short-grain, adjusting liquid.
  • 1 medium Onion Yellow or white onion preferred.
  • 2 cloves Garlic Fresh is best.
  • 2 cups Chicken Broth Substitute with vegetable broth for a vegetarian option.
  • 1/2 cup Barbecue Sauce Hickory or brown sugar BBQ sauce recommended.
  • 2 tbsp Soy Sauce Optional, use tamari for gluten-free.
  • to taste Salt
  • to taste Pepper
For Cooking
  • 1 tbsp Olive Oil Can use vegetable oil if needed.
  • 2 tbsp Chopped Green Onions or Parsley Optional but recommended for garnish.

Equipment

  • Large skillet

Method
 

Step-by-Step Instructions
  1. Heat a large skillet over medium-high heat and add olive oil. Sear the sliced smoked sausage for 3-4 minutes per side until caramelized. Transfer sausage to a plate and set aside.
  2. Reduce heat to medium and add chopped onions. Cook until translucent, about 5 minutes. Add minced garlic and sauté for an additional 30 seconds.
  3. Incorporate the uncooked long-grain rice into the skillet. Stir continuously for 2-3 minutes, lightly toasting the rice until the edges turn golden.
  4. Pour in the chicken broth and barbecue sauce, adding soy sauce if desired. Stir well and bring to a gentle simmer.
  5. Return the browned sausage to the pan, cover with a lid, and simmer for 18-20 minutes, stirring gently halfway through.
  6. Remove from heat and let rest covered for 5 minutes. Fluff the rice with a fork and season with salt and pepper if desired.
  7. Garnish with chopped green onions or parsley and serve warm directly from the pan.

Nutrition

Serving: 1bowlCalories: 400kcalCarbohydrates: 45gProtein: 20gFat: 15gSaturated Fat: 4gPolyunsaturated Fat: 1gMonounsaturated Fat: 2gCholesterol: 50mgSodium: 800mgPotassium: 600mgFiber: 2gSugar: 5gVitamin A: 500IUVitamin C: 10mgCalcium: 30mgIron: 2mg

Notes

Feel free to customize with your favorite vegetables for added nutrition.

Tried this recipe?

Let us know how it was!

Potsticker Soup: A Comforting Flavorful Bowl for Cozy Nights

As I stirred the fragrant broth, a wave of nostalgia washed over me—this potsticker soup brings back memories of warm family gatherings and laughter around the dinner table. With its comforting flavors and enticing aroma, this Homemade Potsticker Soup is not only a delightful twist on traditional dumplings but also a quick and easy meal option ready in just 20 minutes. Imagine a customizable bowl brimming with tender potstickers, fresh greens, and umami-packed broth that will satisfy even the pickiest eaters. Whether you’re opting for a vegetarian spin or kicking up the heat with spices, this soup has something for everyone. Perfect for weeknight dinners or a cozy lunch, it’s a wholesome dish that proves homemade comfort food doesn’t have to be elaborate. Ready to fill your kitchen with savory scents? Let’s dive into this delicious recipe!

Why Is Potsticker Soup a Must-Try?

Simplicity, This recipe can be made in just 20 minutes, perfect for busy weeknights. Versatile options, You can easily customize it to your preference, whether that’s vegetarian or with a spicy kick. Comforting flavors, The combination of savory broth and tender potstickers creates a nostalgic dining experience. Nutritious addition, Fresh vegetables like spinach or bok choy enhance both flavor and nutrition. Crowd-pleaser, This soup appeals to everyone, from picky eaters to gourmet chefs. For additional cozy meals, don’t miss out on my Cheeseburger Soup Comforting recipe!

Potsticker Soup Ingredients

• Dive into the comforting, flavorful bowl of potsticker soup with these essential ingredients.

For the Soup Base

  • Frozen Potstickers – The heart of the soup; substitute with homemade potstickers for a personal touch.
  • Broth (Chicken or Vegetable) – Forms the base of the soup; use vegetable broth to keep it vegetarian.
  • Soy Sauce – Enhances umami flavor; adjust based on dietary sodium preferences.
  • Sesame Oil – Adds a nutty aroma; can be swapped with olive oil, but finish with sesame seeds for extra flavor.

For Essential Flavor

  • Fresh Ginger – Provides warmth; freshly grated ginger works best for an aromatic essence.
  • Garlic – Enhances savory notes; always opt for fresh garlic for maximum flavor impact.

For Color and Nutrition

  • Green Onions – A crucial garnish that adds a crisp bite; essential for a bright finish.
  • Mushrooms (optional) – Introduces earthiness; shiitake or cremini varieties complement the soup wonderfully.
  • Spinach or Bok Choy (optional) – Boosts color and nutrients; swap with kale or napa cabbage if desired.

For Balance

  • Rice Vinegar (optional) – Adds a touch of acidity; omit for a milder soup flavor.
  • Salt & Pepper – Essential for seasoning; adjust based on the broth’s saltiness.
  • Chili Oil or Red Pepper Flakes (optional) – Adds heat; add based on your personal spice preference.

This recipe for potsticker soup not only brings comforting flavors to your table but also caters to your personal tastes and dietary needs!

Step‑by‑Step Instructions for Potsticker Soup Comforting Flavorful Bowl

Step 1: Sauté Aromatics
In a large pot, heat 1 tablespoon of sesame oil over medium heat for about 1 minute until shimmering. Add 2 minced garlic cloves and 1 tablespoon of freshly grated ginger, sautéing them for 30 seconds or until fragrant, making sure not to let them brown. This step lays a flavorful foundation for your potsticker soup.

Step 2: Simmer the Broth
Pour in 4 cups of chicken or vegetable broth into the pot, stirring to combine with the sautéed ginger and garlic. Increase the heat slightly and bring the mixture to a gentle simmer, about 3-4 minutes. The broth should begin bubbling softly, filling your kitchen with wonderful aromas, perfect for this comforting flavorful bowl.

Step 3: Add Potstickers
Gently add 12-16 frozen potstickers directly into the simmering broth. Cook according to package instructions, typically about 5-7 minutes. During this time, you’ll see the potstickers become plump and tender, soaking up the delicious broth flavors, making your potsticker soup heartier and satisfying.

Step 4: Incorporate Vegetables
During the last 2-3 minutes of cooking, stir in any optional ingredients like 1 cup of sliced mushrooms and 1 cup of spinach or bok choy. This ensures they retain their vibrant colors and textures. As they soften and wilt, your potsticker soup will become even more delightful and nutritious.

Step 5: Season Perfectly
Once the vegetables are tender, add 1-2 tablespoons of soy sauce and 1 tablespoon of rice vinegar if using. Taste the broth and season with salt and pepper to your liking. Stir well, allowing the flavors to meld together, ensuring each bowl of your potsticker soup is rich in umami and balance.

Step 6: Serve and Garnish
Ladle the steaming potsticker soup into bowls, ensuring each serving has an equal number of potstickers and vegetables. Garnish generously with chopped green onions and drizzle with chili oil or a sprinkle of red pepper flakes for heat, if desired. Relish the warm, comforting flavors that make this homemade potsticker soup a real treat!

Make Ahead Options

These delicious potsticker soup bowls are perfect for meal prep enthusiasts! You can prepare the broth (up to 3 days in advance) by sautéing the garlic and ginger and then refrigerating it. The potstickers can stay frozen until you’re ready to use them, making this dish incredibly convenient. When you’re ready to serve, simply heat the broth, add the frozen potstickers, and let them cook according to package instructions. Incorporate your fresh vegetables towards the end for an ideal texture and vibrant color. This method ensures that your potsticker soup remains just as comforting and flavorful, saving you precious time during busy weeknights!

How to Store and Freeze Potsticker Soup

Fridge: Store leftover potsticker soup in an airtight container for up to 2 days. Gently reheat on the stove, adding a splash of broth or water to retain moisture.

Freezer: For longer storage, freeze potsticker soup in a freezer-safe container for up to 3 months. To reheat, thaw overnight in the fridge and warm on the stovetop until heated through.

Potstickers: To keep potstickers crisp, separate them from the broth before storing. If they are already mixed, expect them to lose some firmness upon reheating.

Make-Ahead Tip: You can prepare the broth ahead of time and freeze it. When you’re ready for a quick meal, just cook frozen potstickers directly in the warmed broth for a cozy bowl.

Potsticker Soup Comforting Variations

Feel free to personalize your potsticker soup with these delightful modifications that will elevate your culinary experience!

  • Vegetarian: Use vegetable broth and replace potstickers with plant-based ones for a wholesome, meat-free option.

  • Spicy Kick: Add more chili oil or red pepper flakes during cooking for an exciting heat that will warm your soul. Adjust to your preference!

  • Mushroom Medley: Incorporate a variety of mushrooms like shiitake, oyster, or even enoki for an earthy flavor that adds depth—perfect for mushroom lovers.

  • Crunchy Greens: Substitute spinach with shredded cabbage or bok choy for a satisfying crunch that livens up your soup, enhancing both texture and taste.

  • Herbaceous Twist: Toss in fresh herbs like cilantro or basil just before serving. This fragrant addition will brighten your bowl and invigorate your palate.

  • Noodle Booster: Add cooked soba or udon noodles for a heartier meal that transforms your soup into a filling main dish—perfect for those who crave more substance.

  • Ginger-Lime Zing: Stir in a splash of lime juice and more grated ginger for an unexpected zing that perks up the flavors beautifully.

  • Savory Tofu: For a protein boost, add cubed tofu as it cooks with the potstickers, making your soup both satisfying and nutritious.

If you love Asian-inspired flavors, don’t forget to explore my Shepherd’s Pie Soup for another comforting experience!

What to Serve with Homemade Potsticker Soup?

Treat yourself to a delightful culinary experience by pairing your comforting bowl of potsticker soup with these tempting sides.

  • Crispy Spring Rolls: These light, crunchy treats filled with fresh vegetables complement the soft textures of the soup perfectly.

  • Sesame Noodles: Tossed with soy sauce and sesame oil, these noodles add a savory touch and make for a filling addition. Pair them for a wholesome feast!

  • Steamed Edamame: Lightly salted edamame brings a vibrant pop of green and a healthy crunch, balancing the soup’s warmth.

  • Pickled Vegetables: Their tangy flavor cuts through the richness of the broth, providing a refreshing contrast that enlivens each bite.

  • Ginger Tea: This soothing drink warms the soul and complements the ginger notes in your soup, making it an ideal beverage choice.

  • Chocolate-Dipped Fortune Cookies: End your meal on a sweet note with these delightful cookies; their crispness and unexpected fortune messages add a fun twist!

Each of these pairings enhances the delightful flavors and textures of your homemade potsticker soup, creating a memorable meal experience!

Expert Tips for Potsticker Soup

  • Fresh Ingredients Matter: Use fresh ginger and garlic whenever possible. Their flavors are more pronounced and elevate the comforting taste of your potsticker soup.

  • Keep It Warm: When storing leftovers, place potstickers in a separate container to maintain their texture. Reheat gently to avoid making them too soft.

  • Customize the Broth: Adjust the saltiness by choosing low-sodium soy sauce and being cautious with salt, especially if using store-bought broth.

  • Spice It Up: Don’t hesitate to add more chili oil or red pepper flakes if you enjoy a spicy kick—just add slowly and taste as you go!

  • Add More Veggies: To enhance nutrition and flavor, incorporate seasonal vegetables like carrots or snow peas, giving your comforting bowl variety.

  • Don’t Rush the Simmer: Allow the broth to simmer gently so that all flavors meld beautifully before adding potstickers; this step is key for a rich overall taste.

Potsticker Soup Recipe FAQs

How do I choose the right potstickers?
Absolutely! When selecting frozen potstickers, look for ones with high-quality ingredients and a good filling-to-dough ratio. Avoid any with dark spots or an off smell, as these can indicate they’ve been improperly stored. If you want a personal touch, consider making your own potstickers with your favorite filling and wrappers!

How should I store leftover potsticker soup?
Store your leftover potsticker soup in an airtight container in the fridge for up to 2 days. It’s important to keep the potstickers separate from the broth to maintain their texture. When reheating, do so gently on the stove, gradually adding a splash of broth or water to maintain moisture without making them too soft.

Can I freeze potsticker soup?
Yes, you can absolutely freeze potsticker soup! Pour the cooled soup into a freezer-safe container, leaving some space at the top for expansion, and freeze for up to 3 months. To reheat, thaw it overnight in the fridge, then warm it gently on the stovetop. If possible, store the potstickers separately to keep them crispy.

What should I do if my broth is too salty?
No worries! If your broth turns out too salty, you can balance it out by adding a splash of water or vegetable broth to dilute the saltiness. You can also incorporate more vegetables, like chopped potatoes or carrots, which will absorb some of the salt while enhancing the soup’s overall heartiness.

Are there any dietary considerations for pets or allergies?
It’s good to be cautious! This potsticker soup recipe contains soy sauce, which can be high in sodium, so be sure to keep it away from pets. Additionally, if you have allergies, watch out for ingredients like sesame oil, which some individuals may be allergic to. Always use low-sodium soy sauce if you’re sensitive to salt, and read labels carefully if using store-bought potstickers.

Can I make this soup vegetarian or vegan?
Very much so! Simply use vegetable broth instead of chicken broth, and opt for vegetarian potstickers or make your own with a plant-based filling. Adding nutritious greens like spinach or bok choy ensures a satisfying, wholesome, and colorful dish while maintaining the comforting flavors of the original potsticker soup.

Potsticker Soup Comforting Flavorful Bowl

Potsticker Soup: A Comforting Flavorful Bowl for Cozy Nights

This Potsticker Soup is a comforting and flavorful bowl, perfect for cozy nights.
Prep Time 10 minutes
Cook Time 10 minutes
Total Time 20 minutes
Servings: 4 bowls
Course: Dinner
Cuisine: Asian
Calories: 320

Ingredients
  

For the Soup Base
  • 12-16 pieces Frozen Potstickers Substitute with homemade potstickers for a personal touch.
  • 4 cups Broth (Chicken or Vegetable) Use vegetable broth to keep it vegetarian.
  • 2 tablespoons Soy Sauce Adjust based on dietary sodium preferences.
  • 1 tablespoon Sesame Oil Can be swapped with olive oil.
For Essential Flavor
  • 1 tablespoon Fresh Ginger Freshly grated works best.
  • 2 cloves Garlic Always opt for fresh garlic.
For Color and Nutrition
  • 2 stalks Green Onions A crucial garnish.
  • 1 cup Mushrooms (optional) Shiitake or cremini complement the soup.
  • 1 cup Spinach or Bok Choy (optional) Boosts color and nutrients.
For Balance
  • 1-2 tablespoons Rice Vinegar (optional) Omit for a milder flavor.
  • to taste Salt & Pepper Adjust based on broth's saltiness.
  • to taste Chili Oil or Red Pepper Flakes (optional) Add based on personal spice preference.

Equipment

  • Large pot

Method
 

Step-by-Step Instructions
  1. In a large pot, heat 1 tablespoon of sesame oil over medium heat for about 1 minute until shimmering. Add 2 minced garlic cloves and 1 tablespoon of freshly grated ginger, sautéing for 30 seconds until fragrant.
  2. Pour in 4 cups of chicken or vegetable broth, stirring to combine. Increase heat slightly and simmer for about 3-4 minutes.
  3. Gently add 12-16 frozen potstickers into the simmering broth and cook according to package instructions, about 5-7 minutes.
  4. During the last 2-3 minutes, stir in 1 cup of sliced mushrooms and 1 cup of spinach or bok choy.
  5. Once vegetables are tender, add 1-2 tablespoons of soy sauce and 1 tablespoon of rice vinegar if using. Season with salt and pepper to taste.
  6. Ladle the soup into bowls, garnishing with chopped green onions and chili oil or red pepper flakes if desired.

Nutrition

Serving: 1bowlCalories: 320kcalCarbohydrates: 35gProtein: 12gFat: 15gSaturated Fat: 2gPolyunsaturated Fat: 1gMonounsaturated Fat: 10gCholesterol: 15mgSodium: 800mgPotassium: 700mgFiber: 3gSugar: 2gVitamin A: 600IUVitamin C: 15mgCalcium: 40mgIron: 2mg

Notes

Use fresh ginger and garlic for better flavor. Store leftovers in an airtight container for up to 2 days.

Tried this recipe?

Let us know how it was!

Quick & Tasty Chicken Ramen Stir Fry Recipe in 25 Minutes

As the soft hiss of the skillet fills the kitchen, my senses come alive with the vibrant colors and enticing aromas of my Quick & Tasty Chicken Ramen Stir Fry Recipe. This beloved weeknight meal, filled with tender chicken, crunchy vegetables, and a savory sauce, can be whipped up in just 25 minutes. It’s the ultimate solution for busy evenings when you’re craving something satisfying and homemade, yet effortlessly quick to prepare. One of the best parts? This dish is completely customizable, so you can throw in whatever proteins or veggies you have lingering in the fridge. Whether you’re cooking for a crowd or just indulging in a cozy night in, this easy recipe is sure to bring warmth and comfort to your table. Curious about how you can make it your own? Let’s dive in!

Want a delicious and quick meal?

Simplicity shines through in this recipe, requiring just basic cooking skills to throw together a delightful meal. Customizable ingredients mean you’re free to use whatever veggies and proteins you have on hand, making it adaptable for all dietary preferences. Bold flavors from the savory sauce bring a comforting taste that rivals takeout without the wait! Perfect for busy weeknights, this Chicken Ramen Stir Fry is ready in just 25 minutes, bringing you a delicious home-cooked dinner without fuss. Plus, it’s a hit with everyone at the table, ensuring no leftovers go to waste!

Quick & Tasty Chicken Ramen Stir Fry Ingredients

• Get ready to make this comforting dish with ease!

  • Ramen Noodles – The foundation of this recipe, providing a hearty texture; feel free to use any brand and discard spice packets.
  • Unsalted Butter (2 tablespoons) – A rich fat for sautéing chicken and veggies, enhancing flavor and moisture.
  • Chicken Breasts (2, sliced thin) – Juicy protein that stars in this dish; for a vegetarian twist, opt for tofu instead!
  • Pepper (½ teaspoon, or to taste) – A simple seasoning to elevate your dish’s flavor profile.
  • Red Bell Pepper (1, sliced) – Adds vibrant color and sweetness; substitute with any bell pepper or even snap peas.
  • Garlic (4 cloves, minced) – A key ingredient that imparts aromatic depth to your stir fry.
  • Napa Cabbage (2 cups, shredded) – Offers a delightful crunch and packs in nutrients; bok choy or spinach work as great substitutes.
  • Green Onion (½ cup, sliced) – Fresh garnish that brings brightness and a pop of flavor.
  • Sesame Seeds – Optional topping that adds a lovely crunch and nutty flavor.
  • Soy Sauce (¼ cup) – The core of the savory sauce, delivering that delightful umami essence known to make the dish irresistible.
  • Sesame Oil (1 teaspoon) – Infuses a rich, nutty undertone to your blend of flavors.
  • Oyster Sauce (2 tablespoons) – Deepens and enhances the overall taste; hoisin sauce can step in if needed.
  • Honey (1 tablespoon) – Provides a perfect hint of sweetness to balance out the savory notes.
  • Sriracha (2 tablespoons) – The spicy element that gives the dish a kick; adjust to your spice tolerance!

With these Quick & Tasty Chicken Ramen Stir Fry ingredients at your fingertips, you’re all set to create a comforting and delicious meal that’s sure to delight!

Step‑by‑Step Instructions for Quick & Tasty Chicken Ramen Stir Fry Recipe

Step 1: Cook Noodles
Begin by preparing the ramen noodles according to the package instructions, usually taking about 3-5 minutes. Once cooked, drain them well, making sure they’re not too sticky. Reserve one cup of the cooking water on the side; this will help adjust the sauce’s consistency later in the Quick & Tasty Chicken Ramen Stir Fry recipe.

Step 2: Make Sauce
In a small bowl, whisk together the soy sauce, oyster sauce, honey, sriracha, and sesame oil. This savory mixture should come together into a smooth sauce, rich in flavors. Set your sauce aside, as it will soon envelop the freshly cooked ingredients in the Quick & Tasty Chicken Ramen Stir Fry, creating a deliciously satisfying meal.

Step 3: Cook Chicken
Heat a large skillet over medium heat, and add the unsalted butter. Once it’s melted and starts to foam, add the thinly sliced chicken. Season the chicken with freshly cracked pepper and sauté for about 5-7 minutes, stirring frequently until it turns golden brown and is cooked through, ensuring there’s no pink remaining in the center.

Step 4: Add Veggies
After the chicken is perfectly browned, introduce the sliced red bell pepper to the skillet. Sauté for 2-3 minutes until the pepper just begins to soften. Next, add the minced garlic, stirring for about 30 seconds until fragrant, then mix in the shredded napa cabbage. Cook until the cabbage wilts down, which should take another 2 minutes, adding vibrant color and nutrition to your stir fry.

Step 5: Combine Dish
Now it’s time to bring everything together! Add the drained ramen noodles and the previously prepared sauce into the skillet. Gently mix all the ingredients, ensuring the noodles and vegetables are evenly coated. If the mixture feels too thick, use the reserved cooking water to achieve your desired consistency, cooking everything together for an additional minute.

Step 6: Serve
Once everything is combined and heated through, remove the skillet from heat. Serve the Quick & Tasty Chicken Ramen Stir Fry hot, garnished with sliced green onions and a sprinkle of sesame seeds for added texture. This colorful dish will not only warm your heart but also satisfy your taste buds with its delightful flavors.

What to Serve with Quick & Tasty Chicken Ramen Stir Fry?

Enjoy a full meal experience by complementing this vibrant stir fry with delectable sides and drinks.

  • Steamed Edamame: Lightly salted and rich in protein, these tender soybeans bring a satisfying crunch to your meal.

  • Crispy Egg Rolls: Their golden, flaky texture pairs wonderfully with the savory flavors of the stir fry, creating a delightful contrast.

  • Asian Cucumber Salad: A refreshing touch, this salad adds a cool, tangy balance that cuts through the richness of the ramen.

  • Vegetable Tempura: Light and crispy, this crunchy assortment of seasonal vegetables enhances the overall flavor and texture of the meal.

Enjoying a warm bowl of Chicken Ramen Stir Fry alongside these flavors can transport your taste buds to a bustling Asian street market in every single bite!

  • Chili Soy Sauce: For those who crave an extra kick, serve this condiment on the side to add an additional layer of heat to your stir fry.

  • Green Tea: This calming beverage not only complements the flavors of the dish but also aids in digestion, making your meal feel complete.

  • Mango Sticky Rice: End on a sweet note with this comforting dessert, offering a luscious taste that contrasts beautifully with the savory dish.

Quick & Tasty Chicken Ramen Stir Fry Variations

Feel free to let your culinary creativity shine with these exciting twists on the classic Chicken Ramen Stir Fry!

  • Vegetarian Delight: Swap chicken with tofu or tempeh for a satisfying, plant-based option that retains all the flavor.
  • Seafood Fusion: Use shrimp or scallops instead of chicken for a delicious seafood twist that pairs beautifully with the savory sauce.
  • Colorful Veggie Boost: Add vibrant veggies like carrots, broccoli, or snap peas to enhance nutrition and create a delightful rainbow of colors.
  • Spice It Up: Increase the heat by adding sliced jalapeños or a dash of chili flakes, perfect for those who crave an extra kick.
  • Nutty Flavor: Enhance the dish with a sprinkle of chopped peanuts or cashews for extra texture and richness.
  • Citrus Zing: A little lime juice or zest at the end adds a refreshing burst of flavor, balancing out the savory notes beautifully.
  • Gluten-Free Option: Substitute regular ramen with gluten-free noodles or rice noodles, making this dish perfect for gluten-sensitive diners.

By incorporating these variations, you not only customize your meal but also create a new family favorite! If you’re interested in more flavor-packed options, check out my Sweet Chili Chicken recipe or explore the amazing flavors of Sheet Pan Chicken Fajitas for more inspiration. Enjoy experimenting!

Expert Tips for Quick & Tasty Chicken Ramen Stir Fry

  • Cook Chicken Thoroughly: Ensure the chicken is cooked until there’s no pink inside to avoid food safety issues. A meat thermometer can help with this.
  • Customize Wisely: Don’t hesitate to substitute with whatever veggies or proteins you have on hand, but try to maintain balanced flavors and textures.
  • Sauce Consistency: If the stir fry seems dry, gradually add the reserved cooking water to achieve your desired consistency without it becoming watery.
  • Don’t Rush the Veggies: Allow enough time for the veggies to sauté and develop flavor; this enhances the overall taste of your Quick & Tasty Chicken Ramen Stir Fry.
  • Adjust Spice Levels: Start with less sriracha if you’re sensitive to heat; you can always add more later for that perfect kick!

Make Ahead Options

These Quick & Tasty Chicken Ramen Stir Fry preparations are perfect for those seeking to simplify meal time during a busy week! You can slice the chicken and prepare the sauce up to 24 hours in advance; just refrigerate them separately in airtight containers to maintain their freshness and flavor. Additionally, chop the vegetables (like bell peppers and cabbage) and store them in the fridge, ready for use. When it’s time to enjoy your meal, simply sauté the chicken and vegetables, then follow the final steps to combine everything with the ramen and sauce. This method allows you to serve a delicious, homemade dinner with minimal effort and maximum flavor!

How to Store and Freeze Chicken Ramen Stir Fry

  • Fridge: Store leftovers in an airtight container for up to 4 days. Make sure the stir fry cools to room temperature before sealing to prevent moisture buildup.
  • Freezer: For longer storage, freeze the Chicken Ramen Stir Fry (without the noodles) in a freezer-safe container for up to 3 months. Cook fresh noodles when you’re ready to enjoy it again.
  • Reheating: To reheat, thaw in the fridge overnight and warm it on the stove over medium heat, adding a splash of water if needed to maintain moisture.
  • Avoid Overcooking: When reheating, avoid high temperatures to prevent the vegetables from becoming mushy and to maintain the integrity of the sauces.

Quick and Easy Chicken Ramen Stir Fry Recipe FAQs

How do I choose the right vegetables for my Chicken Ramen Stir Fry?
Absolutely! When selecting vegetables, look for fresh, vibrant options. Red bell pepper adds sweetness, but you can mix in crunchy snap peas, carrots, or broccoli for extra nutrients and color. Just remember, the fresher the veggies, the better the flavor!

How should I store leftover Chicken Ramen Stir Fry?
Store any leftovers in an airtight container in the refrigerator for up to 4 days. Make sure it has cooled down to room temperature before putting it in the fridge to avoid excess moisture. This helps maintain the flavors and texture of your delicious meal!

Can I freeze Chicken Ramen Stir Fry?
Yes, you can freeze it! I recommend freezing the stir fry without the noodles in a freezer-safe container for up to 3 months. When you’re ready to eat, simply cook the noodles fresh and add them to the thawed stir fry. This helps retain the best texture and taste.

What if my ramen noodles are too sticky after cooking?
That’s an easy fix! If your noodles are sticky, try rinsing them briefly under cold water after draining to remove excess starch. This will help separate them and ensure they mix well with your stir fry.

Are there any dietary considerations for this recipe?
Definitely! For those with allergies, be aware that soy sauce contains gluten. You can substitute with a gluten-free soy sauce or tamari. If you’re vegetarian or vegan, replace chicken with tofu or tempeh, and skip the oyster sauce, using hoisin sauce instead. Customize it based on your dietary needs!

Quick & Tasty Chicken Ramen Stir Fry Recipe

Quick & Tasty Chicken Ramen Stir Fry Recipe in 25 Minutes

A quick & tasty chicken ramen stir fry recipe that’s customizable and ready in just 25 minutes.
Prep Time 10 minutes
Cook Time 15 minutes
Total Time 25 minutes
Servings: 4 servings
Course: Dinner
Cuisine: Asian
Calories: 450

Ingredients
  

Noodles and Protein
  • 2 cups Ramen Noodles Any brand; discard spice packets.
  • 2 tablespoons Unsalted Butter For sautéing chicken and veggies.
  • 2 pieces Chicken Breasts, sliced thin Or substitute with tofu for a vegetarian option.
Vegetables
  • ½ teaspoon Pepper To taste.
  • 1 piece Red Bell Pepper, sliced Can substitute with other bell peppers or snap peas.
  • 4 cloves Garlic, minced Key for flavor.
  • 2 cups Napa Cabbage, shredded Alternatives include bok choy or spinach.
  • ½ cup Green Onion, sliced For garnish.
Sauces and Seasonings
  • ¼ cup Soy Sauce Core of the savory sauce.
  • 1 teaspoon Sesame Oil Adds rich, nutty undertones.
  • 2 tablespoons Oyster Sauce Can substitute with hoisin sauce.
  • 1 tablespoon Honey Balances savory flavor.
  • 2 tablespoons Sriracha Adjust according to spice preference.
  • Sesame Seeds Optional topping.

Equipment

  • Large skillet
  • small bowl

Method
 

Cooking Steps
  1. Prepare the ramen noodles according to package instructions, usually taking about 3-5 minutes. Drain them well and reserve one cup of cooking water.
  2. In a small bowl, whisk together the soy sauce, oyster sauce, honey, sriracha, and sesame oil. Set aside.
  3. Heat a large skillet over medium heat and add the unsalted butter. Once melted, add the sliced chicken, season with pepper, and sauté for about 5-7 minutes until golden brown.
  4. Add the sliced red bell pepper to the skillet and sauté for 2-3 minutes until softened. Then add the minced garlic and sauté for 30 seconds.
  5. Mix in the shredded napa cabbage and cook until wilted, approximately 2 minutes.
  6. Add the drained ramen noodles and prepared sauce to the skillet. Mix thoroughly, adjusting consistency with reserved cooking water if needed. Cook together for an additional minute.
  7. Serve hot, garnished with sliced green onions and a sprinkle of sesame seeds.

Nutrition

Serving: 1servingCalories: 450kcalCarbohydrates: 50gProtein: 30gFat: 15gSaturated Fat: 5gCholesterol: 80mgSodium: 800mgPotassium: 600mgFiber: 3gSugar: 5gVitamin A: 50IUVitamin C: 60mgCalcium: 50mgIron: 3mg

Notes

Customize with various vegetables or proteins as desired. Ensure chicken is cooked thoroughly.

Tried this recipe?

Let us know how it was!

Cheeseburger Quesadillas: Quick, Crispy, Family-Friendly Delight

As I stood in my kitchen, the smell of sizzling ground beef began to fill the air, blending perfectly with the anticipation of a fun family dinner. Enter the Cheeseburger Quesadillas—a dish that transforms the classic cheeseburger into a crispy, gooey experience everyone will love. In just 20 minutes, you can dish out these gluten-free delights that not only please the little ones but also satisfy adult cravings after a long day. It’s the ideal weeknight dinner that turns meal prep into a delightful escape from takeout. Want to know how this easy yet scrumptious recipe can change your dinner game? Let me share the secrets that will have you grabbing for seconds!

Why are Cheeseburger Quesadillas a must-try?

Quick and Easy: With just 20 minutes from start to finish, these quesadillas are the ultimate solution for busy weeknights.

Kid-Friendly Fun: Your little ones will love the interactive experience of customizing their own quesadillas with toppings!

Flavor Explosion: The combination of savory ground beef, melted cheese, and special sauce creates a cheesy, satisfying taste that rivals any restaurant dish.

Versatile Options: Feel free to experiment with ingredients by adding sautéed veggies or swapping proteins, making it a recipe you’ll want to revisit again and again.

Crispy Perfection: The crispy tortillas provide the perfect contrast to the gooey interior, making every bite a delightful experience that will have everyone coming back for more.

Want an even heartier meal? Check out my Cheeseburger Soup Comforting recipe for another family favorite!

Cheeseburger Quesadillas Ingredients

For the Tortillas

  • Gluten-Free Tortillas – The crunchy base of these quesadillas! Substitution Note: Regular flour tortillas can be used if gluten isn’t a concern.

For the Filling

  • Ground Beef – The heartiness of the dish. Note: Feel free to substitute with turkey or plant-based ground meat for a lighter option.
  • Cheddar Cheese – Adds melty creaminess and fantastic flavor. Substitution Note: Monterey Jack or mozzarella work beautifully in this recipe.
  • Special Sauce – A delightful blend that enhances the burger flavor; mix mayonnaise, ketchup, and mustard to taste. Substitution Note: Store-bought burger sauce is a quick alternative.

For the Toppings

  • Vegetables (e.g., lettuce, tomatoes, avocado) – Optional toppings that bring freshness and nutrition to your meal.

Step‑by‑Step Instructions for Cheeseburger Quesadillas

Step 1: Cook the Beef
In a skillet over medium heat, add your ground beef and cook for about 5-7 minutes, stirring occasionally until it’s browned and fully cooked. Use a spatula to break up the meat as it cooks. Make sure there are no pink bits left, and you can drain any excess fat if necessary to keep the quesadilla filling nice and flavorful.

Step 2: Prepare the Tortilla
Place a clean skillet on low heat and add your first gluten-free tortilla. Allow it to warm up for about 1-2 minutes until it becomes slightly pliable. This ensures a crispy outside while the inside stays melty and gooey. Keep an eye on it; you want it warm, not browned at this stage.

Step 3: Layer the Ingredients
On one half of the warmed tortilla, evenly spread a generous scoop of the cooked ground beef, followed by a handful of cheddar cheese. Drizzle some special sauce over the top for that classic cheeseburger flavor. Make sure the cheese covers the beef for optimal melting and deliciousness with your Cheeseburger Quesadillas.

Step 4: Fold and Cook
Carefully fold the tortilla in half over the filling, pressing it down slightly. Increase the skillet heat to medium and cook the quesadilla for about 3-4 minutes on one side, until the tortilla is golden brown and crispy. Then, flip and cook the other side for another 3-4 minutes, ensuring the cheese melts perfectly inside.

Step 5: Repeat the Process
Remove the first quesadilla from the skillet and let it rest for a minute before cutting. Return to the stove, lower the heat slightly, and repeat the layering and cooking process with the remaining tortillas and filling. Keep the completed quesadillas warm in a low oven if needed, making this a great way to serve the whole family together!

Step 6: Serve Your Quesadillas
Slice the quesadillas into wedges and serve them warm with additional toppings like fresh lettuce, ripe avocados, or sliced tomatoes as desired. This final touch not only enhances the flavor but adds freshness and color to your Cheeseburger Quesadillas, making them appealing and irresistible.

Expert Tips for Cheeseburger Quesadillas

  • Skillet Temperature: Ensure your skillet is preheated for crispy, golden-brown tortillas; a cold pan can lead to soggy quesadillas.

  • Don’t Overstuff: Use a moderate amount of filling to avoid breakage during cooking; too much can make flipping difficult.

  • Cheese Matters: For the best melt, use a cheese that stretches well like cheddar or Monterey Jack in your Cheeseburger Quesadillas.

  • Fresh Toppings: Incorporate a variety of fresh toppings like tomatoes and avocados just before serving for a delightful crunch.

  • Cook Evenly: Flip quesadillas gently and check for an even golden color on both sides to achieve that perfect crispy texture.

Make Ahead Options

These Cheeseburger Quesadillas are ideal for meal prep enthusiasts looking to save time during busy weeknights! You can prepare the ground beef filling up to 3 days in advance; simply cook it, let it cool, and store it in an airtight container in the refrigerator. For even easier assembly, you can pre-chop any vegetables and keep them ready to go. When you’re ready to serve, warm the filling in a skillet, layer it on your tortillas with cheese, and cook as directed. This approach ensures your quesadillas are just as delicious and fresh, making them the perfect solution for stress-free dinners.

How to Store and Freeze Cheeseburger Quesadillas

Fridge: Store leftover quesadillas in an airtight container in the refrigerator for up to 3 days. This helps retain flavor and prevents them from drying out.

Freezer: For longer storage, wrap the quesadillas tightly in plastic wrap and aluminum foil before placing them in a freezer bag. They can be frozen for up to 2 months.

Reheating: To reheat, thaw in the fridge overnight, then warm in a skillet over medium heat to restore crispiness. Alternatively, use an oven at 350°F (175°C) for about 10-15 minutes.

Serving Tips: Always check the internal temperature when reheating to ensure it’s heated thoroughly before serving your Cheeseburger Quesadillas again.

Cheeseburger Quesadillas Variations & Substitutions

Embrace the joy of customizing your Cheeseburger Quesadillas with unique twists that will tickle your taste buds!

  • Vegetarian Delight: Substitute ground beef with black beans or lentils for a plant-based twist. It adds protein while keeping the flavors rich.
  • Spicy Kick: Add diced jalapeños or pepper jack cheese for a fiery delight. This will elevate your quesadillas with that perfect spicy kick!
  • Cheesy Upgrade: Experiment with a blend of cheeses, like gouda and pepper jack for a melty, flavorful experience that’s sure to satisfy any cheese lover.
  • BBQ Flavor: Mix in some barbecue sauce with the beef for a sweet and smoky flavor. This twist offers a delightful change from the traditional cheeseburger taste!
  • Zesty Extras: Incorporate fresh cilantro, lime juice, or pickled onions to enhance the flavor profile with a zesty finish. Your taste buds will dance!
  • Crunchy Veggie: Add thinly sliced bell peppers or spinach for extra crunch and nutrients. These veggies not only add vibrancy but also a satisfying texture!
  • Taco Fusion: Sprinkle in some taco seasoning for a fun fusion twist. It transforms your quesadillas into a mouthwatering Mexican-inspired delight!

Feel free to explore these options and make the recipe your own! Want another cozy meal idea? Check out my Cheeseburger Soup Comforting recipe that takes comfort food to another level!

What to Serve with Cheeseburger Quesadillas

The perfect meal transforms dinnertime into a delightful experience, and these quesadillas are just the beginning!

  • Creamy Guacamole: Adds a smooth texture and fresh flavor, perfectly balancing the savory quesadillas.
  • Spicy Salsa: A zesty kick that complements the cheeseburger essence while bringing bright colors to your plate.
  • Crispy French Fries: A nostalgic pairing that adds crunch, making for an ultimate comfort food feast.
  • Garden Salad: Fresh greens and veggies provide a crisp, refreshing contrast to the warm, cheesy quesadillas.
  • Coleslaw: This tangy, crunchy side enhances the flavors while bringing a bit of crunch and creaminess to each bite.
  • Sweet Corn on the Cob: Grilled or boiled, the sweetness of corn makes for a lovely balance to the savory quesadilla flavors.
  • Cheesy Nachos: Perfect for sharing and soaking up any leftover special sauce; a crowd-pleaser at any dinner table.
  • Horchata: This creamy, cinnamon-infused beverage adds a soothing element that beautifully complements the meal.

Cheeseburger Quesadillas Recipe FAQs

How do I choose the right ground beef for my Cheeseburger Quesadillas?
Absolutely! When selecting ground beef, look for something that is fresh with a good fat-to-lean ratio. I usually opt for 80% lean since it offers great flavor without being too greasy. Avoid any packages with dark spots or a strange smell, as freshness is key.

What’s the best way to store leftover Cheeseburger Quesadillas?
Very! Place your leftovers in an airtight container in the refrigerator. They can be kept for up to 3 days. For best results, reheat them in a skillet over medium heat to maintain that crispy texture—nobody wants a soggy quesadilla!

Can I freeze Cheeseburger Quesadillas for later?
Absolutely! To freeze, wrap each quesadilla tightly in plastic wrap followed by aluminum foil to avoid freezer burn. Place them in a freezer bag and store for up to 2 months. When you’re ready to enjoy, simply thaw them overnight in the fridge before reheating, ensuring they’re evenly warmed.

What if my quesadillas are soggy when I cook them?
No worries! If your quesadillas come out soggy, it might be due to overfilling or cooking them on too low of a heat. Start by ensuring your skillet is preheated well before adding any quesadillas. If they are overstuffed, limit your fillings to avoid breaking them apart during cooking.

Are there any dietary considerations to keep in mind for my Cheeseburger Quesadillas?
Very much so! If you’re cooking for someone with gluten sensitivities, always double-check that your tortillas and any additional ingredients are certified gluten-free. Additionally, consider swapping the ground beef for ground turkey or plant-based meat options for a lighter or vegetarian-friendly dish. It’s always a good idea to ask about allergies before serving!

How can I jazz up my Cheeseburger Quesadillas?
Absolutely! To elevate your quesadillas, mix in sautéed onions or bell peppers with the ground beef. You could also add spices like garlic powder or smoked paprika to the beef as it cooks for an extra flavor kick. Don’t be afraid to customize with your favorite toppings and sauces!

Cheeseburger Quesadillas

Cheeseburger Quesadillas: Quick, Crispy, Family-Friendly Delight

Cheeseburger Quesadillas are a quick, crispy delight that transforms the classic cheeseburger into a family favorite in just 20 minutes.
Prep Time 10 minutes
Cook Time 10 minutes
Total Time 20 minutes
Servings: 4 quesadillas
Course: Dinner
Cuisine: American
Calories: 350

Ingredients
  

For the Tortillas
  • 4 pieces Gluten-Free Tortillas Regular flour tortillas can be used if gluten isn't a concern.
For the Filling
  • 1 pound Ground Beef Feel free to substitute with turkey or plant-based ground meat for a lighter option.
  • 1 cup Cheddar Cheese Monterey Jack or mozzarella work beautifully in this recipe.
  • 1/4 cup Special Sauce Mix mayonnaise, ketchup, and mustard to taste.
For the Toppings
  • Vegetables (e.g., lettuce, tomatoes, avocado) Optional toppings.

Equipment

  • Skillet

Method
 

Step-by-Step Instructions for Cheeseburger Quesadillas
  1. In a skillet over medium heat, add your ground beef and cook for about 5-7 minutes, stirring occasionally until it’s browned and fully cooked. Use a spatula to break up the meat as it cooks.
  2. Place a clean skillet on low heat and add your first gluten-free tortilla. Allow it to warm up for about 1-2 minutes until it becomes slightly pliable.
  3. On one half of the warmed tortilla, evenly spread a generous scoop of the cooked ground beef, followed by a handful of cheddar cheese. Drizzle some special sauce over the top.
  4. Carefully fold the tortilla in half over the filling, pressing it down slightly. Increase the skillet heat to medium and cook the quesadilla for about 3-4 minutes on one side, until the tortilla is golden brown and crispy.
  5. Remove the first quesadilla from the skillet and let it rest for a minute before cutting. Return to the stove, lower the heat slightly, and repeat the layering and cooking process with the remaining tortillas and filling.
  6. Slice the quesadillas into wedges and serve them warm with additional toppings like fresh lettuce, ripe avocados, or sliced tomatoes as desired.

Nutrition

Serving: 1quesadillaCalories: 350kcalCarbohydrates: 30gProtein: 20gFat: 18gSaturated Fat: 8gPolyunsaturated Fat: 1gMonounsaturated Fat: 9gCholesterol: 60mgSodium: 800mgPotassium: 400mgFiber: 2gSugar: 3gVitamin A: 10IUVitamin C: 15mgCalcium: 20mgIron: 10mg

Notes

Store leftover quesadillas in an airtight container in the refrigerator for up to 3 days. For longer storage, wrap in plastic and aluminum foil and freeze for up to 2 months.

Tried this recipe?

Let us know how it was!

Maple Chicken & Beef Bacon Sliders for Cozy Family Nights

“Can you believe how quickly we’re diving into fall flavors?” my friend exclaimed over a cozy dinner. What better way to welcome the season than with these Maple Chicken & Beef Bacon Sliders? This recipe is the ultimate harmony of sweet and savory, boasting crispy beef bacon draped over glazed chicken that’s downright irresistible. Not only are these sliders a crowd-pleaser, but they’re also a breeze to whip up, making them perfect for gatherings or a weeknight meal the whole family will savor. Whether you stick with the original ingredients or explore fun alternatives like turkey or plant-based bacon, these sliders promise to ignite your kitchen with warmth and flavor. So, who’s ready to elevate their slider game?

Why Will You Love These Sliders?

Quick Prep Time: You’ll love how effortlessly these sliders come together! With just a few simple steps, you can create a flavorful dish in under 30 minutes.

Savory-Sweet Delight: The combination of maple syrup and crispy beef bacon creates a mouthwatering balance of flavors that will have your taste buds dancing.

Family-Friendly: These sliders are perfect for a cozy family night or casual gatherings, making them a hit with both kids and adults alike.

Versatile Options: Feel free to swap chicken for turkey or use plant-based bacon for a fantastic vegetarian alternative that doesn’t skimp on flavor!

Perfect Pairing: Serve them alongside sweet potato fries or a fresh salad for a delightful meal that’s both hearty and healthy. Enjoy the comforting vibes of these Maple Chicken & Beef Bacon Sliders as they bring everyone together!

Maple Chicken & Beef Bacon Sliders Ingredients

For the Chicken

  • Chicken Breasts – Provides the base protein for sliders; opt for boneless, skinless for easy cooking.
  • Maple Syrup – Adds a sweet, sticky glaze; substitute with honey if you prefer.
  • Dijon Mustard – Offers a tangy balance to the sweetness of the syrup, enhancing flavor depth.
  • Olive Oil – Used for cooking chicken, adding richness; can be replaced with another oil for a different taste.

For the Bacon

  • Beef Bacon – Introduces a savory, crispy texture; consider turkey bacon for a leaner alternative.

For Assembly

  • Slider Buns – The vehicle for your sliders; any soft bun will do, including whole grain for a healthier twist.
  • Arugula – Adds a fresh, peppery bite; baby spinach is a milder substitute if you prefer.
  • Salt and Pepper – Essential for seasoning the chicken; adjust to your taste for the perfect finish.

By gathering these simple yet delightful ingredients, you’re on your way to making Maple Chicken & Beef Bacon Sliders that will surely impress and satisfy your family!

Step‑by‑Step Instructions for Maple Chicken & Beef Bacon Sliders

Step 1: Marinate the Chicken
In a bowl, whisk together maple syrup, Dijon mustard, garlic powder, and a pinch of black pepper until smooth. Add the boneless, skinless chicken breasts, ensuring they are well-coated. Cover the bowl with plastic wrap and let the chicken marinate in the refrigerator for at least 30 minutes; this allows the flavors to meld beautifully.

Step 2: Cook the Beef Bacon
Heat a skillet over medium heat and add the beef bacon strips in a single layer. Cook for about 5-7 minutes, flipping occasionally, until the bacon is crispy and golden brown. Once cooked, remove the bacon from the skillet and set it on a paper towel-lined plate to drain excess fat while you prepare the chicken.

Step 3: Cook the Chicken
In the same skillet, leaving the delicious bacon drippings, add the marinated chicken breasts. Cook over medium heat for 5-7 minutes on each side, or until the chicken is golden brown and reaches an internal temperature of 165°F (74°C). Once cooked, remove the chicken from the skillet and let it rest for a few minutes to keep it juicy.

Step 4: Assemble the Sliders
Preheat your oven to 350°F (175°C) and toast the slider buns for about 5 minutes until lightly golden. Lay arugula on the bottom half of each toasted bun, then place a piece of the glazed chicken on top, followed by a crispy layer of beef bacon. Finally, crown each slider with the top bun, creating a delightful tower of flavor.

Step 5: Serve and Enjoy
Drizzle a touch of extra maple syrup over the assembled sliders for added sweetness, if desired. Serve your Maple Chicken & Beef Bacon Sliders warm, alongside sweet potato fries or a fresh garden salad for a complete meal. Each bite promises a comforting mix of savory and sweet that your family will love!

What to Serve with Maple Chicken & Beef Bacon Sliders

Enhance your slider experience by complementing these flavors with delightful sides and drinks that amplify the warmth of this cozy dish.

  • Sweet Potato Fries: The natural sweetness and crunchy texture pair perfectly with the savory sliders, creating a delightful contrast.
  • Fresh Green Salad: A light salad with mixed greens and a tangy vinaigrette adds a refreshing balance to the richness of the sliders.
  • Coleslaw: Creamy coleslaw offers a crunchy, tangy element that cuts through the savory bacon and sweet chicken. Its crispness adds a nice texture.
  • Corn on the Cob: Grilled or boiled, corn brings a sweet, juicy bite that enhances the comfort food vibe of your meal—ideal for outdoor gatherings.
  • Brewed Iced Tea: A refreshing iced tea, sweetened or unsweetened, complements the flavors wonderfully, providing a perfect thirst quencher alongside your sliders.
  • Sparkling Lemonade: The citrusy fizz offers an upbeat, refreshing contrast to the sliders, making every bite feel special and celebratory.
  • Chocolate Chip Cookies: For dessert, a classic chocolate chip cookie is a sweet ending to your meal. Its melty chocolate and warm texture will please both kids and adults alike!

Make Ahead Options

These Maple Chicken & Beef Bacon Sliders are perfect for meal prep enthusiasts looking to save time on busy weeknights! You can marinate the chicken up to 24 hours in advance, ensuring the flavors develop beautifully. Also, cook the beef bacon ahead of time and store it in an airtight container in the refrigerator for up to 3 days. When you’re ready to serve, simply reheat the chicken and bacon in a skillet until warmed through, then assemble the sliders with toasted buns and fresh arugula. Following these steps helps maintain the sliders’ delightful texture and flavor, making it a hassle-free meal everyone will enjoy!

Expert Tips for Maple Chicken & Beef Bacon Sliders

  • Perfect Marinade Time: Allow chicken to marinate for at least 30 minutes—not only for flavor but also to ensure it stays tender and juicy.

  • Bacon Cooking Method: Cook the beef bacon until it’s crispy to add the right texture to the sliders. Avoid undercooking it, as soggy bacon can ruin the experience.

  • Avoid Dry Chicken: Use a meat thermometer to check that your chicken reaches an internal temperature of 165°F (74°C). This ensures it’s fully cooked but still juicy.

  • Bun Choice: Opt for soft slider buns like brioche or whole grain to contrast the crispy bacon and tender chicken. Stale buns can detract from the dish’s overall deliciousness.

  • Flavor Boosters: For an extra kick, add a pinch of cayenne pepper to the marinade. This subtle heat beautifully enhances the sweet profile of the maple syrup without overpowering it.

  • Make Ahead Tips: Prepare chicken and bacon in advance and store them separately in the fridge. When ready to serve, just reheat before assembling your Maple Chicken & Beef Bacon Sliders for a quick meal!

How to Store and Freeze Maple Chicken & Beef Bacon Sliders

Fridge: Store any leftover sliders in an airtight container in the refrigerator for up to 3 days. Reheat in the microwave or oven to restore warmth and texture.

Freezer: For longer storage, freezing is a great option! Wrap assembled sliders tightly in plastic wrap and then in aluminum foil. They can be frozen for up to 2 months.

Reheating: When ready to enjoy, thaw sliders overnight in the fridge. Reheat in a preheated oven at 350°F (175°C) for about 15-20 minutes, ensuring the chicken is heated through.

Make-Ahead Tips: Prepare chicken and bacon in advance, storing them separately. This allows for easy assembly and quick meals whenever you crave Maple Chicken & Beef Bacon Sliders!

Maple Chicken & Beef Bacon Sliders Variations

Feel free to get creative with these sliders and make them your own!

  • Turkey Substitute: Swap the chicken for turkey for a leaner slider that still packs a punch of flavor.
  • Plant-Based Bacon: Use plant-based bacon for a vegetarian option that’s just as delicious and satisfying.
  • Greens Galore: Experiment with greens; try arugula for a peppery kick or go for crisp romaine for extra crunch.
  • Spicy Kick: Add jalapeños or a dash of hot sauce to the chicken marinade for some spicy excitement.
  • Sweet & Savory Twist: Stir in a tablespoon of Dijon mustard into the bacon drippings for an extra layer of flavor in your chicken.
  • Bun Variety: Choose whole grain or gluten-free buns to cater to different dietary needs while still enjoying those delightful flavors.
  • Fruit Infusion: For a fruity touch, top sliders with slices of grilled pineapple or apple for a refreshing contrast to the savory flavors.
  • Creamy Addition: Spread a thin layer of creamy avocado or a dollop of aioli on the buns to elevate the richness factor.

If you’re looking for more delicious ideas, try pairing these sliders with BLT Chicken Salad or serve them alongside some comforting Potato Bacon Soup. The possibilities are endless, and your family will love exploring new flavors together!

Maple Chicken & Beef Bacon Sliders Recipe FAQs

What type of chicken is best for this recipe?
Absolutely! Boneless, skinless chicken breasts work best for these sliders as they cook evenly and are easy to handle. For a lighter option, you could also use ground turkey, which provides a similar texture without compromising the flavor.

How to store leftover sliders?
Very simply! Store any leftover Maple Chicken & Beef Bacon Sliders in an airtight container in the refrigerator for up to 3 days. When you’re ready to enjoy them again, just reheat in the microwave or in a preheated oven at 350°F (175°C) for around 10 minutes until warm.

Can I freeze the sliders?
Of course! To freeze, wrap each assembled slider tightly in plastic wrap and then in aluminum foil. This method keeps them fresh for up to 2 months. When you’re ready to serve, thaw them overnight in the refrigerator, then reheat in a preheated oven at 350°F (175°C) for 15-20 minutes until heated through.

What if my chicken turns out dry?
If you’re worried about dry chicken, here’s a handy tip! Start by marinating your chicken for at least 30 minutes to lock in moisture. Additionally, use a meat thermometer to ensure the chicken reaches 165°F (74°C)—this guarantees it’s fully cooked while staying juicy. If the chicken does turn out a bit dry, adding an extra drizzle of maple syrup when serving can help moisten it up.

Are there any allergy considerations?
Yes! If you’re serving others, always check for dietary restrictions. The recipe contains common allergens like chicken and mustard. For those who need alternatives, turkey or isolated plant-based bacon can be great substitutes. Be mindful of any bun choices you use, as gluten can also be an issue for some.

Can I use a different type of bacon?
Definitely! While beef bacon gives a rich, savory flavor, turkey bacon is a fantastic leaner alternative. It maintains a similar texture while reducing calories. Additionally, for a vegetarian option, feel free to explore plant-based bacon that can add a nice crunch without any meat.

Maple Chicken & beef bacon Sliders

Maple Chicken & Beef Bacon Sliders for Cozy Family Nights

Indulge in these Maple Chicken & Beef Bacon Sliders, a perfect blend of sweet and savory flavors for a cozy family meal.
Prep Time 30 minutes
Cook Time 15 minutes
Total Time 45 minutes
Servings: 6 sliders
Course: Lunch
Cuisine: American
Calories: 400

Ingredients
  

For the Chicken
  • 2 pounds boneless, skinless chicken breasts Provides the base protein for sliders.
  • 1/4 cup maple syrup Adds a sweet, sticky glaze.
  • 2 tablespoons Dijon mustard Offers a tangy balance to the sweetness.
  • 2 tablespoons olive oil Used for cooking chicken.
For the Bacon
  • 1 pound beef bacon Introduces a savory, crispy texture.
For Assembly
  • 6 sliders slider buns Any soft bun will do.
  • 2 cups arugula Adds a fresh, peppery bite.
  • to taste salt Essential for seasoning the chicken.
  • to taste pepper Essential for seasoning the chicken.

Equipment

  • Skillet
  • bowl
  • Oven
  • Plastic Wrap
  • paper towels

Method
 

Step‑by‑Step Instructions
  1. In a bowl, whisk together maple syrup, Dijon mustard, garlic powder, and a pinch of black pepper until smooth. Add the chicken breasts, ensuring they are well-coated. Cover and let marinate for 30 minutes.
  2. Heat a skillet over medium heat and add the beef bacon strips. Cook for 5-7 minutes until crispy. Remove and set on paper towels to drain.
  3. In the same skillet, cook the marinated chicken breasts over medium heat for 5-7 minutes on each side until golden and cooked through. Let it rest before slicing.
  4. Preheat oven to 350°F (175°C). Toast the slider buns for 5 minutes. Assemble by placing arugula on the bottom half of each bun, then the glazed chicken, followed by the bacon, and top with the other bun.
  5. Drizzle more maple syrup over the sliders if desired. Serve warm with sweet potato fries or salad.

Nutrition

Serving: 1sliderCalories: 400kcalCarbohydrates: 28gProtein: 20gFat: 25gSaturated Fat: 8gPolyunsaturated Fat: 5gMonounsaturated Fat: 10gCholesterol: 65mgSodium: 800mgPotassium: 300mgFiber: 2gSugar: 5gVitamin A: 500IUVitamin C: 5mgCalcium: 50mgIron: 2mg

Notes

Allow chicken to marinate for at least 30 minutes for optimal flavor. Cook bacon until crispy for the best texture in the sliders.

Tried this recipe?

Let us know how it was!

Stay Connected

Get recipes via email: