Get my cookbooks

Cozy Dump-and-Bake Chicken Alfredo Rice Casserole Recipe

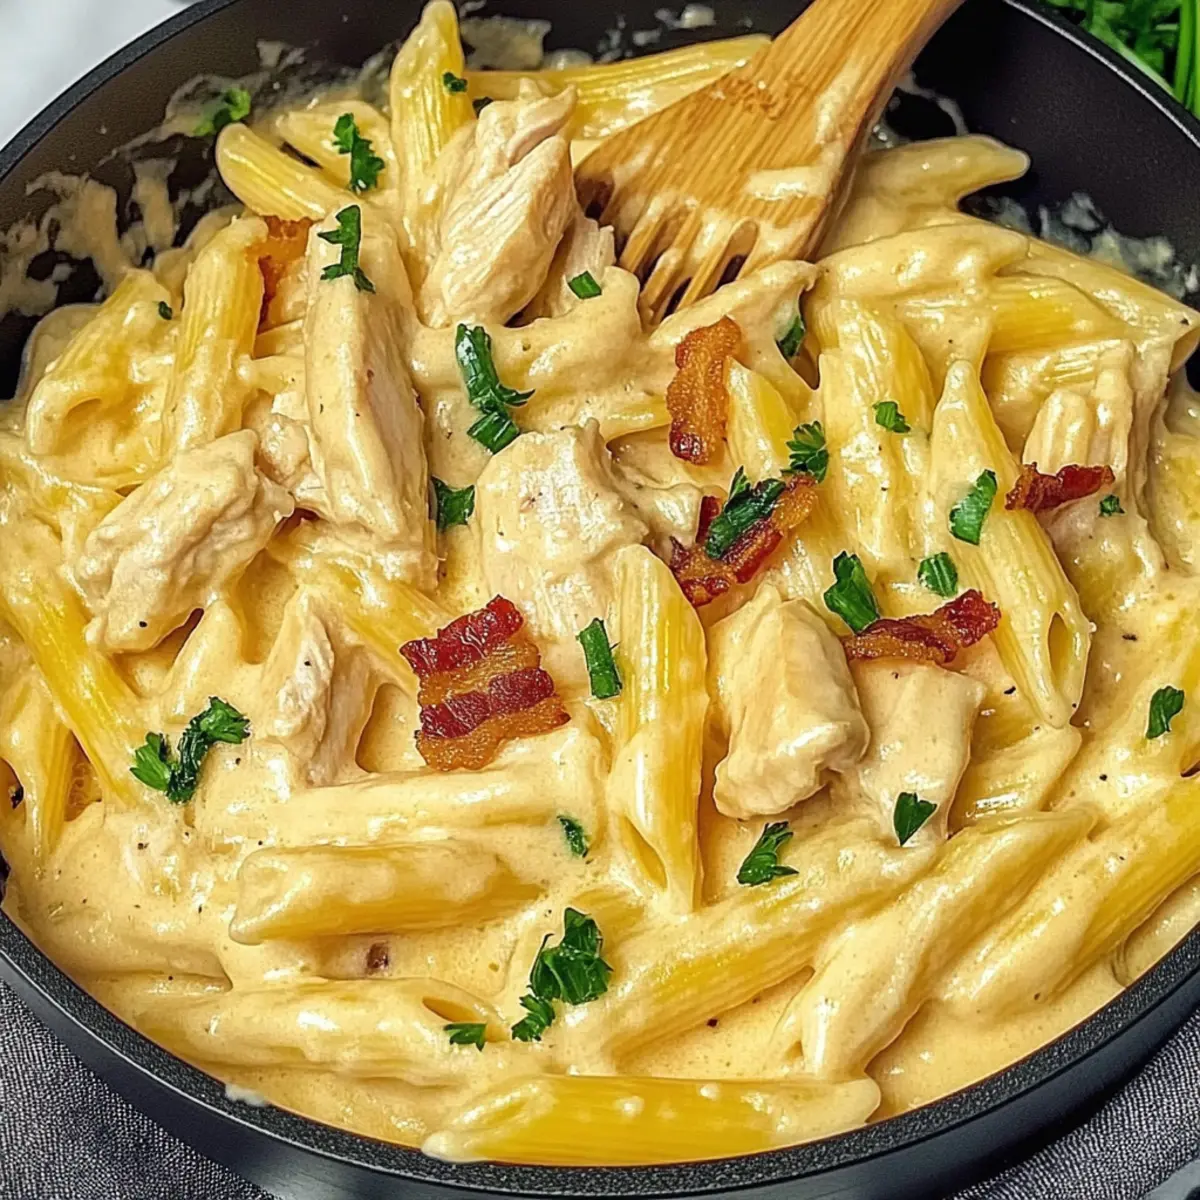
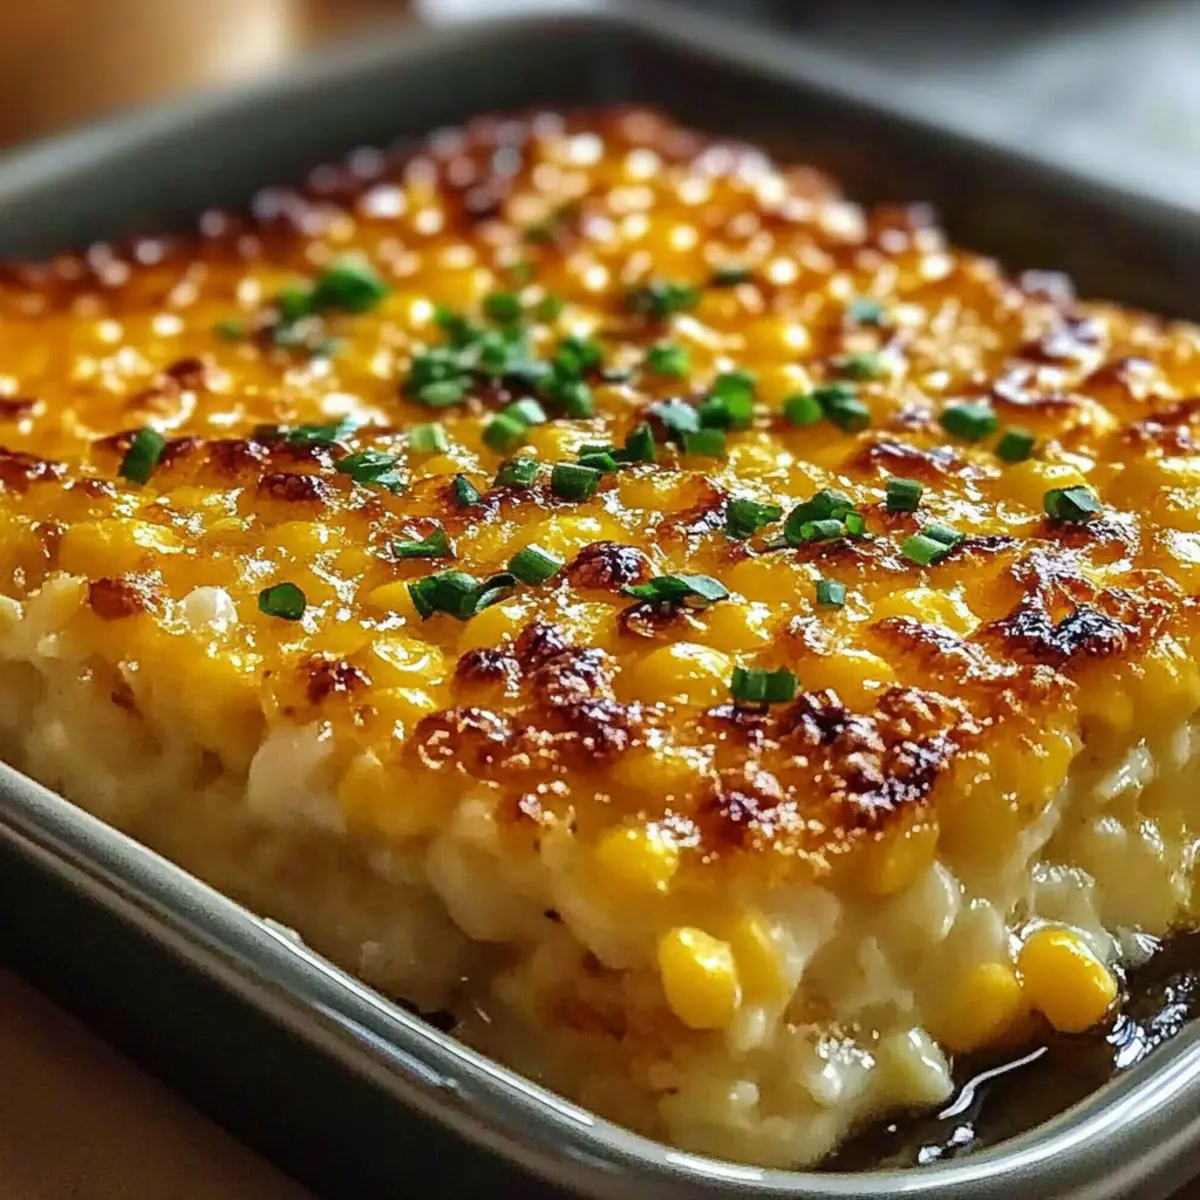
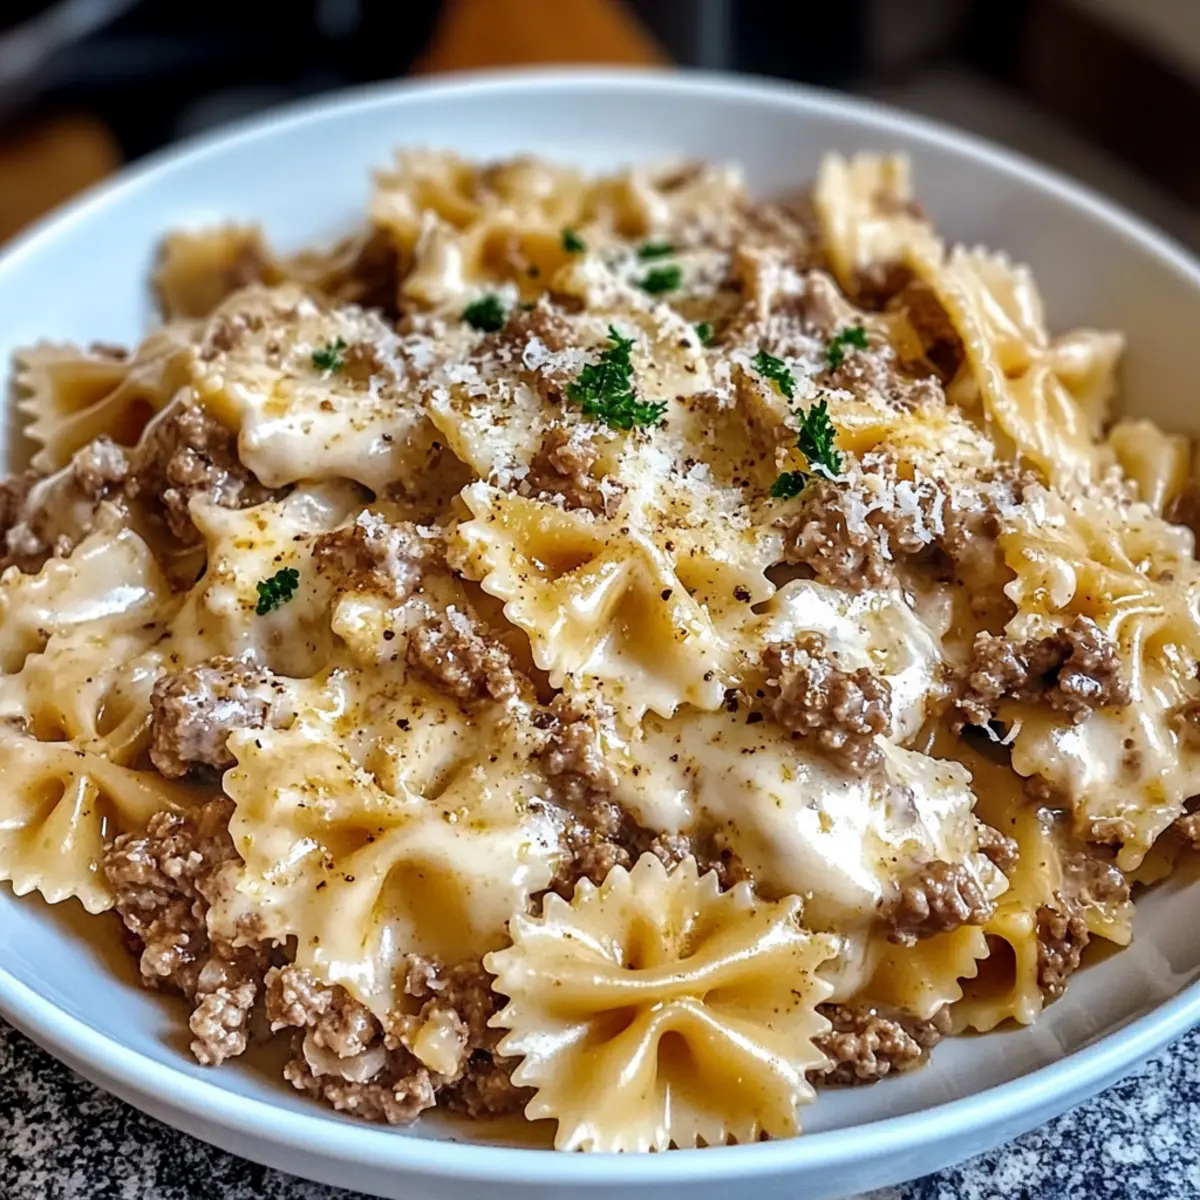
As I stirred the bubbling sauce on the stove, a familiar aroma filled my kitchen, transporting me to cozy family dinners past. That’s when I decided to whip up a Dump-and-Bake Chicken Alfredo Rice Casserole. This comforting dish transforms simple ingredients into a creamy, cheesy masterpiece that even the pickiest eaters can’t resist. Best of all, it’s an incredible time-saver—perfect for hectic weeknights when you want a warm meal without the fuss. With the goodness of rotisserie chicken and fluffy rice, this easy chicken casserole is not only a crowd-pleaser but also gluten-free, making it an excellent choice for anyone looking to satisfy their cravings without compromising on quality. So, are you ready to dive into the effortless charm of this family-favorite recipe? Let’s get cooking!

Why is this Casserole a Must-Try?

Simplicity at Its Best: The beauty of this Dump-and-Bake Chicken Alfredo Rice Casserole lies in its uncomplicated preparation; just mix and bake!

Creamy Comfort: Indulge in a rich and satisfying dish that embodies all the warmth of home cooking in every creamy bite.

Versatile Ingredients: Feel free to personalize with your favorite veggies or even swap in different cheeses; this dish easily adapts to your taste!

Quick Weeknight Solution: With just a few minutes to prep, it’s a lifesaver for busy evenings when you crave homemade goodness without hours of cooking.

Kid-Approved Flavor: Even the pickiest eaters are drawn to the cheesy, hearty flavor, making it a hit with the whole family.

Why not try pairing it with a refreshing green salad or some garlic bread for a complete meal? It’s an easy choice when you’re looking for delightful comfort food!

Dump-and-Bake Chicken Alfredo Rice Casserole Ingredients

For the Casserole

  • Shredded Rotisserie Chicken – A convenient protein source that adds rich flavor; feel free to use leftover cooked chicken if you have some.
  • Uncooked White Rice – The base of the dish that absorbs creamy goodness; for a nuttier taste, try brown rice, but remember to adjust cooking times!
  • Chicken Broth – Provides moisture and depth; you can replace it with vegetable broth for a lighter option.
  • Alfredo Sauce – Ensures a creamy texture; homemade or store-bought works great, but a creamy mushroom soup can lighten things up.
  • Garlic Powder – Gives a burst of flavor; if you love fresh garlic, feel free to substitute!
  • Italian Seasoning – A herbal mix that adds savory elements; adjust the amounts based on your personal palate.
  • Salt & Pepper – Essential for seasoning to taste; customize these according to your dietary needs.
  • Frozen Peas and Carrots – Brighten up the dish with a pop of color and added nutrition; fresh vegetables can work too, just adjust the cooking time.
  • Shredded Mozzarella Cheese – Adds melty cheesiness on top; cheddar is a delightful alternative for a different flavor profile.
  • Fresh Parsley (for garnish) – A simple yet vibrant finish that enhances presentation.

This Dump-and-Bake Chicken Alfredo Rice Casserole Recipe promises to be a delightful addition to your family meals!

Step‑by‑Step Instructions for Dump-and-Bake Chicken Alfredo Rice Casserole Recipe

Step 1: Preheat Your Oven
Begin by preheating your oven to 375°F (190°C). This crucial step ensures even cooking for your Dump-and-Bake Chicken Alfredo Rice Casserole, allowing the flavors to meld beautifully. While the oven is heating, gather your mixing bowls and measuring cups to streamline the process.

Step 2: Combine Ingredients
In a large mixing bowl, combine the shredded rotisserie chicken, uncooked white rice, chicken broth, and Alfredo sauce. Sprinkle in the garlic powder, Italian seasoning, salt, and pepper. Mix everything thoroughly until the rice is coated and all the ingredients are evenly distributed—don’t rush this; a well-mixed casserole means even flavor throughout!

Step 3: Add Vegetables (Optional)
For added nutrition and color, stir in the frozen peas and carrots. This optional step brings a fresh twist to your Dump-and-Bake Chicken Alfredo Rice Casserole, making it even more delightful. If you’re using fresh veggies, keep in mind that you might need to adjust cooking times slightly, but the basic process remains the same.

Step 4: Transfer to Baking Dish
Gently pour the mixture into a greased 9×13 inch baking dish, ensuring it spreads evenly across the bottom. This step is vital, as it allows the casserole to bake uniformly, ensuring all the flavors are perfectly blended by the end of the cooking time.

Step 5: Cover and Bake
Cover the baking dish tightly with aluminum foil and place it in the preheated oven. Bake for 45 minutes, during which the rice will absorb the delicious flavors, and the chicken will heat up. Keep an eye on it—your kitchen will soon be filled with inviting aromas!

Step 6: Add Cheese Topping
Once the initial baking time is complete, carefully remove the foil. Sprinkle a generous layer of shredded mozzarella cheese over the top of the casserole. This step adds a wonderful gooeyness that makes the dish irresistible. Return the casserole to the oven uncovered and bake for an additional 10-15 minutes, until the cheese is melted and bubbly.

Step 7: Cool and Garnish
After baking, remove the casserole from the oven and allow it to cool for a few minutes. This lets the flavors settle and makes for easier serving. Finish off your Dump-and-Bake Chicken Alfredo Rice Casserole by sprinkling fresh parsley on top for a burst of color and a touch of freshness before serving.

How to Store and Freeze Dump-and-Bake Chicken Alfredo Rice Casserole

Fridge: Store any leftovers in an airtight container for up to 3 days to maintain freshness. Reheat in the microwave or oven until warmed through.

Freezer: For longer storage, freeze the casserole in a tightly sealed container for up to 2 months. Thaw in the fridge overnight before reheating, then warm in the oven or microwave.

Reheating: Whether thawed or refrigerated, ensure the casserole is heated to an internal temperature of 165°F (74°C) before serving to ensure food safety.

Make-Ahead: You can prepare the Dump-and-Bake Chicken Alfredo Rice Casserole in advance, cover it tightly, and refrigerate it without baking. Just pop it in the oven when you’re ready to serve!

Expert Tips for Dump-and-Bake Chicken Alfredo Rice Casserole

  • Preheat Properly: Ensure you preheat the oven to avoid undercooked rice. If it’s not hot enough, the rice won’t absorb moisture properly.

  • Brown Rice Adjustments: If using brown rice, increase the baking time by about 15-20 minutes and add an extra half cup of liquid to get it cooked through.

  • Make Ahead Option: Assemble the casserole and refrigerate it covered. You can bake it when you’re ready to serve, making it perfect for busy nights!

  • Customize Your Veggies: Feel free to add your favorite vegetables, but fresh ones may require slight cooking time alterations to ensure everything is perfectly tender.

  • Cheese Alternatives: While mozzarella adds great flavor, try cheddar or a mix of cheeses for a delicious twist on the classic Dump-and-Bake Chicken Alfredo Rice Casserole.

  • Check for Bubbles: When baking, look for bubbly cheese as an indicator of doneness; this means everything is heated beautifully throughout!

Make Ahead Options

These Dump-and-Bake Chicken Alfredo Rice Casserole recipes are perfect for meal prep enthusiasts! You can assemble the entire casserole up to 24 hours in advance by mixing the shredded chicken, rice, chicken broth, Alfredo sauce, and seasonings, then transferring it to a greased 9×13 inch baking dish. Cover it tightly with aluminum foil and refrigerate. When you’re ready to bake, simply add an extra 5-10 minutes to the cooking time. To maintain quality, ensure it’s well-sealed to prevent drying out, and for best results, bake it straight from the fridge. With this prep, you’ll have a comforting family meal ready with minimal fuss!

What to Serve with Dump-and-Bake Chicken Alfredo Rice Casserole

Elevate your dining experience by pairing this cozy casserole with delightful sides that complement its creamy goodness.

  • Garlic Bread: The buttery, crusty texture of garlic bread provides a perfect contrast, soaking up that creamy Alfredo sauce beautifully.

  • Steamed Broccoli: Bright green broccoli adds a fresh, crunchy element that not only enhances nutrition but also looks lovely on the plate.

  • Mixed Green Salad: A light salad with tangy vinaigrette brings a refreshing balance to the rich flavors of the casserole, making each bite more enjoyable.

  • Red Wine: A glass of light red wine, such as Pinot Noir, harmonizes perfectly with the dish’s creamy profile, enhancing the overall dining experience.

  • Roasted Vegetables: Colorful roasted veggies like bell peppers and zucchini add earthy flavors and textures that help round out the meal.

  • Creamy Coleslaw: A dollop of coleslaw adds a crunchy, tangy note that pairs well with the Dresden of creamy chicken and rice.

  • Dessert – Cheesecake Bites: Finish off with creamy cheesecake bites for a sweet treat that contrasts with the savory richness of the casserole.

  • Sparkling Water: For a refreshing beverage, sparkling water with a splash of lemon offers a light, fizzy contrast to the hearty meal.

Dump-and-Bake Chicken Alfredo Rice Casserole Variations

Feel free to explore delightful twists and substitutions to make this comforting casserole your own!

  • Brown Rice: Swap white rice for brown rice for added nutrition and a nuttier flavor. Just remember to extend the baking time and add a little extra liquid.

  • Creamy Mushroom Soup: For a lighter touch, replace Alfredo sauce with creamy mushroom soup for an earthy flavor that still delivers creaminess.

  • Extra Veggies: Boost nutrition by incorporating bell peppers, spinach, or zucchini into the mix for a pop of color and flavor, adapting to seasonal ingredients.

  • Herb Variations: Experiment with fresh herbs like thyme or rosemary to elevate the aromatic profile and give the dish a refreshing twist.

  • Spicy Kick: Add red pepper flakes or diced jalapeños for a touch of heat that will tantalize your taste buds. It’s an adventurous way to transform a favorite comfort dish!

  • Cheese Choices: While mozzarella is a classic, try swapping it for cheddar, gouda, or a mix of your favorite cheeses for a creative flavor explosion on top.

  • Vegetable Broth: For a vegetarian-friendly version, use vegetable broth in place of chicken broth, preserving the moisture without the meat while keeping the richness intact.

If you love experimenting in the kitchen, you might also enjoy a classic Low Carb Chicken option or try out a flavorful One Pan Rice dish that’s perfect for busy days. Tailoring your dish will make mealtime that much more enjoyable!

Dump-and-Bake Chicken Alfredo Rice Casserole Recipe FAQs

How do I choose the best rotisserie chicken for this casserole?
Absolutely! When selecting a rotisserie chicken, look for one with golden, crispy skin and minimal dark spots. The chicken should smell fresh, and ideally, it should be warm at the time of purchase. Ensure you check the expiration date if it’s pre-packaged. A freshly roasted chicken will bring the best flavor to your Dump-and-Bake Chicken Alfredo Rice Casserole.

How should I store leftovers and how long do they last?
Leftovers can be stored in an airtight container in the refrigerator for up to 3 days. Make sure to cool the casserole to room temperature before sealing it tightly. If you want to enjoy it later than that, you can freeze it for up to 2 months. To reheat, simply pop it in the microwave or warm it up in the oven until heated through!

Can I freeze the Dump-and-Bake Chicken Alfredo Rice Casserole?
Yes! To freeze, let the casserole cool completely, then transfer it to a tightly-sealed freezer-safe container. It’s best to enjoy it within 2 months. When you’re ready to dive in, thaw it overnight in the fridge. To reheat, bake it in a preheated oven at 375°F (190°C) until it reaches an internal temperature of 165°F (74°C).

What can I do if my rice turns out undercooked?
If you find that your rice is still undercooked after the baking time, don’t worry! You can add a little more chicken broth (or water) to the casserole, cover it, and continue to bake for an additional 10-15 minutes. This extra time with moisture will help the rice absorb the needed liquid and cook through beautifully.

Are there any dietary considerations I should be aware of?
For those with gluten sensitivities, this Dump-and-Bake Chicken Alfredo Rice Casserole is naturally gluten-free, as long as you use gluten-free Alfredo sauce. If you have any allergies to chicken or dairy, you could replace the chicken with a plant-based protein and use dairy-free cheese alternatives to enjoy a delicious and safe meal for everyone at the table!

Can I prepare this casserole in advance?
Absolutely! You can assemble the entire casserole ahead of time, cover it tightly with foil, and store it in the fridge. This way, you can just place it in the oven when you’re ready to serve. If you’re making it a day ahead, it’s a fantastic way to save time on busy weeknights, ensuring your family gets a warm meal without the fuss.

Dump-and-Bake Chicken Alfredo Rice Casserole Recipe

Cozy Dump-and-Bake Chicken Alfredo Rice Casserole Recipe

This Dump-and-Bake Chicken Alfredo Rice Casserole transforms simple ingredients into a creamy, cheesy dish perfect for weeknights.
Prep Time 10 minutes
Cook Time 55 minutes
Total Time 1 hour 5 minutes
Servings: 6 servings
Course: Casserole
Cuisine: American
Calories: 450

Ingredients
  

For the Casserole
  • 2 cups Shredded Rotisserie Chicken A convenient protein source that adds rich flavor
  • 1 cup Uncooked White Rice Base of the dish that absorbs creamy goodness
  • 2 cups Chicken Broth Provides moisture and depth
  • 1 cup Alfredo Sauce Ensures a creamy texture
  • 1 teaspoon Garlic Powder Gives a burst of flavor
  • 1 teaspoon Italian Seasoning A herbal mix that adds savory elements
  • to taste Salt & Pepper Essential for seasoning to taste
  • 1 cup Frozen Peas and Carrots Brighten up the dish with a pop of color and added nutrition
  • 1 cup Shredded Mozzarella Cheese Adds melty cheesiness on top
  • for garnish Fresh Parsley Enhances presentation

Equipment

  • Mixing Bowl
  • Measuring cups
  • 9x13 inch baking dish
  • Aluminum foil

Method
 

Preparation Steps
  1. Preheat your oven to 375°F (190°C).
  2. In a large mixing bowl, combine the shredded rotisserie chicken, uncooked white rice, chicken broth, and Alfredo sauce. Sprinkle in the garlic powder, Italian seasoning, salt, and pepper. Mix everything thoroughly until the rice is coated and all the ingredients are evenly distributed.
  3. For added nutrition and color, stir in the frozen peas and carrots. If using fresh veggies, adjust cooking times accordingly.
  4. Gently pour the mixture into a greased 9x13 inch baking dish, ensuring it spreads evenly across the bottom.
  5. Cover the baking dish tightly with aluminum foil and place it in the preheated oven. Bake for 45 minutes.
  6. After 45 minutes, carefully remove the foil and sprinkle a layer of shredded mozzarella cheese over the top. Return the casserole to the oven uncovered and bake for an additional 10-15 minutes, until the cheese is melted and bubbly.
  7. After baking, allow the casserole to cool for a few minutes. Finish off by sprinkling fresh parsley on top.

Nutrition

Serving: 1servingCalories: 450kcalCarbohydrates: 42gProtein: 30gFat: 18gSaturated Fat: 8gPolyunsaturated Fat: 2gMonounsaturated Fat: 3gCholesterol: 100mgSodium: 850mgPotassium: 600mgFiber: 3gSugar: 2gVitamin A: 15IUVitamin C: 10mgCalcium: 20mgIron: 10mg

Notes

This casserole can be made ahead of time and refrigerated. Adjust cooking times if using brown rice.

Tried this recipe?

Let us know how it was!

High-Protein Honey Garlic Shrimp: Sweet & Savory Bliss

The aroma of sizzling garlic mingling with the sweet notes of honey instantly transports me to my favorite local bistro, but today, I’m bringing that flavor home with this High-Protein Honey Garlic Shrimp. This dish not only promises an explosion of taste with its tender shrimp coated in a sticky, savory sauce, but it also takes mere minutes to whip up—perfect for those busy weeknight dinners! Whether you’re cooking for yourself or impressing a crowd, you can easily swap shrimp for chicken, tofu, or scallops to satisfy every palate around your table. Are you ready to dive into a heartwarming meal that proves homemade doesn’t have to mean complicated? Let’s get cooking!

Why is High-Protein Honey Garlic Shrimp a Must-Try?

Quick and Easy: This dish can be ready in under 20 minutes, making it perfect for those hectic weeknights!

Healthy and Satisfying: Packed with protein and essential nutrients, it keeps you full without the heaviness.

Versatile Options: Easily swap shrimp for chicken, tofu, or scallops. Want to add more veggies? Toss in some bell peppers or snap peas for extra color and nutrition!

Flavor Explosion: The sweet honey and robust garlic create a delightful contrast that elevates this dish above ordinary weeknight meals. For more incredible flavor combinations, try our Cajun Honey Butter Salmon or Garlic Parmesan Roasted Shrimp.

Crowd-Pleasing: Your family and friends will rave about this dish, making it an instant favorite at dinner gatherings or casual meals!

High-Protein Honey Garlic Shrimp Ingredients

For the Shrimp
Shrimp – Large, peeled, and deveined shrimp provide a hefty dose of protein, making this a filling dish.

For the Sauce
Honey – Adds sweetness and helps create that sticky glaze; consider agave syrup for a vegan alternative.
Garlic – Fresh minced garlic is key to achieving that rich flavor profile we all love!
Soy Sauce – Use regular or low-sodium soy sauce to bring umami flavor without too much salt.
Olive Oil – Perfect for sautéing; you can swap this for butter to add a deeper, richer taste.
Cornstarch – Helps thicken the sauce; this is optional if you prefer a lighter consistency.

For Seasoning
Salt and Pepper – Essential seasoning to enhance the dish’s flavor; adjust to your taste.

For Garnish
Green Onions – Adds color and a refreshing crunch; chives work as a perfect substitute if preferred.
Sesame Seeds – Optional but adds a lovely texture and visual appeal to your finished plate.

Embrace the burst of flavors in this High-Protein Honey Garlic Shrimp recipe, and enjoy every bite that feels just like a warm hug from your kitchen!

Step‑by‑Step Instructions for High-Protein Honey Garlic Shrimp

Step 1: Prepare the Shrimp
Start by rinsing the large, peeled, and deveined shrimp under cold water, then pat them dry with paper towels. This ensures they sear better in the skillet. Make sure they’re well-dried to achieve a golden color when cooked.

Step 2: Mix the Sauce
In a medium bowl, whisk together the honey, freshly minced garlic, soy sauce, and olive oil until well combined. If you desire a thicker sauce, sprinkle in cornstarch and stir until smooth. Set the sauce aside, letting it meld while you prepare to cook the shrimp.

Step 3: Cook the Shrimp
Heat a tablespoon of olive oil in a large skillet over medium-high heat. Once the oil shimmers, carefully arrange the shrimp in a single layer. Sear them for about 2-3 minutes or until they start turning pink, which indicates they’re cooking properly.

Step 4: Season
While the shrimp are cooking, sprinkle a pinch of salt and pepper over them to enhance the flavor. Keep an eye on the shrimp to ensure they don’t overcook; they should appear opaque and slightly firm to the touch when done.

Step 5: Add Sauce
Once the shrimp are almost fully cooked, pour the honey garlic mixture over them, ensuring they are well coated. Gently toss the shrimp in the sauce, cooking for an additional minute to let the flavors fuse together beautifully.

Step 6: Simmer
Reduce the heat to medium-low and allow the shrimp to simmer in the sauce for about 3-5 minutes. During this time, the sauce will thicken slightly and become a sticky coating around the shrimp, creating that signature flavor of High-Protein Honey Garlic Shrimp.

Step 7: Garnish
Remove the skillet from heat and sprinkle the dish with sliced green onions and optional sesame seeds for added crunch. This not only enhances the visual appeal but also adds a fresh flavor that contrasts beautifully with the garlicky sweetness of the shrimp.

Step 8: Serve
Serve your delicious High-Protein Honey Garlic Shrimp immediately while it’s warm. Pair it with steamed rice or quinoa, allowing the grains to soak up the delightful sauce for a fulfilling meal that’s sure to impress!

Expert Tips for High-Protein Honey Garlic Shrimp

  • Shrimp Quality: Choose large, fresh shrimp for the best texture and flavor. Frozen shrimp work too, but ensure they’re fully thawed before cooking.

  • Avoid Overcrowding: When cooking shrimp, make sure not to overcrowd the skillet to ensure even cooking and a nice sear. Cook in batches if necessary.

  • Watch the Heat: Keep a close eye on the heat; shrimp cook quickly. Pull them off the heat just as they turn opaque to avoid a rubbery texture.

  • Thick Sauce Option: If you prefer a thicker sauce, whisk in cornstarch while mixing the honey sauce. Make sure to stir well to avoid lumps.

  • Flavor Additions: For a spicier twist, sprinkle some red pepper flakes into the sauce. This adds a beautiful kick to your High-Protein Honey Garlic Shrimp!

  • Serve Immediately: This dish is best enjoyed fresh off the stovetop to savor the sticky, warm sauce that clings to each shrimp piece.

How to Store and Freeze High-Protein Honey Garlic Shrimp

Fridge: Store leftovers in an airtight container for up to 2 days. Reheat gently in a skillet over low heat to preserve the shrimp’s tenderness and prevent them from becoming rubbery.

Freezer: For longer storage, freeze cooked shrimp in a freezer-safe container for up to 3 months. Thaw in the fridge overnight before reheating.

Reheating: To reheat, place shrimp in a skillet with a splash of water or sauce over medium heat until warmed through. Avoid high heat to maintain the shrimp’s delicate texture.

What to Serve with High-Protein Honey Garlic Shrimp

Set the stage for a delightful dining experience with sides that complement the sweet and savory notes of this captivating dish.

  • Steamed Jasmine Rice: The fluffy texture absorbs the sticky honey garlic sauce beautifully, making every bite a flavorful delight.

  • Garlic Butter Broccoli: This vibrant green side not only adds nutrition but also echoes the garlic notes from the shrimp, creating a harmonious plate.

  • Quinoa Salad: A nutty quinoa salad with cherry tomatoes and cucumber adds freshness and a slightly chewy texture, contrasting perfectly with the prawn’s tenderness.

  • Stir-Fried Vegetables: A colorful mix of bell peppers, snap peas, and carrots adds crunch and a medley of flavors that elevate your meal to a whole new level.

  • Cucumber Salad: A refreshing cucumber salad dressed in a tangy vinegar dressing provides a crisp contrast to the rich shrimp, cleansing the palate beautifully.

  • Sichuan Noodles: Serve this dish with spicy Sichuan noodles for an adventurous twist that enhances the overall experience with bold flavors.

  • Mango Lassi: This fruity, creamy drink is both refreshing and satisfying, perfectly balancing the savory profile of the shrimp.

  • Chocolate Mousse: End your meal on a sweet note with a light, airy chocolate mousse that leaves your taste buds tingling with joy.

Make Ahead Options

These High-Protein Honey Garlic Shrimp are ideal for busy home cooks looking to save time! You can prepare the marinade—mixing honey, garlic, soy sauce, and olive oil—up to 24 hours in advance; simply store it in an airtight container in the refrigerator. Similarly, the shrimp can be prepped by rinsing and patting them dry, then storing them separately in the fridge for up to 2 days before cooking. To maintain their juicy texture, ensure they’re tightly sealed. When you’re ready to serve, simply heat your skillet, cook the shrimp as directed, add the marinade, and enjoy a flavorful meal that feels fresh and delicious, even when prepared ahead!

High-Protein Honey Garlic Shrimp Variations

Feel free to get creative with this dish and mix it up—your taste buds will thank you!

  • Chicken: Swap shrimp for diced chicken breast; cook until golden for a heartier meal.

  • Tofu: For a vegetarian twist, use firm tofu; sauté until crispy for a delightful texture.

  • Scallops: Substitute shrimp with scallops for a luxurious seafood experience; cook briefly for tenderness.

  • Veggie Boost: Add snap peas or bell peppers in the final simmer for a colorful, nutritious pop. The extra crunch and flavor will elevate your dish.

  • Gluten-Free: Use tamari instead of soy sauce, so everyone can enjoy this scrumptious meal without worry.

  • Sweet Heat: Sprinkle in some red pepper flakes to the sauce for a fiery kick that complements the sweetness beautifully.

  • Citrus Burst: Squeeze fresh lime juice into the sauce for a zesty brightness that’ll awaken your taste buds. It’s a simple twist that adds complexity—perfect for sunny days!

  • Savory Swap: Try miso paste instead of soy sauce for an umami-packed flavor profile that will surprise your palate!

Transform your High-Protein Honey Garlic Shrimp with these fun variations, and keep mealtime exciting every time. If you’re in the mood for another delicious dish, consider our Comfort Garlic Butter Steak Bites or the delightfully sweet Honey Banana Grilled Cheese Sandwich for a quick and satisfying treat!

High-Protein Honey Garlic Shrimp Recipe FAQs

How do I choose the best shrimp for my recipe?
Absolutely! When selecting shrimp, look for large, fresh, and preferably wild-caught shrimp to ensure the best flavor and texture. Fresh shrimp should have a mild, briny scent, and the flesh should appear translucent and slightly firm. If using frozen shrimp, make sure they are fully thawed before cooking for optimal results.

What is the best way to store leftover High-Protein Honey Garlic Shrimp?
To store leftovers, place them in an airtight container and keep them in the refrigerator for up to 2 days. When ready to enjoy, reheat gently in a skillet over low heat to maintain the shrimp’s tenderness and prevent any rubbery texture that can occur from high heat.

Can I freeze High-Protein Honey Garlic Shrimp?
Yes, you can freeze this dish! To do so, allow the shrimp to cool completely before transferring them to a freezer-safe container. They can be stored in the freezer for up to 3 months. When ready to eat, thaw the shrimp in the refrigerator overnight and reheat gently in a skillet with a splash of water or extra sauce over medium heat.

What should I do if my sauce isn’t thickening?
If your sauce isn’t reaching the desired thickness, don’t worry! You can easily adjust this by mixing about 1 tablespoon of cornstarch with 2 tablespoons of cold water to create a slurry, then slowly whisk this into your simmering sauce. Allow it to cook for an additional minute to thicken up nicely!

Is this recipe suitable for people with dietary restrictions?
The High-Protein Honey Garlic Shrimp can be easily adapted for various dietary preferences. For a gluten-free version, use tamari instead of soy sauce. If you’re cooking for someone who is allergic to shellfish, feel free to substitute shrimp with chicken, tofu, or scallops. Just adjust the cooking times accordingly for each protein type.

How long does cooked shrimp last in the fridge?
Cooked shrimp can safely be stored in the refrigerator for up to 3 to 4 days. Remember to keep it in an airtight container to maximize its freshness. Always check for any strange odors or textures before consuming leftovers, and enjoy them while they’re still delicious!

High-Protein Honey Garlic Shrimp

High-Protein Honey Garlic Shrimp: Sweet & Savory Bliss

Enjoy this High-Protein Honey Garlic Shrimp that's quick to make, delicious, and packed with protein.
Prep Time 10 minutes
Cook Time 10 minutes
Total Time 20 minutes
Servings: 4 servings
Course: Dinner
Cuisine: American
Calories: 220

Ingredients
  

For the Shrimp
  • 1 pound large shrimp peeled and deveined
For the Sauce
  • 1/4 cup honey or agave syrup for vegan alternative
  • 4 cloves garlic fresh minced
  • 1/4 cup soy sauce regular or low-sodium
  • 2 tablespoons olive oil or substitute with butter
  • 1 tablespoon cornstarch optional for thickening
For Seasoning
  • to taste salt
  • to taste pepper
For Garnish
  • 2 tablespoons green onions sliced
  • 1 tablespoon sesame seeds optional

Equipment

  • Skillet
  • medium bowl
  • whisk

Method
 

Step-by-Step Instructions
  1. Start by rinsing the large, peeled, and deveined shrimp under cold water, then pat them dry with paper towels.
  2. In a medium bowl, whisk together the honey, minced garlic, soy sauce, and olive oil until well combined. If desiring a thicker sauce, sprinkle in cornstarch and stir until smooth.
  3. Heat a tablespoon of olive oil in a large skillet over medium-high heat. Once the oil shimmers, arrange the shrimp in a single layer and sear for about 2-3 minutes.
  4. While the shrimp are cooking, sprinkle salt and pepper over them to enhance the flavor.
  5. Once the shrimp are almost fully cooked, pour the honey garlic mixture over them and toss gently.
  6. Reduce the heat to medium-low and allow the shrimp to simmer in the sauce for about 3-5 minutes.
  7. Remove the skillet from heat and sprinkle with sliced green onions and optional sesame seeds.
  8. Serve your High-Protein Honey Garlic Shrimp immediately while it’s warm.

Nutrition

Serving: 1servingCalories: 220kcalCarbohydrates: 30gProtein: 20gFat: 5gSaturated Fat: 1gPolyunsaturated Fat: 1gMonounsaturated Fat: 2gCholesterol: 150mgSodium: 800mgPotassium: 200mgFiber: 1gSugar: 20gVitamin A: 5IUVitamin C: 2mgCalcium: 20mgIron: 2mg

Notes

Choose large, fresh shrimp for best flavor. Avoid overcrowding the skillet and watch the heat to prevent overcooking.

Tried this recipe?

Let us know how it was!

Creamy Crack Chicken Penne: Comfort Food in Under 30 Minutes

As I sat down with friends last week, someone exclaimed, “This is comfort food redefined!” That’s exactly how I feel every time I whip up my Creamy Crack Chicken Penne. This dish marries rich cheese, crispy bacon, and tender chicken into a delightful one-pan meal that’s ready in under thirty minutes. It’s the perfect solution for those hectic weeknights when you crave something satisfying without the hassle of multiple pots and pans. With its irresistible flavors and comforting textures, this dish impresses even the pickiest eaters at the table. Plus, it’s easily adaptable—there’s a gluten-free option and a low-fat modification for those looking to lighten things up. So, are you ready to discover how this cozy pasta can transform your dinner routine?

Why is Crack Chicken Penne a Family Favorite?

Simplicity at Its Best: This one-pan wonder simplifies your cooking experience, allowing you to spend more time enjoying the meal and less time on cleanup.

Comforting Flavors: With creamy cheese, tender chicken, and crispy bacon, every bite feels like a warm embrace—perfect for cozy family dinners.

Quick Prep Time: Ready in under 30 minutes, it’s an ideal choice for busy weeknights when you crave homemade comfort food without the fuss.

Adaptable to Your Taste: With options for gluten-free pasta and low-fat swaps, you can make this dish suit any dietary need. Try it alongside a refreshing BLT Chicken Salad for a balanced meal.

Crowd-Pleasing Appeal: Impress family and friends with a dish that has something for everyone, making it the star of your table. Whether you’re cooking for picky eaters or culinary adventurers, this recipe hits all the right notes!

Crack Chicken Penne Ingredients

For the Pasta
Penne Pasta – Provides the main structure and bulk of the dish; substitute with gluten-free pasta for a gluten-free option.

For the Chicken & Sauce
Cooked Chicken (shredded) – Adds protein and heartiness; use rotisserie chicken for convenience or leftover chicken to save time.
Cream Cheese – Gives a rich, creamy texture essential for the sauce; can be swapped for light cream cheese for a lower-fat option.
Ranch Seasoning Mix – Adds a depth of flavor with a zesty kick; adjust to taste to avoid overpowering the dish.
Chicken Broth – Serves as the liquid base for the sauce; using low-sodium broth helps control saltiness.

For the Finish
Shredded Cheddar Cheese – Provides creaminess with a melty finish; substitute with mozzarella or a dairy-free cheese for variations.
Cooked Bacon (crumbled) – Enhances savory flavor and crunch; can be left out for a lighter option or replaced with turkey bacon.
Chopped Green Onions – Offers fresh color and a mild onion flavor; can be replaced with chives or omitted if desired.

Step‑by‑Step Instructions for Crack Chicken Penne

Step 1: Cook the Penne Pasta
Start by bringing a large pot of salted water to a boil. Add the penne pasta and cook according to the package instructions until al dente, usually about 10-12 minutes. Once cooked, drain the pasta and set it aside in a large bowl, letting it cool slightly while you prepare the rest of the dish.

Step 2: Prepare the Creamy Sauce
In a large non-stick skillet, combine the cream cheese, ranch seasoning mix, and chicken broth over medium heat. Stir continuously for about 3-5 minutes until the cream cheese is fully melted and the mixture is smooth, creating a creamy base for your Crack Chicken Penne. Look for a silky consistency before proceeding.

Step 3: Add the Chicken and Bacon
Next, integrate the shredded cooked chicken and crumbled bacon into the skillet with the creamy sauce. Mix thoroughly for about 2-3 minutes, ensuring the chicken is heated through and well-coated with the sauce. The flavors will meld together beautifully, making this step essential for that hearty bite.

Step 4: Combine with Penne Pasta
Gently fold the drained penne pasta into the skillet, making sure each piece is evenly coated in the flavorful sauce. Stir for another 2-3 minutes, allowing the pasta to absorb some of that creamy goodness. The Crack Chicken Penne should start to come together with a rich, inviting aroma filling the kitchen.

Step 5: Melt the Cheddar Cheese
Sprinkle the shredded cheddar cheese over the top of the pasta mixture, then cover the skillet with a lid. Let it sit for 2-3 minutes on low heat; this will allow the cheese to melt and create a deliciously cheesy topping. You’ll know it’s ready when the cheese is gooey and beautifully melted.

Step 6: Garnish and Serve
Finally, remove the skillet from heat and uncover it to reveal the creamy, cheesy Crack Chicken Penne. Garnish with chopped green onions for a fresh pop of color and flavor. Serve warm straight from the skillet, and enjoy the comforting, delicious goodness that’s sure to please your family!

What to Serve with Creamy Crack Chicken Penne

Creating a delightful family meal goes beyond just the main dish; it’s all about harmonizing flavors and textures that bring everyone to the table.

  • Simple Green Salad: A crisp salad with mixed greens and a light vinaigrette adds freshness, balancing the richness of the creamy pasta.
  • Garlic Breadsticks: These warm, buttery breadsticks are perfect for soaking up the delicious sauce and add a delightful crunch to the meal.
  • Roasted Vegetables: Colorful roasted veggies create a flavorful side full of nutrients while bringing vibrant texture to the plate.
  • Creamy Coleslaw: The tangy crunch of coleslaw contrasts beautifully with the richness of the Crack Chicken Penne, offering a refreshing palate cleanser.
  • Steamed Broccoli: Add a pop of green with lightly steamed broccoli, enhancing the dish’s health factor without overshadowing its comforting nature.
  • Sparkling Lemonade: A glass of fizzy lemonade brightens the meal with a refreshing tartness, enhancing the savory elements of the dish.
  • Chocolate Chip Cookies: For dessert, these warm, gooey cookies are the perfect sweet end to a savory meal, sure to satisfy any sweet tooth.

Each pairing complements the Crack Chicken Penne beautifully, ensuring a balanced and enjoyable dining experience!

Make Ahead Options

These Creamy Crack Chicken Penne options are perfect for busy cooks looking to save time during the week! You can prepare the chicken and sauce (cream cheese, ranch seasoning mix, and chicken broth) up to 24 hours in advance; simply store them in an airtight container in the refrigerator to keep them fresh. The cooked penne pasta can also be made ahead of time—just toss it lightly in a bit of olive oil to prevent sticking. When you’re ready to serve, combine the prepared chicken mixture with the penne in a skillet, add the crumbled bacon and shredded cheese, and heat over medium until warmed through and the cheese is melted. This way, you’ll have a comforting, home-cooked meal ready in no time!

Expert Tips for Crack Chicken Penne

Cheese Melting: Avoid rushing the cheese melting process; it ensures a smooth, creamy texture that elevates the dish.

Ranch Seasoning Caution: Adjust ranch seasoning carefully; it’s easy to add too much without realizing it, affecting overall flavor balance.

Non-Stick Skillet: Using a non-stick skillet helps prevent sticking and simplifies cleanup, making the cooking process more enjoyable.

Pasta Timing: Don’t overcook the penne; al dente pasta offers the best texture and absorbs the creamy sauce beautifully.

Optional Add-ins: Feel free to incorporate spinach or mushrooms for added nutrients and a delicious twist, enhancing your Crack Chicken Penne experience.

How to Store and Freeze Crack Chicken Penne

Fridge: Store leftovers in an airtight container in the fridge for up to 3 days to maintain freshness and flavor.

Freezer: For longer storage, freeze the Crack Chicken Penne in a compatible airtight container for up to 2 months.

Reheating: To reheat, thaw overnight in the fridge, then warm in a skillet over low heat or microwave until heated through, adding a splash of chicken broth if needed.

Avoid Freezing: Be cautious with storing any creamy sauces, as they may separate upon freezing.

Crack Chicken Penne Variations

Feel free to make this dish your own with these delightful twists that will tickle your taste buds and inspire creativity in the kitchen!

  • Gluten-Free: Substitute penne with gluten-free pasta to cater to dietary needs without sacrificing taste.

  • Low-Fat: Opt for light cream cheese and turkey bacon for a healthier spin that still delivers creamy goodness.

  • Vegetarian: Swap out chicken for hearty cannellini beans or diced tofu, embracing the delicious flavors while keeping it plant-based.

  • Flavor Boost: Add sautéed garlic and fresh herbs like basil or parsley along with the chicken for a vibrant flavor profile.

  • Extra Veggies: Toss in sautéed spinach or zucchini to amp up the nutrition, creating a colorful and wholesome dish your family will love.

  • Cheese Options: Try mozzarella or a dairy-free alternative instead of cheddar for a different cheesy finish that accommodates various dietary preferences.

  • Spicy Kick: Mix in some red pepper flakes or diced jalapeños for those who crave a little heat in their comforting dish.

  • Creamy Upgrade: Add a splash of heavy cream or half-and-half for an ultra-luxurious creamy texture that makes every bite unforgettable.

Whether you’re gravitating toward a lighter fare or exploring exciting flavor combinations, these variations allow you to enjoy your Crack Chicken Penne like never before! Add some flavor to your plate and maybe pair it with a comforting bowl of Tuscan Chicken Soup for a full family feast.

Crack Chicken Penne Recipe FAQs

What kind of pasta should I use for Crack Chicken Penne?
I recommend using penne pasta for its wonderful texture and ability to hold onto the rich sauce. However, if you need a gluten-free option, you can easily substitute it with gluten-free pasta available at many grocery stores.

How long can I store leftovers of Crack Chicken Penne?
You can store leftovers in an airtight container in the fridge for up to 3 days. Just be sure to let it cool down sufficiently before sealing it up to maintain its freshness.

Can I freeze Crack Chicken Penne?
Absolutely! You can freeze Crack Chicken Penne for up to 2 months. To do this, let the dish cool completely, then transfer it to a freezer-safe airtight container. When you’re ready to enjoy it again, thaw it overnight in the fridge and reheat it in a skillet over low heat, adding a splash of chicken broth if it needs a little moisture.

What if my cheese doesn’t melt properly?
If the cheese doesn’t melt to your liking, make sure you’re using medium-low heat and covering the skillet with a lid. This traps steam and helps the cheese melt smoothly. Stir gently, and give it a little extra time—it’s worth the wait for that creamy texture!

Can I make any dietary modifications to this recipe?
Certainly! You can use light cream cheese for a lower-fat version, and consider swapping out the regular cream with a dairy-free alternative if you’re catering to lactose intolerance. Plus, if you’re looking to skip the bacon, you can leave it out or use turkey bacon instead—still delicious!

Is this dish suitable for pets?
While this Creamy Crack Chicken Penne is a tasty human treat, it’s not suitable for pets due to the seasoning, cheese, and potential salt content. Keep it strictly for your family table!

Crack Chicken Penne

Creamy Crack Chicken Penne: Comfort Food in Under 30 Minutes

Crack Chicken Penne is a creamy, comforting pasta dish made with chicken, cheese, and bacon, perfect for quick weeknight dinners.
Prep Time 10 minutes
Cook Time 20 minutes
Total Time 30 minutes
Servings: 4 servings
Course: Pasta
Cuisine: American
Calories: 540

Ingredients
  

For the Pasta
  • 8 oz Penne Pasta Substitute with gluten-free pasta for a gluten-free option.
For the Chicken & Sauce
  • 2 cups Cooked Chicken (shredded) Use rotisserie chicken for convenience or leftover chicken to save time.
  • 8 oz Cream Cheese Can be swapped for light cream cheese for a lower-fat option.
  • 1 packet Ranch Seasoning Mix Adjust to taste to avoid overpowering the dish.
  • 1 cup Chicken Broth Using low-sodium broth helps control saltiness.
For the Finish
  • 1 cup Shredded Cheddar Cheese Substitute with mozzarella or a dairy-free cheese for variations.
  • 6 strips Cooked Bacon (crumbled) Can be left out for a lighter option or replaced with turkey bacon.
  • 2 tablespoons Chopped Green Onions Can be replaced with chives or omitted if desired.

Equipment

  • Large pot
  • Large Non-Stick Skillet

Method
 

Step-by-Step Instructions for Crack Chicken Penne
  1. Start by bringing a large pot of salted water to a boil. Add the penne pasta and cook according to the package instructions until al dente, usually about 10-12 minutes. Once cooked, drain the pasta and set it aside in a large bowl, letting it cool slightly while you prepare the rest of the dish.
  2. In a large non-stick skillet, combine the cream cheese, ranch seasoning mix, and chicken broth over medium heat. Stir continuously for about 3-5 minutes until the cream cheese is fully melted and the mixture is smooth, creating a creamy base for your Crack Chicken Penne.
  3. Next, integrate the shredded cooked chicken and crumbled bacon into the skillet with the creamy sauce. Mix thoroughly for about 2-3 minutes, ensuring the chicken is heated through and well-coated with the sauce.
  4. Gently fold the drained penne pasta into the skillet, making sure each piece is evenly coated in the flavorful sauce. Stir for another 2-3 minutes, allowing the pasta to absorb some of that creamy goodness.
  5. Sprinkle the shredded cheddar cheese over the top of the pasta mixture, then cover the skillet with a lid. Let it sit for 2-3 minutes on low heat; this will allow the cheese to melt and create a deliciously cheesy topping.
  6. Finally, remove the skillet from heat and uncover it to reveal the creamy, cheesy Crack Chicken Penne. Garnish with chopped green onions for a fresh pop of color and flavor. Serve warm straight from the skillet.

Nutrition

Serving: 1servingCalories: 540kcalCarbohydrates: 45gProtein: 34gFat: 28gSaturated Fat: 15gPolyunsaturated Fat: 3gMonounsaturated Fat: 5gCholesterol: 120mgSodium: 950mgPotassium: 680mgFiber: 2gSugar: 2gVitamin A: 800IUVitamin C: 2mgCalcium: 350mgIron: 2.5mg

Notes

Adjust ranch seasoning carefully; it’s easy to add too much without realizing it, affecting overall flavor balance. Feel free to incorporate spinach or mushrooms for added nutrients and a delicious twist.

Tried this recipe?

Let us know how it was!

Savory Chicken Bulgogi Recipe for Quick Weeknight Dinners

Every time I whip up this Easy Chicken Bulgogi, it feels like a mini Korean getaway right in my kitchen. This dish features marinated chicken that’s both tender and infused with a delightful mix of savory and sweet flavors—perfect for those hectic weeknights when you crave something comforting yet quick to prepare. With just a handful of ingredients, you can create a gluten-free meal that’s not only easy to make but also a sure crowd-pleaser. Whether you’re cooking for family or friends, my Chicken Bulgogi Recipe delivers a taste of authentic Korean cuisine that is sure to impress. Are you ready to dive into a bowl of joy with this scrumptious dish?

Why Is Chicken Bulgogi A Must-Try?

Quick and Easy: This Chicken Bulgogi recipe comes together in no time, making it the perfect solution for busy weeknights.

Flavor Explosion: The marinade is a delightful balance of sweet and savory, infusing the chicken with mouth-watering Korean flavors.

Versatile Enjoyment: Serve it over rice, in lettuce wraps, or alongside your favorite vegetables for a customizable meal that pleases everyone.

Gluten-Free Option: Easily make this dish gluten-free by swapping soy sauce for tamari, ensuring everyone at the table can enjoy it.

Crowd-Pleasing Delight: Impress your family or guests with this authentic recipe that brings the vibrant flavors of Korea right to your kitchen! For more dinner inspiration, don’t miss my delicious Crack Chicken Noodle soup recipe!

Chicken Bulgogi Recipe Ingredients

For the Marinade
Soy Sauce – Provides saltiness and umami depth; substitute with gluten-free tamari for a gluten-free option.
Brown Sugar – Adds sweetness and balances flavors in the marinade; for a refined sugar alternative, use coconut sugar.
Minced Garlic – Introduces aromatic notes; fresh garlic is preferred for a stronger taste.
Grated Ginger – Offers warmth and spice; substitute with ground ginger in lesser quantity if fresh is unavailable.
Sesame Oil – Adds rich, nutty flavor; can be substituted with any neutral oil if unavailable.
Black Pepper – Offers mild heat and enhances flavor; adjust according to preference.
Chili Flakes (optional) – Introduces heat for those who enjoy spicy food; omit for a milder dish.

For the Chicken
Chicken (thighs or breasts) – The main protein source; thighs remain juicier when cooked.

For Garnish
Chopped Green Onions – Provides freshness and crunch; additional fresh herbs can be used for variation.
Toasted Sesame Seeds – Adds a delightful crunch and nutty flavor to the final dish.

This delicious Chicken Bulgogi recipe is sure to become a cherished dish in your home!

Step‑by‑Step Instructions for Chicken Bulgogi Recipe

Step 1: Prepare the Marinade
In a medium bowl, whisk together soy sauce, brown sugar, minced garlic, grated ginger, sesame oil, and black pepper until the mixture is smooth and well combined. If you like a hint of spice, add optional chili flakes. This flavorful marinade is the heart of your Chicken Bulgogi, so make sure it’s fully blended before moving on to the next step.

Step 2: Slice the Chicken
Take your chicken thighs or breasts and slice them into thin strips, about ½ inch wide. This allows the chicken to cook quickly while absorbing the rich flavors of the marinade. You’ll want to have even, uniform pieces for consistent cooking. Prepare your skillet by setting it on the stove, ready for the next phase of cooking.

Step 3: Marinate the Chicken
Toss the sliced chicken in the prepared marinade until each piece is thoroughly coated. Cover the bowl with plastic wrap or let it sit in a zippered bag for at least 20 minutes, allowing the chicken to absorb all those amazing flavors. For best results, refrigerate it for up to 2 hours to enhance the depth of the flavors in this Chicken Bulgogi.

Step 4: Heat the Skillet
Preheat a lightly oiled skillet over medium-high heat for 2-3 minutes until hot. Ensure the oil lightly coats the pan to prevent sticking. Once heated, carefully add the marinated chicken in a single layer, making sure not to overcrowd the pan. This helps achieve a nice caramelization, an essential part of your Chicken Bulgogi’s flavor profile.

Step 5: Cook the Chicken
Cook the chicken for about 5-7 minutes, stirring occasionally to ensure even cooking. Watch for the chicken to turn golden brown and slightly caramelized; this indicates it’s cooked through and ready to serve. Use a meat thermometer to verify an internal temperature of 165°F (75°C) for safety and optimal tenderness.

Step 6: Plate and Garnish
Once cooked, transfer the Chicken Bulgogi to a serving plate. To finish, sprinkle toasted sesame seeds and extra chopped green onions on top for a pop of color and crunch. This final touch not only adds visual appeal but enhances the flavor, making your dish irresistible and ready to impress!

Chicken Bulgogi Recipe Variations

Feel free to get creative with this Chicken Bulgogi recipe—there are so many delicious ways to customize it to suit your taste!

  • Lettuce Wraps: Roll the chicken in crisp lettuce leaves for a fresh, crunchy bite that’s perfect for a light meal. Adding a bit of spicy kimchi within the wrap can elevate the flavor profile.

  • Korean Barbecue Style: Grill the marinated chicken on an outdoor grill or grill pan to achieve a smoky flavor and perfect char, bringing a true Korean BBQ experience to your dinner table.

  • Vegetarian Option: Substitute chicken with firm tofu for a delightful vegetarian twist that absorbs all the marinade flavors beautifully. Make sure to press the tofu first to remove excess moisture.

  • Spice it Up: Enhance the heat level by increasing the chili flakes or adding a spoonful of Gochujang (Korean chili paste) for an extra kick. This will also contribute to a richer flavor.

  • Add Veggies: Toss in sliced bell peppers or julienned carrots along with the chicken while cooking, giving your dish an extra crunch and a burst of color that makes it visually stunning.

  • Coconut Sugar: For a subtle tropical twist, swap the brown sugar with coconut sugar. This will add a slight caramel flavor while keeping it refined sugar-free.

  • Noodle Bowl: Serve the chicken over a bed of rice noodles or soba for a comforting noodle bowl that’s perfect for those cozy evenings at home. Top with fresh herbs, like cilantro, for a fragrant finish.

  • Egg Topper: Create a brunch-style dish by adding a perfectly fried egg on top of the Chicken Bulgogi. The runny yolk will add a luxurious creaminess that pairs beautifully with the savory flavors.

For more inspiration, you might enjoy trying these cozy recipes like Crack Chicken Noodle or a heartwarming Sweet Chili Chicken for a delightful weeknight meal!

Expert Tips for Chicken Bulgogi Recipe

  • Marinate Longer: For deeper flavor, try marinating chicken for 1-2 hours instead of just 20 minutes. This enhances the dish’s taste significantly.

  • Choose Thighs: Use chicken thighs instead of breasts as they retain moisture better while cooking, resulting in juicier bites.

  • Uniform Slices: Cut chicken into thin strips for even cooking and maximum flavor absorption from the marinade; this helps prevent uneven texture.

  • Preheat the Skillet: Ensure your skillet is properly heated before adding chicken to achieve that beautiful caramelization on the meat.

  • Garnish Wisely: Don’t skip the sesame seeds and green onions for garnishing—they add a delightful crunch and vibrant flavor that elevate your Chicken Bulgogi.

Storage Tips for Chicken Bulgogi Recipe

Fridge: Store leftover Chicken Bulgogi in an airtight container for up to 3 days. Make sure it cools completely before sealing to maintain freshness.

Freezer: For longer storage, freeze Chicken Bulgogi in a freezer-safe container. It can last up to one month without losing flavor or texture.

Reheating: When reheating, do it gently on the stovetop over low heat. Add a splash of water or oil to maintain moisture and tenderness.

Portioning: Consider portioning out the chicken before freezing, making it easier to defrost only what you need for meals throughout the week.

What to Serve with Easy Chicken Bulgogi

Pair your delightful Chicken Bulgogi with these tasty sides that will elevate your meal and delight your palate!

  • Steamed Rice: The classic choice that soaks up the delicious sauce and balances the flavors of the bulgogi perfectly.
  • Fresh Cucumber Salad: Crisp and refreshing, this salad adds a cool crunch to contrast the tender chicken, enhancing the overall experience.
  • Kimchi: This tangy and spicy Korean side dish offers a bold flavor punch, making it a must-have for a truly authentic meal.
  • Sautéed Greens: Quick-cooked spinach or bok choy adds vibrant color and nourishment, perfectly complementing the rich taste of bulgogi.
  • Lettuce Wraps: Wrap your bulgogi in crisp lettuce leaves for a fresh, handheld bite that feels light and satisfying.
  • Sesame Noodles: These nutty, flavorful noodles bring a delightful chewy texture to the table and pair beautifully with the marinade’s sweetness.
  • Korean Potato Salad: Creamy and subtly sweet, this comforting dish balances the savory depth of the bulgogi with its smooth texture.
  • Miso Soup: A warm bowl of miso soup provides a soothing, earthy flavor that harmonizes perfectly with your main dish.
  • Chilled Soju or Beer: Sip a refreshing drink alongside your meal, as the lightness contrasts the vibrancy of the flavors, making for an enjoyable dining experience.

Make Ahead Options

These Easy Chicken Bulgogi are perfect for busy home cooks eager to simplify mealtime! You can prepare the marinade and slice the chicken up to 24 hours in advance. Simply whisk together the marinade ingredients and coat the chicken, then refrigerate in an airtight container until you’re ready to cook. This allows the flavors to deepen and ensures your Chicken Bulgogi is just as delicious when you cook it! When you’re ready to serve, heat a lightly oiled skillet, cook the marinated chicken for about 5-7 minutes until caramelized, and you’ll enjoy a fantastic meal with minimal effort.

Chicken Bulgogi Recipe FAQs

What type of chicken is best for Chicken Bulgogi?
Absolutely! I recommend using chicken thighs for your Chicken Bulgogi, as they remain juicier and more flavorful compared to breasts. If you prefer using chicken breasts, just be mindful to not overcook them, as they can dry out more quickly.

How should I store leftover Chicken Bulgogi?
Store any leftover Chicken Bulgogi in an airtight container in the refrigerator, where it will stay fresh for up to 3 days. Make sure to let it cool completely before sealing the container to lock in that delicious flavor.

Can I freeze Chicken Bulgogi?
Yes, you can! For longer storage, place Chicken Bulgogi in a freezer-safe container or bag, where it can last up to one month. When you’re ready to enjoy it, simply thaw in the refrigerator overnight before reheating gently on the stovetop.

What’s the best way to reheat Chicken Bulgogi?
To reheat Chicken Bulgogi, do so gently on the stovetop over low heat. Add a splash of water or oil to maintain moisture and keep the chicken tender. Stir occasionally until heated through, aiming for an internal temperature of 165°F (75°C).

How can I customize this Chicken Bulgogi recipe?
Very! You can customize your Chicken Bulgogi by adjusting the spice level—add more chili flakes if you like it spicy or omit them for a milder flavor. Additionally, consider serving it in lettuce wraps with fresh veggies or over rice for a hearty meal. Feel free to experiment with different garnishes, such as fresh herbs or pickled vegetables.

Is this Chicken Bulgogi recipe gluten-free?
Yes, it is! Simply replace soy sauce with gluten-free tamari to create a delightful gluten-free version of Chicken Bulgogi, ensuring everyone can enjoy this flavorful dish with peace of mind.

Chicken Bulgogi Recipe

Savory Chicken Bulgogi Recipe for Quick Weeknight Dinners

This Chicken Bulgogi Recipe is a quick, savory dish perfect for busy weeknights, offering a delightful blend of Korean flavors.
Prep Time 20 minutes
Cook Time 7 minutes
Total Time 27 minutes
Servings: 4 servings
Course: Dinner
Cuisine: Korean
Calories: 300

Ingredients
  

Marinade
  • 1/4 cup Soy Sauce Can substitute with gluten-free tamari.
  • 2 tablespoons Brown Sugar Can substitute with coconut sugar.
  • 3 cloves Minced Garlic Fresh garlic preferred.
  • 1 tablespoon Grated Ginger Can substitute with ground ginger in lesser quantity.
  • 1 tablespoon Sesame Oil Can substitute with any neutral oil.
  • 1/2 teaspoon Black Pepper
  • 1/4 teaspoon Chili Flakes Optional for heat.
Chicken
  • 1 pound Chicken (thighs or breasts) Thighs are preferred for juiciness.
Garnish
  • 2 tablespoons Chopped Green Onions Additional herbs can be used.
  • 1 tablespoon Toasted Sesame Seeds

Equipment

  • Skillet

Method
 

Preparation
  1. In a medium bowl, whisk together soy sauce, brown sugar, minced garlic, grated ginger, sesame oil, and black pepper until smooth.
  2. Slice the chicken into thin strips, about ½ inch wide.
  3. Toss the sliced chicken in the marinade until thoroughly coated and marinate for at least 20 minutes.
  4. Preheat a lightly oiled skillet over medium-high heat.
  5. Cook the chicken for about 5-7 minutes, stirring occasionally until golden brown.
  6. Transfer to a serving plate and garnish with sesame seeds and green onions.

Nutrition

Serving: 1servingCalories: 300kcalCarbohydrates: 14gProtein: 30gFat: 14gSaturated Fat: 2gPolyunsaturated Fat: 1gMonounsaturated Fat: 11gCholesterol: 90mgSodium: 800mgPotassium: 500mgFiber: 1gSugar: 8gVitamin A: 200IUVitamin C: 2mgCalcium: 20mgIron: 2mg

Notes

For deeper flavor, marinate for 1-2 hours instead of 20 minutes.

Tried this recipe?

Let us know how it was!

Gordon Ramsay Carbonara: The Creamy Italian Favorite You’ll Love

As I watched the silky strands of spaghetti intertwine with the crisp pork and creamy egg sauce, I couldn’t help but feel transported to a bustling trattoria in Rome. Gordon Ramsay’s authentic Carbonara is more than just a meal—it’s an experience, capturing the essence of Italian cuisine with just a handful of minimalist ingredients. This classic dish offers the ultimate weeknight solution, coming together quickly while feeling fanciful enough for a special occasion. The best part? It achieves its creamy texture without a trace of cream! With options for substitute meats or even a delightful vegetarian twist, this Carbonara is not only versatile but also brimming with flavors that warm the heart and soul. Are you ready to elevate your pasta game with this Italian masterpiece?

Why is Gordon Ramsay Carbonara a must-try?

Simplicity at Its Finest: With just a few basic ingredients, this dish makes you look like a culinary pro without the fuss.

Authentic Flavor: Experience the rich, savory goodness of traditional Italian cooking that bursts with flavor in every bite.

Versatile Options: Feel free to experiment with ingredients—whether you swap the guanciale for bacon or go completely vegetarian, you can personalize this dish to suit any palate.

Quick and Delicious: Perfect for busy weeknights, this carbonara comes together in under 30 minutes, making it an effortless crowd-pleaser.

Comfort Food Upgrade: The creamy texture without cream? Yes, please! It’s a comforting hug in a bowl that will have your loved ones asking for seconds.

Discover more about innovative pasta recipes in our ultimate guide to pasta dishes.

Gordon Ramsay Carbonara Ingredients

For the Pasta

  • Spaghetti – The perfect base that provides structure; opt for high-quality pasta for the best results.

For the Sauce

  • Guanciale (or pancetta/bacon) – Adds a savory, rich flavor and crunchy texture; consider using pork belly or smoked bacon as alternatives.
  • Large Eggs – Creates a creamy sauce that envelops the pasta; freshness is key to avoid scrambling.
  • Pecorino Romano Cheese – Brings sharp, tangy flavor and contributes to the creaminess; can substitute with Parmesan if necessary.
  • Parmesan Cheese – Complements the Pecorino with a nutty undertone; always grate fresh for optimal melting.
  • Freshly Ground Black Pepper – Essential for seasoning and enhances the dish’s flavors; adjust to personal taste.

For Extra Flavor

  • Garlic (optional) – Adds aromatic depth; sauté briefly to avoid bitterness.
  • Olive Oil (optional) – Use if not enough fat is rendered from the guanciale or bacon; use sparingly to maintain the dish’s richness.
  • Salt – Enhances all flavors in the dish; use cautiously, as the cheese and cured meats are inherently salty.

Unleash your culinary skills with these ingredients as you whisk your way to a delightful bowl of Gordon Ramsay Carbonara!

Step-by-Step Instructions for Gordon Ramsay Carbonara

Step 1: Prepare Guanciale
Begin by dicing the guanciale into small cubes and placing them in a cold skillet. Heat the skillet over medium-low heat, allowing the fat to render slowly. After about 10-15 minutes, the guanciale should turn golden brown and crispy. Remove the cooked guanciale from the skillet, leaving the rendered fat to use in the sauce.

Step 2: Sauté Garlic (optional)
If you’re adding garlic for additional flavor, now is the time to do so. In the skillet with the reserved guanciale fat, sauté minced garlic over low heat for about 30 seconds, just until fragrant. Be cautious not to burn the garlic, as burnt garlic will make your Gordon Ramsay Carbonara bitter.

Step 3: Make Egg Mixture
While the guanciale cooks, whisk together the large eggs, grated Pecorino Romano, and grated Parmesan cheese in a bowl. Add a generous amount of freshly cracked black pepper to the mixture and combine well until smooth and creamy. This egg mixture is key to achieving the luscious sauce in your Carbonara.

Step 4: Cook Pasta
Bring a large pot of salted water to a rolling boil and add the spaghetti. Cook the pasta according to package instructions, typically around 8-10 minutes, until it’s al dente. Remember to reserve about 1 cup of the starchy pasta water before draining the spaghetti to help adjust your sauce later.

Step 5: Combine Pasta and Sauce
Immediately after draining the spaghetti, add it to the skillet with the guanciale fat (and garlic if used). Remove the skillet from heat to prevent the eggs from scrambling. Quickly pour in the egg and cheese mixture, tossing everything together to create a creamy sauce that clings to the pasta.

Step 6: Adjust Consistency
If the sauce appears too thick, gradually add the reserved pasta water, stirring continuously to achieve your desired consistency. The goal is to have a silky, smooth sauce that envelops the spaghetti without pooling at the bottom.

Step 7: Finish
Finally, fold in the crispy guanciale, marrying the flavors together beautifully. Serve your Gordon Ramsay Carbonara immediately, garnished with extra grated cheese and a sprinkle of freshly ground black pepper for an authentic finishing touch. Enjoy this classic Italian dish at its best!

Expert Tips for Gordon Ramsay Carbonara

  • Fresh Ingredients Matter: Always use the freshest eggs and high-quality cheese for the richest flavor. Fresh ingredients ensure your Gordon Ramsay Carbonara tastes authentic and vibrant.

  • Heat Control: Cook guanciale slowly over medium-low heat to render the fat properly without burning. This helps achieve a crispy texture without bitterness.

  • Quick Mixing: Combine the egg mixture with pasta off the heat to prevent scrambling. Working quickly is essential for making a creamy sauce that clings beautifully.

  • Pasta Water is Key: Reserve pasta water to adjust the consistency of your sauce. A touch of starchy water helps create that silky finish you crave in great Carbonara.

  • Adapt and Enjoy: Feel free to swap the guanciale for pancetta or create a vegetarian version with sautéed mushrooms. Just remember to taste and adjust seasonings accordingly.

Make Ahead Options

Gordon Ramsay Carbonara is perfect for meal prep enthusiasts looking to save time on busy weeknights! You can prepare the guanciale (or your chosen meat substitute) and sauté garlic up to 24 hours in advance, storing them separately in the refrigerator to maintain their flavors and textures. Additionally, whisk together the egg and cheese mixture ahead of time, ensuring it’s tightly covered to keep it fresh. When you’re ready to serve, simply cook the spaghetti and toss it with the prepared components, adding reserved pasta water as needed to create the creamy sauce that hugs the noodles. Enjoy effortless, restaurant-quality results with this classic dish that feels just as indulgent on day two!

What to Serve with Gordon Ramsay Carbonara?

Elevate your pasta experience with delightful sides and pairings that enhance the rich, creamy goodness of this Italian classic.

  • Garlic Bread: The crispy, buttery goodness of garlic bread perfectly complements the creamy Carbonara, offering a delightful crunch with every bite.
  • Simple Green Salad: A fresh salad with mixed greens and a light vinaigrette adds a refreshing contrast, balancing the richness of the pasta. A sprinkle of Parmesan or toasted nuts can elevate it further.
  • Roasted Vegetables: Tender, caramelized seasonal veggies add texture and color to your meal, while their natural sweetness balances the savory notes of the Carbonara.
  • Crispy Brussels Sprouts: Sautéed or roasted Brussels sprouts provide a nutty flavor and a satisfying crunch, creating a delightful contrast with the creamy sauce.
  • Crisp White Wine: A chilled glass of Pinot Grigio or Sauvignon Blanc enhances the dining experience with its refreshing acidity, cutting through the richness of the Carbonara beautifully.
  • Tiramisu: For dessert, this classic Italian treat offers a sweet, coffee-flavored end note that’s sure to impress, completing your Italian-themed meal in style.

Gordon Ramsay Carbonara Variations

Feel free to make this recipe your own with delightful twists and substitutions that cater to your taste and dietary needs.

  • Vegetarian Option: Substitute guanciale with sautéed mushrooms or zucchini, seasoned for a savory umami punch. The mushrooms add a lovely earthiness, while zucchini compliments the creamy texture beautifully.

  • Dairy-Free: Use almond or cashew cream instead of cheese, mixed with nutritional yeast for that nutty flavor. It creates a surprisingly creamy sauce that everyone can enjoy!

  • Spicy Kick: Add red pepper flakes or diced chili for some heat, elevating the dish’s flavor profile to tantalizing heights. A little spice can really invigorate each delightful bite.

  • Pasta Variations: Swap spaghetti for whole wheat or gluten-free pasta to suit dietary needs while maintaining the classic flavor. Both options still capture that satisfying, creamy texture.

  • Smoked Flavor: Use smoked bacon instead of guanciale to impart a rich, smoky essence. This variation gives an extra depth of flavor that’s perfect for adventurous palates.

  • Herb Infusion: Incorporate fresh herbs like basil or parsley just before serving for a burst of freshness. They elevate the dish not only visually but also add layers of aromatic flavor.

  • Nutty Twist: Add toasted pine nuts or walnuts for added texture and a satisfying crunch. The nuts introduce a delightful contrast to the creamy sauce that makes each forkful even more satisfying.

  • Fancy Add-ins: Dressing up your Carbonara with a sprinkle of truffle oil or parmesan shavings can make a special occasion even more memorable. These luxurious touches bring an extra layer of indulgence to the meal.

Consider exploring other pasta recipes in our ultimate guide to pasta dishes for more ideas and flavor inspirations that cater to every palate!

Storage Tips for Gordon Ramsay Carbonara

  • Room Temperature: It’s best to enjoy your Gordon Ramsay Carbonara freshly made. If necessary, it can sit out for up to 2 hours but should be refrigerated afterward.

  • Fridge: Store any leftovers in an airtight container in the refrigerator for up to 3 days. Remember, the creamy sauce may thicken, so you’ll want to reheat gently.

  • Reheating: To reheat, add a splash of reserved pasta water or a bit of olive oil while warming on the stovetop over low heat. Stir continuously to re-emulsify the sauce for a creamy finish.

  • Freezer: Freezing is not recommended due to the sauce’s egg-based nature, which may separate. For best flavor and texture, enjoy your Carbonara fresh!

Gordon Ramsay Carbonara Recipe FAQs

What ingredients should I look for when choosing guanciale?
Absolutely! When selecting guanciale for your Gordon Ramsay Carbonara, look for a piece that has a good balance of meat and fat. The ideal guanciale should have a slightly mottled appearance, with pink meat and creamy white fat visible. Avoid any packages with dark spots or a grainy texture, as this may indicate poor quality. If you can’t find guanciale, pancetta or smoked bacon can serve as practical substitutes.

How long can I store leftovers of Gordon Ramsay Carbonara?
Leftovers of Gordon Ramsay Carbonara can be stored in an airtight container in the refrigerator for up to 3 days. However, keep in mind that the creamy sauce may thicken as it cools. To enjoy it again, reheat gently on the stovetop over low heat, adding a splash of reserved pasta water to bring back some of that beautiful creaminess.

Can I freeze Gordon Ramsay Carbonara?
Freezing is not recommended for Gordon Ramsay Carbonara due to the emulsified egg-based sauce, which may separate and change texture upon thawing. To enjoy the best flavor and texture, I’d suggest savoring this dish fresh. If you want to prepare it ahead of time, you could cook the pasta and the guanciale separately, then combine them with the egg mixture just before serving.

What should I do if the sauce becomes too thick?
If your sauce becomes too thick while preparing your Gordon Ramsay Carbonara, don’t worry! Simply add the reserved pasta water gradually, a few tablespoons at a time, while stirring continuously. This starchy water not only thins the sauce but also helps it cling to the pasta beautifully. Aim for a silky consistency that adheres to your spaghetti.

Are there any dietary considerations with this recipe?
Yes, if you’re cooking for friends or family with dietary restrictions, you can modify this recipe for various preferences. For a vegetarian option, consider substituting guanciale with sautéed mushrooms or zucchini for flavor. If allergies are a concern, be mindful of the cheese; you can use dairy-free alternatives if needed. As always, adjust seasonings to keep the flavor vibrant and delightful!

Gordon Ramsay Carbonara

Gordon Ramsay Carbonara: The Creamy Italian Favorite You’ll Love

Gordon Ramsay Carbonara is a quick, creamy pasta dish that captures authentic Italian flavors without using cream.
Prep Time 10 minutes
Cook Time 20 minutes
Total Time 30 minutes
Servings: 4 servings
Course: Pasta
Cuisine: Italian
Calories: 600

Ingredients
  

For the Pasta
  • 400 grams Spaghetti High-quality pasta for best results.
For the Sauce
  • 150 grams Guanciale Can substitute with pancetta or bacon.
  • 4 large Eggs Use fresh eggs to avoid scrambling.
  • 100 grams Pecorino Romano Cheese Can substitute with Parmesan cheese.
  • 50 grams Parmesan Cheese Grate fresh for optimal melting.
  • 1 teaspoon Freshly Ground Black Pepper Adjust to personal taste.
For Extra Flavor
  • 2 cloves Garlic Optional, sauté briefly.
  • 1 tablespoon Olive Oil Use if not enough fat is rendered.
  • 1 teaspoon Salt Use cautiously due to salty cheese and cured meats.

Equipment

  • Skillet
  • Pot
  • whisk
  • bowl

Method
 

Steps
  1. Dice the guanciale into small cubes and place in a cold skillet. Heat over medium-low heat for 10-15 minutes until golden brown and crispy. Remove from skillet, leaving fat.
  2. If using, sauté minced garlic in reserved fat over low heat for 30 seconds until fragrant, being careful not to burn it.
  3. In a bowl, whisk together the eggs, Pecorino Romano, and Parmesan cheese with freshly cracked black pepper until smooth and creamy.
  4. Boil salted water in a large pot, add spaghetti, and cook for 8-10 minutes until al dente. Reserve 1 cup of pasta water before draining.
  5. Add drained spaghetti to the skillet with guanciale fat (and garlic if used) off the heat. Pour in the egg and cheese mixture, tossing to create a creamy sauce.
  6. Gradually add reserved pasta water to adjust consistency, stirring until smooth and silky.
  7. Fold in crispy guanciale and serve immediately, garnished with extra cheese and black pepper.

Nutrition

Serving: 1servingCalories: 600kcalCarbohydrates: 75gProtein: 25gFat: 25gSaturated Fat: 8gPolyunsaturated Fat: 2gMonounsaturated Fat: 5gCholesterol: 240mgSodium: 800mgPotassium: 350mgFiber: 3gSugar: 1gVitamin A: 600IUCalcium: 400mgIron: 2mg

Notes

Use fresh ingredients for the best flavor and cook guanciale slowly to avoid bitterness. Reserve pasta water to adjust sauce consistency.

Tried this recipe?

Let us know how it was!

Korean Style Pot Roast: Comfort Food with a Flavor Twist

As the aroma of savory spices wafts through my kitchen, I can’t help but feel a wave of comfort wash over me. Today, I’m excited to share my take on Korean Style Pot Roast, a dish that transforms simple beef into a culinary masterpiece. This hearty recipe is not only incredibly easy to prepare but also incredibly versatile—perfect for both casual weeknight meals and special gatherings. The tender meat simmers in a rich, flavorful sauce that has a delightful kick, making it a memorable addition to your recipe repertoire. Plus, it’s meal prep friendly, ensuring you have delicious leftovers to savor throughout the week. Are you ready to dive into this comforting masterpiece that’s sure to warm your heart and satisfy your cravings?

Why is Korean Style Pot Roast special?

Comforting Hearty Dish: This recipe is all about hearty flavors that warm the soul, making it an ideal choice for chilly nights or family gatherings.

Easy Preparation: With simple steps, even novice cooks can achieve an incredible meal that tastes like it took hours to prepare.

Customizable Ingredients: Whether you prefer chuck roast or short ribs, this recipe allows for flexibility in ingredients—ideal for experimenting with flavors.

Meal Prep Friendly: With leftovers that taste even better the next day, it’s perfect for those busy weeks when you need delicious meals on-the-go.

Flavorful Twist: The fusion of traditional pot roast with bold Korean spices takes comfort food to a whole new level, making it a dish everyone will love.

Pair it with some Korean Fried Chicken for an unforgettable Korean feast!

Korean Style Pot Roast Ingredients

For the Pot Roast

  • Beef Chuck Roast – Provides richness and tenderness; alternatives include brisket or short ribs for variation.
  • Kosher Salt – Enhances flavor balance; if you’re monitoring sodium, feel free to reduce this ingredient.
  • Vegetable Oil – Ideal for browning the meat and sautéing aromatics; sesame oil can add a lovely extra depth.
  • Sweet Onion – Adds sweetness and depth; yellow onion can also work nicely if sweet onions are not available.
  • Garlic Cloves – Essential for a fragrant base; fresh cloves ensure the best flavor, so avoid pre-minced options.
  • Fresh Ginger – Imparts a zesty note that’s warm; ground ginger can be used in a pinch, but fresh is preferred.
  • Gochujang – Brings heat and umami depth to the dish; reduce quantity for a milder taste if needed.
  • Brown Sugar – Balances savory elements beautifully; honey or maple syrup can be used as sweet substitutes.
  • Soy Sauce – Adds savory richness; tamari is a perfect gluten-free alternative.
  • Beef Broth – Moistens and deepens flavors; chicken broth or vegetable broth can work as acceptable substitutes.

For Serving

  • Cooked Rice – A neutral base for the pot roast; quinoa or mashed potatoes can be excellent alternatives.
  • Fresh Cilantro – Offers a fresh, herbaceous touch as a garnish; optional for those who prefer no cilantro.
  • Kimchi – Provides a spicy, tangy contrast; feel free to replace it with pickled vegetables if you wish.

Enjoy the deliciousness of this Korean Style Pot Roast, where every bite is a warm embrace of flavor!

Step‑by‑Step Instructions for Korean Style Pot Roast

Step 1: Preheat the Oven
Begin by preheating your oven to 300°F (150°C). This low temperature is perfect for gently braising the Korean Style Pot Roast, ensuring tender meat by the end of cooking. Take your time with this step, as a properly heated oven sets the stage for rich flavors to develop while the roast cooks slowly.

Step 2: Brown the Beef
Heat 2 tablespoons of vegetable oil in a large, heavy-bottomed skillet over medium-high heat. Once the oil shimmers, carefully add the beef chuck roast and sear it for about 4-5 minutes on each side, until a beautiful brown crust forms. This step enhances the roast’s flavor, creating a delicious caramelized layer that will enrich your dish.

Step 3: Cook Aromatics
Remove the browned beef and set it aside on a plate. In the same skillet, add a chopped sweet onion, 4 minced garlic cloves, and 1 tablespoon of freshly grated ginger. Sauté the mixture for about 3 minutes, stirring frequently, until the onion becomes translucent and fragrant, allowing the aromatic flavors to infuse the oil.

Step 4: Mix Sauces
In a medium bowl, combine 2 tablespoons of gochujang, 3 tablespoons of brown sugar, 1/4 cup of soy sauce, and 2 cups of beef broth. Whisk these ingredients until smooth, allowing the sweetness of the brown sugar to dissolve. Pour this savory mixture over the sautéed aromatics in the skillet, stirring to combine everything before returning the beef to the pan.

Step 5: Bake the Roast
Carefully transfer the entire contents of the skillet to a large Dutch oven or oven-safe pot. Cover it tightly with a lid or aluminum foil, and place it in your preheated oven. Bake for about 3 to 4 hours, or until the beef is fork-tender and the sauce has thickened, filling your home with aromas of comforting Korean flavors.

Step 6: Rest and Serve
Once the beef is done, remove it from the oven and let it rest for about 15 minutes before slicing. This resting period allows the juices to redistribute within the meat, ensuring each bite is moist and flavorful. Serve your Korean Style Pot Roast over cooked rice and garnish with fresh cilantro and a side of kimchi for a delightful, well-rounded meal.

What to Serve with Korean Style Pot Roast

As your Korean Style Pot Roast simmers, the anticipation of a delightful meal grows. Let’s explore the ideal accompaniments that create a dazzling dining experience.

  • Steamed Jasmine Rice: The fluffy grains offer a neutral base, perfectly soaking up the delicious sauce and enhancing the meal’s rich flavors.

  • Korean Pickled Radishes: These crunchy, tangy bites provide a refreshing contrast to the savory meat, balancing the richness of the pot roast beautifully.

  • Seasoned Spinach: Lightly sautéed spinach brings vibrant color and a touch of freshness to the plate, complementing the hearty pot roast perfectly.

  • Kimchi: A staple when serving Korean dishes, this spicy fermented vegetable side adds a zesty kick and depth to your meal, making every bite more exciting.

  • Creamy Mashed Potatoes: Their buttery texture and warmth enhance the overall comfort of the meal, while the flavor pairs seamlessly with the savory sauce.

  • Ginger Ale: A refreshing, fizzy beverage that not only complements the flavors of the pot roast but also soothes the palate, making it a great drink choice for this dish.

  • Chocolate Mousse: End your meal on a sweet note with a silky, rich dessert that provides a delightful contrast to the savory elements of the pot roast.

  • Sesame Broccoli: This side dish adds a nutty flavor and crunch, while the vibrant green color brightens your plate and nourishes the body.

With these delightful pairings, your Korean Style Pot Roast will shine even brighter as the centerpiece of your meal!

How to Store and Freeze Korean Style Pot Roast

Fridge: Store leftovers in an airtight container for up to 3 days. This ensures the flavors meld beautifully while keeping your meal fresh and ready for quick access.

Freezer: For longer storage, freeze the Korean Style Pot Roast in a sealed container or freezer bags for up to 3 months. Make sure to remove as much air as possible to prevent freezer burn.

Reheating: Thaw frozen pot roast in the refrigerator overnight. Reheat gently on the stovetop or in the microwave until heated through, adding a splash of beef broth if the sauce thickens too much.

Leftover Ideas: Use leftover pot roast in tacos, sandwiches, or stir-fries for a delicious twist that breathes new life into your meals!

Korean Style Pot Roast Variations

Feel free to explore creative twists on this delightful Korean Style Pot Roast to suit your taste preferences!

  • Vegetarian Option: Substitute beef with tofu or tempeh for a plant-based delight. Use vegetable broth to maintain depth of flavor.

  • Mild Heat: Replace gochujang with a mix of chili sauce and miso for similar flavors without the heat. This subtle change keeps it approachable for all.

  • Root Veggies Boost: Incorporate chopped carrots and potatoes in the last hour of cooking for added nutrition and heartiness. They soak up the amazing flavors too!

  • Asian Fusion: Try swapping soy sauce with coconut aminos for a sweeter, soy-free option. Perfect for those who prefer a lighter taste.

  • Rice Swap: Replace cooked rice with fluffy quinoa or creamy mashed potatoes for a delightful twist. Each option brings its unique texture and flavor to the dish.

  • Herb Garnish: Experiment with fresh green onions or parsley as an alternative garnish to cilantro for a different flavor profile that still freshens the dish.

  • Zesty Contrast: Instead of kimchi, serve with pickled radishes or cucumber for a refreshing tang that contrasts beautifully with the richness of the pot roast.

If you’re feeling adventurous, try pairing this flavorful pot roast with some Garlic Parmesan Roasted shrimp for an irresistible family feast!

Expert Tips for Korean Style Pot Roast

  • Choose Quality Beef: Selecting a well-marbled beef chuck roast ensures your Korean Style Pot Roast will be tender and juicy. Don’t skimp on this key ingredient!

  • Fresh Ingredients Matter: Always opt for fresh garlic and ginger for a more robust flavor. Indoors, they create an aromatic base that elevates your dish significantly.

  • Mind the Temperature: Use a meat thermometer to ensure your roast reaches 190°F. This ensures it’s fork-tender, delivering that perfect bite everyone loves.

  • Customize the Heat: Adjust gochujang according to your spice tolerance. Perhaps starting with less and gradually adding more can help balance flavors without overwhelming heat.

  • Let It Rest: Giving the roast time to rest after baking will enhance juiciness. Slicing too soon can lead to loss of flavor and moisture, making each bite less satisfying.

  • Save Those Leftovers: Allowing your Korean Style Pot Roast flavors to meld overnight makes leftover meals even tastier. Reheat gently to enjoy every morsel!

Make Ahead Options

These Korean Style Pot Roast preparations are perfect for busy weeknights! You can season and brown the beef up to 24 hours in advance, then refrigerate it in an airtight container to enhance flavor and tenderness. Additionally, chop the onions, garlic, and ginger a day ahead and store them together in the fridge to streamline your cooking process. When you’re ready to cook, simply combine everything and follow the baking instructions as noted. The pot roast will taste just as delicious, even after prepping ahead, ensuring all you need to do is pop it in the oven for a comforting meal with minimal effort!

Korean Style Pot Roast Recipe FAQs

What type of beef should I use for Korean Style Pot Roast?
Absolutely! Beef chuck roast is the best choice due to its rich marbling, which keeps the meat tender and juicy during cooking. Alternative cuts like brisket or short ribs can also work well if you’re looking to try something different. Just make sure the cut you choose has some fat for optimal flavor and tenderness.

How should I store leftovers from my pot roast?
Very! To keep your Korean Style Pot Roast leftovers fresh, store them in an airtight container in the refrigerator for up to 3 days. This allows the flavors to continue melding together, making the next meal even tastier.

Can I freeze Korean Style Pot Roast?
Definitely! You can freeze your Korean Style Pot Roast for up to 3 months. Just make sure to cool it completely before transferring it to a sealed freezer bag or container. Remove as much air as possible to prevent freezer burn. When you’re ready to enjoy it again, thaw the roast in the refrigerator overnight, then reheat on the stovetop or microwave until warm.

What can I do if my pot roast turns out tough?
If your pot roast is tough, it might need more time to cook. The goal is to reach an internal temperature of 190°F, which results in tender meat that easily shreds. If it’s not fork-tender, cover it and let it bake a little longer—a good guideline is to check every 30 minutes until it reaches the desired doneness. You might also want to review your meat selection; always opt for cuts with good marbling for the best texture.

Is this recipe safe for people with food allergies?
Certainly! This recipe includes several allergens like soy sauce and sesame oil, which can cause issues for some individuals. For a gluten-free version, you can easily substitute soy sauce with tamari. Always check ingredient labels if you or your guests have food allergies. As for pets, avoid giving them any human food that contains garlic or onion, as these can be harmful to dogs and cats.

Can I make Korean Style Pot Roast in a slow cooker?
Yes, definitely! To adapt the recipe for a slow cooker, brown the beef and sauté the aromatics as directed. Then, place the beef and all other ingredients into the slow cooker, cover, and cook on low for 8 hours or high for 4-5 hours until the meat is tender. This method produces delicious results with minimal hassle, so it’s perfect for busy days!

Korean Style Pot Roast

Korean Style Pot Roast: Comfort Food with a Flavor Twist

Discover the comforting flavors of Korean Style Pot Roast, a delicious beef dish that's perfect for gatherings and meal prep.
Prep Time 15 minutes
Cook Time 4 hours
Resting Time 15 minutes
Total Time 4 hours 30 minutes
Servings: 6 servings
Course: Dinner
Cuisine: Korean
Calories: 650

Ingredients
  

For the Pot Roast
  • 3 pounds Beef Chuck Roast or brisket or short ribs for variation
  • 2 teaspoons Kosher Salt reduce if monitoring sodium
  • 2 tablespoons Vegetable Oil or sesame oil for extra depth
  • 1 large Sweet Onion or yellow onion if sweet not available
  • 4 cloves Garlic Cloves fresh is preferred over pre-minced
  • 1 tablespoon Fresh Ginger or ground ginger in a pinch
  • 2 tablespoons Gochujang reduce for milder taste if needed
  • 3 tablespoons Brown Sugar or honey or maple syrup as substitutes
  • 1/4 cup Soy Sauce or tamari for a gluten-free alternative
  • 2 cups Beef Broth or chicken/vegetable broth as substitutes
For Serving
  • 3 cups Cooked Rice or quinoa or mashed potatoes as alternatives
  • 1/4 cup Fresh Cilantro optional for those who prefer no cilantro
  • 1 cup Kimchi or pickled vegetables if desired

Equipment

  • Oven
  • Large skillet
  • Dutch oven
  • Mixing Bowl
  • meat thermometer

Method
 

Main Instructions
  1. Preheat your oven to 300°F (150°C).
  2. Heat 2 tablespoons of vegetable oil in a large skillet over medium-high heat. Sear the beef chuck roast for about 4-5 minutes on each side until browned.
  3. Remove the beef and in the same skillet, sauté a chopped sweet onion, 4 minced garlic cloves, and 1 tablespoon of grated ginger for about 3 minutes until fragrant.
  4. In a bowl, mix 2 tablespoons of gochujang, 3 tablespoons of brown sugar, 1/4 cup of soy sauce, and 2 cups of beef broth. Pour over the sautéed mixture and return the beef to the skillet.
  5. Transfer to a Dutch oven, cover tightly, and bake for 3 to 4 hours or until the beef is fork-tender.
  6. Remove from the oven, let rest for 15 minutes before slicing. Serve over cooked rice with cilantro and kimchi.

Nutrition

Serving: 1plateCalories: 650kcalCarbohydrates: 45gProtein: 50gFat: 30gSaturated Fat: 10gPolyunsaturated Fat: 5gMonounsaturated Fat: 10gCholesterol: 120mgSodium: 900mgPotassium: 800mgFiber: 2gSugar: 10gVitamin A: 500IUVitamin C: 10mgCalcium: 50mgIron: 5mg

Notes

Allowing flavors to meld overnight enhances leftover meals. Reheat gently for best results.

Tried this recipe?

Let us know how it was!

Gourmet BLT Wraps with Secret Sauce: A Twist on Tradition

The aroma of sizzling bacon can awaken the most dormant of appetites, pulling you into the kitchen with dreams of a mouthwatering masterpiece. That’s exactly how I feel when I prepare these Gourmet BLT Wraps with Secret Sauce. A fresh spin on a classic, these wraps combine crispy bacon, vibrant veggies, and a drizzle of a secret sauce that’ll make your taste buds dance. Not only are these wraps quick to make, but they also offer endless customization options, allowing you to tailor each bite to your liking. Whether it’s a light lunch or a casual dinner, these savory wraps promise satisfaction without the mess of traditional sandwiches. Isn’t it time to shake up your meal routine? What delightful twist will you add to your Gourmet BLT Wraps?

Why Try Gourmet BLT Wraps?

Quick Meal Solution: In just a matter of minutes, you can whip up these delicious wraps, making them perfect for busy weeknights or last-minute lunch plans.
Endless Customization: Whether you prefer turkey, chicken, or even a veggie version, the versatility allows you to craft a wrap that suits your taste.
Crispy and Fresh: The harmonious blend of crunchy bacon with crisp lettuce and juicy tomatoes creates a burst of flavor in every bite.
Mess-Free Delight: Say goodbye to soggy bread! These wraps keep everything neatly contained for a clean and enjoyable eating experience.
Crowd-Pleasing Option: Serve them at your next gathering, and watch everyone enjoy these savory delights—perfect as a side with a light pasta salad or Garlic Chicken Wraps. Treat yourself and your loved ones to a bite of innovation!

Gourmet BLT Wraps Ingredients

For the Wraps
Bacon – Provides protein and a crunchy texture; use center-cut for less fat or applewood-smoked for a richer flavor.
Tortillas – Holds all ingredients together; warming slightly enhances pliability for easy rolling.
Lettuce – Offers freshness and crunch; crisp varieties like romaine or iceberg are preferred.
Tomatoes – Adds juiciness and sweetness; drain excess moisture before use to prevent sogginess.

For the Secret Sauce
Olive Oil – Used in the tomato marinade to enhance flavor; a drizzle can also add richness to the wraps.
Red Wine Vinegar – Adds acidity to balance the sweetness of tomatoes; feel free to substitute with apple cider vinegar if needed.
Mayonnaise – Forms the base for the secret sauce; can be mixed with leftover tomato marinade for an extra flavor boost.

Step‑by‑Step Instructions for Gourmet BLT Wraps with Secret Sauce

Step 1: Cook the Bacon
In a large skillet, heat over medium heat and add the bacon strips, cooking for 6-8 minutes until crispy, flipping occasionally. Use a pair of tongs to transfer the golden-brown bacon to a plate lined with paper towels to absorb excess grease while you prepare the other ingredients—this will ensure a satisfying crunch for your Gourmet BLT Wraps.

Step 2: Prepare the Tomatoes
Slice the tomatoes in half and place them in a bowl. Drizzle with 1 tablespoon of olive oil, 1 tablespoon of red wine vinegar, and season with salt and black pepper. Let them marinate for about 10 minutes, then drain any excess liquid. This step enhances the tomatoes’ natural sweetness, adding a juicy quality to your wrap and elevating the flavor of your Gourmet BLT Wraps.

Step 3: Mix the Secret Sauce
In a small bowl, combine 2 tablespoons of mayonnaise with 1 tablespoon of the tomato marinade you just drained. Stir until smooth. The secret sauce will offer a creamy, tangy contrast to the crispy bacon and fresh veggies in your Gourmet BLT Wraps. Set it aside while you assemble the wraps to allow the flavors to meld together beautifully.

Step 4: Assemble the Wraps
Lay a tortilla flat on a clean surface. Smear a generous layer of the secret sauce you just made across the center of the tortilla. Then, layer with fresh lettuce leaves, followed by the crispy bacon pieces, and the marinated tomato halves. This careful layering ensures every bite of your Gourmet BLT Wraps bursts with flavor and texture.

Step 5: Roll and Rest the Wraps
Begin to roll the tortilla tightly from one end, tucking in the filling as you go to keep everything secure. Once rolled, let the wrap sit seam-side down for 2-3 minutes. This resting time helps the tortilla to adhere better and keeps your Gourmet BLT Wraps intact when you slice them.

Step 6: Slice and Serve
Using a sharp knife, cut the wrapped tortilla in half diagonally. This presentation will showcase the colorful layers of your Gourmet BLT Wraps. Arrange them on a serving platter and enjoy these delicious, mess-free wraps immediately, or serve them alongside crispy potato chips or cucumber spears for a delightful meal!

Expert Tips for Gourmet BLT Wraps

Crispy Bacon: Ensure bacon is fully cooked until crispy for a satisfying crunch. Undercooked bacon can lead to a soggy wrap.

Proper Tomato Prep: Drain marinated tomatoes thoroughly to avoid excess moisture in your Gourmet BLT Wraps. Season them well to enhance sweetness.

Warm Tortillas: Briefly heat tortillas in a microwave for 10-15 seconds to make them flexible and easy to roll without tearing.

Watch the Fill: Avoid overfilling your wraps. A heaping portion can lead to spills and an unmanageable wrap.

Cool Down: Allow wraps to rest seam-side down for a few minutes before cutting; this helps them hold together better and makes slicing easier.

How to Store and Freeze Gourmet BLT Wraps

Fridge: Store assembled Gourmet BLT Wraps in an airtight container for up to 4 hours to maintain freshness. Wrap each individually in plastic wrap for better preservation if needed.

Freezer: You can freeze unassembled wraps for up to 2 months. Wrap tightly in foil or freezer bags, and label with the date. Thaw in the fridge overnight before use.

Reheating: If you’ve stored assembled wraps, reheat in the microwave for about 30 seconds to a minute, just until warmed through. Avoid overheating to keep bacon crispy.

Make-Ahead Tips: Prepare the bacon and secret sauce up to 2 days ahead. This way, you can quickly assemble your wraps fresh on the day of serving!

What to Serve with Gourmet BLT Wraps with Secret Sauce

Elevate your meal with delightful sides and drinks that beautifully complement the savory goodness of your wraps.

  • Crispy Potato Chips: The crunchy texture and salty flavor offer a perfect contrast, making every bite satisfying.

  • Cucumber Spears: Refreshing and light, cucumber adds a thirst-quenching element that balances the richness of the bacon.

  • Light Pasta Salad: Tossed with fresh veggies and a zesty dressing, it enhances the meal while keeping it vibrant and colorful.

  • Coleslaw: The crunchy, tangy elements of coleslaw add a refreshing crunch that perfectly complements the wraps.

  • Sweet Tea Lemonade: This sweet and tangy beverage refreshes your palate, enhancing the delicious flavors of the Gourmet BLT Wraps.

  • Fruit Salad: Seasonal fruits bring a natural sweetness that contrasts with the savory wraps while adding a burst of color to your table.

Pairing these options with your Gourmet BLT Wraps not only elevates the dining experience but also turns an easy meal into a festival of flavors!

Gourmet BLT Wraps with Secret Sauce Customizations

Feel free to let your creativity shine as you put your own unique spin on these delicious wraps!

  • Healthier Option: Swap bacon for turkey or chicken for a leaner protein choice. You’ll still enjoy the same wonderful flavors!

  • Greens Boost: Use kale or spinach in place of lettuce for added nutrients and a pop of vibrant color. A great way to sneak extra veggies into your meal!

  • Creamy Twist: Replace mayonnaise with Greek yogurt for a tangy, lower-calorie secret sauce. This will keep your wraps creamy without the guilt.

  • Avocado Delight: Add creamy avocado slices for that rich texture and extra taste. They bring a delightful touch that pairs perfectly with the crispy bacon and fresh veggies.

  • Spicy Kick: For a zesty upgrade, try adding sliced jalapeños or a splash of sriracha to your secret sauce. This kick will take your wraps to the next level of flavor!

  • Sweet Surprise: Mix in some diced peaches or mango with your tomatoes for a touch of sweetness. This unexpected fruit twist will elevate your Gourmet BLT Wraps to new heights.

  • Herb Infusion: Include fresh herbs like basil or cilantro with the tomatoes for a refreshing burst of flavor. These herbs will add a unique aromatic dimension to your delicious wraps.

As you explore these variations, why not enjoy them with a side of Blt Chicken Salad for a delightful, complete meal? The possibilities are endless, and I can’t wait to see how you make these wraps your own!

Make Ahead Options

These Gourmet BLT Wraps with Secret Sauce are perfect for busy home cooks looking to save time during the week! You can prepare the bacon and the secret sauce up to 3 days in advance—just cook the bacon until crisp and store it in an airtight container in the refrigerator for maximum freshness. Additionally, you can slice and marinate the tomatoes up to 24 hours ahead to enhance their flavor while keeping them juicy (just remember to drain excess moisture before use). When you’re ready to serve, simply warm the tortillas for 10-15 seconds in the microwave, assemble your wraps with the prepped ingredients, and enjoy a delicious meal that feels fresh and satisfying!

Gourmet BLT Wraps with Secret Sauce Recipe FAQs

What kind of bacon should I use for Gourmet BLT Wraps?
Absolutely! For the best flavor and texture, I recommend using applewood-smoked bacon for a richer taste. If you’re looking for a lighter option, center-cut bacon has less fat and can yield a satisfying crunch without the grease.

How should I store leftover Gourmet BLT Wraps?
To keep your wraps fresh, store assembled Gourmet BLT Wraps in an airtight container in the refrigerator for up to 4 hours. If you need to store them longer, wrap them individually in plastic wrap to keep them from drying out.

Can I freeze Gourmet BLT Wraps?
Yes, you can freeze unassembled wraps for up to 2 months! Wrap each one tightly in foil or place them in freezer bags. Make sure to label with the date. Thaw them overnight in the fridge before assembling for a quick meal.

Why is my wrap soggy, and how can I fix that?
Very common! To prevent sogginess, ensure to drain the marinated tomatoes thoroughly before adding them to your wrap. Using crispy bacon and avoiding too much sauce in the wrap helps keep everything crunchy. I often suggest letting the wrap sit seam-side down for a few minutes before cutting, as this allows it to hold together better.

Are there any dietary allergies to consider with this recipe?
Definitely! This recipe primarily contains bacon and mayonnaise. If you’re preparing these wraps for someone with dietary restrictions, consider using turkey bacon as a substitute for pork and Greek yogurt instead of mayonnaise for a lighter, tangy sauce. Always check ingredient labels for potential allergens.

How can I customize my Gourmet BLT Wraps?
Very easily! You can swap out the bacon for turkey or chicken for a lighter version. If you’re looking for added nutrients, substituting kale or spinach for lettuce works beautifully. Feel free to mix and match foundational ingredients until your wrap is just the way you like it!

Gourmet BLT Wraps with Secret Sauce

Gourmet BLT Wraps with Secret Sauce

Experience a delightful twist on tradition with these Gourmet BLT Wraps featuring crispy bacon, fresh veggies, and a secret sauce that will leave your taste buds dancing.
Prep Time 15 minutes
Cook Time 8 minutes
Resting Time 3 minutes
Total Time 26 minutes
Servings: 4 wraps
Course: Lunch
Cuisine: American
Calories: 350

Ingredients
  

For the Wraps
  • 8 slices Bacon Use center-cut for less fat or applewood-smoked for richer flavor.
  • 4 large Tortillas Warming slightly enhances pliability for easy rolling.
  • 2 cups Lettuce Crisp varieties like romaine or iceberg are preferred.
  • 2 medium Tomatoes Drain excess moisture before use.
For the Secret Sauce
  • 1 tablespoon Olive Oil Used in the tomato marinade.
  • 1 tablespoon Red Wine Vinegar Can substitute with apple cider vinegar.
  • 2 tablespoons Mayonnaise Forms the base for the secret sauce.

Equipment

  • Large skillet
  • small bowl
  • Tongs
  • Knife
  • Cutting board

Method
 

Step-by-Step Instructions for Gourmet BLT Wraps with Secret Sauce
  1. In a large skillet, cook the bacon strips over medium heat for 6-8 minutes until crispy. Transfer to a paper towel-lined plate to absorb excess grease.
  2. Slice the tomatoes in half and marinate in a bowl with olive oil, red wine vinegar, salt, and pepper for 10 minutes. Drain excess liquid.
  3. In a small bowl, mix mayonnaise with 1 tablespoon of the drained tomato marinade until smooth.
  4. Lay a tortilla flat, smear with secret sauce, and layer with lettuce, bacon, and marinated tomatoes.
  5. Roll the tortilla tightly, seam-side down, and rest for 2-3 minutes before cutting in half diagonally.
  6. Serve immediately or alongside potato chips or cucumber spears.

Nutrition

Serving: 1wrapCalories: 350kcalCarbohydrates: 30gProtein: 15gFat: 20gSaturated Fat: 5gPolyunsaturated Fat: 3gMonounsaturated Fat: 12gCholesterol: 30mgSodium: 800mgPotassium: 400mgFiber: 3gSugar: 2gVitamin A: 500IUVitamin C: 15mgCalcium: 100mgIron: 1.5mg

Notes

Make bacon and secret sauce ahead of time for quick assembly. Store wraps in an airtight container for up to 4 hours in the fridge, or freeze unassembled for up to 2 months.

Tried this recipe?

Let us know how it was!

Sweet and Savory Honey-Glazed Corn Casserole Delight

As I stirred the bubbling pot of creamy corn, the warm aroma enveloped my kitchen like a cozy hug. That’s when I knew it was time to share my beloved Honey-Glazed Corn Casserole, a dish that brings comfort to the table while delighting taste buds. This recipe shines with its perfect harmony of sweet and savory flavors, making it an ideal accompaniment to family gatherings and holiday celebrations. It’s not only easy to prepare but also versatile enough to cater to both fresh and canned corn lovers—so no one gets left out! Plus, you can make it ahead of time, allowing those flavors to meld and deepen, creating a dish that truly feels like home. Curious how to whip up this heartwarming classic? Let’s dive into the recipe!

Why is this casserole a must-try?

Comforting: This Honey-Glazed Corn Casserole is the epitome of coziness, seamlessly blending sweet and savory in every bite.
Versatile: Use fresh corn in summer or canned corn in winter—this recipe adapts to your seasonal pantry.
Make-Ahead Magic: Prepare it in advance to save time, letting the flavors meld beautifully before serving.
Rich Flavor: The blend of honey and cheddar cheese creates a delightful flavor explosion that appeals to all ages.
Crowd-Pleaser: Perfect for family dinners or gatherings, it’s bound to be the star of the table. Enjoy it alongside a hearty Tater Tot Casserole or grilled meats for a complete meal!

Honey-Glazed Corn Casserole Ingredients

For the Casserole

  • Fresh Corn Kernels – Provides natural sweetness and delightful texture; you can substitute with 1 can of corn, drained if fresh isn’t available.
  • Creamed Corn – Adds creaminess and moisture for that irresistible, comforting feel.
  • Sour Cream – Contributes tanginess and richness, making every bite a little more luscious.
  • Shredded Cheddar Cheese – Enhances flavor with a creamy twist that everyone will love.
  • Honey – Acts as the primary sweetener, infusing the dish with floral notes; feel free to swap for maple syrup or agave nectar for a different taste.
  • Unsalted Butter (melted) – Provides rich flavor and helps achieve a tender, melt-in-your-mouth texture.
  • Cornmeal – Gives the casserole a cake-like structure that supports all that deliciousness.
  • Baking Powder – Ensures fluffiness, making it light and airy.
  • Salt – Boosts overall flavor; you can reduce it if using salted butter.
  • Black Pepper – Adds a subtle kick that deepens the flavor profile.
  • Garlic Powder – Brings a touch of savory depth, enhancing the overall taste experience.
  • Eggs (beaten) – Binds everything together while contributing to a light, fluffy texture.
  • Chopped Chives or Parsley – For garnish, bringing a fresh pop of color and flavor to the dish.

Note: This Honey-Glazed Corn Casserole is not just easy to prepare; it’s a comforting dish that will light up your table!

Step‑by‑Step Instructions for Honey-Glazed Corn Casserole

Step 1: Preheat the Oven
Start by preheating your oven to 350°F (175°C). This ensures that once your Honey-Glazed Corn Casserole is assembled, it will bake evenly and achieve that perfect golden-brown finish. While the oven heats, you can prepare your casserole ingredients, making the cooking process smoother.

Step 2: Mix the Wet Ingredients
In a large mixing bowl, combine the fresh corn kernels, creamed corn, sour cream, shredded cheddar cheese, honey, and melted butter. Use a wooden spoon or spatula to blend everything together until you have a smooth mixture with no visible lumps. This combination of ingredients will create a rich and creamy base for your casserole.

Step 3: Combine the Dry Ingredients
In a separate bowl, whisk together the cornmeal, baking powder, salt, black pepper, and garlic powder. This step is crucial as it distributes the leavening agent and spices evenly, ensuring that your Honey-Glazed Corn Casserole has a delightful lift and flavor throughout. Set this mixture aside once well combined.

Step 4: Fold Dry Ingredients into Wet
Gradually add the dry mixture to the wet mixture, stirring gently with a spatula to combine. Be careful not to overmix; you want the ingredients to blend just enough to create a cohesive batter for your casserole. This harmonious blend will ensure a fluffy and moist texture once baked.

Step 5: Incorporate the Eggs
Gently fold the beaten eggs into the casserole mixture. The eggs act as a binding agent, adding to the structure and lightness of your Honey-Glazed Corn Casserole. Make sure they are fully integrated, resulting in a creamy mix that will bake beautifully in the oven.

Step 6: Prepare the Baking Dish
Grease a 9×13 inch baking dish with a bit of butter or cooking spray to prevent sticking. This allows for easy removal of your Honey-Glazed Corn Casserole after baking. Carefully pour the corn mixture into the dish, spreading it evenly with a spatula to ensure even cooking.

Step 7: Bake to Perfection
Place the baking dish in the preheated oven and bake for 35-40 minutes. The casserole should turn a beautiful golden brown, with a toothpick inserted into the center coming out clean. This visual cue indicates that your casserole is ready to be taken out, showcasing its attractive color.

Step 8: Cool and Garnish
Once baked, remove the casserole from the oven and allow it to cool briefly. This resting period helps the casserole to set, making it easier to cut. Just before serving, sprinkle chopped chives or parsley on top for a fresh touch and a pop of color that complements the Honey-Glazed Corn Casserole beautifully.

Storage Tips for Honey-Glazed Corn Casserole

Room Temperature: Allow the casserole to cool completely before letting it sit at room temperature for up to 2 hours—perfect for serving at room temperature.

Fridge: Store leftovers in an airtight container in the refrigerator for up to 3 days. Reheat in the oven or microwave before serving to restore its delightful texture.

Freezer: If you wish to freeze your honey-glazed corn casserole, cool it completely, then wrap tightly in plastic wrap and aluminum foil. It can be frozen for up to 2 months.

Reheating: Thaw overnight in the fridge before reheating. Warm in the oven at 350°F (175°C) for about 20-25 minutes or until heated through for the best results.

Expert Tips for Honey-Glazed Corn Casserole

  • Use Fresh Corn: Opt for fresh corn when in season for the best flavor. If using canned corn, make sure to drain it well to avoid excess moisture.

  • Mix Gently: Be cautious not to overmix the batter when combining wet and dry ingredients. This will help maintain a fluffy texture in your Honey-Glazed Corn Casserole.

  • Taste Test the Sweetness: Since sweetness varies by season, adjust the amount of honey based on your corn’s natural sweetness to achieve a balanced flavor.

  • Rest Before Serving: Allow the casserole to sit for a few minutes after baking. This resting time helps it hold its shape and makes serving easier.

  • Make Ahead: For convenience, prepare the casserole a day in advance and refrigerate. This allows the flavors to meld together beautifully—just remember to let it sit out for 30 minutes before baking!

Make Ahead Options

These Honey-Glazed Corn Casseroles are perfect for busy home cooks looking to save time during hectic weeknights! You can assemble the entire casserole up to 24 hours in advance. Simply prepare the mixture, pour it into a greased baking dish, and cover tightly with plastic wrap before refrigerating. If you want to take it a step further, you can also freeze it for up to 3 months; just ensure it’s cooled completely before wrapping it well. To maintain quality, let it sit at room temperature for 30 minutes before baking, and remember, if baking straight from the fridge, add an extra 5 minutes to the cooking time. When ready to enjoy, bake until golden brown, and you’ll have a wholesome, comforting dish that’s just as delicious as if made fresh!

Honey-Glazed Corn Casserole Variations

Feel free to get creative and make this casserole your own with these delightful variations!

  • Dairy-Free: Substitute sour cream and cheddar cheese with plant-based alternatives for a vegan twist that’s still creamy and rich.

  • Maple Magic: Instead of honey, try using maple syrup for a unique flavor that brings a touch of autumn, perfect for chilly nights!

  • Vegetable Medley: Add diced bell peppers and zucchini to the mix for a colorful, nutrient-packed option that brightens the dish.

  • Spicy Kick: Stir in some diced jalapeños or a pinch of cayenne pepper to give your casserole a delightful heat that balances the sweetness.

  • Herb Infusion: Experiment with fresh herbs like thyme or rosemary for an aromatic touch that adds complexity to each mouthful. These flavors can elevate your casserole to new heights.

  • Nutty Goodness: Consider mixing in some toasted pecans or walnuts for added crunch and an earthy flavor, making every bite a little soul-satisfying.

  • Crispy Topping: Sprinkling a layer of breadcrumbs or crushed tortilla chips on top before baking will add texture and a satisfying crunch that complements the creamy filling beautifully.

No matter how you choose to customize your Honey-Glazed Corn Casserole, these variations will help create a dish that’s not only comforting but also reflective of your personal tastes. Enjoy crafting your perfect version of this beloved classic!

What to Serve with Honey-Glazed Corn Casserole?

As the warm, sweet aromas of your honey-glazed corn casserole waft through the air, it’s time to create a delightful meal that complements every comforting bite.

  • Grilled Chicken: Juicy and smoky grilled chicken enhances the sweet flavors, making for a satisfying balance that’s sure to please everyone at the table.

  • Fresh Garden Salad: A bright mix of greens and seasonal veggies adds a crisp contrast, providing refreshing bites that cut through the casserole’s richness. Toss in a zesty dressing for an uplifting kick!

  • BBQ Ribs: The tangy flavors of barbecued ribs pair beautifully with the sweetness of the casserole, creating a hearty, fulfilling spread that will leave everyone craving more.

  • Roasted Vegetables: Oven-roasted seasonal vegetables boost the nutrition while providing a lovely caramelization that complements the honey-glazed cannery.

  • Creamy Coleslaw: This crunchy, tangy side dish provides a delightful texture contrast, making each bite of the casserole even more exciting. The creaminess pairs well with the sweet flavors, creating a harmonious experience.

  • Fruity Dessert: Finish off your meal with a light fruit tart or a berry crumble. The sweetness of the dessert echoes the honey glaze while offering a refreshing finale to the meal.

  • Iced Tea: A glass of iced tea, whether sweetened or unsweetened, will keep the meal light and refreshing while complementing the dish’s rich flavors.

Explore these pairings and transform your honey-glazed corn casserole into a beloved meal that your family will remember!

Honey-Glazed Corn Casserole Recipe FAQs

How do I choose the right corn for this casserole?
Absolutely! Fresh corn is ideal for its natural sweetness and texture; look for ears with bright green husks and plump kernels. If using canned corn, opt for low-sodium or no-salt-added varieties to keep the dish balanced.

What is the best way to store leftovers of the honey-glazed corn casserole?
After cooling completely, store leftovers in an airtight container in the refrigerator for up to 3 days. Make sure it’s tightly sealed to maintain its freshness and avoid absorbing other odors.

Can I make the honey-glazed corn casserole ahead of time?
Yes! You can prepare the casserole up to 24 hours in advance. Simply assemble the ingredients, cover, and refrigerate. When ready to bake, let it sit at room temperature for 30 minutes before placing it in the preheated oven.

Can I freeze the honey-glazed corn casserole? If so, how?
Definitely! To freeze, allow the casserole to cool completely, then wrap it tightly in plastic wrap followed by aluminum foil to prevent freezer burn. It can be frozen for up to 2 months. When you’re ready to enjoy it, thaw it overnight in the fridge and reheat in the oven at 350°F (175°C) for about 20-25 minutes until warmed through.

My casserole turned out too dense. What might have gone wrong?
Very! If your honey-glazed corn casserole is dense, it could be due to overmixing the batter when combining the wet and dry ingredients. Mix just until combined to keep it fluffy. Additionally, ensure your baking powder is fresh, as old leavening agents can also lead to a heavier texture.

Is this casserole suitable for those with dietary restrictions like gluten intolerance?
Great question! To make this honey-glazed corn casserole gluten-free, substitute regular cornmeal with certified gluten-free cornmeal. Always double-check that other ingredients, like baking powder, are gluten-free. Moreover, this dish is vegetarian-friendly, making it a lovely choice for many dietary needs!

Honey-Glazed Corn Casserole

Sweet and Savory Honey-Glazed Corn Casserole Delight

This Honey-Glazed Corn Casserole is the perfect combination of sweet and savory, making it a must-try dish for any gathering.
Prep Time 15 minutes
Cook Time 40 minutes
Cooling Time 10 minutes
Total Time 1 hour 5 minutes
Servings: 8 servings
Course: Casserole
Cuisine: American
Calories: 250

Ingredients
  

For the Casserole
  • 2 cups Fresh Corn Kernels or 1 can of corn, drained
  • 1 cup Creamed Corn
  • 1 cup Sour Cream
  • 1 cup Shredded Cheddar Cheese
  • 1/2 cup Honey or maple syrup/agave nectar
  • 1/4 cup Unsalted Butter (melted)
  • 1 cup Cornmeal
  • 1 tablespoon Baking Powder
  • 1 teaspoon Salt reduce if using salted butter
  • 1 teaspoon Black Pepper
  • 1 teaspoon Garlic Powder
  • 2 large Eggs (beaten)
  • 1/4 cup Chopped Chives or Parsley for garnish

Equipment

  • Mixing Bowl
  • baking dish
  • whisk
  • spatula

Method
 

Step-by-Step Instructions
  1. Preheat the oven to 350°F (175°C).
  2. In a large mixing bowl, combine the fresh corn, creamed corn, sour cream, cheddar cheese, honey, and melted butter.
  3. In a separate bowl, whisk cornmeal, baking powder, salt, black pepper, and garlic powder.
  4. Gradually add the dry mixture to the wet mixture, stirring gently.
  5. Fold in the beaten eggs.
  6. Grease a 9x13 inch baking dish and pour the mixture in.
  7. Bake for 35-40 minutes until golden brown.
  8. Allow to cool briefly and garnish with chives or parsley before serving.

Nutrition

Serving: 1servingCalories: 250kcalCarbohydrates: 30gProtein: 8gFat: 10gSaturated Fat: 5gPolyunsaturated Fat: 1gMonounsaturated Fat: 3gCholesterol: 50mgSodium: 300mgPotassium: 300mgFiber: 2gSugar: 5gVitamin A: 10IUVitamin C: 5mgCalcium: 15mgIron: 5mg

Notes

This casserole can be made ahead of time for convenience and is perfect for any family gathering or holiday meal.

Tried this recipe?

Let us know how it was!

Creamy Parmesan Garlic Beef Bowtie Pasta for Cozy Nights

As I hurriedly glanced at the clock, it dawned on me that dinner time was just around the corner, and my fridge was squeaky clean. What could possibly save the day? Enter the Creamy Parmesan Garlic Beef Bowtie Pasta! With just 35 minutes to spare, this dish became my lifesaver, blending savory ground beef, fragrant garlic, and rich Parmesan cheese into a mouthwatering melody. Not only is this recipe a quick solution for busy weeknights, but it also wraps you in warmth and comfort that feels like a homemade hug. Perfect for families craving a delightful dinner without the fuss, this Italian-American favorite can easily transform your ordinary evening into a special occasion. Ready to treat your taste buds? Let’s dive into the magic of creamy pasta!

Why is this pasta recipe a must-try?

Comfort in a Bowl: Each bite of this Creamy Parmesan Garlic Beef Bowtie Pasta envelops you in warmth, making it the ideal dish for chilly nights or busy evenings.

Quick and Easy: With just 35 minutes from start to finish, you can whip up a delicious meal that will impress your family.

Flavorful Fusion: The savory blend of garlic, beef, and Parmesan creates an irresistible taste that appeals to pasta lovers of all ages.

Versatile Ingredients: Customize it with veggies or spice it up with red pepper flakes. Need more ideas? Check out my Garlic Parmesan Roasted Shrimp for a different flavor twist!

Crowd-Pleaser: This dish is consistently a hit at family gatherings, making it a go-to for cozy dinners and celebrations alike.

Don’t wait to enjoy the delightful comfort of this creamy masterpiece!

Creamy Parmesan Garlic Beef Bowtie Pasta Ingredients

For the Pasta

  • Bowtie Pasta – The star of the dish, providing delightful texture; feel free to swap in your favorite pasta shape.

For the Beef Mixture

  • Ground Beef – Offers hearty protein, but you can substitute with ground turkey for a lighter twist.
  • Olive Oil – Ideal for sautéing, bringing richness to the dish; vegetable oil works well too.
  • Onion (finely chopped) – Adds sweetness and depth; shallots make for a milder flavor alternative.
  • Garlic (minced) – A flavor enhancer that brings a lovely aroma; garlic powder can be used in a pinch (1/4 teaspoon per clove).
  • Worcestershire Sauce – Infuses umami richness; gluten-free folks can opt for soy sauce instead.
  • Italian Seasoning – Key to classic Italian flavors; if you’re out, using oregano and basil separately will do.
  • Smoked Paprika – Brings a subtle smokiness; regular paprika can replace it if you prefer no smoke.

For the Sauce

  • Butter – Creates a wonderfully creamy sauce; margarine can work for a dairy-free option.
  • Beef Broth – Enhances the richness of the sauce; chicken broth is a great substitute if needed.
  • Half and Half – Adds luscious creaminess to the sauce; whole milk or non-dairy options, like almond milk, can lighten it up.
  • Parmesan Cheese (freshly grated) – Brings sharpness and creaminess; Pecorino Romano offers a bolder flavor swap.

Dive into the deliciousness and comfort of this Creamy Parmesan Garlic Beef Bowtie Pasta—the perfect remedy for busy nights!

Step‑by‑Step Instructions for Creamy Parmesan Garlic Beef Bowtie Pasta

Step 1: Heat the Oil
In a large skillet, heat 2 tablespoons of olive oil over medium-high heat. You’ll know it’s ready when the oil shimmers slightly. This step sets the stage for sautéing the beef and aromatics, infusing the dish with rich flavors and warmth.

Step 2: Brown the Beef
Add 1 pound of ground beef to the skillet, breaking it up with a wooden spoon. Cook for about 5 to 7 minutes until the beef is browned and no longer pink, stirring occasionally. Drain any excess fat to keep the creamy Parmesan garlic sauce from becoming greasy.

Step 3: Sauté Aromatics
Stir in 1 finely chopped onion and 3 cloves of minced garlic; sauté for 2 to 3 minutes. You’re looking for the onion to become soft and translucent, releasing its sweet aroma. This simple step enriches the flavor profile of your Creamy Parmesan Garlic Beef Bowtie Pasta.

Step 4: Season the Mixture
Add 1 tablespoon of Worcestershire sauce, 1 teaspoon of Italian seasoning, and 1 teaspoon of smoked paprika to the skillet. Cook for an additional minute, allowing the spices to bloom and coat the meat with their warm flavors. This step truly enhances the richness of our delicious pasta sauce.

Step 5: Make the Sauce
Add 2 tablespoons of butter to the skillet and allow it to melt completely, swirling occasionally. Then pour in 1 cup of beef broth. Bring the mixture to a gentle simmer for about 3 to 4 minutes, letting it thicken slightly and developing deep, savory flavors.

Step 6: Create Creaminess
Lower the heat and stir in 1 cup of half and half and 1 cup of freshly grated Parmesan cheese. Mix well until the cheese has melted and the sauce is creamy and smooth. This will be the soul of your Creamy Parmesan Garlic Beef Bowtie Pasta, rich and inviting.

Step 7: Cook the Pasta
Meanwhile, bring a large pot of salted water to a boil and cook 12 ounces of bowtie pasta according to package instructions. For al dente pasta, test one minute before the suggested time. Once cooked, drain the pasta and set aside, keeping it warm.

Step 8: Combine and Serve
Combine the cooked bowtie pasta with the creamy sauce in the skillet. Toss gently to ensure each pasta piece is evenly coated. If the sauce needs thinning, add a splash of reserved pasta water or additional broth. Serve hot, and enjoy the delightful comfort of your Creamy Parmesan Garlic Beef Bowtie Pasta!

Expert Tips for Creamy Parmesan Garlic Beef Bowtie Pasta

  • Browning the Beef: Make sure not to overcrowd the skillet when browning the beef; this ensures that it cooks evenly and achieves that lovely caramelized flavor.

  • Perfect Pasta: For the ideal al dente texture, taste the pasta one minute before the package instructions suggest—it makes a world of difference in your dish.

  • Thickening the Sauce: If your sauce is too thick, you can revive it by adding a splash of reserved pasta water or beef broth; this maintains the creamy consistency of your Creamy Parmesan Garlic Beef Bowtie Pasta.

  • Building Flavor: Don’t skip the simmering step with the Worcestershire sauce and spices; this helps develop depth and richness that truly enhances the dish.

  • Prep Ahead: You can prepare the creamy sauce ahead of time; simply reheat it before mixing with the pasta to make weeknight dinners a breeze.

What to Serve with Creamy Parmesan Garlic Beef Bowtie Pasta

Create a delightful dining experience that complements the rich flavors of this comforting pasta dish.

  • Garlic Bread: The buttery, toasted goodness is perfect for soaking up the creamy sauce, bringing a satisfying crunch to your meal.
  • Mixed Greens Salad: A fresh, lightly dressed salad adds a crisp and refreshing contrast to the creamy pasta, balancing the meal beautifully.

For a cozy finish, consider pairing the dish with creamy coleslaw. This crunchy side adds a delightful texture and contrasts the pasta’s richness, making every bite harmonious.

  • Steamed Broccoli: Lightly steamed broccoli introduces a burst of color and nutrients, while its mild flavor pairs perfectly with the savory notes of the dish.

  • Red Wine: A glass of merlot or a light chianti enhances the savoriness while adding a touch of elegance to your dinner table.

  • Chocolate Mousse: For dessert, a silky chocolate mousse offers the perfect sweet ending to your pasta dinner, enveloping you in indulgence.

Make Ahead Options

These Creamy Parmesan Garlic Beef Bowtie Pasta preparations are perfect for busy cooks looking to save time! You can prepare the creamy sauce up to 3 days in advance and store it in an airtight container in the refrigerator. When ready to serve, simply reheat the sauce over low heat, stirring gently until warm, to ensure it keeps its rich, creamy texture. You can also cook the bowtie pasta up to 24 hours ahead; just toss it with a splash of olive oil to prevent sticking. When it’s time to eat, combine the pasta with the reheated sauce, and you’ll have a comforting, delicious meal with minimal effort!

Creamy Parmesan Garlic Beef Bowtie Pasta Variations

Feel free to let your culinary creativity shine as you tailor this delightful dish to your preference!

  • Add Vegetables: Incorporate spinach, peas, or bell peppers for a burst of color and nutrition. Filling your pasta with veggies can elevate it from comfort food to a balanced meal with ease.

  • Spice it Up: If you’re in the mood for some heat, add red pepper flakes or diced jalapeños. A little spice can transform the flavor profile of your Creamy Parmesan Garlic Beef Bowtie Pasta, making it a hit for spice lovers!

  • Cheese Swap: Experiment with other cheeses like cheddar or Gouda for a different twist on flavor. Each cheese brings its unique taste that can add a new layer of richness, making the dish even more enticing.

  • Herbed Goodness: Fresh herbs like basil or parsley can add bright flavors. Tossing in chopped herbs just before serving gives your pasta a fresh, aromatic zest that really brightens up the dish.

  • Pasta Twist: Switch up the bowtie pasta for fusilli, penne, or even whole wheat to add more texture. The type of pasta you choose can enhance the way the sauce clings, ensuring every bite is delicious!

  • Creamy Vegan Alternative: For a dairy-free version, use coconut milk and nutritional yeast instead of half and half and Parmesan. This creates a creamy base without sacrificing flavor, perfect for those following a plant-based diet.

  • Luxury Edition: Elevate the dish with some truffle oil or fresh grated truffle for an indulgent touch. Just a drizzle can transform this comforting bowl into a gourmet experience, perfect for special occasions.

  • Zesty Lemon: Add a splash of lemon juice or zest to brighten up the flavors. This refreshing twist can balance the richness of the pasta and make each bite feel lighter and more vibrant.

For more inspiration, you might enjoy pairing this dish with a side of my Garlic Parmesan Roasted Shrimp or indulge in comforting flavors with Garlic Parmesan Chicken. Enjoy exploring these variations!

Storage Tips for Creamy Parmesan Garlic Beef Bowtie Pasta

Fridge: Store leftovers in an airtight container for up to 3 days to maintain freshness. Gently reheat on the stovetop over low heat, adding a splash of beef broth if needed to restore creaminess.

Freezer: For longer storage, freeze the creamy pasta in a freezer-safe container for up to 2 months. To enjoy later, thaw overnight in the fridge and reheat gently, stirring occasionally.

Reheating: When reheating, do so slowly over low heat on the stovetop; adding a bit of broth or milk can help achieve that creamy texture again. This will keep your Creamy Parmesan Garlic Beef Bowtie Pasta delicious!

Room Temperature: Avoid leaving the pasta out at room temperature for more than 2 hours to ensure food safety.

Creamy Parmesan Garlic Beef Bowtie Pasta Recipe FAQs

What type of pasta should I use for this dish?
Absolutely! Bowtie pasta is the star of this recipe, but you can easily swap it out for any pasta shape you love, such as fusilli or penne. They will both hold onto the creamy sauce beautifully!

How should I store leftovers?
Leftovers can be stored in an airtight container in the refrigerator for up to 3 days. To reheat, do so gently on the stovetop over low heat, adding a splash of beef broth if the sauce has thickened too much.

Can I freeze Creamy Parmesan Garlic Beef Bowtie Pasta?
Yes! To freeze, let the pasta cool completely then transfer it to a freezer-safe container. It can be stored for up to 2 months. When you’re ready to enjoy, thaw overnight in the refrigerator and reheat on the stovetop, stirring frequently. If needed, add a bit of broth to restore the creamy texture.

What could I use instead of ground beef?
Very! Ground turkey or chicken can be used as a healthier alternative in this recipe. They offer a similar texture and flavor, making them perfect substitutes for those looking for a lighter dish.

Any tips for preventing the sauce from being too thick?
Certainly! If your sauce becomes too thick while reheating, add a splash of beef broth or reserved pasta water gradually until you reach your desired consistency. This helps maintain that creamy, velvety quality!

Is there a substitute for half and half in the creamy sauce?
I recommend using whole milk or a non-dairy alternative like almond milk or cashew milk for a lighter option. Just keep in mind that these will slightly alter the richness of the sauce, so you might want to add a bit more cheese to enhance the flavor.

Creamy Parmesan Garlic Beef Bowtie Pasta

Creamy Parmesan Garlic Beef Bowtie Pasta for Cozy Nights

A quick and comforting Creamy Parmesan Garlic Beef Bowtie Pasta recipe perfect for busy weeknights.
Prep Time 15 minutes
Cook Time 20 minutes
Total Time 35 minutes
Servings: 4 servings
Course: Pasta
Cuisine: Italian-American
Calories: 600

Ingredients
  

For the Pasta
  • 12 ounces bowtie pasta or your favorite pasta shape
For the Beef Mixture
  • 1 pound ground beef or ground turkey for a lighter option
  • 2 tablespoons olive oil vegetable oil also works
  • 1 medium onion (finely chopped) or shallots for milder flavor
  • 3 cloves garlic (minced) 1/4 teaspoon garlic powder can be used per clove
  • 1 tablespoon Worcestershire Sauce or soy sauce for gluten-free
  • 1 teaspoon Italian seasoning or use oregano and basil separately
  • 1 teaspoon smoked paprika or plain paprika if preferred
For the Sauce
  • 2 tablespoons butter or margarine for a dairy-free option
  • 1 cup beef broth or chicken broth as a substitute
  • 1 cup half and half or whole milk/non-dairy options like almond milk
  • 1 cup Parmesan cheese (freshly grated) or Pecorino Romano for a bolder flavor

Equipment

  • Large skillet
  • Pot

Method
 

Step-by-Step Instructions
  1. Heat the olive oil in a large skillet over medium-high heat until it shimmers.
  2. Add the ground beef, breaking it up with a wooden spoon. Cook for 5 to 7 minutes until browned.
  3. Stir in the chopped onion and minced garlic; sauté for 2 to 3 minutes until the onion is soft.
  4. Add Worcestershire sauce, Italian seasoning, and smoked paprika. Cook for an additional minute.
  5. Add butter and allow it to melt. Pour in beef broth and bring to a gentle simmer for 3 to 4 minutes.
  6. Lower the heat and stir in half and half and Parmesan cheese until smooth and creamy.
  7. Meanwhile, cook the bowtie pasta in salted boiling water according to package instructions for al dente.
  8. Combine the cooked pasta with the creamy sauce in the skillet and toss gently.

Nutrition

Serving: 1servingCalories: 600kcalCarbohydrates: 55gProtein: 30gFat: 30gSaturated Fat: 15gPolyunsaturated Fat: 1gMonounsaturated Fat: 4gTrans Fat: 1gCholesterol: 80mgSodium: 800mgPotassium: 600mgFiber: 3gSugar: 4gVitamin A: 10IUVitamin C: 2mgCalcium: 20mgIron: 15mg

Notes

Store leftovers in an airtight container for up to 3 days and reheat gently to maintain creaminess.

Tried this recipe?

Let us know how it was!

Savory Apple & Goat Cheese Croissant Sandwich for Quick Lunch

As I walked through my local farmers’ market, the crisp scent of fresh apples mingled with the rich aroma of baked goods, instantly sparking a craving for something special. That’s when the idea of creating an Apple & Goat Cheese Croissant Sandwich hit me. This delightful dish perfectly combines the sweet crunch of apples and the creamy tang of goat cheese, wrapped in a warm, flaky croissant. It’s not just a quick meal, but a sophisticated breakfast or light lunch option that feels like a gourmet treat made at home. Plus, it’s incredibly versatile—swap out ingredients as you please, making it as unique as your taste buds. Ready to elevate your mealtime? Let’s dive into this delightful recipe!

Why is this sandwich a must-try?

Gourmet Quality: The Apple & Goat Cheese Croissant Sandwich brings café-style elegance to your kitchen, making every bite a special occasion.
Quick and Easy: Perfectly suited for busy mornings, this recipe takes minimal time to create without sacrificing flavor.
Flavor Explosion: The combination of sweet apples, tangy goat cheese, and flaky croissants offers a symphony of tastes and textures.
Versatility: Experiment with ingredient swaps like using cream cheese or adding arugula for a peppery kick – the possibilities are endless!
Balanced Meal: Pair it with a side salad or fresh fruit for a wholesome lunch that satisfies without weighing you down.
Impress your guests: Serve this sandwich during brunches or casual gatherings, and watch your friends and family rave about it!

For more delightful combinations, try the Avocado Melt Sandwich or the Banana Grilled Cheese.

Apple & Goat Cheese Croissant Sandwich Ingredients

• Discover the delightful components of this easy recipe!

For the Sandwich

  • Croissants – Use fresh, flaky croissants for that perfect buttery texture.
  • Goat Cheese – Creamy filling that adds tanginess; substitute with cream cheese or cheddar if desired.
  • Honey – Adds sweetness to balance the cheese’s tang; maple syrup is a lovely alternative.
  • Cinnamon – Enhances flavor depth, but feel free to omit or swap with nutmeg for a twist.
  • Apples (Honeycrisp or Granny Smith recommended) – Provide crunch and balance sweetness; other varieties work too.
  • Arugula (optional) – Adds a peppery flavor and vibrant color; spinach can be used for a milder taste.

Step‑by‑Step Instructions for Apple & Goat Cheese Croissant Sandwich

Step 1: Preheat the Oven
Begin by preheating your oven to 350°F (175°C). This ensures that your Apple & Goat Cheese Croissant Sandwich will bake evenly and achieve that perfect warm, flaky texture. While the oven is heating, gather your other ingredients so you’re ready to assemble the sandwiches.

Step 2: Prepare the Croissants
Using a sharp serrated knife, carefully slice the croissants in half horizontally, creating pockets for the filling. This step is crucial to maintain the integrity of the croissant while adding ample space for the creamy goat cheese and crunchy apples. Lay the bottom halves of the croissants on a clean baking sheet.

Step 3: Make the Goat Cheese Mixture
In a mixing bowl, blend the softened goat cheese with honey and a sprinkle of cinnamon until smooth and well-combined. If needed, add a splash of milk to achieve a creamy consistency that spreads easily. This flavorful mixture will provide a tangy contrast to the sweetness of the apples in your sandwich.

Step 4: Assemble the Sandwiches
Spread a generous layer of the goat cheese mixture onto the bottom half of each croissant. Next, layer thinly sliced apples on top, letting their natural sweetness shine through. If you like a little extra crunch, add arugula or spinach atop the apples before closing the sandwich with the top half of the croissant.

Step 5: Bake the Sandwiches
Place the assembled sandwiches in the preheated oven and bake for about 5-7 minutes. Keep an eye on them as they heat up, looking for a lightly toasted top and warm filling to ensure a delightful texture. The croissants should be golden and crisp on the outside yet soft on the inside.

Step 6: Serve and Enjoy
Once the sandwiches are baked to perfection, remove them from the oven and let them cool slightly. Serve your Apple & Goat Cheese Croissant Sandwiches on a plate, optionally pairing them with a side of fresh fruit or a light salad for a balanced meal.

Apple & Goat Cheese Croissant Sandwich Variations

Transform your Apple & Goat Cheese Croissant Sandwich into a personalized masterpiece full of creativity and taste!

  • Vegan Twist: Substitute goat cheese with vegan cream cheese to enjoy a plant-based version while retaining a creamy texture.
  • Gluten-Free Delight: Swap the croissants for gluten-free rolls to enjoy everyone’s favorite sandwich, no matter their dietary restrictions.
  • Fruit Fusion: Incorporate sliced pears or figs along with apples for an added layer of flavor and elegance. These fruits complement the tanginess beautifully.
  • Nutty Flavor: Spread a thin layer of almond or hazelnut butter on the croissant before adding the goat cheese mixture for a delightful nutty crunch.
  • Herbed Cheese: Enhance your filling by mixing in fresh herbs like basil or thyme with the goat cheese. This adds a refreshing aromatic quality!
  • Spicy Kick: Sprinkle a pinch of cayenne pepper or add sliced jalapeños to introduce a hint of heat that contrasts nicely with the sweetness of apples.
  • Savory Addition: Toss in crispy bacon or prosciutto for an irresistible savory touch that beautifully contrasts with the sandwich’s sweetness.
  • Sweet Variation: Experiment by drizzling the finished sandwich with balsamic reduction for a gourmet touch that elevates your culinary creation.

For more tantalizing sandwich ideas, check out the comforting Croissant Breakfast Sandwich or the delightful Apple Crisp Cinnamon. Happy cooking!

What to Serve with Apple & Goat Cheese Croissant Sandwich

Enhance your mealtime experience with delightful pairings that bring out the best flavors of your gourmet sandwich.

  • Crispy Green Salad: Light and refreshing, a salad with mixed greens and a zesty vinaigrette complements the richness of the sandwich. The crunch of the greens balances the creamy filling perfectly.

  • Fresh Fruit Medley: A colorful assortment of berries, melons, and citrus fruits not only adds sweetness but also a vibrant contrast to the savory flavors. Serve this alongside your sandwich for a bright, cheerful plate.

  • Herb-Infused Quinoa: This nutritious side dish adds a nutty flavor and a touch of texture, creating a wholesome meal. Seasoned with fresh herbs, it pairs beautifully with the sandwich’s sweet and tangy profile.

  • Roasted Sweet Potatoes: Warm, caramelized sweet potato wedges offer a delightful contrast with their natural sweetness and creamy texture. They make a hearty addition that feels right at home on your lunch table.

  • Sparkling Citrus Drink: A refreshing beverage with a splash of lemon or orange juice adds a bright, fizzy touch to your meal. This drink echoes the fruity elements of the sandwich while providing a thirst-quenching delight.

  • Chocolate Tart: For a sweet finish, consider a rich chocolate tart with a hint of sea salt. Its indulgent flavor contrasts the sandwich beautifully and adds a touch of sophistication to your dining experience.

Elevating the simple Apple & Goat Cheese Croissant Sandwich can turn a quick meal into a memorable culinary experience!

Make Ahead Options

These Apple & Goat Cheese Croissant Sandwiches are a fantastic choice for meal prep enthusiasts! You can prepare the goat cheese mixture up to 24 hours in advance; simply blend softened goat cheese with honey and cinnamon and store it in an airtight container in the refrigerator. Additionally, slice apples ahead of time, placing them in a bowl of water with a splash of lemon juice to prevent browning. When you’re ready to serve, assemble the sandwiches by spreading the cheese mixture on croissants, layering the apple slices, and baking in a preheated oven for 5-7 minutes. This strategy guarantees you’ll enjoy a quick, gourmet meal with minimal effort at those busy breakfast or lunch times!

Storage Tips for Apple & Goat Cheese Croissant Sandwich

Fridge: Store leftover assembled sandwiches in an airtight container for up to 2 days. Reheat in the oven for a few minutes to restore their flaky texture.

Freezer: If you’ve made extra sandwiches, wrap them tightly in plastic wrap, then aluminum foil, and freeze for up to 1 month. Thaw in the fridge before reheating.

Reheating: When ready to enjoy, bake the refrigerated or thawed sandwiches at 350°F (175°C) for approximately 5-7 minutes until warmed through and crispy.

Ingredient Storage: Keep the goat cheese mixture in the fridge for up to 3 days if prepared in advance, making it easy to whip up this delightful Apple & Goat Cheese Croissant Sandwich anytime!

Expert Tips for Apple & Goat Cheese Croissant Sandwich

  • Slicing Croissants: Use a serrated knife to slice croissants carefully, ensuring they maintain their shape and don’t get squashed.
  • Apple Thickness: Adjust the thickness of apple slices to your preference; thinner slices will provide a more pronounced crunch, while thicker ones add more substance.
  • Make Ahead: To save time, prepare the goat cheese mixture the night before and refrigerate it. Just assemble the sandwich before baking.
  • Oven Preheat: Always ensure your oven is fully preheated before baking so that your Apple & Goat Cheese Croissant Sandwich has the perfect flaky texture.
  • Fresh Ingredients: Choose the freshest apples and croissants for the best flavor and texture, elevating this quick meal into a gourmet delight.

Apple & Goat Cheese Croissant Sandwich Recipe FAQs

How do I choose the best apples for this sandwich?
Absolutely! For this sandwich, I recommend using Honeycrisp or Granny Smith apples, as they provide a delightful crunch and a balance of sweetness and tartness. Look for apples that are firm and free of dark spots or blemishes. If you’re feeling adventurous, you can also experiment with varieties like Fuji or Pink Lady for a sweeter option, or even pears for a different twist.

How should I store the assembled sandwiches?
Certainly! If you have leftover assembled Apple & Goat Cheese Croissant Sandwiches, store them in an airtight container in the refrigerator for up to 2 days. When you’re ready to enjoy them, simply reheat in the oven at 350°F (175°C) for about 5-7 minutes to restore that crispy, flaky texture.

Can I freeze the sandwiches?
Very much so! If you make extra sandwiches, wrap them tightly in plastic wrap, then aluminum foil, and freeze for up to 1 month. To reheat, let the sandwiches thaw in the refrigerator overnight, then bake them at 350°F (175°C) for approximately 5-7 minutes until they’re warm and crispy again. This way, you can enjoy a gourmet treat any time!

What can I do if my goat cheese mixture is too thick?
No worries at all! If your goat cheese mixture is too thick to spread, simply add a small splash of milk or cream to loosen it up. Mix it in until you reach a smooth, spreadable consistency. This ensures that the filling will be creamy and delightful, making your sandwich even more enjoyable.

Are there any allergy considerations for this recipe?
Absolutely! This recipe includes gluten from the croissants and dairy from the goat cheese. For those with gluten sensitivities, you can easily substitute croissants with gluten-free rolls. Additionally, if you’re allergic to dairy, consider using a vegan cream cheese alternative for a similar texture without the animal products. Always check ingredient labels to ensure safety for personal dietary needs!

Apple & Goat Cheese Croissant Sandwich

Savory Apple & Goat Cheese Croissant Sandwich for Quick Lunch

This Apple & Goat Cheese Croissant Sandwich combines sweet apples and creamy goat cheese for a quick, gourmet lunch option.
Prep Time 10 minutes
Cook Time 7 minutes
Total Time 17 minutes
Servings: 2 sandwiches
Course: Lunch
Cuisine: American
Calories: 300

Ingredients
  

For the Sandwich
  • 2 pieces Croissants Use fresh, flaky croissants for that perfect buttery texture.
  • 4 oz Goat Cheese Creamy filling, can substitute with cream cheese or cheddar.
  • 1 tablespoon Honey Adds sweetness to balance the cheese's tang; maple syrup is a lovely alternative.
  • 1 teaspoon Cinnamon Enhances flavor depth; feel free to omit or swap with nutmeg.
  • 1 cup Apples Honeycrisp or Granny Smith recommended, provides crunch and balance sweetness.
  • 1 cup Arugula Optional; adds a peppery flavor.

Equipment

  • Oven
  • Baking Sheet
  • Mixing Bowl
  • Serrated Knife

Method
 

Step-by-Step Instructions
  1. Preheat your oven to 350°F (175°C).
  2. Slice the croissants in half horizontally to create pockets.
  3. Blend the goat cheese with honey and cinnamon until smooth.
  4. Spread the goat cheese mixture on the bottom half of each croissant.
  5. Layer thinly sliced apples on top and add arugula if desired.
  6. Bake for about 5-7 minutes until golden and warm.
  7. Serve and enjoy with fresh fruit or a light salad.

Nutrition

Serving: 1sandwichCalories: 300kcalCarbohydrates: 34gProtein: 10gFat: 15gSaturated Fat: 8gCholesterol: 30mgSodium: 500mgPotassium: 200mgFiber: 2gSugar: 8gVitamin A: 500IUVitamin C: 5mgCalcium: 100mgIron: 1mg

Notes

Ensure to slice croissants carefully and use the freshest ingredients.

Tried this recipe?

Let us know how it was!

Stay Connected

Get recipes via email: