Get my cookbooks

Arugula Orange Pomegranate Salad for a Festive Crunch

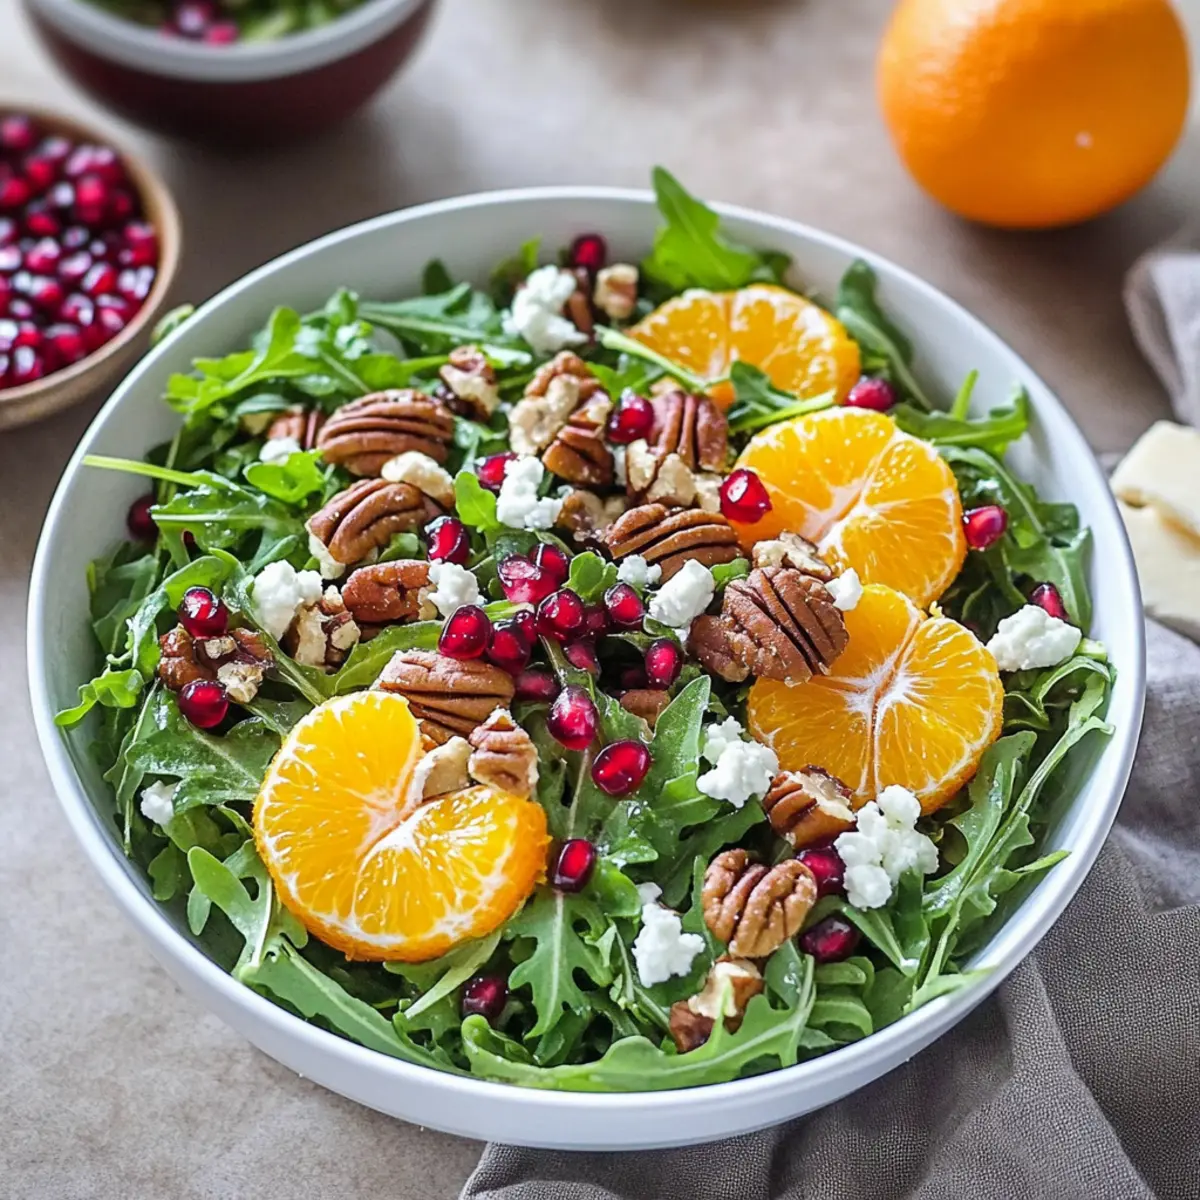
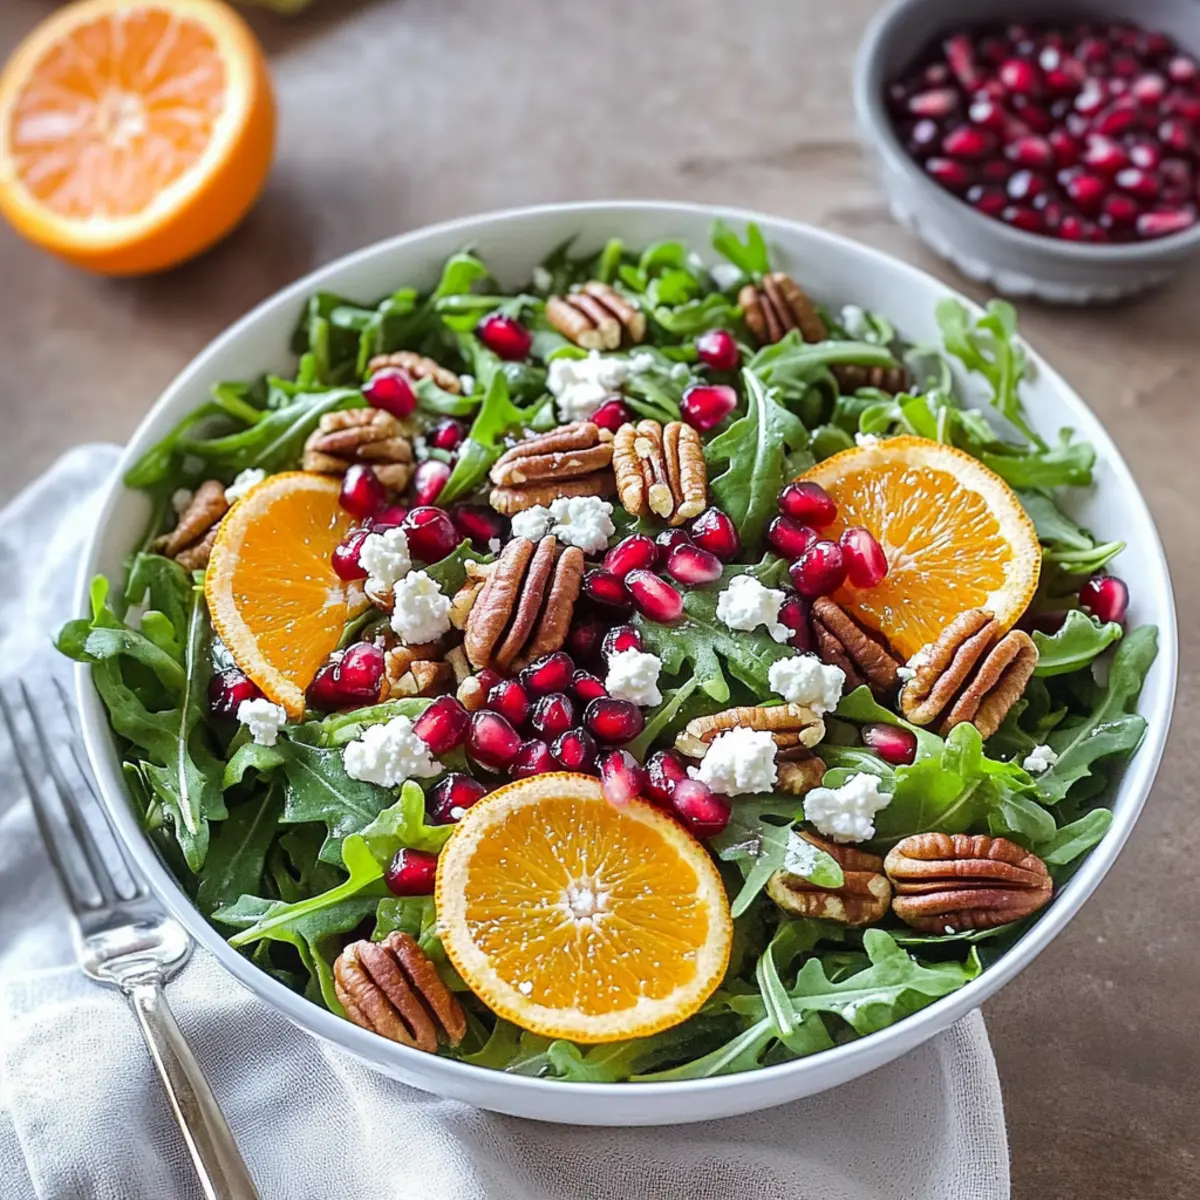
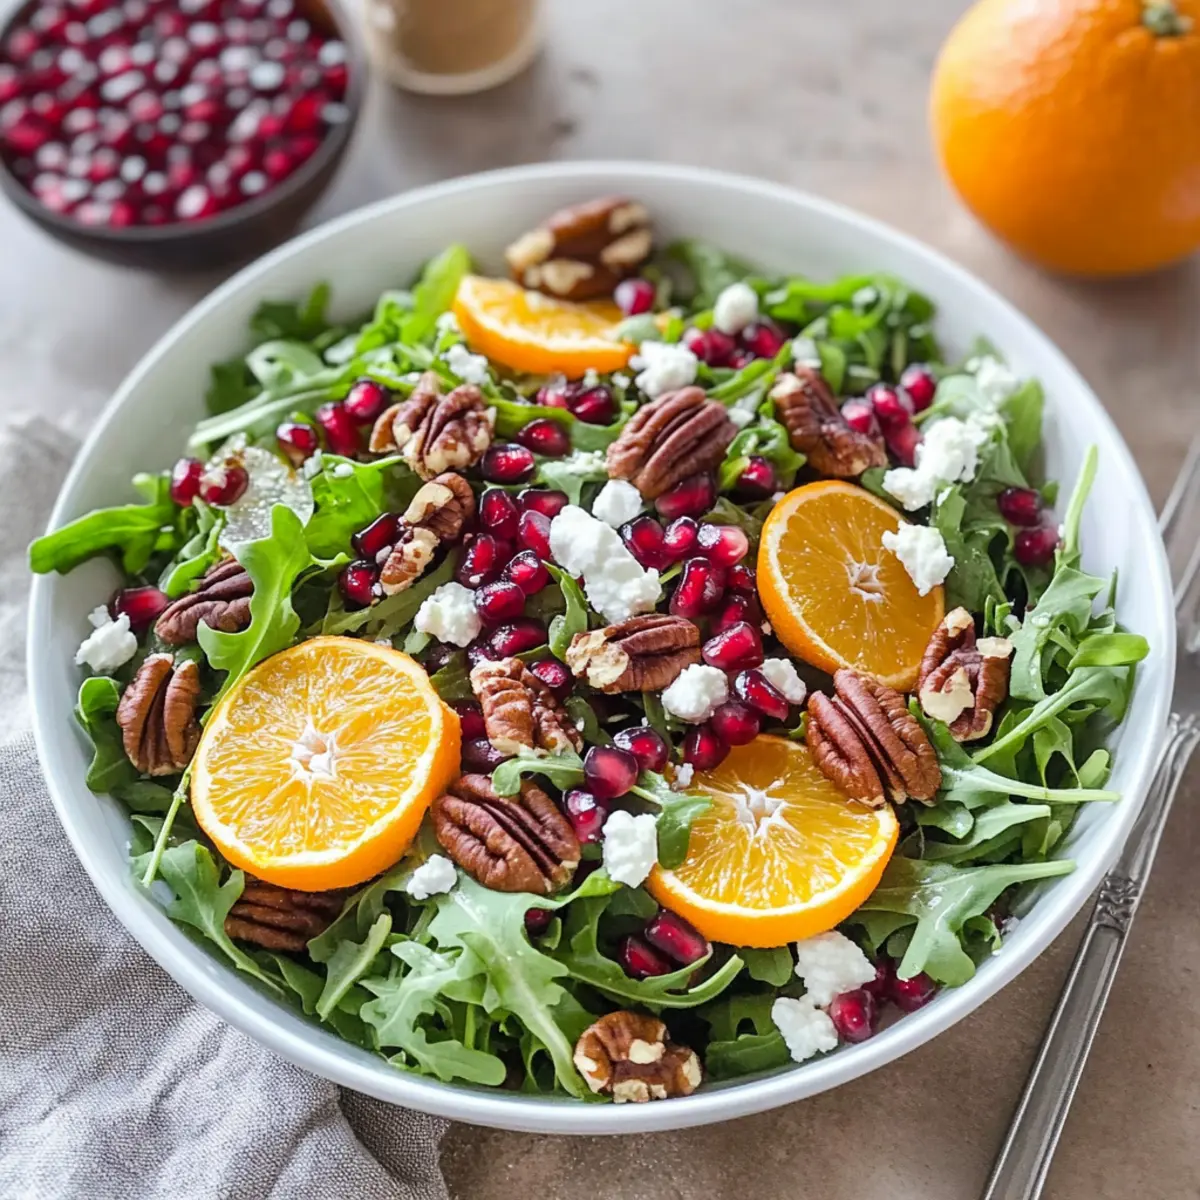
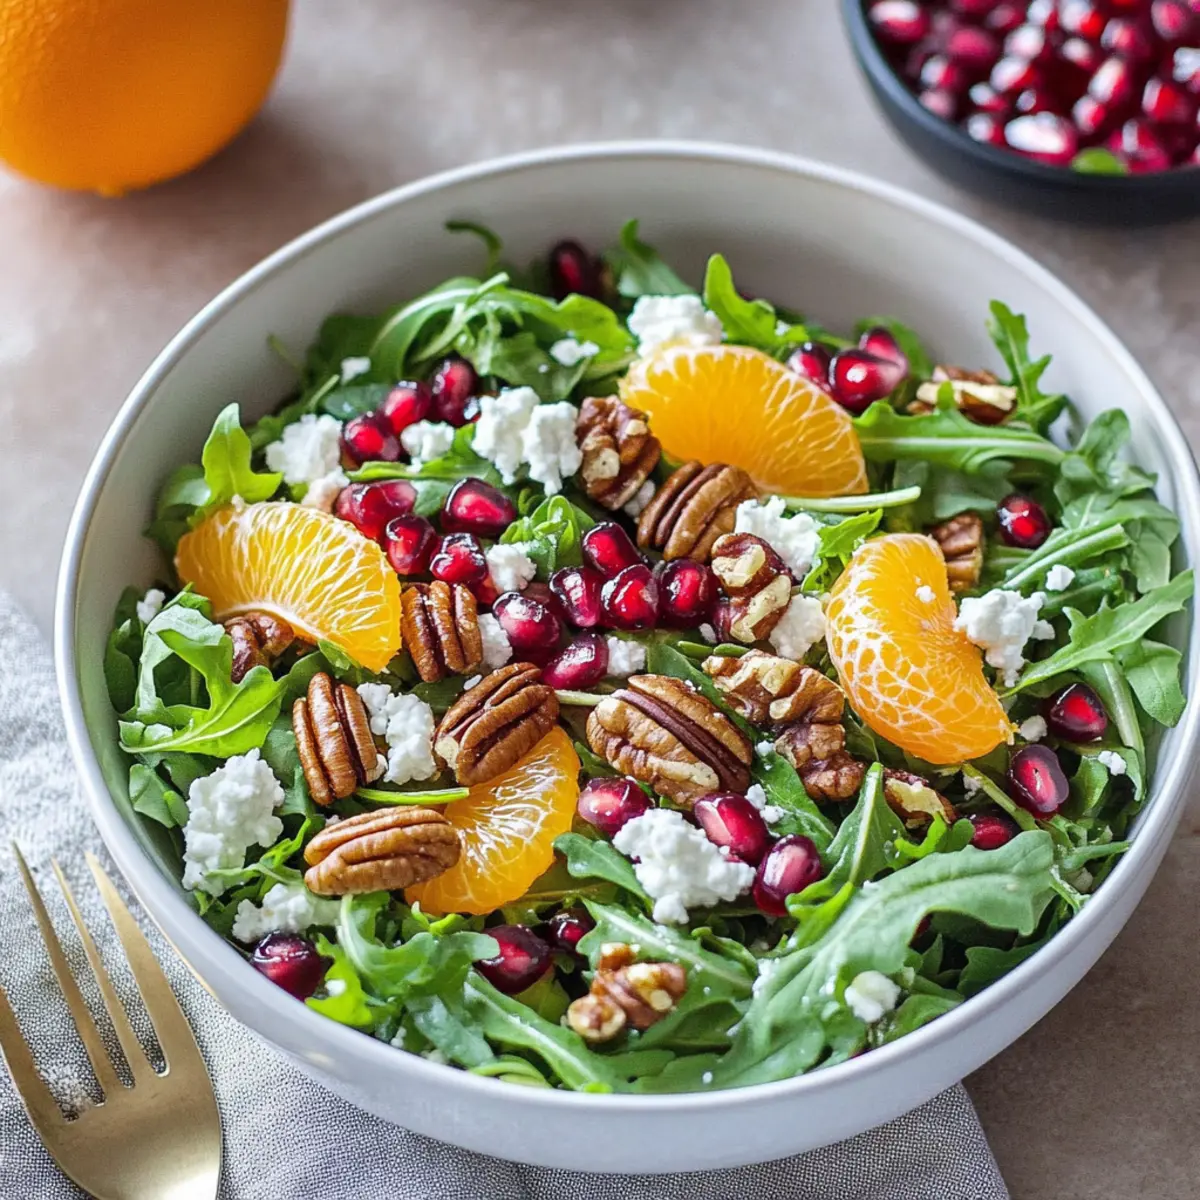
The allure of winter’s bounty always pulls me into the kitchen, and this vibrant Arugula Orange Pomegranate Salad captures the season’s magic perfectly. With a delightful mix of peppery arugula, the sweet zing of fresh oranges, and the jewel-like crunch of pomegranate seeds, this dish is both visually stunning and irresistibly fresh. Not only is it gluten-free, making it a wonderful option for various dietary needs, but it also transforms any meal into a festive occasion. Plus, the tangy pomegranate dressing adds just the right touch of brightness! Whether you’re looking to impress guests or simply want to enjoy a nutritious winter salad, this recipe is sure to deliver. Curious about how to whip this up in just a few easy steps? Let’s dive in!

Why is this salad so special?

Festive Vibrance: Packed with bright colors, this Arugula Orange Pomegranate Salad brings a cheerful touch to any table, making it perfect for the holiday season.
Nutritious Delight: Each ingredient is not only delicious but also loaded with nutrients, ensuring you enjoy a wholesome meal.
Quick and Easy: With straightforward prep steps, you can whip this salad up in no time—ideal for busy cooks!
Versatile Base: Feel free to customize with grilled chicken or quinoa for a heartier option, just as in our delicious BLT Chicken Salad.
Crowd-Pleaser: This salad’s balance of sweet, savory, and crunch appeals to all palates, making it a standout dish at any gathering.
Simple Substitutions: Mix and match ingredients to fit your taste or what’s on hand, ensuring you can make it anytime!

Arugula Orange Pomegranate Salad Ingredients

For the Salad
Pecan Pieces – Adds crunch and nutty flavor; substitute with walnuts or almonds if desired.
Arugula – Provides a peppery green base; can be replaced with spinach for a milder taste.
Clementines/Navel Orange – Offers sweetness and citrus flavors; use any sweet citrus variety as an alternative.
Pomegranate Arils – Introduces juicy bursts and a tart-sweet flavor; dried cranberries can be an alternative for a different texture.
Red Onion – Adds sharpness and color; green onions can be substituted for a milder flavor.
Goat Cheese – Contributes creaminess and tang; feta or blue cheese can be used as a substitute.

For the Dressing
Pomegranate Juice – Forms the salad dressing base with tartness; look for 100% juice with no added sugars.
Fresh Orange Juice – Enhances flavor depth; additional lemon juice could serve as a substitute.
Red Wine Vinegar – Provides acidity to the dressing; apple cider vinegar can be used instead.
Dijon Mustard – Acts as an emulsifier and adds tang; yellow mustard can be a substitute.
Extra Virgin Olive Oil – Adds richness and helps to combine dressing ingredients; other neutral oils may be substituted as needed.
Kosher Salt & Black Pepper – Enhance overall flavor as seasonings.

Step‑by‑Step Instructions for Arugula Orange Pomegranate Salad

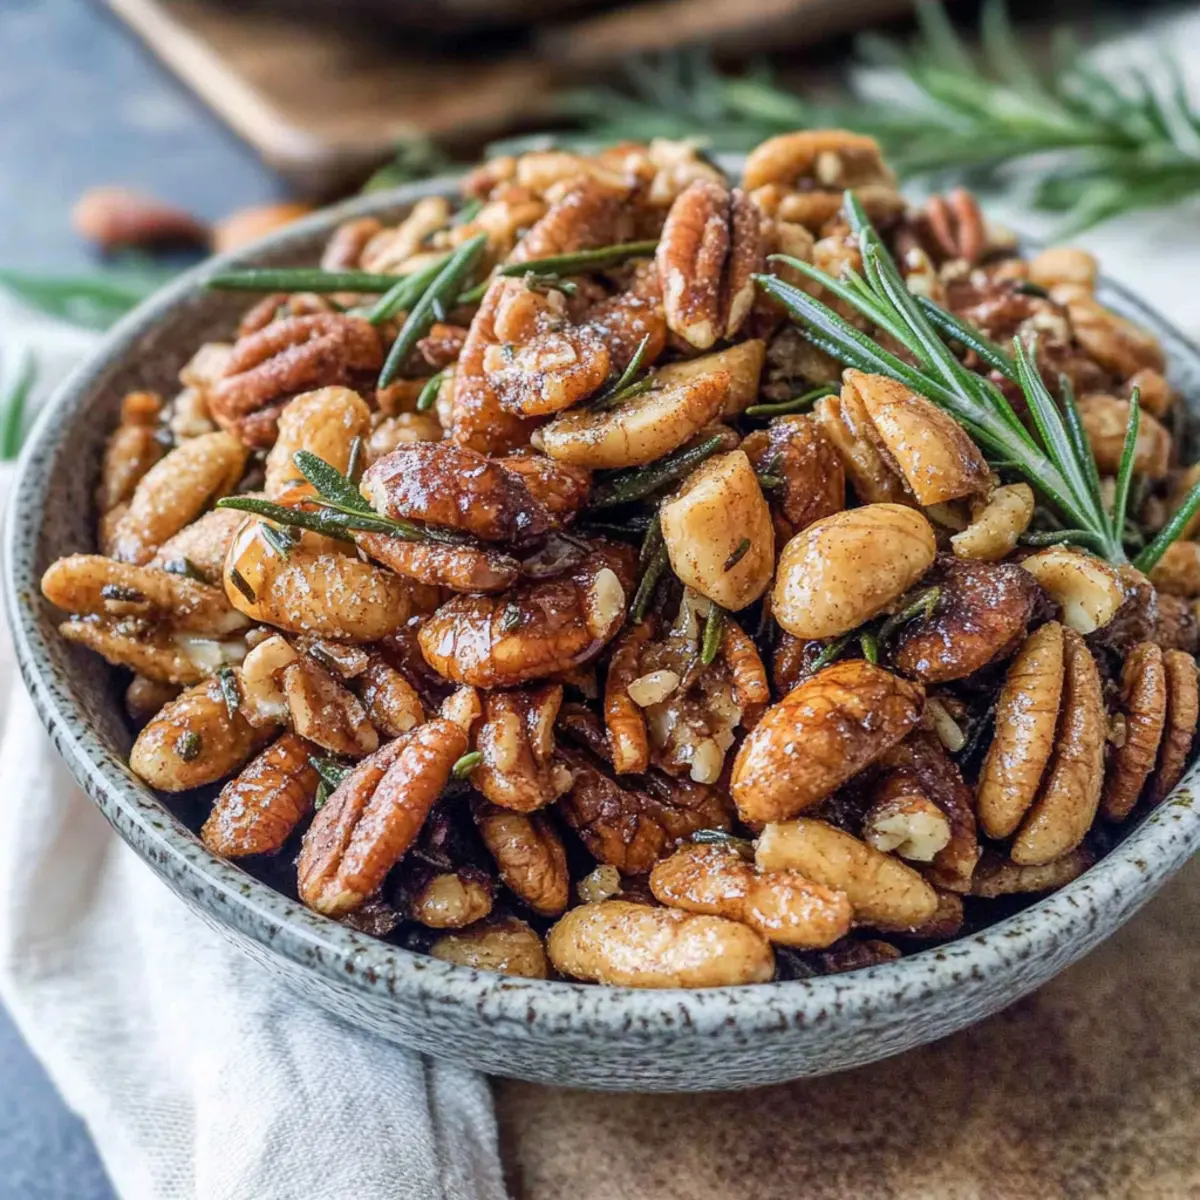
Step 1: Toast the Pecans
Preheat your oven to 350°F (175°C) and spread the pecans in a single layer on a rimmed baking sheet. Toast them for 8-10 minutes, stirring occasionally, until they become fragrant and golden brown. Keep a close eye on them to avoid burning, as toasted pecans add a delightful crunch to your Arugula Orange Pomegranate Salad.

Step 2: Prepare Salad Ingredients
While the pecans are toasting, rinse and dry the arugula, then place it in a large salad bowl. Next, peel and segment the oranges, ensuring you capture all the juicy flesh. Finally, thinly slice the red onion. Each component contributes essential flavor and color, making this salad visually appealing and nutritious.

Step 3: Make the Dressing
In a mason jar or a small bowl, combine the pomegranate juice, fresh orange juice, red wine vinegar, Dijon mustard, and extra virgin olive oil. Season with kosher salt and black pepper to taste. Secure the jar lid tightly and shake vigorously for about 30 seconds until the dressing is well emulsified and creamy, ready to complement your Arugula Orange Pomegranate Salad.

Step 4: Assemble the Salad
Once all components are prepared, add the arugula to a large serving bowl along with the segmented oranges, pomegranate arils, sliced red onion, and crumbled goat cheese. Gently toss the salad, ensuring the ingredients are well mixed, then drizzle with the desired amount of dressing. This step brings together the salad’s vibrant flavors and textures.

Step 5: Serve Immediately
To finish, transfer the salad to a serving platter and top it with the toasted pecans for added crunch. Serve your Arugula Orange Pomegranate Salad immediately for the best freshness and textural contrast. This dish is perfect for festive gatherings or as a healthy addition to any meal, delighting everyone with its colorful presentation and delicious taste.

What to Serve with Arugula Orange Pomegranate Salad

Elevate your dining experience by pairing this delightful salad with perfect complementary dishes that enhance its vibrant flavors.

  • Creamy Goat Cheese Toasts: These rich toasts are perfect for balancing the salad’s freshness and add a comforting creaminess to each bite.
  • Herb-Lemon Grilled Chicken: Juicy chicken seasoned with fresh herbs enhances the salad’s flavor while offering a satisfying protein boost.
  • Crispy Sweet Potato Fries: Their natural sweetness and crispy texture provide a delightful contrast and a hearty element that rounds out the meal.
  • Quinoa Pilaf: This fluffy, grain-based side dish harmonizes beautifully with the salad and adds a nutty depth to your plate. Combine with nuts for added crunch!
  • Sparkling Water with Lime: This refreshing drink complements the salad’s citrus notes, making every bite even more invigorating and enjoyable.
  • Chocolate-Dipped Oranges: For a sweet ending, these decadent treats resonate with the salad’s citrus components and add a festive touch that feels indulgent yet light.

Storage Tips for Arugula Orange Pomegranate Salad

Fridge: Store any leftover salad in an airtight container without dressing for up to 1 day. This helps maintain the salad’s vibrant texture and freshness.

Freezer: Although it’s best enjoyed fresh, you can freeze individual components, such as toasted pecans and dressing, for up to 3 months. However, avoid freezing the salad fully assembled.

Reheating: There’s no need to reheat this Arugula Orange Pomegranate Salad since it’s best served cold. Just toss in fresh ingredients after thawing to revive its essential flavors.

Serving Suggestions: When ready to serve, simply add the dressing, toss everything together gently, and enjoy!

Make Ahead Options

These Arugula Orange Pomegranate Salads are perfect for busy meal prep enthusiasts! You can wash and dry the arugula, segment the oranges, and slice the red onion up to 24 hours in advance. For the best flavor and freshness, store these components separately in airtight containers in the refrigerator. Additionally, the dressing can be mixed ahead of time and stored in the fridge for up to 3 days—just give it a good shake before using. When ready to serve, simply toss the prepped ingredients in a bowl, add the dressing, and top with toasted pecans for that delightful crunch. This way, you’ll have a dazzling salad ready in no time!

Arugula Orange Pomegranate Salad Variations

Feel free to get creative and make this Arugula Orange Pomegranate Salad uniquely yours!

  • Grain Swap: Replace pecans with quinoa or farro for a heartier base, adding a delightful chewiness.
    Embrace the versatility of this recipe—grains elevate texture and deliver extra nutrients, making your salad more filling.

  • Fruity Additions: Diced apples or pears will add another layer of sweetness and crunch, enhancing the salad’s freshness.
    Consider mixing in some thin slices of apple for contrast; their crispness pairs beautifully with tangy flavors.

  • Protein Boost: Add shredded rotisserie chicken or chickpeas for a satisfying protein element, perfect for a main dish.
    Chicken or chickpeas transform this salad into a filling meal, ensuring you leave the table satisfied.

  • Cheese Variations: Swap goat cheese for feta or blue cheese to give a different flavor profile that complements the fresh ingredients.
    Feta adds a salty tang, while blue cheese brings a rich creaminess that blends wonderfully with the arugula.

  • Nut Alternative: If allergies are a concern, swap pecans with sunflower seeds or pumpkin seeds for a nut-free delight.
    Seeds not only provide great texture but also still embody the crunch factor that makes the salad enjoyable.

  • Dressing Twists: Experiment with honey or maple syrup in your dressing for a hint of sweetness that balances the tart elements.
    Balanced dressing creates harmony in flavors, and a touch of sweetness works wonders with the pomegranate!

  • Heat Index: For a spicier kick, sprinkle in some crushed red pepper flakes to your pomegranate dressing.
    Heat adds excitement to the dish, making every bite a balanced adventure of flavors, while still maintaining the fresh taste.

  • Herb Infusion: Incorporate fresh herbs like mint or basil for an aromatic twist that brightens the entire salad experience.
    These herbs add a refreshing layer that complements the citrus and pomegranate, making it feel extra exciting.

With these variations, you can enjoy your own twist on the festive Arugula Orange Pomegranate Salad. Looking for a heartier meal? Consider pairing it with a comforting bowl of Blt Chicken Salad. You can truly create a culinary masterpiece!

Expert Tips for Arugula Orange Pomegranate Salad

  • Prep Ahead: Prepare individual salad components in advance, but only mix them just before serving. This maintains freshness and the salad’s delightful crunch.
  • Careful Toasting: Monitor pecans closely while toasting to prevent burning; the perfect pecan adds enhanced flavor and texture to your Arugula Orange Pomegranate Salad.
  • Dressing Control: Start by adding a small amount of dressing, tossing gently to combine. You can always add more if needed, preventing overdressing.
  • Pomegranate Pearls: Deseed pomegranates ahead of time to save on prep time; this way, you’ll have juicy arils ready to go for your salad.
  • Flavor Balance: Adjust the dressing salt and acidity to your preference; a well-balanced dressing elevates the flavors without overwhelming them.
  • Substitution Flexibility: Don’t hesitate to swap ingredients based on what you have at home; the Arugula Orange Pomegranate Salad can easily adapt!

Arugula Orange Pomegranate Salad Recipe FAQs

How should I choose ripe oranges for this salad?
Absolutely! Look for oranges that are firm with a slight give when gently squeezed. The skin should be smooth and shiny, without any dark spots or blemishes. If you’re opting for clementines, choose ones that feel heavy for their size—they hold more juice and sweetness, perfect for enhancing your Arugula Orange Pomegranate Salad.

What is the best way to store leftovers?
Very important! To keep your Arugula Orange Pomegranate Salad fresh, store any leftovers in an airtight container in the fridge for up to 1 day without dressing. Dress it just before serving to maintain the crunch of the arugula and the juiciness of the pomegranate arils.

Can I freeze any ingredients from this salad?
While it’s best enjoyed fresh, you can freeze individual components. For instance, toasted pecans and the salad dressing can be frozen in airtight containers for up to 3 months. Just be sure to thaw them in the refrigerator before using. Avoid freezing the fully assembled salad, as the textures will not hold up well.

What if my pomegranate arils are not as sweet as I’d like?
No worries! If your pomegranate arils lack sweetness, mix in a touch of honey or a sprinkle of sugar into the dressing to enhance that delightful tart-sweet flavor. You can also use dried cranberries as a substitute for a little added texture and sweetness, which can beautifully complement the other ingredients in your Arugula Orange Pomegranate Salad.

Are there any dietary considerations for this salad?
Very much so! This recipe is naturally gluten-free and can be adapted for various dietary preferences. If you have guests with nut allergies, simply omit the pecans and consider adding sunflower seeds for crunch. Additionally, to accommodate dairy-free diets, swap out goat cheese for a dairy-free alternative or simply leave it out entirely.

How can I prevent my salad from becoming soggy?
Certainly! To prevent the Arugula Orange Pomegranate Salad from becoming soggy, keep the dressing separate and only toss it in just before serving. Also, ensure that your arugula is completely dry after washing, as moisture can lead to wilting. Using a salad spinner is a great trick to ensure all excess water is removed!

Arugula Orange Pomegranate Salad

Arugula Orange Pomegranate Salad for a Festive Crunch

This Arugula Orange Pomegranate Salad is a vibrant, gluten-free dish that combines peppery arugula, sweet oranges, and tart pomegranate for a festive crunch.
Prep Time 15 minutes
Cook Time 10 minutes
Total Time 25 minutes
Servings: 4 servings
Course: Salad
Cuisine: American
Calories: 300

Ingredients
  

For the Salad
  • 1 cup Pecan Pieces Adds crunch and nutty flavor; substitute with walnuts or almonds if desired.
  • 4 cups Arugula Provides a peppery green base; can be replaced with spinach for a milder taste.
  • 2 Clementines/Navel Orange Offers sweetness and citrus flavors; use any sweet citrus variety as an alternative.
  • 1 cup Pomegranate Arils Introduces juicy bursts and a tart-sweet flavor; dried cranberries can be an alternative for a different texture.
  • 1/4 cup Red Onion Adds sharpness and color; green onions can be substituted for a milder flavor.
  • 3/4 cup Goat Cheese Contributes creaminess and tang; feta or blue cheese can be used as a substitute.
For the Dressing
  • 1/2 cup Pomegranate Juice Forms the salad dressing base with tartness; look for 100% juice with no added sugars.
  • 1/4 cup Fresh Orange Juice Enhances flavor depth; additional lemon juice could serve as a substitute.
  • 2 tablespoons Red Wine Vinegar Provides acidity to the dressing; apple cider vinegar can be used instead.
  • 1 tablespoon Dijon Mustard Acts as an emulsifier and adds tang; yellow mustard can be a substitute.
  • 1/3 cup Extra Virgin Olive Oil Adds richness and helps to combine dressing ingredients; other neutral oils may be substituted as needed.
  • to taste Kosher Salt Enhance overall flavor as seasonings.
  • to taste Black Pepper Enhance overall flavor as seasonings.

Equipment

  • Oven
  • large salad bowl
  • Mason jar

Method
 

Step-by-Step Instructions
  1. Preheat your oven to 350°F (175°C) and spread the pecans in a single layer on a rimmed baking sheet. Toast them for 8-10 minutes, stirring occasionally, until they become fragrant and golden brown.
  2. While the pecans are toasting, rinse and dry the arugula, then place it in a large salad bowl. Peel and segment the oranges, ensuring you capture all the juicy flesh. Thinly slice the red onion.
  3. In a mason jar or a small bowl, combine the pomegranate juice, fresh orange juice, red wine vinegar, Dijon mustard, and extra virgin olive oil. Season with kosher salt and black pepper. Shake vigorously until emulsified.
  4. Add the arugula to a large serving bowl along with the segmented oranges, pomegranate arils, sliced red onion, and crumbled goat cheese. Gently toss the salad.
  5. Transfer the salad to a serving platter and top it with the toasted pecans for added crunch. Serve immediately.

Nutrition

Serving: 1servingCalories: 300kcalCarbohydrates: 25gProtein: 7gFat: 20gSaturated Fat: 5gPolyunsaturated Fat: 4gMonounsaturated Fat: 10gCholesterol: 15mgSodium: 150mgPotassium: 350mgFiber: 4gSugar: 10gVitamin A: 500IUVitamin C: 60mgCalcium: 150mgIron: 2mg

Notes

Prepare individual salad components in advance but only mix them just before serving to maintain freshness.

Tried this recipe?

Let us know how it was!

Irresistible Red Velvet Brownies with Creamy Cheesecake Swirl

The vibrant red of these Red Velvet Brownies beckons me to the kitchen, conjuring memories of festive gatherings filled with laughter and indulgence. What makes this dessert so special is its harmonious blend of rich chocolate and creamy cheesecake, creating a harmonious swirl that’s both visually stunning and utterly delicious. This easy-to-make recipe is perfect for celebrating Christmas or Valentine’s Day, making it a lovely surprise for any loved one—or even a delightful treat for yourself! Plus, they offer a unique twist on a classic favorite that’s sure to impress. Are you ready to dive into a world of chocolatey goodness and create a showstopping dessert that will leave everyone asking for seconds?

Why Are These Brownies Irresistible?

Decadent, creamy goodness: These Red Velvet Brownies boast a luscious cheesecake swirl that elevates them to dessert royalty.

Easy to make: With just a few simple steps, this recipe is perfect for bakers of all skill levels.

Visually stunning: The vibrant red color provides an eye-catching dessert that brings festive cheer to any gathering.

Perfect for any occasion: Whether it’s Christmas or Valentine’s Day, they are sure to impress guests and loved ones alike.

Delightfully versatile: Feel free to explore variations like fudgy matcha brownies or peppermint brownies for a fun twist! Check out our Cajun Steak Alfredo for another festive dish that complements this sweet treat!

Irresistible crowd-pleaser: With flavors and textures everyone loves, these brownies will keep your guests coming back for more!

Red Velvet Brownies Ingredients

For the Brownie Base

  • Unsalted Butter – Provides richness and moisture; remember to melt before mixing for the best texture.
  • Granulated Sugar – Sweetens the brownies and contributes to their delightful texture.
  • Vanilla Extract – Enhances the overall flavor profile beautifully.
  • Unsweetened Cocoa Powder – Adds a subtle chocolate flavor that pairs perfectly with red velvet.
  • Salt – Balances sweetness and elevates all the flavors in the mix.
  • Liquid Food Coloring – Gives these brownies their signature red hue; gel food coloring is a great substitute if you desire a more concentrated color.
  • White Vinegar – Adds acidity, enhancing the red color and balancing sweetness; white balsamic works too!
  • Large Eggs – Essential for binding the ingredients and creating structure.
  • All-Purpose Flour – The key component for building structure in these scrumptious brownies.

For the Cheesecake Layer

  • Cream Cheese – Creates a luscious, creamy layer; ensure it’s softened for easy mixing.
  • Granulated Sugar – Sweetens the cheesecake layer, harmonizing with the brownie base.
  • Large Egg – Helps bind the cheesecake ingredients together for a smooth texture.
  • Vanilla Extract – Enhances the flavor of the cheesecake, making it even more delicious.

For the Topping

  • Semi-Sweet Chocolate Chips – Adds extra chocolatey goodness and delightful texture to the brownies; feel free to swap for white chocolate chips for a unique spin!

These Red Velvet Brownies are a wonderful blend of flavors and textures, making them a festive dessert perfect for any gathering—especially during Christmas and Valentine’s Day!

Step‑by‑Step Instructions for Irresistible Red Velvet Brownies with Creamy Cheesecake Swirl

Step 1: Preheat the Oven
Begin by preheating your oven to 350°F (175°C). While the oven is heating, grease an 8×8-inch baking pan with cooking spray or butter to ensure your Red Velvet Brownies release easily once baked. This step is crucial for achieving that perfect, gooey texture later.

Step 2: Prepare the Brownie Base
In a medium saucepan, melt ½ cup of unsalted butter over low heat. Once melted, remove it from the heat and whisk in 1 cup of granulated sugar, 1 teaspoon of vanilla extract, 1 teaspoon of unsweetened cocoa powder, a pinch of salt, several drops of liquid food coloring, and 1 teaspoon of white vinegar. Mix until smooth, and then add 2 large eggs, stirring until fully combined. Finally, fold in 1 cup of all-purpose flour just until mixed for a rich brownie base.

Step 3: Reserve Some Batter
After mixing all the ingredients for your brownie base, scoop out 4 tablespoons of the batter and set it aside in a small bowl. This reserved batter will be used later to create a delightful swirl on top of your brownies, enhancing both appearance and flavor.

Step 4: Assemble the Base Layer
Pour the remaining brownie batter into the prepared baking pan, spreading it evenly with a spatula. Make sure the layer is smooth and reaches the corners of the pan. This sets the foundation for your Red Velvet Brownies, ensuring a perfectly baked bottom layer that’s rich and fudgy.

Step 5: Make the Cheesecake Layer
In a medium bowl, beat together 8 ounces of softened cream cheese, ¼ cup of sugar, 1 large egg, and 1 teaspoon of vanilla extract until the mixture is smooth and creamy. This cheesecake layer adds a luxurious texture and flavor to your brownies, so take your time to ensure it’s well combined and free of lumps.

Step 6: Combine the Layers
Dollop the cheesecake mixture over the brownie batter in the baking pan, allowing it to sit in spaced-out mounds. Next, take the reserved brownie batter and spoon it in small dollops over the cheesecake layer. This layering provides those delightful swirls you’ll see once the brownies are baked.

Step 7: Swirl for Effect
Using a knife or a toothpick, gently swirl the cheesecake and brownie layers together, creating a marbled effect. Aim for a balance of both batters in each swirl to achieve a beautiful contrast once baked. This step will help the flavors meld beautifully as it bakes in the oven.

Step 8: Bake the Brownies
Place the assembled pan in the preheated oven. Bake for 20-25 minutes, or until a toothpick inserted in the center comes out with moist crumbs but no wet batter. Keep a close eye as they bake; the top should look set but still have a slight jiggle when you gently shake the pan.

Step 9: Cool and Serve
Once baked, remove your Red Velvet Brownies from the oven and let them cool in the pan on a wire rack. Allow them to cool completely before slicing into squares. This cooling time lets the layers set and ensures that each piece holds its shape, revealing that stunning swirl when served.

Make Ahead Options

These Red Velvet Brownies are a fantastic choice for meal prep, allowing you to enjoy the baking experience now while saving time later! You can prepare the brownie base and cheesecake layer up to 24 hours in advance, just be sure to keep them refrigerated in separate airtight containers. When you’re ready to bake, simply pour the brownie base into the pan, dollop on the cheesecake layer, and swirl as directed before baking. This method not only saves you time but helps maintain the brownies’ super moist texture. Just remember to allow them to cool completely before slicing to ensure that perfect presentation for your festive gatherings!

Red Velvet Brownies Variations

Feel free to play with flavors and textures; these ideas will help you create your own perfect twist on this classic treat!

  • White Chocolate: Swap semi-sweet chocolate chips for white chocolate to add a creamy sweetness that complements the red velvet.

  • Espresso Boost: Add a teaspoon of espresso powder to the brownie mix for a delightful coffee undertone that enhances the chocolate flavor. It’ll become your new favorite!

  • Peanut Butter Swirl: Replace the cream cheese layer with peanut butter for a heavenly combo that brings a nutty richness to each bite.

  • Minty Freshness: Add a few drops of peppermint extract to the cheesecake layer for a refreshing twist—perfect for holiday gatherings! Pair it with our Cajun Steak Alfredo for a delicious meal.

  • Fudgy Matcha: For an earthy twist, replace half of the cocoa powder with matcha powder in the brownie base. The vibrant color will surprise and delight!

  • Nutty Crunch: Toss in chopped nuts, like pecans or walnuts, to the brownie batter for an added crunch. The textures will elevate your experience even more.

  • Fruit Infusion: Add a layer of raspberry or strawberry preserves beneath the cheesecake layer for a fruity touch that brightens the flavor profile.

Exploring these variations can lead to delicious discoveries, making your Red Velvet Brownies a true reflection of your taste!

Expert Tips for Red Velvet Brownies

  • Room Temperature Cream Cheese: Ensure your cream cheese is at room temperature to mix smoothly and achieve a creamy cheesecake layer.

  • Careful Mixing: Avoid over-mixing the brownie batter after adding the flour; this keeps the brownies beautifully tender.

  • Swirling Technique: Don’t be afraid to swirl! Use a knife to create marbled patterns; it beautifully enhances the presentation of your Red Velvet Brownies.

  • Monitor Baking Time: Every oven is different. Check your brownies a few minutes early with a toothpick for the perfect baked texture—moist crumbs but no wet batter.

  • Storage Secrets: To keep brownies fresh, store them in an airtight container at room temperature for up to 3 days, or refrigerate for up to a week.

How to Store and Freeze Red Velvet Brownies

Room Temperature: Store brownies in an airtight container at room temperature for up to 3 days to maintain their fudgy texture.

Fridge: For longer freshness, refrigerate the brownies in an airtight container for up to 1 week. This can enhance the cream cheese flavor over time.

Freezer: Freeze brownies by wrapping them individually in plastic wrap, then placing them in a sealed freezer bag. They can last for up to 3 months in the freezer.

Reheating: For a warm treat, reheat a brownie in the microwave for about 10-15 seconds; topped with a scoop of ice cream, it becomes an indulgent dessert experience!

What to Serve with Decadent Red Velvet Cheesecake Brownies

Nothing pairs better with these delightful brownies than the right accompaniments to elevate your dessert experience!

  • Vanilla Ice Cream: The creamy, cool richness of vanilla ice cream beautifully complements the fudgy texture of the brownies, creating a heavenly contrast. A scoop on top transforms every bite into an indulgent delight!

  • Fresh Berries: Bright, tangy berries like raspberries or strawberries add a burst of freshness, making the flavors pop. Their natural sweetness enhances the rich chocolate notes, balancing each forkful.

  • Chocolate Sauce: Drizzling warm chocolate sauce over each serving takes the decadence to the next level. This luscious addition enhances the chocolatey goodness, making every piece more irresistible!

  • Whipped Cream: Light and fluffy whipped cream adds a sweet, airy element that plays well with the dense brownies. It’s a classic pairing that lightens up the experience without overshadowing the rich flavors.

  • Milk or Coffee: A tall glass of cold milk or a warm cup of coffee perfectly complements the sweetness of the brownies. The creamy or bitter notes balance the richness, ensuring each bite is enjoyable.

  • Chocolate-Covered Strawberries: For a romantic touch, serve these brownies alongside chocolate-covered strawberries. This combination adds a festive feel, making them perfect for special occasions like Valentine’s Day.

These wonderful pairings not only enhance the enjoyment of your Red Velvet Brownies but also create a memorable dessert experience for everyone gathered around the table!

Red Velvet Brownies Recipe FAQs

How do I choose the right food coloring for my brownies?
Absolutely! For the best results, I recommend using liquid food coloring as it mixes easily into the batter. If you prefer a more intense color, gel food coloring works wonders too—just remember to use a smaller amount, as it’s more concentrated. Aim for a vibrant red hue without any unnatural flavors in the final product!

What is the best way to store leftover brownies?
To keep your delicious Red Velvet Brownies fresh, store them in an airtight container at room temperature for up to 3 days. If you want them to last a bit longer, transferring them to the refrigerator can extend their shelf life up to 1 week. The cool temperature can even enhance the cheesecake flavor, making each bite a delightful surprise!

Can I freeze my Red Velvet Brownies for later?
Absolutely! To freeze your brownies, first let them cool completely. Then, wrap each brownie individually in plastic wrap and place them in a sealed freezer bag. They can last for up to 3 months in the freezer. When you’re ready to enjoy them, simply thaw overnight in the fridge or microwave for a quick 10-15 seconds for a warm, fudgy treat!

What should I do if my brownies turn out dry?
If you find your brownies are dry, don’t be discouraged! This typically happens when they are over-baked. To prevent this, ensure you check for doneness a few minutes before the timer goes off, looking for moist crumbs on a toothpick inserted into the center. If they’re still underdone, you can always bake them a bit more, but keep a close eye to avoid overcooking!

Are these brownies safe for people with allergies?
It’s essential to consider dietary needs! The Red Velvet Brownies contain gluten and dairy, so they are not suitable for those with gluten intolerance or a dairy allergy. However, feel free to substitute gluten-free flour and a dairy-free cream cheese alternative. I often make modifications to suit my loved ones’ tastes, and it works beautifully!

Red Velvet Brownies

Irresistible Red Velvet Brownies with Creamy Cheesecake Swirl

These Red Velvet Brownies feature a rich chocolate flavor and a creamy cheesecake swirl, perfect for festive gatherings and celebrations.
Prep Time 20 minutes
Cook Time 25 minutes
Cooling Time 30 minutes
Total Time 1 hour 15 minutes
Servings: 16 slices
Course: Dessert
Cuisine: American
Calories: 250

Ingredients
  

For the Brownie Base
  • 0.5 cups Unsalted Butter Melted before mixing
  • 1 cups Granulated Sugar
  • 1 teaspoon Vanilla Extract
  • 1 teaspoon Unsweetened Cocoa Powder
  • pinch Salt
  • several drops Liquid Food Coloring Gel food coloring is a great substitute
  • 1 teaspoon White Vinegar White balsamic works too
  • 2 large Large Eggs Essential for binding
  • 1 cups All-Purpose Flour
For the Cheesecake Layer
  • 8 ounces Cream Cheese Softened for easy mixing
  • 0.25 cups Granulated Sugar
  • 1 large Large Egg
  • 1 teaspoon Vanilla Extract
For the Topping
  • 1 cup Semi-Sweet Chocolate Chips Can swap for white chocolate chips

Equipment

  • 8x8 inch baking pan
  • medium saucepan
  • medium bowl
  • spatula
  • whisk
  • Knife or Toothpick

Method
 

Step-by-Step Instructions
  1. Preheat the oven to 350°F (175°C). Grease an 8x8-inch baking pan.
  2. Melt the unsalted butter, then mix with sugar, vanilla, cocoa, salt, food coloring, vinegar, and eggs. Fold in flour.
  3. Reserve 4 tablespoons of the brownie batter for later.
  4. Pour the brownie batter into the baking pan, smoothing it evenly.
  5. Beat cream cheese, sugar, egg, and vanilla in a bowl until smooth for the cheesecake layer.
  6. Dollop the cheesecake mixture over the brownie batter, then add reserved brownie batter in dollops.
  7. Use a knife to swirl the cheesecake and brownie layers together.
  8. Bake in the preheated oven for 20-25 minutes or until a toothpick comes out with moist crumbs.
  9. Cool the brownies in the pan on a wire rack before slicing.

Nutrition

Serving: 1sliceCalories: 250kcalCarbohydrates: 30gProtein: 3gFat: 13gSaturated Fat: 7gPolyunsaturated Fat: 1gMonounsaturated Fat: 5gCholesterol: 50mgSodium: 150mgPotassium: 120mgFiber: 1gSugar: 22gVitamin A: 400IUCalcium: 50mgIron: 1mg

Notes

Ensure cream cheese is room temperature for easy mixing. Store brownies in an airtight container at room temperature for up to 3 days or refrigerate for a week.

Tried this recipe?

Let us know how it was!

Creamy Chocolate Peanut Butter Fudge You Can Make No-Bake

When the craving for something sweet strikes, I often find myself at the crossroads of time and taste. That’s where my Ultimate No-Bake Chocolate Peanut Butter Fudge comes in, a delightful solution that brings together the rich flavors of dark chocolate and creamy peanut butter, all in an effortless recipe. With just five simple ingredients and minimal prep time, this treat is not only gluten-free but also perfect for those moments when you need a quick dessert fix without turning on the oven. Picture this: a fudgy texture that melts in your mouth, topped with a satisfying crunch from salted peanuts—talk about a treat that’s sure to impress! Are you ready to make this effortless dessert that everyone will adore? Let’s dive in!

Why is this recipe a must-try?

Simplicity at Its Best: This no-bake recipe means you can whip up a decadent dessert without any complex techniques or heated kitchens.

Quick and Easy: With just 5 ingredients and under 20 minutes of prep, you can satisfy your sweet cravings in no time!

Irresistible Flavor: The luscious combination of dark chocolate and creamy peanut butter creates a flavor experience that will leave your taste buds tingling.

Crowd-Pleasing Treat: Perfect for gatherings or as a gift, this fudge is sure to impress family and friends alike.

Versatile Enjoyment: Feel free to experiment with other nut butters or add-ins, like mini marshmallows or shredded coconut, to customize your fudge!

No Guilt Indulgence: Being gluten-free, this treat can be enjoyed by many, making it the ideal choice for those on special diets.

Pair it with some Cajun Honey Butter for a delightful meal, or enjoy alongside Chocolate Fudge Cupcakes for the ultimate dessert spread!

Chocolate Peanut Butter Fudge Ingredients

For the Fudge

  • Dark Chocolate Chips – These provide a rich chocolate flavor and structure; for a different sweetness level, you can use semi-sweet or milk chocolate chips instead.
  • Coconut Oil – Adds creaminess and helps bind the melted ingredients; unsalted butter can also work as a substitute if needed.
  • Sweetened Condensed Milk – Acts as a sweetener and emulsifier, making the fudge-making process a breeze; no substitutions are advised here.
  • Peanut Butter – Offers a creamy texture that pairs beautifully with chocolate; consider swapping it for almond or cashew butter for a unique twist.
  • Chopped Salted Peanuts – These add a delightful crunch and a savory contrast to the sweetness; you can omit them or try other nuts if you prefer.

In just a few easy steps, you can create this irresistible Chocolate Peanut Butter Fudge that will become a go-to favorite in your household!

Step‑by‑Step Instructions for Chocolate Peanut Butter Fudge

Step 1: Prepare the Pan
Begin by lining an 8×8 inch square baking pan with aluminum foil, allowing some overhang on the edges for easy removal later. Lightly coat the foil with cooking spray to prevent sticking. This simple prep will ensure your Chocolate Peanut Butter Fudge comes out effortlessly once it’s set.

Step 2: Melt Chocolate
In a double boiler over simmering water, combine 1 cup of dark chocolate chips with 1 tablespoon of coconut oil and half of the sweetened condensed milk. Stir continuously for about 3-5 minutes until the mixture is completely melted and smooth. Once melted, fold in ¼ cup of chopped salted peanuts for that irresistible crunch and flavor.

Step 3: Set Layer
Carefully pour the melted chocolate mixture into the prepared pan, using a spatula to spread it evenly across the bottom. Gently tap the pan on the countertop to remove air bubbles and ensure a level surface. Allow the chocolate layer to cool for about 10 minutes while you prepare the peanut butter layer.

Step 4: Prepare Peanut Butter Layer
In a microwave-safe bowl, combine the remaining peanut butter with 1 tablespoon of coconut oil and the rest of the sweetened condensed milk. Microwave on high for 20-second intervals, stirring in between, until the mixture is fully melted and blended—about 1-2 minutes total. The creamy consistency should be smooth and easily pourable.

Step 5: Combine Layers
Pour the melted peanut butter mixture over the cooled chocolate layer in the baking pan, spreading it evenly with a spatula. Make sure to cover the entire chocolate base for a beautiful, layered effect in your Chocolate Peanut Butter Fudge.

Step 6: Top and Chill
Sprinkle the remaining chocolate chips and chopped salted peanuts generously over the peanut butter layer, gently pressing them into the fudge. Place the pan in the refrigerator and chill for at least 2 hours, or until the fudge is firm and set.

Step 7: Cut and Serve
Once set, lift the fudge out of the pan using the foil overhang. Carefully remove the foil and place the fudge on a cutting board. Using a sharp knife, cut the fudge into squares, showcasing those beautiful layers. Your delectable Chocolate Peanut Butter Fudge is now ready to be shared and enjoyed!

Chocolate Peanut Butter Fudge Variations

Feel free to get creative with this chocolate peanut butter fudge and make it your own!

  • Nut-Free: Substitute peanut butter with sunflower seed butter for a safe and allergen-friendly option.
  • Crunch Factor: Mix in some crushed graham crackers for a delightful crunch and a hint of nostalgia.
  • Flavor Boost: Add a dash of vanilla or almond extract to the melted chocolate for an elevated flavor profile.
  • Minty Fresh: Incorporate mint extract into the chocolate layer for a refreshing twist that delights the senses.
  • Dairy-Free: Use dairy-free chocolate chips and nut butter to craft a vegan version of this indulgent treat.
  • Sweet and Spicy: Sprinkle in some cayenne pepper or chili powder for a surprising kick that complements the chocolate and peanut butter beautifully.
  • Add a Fruit Layer: Swirl in some fruit preserves like raspberry or strawberry between layers for a fruity surprise in every bite.

No matter how you decide to customize, every variation brings a new adventure to this beloved fudge! If you’re feeling extra inspired, you might try serving it alongside some delightful Chocolate Fudge Cupcakes or even enjoy it with a savory dish like Cajun Honey Butter to strike a perfect balance.

Storage Tips for Chocolate Peanut Butter Fudge

  • Room Temperature: Store for up to 1 week in a cool, dry place; ensure it’s in an airtight container to prevent sticking.

  • Fridge: Keep in the refrigerator for up to 2 weeks. An airtight container is essential to maintain freshness and prevent the fudge from drying out.

  • Freezer: For longer storage, freeze your Chocolate Peanut Butter Fudge for up to 3 months. Wrap tightly in plastic wrap and place in a freezer-safe container.

  • Reheating: If chilled or frozen, allow it to come to room temperature before enjoying; alternatively, gently microwave for 10-15 seconds if a softer texture is desired.

Make Ahead Options

These Chocolate Peanut Butter Fudge bites are ideal for meal prep enthusiasts looking to save time during busy weeks! You can prepare the fudge components up to 24 hours in advance, starting with the chocolate layer. Simply melt and layer the chocolate mixture into the pan, cover it tightly with plastic wrap, and refrigerate. You can also mix the peanut butter layer and store it separately in an airtight container in the fridge. When you’re ready to serve, simply pour the prepared peanut butter layer over the chilled chocolate base and top with peanuts before chilling for at least 2 hours or until set. This way, you’ll have delicious, homemade Chocolate Peanut Butter Fudge ready to impress with minimal last-minute effort!

Expert Tips for Chocolate Peanut Butter Fudge

Use Quality Chocolate: Always opt for high-quality dark chocolate chips to enhance the flavor and texture of your fudge.

Melt Carefully: Use a double boiler or microwave on low heat when melting chocolate to prevent burning. Stir continuously for even melting.

Chill Thoroughly: Allow the fudge to chill for at least 2 hours to ensure a firm, sliceable consistency. Cutting too soon can result in a gooey mess.

Customize Your Fudge: Don’t hesitate to add different mix-ins like dried fruit or different nuts. This can elevate your Chocolate Peanut Butter Fudge to a whole new level!

Proper Storage: Keep your fudge in an airtight container in the refrigerator to maintain freshness. It can last up to 2 weeks, but we doubt it’ll last that long!

What to Serve with Ultimate No-Bake Chocolate Peanut Butter Fudge

Delight in the flavors of your fudge by pairing it with these sweet and savory accompaniments that will elevate your dessert experience.

  • Vanilla Ice Cream: The cold creaminess of vanilla ice cream perfectly balances the rich fudge, adding a delightful contrast. Drizzle with chocolate sauce for an indulgent touch!

  • Fresh Berries: Juicy raspberries or strawberries provide a refreshing burst of flavor that cuts through the sweetness of the fudge. They’re a vibrant addition to your dessert plate!

  • Whipped Cream: A dollop of light and airy whipped cream adds a lovely texture and creamy taste that complements the fudge’s richness beautifully. It’s like a cloud on your dessert!

  • Coffee: A warm cup of coffee contrasts the sweetness of the fudge, making each bite even more satisfying. The bitter notes enhance the chocolate, creating a harmonious pairing.

  • Chocolate-Dipped Pretzels: The crunch and saltiness of pretzels dipped in chocolate offer an exciting textural contrast to the smooth fudge, making for an addictive treat.

  • Nutty Crunch Cookies: These cookies, with their buttery texture and nutty flavor, seamlessly blend with the ingredients of the fudge. Serve them on the side for a delightful combo.

  • Milk: A cold glass of milk makes an all-time classic pairing with chocolate. It enhances the flavor and refreshes your palate between delicious bites of fudge.

Explore different pairings to find your favorite match with this luscious Chocolate Peanut Butter Fudge!

Chocolate Peanut Butter Fudge Recipe FAQs

How can I tell if my chocolate is ripe for melting?
Absolutely! When selecting chocolate chips, look for those that are glossy and without any dark spots or discoloration. If you find any signs of white streaks or a grainy texture, the chocolate may be spoiling or not suitable for melting.

What are the best storage methods for my fudge?
Very good question! Store your Chocolate Peanut Butter Fudge in an airtight container in the refrigerator for up to 2 weeks. For room temperature, it can last up to 1 week in a cool, dry place, but an airtight container is essential to avoid it sticking together.

Can I freeze Chocolate Peanut Butter Fudge? How do I do it?
You bet! To freeze your fudge, wrap each piece tightly in plastic wrap and place them in an airtight, freezer-safe container. It can be kept for up to 3 months. When you’re ready to enjoy, let it thaw in the refrigerator or at room temperature for a delightful treat.

What should I do if my fudge is too soft to cut?
If your fudge is too soft, it might not have chilled long enough. Make sure to chill it for at least 2 hours. If it’s already been chilled for that time and still seems gooey, you can pop it back in the refrigerator for an additional hour, as these cooling changes can help it set properly.

Are there any dietary considerations I should be aware of?
Absolutely! This recipe is naturally gluten-free, making it a great option for those with gluten sensitivities. However, if you have a peanut allergy, consider using alternative nut butters like almond or sunflower seed butter for a safe and delicious substitute. Always check your ingredients to ensure they meet your dietary needs, especially if serving to others.

Can I use an alternative for sweetened condensed milk?
This question comes up often! While sweetened condensed milk plays a crucial role as a sweetener and emulsifier, you could try making your own with powdered milk and sugar or use a homemade coconut milk version. However, I recommend using it as instructed for the best results in your Chocolate Peanut Butter Fudge.

Chocolate Peanut Butter Fudge

Creamy Chocolate Peanut Butter Fudge You Can Make No-Bake

Indulge in this effortless Chocolate Peanut Butter Fudge, combining rich chocolate and creamy peanut butter for a quick, no-bake dessert.
Prep Time 15 minutes
Cook Time 5 minutes
Chilling Time 2 hours
Total Time 2 hours 20 minutes
Servings: 16 squares
Course: Dessert
Cuisine: American
Calories: 150

Ingredients
  

For the Fudge
  • 1 cup Dark Chocolate Chips Feel free to substitute with semi-sweet or milk chocolate chips.
  • 1 tablespoon Coconut Oil Unsalted butter can be used as a substitute.
  • 1 can Sweetened Condensed Milk No substitutions are advised.
  • 1 cup Peanut Butter Almond or cashew butter can be used as alternatives.
  • 1/4 cup Chopped Salted Peanuts Can be omitted or replaced with other nuts.

Equipment

  • double boiler
  • Microwave
  • 8x8 inch baking pan
  • spatula

Method
 

Step-by-Step Instructions for Chocolate Peanut Butter Fudge
  1. Begin by lining an 8x8 inch baking pan with aluminum foil, allowing some overhang for easy removal. Lightly coat with cooking spray.
  2. In a double boiler, combine dark chocolate chips, coconut oil, and half of the sweetened condensed milk. Stir until melted and smooth, about 3-5 minutes. Fold in chopped salted peanuts.
  3. Pour the melted chocolate mixture into the prepared pan and spread evenly. Tap to remove air bubbles and allow to cool for about 10 minutes.
  4. In a microwave-safe bowl, combine the remaining peanut butter, coconut oil, and the rest of the sweetened condensed milk. Microwave on high in 20-second intervals, stirring until fully melted and smooth.
  5. Pour the peanut butter mixture over the cooled chocolate layer, spreading evenly to cover the entire base.
  6. Sprinkle the remaining chocolate chips and chopped salted peanuts over the peanut butter layer, gently pressing them in. Chill for at least 2 hours until set.
  7. Once set, lift the fudge out using the foil. Cut into squares and enjoy your Chocolate Peanut Butter Fudge!

Nutrition

Serving: 1squareCalories: 150kcalCarbohydrates: 15gProtein: 3gFat: 9gSaturated Fat: 4gPolyunsaturated Fat: 1gMonounsaturated Fat: 3gCholesterol: 5mgSodium: 50mgPotassium: 150mgFiber: 1gSugar: 10gVitamin A: 50IUCalcium: 30mgIron: 0.5mg

Notes

Store in an airtight container in the refrigerator for up to 2 weeks or freeze for up to 3 months.

Tried this recipe?

Let us know how it was!

Creamy Parsnip Puree Recipe: The Ultimate Comfort Food Upgrade

As I stood in my kitchen, the sweet fragrance of roasting parsnips filled the air, transporting me to cozy family dinners of my childhood. In moments like these, I knew it was time to whip up a comforting dish: my Creamy Parsnip Puree Recipe. This gluten-free, velvety alternative to traditional mashed potatoes is not just a delicious side, but it also brings a gourmet twist to any meal with minimal effort. With just a handful of simple ingredients, including aromatic garlic and fresh thyme, you can create a dish that’s not only low in carbs but also bursting with comforting flavor. Whether you’re pairing it with roasted meats or serving it as a delightful base for saucy dishes, this puree is sure to become a staple in your kitchen. Ready to elevate your dinner table with this rich, creamy goodness? Let’s dive into the recipe!

Why is This Puree So Irresistible?

Creamy, Dreamy Texture: This velvety parsnip puree rivals even the creamiest mashed potatoes, making it a delightful alternative for any celebration or weeknight dinner.

Nutritious Goodness: Packed with vitamins A and C, this gluten-free dish is a wholesome choice for your family. Who knew comfort food could be so good for you?

Quick and Easy: With simple step-by-step instructions, you’ll whip up this gourmet side in no time, making it perfect for busy weeknights.

Versatile Pairing: It complements everything from grilled chicken to hearty beef, ensuring it fits seamlessly into any meal plan.

Customize To Taste: Feel free to experiment with different herbs or toppings, like sautéed mushrooms, to create your unique twist on this cozy dish.

This Creamy Parsnip Puree Recipe will definitely become a go-to in your kitchen, alongside other favorites like Chicken Penne Dish and Marry Shrimp Pasta.

Creamy Parsnip Puree Ingredients

• Discover the simple building blocks for a delightful creamy parsnip puree!

For the Puree

  • Parsnips – 3 lbs. of peeled and cut parsnips offer a naturally sweet and earthy base.
  • Garlic – 3 cloves, smashed and peeled, add aromatic depth and flavor.
  • Half and Half – This creamy addition can be swapped with whole milk or heavy cream for different richness.
  • Unsalted Butter – 4 tablespoons softened provide a luxurious richness that enhances the texture.
  • Fresh Thyme – Use this aromatic herb to elevate overall flavor; feel free to substitute with your favorite herbs.
  • Kosher Salt – Use to bring out the parsnips’ natural sweetness—if using table salt, reduce to ½ teaspoon.
  • Black Pepper – 1/4 teaspoon of freshly ground pepper adds a touch of seasoning that brightens the dish.

With these ingredients at hand, you’re one step closer to mastering the creamy parsnip puree recipe that will quickly become a new family favorite!

Step‑by‑Step Instructions for Creamy Parsnip Puree Recipe

Step 1: Boil Parsnips and Garlic
In a large pot, combine 3 lbs. of peeled and cut parsnips and 3 smashed garlic cloves. Cover them with water by about 1 inch, and bring to a boil over medium-high heat. Watch for the water to rapidly bubble, which indicates you’re ready to move to the next step.

Step 2: Simmer Until Tender
Once boiling, reduce the heat to a gentle simmer, removing the lid to allow steam to escape. Cook the parsnips and garlic for 10-15 minutes until fork-tender. The parsnips should be easily pierced with a fork, signaling they are soft enough for a smooth puree.

Step 3: Drain the Mixture
Carefully drain the cooked parsnips and garlic in a colander, allowing any excess water to evaporate. Use this time to prepare your blending equipment. A clean pot will make it easy to return the drained mixture for the next step in the Creamy Parsnip Puree recipe.

Step 4: Combine with Buttery Goodness
Return the drained parsnips and garlic back to the pot. Add 4 tablespoons of softened unsalted butter and ½ cup of half-and-half, which will add a rich creaminess to your puree. Stir gently to incorporate the butter before blending, making sure it melts evenly.

Step 5: Blend Until Smooth
Using an immersion blender, puree the mixture until it reaches a smooth and silky consistency. If you don’t have an immersion blender, transfer the mixture to a blender or food processor, blending in batches as necessary. The goal is a creamy texture without any lumps for your delightful Creamy Parsnip Puree.

Step 6: Season and Serve
After achieving a velvety blend, stir in ¾ teaspoon of kosher salt, freshly ground black pepper to taste, and a handful of fresh thyme leaves. Mix well to ensure the flavors meld beautifully. Serve warm as the perfect side dish to complement your main course.

Make Ahead Options

These Creamy Parsnip Puree are perfect for busy weeknights and make-ahead meal planning! You can prepare the entire puree up to 24 hours in advance. Simply follow the recipe instructions through blending, then allow it to cool completely. Transfer the puree to an airtight container and refrigerate. To maintain its creamy texture, stir in a splash of half-and-half before reheating to prevent it from thickening too much. When you’re ready to serve, simply warm the puree in a saucepan over low heat, stirring gently until heated through, and you’ve got a comforting, delicious side dish waiting for you with minimal effort!

What to Serve with Creamy Parsnip Puree

This delightful side dish is the perfect companion to elevate your entire meal experience.

  • Roasted Chicken: The crispy skin and juicy meat contrast beautifully with the creamy texture, creating a harmonious balance on your plate.
  • Grilled Salmon: With its rich and fatty profile, salmon pairs perfectly with the sweet earthiness of the puree, enhancing every bite.
  • Sautéed Greens: Fresh, lightly sautéed spinach or kale add a vibrant, nutritious touch that complements the smoothness of the parsnip puree.
  • Herb-Crusted Pork Tenderloin: The savory herbs in the pork elevate the dish, making it a gourmet delight that feels special any night of the week.
  • Mushroom Stroganoff: This hearty vegetarian option adds a rich umami flavor that beautifully contrasts with the sweetness of the parsnips.
  • Crispy Shallots: Scatter these on top for a delightful crunch that brings texture and extra flavor, turning an everyday dish into something extraordinary.
  • Wine Pairing: A crisp Chardonnay offers refreshing acidity that cuts through the richness, enhancing the overall dining experience.
  • Chocolate Mousse: Finish your meal with a rich and creamy dessert to complement the comforting vibes started with the parsnip puree.
  • Garlic Bread: The crunchy buttery exterior of garlic bread adds texture while its savory notes pair well with the creamy goodness.

Creamy Parsnip Puree Recipe Variations

Feel free to explore different ways to personalize this delicious puree and make it truly your own!

  • Herb Swap: Try chives or rosemary instead of thyme for a fresh flavor twist. Each herb brings its unique fragrance, adding depth to the dish.

  • Dairy-Free Delight: Use coconut milk or almond milk in place of half-and-half for a creamy, approachable option perfect for lactose intolerant guests.

  • Additional Flavor: Incorporate a pinch of nutmeg for a warm, aromatic essence that beautifully complements the sweetness of parsnips.

  • Texture Boost: Top with sautéed mushrooms or crispy shallots to add delightful crunch and extra flavor to each spoonful of creamy goodness. They make every bite exciting!

  • Spicy Kick: Add a dash of cayenne pepper or red pepper flakes for those who like a little heat. This pleasant surprise heightens the flavor profile, making it an adventurous treat.

  • Roasted Garlic: Consider roasting your garlic beforehand for a sweeter, mellower flavor that can make your puree even more scrumptious. The transformation is absolutely worth it!

  • Creamy Variation: For a more decadent version, use heavy cream instead of half-and-half, creating an opulently rich and smooth texture that’s pure indulgence.

  • Flavor Fusion: Mix in some parmigiano-reggiano cheese for a deliciously cheesy twist. This addition brings a comforting umami flavor that pairs nicely with your roasted meats.

As you play around with these variations, don’t forget to explore other comforting recipes, like Mexican Taco Soup or Parmesan Italian Sausage, to complement your cozy meal. Enjoy creating your delicious masterpiece!

How to Store and Freeze Creamy Parsnip Puree

Fridge: Store your leftover creamy parsnip puree in an airtight container for up to 3 days. Reheat gently on the stove or in the microwave, adding a splash of milk for extra creaminess.

Freezer: For longer storage, freeze your parsnip puree in airtight containers or freezer bags for up to 3 months. Thaw in the fridge overnight before reheating.

Reheating: To reheat frozen puree, place in a pot over low heat, stirring occasionally, or microwave in short bursts, ensuring an even temperature throughout.

Texture Note: Be aware that freezing may impact the texture slightly, but a good stir and reheating will help restore its creamy consistency.

Tips for the Best Creamy Parsnip Puree

Choose Fresh Parsnips: Fresh parsnips have a sweeter and more earthy flavor. Look for firm, unblemished roots for the best results.

Avoid Overcooking: Ensure parsnips are fork-tender but not mushy; overcooked parsnips can lead to a watery puree. Aim for 10-15 minutes of simmering.

Mixing Method: An immersion blender is ideal for a smooth consistency. If using a blender, allow the mixture to cool slightly to prevent steam buildup.

Season Gradually: Taste and adjust salt and pepper gradually. Remember, kosher salt is less salty than table salt, so measure accordingly for your creamy parsnip puree recipe.

Flavor Enhancements: Feel free to experiment with different herbs or add a pinch of nutmeg for a warm, cozy flavor twist.

Storing Leftovers: Keep leftovers in an airtight container in the fridge for up to three days. Gently reheat on the stove, adding splash of milk for creaminess.

Creamy Parsnip Puree Recipe FAQs

What type of parsnips should I use for the puree?
Absolutely! For the best flavor and texture, choose fresh parsnips that are firm and unblemished. They should be creamy white or golden in color and free from dark spots or soft areas, indicating freshness and sweetness.

How long can I store the creamy parsnip puree in the fridge?
You can store your creamy parsnip puree in an airtight container in the fridge for up to 3 days. When reheating, add a splash of milk to enhance the creaminess and prevent the puree from drying out.

Can I freeze creamy parsnip puree, and how do I do it?
Yes, you can freeze creamy parsnip puree for up to 3 months. To do this, ensure the puree is completely cooled, then transfer it to airtight containers or freezer bags. Label and date them for easy identification. To thaw, place in the refrigerator overnight, and reheat gently on the stove, adding a bit of milk if needed to restore creaminess.

What should I do if my puree is too thin?
If your creamy parsnip puree turned out too thin, don’t worry! Simply return it to the pot and cook it over low heat, stirring frequently to evaporate some moisture. Alternatively, you can add a little more softened butter or cook a small amount of additional parsnips, blending them in to adjust the texture.

Is this creamy parsnip puree recipe suitable for those with dietary restrictions?
Yes, this creamy parsnip puree recipe is gluten-free and can be tailored for various dietary needs! To make it dairy-free, consider substituting the half-and-half with plant-based milk and leaving out the butter, or using a dairy-free alternative. Always check for personal allergies regarding specific herbs or vegetable intake.

Creamy Parsnip Puree Recipe

Creamy Parsnip Puree Recipe: The Ultimate Comfort Food Upgrade

Experience the deliciousness of this Creamy Parsnip Puree Recipe, a gluten-free, comforting alternative to mashed potatoes.
Prep Time 10 minutes
Cook Time 15 minutes
Total Time 25 minutes
Servings: 4 servings
Course: Dinner
Cuisine: American
Calories: 150

Ingredients
  

For the Puree
  • 3 lbs Parsnips, peeled and cut
  • 3 cloves Garlic, smashed and peeled
  • 1/2 cup Half and Half can be swapped for whole milk or heavy cream
  • 4 tablespoons Unsalted Butter, softened
  • 1 tablespoon Fresh Thyme can substitute with other herbs
  • 3/4 teaspoon Kosher Salt reduce to 1/2 tsp if using table salt
  • 1/4 teaspoon Black Pepper, freshly ground

Equipment

  • Pot
  • Colander
  • Immersion blender

Method
 

Step-by-Step Instructions for Creamy Parsnip Puree
  1. In a large pot, combine 3 lbs. of peeled and cut parsnips and 3 smashed garlic cloves. Cover with water by about 1 inch and bring to a boil over medium-high heat.
  2. Once boiling, reduce the heat to a gentle simmer. Remove the lid and cook the parsnips and garlic for 10-15 minutes until fork-tender.
  3. Carefully drain the cooked parsnips and garlic in a colander and prepare your blending equipment.
  4. Return the drained parsnips and garlic back to the pot. Add 4 tablespoons of softened unsalted butter and 1/2 cup of half-and-half.
  5. Using an immersion blender, puree the mixture until smooth. Alternatively, transfer to a blender or food processor.
  6. Stir in 3/4 teaspoon of kosher salt, black pepper to taste, and fresh thyme leaves. Mix well and serve warm.

Nutrition

Serving: 1cupCalories: 150kcalCarbohydrates: 22gProtein: 3gFat: 7gSaturated Fat: 4gPolyunsaturated Fat: 0.5gMonounsaturated Fat: 3gCholesterol: 20mgSodium: 300mgPotassium: 400mgFiber: 5gSugar: 3gVitamin A: 650IUVitamin C: 15mgCalcium: 80mgIron: 1mg

Notes

For best results, choose fresh, firm parsnips and avoid overcooking for a perfect texture. Store leftovers in an airtight container in the fridge for up to three days.

Tried this recipe?

Let us know how it was!

Bright and Cheerful Winter Fruit Salad to Beat the Chill

As snowflakes gently swirl outside, I find myself craving something fresh to brighten up those chilly winter days. This Vibrant Winter Fruit Salad not only satisfies that craving but also serves as a cheerful antidote to winter blues. Packed with a delightful mix of kiwi, clementines, and juicy apples, this dish is a celebration of color and flavor that’s quick and easy to whip up. Plus, it’s a kid-friendly, gluten-free, and vegan option that contains no refined sugar—perfect for brunch, snacks, or bringing along to potlucks. Imagine serving this colorful medley to loved ones and watching them light up with joy! Are you ready to dive into a bowl of fruity goodness?

Why Is This Salad a Must-Try?

Freshness at its finest: This Winter Fruit Salad bursts with vibrant flavors that brighten any dull day. Customizable and versatile: You can swap in your favorite seasonal fruits to keep it fresh and exciting! Quick prep time means you can whip it up in a jiffy—ideal for busy schedules. Kid-approved and healthy: It’s a hit with the little ones and packed with nutrients. Serve it as a refreshing side for brunch or grab-and-go snack, and watch your family’s smiles grow! Need another healthy option? Check out my Blt Chicken Salad for more delicious ideas.

Winter Fruit Salad Ingredients

For the Salad
Kiwi – adds sweetness and tartness with vibrant color, making your salad visually appealing.
Clementines – offer refreshing citrus flavor and juiciness that lifts the overall taste.
Apple – provides a crunchy texture; use a tart variety for a delightful flavor contrast.
Pear – adds juiciness and mild sweetness, perfectly complementing the apple.
Banana – contributes creaminess; use ripe but firm bananas to maintain structure.
Pomegranate Arils – introduces a pop of flavor and crunch; substitute with blueberries if desired.

For the Dressing
Orange Juice – key for the dressing; boosts freshness—use fresh-squeezed for the best flavor.
Lemon Juice – enhances brightness in the dressing, vital for flavor balance.
Maple Syrup – adds natural sweetness; can be substituted with honey or agave syrup.
Poppy Seeds – provides a decorative touch and slight crunch that elevates the salad.

Step‑by‑Step Instructions for Winter Fruit Salad

Step 1: Make the Dressing
In a small bowl, combine 1/4 cup of fresh-squeezed orange juice, 2 tablespoons of lemon juice, 2 tablespoons of maple syrup, and 1 tablespoon of poppy seeds. Whisk together until the ingredients are well blended, forming a smooth dressing. Set the dressing aside so the flavors can meld while you prepare the fruit for your vibrant winter fruit salad.

Step 2: Prepare the Fruit
Start by peeling and chopping one kiwi and three clementines, separating or slicing them into bite-sized pieces. Next, dice one tart apple and one juicy pear, ensuring all fruit pieces are similar in size for uniform mixing. Finally, slice one ripe but firm banana. Arrange the chopped fruits in a large mixing bowl, ready to create your colorful winter fruit salad.

Step 3: Combine the Ingredients
Gently add the prepared fruit into the bowl, taking care to preserve the textures of each component. Drizzle in enough of your tasty dressing to lightly coat the fruit without overwhelming it. With clean hands or a spatula, softly toss the fruit and dressing together until everything is beautifully combined and glistening, reflecting the freshness of your winter fruit salad.

Step 4: Serve Immediately
To enjoy this winter fruit salad at its freshest, serve it right after tossing. Spoon the salad into individual bowls, showcasing the vibrant colors and inviting textures. For an extra touch, consider topping with a few additional poppy seeds for decoration. This dish brings warmth and cheer to your table, perfect for sharing with your loved ones during the cold days ahead.

Make Ahead Options

This Vibrant Winter Fruit Salad is perfect for meal prep enthusiasts! You can prepare the fruit components—such as kiwi, clementines, apple, and pear—up to 24 hours in advance by washing, peeling, and chopping them. Store the fruit in an airtight container in the refrigerator to maintain freshness and prevent browning. For best quality, slice bananas just before serving, as they tend to discolor quickly. You can also make the maple citrus dressing ahead of time and refrigerate it for up to 3 days. When you’re ready to serve, simply toss the prepped fruit with the dressing and enjoy a delightful, refreshing dish with minimal effort!

What to Serve with Vibrant Winter Fruit Salad?

Imagine a cheerful winter gathering, where flavors burst like confetti, complementing the colorful magic of the season’s freshest fruits.

  • Creamy Yogurt: A dollop of Greek yogurt adds a rich and creamy texture, balancing the tartness of the fruit beautifully. It’s a lovely contrast that makes each bite unforgettable.

  • Honey-Drizzled Toast: Crunchy toast topped with a drizzle of honey harmonizes sweetness and crunch, making it the perfect vehicle for vibrant fruit goodness.

  • Savory Quinoa Salad: The nutty flavor and chewy texture of quinoa provide a hearty contrast to the fruit’s freshness, creating a satisfying meal blend. The added proteins also help keep energy levels high.

  • Roasted Almonds: These crunchy bites offer a nutty flavor that pairs well with the fruity medley while adding a satisfying crunch. Toss them atop the salad for added texture!

  • Sparkling Water with Citrus: A refreshing drink like sparkling water infused with lemon or lime brightens your palate, enhancing the vibrant flavors of the salad. It’s festive, hydrating, and non-sweetened!

  • Lemon-Mint Sorbet: For a sweet finish, serve a small scoop of lemon-mint sorbet. Its chilly sensation and citrus notes will dance on your tongue, leaving a refreshing aftertaste alongside the fruity delight.

  • Dark Chocolate Shavings: For a decadent touch, sprinkle some dark chocolate shavings over the salad. The rich, slightly bitter notes contrast nicely with the sweetness of the fruits, creating a delightful experience.

  • Mini Spinach Salad: A small side of spinach salad with a citrus vinaigrette can enhance the meal’s freshness. The slight bitterness of spinach contrasts well with the sweet fruits, creating a balanced plate.

Winter Fruit Salad Customizations

Feel free to let your creativity shine by customizing this vibrant salad with these delightful variations!

  • Berry Boost: Swap in strawberries or blueberries for a burst of color and sweetness. They pair beautifully with the citrus dressing!

  • Citrus Swap: Replace clementines with mandarin oranges for a different citrus twist, or add a variety of citrus fruits for extra flavor depth.

  • Nutty Crunch: Toss in some toasted nuts, like almonds or walnuts, for added crunch and healthy fats. They will enhance the salad’s texture!

  • Tropical Twist: Substitute bananas with diced pineapple or mango for a tropical vibe that brightens up winter days. This fruity twist will feel like a vacation in a bowl.

  • Herb Infusion: Add a sprinkle of fresh mint or basil to the salad for an aromatic lift. It not only tastes amazing but also brings a refreshing fragrance!

  • Sweetener Alternatives: Use agave syrup instead of maple syrup for a lighter sweetness—a fantastic option if you want to switch things up.

  • Zesty Kick: Experiment by adding a pinch of cayenne pepper or minced jalapeño to the dressing for a surprising and delightful heat.

  • Granola Topping: For a fun texture change, sprinkle some granola on top right before serving. This adds a delightful crunch that kids and adults will love.

Embrace the joy of creating your version of this wonderful dish! If you’re looking for another healthy meal idea, check out this delicious Blt Chicken Salad. Each variation adds a unique flavor, ensuring every bite is a delight.

Expert Tips for Winter Fruit Salad

  • Freshness Matters: To enjoy optimal flavor, prepare the salad shortly before serving. This keeps the fruit from browning and losing its vibrant appeal.

  • Mind the Bananas: Slice bananas last to prevent them from browning too quickly. This ensures a beautiful presentation in your Winter Fruit Salad.

  • Customizable Choices: Feel free to swap in your favorite fruits. Seasonal varieties keep your salad exciting and cater to personal taste preferences.

  • Dressing Dilemma: Use fresh-squeezed juices for the dressing; it makes a noticeable difference in flavor. Bottled juices can lack the freshness you need.

  • Prep Ahead: If you’re short on time, prep your citrus and pomegranate in advance, but mix with fruit and dressing just before serving for the best results.

How to Store and Freeze Winter Fruit Salad

Fridge: Store in an airtight container in the refrigerator for up to 2-3 days to keep the fruit fresh and prevent browning.

Freezer: Freezing is not recommended for this salad, as the texture of the fruit will suffer once thawed.

Make-Ahead Tips: Prepare the dressing and chop the citrus and pomegranate ahead of time. Combine the fruit and dressing just before serving for optimal freshness.

Reheating: This Winter Fruit Salad is best enjoyed cold; no reheating is necessary or recommended.

Winter Fruit Salad Recipe FAQs

What fruits should I look for when making this Winter Fruit Salad?
When selecting fruits for your Winter Fruit Salad, aim for ripe yet firm options. For kiwis, choose those with a little give when gently pressed, indicating ripeness without being overly soft. Clementines should feel heavy for their size and have smooth, shiny peels. Apples should be crunchy and tart, like Granny Smith, while pears can be slightly soft but not mushy. Pomegranate arils should be bright red and juicy; if they’re not available, you can substitute them with fresh blueberries instead.

How should I store leftover Winter Fruit Salad?
Absolutely! Store any leftover Winter Fruit Salad in an airtight container and refrigerate it. It will remain fresh for about 2-3 days. Just keep in mind to avoid pressing the fruits too tightly together to minimize browning and maintain the salad’s delightful textures. If you have a dressing left over, store it separately to ensure the fruits don’t become soggy.

Can I freeze Winter Fruit Salad for later?
I don’t recommend freezing this Winter Fruit Salad, as the fruit’s texture will change, becoming mushy once thawed. If you love the ingredients, though, you can freeze some fruits like bananas or pomegranates separately and add them during fresh preparation later.

What should I do if my salad starts looking brown?
To prevent browning, always add the dressing just before serving the salad. If you notice the fruits starting to discolor after it’s been mixed, there are a few tricks you can employ. Squeeze a bit of lemon juice over the offending pieces; the citric acid helps slow down oxidation, preserving the fresh look. Another preventative measure is to use fresh fruits that are at their peak ripeness. If the apples and bananas are too ripe to begin with, they will brown more quickly.

Is this Winter Fruit Salad safe for kids and people with allergies?
Yes! This Winter Fruit Salad is a fantastic choice for kids as it’s not only gluten-free and vegan but also free from refined sugar. However, always double-check the ingredients if allergies are a concern. For instance, some individuals may be sensitive to certain fruit types or other ingredients you might use in variations, like honey instead of maple syrup. When serving to children, cut the fruit into smaller pieces to make it easier for little hands to enjoy.

What are some delicious variations I can try?
The more the merrier when it comes to customizing your Winter Fruit Salad! You can swap out the bananas for strawberries or add grapes for a different flavor twist. If you find yourself with extra ripe fruit, consider mixing in some diced mango or even a handful of chopped nuts for added crunch. Plus, you can spice up the dressing by adding a hint of ground ginger or a sprinkle of fresh mint for extra zest!

Winter Fruit Salad

Bright and Cheerful Winter Fruit Salad to Beat the Chill

Enjoy this vibrant Winter Fruit Salad that delivers fresh flavors to brighten your chilly days, perfect for brunch or snacks.
Prep Time 15 minutes
Total Time 15 minutes
Servings: 4 cups
Course: Salad
Cuisine: American
Calories: 150

Ingredients
  

For the Salad
  • 1 unit Kiwi peeled and chopped
  • 3 units Clementines peeled and chopped
  • 1 unit Apple diced, use a tart variety
  • 1 unit Pear diced
  • 1 unit Banana sliced, use ripe but firm
  • 1 cup Pomegranate Arils
For the Dressing
  • 1/4 cup Orange Juice fresh-squeezed
  • 2 tablespoons Lemon Juice
  • 2 tablespoons Maple Syrup or honey/agave syrup
  • 1 tablespoon Poppy Seeds

Equipment

  • Mixing Bowl
  • whisk
  • Knife
  • Cutting board

Method
 

Step-by-Step Instructions
  1. In a small bowl, combine 1/4 cup of fresh-squeezed orange juice, 2 tablespoons of lemon juice, 2 tablespoons of maple syrup, and 1 tablespoon of poppy seeds. Whisk together until well blended.
  2. Peel and chop the kiwi and clementines. Dice the apple and pear. Slice the banana. Arrange in a large mixing bowl.
  3. Gently add the fruit into the bowl. Drizzle enough dressing to lightly coat the fruit. Toss the fruit and dressing together until combined.
  4. Serve immediately in individual bowls, optionally topping with additional poppy seeds.

Nutrition

Serving: 1cupCalories: 150kcalCarbohydrates: 36gProtein: 2gSodium: 5mgPotassium: 300mgFiber: 4gSugar: 20gVitamin A: 500IUVitamin C: 60mgCalcium: 30mgIron: 0.5mg

Notes

Ensure to prepare the salad shortly before serving for optimal freshness, and slice bananas last to prevent browning.

Tried this recipe?

Let us know how it was!

Delicious Chocolate Truffles Recipe: Indulge in Easy Elegance

As I rummaged through my pantry one rainy afternoon, the sight of just four simple ingredients sparked a delightful idea. Why not whip up a batch of irresistible chocolate truffles? This Chocolate Truffles Recipe is a game changer for anyone seeking an easy, no-bake dessert that’s both elegant and indulgent. With a smooth, creamy interior and a simple ganache, these truffles are a crowd-pleaser perfect for any occasion. Not only are they a breeze to make, but they’re also vegetarian and gluten-free, making them accessible to almost everyone. Whether you’re looking to impress guests, create thoughtful gifts, or simply treat yourself, these little bites of joy have got you covered. Curious about how to make these luscious delights? Let’s dive into the recipe!

Why Make Chocolate Truffles at Home?

Simplicity: With just four ingredients, this Chocolate Truffles Recipe is deceptively easy to prepare, making it perfect for both novice and experienced cooks alike.

No-Bake Delight: Forget about turning on the oven! These truffles come together quickly, saving you time and energy.

Versatile Coatings: Customize how your truffles look and taste by rolling them in cocoa powder, nuts, or sprinkles. Each bite can be a new experience!

Gourmet Appeal: Perfect for gifting or serving at parties, these delightful treats impress without the fuss. Pair them with our delicious Easter Chocolate Lasagna for an unforgettable dessert spread!

Crowd-Pleasing Flavor: With the rich taste of chocolate and the option for different flavor twists, you can satisfy any sweet tooth—after all, who can resist chocolate?

Chocolate Truffles Recipe Ingredients

• Just four simple ingredients needed!

For the Ganache

  • Bittersweet or Semi-Sweet Chocolate – Use at least 50% cocoa content for a rich chocolate flavor.
  • Unsalted Butter – Adds a creamy texture that elevates the truffle’s rich taste.
  • Heavy Cream – This ingredient creates a velvety ganache that’s simply divine; don’t substitute with lower fat options!
  • Vanilla Extract (optional) – A splash enhances the chocolate flavor; feel free to experiment with other extracts!

For the Coatings

  • Cocoa Powder – Classic and rich, it adds a nice contrast to the creamy truffle.
  • Chopped Nuts – Provides delightful crunch and texture; choose your favorites!
  • Sprinkles – Fun and festive, perfect for special occasions or just to add a pop of color!
  • Shredded Coconut – Adds a tropical twist that’s deliciously unique.

Enjoy crafting your memorable Chocolate Truffles Recipe!

Step‑by‑Step Instructions for Chocolate Truffles Recipe

Step 1: Prepare the Chocolate Mixture
Begin by finely chopping your bittersweet or semi-sweet chocolate and placing it in a medium mixing bowl. Add the cubed unsalted butter to the bowl, which enhances the creaminess of your Chocolate Truffles Recipe. This setup is crucial for ensuring a smooth ganache later on.

Step 2: Heat the Cream
In a small saucepan, pour in ½ cup of heavy cream and heat it over medium heat. Watch carefully as small bubbles start to form around the edges of the pan, signaling that the cream is close to boiling. Once you notice this, pour the hot cream over your chocolate mixture and let it sit undisturbed for 1-2 minutes to allow the chocolate to melt.

Step 3: Create the Ganache
After letting it sit, stir the mixture gently using a spatula or a whisk until completely smooth and emulsion forms. If you see any stubborn lumps of chocolate, heat the bowl in the microwave in 15-20 second intervals until all the chocolate is melted and fully incorporated. Your delicious ganache is now ready for chilling.

Step 4: Chill the Ganache
Transfer your smooth ganache to the refrigerator and let it chill for at least 1-2 hours, or until it becomes firm enough to scoop. This step is vital; chilling allows for the perfect texture, making your Chocolate Truffles easier to roll later on. Keep an eye on the time to avoid losing that creamy goodness.

Step 5: Scoop and Shape the Truffles
Once chilled, line a baking sheet with parchment paper to catch any chocolate drips. Using a small cookie scoop or a tablespoon, portion out the chilled ganache and place each on the prepared baking sheet. Aim to create equal-sized portions for uniformity once you roll them into balls.

Step 6: Roll the Truffles
With clean hands, gently roll each scoop of ganache into a smooth ball. If the ganache feels sticky, return the truffles to the refrigerator briefly to firm up for easier handling. This step will help give your Chocolate Truffles a professional look and feel.

Step 7: Coat the Truffles
Choose your preferred coatings such as cocoa powder, chopped nuts, or shredded coconut, and pour them into separate shallow dishes. Roll each truffle in the coatings, ensuring they are fully covered. This not only adds flavor and texture to your truffles but also makes them visually appealing for serving.

Step 8: Set the Coated Truffles
Place the coated Chocolate Truffles back on the parchment-lined baking sheet and let them sit for a few minutes to allow the coatings to set. This final step enhances the texture and look of your truffles, making them ready to indulge or gift to friends and family!

Expert Tips for Chocolate Truffles

  • Use Quality Chocolate: Choose high-quality bittersweet or semi-sweet chocolate with at least 50% cocoa content for the best flavor in your Chocolate Truffles Recipe.

  • Mind the Temperature: When heating the cream, avoid boiling for a smoother ganache. Watch closely for bubbling to know when to pour over the chocolate.

  • Perfectly Chilled: Chill the ganache long enough to set but not so long that it becomes too hard to scoop. Aim for 1-2 hours for a perfect consistency.

  • Coating Options: Get creative with coatings! From crushed cookies to flavored nuts, vary your toppings to enhance both texture and taste.

  • Avoid Stickiness: If the ganache is too sticky to handle while shaping truffles, pop it back in the refrigerator for a few minutes for easier rolling.

What to Serve with Chocolate Truffles?

Indulging in these creamy morsels can easily be the highlight of your sweet moments. Let’s explore delightful pairings!

  • Fresh Berries: Juicy strawberries or raspberries add a refreshing contrast to the richness of chocolate. The tartness complements perfectly.

  • Coffee or Espresso: The bold flavors of a hot cup enhance the rich chocolate notes. Perfect for afternoon treats or after dinner.

  • Red Wine: A smooth red wine, like Pinot Noir, pairs beautifully, accentuating the chocolate while adding a sophisticated touch.

  • Nutty Biscotti: Crunchy almond biscotti offers a delightful texture and slightly sweet flavor, ideal for dipping alongside your truffles.

  • Coconut Macaroons: These chewy delights enhance your dessert spread’s texture and bring a tropical note to your chocolate experience.

  • Vanilla Ice Cream: Soft, creamy ice cream balances the richness of the truffles, creating a luxurious dessert that’s hard to resist.

  • Chocolate Sauce: Drizzling warm chocolate sauce over the truffles makes for an indulgent dessert experience, intensifying the flavors.

  • Caramel Sauce: A drizzle of salted caramel adds a contrasting sweetness, enhancing the complexity of these decadent treats.

Each pairing brings a unique element that elevates your experience with these delightful chocolate truffles!

Storage Tips for Chocolate Truffles

Room Temperature: Store truffles in an airtight container at room temperature for up to 3 days to keep them fresh and delicious.

Fridge: If you’re planning to keep your chocolate truffles longer, refrigerate them for up to 2 weeks. Just ensure they’re sealed properly to avoid absorbing odors.

Freezer: For longer storage, these delectable treats can be frozen for up to 3 months. Place them in a freezer-safe container, and allow them to soften at room temperature before enjoying their rich texture again.

Reheating: There’s no need to reheat chocolate truffles; simply let them sit at room temperature for a few minutes to regain their ideal consistency before serving.

Chocolate Truffles Recipe Variations

Feel free to unleash your creativity with these delightful twists on the classic chocolate truffles. Each variation brings a new layer of flavor and experience to your truffle-making adventure!

  • Flavored Chocolate: Use chocolate infused with different flavors like raspberry or coffee for a delightful twist. This allows you to customize each truffle to suit your taste!
  • Spice It Up: Add cinnamon or chili powder to the ganache for a warm and spicy flavor contrast that will surprise your palate. It’s a fantastic way to elevate the chocolate experience.
  • Nutty Crunch: Roll the truffles in finely chopped nuts like almonds or hazelnuts to enhance texture and add a crispy layer of flavor. Nuts pair beautifully with chocolate and add a satisfying crunch!
  • Decadent Drizzle: Melt some white chocolate and drizzle it over your rolled truffles for an elegant finish. Not only does it look stunning, but it also provides a sweet contrast to the bittersweet chocolate.
  • Zesty Citrus: Incorporate orange or lemon zest into the ganache for a refreshing citrus note that brightens the rich chocolate. This twist adds a lovely aromatic flavor to the truffles.
  • Vegan Variation: Substitute the heavy cream with full-fat coconut milk and use dairy-free chocolate to create a completely vegan version while keeping that rich taste intact.
  • Dessert Blend: Combine crushed cookies or brownie bits with your coatings for extra flavor and texture. It’s a fun way to incorporate your favorite desserts into the mix!
  • Hot and Spicy: For the adventurous, sprinkle a dash of cayenne pepper into your cocoa powder coating. This surprising kick shines through each luscious bite without overpowering the chocolate.

For more delicious recipes that you can enjoy alongside your truffles, don’t miss out on our irresistible Chocolate Granola Cups or the delightful Chocolate Chip Pancakes—the perfect complements to your sweet festivities!

Make Ahead Options

These Chocolate Truffles are perfect for meal prep enthusiasts! You can prepare the ganache up to 24 hours in advance by following the initial steps of the recipe and refrigerating the mixture. Once chilled and firm, scoop the truffles and roll them in your desired coatings when you’re ready to serve them, as this will keep their texture fresh and the coatings crisp. If you prefer, you can also roll them into balls and store them in an airtight container in the fridge for up to 3 days or freeze for up to 3 months—just let them come to room temperature before serving. This way, your truffles will be just as delicious with minimal effort on busy evenings!

Chocolate Truffles Recipe FAQs

How do I select the best chocolate for this recipe?
Absolutely! For the best chocolate truffles, choose bittersweet or semi-sweet chocolate that has at least 50% cocoa content. This level ensures a rich chocolate flavor and a smooth texture. Look for brands that specify a higher cocoa percentage, as this also affects the final taste of the truffles.

How should I store my chocolate truffles?
Very good question! Store your chocolate truffles in an airtight container at room temperature for up to 3 days. For longer enjoyment, refrigerate them for up to 2 weeks. Just make sure they’re well-sealed to prevent them from absorbing any odors from your fridge.

Can I freeze chocolate truffles?
Absolutely! You can freeze your chocolate truffles for up to 3 months. To freeze, place them in a freezer-safe container, separating layers with parchment paper if needed. When you’re ready to enjoy them, simply let them sit at room temperature for about 30 minutes to soften before indulging.

What should I do if my ganache turns grainy?
If your ganache appears grainy, don’t worry—this can happen! First, make sure you’re using high-quality chocolate. When preparing the ganache, ensure you heat the cream just until bubbles form; boiling can cause the chocolate to seize. If it’s already grainy, try reheating in the microwave in 15-20 second intervals, stirring gently until smooth again.

Are these chocolate truffles safe for people with allergies?
It’s important to consider dietary needs! This chocolate truffles recipe is gluten-free and vegetarian, but if anyone has allergies to dairy or nuts, you could opt for dairy-free chocolate and coatings like crushed rice cereal or seeds. Always check ingredient labels to ensure they are free of allergens tailored to your specific needs.

What are some variations I can try with my chocolate truffles?
The more the merrier! You can easily switch up your chocolate truffles recipe by experimenting with flavored chocolates or introducing spices like cinnamon. Additionally, roll them in unique coatings, such as crushed cookies or flavored nuts, to tailor each bite to your preference. Enjoy creating!

Chocolate Truffles Recipe

Delicious Chocolate Truffles Recipe: Indulge in Easy Elegance

This Chocolate Truffles Recipe is an easy, no-bake dessert that's both elegant and indulgent, perfect for any occasion.
Prep Time 30 minutes
Chilling Time 2 hours
Total Time 2 hours 30 minutes
Servings: 12 truffles
Course: Dessert
Cuisine: American
Calories: 100

Ingredients
  

For the Ganache
  • 8 ounces Bittersweet or Semi-Sweet Chocolate Use at least 50% cocoa content.
  • 2 tablespoons Unsalted Butter Adds creamy texture.
  • 1/2 cup Heavy Cream Do not substitute with lower fat options.
  • 1 teaspoon Vanilla Extract Optional; enhances chocolate flavor.
For the Coatings
  • 1/4 cup Cocoa Powder Classic coating option.
  • 1/4 cup Chopped Nuts Choose your favorites.
  • 1/4 cup Sprinkles Fun and festive.
  • 1/4 cup Shredded Coconut A unique tropical twist.

Equipment

  • Mixing Bowl
  • Small saucepan
  • spatula
  • Cookie Scoop
  • Baking Sheet
  • Parchment Paper

Method
 

Step-by-Step Instructions
  1. Finely chop the bittersweet or semi-sweet chocolate and place it in a medium mixing bowl. Add the cubed unsalted butter.
  2. Heat 1/2 cup of heavy cream in a small saucepan over medium heat until small bubbles form around the edges.
  3. Pour the hot cream over the chocolate mixture and let it sit for 1-2 minutes to allow the chocolate to melt.
  4. Stir the mixture gently until completely smooth. Heat in the microwave if needed to melt stubborn lumps.
  5. Transfer the smooth ganache to the refrigerator and chill for 1-2 hours until firm enough to scoop.
  6. Line a baking sheet with parchment paper. Portion out the chilled ganache using a small cookie scoop.
  7. Roll each scoop of ganache into a smooth ball. If too sticky, refrigerate briefly before rolling.
  8. Coat each truffle in cocoa powder, chopped nuts, or shredded coconut, ensuring they are fully covered.
  9. Set the coated truffles back on the baking sheet and let them sit for a few minutes to allow coatings to set.

Nutrition

Serving: 1truffleCalories: 100kcalCarbohydrates: 10gProtein: 1gFat: 6gSaturated Fat: 4gPolyunsaturated Fat: 0.5gMonounsaturated Fat: 1.5gCholesterol: 10mgSodium: 10mgPotassium: 50mgFiber: 1gSugar: 6gVitamin A: 80IUCalcium: 10mgIron: 1mg

Notes

These truffles are vegetarian and gluten-free, making them accessible to almost everyone. Store in an airtight container at room temperature for up to 3 days, in the fridge for up to 2 weeks, or freeze for up to 3 months.

Tried this recipe?

Let us know how it was!

Juicy Pork Loin Roast That Steals the Show at Dinner

As I stood in my kitchen, filling the air with the savory aroma of spices, I couldn’t help but feel the excitement that comes with preparing a special meal. This Tender Pork Loin Roast is more than just a dish; it’s a celebration of flavor, perfect for holidays, gatherings, or even a cozy weeknight dinner. With its juicy, melt-in-your-mouth texture and the option to drizzle on a delightful dijon cream sauce, this recipe makes impressing family and friends a breeze. Plus, it’s easy to prepare, allowing you to focus on what truly matters—creating memories around the dinner table. Are you ready to elevate your dinner game? Let’s dive into this delicious journey together!

Why is this Pork Loin Roast a must-try?

Simplicity: This recipe is straightforward, making it accessible for both novice and experienced cooks.

Juicy Perfection: With a cooking process that locks in moisture, this roast is guaranteed to be tender and succulent every time.

Versatile Flavor: The optional dijon cream sauce adds a gourmet touch, but a simple glaze or savory gravy works perfectly too!

Time-Saving: Prep and cook this delicious dish in under two hours—ideal for busy weeknights or last-minute gatherings.

Feast for the Eyes: Beautifully browned and appealing, it’s sure to impress your guests, making it a true centerpiece for any meal.

This dish can easily be complemented with sides like roasted vegetables or paired with Sweet Savory Delights for a full experience!

Pork Loin Roast Ingredients

For the Roast

  • Pork Loin Roast – Choose a 3 lb. cut for the best flavor and juiciness.
  • Salt – Generously season to enhance flavors; consider dry brining for added depth.
  • Black Pepper – Use freshly ground for the best taste; it provides a lovely warmth.
  • Olive Oil – Helps golden browning; avocado oil is a suitable alternative.
  • Ground Cumin – Adds an earthy aroma; substitute with coriander for a distinct flavor.
  • Coriander – Complements cumin with a citrusy note, enriching the overall taste.
  • Garlic Powder – A robust flavor base; fresh minced garlic can be used for intensity.
  • Dried Thyme – Introduces herbal depth; fresh thyme can elevate the flavor surprisingly.

For the Optional Dijon Cream Sauce

  • Vermouth – Great for deglazing and enhancing the sauce; chicken stock can replace it.
  • Chicken Stock – Boosts flavor in the sauce; homemade or low-sodium options are best.
  • Heavy Cream – Adds that luxurious creaminess; consider chicken stock for a dairy-free alternative.
  • Dijon Mustard – Offers a delightful tang; whole grain mustard works well for added texture.
  • Chopped Fresh Thyme – Provides freshness to the sauce; parsley may also be a good substitute.

With these ingredients, you’re on your way to creating an unforgettable Pork Loin Roast that will steal the show at dinner!

Step‑by‑Step Instructions for Tender Pork Loin Roast

Step 1: Prep the Meat
Begin by seasoning the pork loin evenly with generous amounts of salt and freshly ground black pepper. Allow it to come to room temperature, letting it rest for 30 to 60 minutes. This step is crucial for ensuring an even cook throughout the meat, which will enhance the flavor and juiciness of your Pork Loin Roast.

Step 2: Preheat Oven
While the pork is resting, preheat your oven to 400°F (200°C). A hot oven is essential for creating a beautifully browned crust on your roast. Ensure your oven rack is positioned in the center of the oven for even heat distribution, preparing it for the next delicious steps in cooking this tender roast.

Step 3: Make the Seasoning Mixture
In a small bowl, combine olive oil, ground cumin, coriander, garlic powder, and dried thyme. Mix until you have a smooth paste. Once combined, rub this fragrant seasoning mixture thoroughly over the surface of your pork loin. This will not only impart flavor but also help form a lovely crust during roasting.

Step 4: Start Roasting
Place the seasoned pork loin on a rimmed baking sheet. Roast the pork for 30 minutes at the preheated 400°F (200°C) until the exterior begins to brown and a delightful aroma fills your kitchen. Use this time to prepare any side dishes or sauces you’d like to serve alongside your Pork Loin Roast.

Step 5: Reduce Temperature
After the initial 30 minutes, lower the oven temperature to 350°F (175°C) and continue roasting the pork for approximately 30 minutes. Use a meat thermometer to check for doneness; the internal temperature should reach 145°F (63°C). Begin checking it after 45 minutes to avoid overcooking, as every oven varies.

Step 6: Rest the Roast
Once your Pork Loin Roast achieves the desired temperature, remove it from the oven and tent it loosely with aluminum foil. Allow it to rest for 10 to 15 minutes. This resting period is vital, as it allows juices to redistribute throughout the meat, leading to a perfectly juicy and tender roast when sliced.

Step 7: Optional Sauce Preparation
If you wish to elevate your meal, prepare the optional dijon cream sauce. In a skillet over medium heat, add vermouth and deglaze the pan by scraping up any flavorful browned bits. Once deglazed, stir in chicken stock and heavy cream, cooking until thickened for a rich sauce that pairs beautifully with your Pork Loin Roast.

Step 8: Final Touches
Finish the dijon cream sauce by stirring in dijon mustard and chopped fresh thyme. Taste and adjust seasoning with salt and black pepper as needed. This luxurious sauce will complement the juiciness of your roast, adding a gourmet touch to your dining experience. Serve alongside the sliced pork for a truly special meal.

Expert Tips for Perfect Pork Loin Roast

  • Room Temperature: Allow your pork loin to reach room temperature before cooking for even heat distribution and a more tender outcome.

  • Dry Brining Magic: For enhanced flavor, consider dry brining by generously salting the pork and letting it rest uncovered in the refrigerator for 1-3 days.

  • Avoid Overcooking: Keep a close watch on the internal temperature; 145°F is optimal for juicy Pork Loin Roast. Use a meat thermometer for accuracy.

  • Let It Rest: After roasting, tent the pork with foil and let it rest for 10-15 minutes to let the juices redistribute, ensuring every slice is moist and flavorful.

  • Personal Touch: Feel free to customize the spice rub with your favorite herbs, such as rosemary or oregano, for a unique flair that suits your taste!

Pork Loin Roast Variations & Substitutions

Feel free to adapt this recipe to suit your tastes and dietary needs, making each roast uniquely yours!

  • Spice Blend Twist: Try using rosemary or oregano instead of cumin and coriander for a different flavor profile that adds a fragrant touch. Each herb brings out the natural juiciness of the pork beautifully.

  • Sauce Swap: Replace the dijon cream sauce with a savory barbecue sauce for a sweet and tangy finish. Whether you prefer homemade or store-bought, this alternative elevates the dish to new heights.

  • Sweet Glaze: Drizzle a mix of honey or maple syrup during the last few minutes of roasting for a delightful caramelization. The result is a sweet exterior that balances the savory pork delightfully.

  • Herb Infusion: Use fresh rosemary or sage instead of thyme for an earthy aroma that pairs perfectly with roasted meats. Fresh herbs always make a dish pop with flavor and brightness, giving it a gourmet touch.

  • Dairy-Free Option: Substitute heavy cream with additional chicken stock or coconut cream to create a simple, dairy-free sauce without compromising the richness of the dish. Enjoy a creamy experience without the dairy!

  • Heat Level: For a kick, incorporate red pepper flakes or smoked paprika into the spice rub. This offers a subtle heat that enhances the overall flavor without overwhelming the dish.

  • Alternative Cooking Method: Instead of roasting, consider slow cooking the pork loin with your favorite sauces for a hands-off, melt-in-your-mouth meal. This method creates an incredibly tender roast that’s perfect for any gathering.

Don’t forget to also explore delightful pairings like a side of Sweet Savory Delights or a refreshing salad to round out your meal. Enjoy every bite!

What to Serve with Tender Pork Loin Roast

A memorable dinner deserves equally delicious sides to complement the rich flavors of your roast.

  • Creamy Mashed Potatoes: The velvety texture and buttery flavor make them a comforting match for the juicy pork.
  • Garlic Roasted Asparagus: The slight crunch and fresh flavor of asparagus beautifully balance the tender roast, adding a vibrant green touch to your plate.
  • Honey Glazed Carrots: Sweet and sticky, these carrots add a delightful burst of flavor, enhancing the overall sweetness of the dish.
  • Crispy Brussels Sprouts: Roasting brings out their nuttiness, contrast in texture, and earthiness that complements the succulent meat.
  • Mixed Green Salad: A fresh salad with a tangy vinaigrette brings brightness and cuts through the richness of the pork, making for a light contrast.
  • Homemade Applesauce: The sweetness and acidity of applesauce provide a wonderful contrast that enhances the savory notes of the pork.
  • Herbed Rice Pilaf: Fluffy rice infused with herbs adds a nutty flavor, creating a cozy backdrop for the beautifully seasoned pork.
  • Red Wine: A glass of your favorite red pairs wonderfully with the savory elements of the roast, enhancing the depth of flavors.
  • Chocolate Cake: Finish the meal on a sweet note with a slice of rich chocolate cake, bringing an indulgent end to your dinner experience.

Each of these pairings will elevate your dining experience, ensuring your Pork Loin Roast shines as the star of the meal!

How to Store and Freeze Pork Loin Roast

Fridge: Store leftover Pork Loin Roast in an airtight container for up to 3 days. Make sure it has cooled down before sealing to maintain its tenderness.

Freezer: For longer storage, wrap the cooled pork tightly in plastic wrap and then in aluminum foil. It can be frozen for up to 3 months without losing moisture.

Reheating: Thaw the pork in the fridge overnight before reheating. Gently warm in the oven at 325°F (160°C) until heated through to retain juiciness.

Serving Tips: Enjoy cold in sandwiches or reheat with your favorite sauces for a delightful meal that’s just as satisfying as when it was first cooked!

Make Ahead Options

Preparing this Tender Pork Loin Roast ahead of time is a fantastic way to save valuable time on busy days! You can season the pork loin and let it marinate in the refrigerator for up to 24 hours to enhance its flavor. Just rub it with the seasoning mixture, wrap it tightly, and refrigerate. For the dijon cream sauce, you can prepare it up to 3 days in advance; simply reheat it on the stove when you’re ready to serve. When it’s time to cook, take the seasoned pork out of the fridge, let it come to room temperature, and roast as instructed. This way, you’ll enjoy a delicious, juicy roast that feels just as fresh as the day you made it!

Pork Loin Roast Recipe FAQs

How do I select the perfect pork loin roast?
Absolutely! Look for a well-marbled 3 lb. pork loin roast; the marbling signifies flavor and juiciness. Check for a pinkish color and avoid cuts with dark spots. If you can, purchase from a butcher or high-quality grocery store for the best results!

What is the best way to store leftover pork loin roast?
Leftover pork loin can be stored in an airtight container for up to 3 days in the refrigerator. It’s crucial to let the roast cool completely before sealing to maintain that juicy texture. Cover the container tightly to keep moisture in and flavors fresh!

Can I freeze pork loin roast, and how should I do it?
Very! To freeze your pork loin roast, wrap it tightly in plastic wrap, ensuring there are no gaps. Then, place it in a freezer-safe bag or wrap it in aluminum foil for extra protection. This way, it can stay fresh for up to 3 months. When you’re ready to enjoy it again, simply thaw it overnight in the fridge!

What can I do if my pork loin roast turns out dry?
If your roast ends up a bit dry, don’t fret! You can slice it and serve it with a flavorful sauce or gravy to add moisture. To avoid this in the future, closely monitor the internal temperature with a meat thermometer, and aim for 145°F. Letting it rest after roasting also helps retain those juices!

Are there any dietary considerations I should keep in mind when serving pork loin?
Definitely! If you’re serving to guests, you might want to check for any allergies, particularly to mustard if you’re making the optional dijon cream sauce. While pork is generally safe for most diets, consider offering a dairy-free option using chicken stock instead of cream if needed. Always a good idea to have alternatives to accommodate various dietary needs!

Pork Loin Roast

Juicy Pork Loin Roast That Steals the Show at Dinner

This Juicy Pork Loin Roast is a crowd-pleaser, perfect for gatherings and sure to impress with its flavorful and tender texture.
Prep Time 1 hour
Cook Time 1 hour
Resting Time 15 minutes
Total Time 2 hours 15 minutes
Servings: 6 slices
Course: Dinner
Cuisine: American
Calories: 350

Ingredients
  

For the Roast
  • 3 lb Pork Loin Roast Choose a 3 lb. cut for the best flavor and juiciness
  • to taste Salt Generously season to enhance flavors; consider dry brining for added depth
  • to taste Black Pepper Use freshly ground for the best taste
  • 2 tbsp Olive Oil Helps golden browning; avocado oil is a suitable alternative
  • 1 tbsp Ground Cumin Adds an earthy aroma; substitute with coriander for a distinct flavor
  • 1 tbsp Coriander Complements cumin with a citrusy note
  • 1 tbsp Garlic Powder A robust flavor base; fresh minced garlic can be used for intensity
  • 1 tbsp Dried Thyme Introduces herbal depth; fresh thyme can elevate the flavor
For the Optional Dijon Cream Sauce
  • 1 cup Vermouth Great for deglazing and enhancing the sauce
  • 1 cup Chicken Stock Boosts flavor in the sauce; homemade or low-sodium options are best
  • 1 cup Heavy Cream Adds that luxurious creaminess; consider chicken stock for a dairy-free alternative
  • 2 tbsp Dijon Mustard Offers a delightful tang
  • 2 tbsp Chopped Fresh Thyme Provides freshness to the sauce

Equipment

  • Oven
  • rimmed baking sheet
  • Skillet
  • meat thermometer

Method
 

Step-by-Step Instructions for Tender Pork Loin Roast
  1. Season the pork loin evenly with salt and freshly ground black pepper. Allow it to come to room temperature, resting for 30 to 60 minutes.
  2. Preheat your oven to 400°F (200°C). Position the oven rack in the center for even heat distribution.
  3. In a small bowl, combine olive oil, ground cumin, coriander, garlic powder, and dried thyme. Mix until smooth and rub over the pork loin.
  4. Place the seasoned pork loin on a rimmed baking sheet. Roast for 30 minutes at 400°F (200°C) until it begins to brown.
  5. After 30 minutes, lower the temperature to 350°F (175°C) and continue roasting for approximately 30 minutes until the internal temperature reaches 145°F (63°C).
  6. Once done, remove from the oven and tent with aluminum foil. Let it rest for 10 to 15 minutes to redistribute juices.
  7. For the optional dijon cream sauce, in a skillet, add vermouth and deglaze the pan. Stir in chicken stock and heavy cream, cooking until thickened.
  8. Finish the sauce by stirring in dijon mustard and chopped fresh thyme. Adjust seasoning as needed. Serve alongside the sliced pork.

Nutrition

Serving: 1sliceCalories: 350kcalCarbohydrates: 6gProtein: 32gFat: 22gSaturated Fat: 10gPolyunsaturated Fat: 2gMonounsaturated Fat: 10gCholesterol: 90mgSodium: 540mgPotassium: 600mgFiber: 1gSugar: 1gVitamin A: 500IUVitamin C: 1mgCalcium: 30mgIron: 2mg

Notes

To ensure the best results, always use a meat thermometer and allow the roast to rest adequately before slicing.

Tried this recipe?

Let us know how it was!

Lemon Garlic Roasted Chicken for Juicy Perfection at Home

The aroma wafting from my kitchen was a delightful reminder of family gatherings, where the meals didn’t just fill our stomachs but warmed our hearts too. This Lemon Garlic Roasted Chicken is one of those dishes that instantly transforms an ordinary evening into a cherished occasion. Not only is it tantalizingly juicy with that sought-after crispy skin, but it’s also a family-friendly choice that’s as budget-friendly as it is impressive. Whether you’re entertaining guests or simply enjoying dinner with your loved ones, this recipe makes preparation a breeze—perfect for those busy weeknights or special celebrations alike. Ready to elevate your dinner game with this succulent delight? Let’s dive into the recipe!

Why is This Chicken Recipe a Must-Try?

Juicy Perfection: This Lemon Garlic Roasted Chicken boasts an irresistible combination of flavors, making it a crowd favorite that will have everyone coming back for seconds.

Effortless Preparation: The straightforward steps mean anyone can master this dish, from novice cooks to seasoned chefs.

Versatile Serving Options: Pair it with seasonal veggies or serve over rice for a complete meal—perfect for any occasion!

Budget-Friendly Delight: Using just a few ingredients, you can create a dish that impresses without breaking the bank.

If you’re looking for more delicious chicken ideas, don’t miss out on these Cheesy Garlic Chicken and Garlic Chicken Gnocchi recipes that are sure to elevate your home-cooked meals!

Lemon Garlic Roasted Chicken Ingredients

• Discover the blend of flavors!

For the Chicken

  • Whole Chicken (4 lb.) – Ensure it’s fresh for the best flavor and texture.
  • Kosher Salt – Vital for dry brining; enhances flavor and moisture retention.
  • Olive Oil (1.5 tablespoons) – Adds richness and helps achieve that crispy skin.

For the Seasoning

  • Garlic Powder (1.5 teaspoons) – Essential for infusing that delicious garlic flavor.
  • Dried Rosemary (1.5 teaspoons) – Adds herbal notes; feel free to swap with thyme or oregano.
  • Black Pepper (1 teaspoon) – Elevates the overall flavor profile.

For the Stuffing

  • Lemon (1, quartered) – Brings acidity and brightness to the dish; lime works as a substitute too.
  • Garlic (1 head, halved crosswise) – Imparts a deeper garlic flavor during roasting.
  • Fresh Rosemary (3 sprigs) – Adds aromatic depth; substitute with your favorite herbs if desired.

This Lemon Garlic Roasted Chicken is set to become a beloved staple in your kitchen, filling your home with charm and warmth!

Step‑by‑Step Instructions for Lemon Garlic Roasted Chicken

Step 1: Prepare the Chicken
Start by removing the giblets from your 4 lb. whole chicken and pat it dry thoroughly with paper towels. This will ensure a crispy skin during roasting. Generously salt the inside and outside of the chicken to enhance flavor and moisture retention. For best results, let it rest uncovered in the refrigerator for 1-3 days to dry brine.

Step 2: Bring to Room Temperature
About one hour before cooking, take your chicken out of the refrigerator to bring it to room temperature. This step is crucial for even cooking throughout. As the chicken warms up, its juices will redistribute, ensuring each bite is tender and juicy.

Step 3: Preheat the Oven
Preheat your oven to 400°F (200°C) while the chicken is coming to room temperature. This ensures that the chicken will bake evenly, starting with that perfect initial high heat. An adequately preheated oven will help achieve that iconic crispy skin for your Lemon Garlic Roasted Chicken.

Step 4: Prepare the Seasoning
In a small bowl, mix together 1.5 tablespoons of olive oil, 1.5 teaspoons of garlic powder, 1.5 teaspoons of dried rosemary, and 1 teaspoon of black pepper. This fragrant blend will create a delicious crust on the chicken. Use your hands or a brush to rub this mixture all over the chicken, ensuring it is well-coated.

Step 5: Stuff the Chicken
Now, stuff the cavity of your chicken with the quartered lemon, halved garlic head, and fresh rosemary sprigs. These aromatics will infuse the meat with flavor as it roasts. To ensure even cooking, truss the legs using kitchen twine, which will help the chicken maintain its shape during roasting.

Step 6: Roast at High Temperature
Place your seasoned chicken in a roasting pan and roast uncovered in the preheated oven at 400°F for 30 minutes. This initial phase will allow the skin to become beautifully golden brown. Keep an eye on it; the aroma will be tantalizing and is a sign that your Lemon Garlic Roasted Chicken is on its way to perfection.

Step 7: Reduce Oven Temperature
After 30 minutes, reduce the oven temperature to 350°F (175°C) and continue roasting for an additional 45-60 minutes. This slower cooking will ensure juicy meat while allowing the skin to crisp perfectly. Use a meat thermometer to check that the internal temperature reaches 175°F in the thigh for doneness.

Step 8: Monitor for Browning
If you notice the skin browning too quickly during roasting, you can loosely cover the chicken with aluminum foil to prevent burning. This simple trick will protect the skin while allowing the inside of your Lemon Garlic Roasted Chicken to finish cooking beautifully.

Step 9: Let It Rest
Once cooked to perfection, remove the chicken from the oven and allow it to rest for a full 20 minutes. This resting period lets the juices settle, ensuring every slice remains incredibly juicy and tender. The crispy skin will stay intact, making carving a delight.

Storage Tips for Lemon Garlic Roasted Chicken

  • Room Temperature: Allow the chicken to cool completely at room temperature for no more than 2 hours after roasting to prevent bacterial growth.

  • Fridge: Store leftover Lemon Garlic Roasted Chicken in an airtight container in the refrigerator for up to 3 days for optimal freshness and flavor.

  • Freezer: For longer storage, wrap the chicken tightly in plastic wrap or a freezer bag and freeze for up to 3 months. Thaw in the fridge before reheating.

  • Reheating: To reheat, place the chicken in a preheated oven at 350°F (175°C) until warmed through, about 20-25 minutes, keeping it covered to maintain moisture.

Lemon Garlic Roasted Chicken Variations

Feel free to give this Lemon Garlic Roasted Chicken a personal twist with these delightful variations!

  • Herb Swap: Replace dried rosemary with thyme for a new aromatic experience. It’s a subtle yet impactful change that brightens the flavor!

  • Citrus Zest: Experiment with other citrus fruits like lime or orange, offering a refreshing twist to your chicken. The different notes can transform your meal into something extraordinary.

  • Add Aromatics: Toss in some quartered onions or shallots in the cavity for added sweet depth. This brings a lovely, rich flavor to your roast chicken.

  • Spicy Kick: Sprinkle some chili flakes or use smoked paprika in your seasoning blend for a spicy twist. It’s a wonderful way to heat things up a notch.

  • Dairy-Free: Opt for avocado oil instead of olive oil to cater to those with dietary restrictions while maintaining the rich flavor. It will still achieve that golden, crispy finish!

  • Garlic Lovers: For an even bolder garlic flavor, add extra garlic cloves or use roasted garlic paste in the seasoning mix, enhancing that savory profile.

  • Stuffing Options: Get creative by stuffing the chicken with fresh herbs like cilantro or parsley alongside the lemon for a garden-fresh taste. The herbs will beautifully infuse as it roasts.

  • Quick Roast: Use chicken pieces instead of a whole bird for a faster cooking time, while still enjoying the same flavors. This is perfect for busy weeknights!

If you’re on the lookout for more mouth-watering chicken recipes, don’t miss out on trying out Garlic Butter Baked or Garlic Parmesan Chicken for your next family dinner!

What to Serve with Lemon Garlic Roasted Chicken

Transform your dinner into a delightful feast with the perfect pairings that elevate your taste experience!

  • Creamy Mashed Potatoes: Their buttery texture complements the savory chicken beautifully, absorbing those delicious juices.

  • Seasonal Roasted Vegetables: Tossed in herbs, these add vibrant color and fresh crunch, enhancing the overall meal appeal.

  • Garlic Green Beans: These crisp green beans, sautéed with garlic, echo the flavors of the chicken while adding brightness to your plate. They are a simple yet flavorful side.

  • Citrusy Quinoa Salad: The light, zesty nature of this salad adds a refreshing element that balances the richness of the roasted chicken.

  • Savory Stuffing: A classic pairing, a herbed stuffing laced with broth brings warmth and comfort that works harmoniously with every bite of chicken.

  • Apple Crisp: For a sweet finish, this warm dessert pairs perfectly. Its crumbly topping and tart apples balance the savory notes of the meal.

  • Dry White Wine: A chilled glass of Sauvignon Blanc elevates the experience, enhancing the flavors and providing a lovely contrast to the garlic.

  • Lemonade: For a refreshing, non-alcoholic option, sparkling lemonade complements the chicken’s citrus notes, cleansing the palate.

  • Bread Rolls: Soft, warm rolls are perfect for soaking up the juices, bringing an inviting element to your dining experience.

Let your imagination run wild—these pairings will surely make your Lemon Garlic Roasted Chicken shine even brighter!

Expert Tips for Lemon Garlic Roasted Chicken

  • Brining Benefits: Start dry brining the chicken 1-3 days in advance. This enhances moisture and flavor, leading to a juicy Lemon Garlic Roasted Chicken.

  • Room Temperature is Key: Always allow your chicken to come to room temperature before cooking. This ensures even cooking and prevents the meat from drying out.

  • Trust Your Thermometer: Use a reliable meat thermometer to check for doneness. Aim for an internal temperature of 175°F in the thigh for perfect results.

  • Avoiding Soggy Skin: Pat the chicken dry thoroughly before seasoning. This helps achieve that coveted crispy skin during roasting.

  • Save for Stock: Don’t discard the carcass! Use it to make homemade chicken stock, reducing waste and creating a flavorful base for future meals.

Make Ahead Options

This Lemon Garlic Roasted Chicken is perfect for meal prep enthusiasts! To save time on your busy weeknights, you can dry brine the whole chicken with kosher salt up to 3 days in advance, enhancing flavor and moisture. Just season generously, cover, and refrigerate it until you’re ready to cook. Additionally, you can mix the olive oil and spices, storing them in the refrigerator for up to 24 hours, ensuring the blend is fresh. When you’re ready to serve, simply bring the chicken to room temperature about an hour beforehand, rub the seasoning over it, stuff with aromatics, and roast as directed, guaranteeing restaurant-quality results with minimal effort!

Lemon Garlic Roasted Chicken Recipe FAQs

What type of chicken should I use for this recipe?
Absolutely! Using a fresh, whole chicken (around 4 lbs) is key for the best flavor and texture. Look for chickens with smooth skin and no dark spots. Frozen chickens can work in a pinch, but thaw them completely before cooking.

How should I store leftover Lemon Garlic Roasted Chicken?
After the chicken has cooled completely—no more than 2 hours at room temperature—store it in an airtight container in the refrigerator for up to 3 days. This will keep it fresh and tasty for your next meal!

Can I freeze the Lemon Garlic Roasted Chicken?
Yes, you can! Wrap the chicken tightly in plastic wrap or place it in a freezer bag, ensuring all the air is pushed out. It can be frozen for up to 3 months. When you’re ready to enjoy it again, thaw it in the fridge overnight before reheating.

What if my chicken isn’t browning enough?
If you notice it’s not browning well, begin by checking your oven temperature with a thermometer. An oven that’s not hot enough can cause uneven cooking. If it’s still not browning, try roasting at 400°F longer, or if needed, you can crank it back up for a few minutes, keep an eye on it to avoid burning!

Is this recipe suitable for those with dietary restrictions?
Certainly! This Lemon Garlic Roasted Chicken is gluten-free and family-friendly. If cooking for pets, remember that the seasoning can be harmful; be sure to remove any leftover, seasoned bones, and only offer unseasoned pieces to pets. If allergies are a concern, ensure all ingredients, like garlic and herbs, are safe for those with specific dietary needs.

What’s the best way to tell if the chicken is fully cooked?
To accurately check for doneness, invest in a good meat thermometer. Insert it into the thickest part of the thigh—once it reads 175°F, your Lemon Garlic Roasted Chicken is safely cooked and ready to serve! A clear juice running from the meat is another good visual cue.

Lemon Garlic Roasted Chicken

Lemon Garlic Roasted Chicken for Juicy Perfection at Home

This Lemon Garlic Roasted Chicken offers juiciness with a crispy skin, transforming any dinner into a cherished occasion. Perfect for families and gatherings.
Prep Time 1 hour 30 minutes
Cook Time 1 hour 15 minutes
Resting Time 20 minutes
Total Time 3 hours 5 minutes
Servings: 4 servings
Course: Dinner
Cuisine: American
Calories: 350

Ingredients
  

For the Chicken
  • 4 lb Whole Chicken Ensure it’s fresh for the best flavor and texture.
  • Kosher Salt Vital for dry brining; enhances flavor and moisture retention.
  • 1.5 tablespoons Olive Oil Adds richness and helps achieve that crispy skin.
For the Seasoning
  • 1.5 teaspoons Garlic Powder Essential for infusing that delicious garlic flavor.
  • 1.5 teaspoons Dried Rosemary Adds herbal notes; feel free to swap with thyme or oregano.
  • 1 teaspoon Black Pepper Elevates the overall flavor profile.
For the Stuffing
  • 1 Lemon Brings acidity and brightness; lime works as a substitute too.
  • 1 head Garlic Halved crosswise to impart a deeper garlic flavor during roasting.
  • 3 sprigs Fresh Rosemary Add aromatic depth; substitute with your favorite herbs if desired.

Equipment

  • Roasting Pan
  • meat thermometer
  • Kitchen Twine
  • Mixing Bowl

Method
 

Step‑by‑Step Instructions
  1. Remove giblets from the whole chicken and pat it dry thoroughly with paper towels. Salt the inside and outside generously, then let it rest uncovered in the refrigerator for 1-3 days to dry brine.
  2. Take the chicken out of the refrigerator about one hour before cooking to bring it to room temperature.
  3. Preheat the oven to 400°F (200°C) while the chicken is coming to room temperature.
  4. Mix together olive oil, garlic powder, dried rosemary, and black pepper in a small bowl. Rub the mixture all over the chicken.
  5. Stuff the chicken cavity with quartered lemon, halved garlic, and fresh rosemary sprigs. Truss the legs using kitchen twine.
  6. Place the seasoned chicken in a roasting pan and roast uncovered at 400°F for 30 minutes.
  7. After 30 minutes, reduce the temperature to 350°F (175°C) and continue roasting for an additional 45-60 minutes.
  8. If the skin browns too quickly, loosely cover the chicken with aluminum foil.
  9. Once cooked, remove the chicken from the oven and let it rest for 20 minutes.

Nutrition

Serving: 1servingCalories: 350kcalCarbohydrates: 2gProtein: 39gFat: 20gSaturated Fat: 5gPolyunsaturated Fat: 1gMonounsaturated Fat: 13gCholesterol: 115mgSodium: 875mgPotassium: 400mgVitamin A: 350IUVitamin C: 10mgCalcium: 20mgIron: 1mg

Notes

Brining the chicken in advance enhances moisture and flavor. Always allow chicken to come to room temperature before cooking to ensure even cooking and avoid dryness.

Tried this recipe?

Let us know how it was!

Decadent Apple Cranberry Pie Recipe for Cozy Holiday Moments

As the crisp air of autumn settles in, the scent of warmth and nostalgia fills my kitchen, beckoning me to revisit a cherished family recipe: Apple Cranberry Pie. This delightful treat harmoniously combines the tartness of fresh cranberries with the sweetness of baking apples, all cozily wrapped in a flaky, golden lattice crust. What I adore most about this Apple Cranberry Pie Recipe is how it can be made ahead of time, allowing you to savor the moments with your loved ones rather than stress over dessert in the kitchen. It’s a seasonal showstopper, perfect for holiday gatherings, where each slice offers a delightful balance of textures and flavors. Are you ready to impress your guests with this stunning pie that tastes as lovely as it looks?

Why is this pie a must-try?

Flavor Fusion: The perfect blend of sweet apples and tart cranberries creates a symphony of taste that will leave your taste buds singing.

Stress-Free Baking: You can prepare this pie ahead of time, making it a lifesaver for busy holiday schedules, so you can enjoy precious moments with loved ones.

Irresistible Appearance: The golden lattice crust not only looks stunning but also adds a delightful texture that complements the juicy filling.

Seasonal Delight: This Apple Cranberry Pie embodies the essence of fall, making it a warm and inviting addition to your holiday table, just like a comforting bowl of Chef’s special Cheesy Hamburger Soup.

Versatile Serving: Serve it warm with vanilla ice cream or dollop on a generous spoonful of whipped cream for that extra indulgence! Try it out and savor the flavor!

Apple Cranberry Pie Ingredients

For the Pie Crust
Pie Dough – Essential for a flaky crust; can be made 3 days in advance or substituted with store-bought if time is tight.

For the Filling
Apples – Use 6 medium baking apples (about 3 lbs), like Granny Smith or Pink Lady, for a blend of sweetness and structure.
Cranberries – 1.5 cups of fresh or frozen cranberries provide necessary tartness; chop for better distribution if preferred.
Sugar – 1 cup of granulated sugar sweetens the filling; consider coconut or maple sugar for a refined sugar-free option.
Orange Zest – 1 tablespoon brightens the filling, lending a hint of citrus freshness.
Orange Juice – 2 tablespoons enhance the flavors and balance the sweetness.
Cornstarch – 2.5 tablespoons thicken the filling for a perfect texture.
Cinnamon – 2 teaspoons add a warm, aromatic essence that elevates the dish.

For the Glaze
Egg – 1 egg yolk mixed with water creates a glossy egg wash for a beautiful golden crust.
Butter – A couple of tablespoons cubed and dotted on the filling enrich the flavors and create a delightful experience in your Apple Cranberry Pie.

Step‑by‑Step Instructions for Apple Cranberry Pie Recipe

Step 1: Prepare Pie Crust
Start by rolling out your pie dough on a lightly floured surface until it’s about 1/8 inch thick. Place the rolled crust into a 9-inch pie plate, gently pressing it into the edges without stretching. Trim any excess dough, leaving about an inch overhang. Chill the crust in the refrigerator for at least 30 minutes while you prepare the filling, ensuring a flaky texture.

Step 2: Make Filling
In a large mixing bowl, combine the sliced apples and fresh or frozen cranberries. Add the granulated sugar, orange zest, orange juice, cinnamon, and cornstarch, mixing thoroughly until all the ingredients are evenly coated. Allow the filling to sit for about 10 minutes, letting the flavors meld together while you preheat your oven to 400°F.

Step 3: Assemble Pie
Take your chilled pie crust from the refrigerator and pour the apple-cranberry mixture into the bottom crust. Roll out a second piece of pie dough and cut it into strips for the lattice top. Weave the strips over the filling, alternating them to create a beautiful pattern. Crimp the edges of the crust together, sealing in the delicious filling, and brush the top with the egg wash for a lovely golden finish.

Step 4: Bake
Place your assembled Apple Cranberry Pie on a foil-lined baking sheet to catch any drips. Bake it in the preheated oven at 400°F for the first 20 minutes, then reduce the temperature to 350°F and continue baking for 40-50 minutes. You’re looking for a bubbly filling and a golden crust, so keep an eye on it to ensure it doesn’t over-brown.

Step 5: Cool
Once baked, remove the pie from the oven and let it cool on a wire rack at room temperature for at least 3 hours. This cooling time allows the filling to set up properly, making it easier to slice. The aroma of your freshly baked Apple Cranberry Pie will fill the kitchen, creating sweet anticipation for your upcoming gathering.

Make Ahead Options

This Apple Cranberry Pie is perfect for busy home cooks looking to save time without sacrificing quality! You can prepare the pie crust up to 3 days in advance; simply wrap it tightly in plastic wrap and refrigerate to maintain its flakiness. The filling can also be made up to 24 hours ahead—just store it in an airtight container in the fridge to keep the apples from browning. When you’re ready to serve, assemble your pie with a lattice top, brush with the egg wash, and bake as instructed. You’ll enjoy a stress-free dessert that’s just as delicious as if made fresh that day!

Expert Tips for Apple Cranberry Pie

  • Chill for Shape: Chilling the assembled pie for 20 minutes before baking helps it maintain its shape, ensuring a beautiful presentation.

  • Cold Ingredients Matter: Using cold butter and water in your pie dough will yield a flakier crust—overworking the dough can lead to a tough texture.

  • Lattice Practice: If you’re unfamiliar with weaving a lattice crust, practice on a flat surface first to boost your confidence before assembly.

  • Avoid Soggy Bottoms: To prevent a soggy crust, sprinkle a thin layer of cornstarch on the bottom pie crust before adding the filling. This absorbs excess moisture.

  • Time for Cooling: Allowing your Apple Cranberry Pie to cool for at least 3 hours after baking is crucial; it helps the filling set for neat slices.

Apple Cranberry Pie Recipe Variations

Customize this delightful pie to your liking and experience an even richer taste journey with every slice!

  • Crumble Topping: Replace the lattice top with a crunchy streusel, combining oats, brown sugar, and butter for added texture.

  • Apple Variety Swap: Experiment with different apple types like Honeycrisp or Fuji for varying sweetness and flavor profiles, creating a unique pie every time.

  • Nutty Addition: Mix in walnuts or pecans with the filling for an unexpected crunch that beautifully complements the soft fruit.

  • Spice It Up: Add a pinch of nutmeg or ginger alongside cinnamon for an extra layer of warmth and excitement in every bite.

  • Maple Sweetness: Substitute granulated sugar with pure maple syrup for a deeper, caramel-like sweetness that elevates the filling’s flavor.

  • Cranberry Twist: Incorporate dried cherries or blueberries along with the cranberries to introduce another delightful fruit dimension in your pie. They resonate beautifully with the tartness.

  • Vegan Option: Use coconut oil instead of butter for the crust and choose flaxseed or a chia egg as a substitute for egg wash, making this pie plant-based.

  • Zesty Surprise: Add some finely grated lemon zest to the filling for an invigorating citrus note that perfectly balances the sweet and tart flavors!

Pondering more options? Check out my spin on cozy comfort foods like Cheesy Hamburger Soup or brighten your day with a slice of Apple Crisp Cinnamon Roll Casserole. Each twist adds joy and flavor to your holiday baking!

How to Store and Freeze Apple Cranberry Pie

Room Temperature: Store leftover pie covered at room temperature for 1-2 days; this keeps the crust crisp and delicious.

Fridge: If you need longer storage, refrigerate the pie for up to one week, but be aware that the crust might soften slightly.

Freezer: For optimal freshness, freeze the pie wrapped tightly in plastic wrap and aluminum foil for up to 3 months; thaw in the fridge before serving.

Reheating: To bring back that warm, inviting texture, reheat slices in a preheated oven at 350°F for about 10-15 minutes until heated through. Enjoy your Apple Cranberry Pie!

What to Serve with Apple Cranberry Pie

Nothing says cozy gathering like a selection of side dishes and treats that elevate the delightful experience of sharing a homemade dessert.

  • Vanilla Ice Cream: A scoop of creamy vanilla ice cream melts into the warm pie, creating an indulgent balance of hot and cold textures.

  • Whipped Cream: A dollop of freshly whipped cream adds lightness, accentuating the pie’s sweetness while contributing a lovely texture with each bite.

  • Cinnamon Sugar Doughnuts: These fluffy treats dusted in cinnamon sugar echo the pie’s spices, making them a playful yet complementary pairing with every slice.

  • Maple Glazed Carrots: Sweet and savory, these tender carrots bring a colorful contrast to the table and enhance the meal’s cozy warmth.

  • Mixed Green Salad: A refreshing salad with tart apples and cranberries provides a delightful crunch, contrasting beautifully with the soft pie filling.

  • Sparkling Cider: A glass of sparkling cider offers a festive touch, its fizz brightening the palate between bites of pie while enhancing the seasonal theme.

  • Pecan Pie Bars: Keep the dessert table delightful with these rich bars, sharing nutty caramel flavors that pair seamlessly with the fruits in the pie.

  • Cheese Platter: An assortment of cheeses, particularly sharp cheddar or creamy brie, creates an intriguing flavor dynamic, balancing the sweetness with savory notes.

  • Hot Apple Cider: Served warm with spices, this drink wraps you in autumn comfort, echoing the apple flavors while making every gathering feel like a hug.

Apple Cranberry Pie Recipe FAQs

What type of apples are best for this pie?
For your Apple Cranberry Pie, I recommend using medium baking apples like Granny Smith or Pink Lady. These varieties provide the perfect balance of sweetness and structure to hold up well during baking, enhancing the overall flavor of the pie.

How should I store leftover Apple Cranberry Pie?
Absolutely! You can store leftover pie covered at room temperature for about 1 to 2 days to maintain its delightful crispness. For longer storage, refrigerate it for up to one week, although the crust may become softer. Just remember to cover it well to keep it fresh.

Can I freeze the Apple Cranberry Pie for later use?
Yes, you can! To freeze your pie, wrap it firmly in plastic wrap followed by aluminum foil, which helps protect it from freezer burn. It can be stored this way for up to 3 months. When you’re ready to enjoy it again, thaw it in the refrigerator overnight before rewarming it in a 350°F oven for about 10-15 minutes.

What should I do if my pie crust becomes tough?
No worries! If your pie crust turns out tough, it may have been overworked or made with warm ingredients. Next time, start with cold butter and water, and handle the dough gently. Also, chilling the crust before baking can help keep it tender and flaky.

Are there any dietary considerations for the Apple Cranberry Pie?
Sure thing! If you’re concerned about gluten, you can use a gluten-free pie crust instead. For those with sugar restrictions, using coconut or maple sugar as a substitute can minimize refined sugar intake while still providing sweetness. Just be sure to check your specific dietary needs with any ingredient changes.

How long should I let my pie cool before serving?
Letting your Apple Cranberry Pie cool for at least 3 hours is essential. This cooling time allows the filling to set properly, so when you slice it, the filling stays intact and doesn’t run out. Plus, the tantalizing aroma will create sweet anticipation for your gathering!

Apple Cranberry Pie Recipe

Decadent Apple Cranberry Pie Recipe for Cozy Holiday Moments

This Apple Cranberry Pie harmonizes the tartness of cranberries with sweet apples, nestled in a flaky crust, perfect for holiday gatherings.
Prep Time 30 minutes
Cook Time 1 hour
Cooling Time 3 hours
Total Time 4 hours 30 minutes
Servings: 8 slices
Course: Dessert
Cuisine: American
Calories: 350

Ingredients
  

For the Pie Crust
  • Pie Dough can be made 3 days in advance or substituted with store-bought
For the Filling
  • 6 medium Baking Apples like Granny Smith or Pink Lady
  • 1.5 cups Fresh or Frozen Cranberries chopped for better distribution
  • 1 cup Granulated Sugar consider coconut or maple sugar for sugar-free option
  • 1 tablespoon Orange Zest for citrus freshness
  • 2 tablespoons Orange Juice to enhance flavors
  • 2.5 tablespoons Cornstarch to thicken the filling
  • 2 teaspoons Cinnamon adds a warm essence
For the Glaze
  • 1 Egg Yolk mixed with water for egg wash
  • 2 tablespoons Butter cubed and dotted on filling

Equipment

  • 9-inch pie plate
  • Mixing Bowl
  • Rolling Pin
  • Wire rack

Method
 

Step-by-Step Instructions for Apple Cranberry Pie Recipe
  1. Start by rolling out your pie dough on a lightly floured surface until it’s about 1/8 inch thick. Place the rolled crust into a 9-inch pie plate, gently pressing it into the edges without stretching. Trim any excess dough, leaving about an inch overhang. Chill the crust in the refrigerator for at least 30 minutes while you prepare the filling.
  2. In a large mixing bowl, combine the sliced apples and fresh or frozen cranberries. Add the granulated sugar, orange zest, orange juice, cinnamon, and cornstarch, mixing thoroughly until all the ingredients are evenly coated. Allow the filling to sit for about 10 minutes while you preheat your oven to 400°F.
  3. Take your chilled pie crust from the refrigerator and pour the apple-cranberry mixture into the bottom crust. Roll out a second piece of pie dough and cut it into strips for the lattice top. Weave the strips over the filling, alternating them to create a beautiful pattern. Crimp the edges of the crust together, sealing in the filling, and brush the top with the egg wash for a lovely golden finish.
  4. Place your assembled Apple Cranberry Pie on a foil-lined baking sheet to catch any drips. Bake it in the preheated oven at 400°F for the first 20 minutes, then reduce the temperature to 350°F and continue baking for 40-50 minutes. Keep an eye on it to ensure it doesn't over-brown.
  5. Once baked, remove the pie from the oven and let it cool on a wire rack at room temperature for at least 3 hours. This cooling time allows the filling to set up properly, making it easier to slice.

Nutrition

Serving: 1sliceCalories: 350kcalCarbohydrates: 52gProtein: 2gFat: 16gSaturated Fat: 8gPolyunsaturated Fat: 0.5gMonounsaturated Fat: 7gCholesterol: 85mgSodium: 200mgPotassium: 150mgFiber: 2gSugar: 18gVitamin A: 200IUVitamin C: 10mgCalcium: 20mgIron: 1mg

Notes

Chilling the assembled pie for 20 minutes before baking helps maintain its shape. Using cold butter and water in the pie dough yields a flakier crust. Allow the pie to cool for at least 3 hours after baking for neat slices.

Tried this recipe?

Let us know how it was!

Maple Rosemary Roasted Nuts: Irresistibly Crunchy Delight

As the sweet aroma of maple and rosemary wafts through my kitchen, I can’t help but feel a little thrill of anticipation. I’ve created a delightful recipe—Maple Rosemary Roasted Nuts—that turns simple ingredients into a crowd-pleasing snack in just 20 minutes! With the perfect balance of savory and sweet, these gluten-free, vegetarian munchies are versatile enough to customize with your favorite nuts and spices. Whether you’re entertaining guests or seeking a satisfying snack for movie night, this recipe delivers an irresistible crunch and warmth. Who knew that such a simple preparation could lead to such mouthwatering results? Ready to elevate your snacking game? Let’s dive into this delicious adventure together!

Why are Maple Rosemary Roasted Nuts amazing?

Irresistible Crunch: Enjoy the delightful texture that makes every bite satisfying, perfect for snacking or entertaining.

Quick and Easy: Ready in just 20 minutes, this recipe is perfect for when you need a last-minute treat.

Customizable Flavor: Tailor your nuts using your favorite herbs and spices—try spicy Cayenne or fragrant Thyme for a twist!

Healthy Indulgence: Gluten-free and vegetarian, these roasted nuts pack a nutritious punch, making them the perfect guilt-free snack.

Crowd-Pleaser: Whether it’s a cozy movie night or a festive gathering, everyone will adore these sweet-savory bites, just like my Garlic Parmesan Roasted variations! Also, consider using them as a delightful topping for salads!

Maple Rosemary Roasted Nuts Ingredients

For the Nuts

  • Raw Pecans – Adds a rich, sweet flavor and crunch; consider using roasted for a deeper taste.
  • Raw Almonds – Provides texture and a mild nutty taste; can easily swap for other nuts if desired.
  • Raw Walnuts – Contributes a distinct earthy flavor; feel free to substitute with your favorite nut variety.

For the Flavor Enhancers

  • Unsalted Butter – Adds richness to this delightful recipe; substitute with coconut or olive oil for a dairy-free option.
  • Pure Maple Syrup – A natural sweetener that beautifully balances the savory elements; honey can also provide a different flavor twist.
  • Cayenne Pepper – Introduces a subtle kick of heat; adjust to taste or omit for a milder flavor.
  • Fresh Rosemary – Offers an aromatic herbal note; if fresh isn’t available, dried rosemary works just as well.
  • Salt – Enhances overall flavor; using flaky sea salt elevates presentation, but regular salt will work if that’s what you have.

For the Final Touch

  • Flaky Sea Salt – A sprinkle at the end elevates the snack’s flavor and presentation; adjust to taste for the perfect finish.

These Maple Rosemary Roasted Nuts are not only easy to prepare but also a customizable delight, perfect for sharing at any gathering!

Step‑by‑Step Instructions for Maple Rosemary Roasted Nuts

Step 1: Preheat the Oven
Preheat your oven to 350°F (175°C) to create the perfect environment for roasting. This temperature ensures that the Maple Rosemary Roasted Nuts become golden and aromatic. While the oven warms up, gather your ingredients and prepare a rimmed baking sheet for the next steps.

Step 2: Prepare the Baking Sheet
Line your rimmed baking sheet with parchment paper for easy cleanup and to prevent sticking. Spread out the raw pecans, almonds, and walnuts in an even layer, ensuring they have room to roast properly. This step is crucial for achieving that delightful crunch in your finished Maple Rosemary Roasted Nuts.

Step 3: Create the Flavor Mixture
In a mixing bowl, melt the unsalted butter and then whisk in the pure maple syrup, cayenne pepper, salt, and 1 tablespoon of finely chopped fresh rosemary. Stir the mixture until well combined, creating a fragrant glaze that will enhance the flavor of your Maple Rosemary Roasted Nuts as they bake.

Step 4: Coat the Nuts
Pour the butter and maple mixture over the nuts on the prepared baking sheet. Using a spatula, gently toss the nuts to evenly coat them in the flavorful glaze. Make sure each nut is well-covered to maximize the sweet and savory taste, then spread the nuts back into a single, even layer.

Step 5: Bake the Nuts
Place the baking sheet in the preheated oven and bake for 10 minutes. After that time, remove the sheet and give the nuts a good stir to ensure even roasting. Return them to the oven for an additional 5–10 minutes, watching closely until they are golden brown and fragrant, which will fill your kitchen with the delicious scent of maple and rosemary.

Step 6: Add Finishing Touches
Once your Maple Rosemary Roasted Nuts are perfectly roasted, remove them from the oven and immediately toss them with any remaining chopped rosemary and a sprinkle of flaky sea salt to taste. This final touch adds an extra layer of flavor and presentation to your delicious nut blend.

Step 7: Cool Before Serving
Allow the nuts to cool completely on the baking sheet. This cooling process helps them become even crunchier. Once they reach room temperature, your Maple Rosemary Roasted Nuts are ready to be enjoyed, whether as a snack or an impressive appetizer for your guests.

Make Ahead Options

These Maple Rosemary Roasted Nuts are perfect for busy home cooks looking to save time and enjoy delicious snacks! You can prepare the nut mixture, including coating them with the maple and butter glaze, up to 24 hours in advance. Simply store the coated nuts in an airtight container in the refrigerator to prevent sogginess. When you’re ready to serve, just spread the nuts on a baking sheet and roast them for 15-20 minutes at 350°F (175°C), stirring halfway to ensure even cooking. This way, you maintain their delightful crunch and flavor, letting you enjoy freshly roasted nuts with minimal effort whenever the craving strikes!

What to Serve with Maple Rosemary Roasted Nuts

Enhance your snacking experience with delightful pairings that perfectly complement the warm, crunchy goodness of roasted nuts.

  • Cheese Platter: Create a savory cheese board featuring creamy brie or sharp cheddar; the richness harmonizes beautifully with the sweet and savory flavors.

  • Fresh Vegetables: Crisp carrot sticks or cucumber slices add a refreshing crunch; their coolness balances the warmth and spice of the nuts.

  • Salad Greens: Toss these nuts into a salad of mixed greens with a light vinaigrette. The added crunch and flavor elevate the dish and provide variety!

  • Charcuterie Board: Incorporate these roasted nuts alongside cured meats and olives; their unique flavors will surprise and delight your guests at gatherings.

  • Dark Chocolate: Pair with rich dark chocolate for an indulgent treat. The sweet and salty combination creates a perfect harmony of flavors, making it an irresistible pairing.

  • Cranberry Chutney: Serve with a spoonful of cranberry chutney for a festive touch; the tart sweetness complements the nuts’ flavor excellently.

  • Herbal Tea: Sip a cup of chamomile or green tea alongside these nuts; the soothing warmth of the tea enhances the comforting experience of the snack.

How to Store and Freeze Maple Rosemary Roasted Nuts

Airtight Container: Store your roasted nuts in an airtight container at room temperature for up to 2 weeks to preserve their crunchy texture.

Fridge: For longer freshness, you can refrigerate the Maple Rosemary Roasted Nuts in an airtight container for up to 1 month, though this may slightly alter their crunch.

Freezer: If you want to keep them even longer, freeze your nuts in a sealed freezer bag for up to 3 months. To enjoy, allow them to thaw at room temperature.

Reheating: If you prefer your nuts warm, reheat them in a 350°F (175°C) oven for 5–10 minutes, ensuring they regain that delightful crunch before serving.

Expert Tips for Maple Rosemary Roasted Nuts

Watch for Burning: Keep a close eye on the nuts during roasting, as they can burn quickly after they become fragrant.

Choose Raw Nuts: Use raw, unseasoned nuts for the best flavor and texture; pre-roasted nuts can alter the taste and consistency.

Customize Wisely: Feel free to experiment with different types of nuts and spices, but remember to taste-test as you go to maintain balance in your Maple Rosemary Roasted Nuts.

Store Properly: To keep your roasted nuts fresh and crunchy, store them in an airtight container at room temperature for up to 2 weeks.

Add a Touch of Sweetness: For extra sweetness, drizzle more maple syrup over the nuts during the last few minutes of baking, enhancing the flavor even further.

Maple Rosemary Roasted Nuts Variations

Feel free to add your personal twist to these Maple Rosemary Roasted Nuts and make them your own!

  • Nut Mix: Swap pecans, almonds, and walnuts for cashews or hazelnuts for a unique flavor. Each nut brings a different crunchy character to your mix.
  • Seed Boost: Add a handful of sunflower or pumpkin seeds for extra crunch and nutrition. The seeds not only enhance texture but also provide a delightful nutty flavor.
  • Herb Swaps: Experiment with thyme or sage instead of rosemary for an exciting flavor twist. These herbs provide distinct notes and can turn your nuts into something entirely new!
  • Spice It Up: If you crave heat, increase the cayenne pepper or add smoked paprika for a smoky kick. The result will be a warm and zesty snack that awakens your taste buds.
  • Sweetness Variations: Try substituting honey for maple syrup for a different sweetness profile. Honey’s floral notes will create a lovely balance with the nuts.
  • Chocolate Drizzle: For a decadent treat, drizzle melted dark chocolate over the cooled nuts. This luscious addition creates a sweet-savory experience everyone will love.
  • Tropical Flair: Mix in toasted coconut flakes for a sweet, tropical flair. The coconut adds both chewiness and an aromatic element that transports you to paradise!
  • Savory Touch: Consider adding a cool twist with a sprinkle of cheese powder after baking for a cheesy-savory snack. This unexpected flavor addition will surprise your guests delightfully.

Whichever variation you choose, these Maple Rosemary Roasted Nuts will surely become a favorite, just like my delightful Garlic Parmesan Roasted options, ready to be enjoyed any time!

Maple Rosemary Roasted Nuts Recipe FAQs

What nuts should I use for Maple Rosemary Roasted Nuts?
Absolutely! You can use a mix of raw pecans, almonds, and walnuts for a delightful flavor and texture. However, feel free to experiment with other nuts like cashews or hazelnuts. Just keep in mind that some nuts may roast faster than others, so adjust your baking time accordingly!

How should I store Maple Rosemary Roasted Nuts?
To keep your roasted nuts fresh and crunchy, store them in an airtight container at room temperature for up to 2 weeks. If you want them to last a bit longer, the fridge can be a good option; they’ll maintain freshness there for about 1 month, though they may lose some crunchiness.

Can I freeze Maple Rosemary Roasted Nuts?
Yes! Freezing is a great way to extend their shelf life. Place your cooled roasted nuts in a sealed freezer bag or airtight container for up to 3 months. When you’re ready to enjoy them, simply take them out and let them thaw at room temperature. If you prefer them warm, pop them back in a 350°F (175°C) oven for about 5-10 minutes!

How do I prevent my nuts from burning during roasting?
Very good question! The key is to watch them closely as they roast. After about 10 minutes, give the nuts a stir to ensure even roasting. Look for a beautiful golden brown color, and take them out as soon as they become fragrant. If you smell them starting to burn, it’s best to remove them immediately to avoid any bitter flavor.

Can my pets eat Maple Rosemary Roasted Nuts?
While some nuts are safe for dogs and other pets, it’s essential to consider the ingredients. Avoid sharing Maple Rosemary Roasted Nuts with them, as onions, garlic, and excess salt (found in the butter and toppings) can be harmful. Always consult your veterinarian before introducing new foods to your pet’s diet for safety!

What if I don’t have fresh rosemary?
If fresh rosemary isn’t available, don’t worry! You can substitute it with dried rosemary. Just remember, dried herbs are more potent, so use about one-third of the amount. For instance, if the recipe calls for 1 tablespoon of fresh rosemary, use about 1 teaspoon of dried instead. Enjoy experimenting with flavors!

Maple Rosemary Roasted Nuts

Maple Rosemary Roasted Nuts: Irresistibly Crunchy Delight

Maple Rosemary Roasted Nuts are a gluten-free and vegetarian savory-sweet snack that's ready in just 20 minutes!
Prep Time 10 minutes
Cook Time 10 minutes
Total Time 20 minutes
Servings: 6 servings
Course: Appetizers
Cuisine: American
Calories: 200

Ingredients
  

For the Nuts
  • 1 cup Raw Pecans Consider using roasted for a deeper taste.
  • 1 cup Raw Almonds Can easily swap for other nuts if desired.
  • 1 cup Raw Walnuts Feel free to substitute with your favorite nut variety.
For the Flavor Enhancers
  • 2 tablespoons Unsalted Butter Substitute with coconut or olive oil for a dairy-free option.
  • 1/4 cup Pure Maple Syrup Honey can also provide a different flavor twist.
  • 1/2 teaspoon Cayenne Pepper Adjust to taste or omit for a milder flavor.
  • 1 tablespoon Fresh Rosemary If fresh isn’t available, dried works too.
  • 1/2 teaspoon Salt Using flaky sea salt elevates presentation.
For the Final Touch
  • 1 pinch Flaky Sea Salt Adjust to taste.

Equipment

  • Oven
  • rimmed baking sheet
  • Parchment Paper
  • Mixing Bowl
  • spatula

Method
 

Step-by-Step Instructions
  1. Preheat your oven to 350°F (175°C) to create the perfect environment for roasting.
  2. Line your rimmed baking sheet with parchment paper and spread the raw pecans, almonds, and walnuts in an even layer.
  3. In a mixing bowl, melt the unsalted butter and whisk in the pure maple syrup, cayenne pepper, salt, and 1 tablespoon of finely chopped fresh rosemary.
  4. Pour the butter and maple mixture over the nuts and gently toss to coat them evenly.
  5. Place the baking sheet in the preheated oven and bake for 10 minutes. Stir and return to the oven for an additional 5–10 minutes.
  6. Once roasted, toss the nuts with remaining chopped rosemary and a sprinkle of flaky sea salt.
  7. Allow the nuts to cool completely on the baking sheet before serving.

Nutrition

Serving: 1cupCalories: 200kcalCarbohydrates: 10gProtein: 4gFat: 18gSaturated Fat: 3gPolyunsaturated Fat: 5gMonounsaturated Fat: 10gCholesterol: 10mgSodium: 150mgPotassium: 200mgFiber: 2gSugar: 2gVitamin A: 2IUCalcium: 4mgIron: 6mg

Notes

Store your roasted nuts in an airtight container at room temperature for up to 2 weeks.

Tried this recipe?

Let us know how it was!

Stay Connected

Get recipes via email: