Get my cookbooks

Easy Coconut Macaroons Recipe – Dairy-Free & Delightfully Chewy

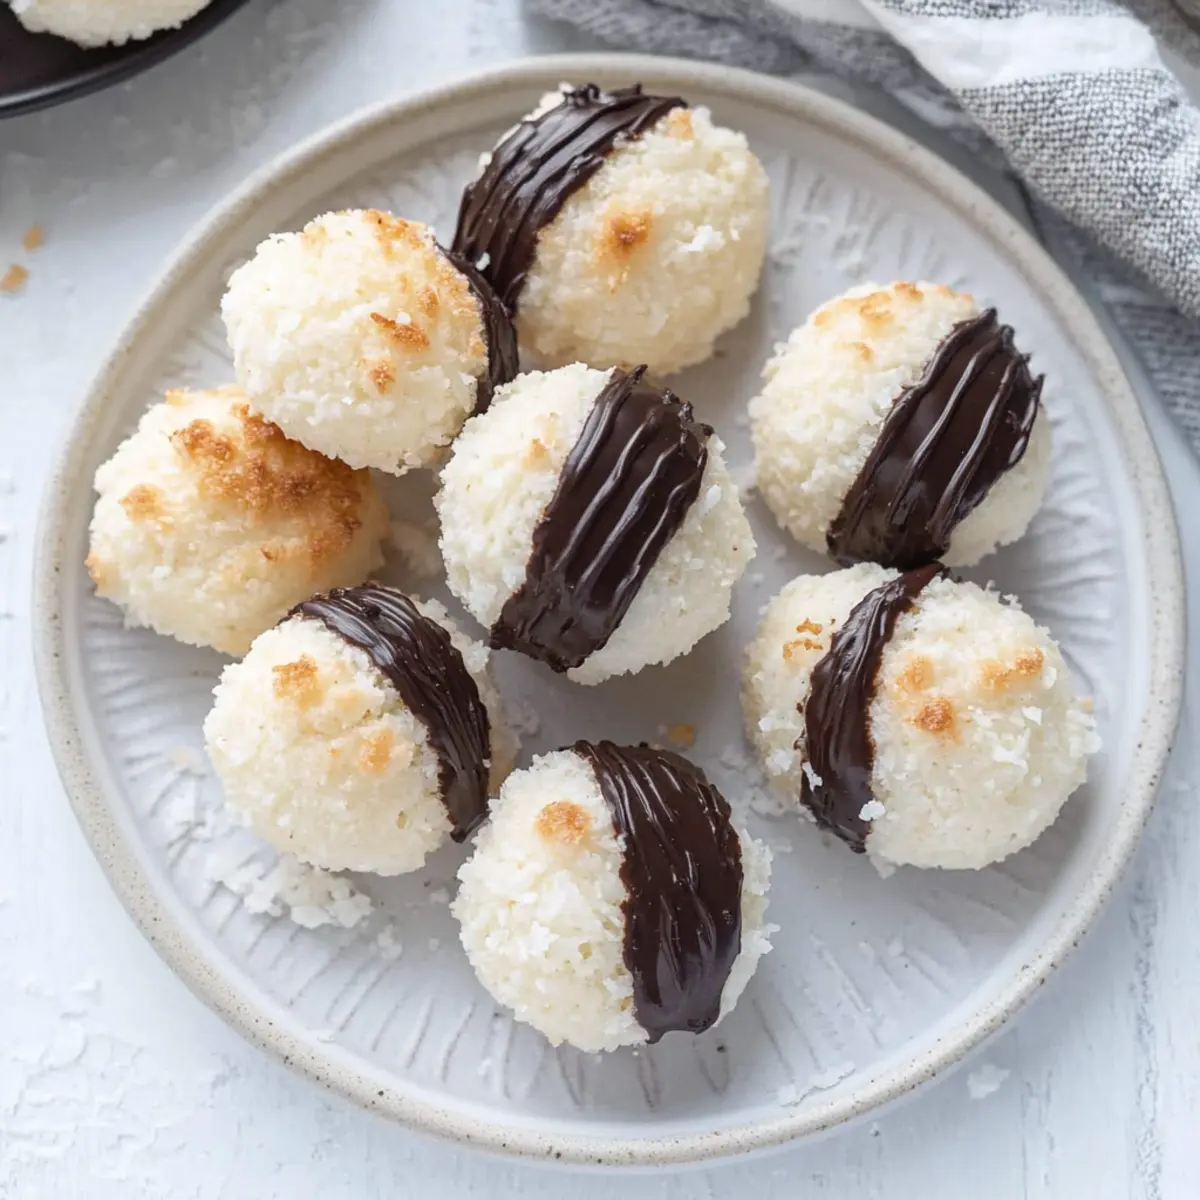
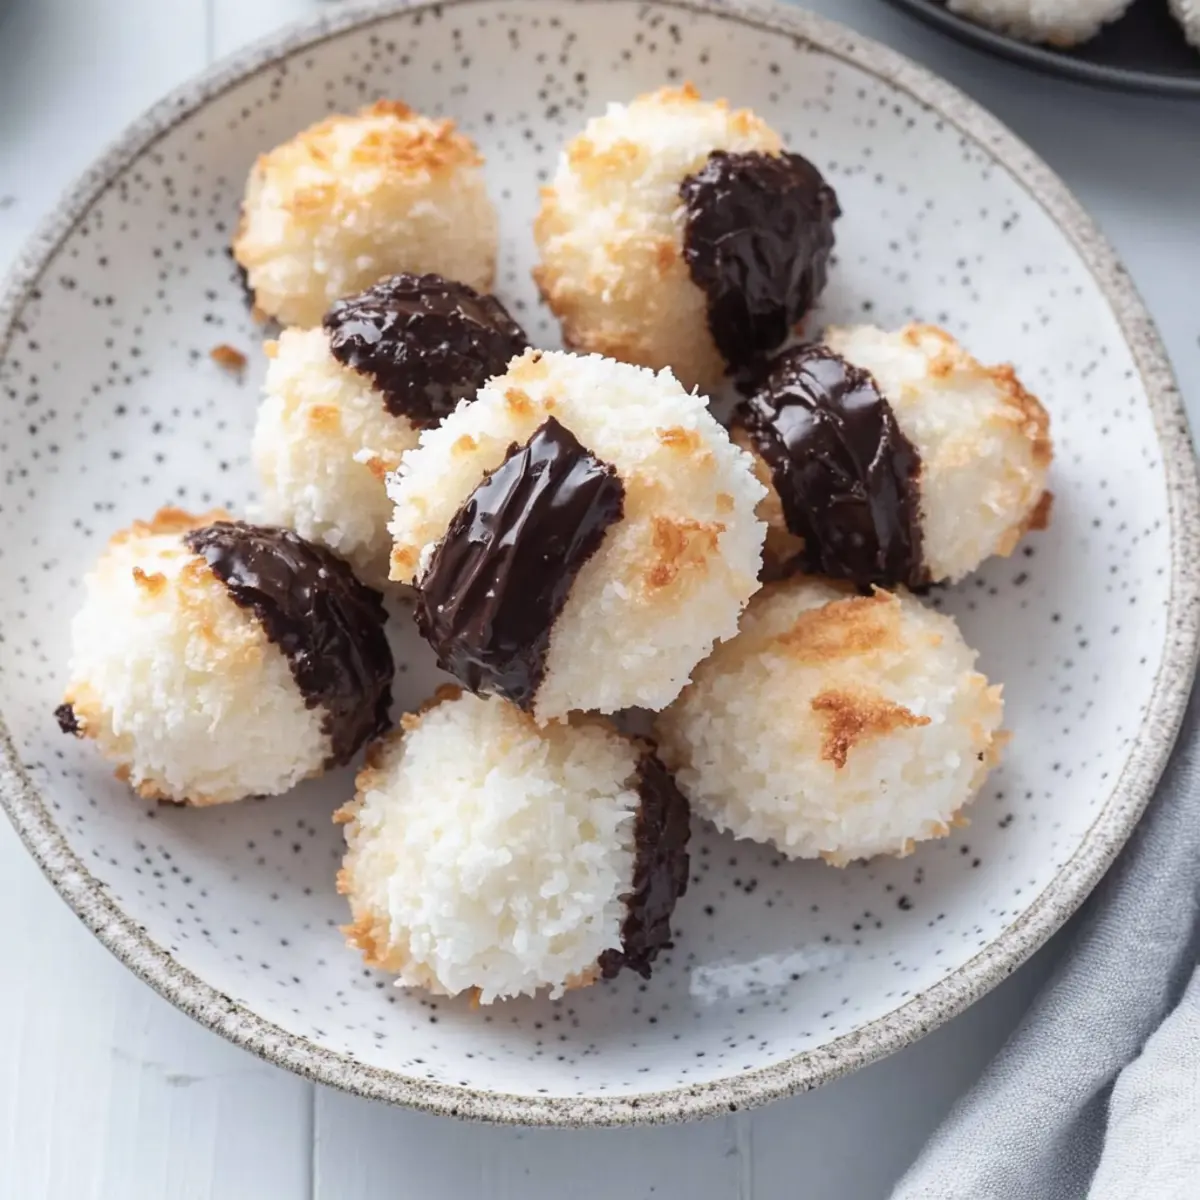
The tropical aroma of coconut wafts through the air as I pull my Easy Coconut Macaroons from the oven, golden and inviting. These delightful bites are not only reminiscent of childhood treats but are also a thoughtful twist on traditional recipes—dairy-free and gluten-free, without a drop of condensed milk in sight. In just 30 minutes, you can craft these chewy, sweet morsels that satisfy both your sweet tooth and dietary needs. Perfect for everything from an afternoon pick-me-up to a crowd-pleasing dessert at your next gathering, these macaroons bring joy to any occasion. Curious about how to make these heavenly treats yourself? Let’s dive into the magic of coconut!

Why are these macaroons so irresistible?

Delightfully Chewy: The texture of these Easy Coconut Macaroons is simply perfect—dense, chewy, and satisfying, just like your favorite childhood treats.

Dairy-Free & Gluten-Free: Enjoy these treats guilt-free; they fit right into your dietary preferences and are suitable for various guests, including those following gluten-free and dairy-free diets.

Quick and Easy: With only 30 minutes from start to finish, this recipe is a fantastic option when you need a sweet fix fast!

Versatile Treats: Whether you enjoy them plain or with a chocolate dip, you can customize these macaroons with nuts or dried fruits to satisfy all taste buds.

Crowd-Pleasing: Perfect for gatherings or cozy nights in, these macaroons are easy to share and will surely impress your friends and family—just like the flavors of Spicy Brazilian Coconut that bring everyone together!

Easy Coconut Macaroons Ingredients

• Create your own delicious Easy Coconut Macaroons with these simple ingredients.

For the Macaroons

  • 4 large egg whites – Provides structure and binding for the cookies; at room temperature yields the best results.
  • 1 cup granulated sugar – Adds sweetness; consider reducing the amount if using sweetened coconut.
  • 1/4 teaspoon sea salt – Essential for enhancing the flavors perfectly.
  • 3 cups unsweetened shredded coconut – This is the main flavor component; sweetened coconut can increase overall sweetness if you prefer.
  • 1/3 cup almond flour – Contributes moisture and helps bind; can be swapped with gluten-free 1:1 flour or all-purpose flour.
  • 1 teaspoon vanilla extract – Enhances depth of flavor; no need for substitutions here.
  • 1 cup dark chocolate chips (optional) – Perfect for dipping; choose dairy-free chocolate to keep the recipe fully dairy-free.

With these quality ingredients, you’ll create your own batch of heavenly Easy Coconut Macaroons that are sure to impress!

Step‑by‑Step Instructions for Easy Coconut Macaroons Recipe

Step 1: Preheat and Prepare
Begin by preheating your oven to 350°F (175°C) and lining two baking sheets with parchment paper. This ensures an even bake and prevents sticking, allowing your Easy Coconut Macaroons to come out perfectly golden and intact. Set the baking sheets aside while you prepare the macaroon mixture.

Step 2: Melt Ingredients
In a large saucepan, combine 4 large egg whites and 1 cup of granulated sugar over low heat. Stir continuously until the mixture is melted and lukewarm, which should take about 3 minutes. This step helps dissolve the sugar and gives the macaroons a smooth texture, setting the base for your delicious coconut treats.

Step 3: Combine Coconut Mixture
Raise the heat to medium and stir in 3 cups of unsweetened shredded coconut, 1/3 cup of almond flour, and 1/4 teaspoon of sea salt. Continue stirring until the dough thickens and starts pulling away from the sides of the pan, which will take about 1 minute. This transformation is key to achieving the chewy consistency characteristic of Easy Coconut Macaroons.

Step 4: Add Vanilla
Remove the saucepan from heat and gently fold in 1 teaspoon of vanilla extract until fully incorporated. This addition enhances the flavor profile of your macaroons, creating that delightful aroma we love. Allow the dough to cool slightly before shaping, ensuring it’s manageable for the next step.

Step 5: Portion the Dough
Using a 1½-inch cookie scoop, carefully portion the coconut mixture onto the prepared baking sheets. Space the scoops about 2 inches apart to allow for some spreading during baking. This portioning ensures each macaroon is uniform in size, contributing to an even bake and consistent texture across your Easy Coconut Macaroons.

Step 6: Bake to Perfection
Place the baking sheets in the preheated oven and bake for 12-15 minutes. Halfway through, rotate the pans to ensure even baking. Keep an eye on the macaroons, which should turn lightly golden on the outside. Once done, remove them from the oven and let them cool completely on a wire rack to achieve the perfect chewy texture.

Step 7: Optional Chocolate Dipping
If you wish to add a chocolatey twist, melt 1 cup of dark chocolate chips in a heatproof bowl in the microwave, heating in 30-second intervals until smooth. Dip the bottom of each cooled macaroon in the melted chocolate, then place them back on parchment paper to set. This optional step transforms your Easy Coconut Macaroons into a decadent treat that’s sure to impress!

Make Ahead Options

These Easy Coconut Macaroons are perfect for busy weeknights or special occasions when you need to save time! You can prepare the coconut dough up to 24 hours in advance; just skip the baking step and refrigerate the shaped balls on a baking sheet covered with plastic wrap. This helps maintain their texture, ensuring they come out just as delicious. When you’re ready to enjoy them, simply bake straight from the fridge as instructed, adding a couple of extra minutes to the baking time if needed. You can also melt the chocolate for dipping ahead of time and store it in the fridge for quick finishing when you’re ready to serve. Overall, these make-ahead options make it easy to delight your guests with minimal effort!

Easy Coconut Macaroons Recipe Variations

Feel free to get creative with these delightful macaroons and make them your own!

  • Nut-Free: Simply omit the almond flour and replace it with an equal amount of gluten-free 1:1 flour for a nut-free version.
    The texture remains just as chewy, ensuring everyone can enjoy these sweet treats!

  • Chocolate Lovers: Add 2 tablespoons of cocoa powder to the coconut mixture before baking for a chocolatey twist.
    This adds a delicious depth of flavor that will satisfy all the chocolate cravings!

  • Spice it Up: Fold in a teaspoon of cinnamon or nutmeg to infuse warmth into the macaroons.
    A hint of spice can transform the macaroons into a cozy, dessert experience that feels like a warm hug.

  • Fruity Surprise: Stir in a half cup of chopped dried fruits like cranberries or apricots for a burst of flavor.
    The chewy fruit pairs wonderfully with coconut, offering a delightful surprise in every bite!

  • Coconut Dreams: Swap in toasted coconut flakes for half of the shredded coconut for an added depth of flavor and crunch.
    This offers a lovely nutty flavor in each macaroon, making them an irresistible treat!

  • Lower Sugar: Reduce the granulated sugar to ¾ cup for a less sweet macaroon, especially if using sweetened coconut.
    You’ll maintain that delightful chewy texture while cutting back on sweetness, perfect for those watching their sugar intake.

  • Tropical Twist: Incorporate a tablespoon of lime or orange zest into the mixture for a refreshing citrus flavor.
    This brightens up the macaroons and will have your taste buds dancing like they’re on a tropical getaway!

  • Dipped Delights: For extra richness, drizzle or dip the cooled macaroons in melted white chocolate instead of dark.
    The contrast between the sweet coconut and creamy chocolate is simply heavenly!

These variations allow you to personalize your Easy Coconut Macaroons and explore new, exciting flavors. Whether serving them with a cup of tea or at your next gathering, they will surely impress your guests—just like the delightful flavors in Mexican Taco Soup that bring everyone together!

What to Serve with Easy Coconut Macaroons

The sweetness and chewy texture of these macaroons can be perfectly complemented with delightful pairings, turning your dessert into a charming experience.

  • Rich Coffee: A cup of freshly brewed coffee brings out the sweet coconut flavor, making your macaroons even more enjoyable.
  • Flavored Tea: Pair with a soothing herbal or chai tea; the spices and warmth enhance the coconut’s tropical vibes beautifully.
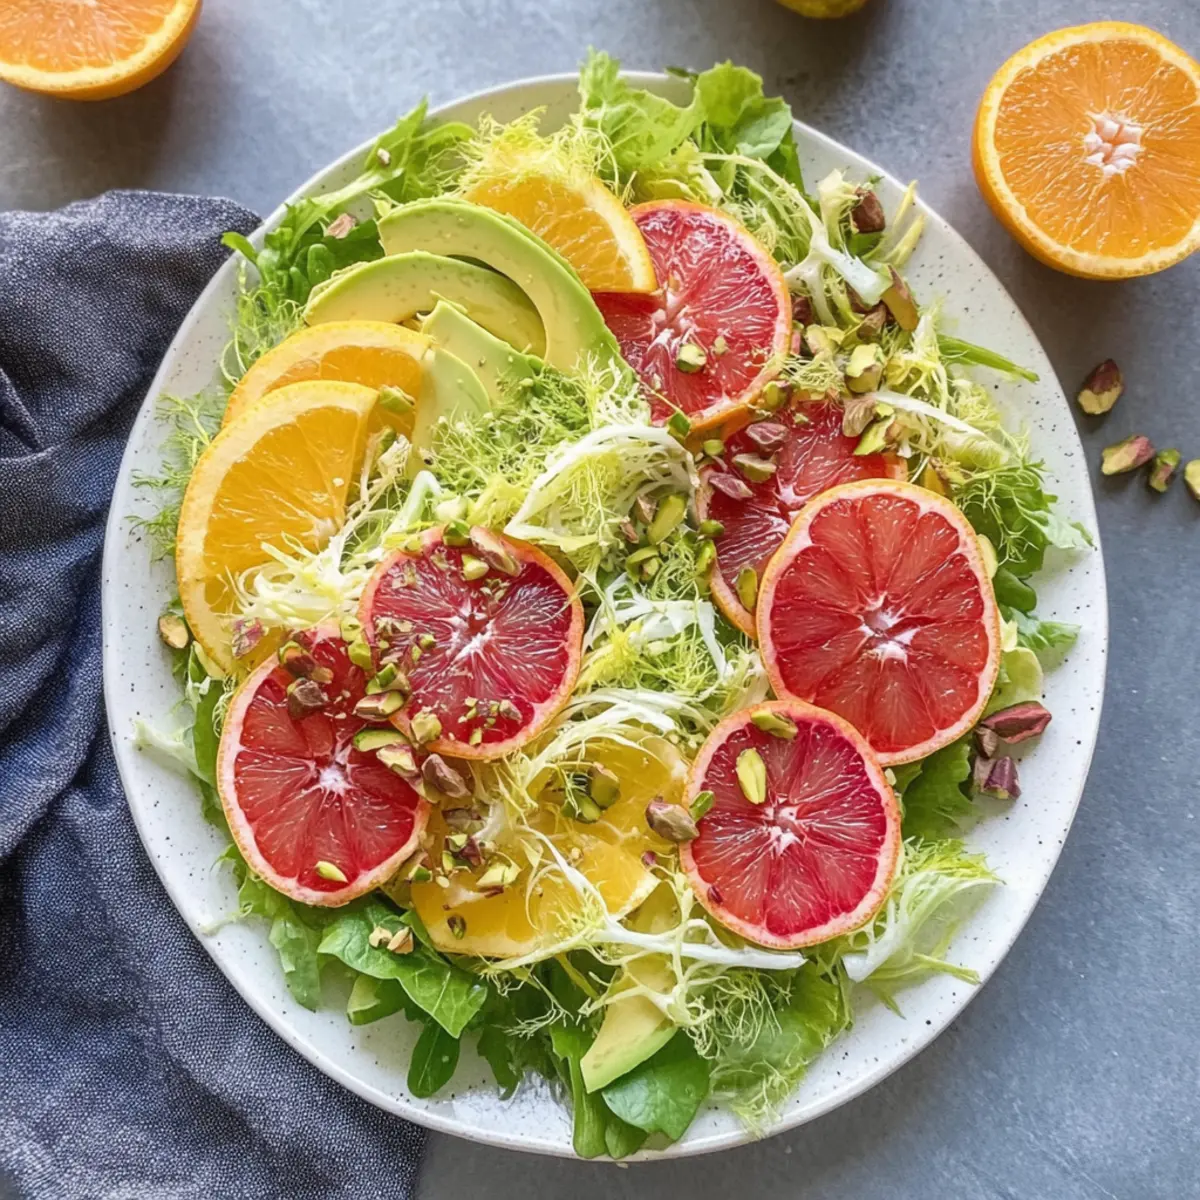
  • Fresh Fruit Salad: A refreshing mix of seasonal fruits balances the sweetness of the macaroons, adding a burst of juicy freshness.
  • Chocolate Sauce: Drizzle some warm chocolate sauce over the macaroons for an indulgent touch that takes them to the next level.
  • Whipped Coconut Cream: Serve alongside a light whipped coconut cream for an extra creamy, luscious texture that complements the chewiness.
  • Nut Milk: Almond or coconut milk is a delightful drink pairing, adding a creamy touch that harmonizes with the coconut flavor profile.
  • Ice Cream: A scoop of vanilla or coconut ice cream creates an enchanting dessert duo, ideal for warm days when you crave something cool.
  • Chocolate Dipped Biscuits: Offering a crunch alongside the chewy texture of the macaroons adds complexity to your dessert table.
  • Sparkling Water: A splash of zest with lemon-lime sparkling water cleanses the palate, emphasizing the sweetness of the treats.

Expert Tips for Easy Coconut Macaroons

  • Room Temperature Egg Whites: Make sure your egg whites are at room temperature for optimal volume and texture. Cold egg whites may not whip properly.

  • Consistency Check: Ensure the dough pulls away from the pan before scooping. This indicates that the mixture has reached the right thickness for chewy Easy Coconut Macaroons.

  • Uniform Size: Using a cookie scoop not only helps in achieving uniform macaroons but also ensures even baking. This prevents some from being overcooked while others remain underdone.

  • Avoid Sweetened Coconut: Stick to unsweetened shredded coconut to maintain the perfect balance of sweetness. If you must use sweetened coconut, reduce sugar to ¾ cup.

  • Storage Tips: Store your macaroons in an airtight container for up to 5 days at room temperature. For longer freshness, refrigerate them for up to 2 weeks.

How to Store and Freeze Easy Coconut Macaroons

Room Temperature: Store your Easy Coconut Macaroons in an airtight container at room temperature for up to 5 days. Keep them in a cool, dry place to maintain freshness.

Fridge: If you want to extend their shelf life, keep the macaroons in the refrigerator for up to 2 weeks. Be sure they’re in an airtight container to prevent them from drying out.

Freezer: For longer storage, freeze the macaroons in a single layer on a baking sheet until firm, then transfer to a freezer-safe container or bag. They can be frozen for up to 3 months.

Reheating: To enjoy them warm, thaw them in the fridge overnight and then briefly warm them in the oven at 300°F (150°C) for 5-10 minutes. This helps restore their chewy texture!

Easy Coconut Macaroons Recipe FAQs

What type of coconut should I use for this recipe?
Absolutely! I recommend using unsweetened shredded coconut to achieve the right balance of flavors in these Easy Coconut Macaroons. Sweetened coconut can make the macaroons overly sweet, so if you choose that option, reduce the sugar to ¾ cup for a better taste.

How should I store leftover macaroons?
Store your macaroons in an airtight container at room temperature for up to 5 days. If you want them to last longer, refrigerate them for up to 2 weeks, ensuring they are sealed tightly to prevent drying out.

Can I freeze coconut macaroons?
Yes, you can! To freeze your Easy Coconut Macaroons, place them in a single layer on a baking sheet until firm. Then, transfer them to a freezer-safe container or bag. They can be stored in the freezer for up to 3 months. Whenever you want to enjoy them, just thaw them in the fridge overnight.

What should I do if my macaroons spread too much during baking?
If your macaroons spread too much, it could be due to the egg whites not being beaten adequately, or the dough was too warm when scooping. Ensure that the egg whites are whipped to a stable peak and allow the mixture to cool slightly before portioning. Avoid using sweetened coconut as well; it has more moisture which can lead to excessive spreading.

Are these macaroons suitable for people with nut allergies?
If you are making these macaroons for someone with a nut allergy, be cautious with the almond flour. You can easily substitute it with a gluten-free flour blend or simply omit it altogether. The macaroons will still turn out delicious and chewy!

Can I use a different type of flour instead of almond flour?
Absolutely! You can substitute almond flour with gluten-free 1:1 flour or even all-purpose flour if dietary restrictions allow. Just keep in mind it may alter the flavor slightly, but they will still be delightful!

Easy Coconut Macaroons Recipe

Easy Coconut Macaroons Recipe - Dairy-Free & Delightfully Chewy

This Easy Coconut Macaroons Recipe is a delightful, dairy-free treat, perfect for satisfying your sweet tooth in just 30 minutes.
Prep Time 10 minutes
Cook Time 15 minutes
Total Time 30 minutes
Servings: 24 macaroons
Course: Dessert
Cuisine: International
Calories: 120

Ingredients
  

For the Macaroons
  • 4 large egg whites at room temperature
  • 1 cup granulated sugar reduce if using sweetened coconut
  • 1/4 teaspoon sea salt essential for flavor enhancement
  • 3 cups unsweetened shredded coconut main flavor component
  • 1/3 cup almond flour substitute with gluten-free 1:1 flour if needed
  • 1 teaspoon vanilla extract no substitutions needed
  • 1 cup dark chocolate chips optional for dipping, choose dairy-free if needed

Equipment

  • large saucepan
  • Baking Sheets
  • Parchment Paper
  • Cookie Scoop
  • Heatproof bowl
  • Microwave

Method
 

Step-by-Step Instructions
  1. Preheat your oven to 350°F (175°C) and line two baking sheets with parchment paper.
  2. In a large saucepan, combine 4 large egg whites and 1 cup of granulated sugar over low heat, stirring until melted and lukewarm, about 3 minutes.
  3. Raise the heat to medium, stir in 3 cups of unsweetened shredded coconut, 1/3 cup almond flour, and 1/4 teaspoon sea salt, stirring until the dough thickens, about 1 minute.
  4. Remove from heat and gently fold in 1 teaspoon of vanilla extract. Allow the dough to cool slightly.
  5. Using a 1½-inch cookie scoop, portion the coconut mixture onto prepared baking sheets, spacing them about 2 inches apart.
  6. Bake for 12-15 minutes, rotating halfway through. They should turn lightly golden. Let cool completely on a wire rack.
  7. For optional chocolate dipping, melt 1 cup of dark chocolate chips in a microwave until smooth, then dip the bottoms of each macaroon in melted chocolate.

Nutrition

Serving: 1macaroonCalories: 120kcalCarbohydrates: 18gProtein: 1gFat: 6gSaturated Fat: 4gPolyunsaturated Fat: 0.5gMonounsaturated Fat: 1gSodium: 25mgPotassium: 40mgFiber: 1gSugar: 10gCalcium: 1mgIron: 1mg

Notes

Store in an airtight container at room temperature for up to 5 days, or refrigerate for up to 2 weeks. For longer storage, freeze for up to 3 months.

Tried this recipe?

Let us know how it was!

Creamy Mashed Butternut Squash: A Cozy Gluten-Free Delight

As I stood in my kitchen, the vibrant color of butternut squash caught my eye, instantly sparking cravings for its sweet, nutty flavor. It was the perfect moment to whip up a batch of Mashed Butternut Squash, a dish that checks all the boxes: uncomplicated, gluten-free, and adaptable to various dietary preferences. In just about 30 minutes, this velvety side transforms any meal, from weeknight dinners to festive gatherings, while offering a unique twist that sets it apart from typical mashed potatoes. Packed with nutrients and effortlessly customizable—from creamy to dairy-free—this recipe is a delightful breath of fresh air that will have everyone eager for seconds. Curious how to elevate your next meal with this colorful comfort? Let’s dive in!

Why is Mashed Butternut Squash a Must-Try?

Simplicity at Its Best: This recipe is straightforward and perfect for home cooks looking to impress without the fuss.
Rich, Nutty Flavor: Infused with garlic and fresh herbs, it offers a unique taste that elevates any dish.
Versatile Options: Easily customize it to suit your dietary needs, whether it’s dairy-free, low FODMAP, or just bursting with seasonal spices!
Quick Preparation: In under 30 minutes, you can serve a gourmet side that looks and tastes like a labor of love.
Crowd-Pleasing Appeal: The vibrant color and cozy texture make it perfect for any occasion, from everyday meals to festive feasts!
Looking for more tasty side dishes? Check out our hearty grain options to complement your Mashed Butternut Squash perfectly!

Mashed Butternut Squash Ingredients

Note: Here’s everything you need to create a delightful serving of Mashed Butternut Squash that’s beautifully creamy and effortlessly satisfying!

For the Base

  • Butternut Squash – The star of the dish, providing a lovely sweetness and creamy texture; either 5 cups of cubed squash or one whole roasted squash will do!
  • Garlic – Adds a savory depth; optional for those following low FODMAP diets.
  • Butter – Brings richness to the mash; swap with dairy-free butter for a vegan version.
  • Olive Oil – Infuses moisture and flavor; can be replaced with milk or cream for extra creaminess.

For Seasoning

  • Sea Salt – Enhances all the flavors; always adjust to your personal taste.
  • Black Pepper – Adds a warm, subtle kick; feel free to adjust based on your spice preference.

For Garnish

  • Fresh Chives – A delightful garnish for freshness and a mild onion flavor; can be replaced with parsley or your choice of herbs.

Step‑by‑Step Instructions for Mashed Butternut Squash

Step 1: Prepare the Squash
Begin by peeling the butternut squash and cutting it into approximately 1½-inch cubes. In a large pot, combine the cubed squash with peeled garlic cloves and cover with water. Bring the mixture to a rolling boil over medium-high heat, then reduce the heat to a simmer and cook for 10-15 minutes, or until the squash is tender and easily pierced with a fork.

Step 2: Drain and Return
Once the squash and garlic are tender, carefully drain them in a colander. Return the drained mixture back to the pot over low heat. This helps to evaporate any excess water, ensuring your Mashed Butternut Squash remains creamy rather than watery.

Step 3: Mash the Mixture
Add in the butter and olive oil to the pot. Using a potato masher, mash the ingredients together until you achieve your desired consistency. Alternatively, for an ultra-smooth texture, use an immersion blender to purée the mixture completely, creating a velvety finish that highlights the sweet flavors of the squash.

Step 4: Season to Taste
Taste your Mashed Butternut Squash and add sea salt and black pepper according to your preference. Stir well to ensure the seasoning is evenly distributed, enhancing the overall flavor. This is also the perfect time to adjust the richness if you desire a bit more butter or olive oil.

Step 5: Garnish and Serve
Finally, transfer the creamy mashed squash to a serving bowl. Sprinkle with freshly chopped chives for a pop of color and flavor. Serve warm as a delicious side dish, perfect for complementing roasted meats or grains, ready to impress family and friends alike!

How to Store and Freeze Mashed Butternut Squash

Refrigerator: Store leftover mashed butternut squash in an airtight container for up to 3 days. Reheat gently on the stove or in the microwave, adding a splash of water or olive oil to restore creaminess.

Freezer: For longer storage, freeze the mashed squash in a freezer-safe container for up to 3 months. Thaw overnight in the fridge before reheating for best results.

Reheating: Heat frozen mashed butternut squash slowly over low heat, stirring occasionally until warmed through. If needed, add a bit of milk or olive oil to help regain its velvety texture.

Prep Ahead: Consider prepping the butternut squash in advance by cutting or cooking it up to 3 days before using it in your mashed butternut squash dish.

Expert Tips for Mashed Butternut Squash

  • Perfectly Tender: Make sure the squash is cooked until tender but not mushy, which can lead to watery mashed butternut squash.
  • Prep Ahead: You can prep the butternut squash up to 3 days in advance. Store it cut and refrigerated, or use pre-cut squash for convenience.
  • Dairy-Free Alternative: Omit butter for a dairy-free version and use an extra drizzle of olive oil or a non-dairy alternative instead to maintain creaminess.
  • Customize Texture: Adjust your desired texture by mashing for a rustic feel or puréeing for silky smoothness. Choose your method according to your family’s preferences!
  • Season Thoughtfully: Taste and season your mashed butternut squash as you go. Start with less salt and pepper, then adjust to enhance the sweet flavor beautifully without overpowering it.

Variations & Substitutions for Mashed Butternut Squash

Feel free to get creative and customize your Mashed Butternut Squash with these delightful variations!

  • Sweet Twist: Add a drizzle of maple syrup or honey, along with a pinch of cinnamon, to enhance the natural sweetness. This creates a comforting dish that’s perfect for chilly nights.

  • Garlic Lovers: Swap out regular garlic for roasted garlic to deepen the flavor profile. Roasting mellows the garlic, adding a rich, caramelized essence that pairs beautifully with butternut squash.

  • Herb Infusions: Experiment with fresh herbs! Substitute chives with thyme, rosemary, or sage for a fragrant spin. Each herb brings its unique character, transforming the taste to suit any occasion.

  • Dairy-Free Delight: For a vegan option, replace butter with dairy-free alternatives such as coconut oil or vegan butter. This keeps the dish creamy while accommodating dairy-free diets.

  • Extra Creamy: If you prefer a richer texture, mix in a splash of cream or whole milk instead of olive oil. This creates a luscious, decadent side that feels indulgent without being complex.

  • Spice It Up: Add a pinch of cayenne pepper or smoked paprika for some heat and depth. This unexpected kick can bring a cozy warmth, making it a standout dish at your table.

  • Nutty Crunch: Mix in toasted pecans or walnuts for a satisfying crunch in each bite. This addition not only enhances the flavor but also adds a lovely texture contrast.

  • Citrusy Zing: Brighten your mash with a splash of lemon juice or orange zest. This refreshing twist can brighten up the flavor, making it a perfect complement to heavier mains.

Ready to elevate your dining experience? Why not try pairing your Mashed Butternut Squash with some delicious hearty grain options for a complete meal that’s both nutritious and satisfying!

Make Ahead Options

These creamy Mashed Butternut Squash are perfect for meal prep enthusiasts! You can prep your butternut squash up to 3 days in advance by peeling and cubing it, then storing it in an airtight container in the refrigerator. To maintain quality, consider keeping the garlic cloves separate until you’re ready to cook. When you’re ready to enjoy the dish, simply boil the squash and garlic together as directed, mash, and season before serving. This simple prep method not only saves you valuable time on busy weeknights but also ensures you have a delicious, homemade side that’s just as delightful as if made fresh!

What to Serve with Savory Mashed Butternut Squash

Elevate your dining experience by pairing this creamy delight with a variety of sides that enhance its flavors and textures.

  • Roasted Chicken: The crispy, seasoned skin and juicy meat complement the sweetness of the squash perfectly.
  • Grilled Sausages: A smoky, savory element that contrasts beautifully with the velvety mash, creating a satisfying bite.
  • Steamed Green Beans: Their crispness offers a refreshing balance, adding a pop of color and nutrition to your plate.
  • Quinoa Salad: Hearty and nutritious, a quinoa salad with citrus dressing adds brightness and enhances the overall flavor profile.
  • Cranberry Sauce: A tangy-sweet sauce brings a festive element and creates a tantalizing flavor juxtaposition that tantalizes the taste buds.
  • Balsamic Glazed Brussels Sprouts: Their crispy exterior and earthy flavor provide a delightful contrast, enriching the meal’s complexity.
  • Garlic Bread: Warm, crusty garlic bread adds texture and indulgence, perfect for scooping up each savory bite.
  • White Wine: A chilled glass of Sauvignon Blanc will accentuate the squash’s sweetness, making for an elegant pairing.
  • Pumpkin Spice Cake: For dessert, a slice of pumpkin spice cake finishes the meal on a sweet note, echoing the seasonal flavors of the squash.

Mashed Butternut Squash Recipe FAQs

How do I choose the perfect butternut squash?
Absolutely! Look for butternut squash that feels heavy for its size, with a smooth, tan skin and no dark spots or soft spots. The stem should be firm and not cracked. A good squash will also have a nice, even coloration; avoid those with lots of blemishes, which may indicate poor flavor or texture.

What’s the best way to store leftover mashed butternut squash?
You can store leftover mashed butternut squash in an airtight container in the refrigerator for up to 3 days. When you’re ready to enjoy it again, gently reheat in a saucepan, adding a splash of water or a drizzle of olive oil to restore its creamy texture.

Can I freeze mashed butternut squash?
Very! To freeze mashed butternut squash, allow it to cool completely. Then, divide it into portions and transfer them into freezer-safe containers or resealable bags, squeezing out excess air. It will keep in the freezer for up to 3 months. Thaw overnight in the refrigerator before reheating on the stove or in the microwave.

What if my mashed butternut squash turns out watery?
If your mashed butternut squash is too watery, it might be because the squash was overcooked. To fix this, try simmering it gently over low heat without a lid for a few minutes to evaporate some moisture. When mashing, ensure you drain it well and consider adding a bit of olive oil or butter to balance the consistency.

Is this recipe safe for people with dietary restrictions?
Absolutely! This mashed butternut squash recipe is gluten-free and can easily be adapted for dairy-free or low FODMAP diets. Simply substitute the butter with dairy-free alternatives like coconut oil or vegan butter, and omit the garlic for a low FODMAP version. Always double-check ingredient labels for allergens if you’re cooking for someone with dietary restrictions.

Mashed Butternut Squash

Creamy Mashed Butternut Squash: A Cozy Gluten-Free Delight

Mashed Butternut Squash is a gluten-free, creamy side dish that transforms any meal with its sweet and nutty flavor.
Prep Time 10 minutes
Cook Time 20 minutes
Total Time 30 minutes
Servings: 4 servings
Course: Dinner
Cuisine: American
Calories: 120

Ingredients
  

For the Base
  • 5 cups Butternut Squash cubed or one whole roasted squash
  • 3 cloves Garlic optional for low FODMAP diets
  • 4 tablespoons Butter use dairy-free butter for a vegan version
  • 2 tablespoons Olive Oil can replace with milk or cream for extra creaminess
For Seasoning
  • 1 teaspoon Sea Salt adjust to taste
  • 1/2 teaspoon Black Pepper adjust to taste
For Garnish
  • 2 tablespoons Fresh Chives can be replaced with parsley or other herbs

Equipment

  • Large pot
  • Colander
  • potato masher
  • Immersion blender

Method
 

Step-by-Step Instructions
  1. Begin by peeling the butternut squash and cutting it into approximately 1½-inch cubes. In a large pot, combine the cubed squash with peeled garlic cloves and cover with water. Bring to a rolling boil over medium-high heat, then reduce heat to a simmer and cook for 10-15 minutes, or until tender.
  2. Carefully drain the squash and garlic in a colander. Return the mixture to the pot over low heat to evaporate excess water.
  3. Add in the butter and olive oil. Mash the ingredients together with a potato masher, or use an immersion blender for a smoother texture.
  4. Taste and add sea salt and black pepper according to preference. Stir well to evenly distribute the seasoning.
  5. Transfer to a serving bowl and sprinkle with freshly chopped chives. Serve warm.

Nutrition

Serving: 1cupCalories: 120kcalCarbohydrates: 22gProtein: 2gFat: 5gSaturated Fat: 3gPolyunsaturated Fat: 1gMonounsaturated Fat: 1gCholesterol: 15mgSodium: 220mgPotassium: 400mgFiber: 4gSugar: 3gVitamin A: 150IUVitamin C: 30mgCalcium: 5mgIron: 4mg

Notes

This recipe is gluten-free, can be made dairy-free, and is easily customizable with various herbs and spices.

Tried this recipe?

Let us know how it was!

Irresistibly Creamy Mini Goat Cheese Balls for Any Gathering

Stepping into my kitchen, the enticing aroma of fresh rosemary mingles with creamy goat cheese, and I can’t help but smile. It’s time to prepare a party staple that never fails to impress: Mini Goat Cheese Balls! These bite-sized delights are not just easy to whip up but also gluten-free and vegetarian, making them the ideal appetizer for holiday gatherings or casual get-togethers. What’s more, you can make them ahead of time, freeing you up to savor the moments with friends and family instead of stressing over last-minute details. Trust me, your guests will love the vibrant burst of flavors from the tangy cheese rolled in sweet cranberries and crunchy pistachios. Ready to become the host with the most? Let’s dive into making these creamy Mini Goat Cheese Balls!

Why Are Mini Goat Cheese Balls Perfect?

Creamy Delight: These Mini Goat Cheese Balls are a luscious blend of flavors that will tantalize your taste buds. Mouthwatering Textures: The combination of silky cheese with crunchy nuts and chewy cranberries creates a perfect snacking experience. Versatile Choice: They’re gluten-free and vegetarian, fitting seamlessly into any gathering. Make-Ahead Convenience: You can prep these in advance, allowing you to enjoy your time with guests, just like with my Banana Grilled Cheese that saves you the last-minute hassle. Crowd-Pleasing Appeal: Everyone loves bite-sized treats, ensuring your plate will be empty in no time!

Mini Goat Cheese Balls Ingredients

For the Cheese Mixture
Cream Cheese – Adds creaminess and structure; Neufchâtel can be used for a lighter version.
Goat Cheese – Imparts a tangy and rich flavor; consider flavored varieties like herb-infused for extra depth.
Honey – Provides sweetness to balance the tang; can replace with maple syrup for a vegan alternative.
Cayenne Pepper – Adds a hint of spice; omit for a milder flavor or swap with black pepper for subtle heat.
Salt – Enhances all flavors; adjust to taste, especially if using salted pistachios.
Freshly Chopped Rosemary – Adds a fragrant herbal note; thyme or parsley works as alternatives.

For the Coating
Dried Cranberries – Introduces sweetness and chewiness; substitute with dried cherries or apricots if desired.
Roasted Salted Shelled Pistachios – Provides crunch and a salty contrast; almonds or walnuts can be used instead.

These creamy Mini Goat Cheese Balls are sure to impress at your next gathering!

Step‑by‑Step Instructions for Mini Goat Cheese Balls

Step 1: Prepare the Cheese Mixture
In a medium bowl, combine softened cream cheese and goat cheese, mixing with a hand mixer until creamy, about 2 minutes. Add honey, cayenne pepper, and salt, continuing to beat until the mixture is completely smooth and well incorporated. This creamy base is the soul of your Mini Goat Cheese Balls, offering a rich and tangy flavor profile.

Step 2: Incorporate Fresh Herbs
Gently fold in the freshly chopped rosemary using a spatula until just combined, taking care not to overmix. This fragrant herb elevates the flavor and adds a lovely aroma. Once ready, cover the bowl with plastic wrap and chill the cheese mixture in the refrigerator for about 15 minutes; this will help it firm up for easier rolling.

Step 3: Prepare Your Coating Station
While the cheese mixture chills, line a baking sheet with wax paper for easy cleanup. In a separate bowl, combine the chopped cranberries and pistachios, mixing them well to create a colorful and crunchy coating that perfectly complements the creamy cheese. This preparation makes the next step seamless and efficient.

Step 4: Shape the Cheese Balls
Using a cookie scoop, scoop out the chilled cheese mixture and roll it into bite-sized balls with your hands, approximately 1 inch in diameter. Place each ball on the prepared baking sheet, ensuring they have space between them. Creating uniform cheese balls ensures a delightful presentation and even coating once rolled.

Step 5: Coat the Cheese Balls
Carefully roll each cheese ball in the cranberry-pistachio mixture, pressing gently to ensure an even coating. This bright mixture adds both taste and texture to your Mini Goat Cheese Balls. As you finish coating each ball, arrange them back on the baking sheet, making sure they are evenly distributed.

Step 6: Chill Before Serving
Once all the cheese balls are coated, cover the baking sheet with plastic wrap and chill in the refrigerator for at least 30 minutes. This chilling step enhances the flavors while allowing the Mini Goat Cheese Balls to firm up, making them more enjoyable to eat. Prepare them ahead of time, so they are ready to impress your guests!

Mini Goat Cheese Balls Variations

Feel free to put your unique spin on these delightful Mini Goat Cheese Balls and create something special for your gathering!

  • Nutty Twist: Roll the cheese balls in different nuts like chopped pecans or hazelnuts for added flavor and crunch.

  • Dried Fruit Delight: Substitute dried cranberries with diced figs or dates, adding a chewy sweetness that’ll surprise your taste buds.

  • Herb Infusion: Switch the rosemary for fresh thyme or parsley for a refreshing aroma that brightens the dish.

  • Spicy Kick: Introduce a little heat by adding smoked paprika or even crushed red pepper flakes to the cheese mixture. It’s a simple way to awaken your palate!

  • Vegan Friendly: Replace cream cheese with a plant-based alternative and use maple syrup instead of honey for a delightful vegan option that’s just as creamy.

  • Cheeseboard Star: Pair these mini cheese balls with an assortment of crackers, fresh fruits, and even some of my favorite Strawberry Cheesecake Dump Cake for a beautiful cheese board display.

  • Flavor Fusion: Experiment with flavored goat cheese, such as herbed or lemon-infused, to elevate the taste profile; it adds an exciting twist that your guests will love!

  • Zesty Lime: Incorporate a touch of lime zest into the cheese mixture for a bright, zesty flavor that pairs beautifully with cranberries. This twist brings a refreshing element to each bite, perfect for warm weather gatherings!

Expert Tips for Mini Goat Cheese Balls

Consistent Size: Use a cookie scoop to ensure uniformity in size; this makes for an attractive presentation and helps with even flavor distribution.

Chill for Ease: Chilling the cheese mixture before rolling makes it easier to shape the Mini Goat Cheese Balls, preventing them from becoming sticky.

Flavor Variations: Don’t hesitate to experiment with different toppings, like chopped herbs or different nuts, to add a unique twist to your Mini Goat Cheese Balls.

Make Ahead: These tasty bites can be prepared up to 24 hours in advance. Store them in an airtight container in the refrigerator for the best flavor.

Check Your Salt: Be cautious with salt, especially if using salted pistachios—adjust accordingly to ensure the perfect balance of flavors!

Make Ahead Options

These Mini Goat Cheese Balls are a fantastic choice for meal prep, allowing you to create a stress-free appetizer for your next gathering. You can prepare the cheese mixture and roll the balls up to 24 hours in advance. Simply store the formed cheese balls in an airtight container in the refrigerator to maintain their delicious quality. When it’s time to serve, roll them in the cranberry-pistachio coating just before plating, which keeps the crunch intact. This approach saves you valuable time on the day of your event, ensuring your guests are greeted with fresh, flavorful treats that taste just as delicious as when they were first made!

How to Store and Freeze Mini Goat Cheese Balls

Fridge: Store your Mini Goat Cheese Balls in an airtight container for up to 7 days. This keeps them fresh and ready for snacking anytime!

Freezer: For longer storage, place the cheese balls on a baking sheet in a single layer until frozen solid, then transfer them to a zip-top bag. They can stay frozen for up to 3 months.

Thawing: When ready to enjoy, thaw them in the fridge overnight. They taste best when allowed to come to room temperature before serving.

Refrigerate Leftovers: If you’d like to save some for later, simply keep any uneaten cheese balls refrigerated and consume within a few days for optimal flavor.

What to Serve with Creamy Mini Goat Cheese Balls?

Creating a memorable meal is all about pairing flavors and textures that enhance each other, so let’s explore some delightful accompaniments!

  • Assorted Crackers: These provide a crunchy base that enhances the creamy texture of the cheese balls. Choose a variety to surprise your palate!
  • Fresh Fruit Platter: Juicy fruits like grapes or apple slices add a refreshing sweetness that beautifully balances the tartness of the goat cheese.
  • Mixed Green Salad: A light salad with a tangy vinaigrette adds a refreshing contrast. The crisp greens will cleanse your palate between bites of the rich cheese balls.
  • Chutney or Fig Jam: A sweet and spicy chutney complements the creaminess and tang, enhancing the flavor experience with every bite. Spread it on crackers for extra zest!
  • Vegetable Crudités: Crisp, fresh vegetables provide a delightful crunch and can be dipped in a yogurt dressing for a creamy complement to the cheese balls.
  • Sparkling Wine or Champagne: The effervescence of sparkling wine elevates the celebratory mood, cleansing the palate while enhancing the flavors of the cheese and nuts.
  • Chocolate-Dipped Fruit: For a sweet finish, serve chocolate-dipped strawberries or figs. The richness and sweetness pair exceptionally well with the tangy cheese!

Mini Goat Cheese Balls Recipe FAQs

What kind of goat cheese should I use for the Mini Goat Cheese Balls?
I recommend using plain goat cheese for a classic tangy flavor, but you can also experiment with flavored varieties like herb-infused goat cheese for added complexity. Just make sure it’s at room temperature for easier mixing!

How should I store my Mini Goat Cheese Balls?
Store your Mini Goat Cheese Balls in an airtight container in the refrigerator for up to 7 days. This will keep them fresh and delicious, ready for you to enjoy as a snack or appetizer anytime!

Can I freeze Mini Goat Cheese Balls?
Absolutely! To freeze, place the cheese balls on a baking sheet in a single layer until solid, then transfer them to a zip-top bag. They’ll keep well for up to 3 months. When you’re ready to enjoy them, thaw in the fridge overnight and let them come to room temperature before serving for the best flavor and texture.

What should I do if my cheese mixture is too soft to roll?
If you find that your cheese mixture is too soft, simply chill it in the refrigerator for another 15 to 30 minutes. This will help it firm up and make rolling your Mini Goat Cheese Balls much easier. Remember to keep everything cold as you work!

Are Mini Goat Cheese Balls safe for people with nut allergies?
Great question! Traditional recipes include nuts in the coating, like pistachios; however, you can easily adapt the recipe by omitting the nuts or using sunflower seeds for a crunchier alternative that’s safe for those with nut allergies.

How long can I prepare Mini Goat Cheese Balls in advance?
You can make these delightful Mini Goat Cheese Balls up to 24 hours ahead of time! Store them in the refrigerator until you’re ready to serve. This makes them perfect for parties, as you can enjoy the mingling instead of being stuck in the kitchen!

Mini Goat Cheese Balls

Irresistibly Creamy Mini Goat Cheese Balls for Any Gathering

Delight your guests with these Mini Goat Cheese Balls, a creamy, gluten-free, and vegetarian appetizer bursting with flavor.
Prep Time 15 minutes
Chilling Time 30 minutes
Total Time 45 minutes
Servings: 12 balls
Course: Appetizers
Cuisine: American
Calories: 100

Ingredients
  

For the Cheese Mixture
  • 8 oz Cream Cheese Softened; Neufchâtel can be used for a lighter version.
  • 4 oz Goat Cheese Flavored varieties like herb-infused can be used for extra depth.
  • 2 tbsp Honey Can replace with maple syrup for a vegan alternative.
  • 1/4 tsp Cayenne Pepper Omit for a milder flavor or swap with black pepper.
  • 1/2 tsp Salt Adjust to taste, especially if using salted pistachios.
  • 1 tbsp Freshly Chopped Rosemary Thyme or parsley can work as alternatives.
For the Coating
  • 1 cup Dried Cranberries Substitute with dried cherries or apricots if desired.
  • 1 cup Roasted Salted Shelled Pistachios Almonds or walnuts can be used instead.

Equipment

  • medium bowl
  • Hand mixer
  • spatula
  • Baking Sheet
  • Wax paper
  • Cookie Scoop

Method
 

Steps
  1. In a medium bowl, combine softened cream cheese and goat cheese, mixing with a hand mixer until creamy, about 2 minutes. Add honey, cayenne pepper, and salt, continuing to beat until completely smooth.
  2. Gently fold in the freshly chopped rosemary using a spatula until just combined. Cover the bowl with plastic wrap and chill the mixture in the refrigerator for about 15 minutes.
  3. While the cheese mixture chills, line a baking sheet with wax paper. In a separate bowl, combine the chopped cranberries and pistachios.
  4. Using a cookie scoop, scoop out the chilled cheese mixture and roll it into bite-sized balls, placing each ball on the prepared baking sheet.
  5. Carefully roll each cheese ball in the cranberry-pistachio mixture, pressing gently for an even coating, and arrange them back on the baking sheet.
  6. Cover the baking sheet with plastic wrap and chill in the refrigerator for at least 30 minutes.

Nutrition

Serving: 1ballCalories: 100kcalCarbohydrates: 10gProtein: 4gFat: 6gSaturated Fat: 3gPolyunsaturated Fat: 0.5gMonounsaturated Fat: 2gCholesterol: 15mgSodium: 150mgPotassium: 100mgFiber: 1gSugar: 4gVitamin A: 200IUVitamin C: 1mgCalcium: 80mgIron: 0.5mg

Notes

These bites can be prepared up to 24 hours in advance and stored in an airtight container for the best flavor.

Tried this recipe?

Let us know how it was!

Creamy Mashed Sweet Potatoes with Zesty Orange Flavor

The kitchen filled with a warm, inviting aroma as I peeled the sweet potatoes, eager to transform them into something truly extraordinary. Mashed Sweet Potatoes with Orange and Rosemary are not just a side dish; they are a celebration of flavors that dance together beautifully. This recipe isn’t just quick and easy to make, whether you prefer the Instant Pot or the stove top method, but it also offers an uplifting twist that will impress your family and friends. Perfect for holiday gatherings or cozy dinners, these gluten-free and vegetarian potatoes bring a vibrant pop of color and delightful zest to your table. Are you ready to elevate your side dish game and discover the perfect pairing for your next meal?

Why Are Mashed Sweet Potatoes So Irresistible?

Versatile Cooking Methods: Whether you choose the Instant Pot or stove top, this recipe offers effortless preparation.

Deliciously Unique Flavor: The combination of orange zest and rosemary adds a fresh twist that elevates classic mashed potatoes to gourmet status.

Quick & Easy: Perfect for busy weeknights or holiday gatherings, you can whip these up in no time!

Crowd-Pleasing Appeal: These creamy mashed sweet potatoes are not only gluten-free and vegetarian, making them suitable for various dietary needs, but they also delight everyone’s taste buds.

Perfect Pairing: They beautifully complement a range of dishes, from roasted turkey to Sweet Chili Chicken, adding a burst of color and flavor to your table.

Mashed Sweet Potatoes Ingredients

For the Potatoes

  • Sweet Potatoes – The foundation of this dish, bringing natural sweetness and a creamy texture. Feel free to mix different varieties for unique flavors!

For the Creaminess

  • Half and Half – Provides a rich, velvety finish; substitute with whole milk, heavy cream, or non-dairy options for a lighter touch.
  • Butter – Enhances flavor; opt for dairy-free butter or olive oil if you’re looking for a vegan alternative.

For the Zesty Flavor

  • Orange Zest – Adds a vibrant citrus kick that brightens the sweetness; this ingredient truly makes your mashed sweet potatoes shine.
  • Rosemary – A fragrant herb that adds warmth; for a different twist, swap with fresh parsley, thyme, or dried herbs.

Seasoning Essentials

  • Salt and Pepper – A must for bringing out the flavors; adjust to your taste for that perfect balance.

Step‑by‑Step Instructions for Creamy Mashed Sweet Potatoes with Orange and Rosemary

Step 1: Prepare the Sweet Potatoes
Start by peeling the sweet potatoes and cutting them into 2-inch chunks for even cooking. If using the stove top method, place the chunks in a large pot and cover them with water. Bring the pot to a boil over medium-high heat and reduce to a gentle simmer for 10-15 minutes until the potatoes are fork-tender and easily mashed.

Step 2: Cook the Sweet Potatoes in Instant Pot
For the Instant Pot method, position the peeled and chopped sweet potatoes into the pot and add 1 cup of water. Seal the lid properly, ensuring the vent is closed. Set the Instant Pot to cook on high pressure for 8 minutes. Once cooking is complete, perform a quick release of the pressure, which usually takes a couple of minutes.

Step 3: Drain and Mash
Once the sweet potatoes are cooked, drain them well using a colander if using the stove. If using the Instant Pot, simply drain off any excess liquid without removing the potatoes from the pot. Return the sweet potatoes to the pot or mixing bowl, and use a potato masher or ricer to mash them until smooth and creamy, achieving the desired consistency for this mashed sweet potatoes dish.

Step 4: Incorporate Creaminess and Flavor
Next, add the richness of half and half and butter into the mashed sweet potatoes. Then, introduce the zesty orange zest and aromatic rosemary to the mix. Stir everything together thoroughly, ensuring each ingredient is well incorporated, and adjust seasoning with salt and pepper to elevate the flavors, giving your creamy mashed sweet potatoes a delightful finish.

Step 5: Serve and Enjoy
After mixing, transfer your mashed sweet potatoes to a serving dish or keep them in the pot on warm. Ensure they’re smooth and fluffy, displaying a vibrant orange color. Serve this beautiful side dish alongside your holiday entrée or at family gatherings, ready to impress all those who gather around your table.

Make Ahead Options

These Creamy Mashed Sweet Potatoes with Orange and Rosemary are perfect for busy home cooks looking to save time without sacrificing flavor. You can prepare the sweet potatoes up to 24 hours in advance by cooking them as directed, then storing the mashed mixture in an airtight container in the refrigerator. To maintain their luscious texture and prevent browning, cover the surface with a layer of plastic wrap before sealing. When you’re ready to serve, simply reheat on the stove over low heat or in the microwave, adding a splash of half and half to ensure they stay creamy. With these make-ahead options, you’ll have a delightful dish ready to impress with minimal last-minute effort!

Expert Tips for Mashed Sweet Potatoes

  • Avoid Overcooking: Be careful not to overcook sweet potatoes, as this can lead to a watery texture in your mashed sweet potatoes. Check for doneness with a fork!

  • Drain Thoroughly: After boiling or steaming, ensure sweet potatoes are drained well to achieve a creamy consistency without excess moisture affecting the texture.

  • Customize Flavors: Try adding roasted garlic for a savory depth or a splash of maple syrup for an extra hint of sweetness, making your mashed sweet potatoes truly unique.

  • Experiment with Herbs: While rosemary is delightful, feel free to substitute it with thyme or sage for a different flavor profile that complements your holiday dishes beautifully.

  • Serve Warm: Keep your mashed sweet potatoes warm until serving, especially during gatherings, to maintain their inviting, creamy allure that everyone will love.

How to Store and Freeze Mashed Sweet Potatoes

Fridge: Store leftover mashed sweet potatoes in an airtight container for up to 3 days. Make sure to let them cool completely before sealing to prevent moisture buildup.

Freezer: For longer storage, freeze mashed sweet potatoes in a freezer-safe container for up to 2 months. Label the container with the date for easy tracking!

Reheating: To reheat, thaw frozen mash in the fridge overnight, then warm gently on the stove or in the microwave, adding a splash of milk for creaminess if needed.

Make-Ahead: Prepare mashed sweet potatoes a day in advance and keep them in the fridge, ensuring they’re warm right before serving for a delightful addition to your holiday table.

Mashed Sweet Potatoes Variations & Substitutions

Customize these delightful mashed sweet potatoes to suit your taste buds and dietary preferences. Each variation adds a unique twist, making this dish even more exciting!

  • Vegan Option: Replace half and half and butter with almond milk and coconut oil for a delicious plant-based version. The sweet potatoes will remain creamy and flavorful!

  • Extra Creamy: Incorporate a splash of heavy cream instead of half and half for a richer texture; your taste buds will thank you. This ultra-creamy option is simply irresistible and makes every bite feel indulgent!

  • Citrus Twist: Add a squeeze of lemon juice to enhance the zesty flavor; this brightens the dish beautifully and pairs exceptionally well with turkey. It adds a refreshing touch that effortlessly balances the sweetness.

  • Cheesy Goodness: Stir in shredded cheddar cheese or goat cheese for a savory richness that complements the sweet potatoes perfectly. This variation is great for those who love that extra layer of flavor!

  • Spicy Kick: Mix in a pinch of cayenne pepper or chili powder for a warm kick that contrasts nicely with the sweet flavor. This is perfect for spice lovers looking to elevate their dish with a bit of heat.

  • Gourmet Garnish: Top with crispy fried onions or freshly chopped chives for added texture and flavor. This simple twist will elevate your presentation and every bite!

  • Maple Cinnamon Delight: Mix in a tablespoon of maple syrup and a sprinkle of cinnamon for a cozy, sweet version. The combination is comforting and perfect for holiday feasts!

  • Nutty Crunch: Incorporate chopped pecans or walnuts into the mash or as a topping for a delightful crunch. Nut lovers will enjoy the added texture and flavor difference this provides.

Feel free to explore these variations, or check out these ideas to take your holiday meals to the next level: Sweet Escape Charm and Comfort Garlic Potatoes for additional inspiration!

What to Serve with Creamy Mashed Sweet Potatoes with Orange and Rosemary

The comforting allure of creamy mashed sweet potatoes opens the door to a deliciously complete meal that’s perfect for sharing.

  • Roasted Turkey: Juicy, tender turkey pairs effortlessly with the sweet and zesty flavors of these mashed potatoes, making it a holiday favorite.

  • Honey-Glazed Ham: The sweetness of the ham complements the orange notes in the mashed sweet potatoes, creating a lovely balance on your plate.

  • Garlic Green Beans: Fresh, crisp green beans bring a satisfying crunch and vibrant color, enhancing the dish’s overall appeal with each bite.

  • Cranberry Sauce: The tartness of cranberry sauce cuts through the creamy texture of the sweet potatoes, adding a delightful tang that elevates your meal.

  • Maple-Glazed Carrots: Sweet glazed carrots pair beautifully with the earthy sweetness of the mashed potatoes, creating a colorful, comforting side table.

  • Warm Bread Rolls: Soft, buttery rolls offer a wonderful vehicle for scooping up creamy mashed sweet potatoes, ensuring no flavor goes to waste.

  • Sauvignon Blanc: This crisp wine enhances the citrusy notes from the orange zest while brightly complementing your festive meal.

  • Pumpkin Pie: End your meal on a sweet note with a slice of pumpkin pie, as its warmth and spices echo the comforting autumn flavors throughout the dinner.

Creamy Mashed Sweet Potatoes with Orange and Rosemary Recipe FAQs

How do I choose the best sweet potatoes?
Absolutely! Look for sweet potatoes that are firm, with smooth skin and no dark spots or blemishes. Varieties like Beauregard or Jewel are popular for their sweetness and creamy texture. Avoid those that feel soft or have sprouts.

What is the best way to store leftover mashed sweet potatoes?
I recommend transferring any leftover mashed sweet potatoes into an airtight container and refrigerating them. They can be stored for up to 3 days. Allow them to cool completely before sealing to avoid excess moisture that could affect their texture.

Can I freeze mashed sweet potatoes, and how?
Very easily! To freeze, let your mashed sweet potatoes cool completely, then place them in a freezer-safe container or freezer bag. Make sure to label it with the date. They can be frozen for up to 3 months. When you’re ready to use them, thaw in the fridge overnight and reheat, adding a bit of milk to restore creaminess.

Why are my mashed sweet potatoes watery, and how can I fix them?
If you find your mashed sweet potatoes are watery, it’s likely due to overcooking them or not draining them thoroughly afterward. To remedy this, you can return the mashed sweet potatoes to low heat in a pot to evaporate some excess moisture gently. Stir continuously until thickened. For the best texture, always ensure they are drained well after boiling!

Are mashed sweet potatoes safe for pets?
While sweet potatoes are generally safe and can be a healthy treat for dogs in moderation, avoid adding any butter, salt, or seasoning which could upset their stomach. Always check with your vet before introducing new foods to your pet’s diet.

What dietary considerations should I keep in mind?
These mashed sweet potatoes are gluten-free and vegetarian! For a dairy-free option, simply swap in non-dairy alternatives for half and half and butter, such as almond milk or coconut cream. This way, you can serve a delicious dish that accommodates most dietary restrictions.

Mashed Sweet Potatoes

Creamy Mashed Sweet Potatoes with Zesty Orange Flavor

This Creamy Mashed Sweet Potatoes recipe features vibrant orange zest for a delightful twist, making it an irresistible gluten-free and vegetarian dish perfect for any dinner.
Prep Time 15 minutes
Cook Time 15 minutes
Total Time 30 minutes
Servings: 4 servings
Course: Dinner
Cuisine: American
Calories: 200

Ingredients
  

For the Potatoes
  • 2 pounds Sweet Potatoes You can mix different varieties for unique flavors.
For the Creaminess
  • 1/2 cup Half and Half Substitute with whole milk, heavy cream, or non-dairy options.
  • 4 tablespoons Butter Use dairy-free butter or olive oil for vegan alternative.
For the Zesty Flavor
  • 1 tablespoon Orange Zest This ingredient truly elevates the dish.
  • 1 tablespoon Rosemary You can swap with fresh parsley, thyme, or dried herbs.
Seasoning Essentials
  • to taste Salt
  • to taste Pepper

Equipment

  • Instant Pot
  • Pot
  • Colander
  • potato masher

Method
 

Step-by-Step Instructions
  1. Peel the sweet potatoes and cut them into 2-inch chunks. If using the stove top, place in a pot, cover with water, boil, then simmer for 10-15 minutes until fork-tender.
  2. For the Instant Pot, add peeled and chopped sweet potatoes to the pot with 1 cup of water. Seal and cook on high pressure for 8 minutes. Quick release the pressure afterward.
  3. Drain the sweet potatoes well using a colander, or drain off excess liquid if using the Instant Pot. Mash until smooth and creamy.
  4. Stir in half and half and butter, followed by orange zest and rosemary. Adjust seasoning with salt and pepper to taste.
  5. Transfer to a serving dish or keep warm in the pot. Serve smooth, fluffy, and enjoy with your holiday meal.

Nutrition

Serving: 1cupCalories: 200kcalCarbohydrates: 30gProtein: 2gFat: 9gSaturated Fat: 5gPolyunsaturated Fat: 0.5gMonounsaturated Fat: 3.5gCholesterol: 20mgSodium: 200mgPotassium: 500mgFiber: 4gSugar: 6gVitamin A: 15000IUVitamin C: 30mgCalcium: 100mgIron: 1mg

Notes

Avoid overcooking for optimal texture. Customize flavors with roasted garlic or maple syrup and serve warm for gatherings.

Tried this recipe?

Let us know how it was!

Easy Brussels Sprouts and Bacon for the Perfect Flavor Boost

Have you ever found yourself staring blankly at a pile of Brussels sprouts, unsure how to transform them from bland to brilliant? Enter my Easy Brussels Sprouts and Bacon recipe—a delightful hero for any mealtime dilemma. This dish brings together tender, caramelized sprouts and crispy bacon, all brightened by a splash of lemon. Not only is it a breeze to prepare, but it doubles as a crowd-pleasing side that fits seamlessly into gluten-free, keto, and paleo diets. Imagine the comforting aroma that fills your kitchen as the savory bacon sizzles, mingling with the earthy notes of Brussels sprouts. Ready to elevate your dinner game with this delicious twist? Let’s dive into creating a side dish that everyone will rave about!

Why Should You Try This Dish?

Easy Preparation: This recipe requires minimal cooking skills, making it perfect for anyone looking to whip up a quick and satisfying side.

Flavor Explosion: The savory bacon harmonizes beautifully with sweet, caramelized Brussels sprouts, creating a mouthwatering flavor combination that even picky eaters will love.

Versatile Pairing: Serve as a side dish with roasted meats, or include it in holiday feasts for a festive touch.

Diet-Friendly: With gluten-free, keto, and low-carb attributes, this dish caters to various dietary needs while remaining delicious—how about serving alongside Oven Chicken Rice for a complete meal?

Make-Ahead Friendly: Prep your sprouts in advance and take the stress out of mealtime—just toss them in the pan when you’re ready.

Give your ordinary meals an extraordinary boost with this Easy Brussels Sprouts and Bacon recipe, where every bite is a crunchy, savory delight!

Easy Brussels Sprouts and Bacon Ingredients

For the Dish

  • Bacon – Adds savory, smoky flavor; you can choose to chop it for quicker cooking or enjoy it in slices.
  • Brussels Sprouts – Offers sweetness and a hearty texture; remember to trim and halve them for even cooking.
  • Lemon Zest – Provides a burst of freshness; steering clear of Meyer lemon is best, as its sweetness can overpower the dish.
  • Lemon Juice – Balances rich flavors with a touch of acidity for brightness.
  • Kosher Salt – Enhances overall flavor; feel free to adjust according to your taste.
  • Black Pepper – Adds a hint of spice; adjust based on your preference for heat.

This Easy Brussels Sprouts and Bacon recipe captures simple ingredients that create a standout side dish everyone will enjoy!

Step‑by‑Step Instructions for Easy Brussels Sprouts and Bacon

Step 1: Cook the Bacon
Begin by heating a large skillet over medium heat. Add your chopped bacon and cook for about 3-4 minutes until it becomes crispy and golden brown. The bacon will release its delicious fat, which will flavor the Brussels sprouts later. Once cooked, remove the bacon from the skillet and drain it on a paper towel, leaving the bacon grease in the pan.

Step 2: Prepare the Brussels Sprouts
In the same skillet with the leftover bacon grease, add the trimmed and halved Brussels sprouts. Toss them gently to coat with the grease and push them cut side down. Cover the skillet with a lid and cook for 5 minutes; this will help them get tender and start caramelizing, turning a lovely golden color.

Step 3: Sauté for Caramelization
After 5 minutes, uncover the skillet and give the Brussels sprouts a stir to promote even cooking. Cover the skillet again and cook for an additional 5-8 minutes, stirring occasionally. You’ll know they are done when they are beautifully caramelized and tender yet still retain a bit of crunch—just how we like them in this Easy Brussels Sprouts and Bacon recipe.

Step 4: Combine Ingredients
Once the Brussels sprouts are perfectly cooked, remove the skillet from the heat. Add the crispy bacon back into the pan, along with the lemon zest and lemon juice. Season with kosher salt and black pepper according to your taste. Gently mix everything together until the flavors meld and the bacon enriches the Brussels sprouts, creating a delightful side dish.

Step 5: Serve and Enjoy
Transfer the Easy Brussels Sprouts and Bacon to a serving dish, showcasing the wonderful contrast of golden sprouts and crispy bacon. This dish is now ready to elevate your meal. Serve it warm as a side that complements roasted meats or even as part of your festive holiday spread!

Expert Tips for Easy Brussels Sprouts and Bacon

  • Prep Ahead: Chop Brussels sprouts up to 3 days in advance to save time during meal prep.
  • Use Bacon Grease: Don’t discard the bacon grease after cooking; it adds a rich, savory depth to the dish.
  • Mind the Texture: Ensure Brussels sprouts are tender yet slightly crunchy. Overcooking can lead to mushy results.
  • Adjust Seasoning: Taste and adjust the salt and pepper before serving to ensure your Easy Brussels Sprouts and Bacon dish is perfectly seasoned.
  • Experiment with Variations: Feel free to explore additional flavors, such as garlic or shallots, to enhance your Brussels sprouts further.

How to Store and Freeze Easy Brussels Sprouts and Bacon

Fridge: Store leftovers in an airtight container for up to 3 days. This helps maintain freshness while preventing odor absorption from other foods.

Freezer: For longer storage, freeze the dish in a freezer-safe container. It can last for up to 2 months. When ready to enjoy, thaw overnight in the fridge before reheating.

Reheating: Reheat gently in a skillet over medium heat to maintain the texture of the Brussels sprouts and crispiness of the bacon. Add a splash of lemon juice to bring back the dish’s bright flavor.

What to Serve with Easy Brussels Sprouts and Bacon?

Elevate your meal by pairing this delightful side with flavors that enhance its richness and complement its savory notes.

  • Creamy Mashed Potatoes: The smooth, buttery texture creates a comforting contrast to the crispy bacon, making them a classic side.
  • Roasted Chicken: Tender, juicy chicken balances the savory components of the Brussels sprouts while absorbing the lemony brightness.
  • Quinoa Salad: A fresh salad with vibrant veggies offers a light and nutritious pairing, adding crunch and color to your plate.
  • Garlic Butter Shrimp: The sweet garlic flavor enhances the smokiness of the bacon, while the shrimp adds a touch of elegance to your meal.
  • Herbed Rice Pilaf: Fluffy, seasoned rice alongside Brussels sprouts creates a delightful texture combination, bringing a homey feel to your dining experience.
  • Red Wine: A smooth, full-bodied red wine pairs perfectly, enhancing the dish’s savory elements while the acidity balances the richness.
  • Chocolate Brownies: End on a sweet note with fudgy brownies—this decadent dessert contrasts wonderfully with the dish’s savory flavors.

Pairing these delightful options with your Easy Brussels Sprouts and Bacon will surely create a memorable meal that satisfies everyone’s taste buds!

Easy Brussels Sprouts and Bacon Variations

Feel free to tailor this recipe to match your tastes and dietary needs, creating your own culinary masterpiece!

  • Vegetarian: Replace bacon with smoked paprika or a dash of liquid smoke for a deep, smoky flavor without meat.

  • Nut-Free: For a nutty richness, top with toasted sunflower seeds instead of nuts—great crunch with a delightful bite.

  • Cheesy Delight: Sprinkle with grated Parmesan, feta, or goat cheese right before serving for a creamy, tangy finish.

  • Sweet and Savory: Drizzle with honey or maple syrup during the last few minutes of cooking for a beautifully balanced glaze.

  • Garlic-Infused: Add minced garlic along with the Brussels sprouts for an aromatic twist as they sauté together in the bacon grease.

  • Balsamic Twist: Swap lemon juice for balsamic vinegar, giving the dish a sweet and tangy flavor profile that pairs wonderfully with the sprouts.

  • Spicy Kick: Toss in red pepper flakes before serving to indulge your taste buds with a delightful heat that complements the bacon.

  • Loaded Side: Mix in cooked quinoa or rice for a hearty, filling dish that fits beautifully alongside Potato Bacon Soup or Easier Than Takeout Fried Rice.

Explore these variations and find your perfect match for a scrumptious side that shines at any table! Enjoy the delight of culinary creativity as you make this dish your own.

Make Ahead Options

These Easy Brussels Sprouts and Bacon are perfect for busy home cooks looking to streamline their meal prep! You can wash, trim, and halve the Brussels sprouts up to 3 days in advance, storing them in an airtight container in the refrigerator to maintain freshness. The bacon can also be cooked and stored in the fridge for up to 24 hours. When you’re ready to serve, simply sauté the prepped Brussels sprouts in the reserved bacon grease, add the crispy bacon back in, and finish with lemon zest and juice for that bright flavor. This way, you’ll have a fantastic side dish ready with minimal effort, ensuring your meals remain delicious and stress-free!

Easy Brussels Sprouts and Bacon Recipe FAQs

How do I choose the best Brussels sprouts?
Absolutely! Look for Brussels sprouts that are firm and compact with vibrant green coloring. Avoid any that have dark spots all over or feel soft to the touch, as these are signs of over-ripeness. Fresh sprouts will have tight leaves and should feel heavy for their size.

What is the best way to store leftovers?
Very simple! After cooking, let the Easy Brussels Sprouts and Bacon cool completely, then transfer them to an airtight container. They can be stored in the refrigerator for up to 3 days. This helps lock in flavors and prevent any unwanted odors from seeping in.

Can I freeze this dish? How?
Absolutely! To freeze, allow the cooked Brussels sprouts and bacon to cool down completely. Then, transfer them to a freezer-safe container or a resealable plastic bag, making sure to remove as much air as possible. This dish can be frozen for up to 2 months. When you’re ready to enjoy it, thaw overnight in the fridge, and gently reheat in a skillet over medium heat to maintain that glorious texture.

How do I prevent Brussels sprouts from becoming mushy?
Ah, that’s a great question! To prevent mushiness, stick to the cooking times mentioned in the recipe. Keep them tender yet slightly crunchy by covering the skillet only halfway during cooking to let steam escape, which helps them caramelize rather than overcook. Stir them occasionally to promote even cooking and keep an eye on them!

Can I make this dish ahead of time?
Absolutely! You can prep Brussels sprouts up to 3 days in advance; just store them in the fridge until you’re ready to use them. This not only saves time but also allows the flavors to meld beautifully! When you’re set to cook, simply sauté them with bacon as directed.

Are there any dietary considerations for this recipe?
Yes! This Easy Brussels Sprouts and Bacon dish is gluten-free, keto, and low-carb, making it a great choice for a variety of diets. If you’re cooking for someone with allergies, be sure to check the type of bacon used, as some brands may contain gluten or other allergens. Feel free to adjust any seasonings to cater to specific dietary needs.

Easy Brussels Sprouts and Bacon

Easy Brussels Sprouts and Bacon for the Perfect Flavor Boost

Transform Brussels sprouts into a delicious side with this Easy Brussels Sprouts and Bacon recipe featuring crispy bacon and bright lemon.
Prep Time 10 minutes
Cook Time 20 minutes
Total Time 30 minutes
Servings: 4 servings
Course: Dinner
Cuisine: American
Calories: 150

Ingredients
  

For the Dish
  • 6 slices Bacon Chopped for quicker cooking
  • 1 lb Brussels Sprouts Trimmed and halved
  • 1 tbsp Lemon Zest Avoid Meyer lemon
  • 1 tbsp Lemon Juice
  • 1 tsp Kosher Salt Adjust to taste
  • 1 tsp Black Pepper Adjust to taste

Equipment

  • Skillet

Method
 

Step-by-Step Instructions for Easy Brussels Sprouts and Bacon
  1. Begin by heating a large skillet over medium heat. Add your chopped bacon and cook for about 3-4 minutes until it becomes crispy and golden brown. Remove the bacon from the skillet and drain it on a paper towel, leaving the bacon grease in the pan.
  2. In the same skillet with the leftover bacon grease, add the trimmed and halved Brussels sprouts. Toss them gently to coat with the grease and push them cut side down. Cover the skillet and cook for 5 minutes.
  3. After 5 minutes, uncover the skillet and stir the Brussels sprouts. Cover again and cook for an additional 5-8 minutes, stirring occasionally, until they are caramelized and tender.
  4. Once the Brussels sprouts are cooked, remove from heat. Add crispy bacon, lemon zest, lemon juice, salt, and pepper. Gently mix until combined.
  5. Transfer to a serving dish and serve warm as a side.

Nutrition

Serving: 1servingsCalories: 150kcalCarbohydrates: 10gProtein: 8gFat: 10gSaturated Fat: 3gPolyunsaturated Fat: 2gMonounsaturated Fat: 4gCholesterol: 20mgSodium: 600mgPotassium: 300mgFiber: 4gSugar: 2gVitamin A: 500IUVitamin C: 60mgCalcium: 50mgIron: 1mg

Notes

Chop Brussels sprouts up to 3 days in advance. Use bacon grease for flavor, and ensure Brussels sprouts are tender but crunchy.

Tried this recipe?

Let us know how it was!

Crisp Frisée Citrus Salad with Fennel and Avocado Delight

The crisp snap of frisée lettuce mingles with vibrant citrus colors—welcome to the enticing world of my Frisée Citrus Salad with Fennel and Avocado! This winter salad is not only a feast for the eyes but also packs a punch of refreshing flavors. With sweet blood oranges, tart grapefruit, and creamy avocado, it’s a delightful balance of textures that will brighten your table and soothe those winter blues. Plus, it’s naturally gluten-free and vegan, making it an easy choice for meal prep or when entertaining guests. Imagine serving this beautiful medley as a side dish that outshines any heavy comfort food—or savoring it solo for a light yet satisfying lunch. Ready to dive into this vibrant culinary adventure? Let’s get started!

Why Will You Love This Salad?

Vibrant Colors: The eye-catching hues of citrus and greens create a feast for the senses that makes your table pop.

Fresh and Crunchy: Enjoy the satisfying crunch of frisée lettuce and fennel, giving each bite a refreshing texture.

Customizable: Whether you prefer a citrus blend or want to add protein like grilled chicken, this salad adapts to your cravings perfectly.

Quick Prep: You can have this dish ready in no time, ideal for those busy weeknights or last-minute gatherings.

Nutrient-Rich: Packed with vitamins and healthy fats from avocado, this salad nourishes your body while still being a treat for your taste buds.

Pair it alongside dishes like Shrimp Avocado Bowls or consider a filling option like Avocado Melt Sandwich to round out your meal!

Frisée Citrus Salad Ingredients

• Enjoy a delightful mix of flavors with this Frisée Citrus Salad with Fennel and Avocado!

For the Base

  • Frisée Lettuce – Provides a crisp texture and a slightly bitter flavor that balances the sweetness of the citrus. Substitute with escarole or endive for a similar experience.
  • Small Fennel Bulb – Offers crunch and a sweet anise aroma; reserved fronds can be used as a lovely garnish.

For the Citrus

  • Blood Orange – Adds sweetness and vibrant color; optional substitutes include Cara Cara oranges or mandarins.
  • Orange – Provides refreshing sweetness; varieties like clementines or pomelo can also be used for a twist.
  • Ruby Red Grapefruit – Delivers a tangy element that brightens the salad; feel free to swap in any grapefruit variety you like.

For the Creaminess

  • Avocado – Adds a smooth texture and healthy fats; you can swap it with seeds or nuts for a delightful crunch.

For the Crunch

  • Chopped Pistachios – Contributes a delightful crunch and elevates the salad’s visual appeal; substitute with your favorite nuts or seeds if desired.

For the Dressing

  • Citrus Vinaigrette – Brings the right amount of tanginess to enhance all the flavors; a lime or lemon vinaigrette could offer a zesty variation as well.

Step‑by‑Step Instructions for Frisée Citrus Salad with Fennel and Avocado

Step 1: Prepare the Citrus
Begin by setting your cutting board and a sharp knife nearby. Cut off the tops and bottoms of the blood orange, ruby red grapefruit, and orange to create a stable base. Peel them thoroughly, removing the white pith, then slice them into rounds about half an inch thick, arranging them neatly on a platter for a colorful presentation.

Step 2: Lay the Base
Take a large serving platter or salad bowl and gently toss the frisée lettuce into it. Make sure the leaves are clean and dry for the best texture. Allow the frisée to form a fluffy bed in the center of the platter, creating a lovely backdrop for the vibrant citrus slices and ensuring easy serving when assembling the Frisée Citrus Salad with Fennel and Avocado.

Step 3: Assemble the Ingredients
Evenly distribute the sliced citrus and small pieces of fennel bulb over the arranged frisée lettuce. The contrast of colors and textures will start to pop! Use your hands or tongs to gently toss the ingredients, blending the flavors while keeping the presentation intact, ensuring every bite of this refreshing salad is a delightful mix of taste and appearance.

Step 4: Dress the Salad
Take your citrus vinaigrette and drizzle it generously over the assembled salad, evenly coating the ingredients. Be careful not to drown the salad; a light touch is key! This dressing will enhance the vivid flavors of the Frisée Citrus Salad with Fennel and Avocado, making it an invigorating dish that is sure to impress.

Step 5: Add Creaminess and Crunch
Slice the avocado in half, remove the pit, and scoop out into cubes. Scatter the creamy avocado pieces atop the salad, followed by a sprinkle of the chopped pistachios for added crunch. The combination of creamy and crunchy textures will elevate your salad, creating a beautiful contrast that entices everyone’s taste buds.

Step 6: Serve Immediately
Once everything is assembled, serve the salad immediately to keep the frisée crisp and the avocado fresh. Feel free to drizzle additional vinaigrette on each individual serving for an extra burst of flavor. This Frisée Citrus Salad with Fennel and Avocado is perfect as a bright side dish or a refreshing main course that will surely delight any palate!

Make Ahead Options

This Frisée Citrus Salad with Fennel and Avocado is perfect for meal prep, allowing you to spend less time in the kitchen during busy weeknights! You can prepare the citrus, fennel, and vinaigrette up to 24 hours in advance. Simply slice the blood orange, grapefruit, and orange, and store them in an airtight container in the refrigerator to maintain their freshness. The fennel can be sliced and refrigerated as well. However, to preserve the crispness of the frisée and creaminess of the avocado, it’s best to assemble the salad just before serving. When you’re ready to enjoy, simply toss everything together, drizzle with dressing, and savor the vibrant flavors!

Frisée Citrus Salad with Fennel and Avocado Variations

Feel free to get creative and tailor this salad to your taste buds with these delightful adjustments!

  • Seasoned Chickpeas: Toss in crunchy roasted chickpeas for added protein and a hint of spice. They’re also a delightful way to increase texture in each bite.
  • Nut-Free Option: Skip the pistachios and use sunflower seeds for a delightful crunch without the nuttiness—perfect for nut allergies!
  • Herb Boost: Mix in fresh herbs like mint or cilantro for an aromatic garden-like twist that elevates the salad’s flavor profile.
  • Fruit Medley: Swap in seasonal fruits like pomegranate seeds or sliced strawberries for a pop of sweetness that complements winter’s chill beautifully.
  • Add Protein: Grilled chicken or shrimp can turn this salad into a hearty main course that satisfies those mid-afternoon hunger pangs.
  • Warm Fennel: Sauté the fennel with olive oil and a pinch of salt for a savory warm version of this dish that pairs beautifully with creamy avocado.
  • Spicy Kick: Add sliced jalapeños or a dash of hot sauce to your vinaigrette for a spicy twist that brings warmth to the bright flavors of the salad.
  • Citrus Zing: Experiment with citrus varieties like tangelos or limes to give this salad a unique zing, making every bite an unexpected delight.

This Frisée Citrus Salad is incredibly versatile! If you’re looking for more inspiration, consider pairing it with dishes like a delicious Blt Chicken Salad or enjoyable Chocolate Granola Cups for a complete meal experience.

Expert Tips for Frisée Citrus Salad

  • Prep Ahead: Chop the citrus, fennel, and frisée a day in advance. This saves time when assembling your Frisée Citrus Salad with Fennel and Avocado for a dinner party.

  • Slice with Care: Use a sharp knife to cut citrus into rounds without tearing the flesh. This enhances presentation and ensures every bite is juicy.

  • Dress Just Before Serving: To maintain the crispness of the frisée, avoid dressing the salad until you’re ready to serve. Packed salads can wilt quickly!

  • Mix and Match Citrus: Feel free to experiment with different citrus varieties based on what’s available. Each adds its unique twist to your salad!

  • Garnish Thoughtfully: Don’t discard fennel fronds! They make a beautiful, aromatic garnish that adds to the overall visual appeal of your dish.

What to Serve with Frisée Citrus Salad with Fennel and Avocado

The vibrant flavors of your winter salad can shine even brighter when paired with complementary dishes.

  • Grilled Chicken Skewers: Juicy, tender chicken adds a savory element that balances the salad’s brightness and refreshes your palate.
  • Quinoa Pilaf: Nutty quinoa with herbs provides a hearty base that offers both texture and added nutrition to your meal.
  • Crispy Baby Potatoes: Seasoned with garlic and rosemary, their crisp skin pairs well with the creamy avocado and citrus flavors.
  • Pan-Seared Scallops: Delicate and sweet, scallops elevate the dish with their soft texture, making your salad feel gourmet.
  • Toasty Whole-Grain Bread: A side of rustic bread allows for carb indulgence, perfect for scooping up any leftover salad with its creamy elements.
  • Sparkling Water with Lime: Refreshingly effervescent, this drink harmonizes beautifully with the citrus notes of your salad, enhancing each bite.
  • Lemon Tart: A light dessert featuring a tangy filling perfectly contrasts the salad’s flavors, concluding the meal on a bright note.
  • Herbed Couscous: Fluffy couscous mixed with fresh herbs adds depth and a slight nuttiness, making it a wonderful, quick-to-make side.

How to Store and Freeze Frisée Citrus Salad

Fridge: Store the components separately in airtight containers for up to 2 days to maintain freshness and texture. Assemble just before serving for the best experience.

Avocado: If you have leftover avocado, sprinkle it with lemon juice to prevent browning, then cover tightly and refrigerate for up to 1 day.

Freezer: Avoid freezing the assembled salad, as the texture will suffer once thawed. However, citrus segments can be frozen for up to 3 months if individually laid out on a baking sheet.

Reheating: There’s no need to reheat this salad; enjoy it cold and refreshing as intended! Adjust the citrus vinaigrette before serving for extra zing.

Frisée Citrus Salad with Fennel and Avocado Recipe FAQs

How do I select the right citrus fruits for this salad?
For a vibrant Frisée Citrus Salad with Fennel and Avocado, look for citrus fruits that are heavy for their size, indicating juiciness. Choose blood oranges that have smooth, unblemished skin, and ruby red grapefruits with a vibrant color. Avoid fruits with dark spots or a hard feel, as these can signal overripeness.

How should I store leftover salad components?
To keep your salad fresh, store the frisée lettuce, sliced citrus, fennel, and dressing separately in airtight containers in the fridge. They can last for up to 2 days. Just assemble when you’re ready to serve. If you’re unsure about any ingredients, look for wilting in greens or browning in avocado as signs they should be used soon!

Can I freeze the salad or any of its components?
It’s best not to freeze the assembled Frisée Citrus Salad as that will affect the texture of the ingredients. However, individual citrus segments can be frozen for up to 3 months. Lay them in a single layer on a baking sheet before placing them in a freezer bag. This method helps prevent them from sticking together.

What should I do if my avocado is browning?
If your avocado begins to brown, don’t worry! Simply sprinkle it with a little lemon or lime juice to slow the oxidation process. If it’s already brown, you can scoop out any discolored parts; the rest is often still good to eat. Just be cautious and trust your taste in determining edibility.

Are there any dietary considerations I should be aware of?
This salad is naturally gluten-free and vegan, making it a great choice for many dietary restrictions. However, if you’re preparing this for guests, consider checking for any nut allergies, especially since the recipe includes pistachios. You can easily substitute with seeds to accommodate those who may have nut sensitivities.

Frisee Citrus Salad with Fennel and Avocado

Crisp Frisée Citrus Salad with Fennel and Avocado Delight

Discover the vibrant Frisee Citrus Salad with Fennel and Avocado, a delightful and refreshing take on winter salads.
Prep Time 15 minutes
Total Time 15 minutes
Servings: 4 servings
Course: Salad
Cuisine: Gluten-Free, Mediterranean, Vegan
Calories: 230

Ingredients
  

For the Base
  • 1 head Frisée Lettuce Substitute with escarole or endive if desired.
  • 1 small bulb Fennel Reserved fronds can be used for garnish.
For the Citrus
  • 1 Blood Orange Optional substitutes: Cara Cara oranges or mandarins.
  • 1 Orange Other options include clementines or pomelo.
  • 1 Ruby Red Grapefruit Feel free to swap in any grapefruit variety.
For the Creaminess
  • 1 medium Avocado Can be substituted with seeds or nuts.
For the Crunch
  • 1/4 cup Chopped Pistachios Substitute with your favorite nuts or seeds if desired.
For the Dressing
  • 1/4 cup Citrus Vinaigrette A lime or lemon vinaigrette can be used as a variation.

Equipment

  • Cutting board
  • Sharp knife
  • Large serving platter
  • salad bowl
  • Tongs

Method
 

Step-by-Step Instructions
  1. Prepare the Citrus: Cut off the tops and bottoms of the blood orange, ruby red grapefruit, and orange to create a stable base. Peel them thoroughly, removing the white pith, then slice them into rounds about half an inch thick, arranging them neatly on a platter for a colorful presentation.
  2. Lay the Base: Take a large serving platter or salad bowl and gently toss the frisée lettuce into it. Allow the frisée to form a fluffy bed in the center of the platter.
  3. Assemble the Ingredients: Evenly distribute the sliced citrus and small pieces of fennel bulb over the arranged frisée lettuce. Use your hands or tongs to gently toss the ingredients.
  4. Dress the Salad: Take your citrus vinaigrette and drizzle it generously over the assembled salad, evenly coating the ingredients.
  5. Add Creaminess and Crunch: Slice the avocado, remove the pit, and scoop out into cubes. Scatter the avocado pieces atop the salad, followed by a sprinkle of the chopped pistachios.
  6. Serve Immediately: Once everything is assembled, serve the salad immediately to keep the frisée crisp and the avocado fresh.

Nutrition

Serving: 1servingCalories: 230kcalCarbohydrates: 22gProtein: 3gFat: 15gSaturated Fat: 2gPolyunsaturated Fat: 1gMonounsaturated Fat: 10gSodium: 120mgPotassium: 400mgFiber: 7gSugar: 5gVitamin A: 900IUVitamin C: 80mgCalcium: 50mgIron: 1mg

Notes

Prep Ahead: Chop the citrus, fennel, and frisée a day in advance for efficiency. Dress just before serving to maintain crispness.

Tried this recipe?

Let us know how it was!

Creamy Butternut Squash Mac and Cheese for Cozy Nights

As I savored the crisp autumn air, the warm aromas of a cozy kitchen brought back memories of family gatherings centered around hearty comfort food. One dish that consistently makes an appearance is my creamy Butternut Squash Mac and Cheese. This delightful twist on the classic combines the rich, cheesy goodness we all adore with the sweet and nutty flavors of roasted butternut squash. What’s more, it’s a vegetarian delight that not only celebrates fall but also packs in some serious nutrition while being irresistibly creamy. With its quick prep time and scrumptious crispy breadcrumb topping, this dish is sure to become a favorite at your table. Ready to make cozy memories in the kitchen? Let’s dive into the recipe!

Why is this Mac and Cheese special?

Comforting and fulfilling, this Butternut Squash Mac and Cheese redefines your notion of cozy food. Rich flavors blend beautifully with the sweetness of roasted squash, creating a dish that’s both familiar and exciting. Quick to prepare, it fits seamlessly into busy lifestyles while allowing you to enjoy homemade goodness. Nutritious twist on a classic, it ensures everyone can enjoy a hearty meal without sacrificing health. Crowd-pleaser, this dish is perfect for gatherings or simple family dinners, making it a staple for any fall or winter occasion. Try it alongside a refreshing salad or even paired with a slice of Honey Banana Grilled Cheese for a delightful contrast!

Butternut Squash Mac and Cheese Ingredients

This recipe for Butternut Squash Mac and Cheese highlights the seasonal flavors while delivering nutrition.

For the Roasted Squash

  • Extra Virgin Olive Oil – Adds richness and helps roast the squash; vegetable oil can substitute.
  • Butternut Squash (1.5 lbs) – Provides sweetness and creamy texture; fresh roasted squash is preferred over canned for optimal flavor.

For the Cheese Sauce

  • Whole Milk (2.5 cups) – Creates a smooth, creamy cheese sauce; use almond or oat milk for a dairy-free option.
  • Unsalted Butter (4 tablespoons) – Adds flavor to the sauce; margarine or a dairy alternative can be used.
  • Shallot (1 small) – Offers a mild onion flavor; substitute with onion or leeks if unavailable.
  • Garlic (2 cloves) – Enhances depth of flavor; fresh garlic is recommended for brightness.
  • Smoked Paprika (1/2 teaspoon) – Adds a subtle smokiness; regular paprika may substitute but will lack the smoky flavor.
  • All-Purpose Flour (2 tablespoons) – Acts as a thickening agent for the cheese sauce; gluten-free flour can be used as a substitute.
  • White Cheddar Cheese (2 cups) – Provides a sharp, cheesy flavor; consider mixing with Fontina, Gruyère, or Parmesan for variety.
  • Fresh Thyme (1 tablespoon) – Introduces an herbal note; dried thyme (1.5 teaspoons) works as a substitute.
  • Salt and Pepper – Season to taste.

For the Pasta and Topping

  • Short Cut Pasta (8 ounces) – Acts as the base for the dish; choose elbow macaroni, shells, or cavatappi for best sauce adhesion.
  • Panko Breadcrumbs (1/2 cup) – Creates a crispy topping; any preferred breadcrumbs can be used.

This comforting Butternut Squash Mac and Cheese is not just a recipe; it’s a warm hug on a plate!

Step‑by‑Step Instructions for Butternut Squash Mac and Cheese

Step 1: Roast the Squash
Preheat your oven to 400°F (200°C). Carefully cut the butternut squash in half and scoop out the seeds. Brush the cut surfaces with extra virgin olive oil and place them cut-side down on a baking sheet. Roast for 30-40 minutes until the squash is tender and easily pierced with a fork, releasing a sweet aroma that fills the kitchen.

Step 2: Prepare Squash Purée
Once the roasted squash has cooled slightly, scoop out the flesh into a blender. Add ½ cup of whole milk and blend until completely smooth, creating a velvety squash purée. Set this aside for later use in your creamy Butternut Squash Mac and Cheese or store in the refrigerator if preparing in advance.

Step 3: Cook Pasta
In a large pot, bring water to a rolling boil. Add in your choice of short cut pasta, like elbow macaroni or shells, and cook according to package instructions until just under al dente. This usually takes around 6-8 minutes; remember, the pasta will cook further in the oven. Drain and set aside.

Step 4: Make Cheese Sauce
In a large saucepan, melt 4 tablespoons of unsalted butter over medium heat. Sauté one small shallot until it becomes translucent, about 2-3 minutes, then add minced garlic and smoked paprika. Cook for an additional minute before sprinkling in 2 tablespoons of flour to create a roux, stirring constantly until it turns golden. Gradually whisk in the remaining 2 cups of milk until thickened, about 5 minutes.

Step 5: Combine the Mixture
Stir in the roasted butternut squash purée, followed by 2 cups of white cheddar cheese, fresh thyme, and season with salt and pepper to taste. Mix until the cheese is melted and the sauce is creamy. Now, gently fold in the cooked pasta, ensuring each piece is coated in this luscious sauce.

Step 6: Assemble and Bake
Preheat your oven to 350°F (175°C). Transfer the pasta mixture into a greased baking dish, spreading it evenly. Sprinkle the remaining cheese on top followed by ½ cup of panko breadcrumbs mixed with a little melted butter for extra crunch. Bake for 20-30 minutes, until the top is golden brown and the sauce is bubbly, creating a delightful contrast in textures.

What to Serve with Butternut Squash Mac and Cheese

As the warm, cheesy aroma envelops your kitchen, it’s time to elevate your meal with delightful pairings that harmonize beautifully with this comforting dish.

  • Fresh Green Salad: A crisp, green salad with a tangy vinaigrette adds a refreshing contrast to the creamy richness of the mac and cheese. The bright flavors will balance the dish wonderfully.

  • Garlic Bread: This quintessential companion offers a crunchy texture and aromatic flavors that complement the cheese sauce, making for a perfect side as you scoop up cheesy goodness.

  • Roasted Brussels Sprouts: The nutty flavor of roasted Brussels sprouts, lightly seasoned, enhances the sweetness of butternut squash and brings a delightful, earthy element to your plate.

  • Apple Cider: Sipping on a refreshing glass of apple cider, whether hot or cold, enhances the autumn vibes while the sweet and tangy notes pair beautifully with the savory mac and cheese.

  • Herbed Quinoa: A side of fluffy quinoa seasoned with fresh herbs adds a nutritious twist and nutty flavor that contrasts nicely with the creamy texture of the dish.

  • Pumpkin Spice Muffins: For a sweet finish, serve warm pumpkin spice muffins that reflect the season and provide a cozy end to your meal, making it entirely memorable.

  • Steamed Broccoli: Simple and nutritious, steamed broccoli adds a touch of green to your plate, providing a slight crunch and balancing the richness of the Butternut Squash Mac and Cheese.

  • Cheese Platter: Offering a selection of cheeses, crackers, and fruits allows for a fun, shareable appetizer that can enhance the cheese experience alongside the pasta dish.

How to Store and Freeze Butternut Squash Mac and Cheese

Fridge: Store leftover Butternut Squash Mac and Cheese in an airtight container for up to 3 days. Reheat on the stovetop or in the microwave, adding a splash of milk for creaminess.

Freezer: You can freeze this dish for up to 2 months. Portion it into freezer-safe containers and let it cool completely before sealing.

Reheating: To reheat from frozen, bake at 350°F (175°C) for about 45 minutes, or until heated through. Cover with foil to prevent browning too fast.

Thawing: When ready to enjoy, transfer the frozen mac and cheese to the fridge to thaw overnight before reheating.

Butternut Squash Mac and Cheese Variations

Feel free to get creative with your Butternut Squash Mac and Cheese—there are so many delightful twists you can explore!

  • Pumpkin Puree: Swap in pureed pumpkin for a seasonal twist, enhancing sweetness while keeping the creamy texture.

  • Greens Galore: Add sautéed spinach or kale for a nutritious boost that brings vibrant color and extra flavor to the dish.

  • Whole Wheat Pasta: Choose whole wheat pasta for a heartier texture and added fiber, making this comfort food even more nutritious.

  • Cheddar Alternatives: Mix in Fontina or Gruyère for a unique flavor profile. These cheeses melt beautifully, adding richness to your creamy sauce.

  • Spicy Kick: For some heat, sprinkle in a bit of cayenne pepper. It adds a warming spice that pairs perfectly with the sweetness of the squash.

  • Nutty Crunch: Toss in some toasted walnuts or pecans in addition to or instead of the breadcrumbs for an enjoyable crunch and nutty flavor.

  • Cream Cheese Addition: Stir in a dollop of cream cheese as the sauce thickens for extra creaminess that enhances the velvety texture.

  • Herbal Infusion: Experiment by replacing thyme with fresh basil or rosemary for an aromatic twist, which complements the dish beautifully.

With these variations, you’re sure to create a personalized version of Butternut Squash Mac and Cheese that will warm hearts during cozy nights. And if you’re curious for more cheesy goodness, you might want to check out this delicious Chicken Grilled Cheese or the sweet notes of a Strawberry Cheesecake Dump Cake. Enjoy your kitchen adventures!

Make Ahead Options

These Butternut Squash Mac and Cheese are perfect for busy weeknights! You can prepare the roasted butternut squash purée up to 3 days in advance, storing it in an airtight container in the refrigerator to maintain its creamy texture. Additionally, cook and cool the pasta, keeping it refrigerated for up to 24 hours. When you’re ready to serve, simply warm the squash purée and mix it with the cheese sauce and pasta. Finish by assembling and baking as directed—your comforting dish will be just as delicious and ready with minimal effort! This time-saving approach allows you to enjoy homemade goodness without the last-minute rush.

Expert Tips for Butternut Squash Mac and Cheese

  • Fresh Purée: Always use homemade butternut squash purée for the best flavor—canned options often lack depth and sweetness.
  • Grate Your Cheese: Grate cheese from a block rather than using pre-grated to ensure a creamier melt in your Butternut Squash Mac and Cheese.
  • Pasta Perfection: Avoid overcooking the pasta; you want it al dente since it continues to cook in the oven, maintaining the ideal texture.
  • Check for Doneness: Look for a golden-brown top and bubbly sauce when baking—cover it with foil if it browns too quickly to prevent burning.
  • Adjust for Taste: Experiment with spices or herbs—add a pinch of nutmeg or a sprinkle of cayenne for an extra flavor kick in your creamy dish!

Butternut Squash Mac and Cheese Recipe FAQs

How do I choose the right butternut squash?
Absolutely! For the best flavor, look for a butternut squash that feels heavy for its size and has a smooth, even skin without deep cuts or dark spots all over. Smaller squash tend to be sweeter and less fibrous, so go for those if you can!

How should leftovers be stored?
Very easily! Leftover Butternut Squash Mac and Cheese can be stored in an airtight container in the refrigerator for up to 3 days. When reheating, just add a splash of milk to restore its creamy consistency while warming it up on the stovetop or in the microwave.

Can I freeze Butternut Squash Mac and Cheese?
Of course! To freeze, portion the dish into freezer-safe containers and let it cool completely. It can be safely frozen for up to 2 months. When you’re ready to eat, simply transfer it to the fridge the night before to thaw. When reheating from frozen, bake at 350°F (175°C) for about 45 minutes, covering it with foil to prevent it from browning too quickly.

What if my cheese sauce is too thick?
No worries! If you find your cheese sauce has thickened too much, simply whisk in a little more milk, a tablespoon at a time, until you reach the desired consistency. This way, your Butternut Squash Mac and Cheese will remain rich and creamy!

Is this dish safe for people with dairy allergies?
Great question! This recipe is not suitable for those with dairy allergies unless you make some adjustments. Substitute the whole milk with almond or oat milk, use dairy-free cheese alternatives, and switch butter with a plant-based option. This will keep the flavors while making it more allergy-friendly!

Can I use a different type of pasta?
Absolutely! Feel free to swap out the short cut pasta for any pasta shape you prefer, such as whole wheat or gluten-free options. Just be mindful of the cooking instructions, ensuring it’s al dente before combining it with the cheese sauce for the best texture.

Butternut Squash Mac and Cheese

Creamy Butternut Squash Mac and Cheese for Cozy Nights

A delightful vegetarian twist on classic mac and cheese featuring butternut squash, perfect for fall and winter evenings.
Prep Time 15 minutes
Cook Time 1 hour
Total Time 1 hour 15 minutes
Servings: 4 servings
Course: Casserole
Cuisine: American
Calories: 600

Ingredients
  

For the Roasted Squash
  • 2 tablespoons Extra Virgin Olive Oil Vegetable oil can substitute.
  • 1.5 lbs Butternut Squash Fresh roasted squash is preferred.
For the Cheese Sauce
  • 2.5 cups Whole Milk Use almond or oat milk for dairy-free option.
  • 4 tablespoons Unsalted Butter Margarine or dairy alternative can be used.
  • 1 small Shallot Substitute with onion or leeks if unavailable.
  • 2 cloves Garlic Fresh garlic is recommended.
  • 0.5 teaspoon Smoked Paprika Regular paprika may substitute.
  • 2 tablespoons All-Purpose Flour Gluten-free flour can be used.
  • 2 cups White Cheddar Cheese Consider mixing with other cheeses.
  • 1 tablespoon Fresh Thyme Dried thyme can be substituted.
  • Salt and Pepper Season to taste.
For the Pasta and Topping
  • 8 ounces Short Cut Pasta Elbow macaroni, shells, or cavatappi recommended.
  • 0.5 cup Panko Breadcrumbs Any preferred breadcrumbs can be used.

Equipment

  • Oven
  • blender
  • Large pot
  • Large Saupan
  • baking dish

Method
 

Step-by-Step Instructions
  1. Preheat your oven to 400°F (200°C). Cut the butternut squash in half, scoop out the seeds, brush with olive oil, and roast for 30-40 minutes until tender.
  2. Scoop out the flesh of the roasted squash into a blender, add ½ cup of milk, and blend until smooth. Set aside.
  3. In a large pot, bring water to a boil, add pasta, and cook until just under al dente, about 6-8 minutes. Drain and set aside.
  4. In a large saucepan, melt 4 tablespoons of butter over medium heat. Sauté shallot until translucent, add garlic and paprika, then cook for another minute. Stir in flour to create a roux.
  5. Gradually whisk in remaining milk until thickened, about 5 minutes. Stir in the squash purée, cheddar cheese, thyme, and season with salt and pepper. Fold in the cooked pasta.
  6. Preheat your oven to 350°F (175°C). Transfer the mixture to a greased baking dish, sprinkle remaining cheese and panko breadcrumbs, and bake for 20-30 minutes until golden brown.

Nutrition

Serving: 1servingCalories: 600kcalCarbohydrates: 65gProtein: 20gFat: 30gSaturated Fat: 15gPolyunsaturated Fat: 2gMonounsaturated Fat: 8gCholesterol: 70mgSodium: 800mgPotassium: 600mgFiber: 4gSugar: 6gVitamin A: 5000IUVitamin C: 20mgCalcium: 350mgIron: 2mg

Notes

For best flavor, use fresh butternut squash purée and freshly grated cheese. Avoid overcooking pasta, as it continues to cook in the oven.

Tried this recipe?

Let us know how it was!

Vibrant Kale Orange Salad That Brightens Your Day

As I stood at my kitchen counter, the vibrant colors of a beautiful salad began to take shape. Lovers of homemade food, get ready to indulge in this Hearty Kale Orange Salad with Goat Cheese! The combination of tender kale, creamy goat cheese, juicy orange segments, and crunchy pepitas creates a deliciously hearty salad that’s not only a feast for the eyes but also incredibly nourishing. Just imagine the flavors dancing on your palate! Not only is this salad gluten-free and vegetarian, but it’s also perfect for meal prep—allowing you to enjoy fresh, homemade goodness throughout the week. If you’re on the hunt for a refreshing dish that can elevate your lunch game or impress your guests, keep scrolling to discover how easy it is to whip up this delightful salad!

Why is this Kale Orange Salad special?

Vibrant, fresh flavors: Each bite bursts with the citrusy sweetness of orange and the rich creaminess of goat cheese.

Nutritious base: Packed with hearty kale, this salad not only nourishes but also satisfies, making it a perfect choice for health-conscious food lovers.

Meal prep-friendly: Whip it up ahead of time, storing it in an airtight container for quick lunches or dinner sides throughout the week!

Versatile delight: Enjoy it as a refreshing accompaniment to grilled meats or fish, or transform it into a filling main dish by adding your favorite protein, like grilled chicken or roasted chickpeas.

Perfect for all occasions: Whether you’re hosting friends or just craving a colorful dish, this Kale Orange Salad will surely impress! For more delightful ideas, check out our Blt Chicken Salad for a tasty variation.

Kale Orange Salad Ingredients

For the Salad

  • Kale – A hearty base that adds texture and nutrition; opt for curly or lacinato kale for the best results.
  • Olive Oil – Essential for massaging the kale, softening it while enhancing flavor and nutrient absorption.
  • Navel Orange – Juicy and sweet, it elevates the salad’s flavor profile; clementines work well as a substitute too.
  • Green Onions – Provides a mild onion flavor and crunchy texture; don’t forget to use both the green and white parts!
  • Goat Cheese – Creamy and tangy, it complements the other ingredients; you can swap it for feta or skip it for a dairy-free option.
  • Dried Cranberries – Adds a sweet, chewy element to the mix; feel free to substitute with raisins or any dried fruit you love.
  • Pepitas (Pumpkin Seeds) – Offers a satisfying crunch and nutritional boost; swap with your preferred nuts or seeds if desired.

For the Dressing

  • Citrus Vinaigrette – A tangy drizzle that ties the salad together beautifully; make your own or use a store-bought version.

Enjoy this Kale Orange Salad sprinkled with your favorite toppings and make it a colorful and fulfilling addition to your meal!

Step‑by‑Step Instructions for Kale Orange Salad

Step 1: Massage the Kale
In a large mixing bowl, place the chopped kale and drizzle it with olive oil. Using your hands, massage the oil into the kale for about 1-2 minutes until it becomes tender and vibrant in color. This crucial step helps to soften the leaves and reduce bitterness, ensuring the base of your Kale Orange Salad is deliciously enjoyable.

Step 2: Prepare the Additions
Once the kale is softened, it’s time to add the vibrant components. Toss in the segmented navel orange, sliced green onions, crumbled goat cheese, dried cranberries, and toasted pepitas. Each ingredient adds a burst of flavor and texture, creating a well-rounded mix. Make sure to combine everything gently to avoid bruising the ingredients.

Step 3: Dress the Salad
Drizzle your desired amount of tangy citrus vinaigrette over the salad mixture. This dressing will elevate the flavors beautifully! Use a pair of salad tongs or your hands to toss everything together, ensuring every ingredient is evenly coated. As you mix, admire the colorful display that makes this Kale Orange Salad both eye-catching and appetizing.

Step 4: Serve or Store
After tossing, serve the salad immediately for the freshest taste. If preparing in advance, consider keeping the salad undressed in an airtight container in the fridge for up to three days. This way, you ensure that the ingredients, particularly the kale, stay crisp. When ready to enjoy, just dress the salad and give it another gentle toss to revive its flavors!

How to Store and Freeze Kale Orange Salad

Fridge: Store the undressed Kale Orange Salad in an airtight container for up to 3 days. This prevents the kale from wilting and maintains crispness.

Freezer: It’s not recommended to freeze this salad, as the ingredients, especially the kale and goat cheese, do not thaw well and can become mushy.

Meal Prep Tips: Prepare components separately if making it ahead of time. Keep the citrus vinaigrette in a sealed jar and add it just before serving for the freshest flavor.

Reheating: This salad is best enjoyed cold; avoid reheating to maintain texture and taste. Enjoy it as a refreshing side or a light meal!

Kale Orange Salad Variations & Substitutions

Feel free to let your creativity shine and tailor this salad to suit your taste!

  • Dairy-Free: Omit the goat cheese or swap it for a creamy avocado to still enjoy that luscious texture without dairy.
  • Nut-Free: Replace the pepitas with sunflower seeds for a similar crunch that’s safe for nut allergies.
  • Fruity Twist: Add seasonal fruits like sliced apples or pomegranate seeds for a delightful burst of color and flavor.
  • Hearty Addition: Transform this salad into a main by mixing in grilled chicken, chickpeas, or quinoa for an extra protein punch.
  • Vinaigrette Variation: Try a balsamic vinaigrette or a honey mustard dressing for a different flavor profile that complements the salad beautifully.
  • Spicy Kick: Sprinkle in a pinch of red pepper flakes or toss in some sliced jalapeños to give your salad an exciting heat.
  • Herb Infusion: Incorporate fresh herbs like cilantro, mint, or parsley for an aromatic experience that brightens up each bite.
  • Alternative Greens: Use spinach, arugula, or mixed greens if you prefer a softer base instead of the hearty kale.

With these simple modifications, your Kale Orange Salad can adapt to any meal or occasion! For transition ideas to other salads, take a look at our delightful Blt Chicken Salad that often keeps the flavors fresh and exciting.

Expert Tips for the Best Kale Orange Salad

  • Massage well: Spend a full 1-2 minutes massaging the kale with olive oil. This step transforms the kale, making it tender and reducing bitterness.

  • Dress just before serving: To keep the salad fresh and crisp, combine all components and dress it right before you plan to enjoy the Kale Orange Salad.

  • Customize your ingredients: Feel free to mix and match the dried fruits or nuts. Experimenting ensures each salad remains exciting and personal to your taste.

  • Store separately: Keep the dressed salad in the fridge for up to three days, but store the dressing separately to maintain crispness.

  • Add protein for a meal: For a more filling option, add grilled chicken, chickpeas, or shrimp to your Kale Orange Salad, turning it into a hearty main dish!

What to Serve with Kale Orange Salad with Goat Cheese

Elevate your dining experience by pairing this vibrant salad with complementary dishes that balance its delightful flavors.

  • Grilled Chicken: Juicy, tender grilled chicken adds protein and flavor, making the salad a hearty main course.
  • Quinoa Pilaf: This nutty and fluffy grain salad enhances the dish’s texture while adding a wholesome touch.
  • Roasted Beets: Earthy and sweet roasted beets create a beautiful contrast with the citrusy notes of the salad, making every bite exciting.
  • Homemade Hummus: Creamy hummus provides a rich dip that can complement the crunchy textures of the salad—pair it with whole grain pita for a delightful combo.
  • Toasted Bread: A slice of fresh, crusty bread adds a satisfying crunch to your plate and helps to soak up any extra vinaigrette.
  • Chilled White Wine: A glass of crisp Chardonnay or Sauvignon Blanc enhances the salad’s flavors while making for a refreshing dining experience.
  • Dark Chocolate Dessert: Finish off with a small piece of dark chocolate, a rich and slightly bitter bite can elevate the sweet notes in the salad beautifully.
  • Roasted Sweet Potatoes: Their natural sweetness pairs perfectly with the salad’s tang, offering a warm contrast that elevates the meal.
  • Avocado Toast: Creamy and rich, avocado toast makes for a great side or snack, balancing the freshness of the salad with heartiness.

Make Ahead Options

These vibrant Kale Orange Salads are perfect for busy home cooks looking to save time during the week! You can prepare the kale, along with the citrus segments and goat cheese, up to 24 hours in advance and store them separately in an airtight container in the refrigerator for optimal freshness. To maintain quality, keep the salad undressed until you’re ready to serve, which ensures the kale stays crisp and the flavors stay bright. When you’re ready to enjoy, simply combine all the components, drizzle with the tangy citrus vinaigrette, and give it a gentle toss for a refreshing, restaurant-quality dish—effortlessly made in a matter of minutes!

Kale Orange Salad Recipe FAQs

How do I select ripe ingredients for this salad?
When choosing kale, look for vibrant, dark green leaves without any yellowing or dark spots. For the oranges, pick ones that feel heavy for their size, indicating juiciness, and avoid any with soft spots. Fresh, crunchy green onions will enhance the salad, so they should be firm with no signs of wilting.

How long can I store Kale Orange Salad in the fridge?
You can store the undressed Kale Orange Salad in an airtight container for up to 3 days. Keep the dressing separate until you’re ready to serve; this will help maintain the crispness and freshness of the kale.

Can I freeze Kale Orange Salad?
Freezing this salad is not recommended as the kale and goat cheese do not thaw well, resulting in a mushy texture. Instead, prepare separate components ahead of time; freeze ingredients like cooked proteins or store the citrus vinaigrette for later use.

What should I do if my kale is too bitter?
If you find your kale overly bitter, ensure you massage it well with olive oil for 1-2 minutes to help soften it. This process significantly reduces bitterness. Additionally, adding a touch more citrus in the dressing or a sprinkle of salt can help balance the flavors.

Can I make this salad ahead of time, and how should I do it?
Absolutely! For optimal freshness, prepare the salad components separately. Massage and store the kale in an airtight container, keep the segmented oranges, green onions, goat cheese, dried cranberries, and pepitas in separate containers. Combine everything and add the dressing just before serving to ensure the salad remains crisp and flavorful.

Are there any dietary considerations I should be aware of?
This Kale Orange Salad is gluten-free and vegetarian. If you have dairy allergies, you can easily omit the goat cheese or substitute it with a dairy-free equivalent. Always double-check allergy information for ingredients, especially if using pre-packaged items like dressings.

Kale Orange Salad

Vibrant Kale Orange Salad That Brightens Your Day

Discover this delightful Kale Orange Salad - a colorful and nutritious dish perfect for any occasion.
Prep Time 15 minutes
Total Time 15 minutes
Servings: 4 servings
Course: Salad
Cuisine: American
Calories: 280

Ingredients
  

For the Salad
  • 1 bunch kale curly or lacinato preferred
  • 2 tablespoons olive oil for massaging the kale
  • 2 units navel orange or clementines as a substitute
  • 4 stalks green onions both green and white parts
  • 4 ounces goat cheese or feta if preferred
  • 1/2 cup dried cranberries or raisins
  • 1/4 cup pepitas or preferred nuts or seeds
For the Dressing
  • 1/4 cup citrus vinaigrette homemade or store-bought

Equipment

  • Mixing Bowl
  • salad tongs

Method
 

Step-by-Step Instructions
  1. In a large mixing bowl, place the chopped kale and drizzle it with olive oil. Massage the oil into the kale for 1-2 minutes until tender.
  2. Add segmented navel orange, sliced green onions, crumbled goat cheese, dried cranberries, and pepitas. Toss gently.
  3. Drizzle citrus vinaigrette over the salad mixture and toss to coat evenly.
  4. Serve immediately or store undressed in an airtight container for up to three days.

Nutrition

Serving: 1servingCalories: 280kcalCarbohydrates: 20gProtein: 8gFat: 20gSaturated Fat: 5gPolyunsaturated Fat: 2gMonounsaturated Fat: 12gCholesterol: 15mgSodium: 250mgPotassium: 400mgFiber: 5gSugar: 10gVitamin A: 100IUVitamin C: 150mgCalcium: 15mgIron: 10mg

Notes

For a more filling option, add grilled chicken or chickpeas to turn this salad into a hearty main dish.

Tried this recipe?

Let us know how it was!

Delicious Overnight Eggnog French Toast Casserole Recipe

“Can you believe the holidays are already here?” a friend remarked as we gathered for our annual Christmas brunch planning. It’s the perfect time to create unforgettable memories around the table. This year, I’m excited to share my Overnight Eggnog French Toast Casserole, a festive twist that will make your mornings merry and bright. With its soft, fluffy challah soaked in a spiced eggnog custard, this make-ahead breakfast casserole lifts the holiday spirit without the stress of last-minute cooking. Not only does it showcase the luxurious flavors of eggnog, but it also offers a fantastic opportunity to use up leftover holiday drinks. Whether you’re hosting a family gathering or enjoying a cozy morning at home, this crowd-pleaser is bound to add sweetness to your holiday celebrations. Are you ready to dive into a slice of this deliciousness? Let’s get started!

Why is this recipe a holiday favorite?

Festive Flavors: The combination of eggnog, cinnamon, and orange zest infuses every bite with holiday spirit, making it truly special.
Easy Prep: This make-ahead casserole allows you to enjoy quality time with loved ones, as you can pop it in the fridge the night before.
Versatile Options: With simple substitutions, such as using brioche or making it dairy-free, you can customize it to suit your guests’ preferences.
Crowd-Pleaser: This dish serves a generous portion, ensuring everyone at your holiday gathering leaves with a smile!
Don’t forget to check out other festive recipes like French Toast Casserole and Overnight Creme Brulee for more delicious ideas!

Overnight Eggnog French Toast Casserole Ingredients

For the Casserole
Challah Bread – This soft, airy bread is perfect for soaking up the custard; day-old bread works best.
Large Eggs – Essential for creating a rich, custardy texture in your casserole.
Eggnog – The star of the dish, lending a delightful sweetness—opt for alcohol-free if serving kids!
Milk – Adds creaminess; feel free to swap with additional eggnog for a richer flavor.
Ground Cinnamon – Brings warmth and nostalgia, enhancing the festive essence of this casserole.
Orange Zest – A touch of citrus brightness, elevating the overall flavor profile.

For the Topping (Optional)
Pecan Pieces – Provide a lovely crunch and texture; sprinkle them on top for added dimension.
Brown Sugar – Sweetens the streusel topping; adjust to taste for a perfect balance.
Melted Butter – Helps bind the topping ingredients together for that delightful crispness.

For Serving (Optional)
Homemade Whipped Cream – Enhances the richness and adds a touch of decadence when served on top.

This Overnight Eggnog French Toast Casserole is not only a delicious choice for your holiday breakfast but also a clever way to use leftover eggnog. Enjoy!

Step‑by‑Step Instructions for Overnight Eggnog French Toast Casserole

Step 1: Prepare the Baking Dish
Start by greasing a 13×9-inch baking pan with non-stick spray or butter to ensure your casserole doesn’t stick. Next, cut your day-old challah bread into bite-sized cubes and distribute them evenly in the prepared dish. This forms the base of your Overnight Eggnog French Toast Casserole, creating a cozy, fluffy structure.

Step 2: Whisk the Custard Mixture
In a large mixing bowl, combine 6 large eggs, 2 cups of eggnog, and 1 cup of milk. Add 1 tablespoon of fresh orange zest and 1 teaspoon of ground cinnamon for that festive flair. Whisk everything together vigorously until well blended, ensuring a homogenous custard that will fully soak the bread for the best texture.

Step 3: Combine Bread and Custard
Gently pour the eggnog custard mixture over the cubed challah bread in your baking dish. Use a spatula to press down lightly on the bread cubes, making sure they are fully submerged in the custard. Cover the dish tightly with plastic wrap and refrigerate overnight. This soaking time allows the bread to absorb those delicious flavors thoroughly.

Step 4: Preheat the Oven
On the morning you plan to serve your casserole, preheat your oven to 350°F (175°C). While the oven warms, carefully remove the plastic wrap from the baking dish. This step is essential to ensure even baking without condensation affecting your casserole.

Step 5: Add Topping (Optional)
In a separate bowl, mix together 1 cup of chopped pecans, ¼ cup of brown sugar, and 4 tablespoons of melted butter to create a crunchy topping. Sprinkle this mixture evenly over the soaked bread before placing it in the oven, adding a delightful texture to your Overnight Eggnog French Toast Casserole.

Step 6: Bake to Golden Perfection
Slide the casserole into your preheated oven, letting it bake for 50 minutes to 1 hour. You’ll know it’s ready when the top is beautifully golden brown and a toothpick inserted in the center comes out clean. This ensures the custard has set properly, leading to the perfect custardy bite.

Step 7: Cool and Serve
Once baked, remove the casserole from the oven and let it cool for about 10-15 minutes. This cooling period allows the flavors to settle. Cut it into squares and serve warm, drizzled with maple syrup or topped with a dollop of homemade whipped cream for an extra indulgent touch!

Expert Tips for Overnight Eggnog French Toast Casserole

  • Use Day-Old Bread: Opt for stale or day-old challah bread for the best absorption of the custard in your Overnight Eggnog French Toast Casserole.

  • Toast Fresh Bread: If using fresh bread, lightly toast the cubes before soaking to avoid a soggy texture in your casserole.

  • Check Eggnog Labels: Ensure the eggnog is alcohol-free, especially important if children will be enjoying this festive dish.

  • Monitor Browning: If the casserole browns too quickly during baking, loosely cover it with foil to prevent overcooking while the center sets.

  • Prep Ahead: Remember, this casserole is perfect for make-ahead! Assemble it the night before for a stress-free holiday breakfast.

How to Store and Freeze Overnight Eggnog French Toast Casserole

Fridge: Store any leftovers in an airtight container for up to 3 days. This helps retain the flavors and moisture of your Overnight Eggnog French Toast Casserole.

Freezer: If you want to keep it longer, you can freeze the unbaked casserole tightly wrapped in plastic wrap and aluminum foil for up to 2 months. Thaw in the refrigerator overnight before baking.

Reheating: For best results, reheat individual portions in the microwave or warm them in the oven at 350°F (175°C) for about 15-20 minutes. This will help regain the casserole’s delightful custardy texture.

Make Ahead Options

This Overnight Eggnog French Toast Casserole is a fantastic choice for busy home cooks looking to save time during the holiday hustle! You can assemble the casserole up to 24 hours in advance, allowing the bread to soak in the delicious eggnog custard overnight. Simply follow the instructions to prepare the baking dish, mix the custard, and pour it over the bread before covering it tightly with plastic wrap and refrigerating. To maintain the quality, ensure the casserole is properly sealed to prevent drying out. When you’re ready to bake, just pop it in the preheated oven and enjoy a delightful and stress-free breakfast that tastes just as delicious as if you made it fresh that morning!

What to Serve with Overnight Eggnog French Toast Casserole

Elevate your holiday breakfast with delightful side dishes that perfectly accompany this cozy casserole.

  • Crispy Bacon: The savory crunch of bacon adds a wonderful contrast to the sweet eggnog casserole, making each bite satisfying.

  • Fresh Fruit Salad: A light and colorful fruit salad brings a refreshing element, balancing sweetness and providing a burst of nutrients.

  • Maple Syrup Drizzle: Enhance the rich flavors of the casserole with a drizzle of warm maple syrup over each serving, a classic pairing that never disappoints.

  • Homemade Whipped Cream: A dollop of freshly whipped cream complements the rich and custardy casserole, adding an extra layer of indulgence for a special touch.

  • Spiced Hot Chocolate: Cozy up with a cup of this creamy drink, infused with cinnamon or nutmeg, providing warmth and richness to your morning feast.

  • Orange Sugared Cranberries: Brighten up your plate with these festive cranberries, offering a tart contrast that cuts through the richness of the French toast.

Each of these pairings adds a unique flavor or texture, inviting everyone to savor the festive spirit of your holiday gathering!

Overnight Eggnog French Toast Casserole Variations

Feel free to rejoice in the fun of customizing your casserole with these delightful twists!

  • Bread Swap: Use brioche or French bread instead of challah for different textures and flavors. Each bread brings its unique sweetness and fluffy bite to the table.

  • Dairy-Free Delight: Substitute with non-dairy eggnog and almond milk for a vegan-friendly version that everyone will love. You’ll barely notice the difference when it’s baked!

  • Flavor Boost: Experiment by adding nutmeg or pumpkin spice for a seasonal flair that dances on your palate. A sprinkle of either spice contributes to that warm, cozy holiday atmosphere.

  • Chocolate Lovers: Fold in chocolate chips or chunks into the bread mixture before baking for a decadent surprise in every bite. Just imagine the melting chocolate paired with creamy eggnog!

  • Fruit Infusion: Add sliced bananas or diced apples for a fruity twist. Their natural sweetness complements the spicy custard beautifully, making each slice even more inviting.

  • Nuts & Crunch: Incorporate walnuts or almonds in place of pecans for a different nutty profile. Each bite becomes an adventure with varied textures and flavors.

  • Heat it Up: For spice lovers, sprinkle in some cayenne pepper or red pepper flakes—just a pinch—to elevate the warmth of your casserole. This unexpected kick adds excitement, contrasting perfectly with the sweetness.

This recipe is as versatile as your imagination allows, just like my other favorites—try the Tater Tot Casserole or for a sweet escape, don’t miss out on the Apple Crisp Casserole!

Overnight Eggnog French Toast Casserole Recipe FAQs

What type of bread is best for this recipe?
Absolutely! Day-old challah bread is ideal as it absorbs the custard beautifully, yielding a fluffy texture. If you don’t have challah, French bread or brioche are great alternatives that also work wonderfully in this casserole.

How should I store leftovers?
I recommend keeping any leftovers in an airtight container in the refrigerator for up to 3 days. This helps maintain the flavor and moisture of your Overnight Eggnog French Toast Casserole, so it stays just as delicious when you enjoy it again!

Can I freeze the casserole?
Yes, you can freeze the unbaked casserole! Wrap it tightly in plastic wrap and then in aluminum foil. This will keep it fresh for up to 2 months. To bake, simply thaw it in the refrigerator overnight before preheating your oven and baking as directed.

What should I do if the casserole browns too quickly during baking?
Very! If you notice the top of your casserole turning brown faster than the center is baking, cover it loosely with aluminum foil. This helps prevent burning while the inside continues to cook through until it’s perfectly set and golden brown.

Is this casserole suitable for those with dietary restrictions?
You can easily make this Overnight Eggnog French Toast Casserole dairy-free! Just substitute the eggnog and milk with your favorite non-dairy alternatives. Additionally, be cautious about allergies by ensuring your eggnog and any toppings used are free from nuts, dairy, or other allergens if necessary. Always check labels, especially if serving to guests with dietary restrictions.

Overnight Eggnog French Toast Casserole

Delicious Overnight Eggnog French Toast Casserole Recipe

This Overnight Eggnog French Toast Casserole is a festive breakfast that combines eggnog, cinnamon, and orange zest into a delightful holiday treat.
Prep Time 30 minutes
Cook Time 1 hour
Cooling Time 15 minutes
Total Time 1 hour 45 minutes
Servings: 8 slices
Course: Breakfast
Cuisine: American
Calories: 400

Ingredients
  

For the Casserole
  • 8 cups Challah Bread cut into cubes
  • 6 large Eggs large
  • 2 cups Eggnog opt for alcohol-free if serving kids
  • 1 cup Milk can substitute with additional eggnog
  • 1 tablespoon Ground Cinnamon
  • 1 tablespoon Orange Zest fresh
For the Topping (Optional)
  • 1 cup Pecan Pieces chopped
  • 0.25 cup Brown Sugar adjust to taste
  • 4 tablespoons Melted Butter
For Serving (Optional)
  • 1 cup Homemade Whipped Cream

Equipment

  • 13x9-inch baking pan
  • Mixing Bowl
  • spatula
  • Plastic Wrap
  • Oven

Method
 

Step-by-Step Instructions
  1. Prepare the Baking Dish: Grease a 13x9-inch baking pan and distribute the day-old challah bread cubes evenly.
  2. Whisk the Custard Mixture: In a bowl, combine eggs, eggnog, milk, orange zest, and cinnamon. Whisk until blended.
  3. Combine Bread and Custard: Pour the custard mixture over the bread cubes and press down lightly. Cover and refrigerate overnight.
  4. Preheat the Oven: On the morning of baking, preheat your oven to 350°F (175°C) and remove the plastic wrap.
  5. Add Topping (Optional): Mix pecans, brown sugar, and melted butter. Sprinkle over the soaked bread.
  6. Bake to Golden Perfection: Bake for 50 minutes to 1 hour until golden brown and set.
  7. Cool and Serve: Let cool for 10-15 minutes, cut into squares, and serve with syrup or whipped cream.

Nutrition

Serving: 1sliceCalories: 400kcalCarbohydrates: 50gProtein: 8gFat: 18gSaturated Fat: 10gPolyunsaturated Fat: 2gMonounsaturated Fat: 4gCholesterol: 150mgSodium: 300mgPotassium: 250mgFiber: 2gSugar: 20gVitamin A: 500IUVitamin C: 1mgCalcium: 150mgIron: 2mg

Notes

This casserole is perfect for utilizing leftover eggnog. Prepare the night before for a stress-free breakfast.

Tried this recipe?

Let us know how it was!

Irresistible Stuffed Shells with Ground Beef You’ll Love

As I was stirring the rich marinara sauce, the aroma filled my kitchen, instantly transporting me to a cozy Italian trattoria. There’s something truly magical about Hearty Stuffed Shells with Ground Beef—these jumbo pasta shells cradling a smooth blend of ricotta and perfectly seasoned meat create a warm embrace for any weeknight dinner or festive occasion. Not only are these shells a family-friendly dish that even the pickiest eaters will adore, but they can also be prepped ahead of time. Imagine assembling them earlier in the day and popping them into the oven when it’s time for dinner—what a stress-free triumph! Are you ready to dive into this comforting classic that’s sure to please your loved ones?

Why Are Stuffed Shells So Irresistible?

Comforting Delight: With their generous fillings and hearty meat sauce, these Stuffed Shells with Ground Beef deliver a truly satisfying meal that feels like a warm hug on a plate.

Family-Friendly: Even the pickiest eaters adore these cheesy, flavorful shells, making dinner a breeze—no more worrying about complaints at the table!

Make-Ahead Convenience: Prep them ahead of time! Assemble and refrigerate during the day, then bake when hunger strikes. Perfect for busy evenings or last-minute gatherings.

Versatile Options: Looking to switch things up? Use ground turkey or Italian sausage for a flavor twist, or sneak in some spinach for a nutritional boost.

Memorable Meal: These shells are bound to become a family favorite, evoking memories of special occasions and cozy nights in, just like a classic Italian meal should!

Stuffed Shells with Ground Beef Ingredients

• Dive into the comforting world of Stuffed Shells with Ground Beef with these essential ingredients!

For the Pasta

  • Jumbo Shells – Perfectly holds the filling, providing a delightful bite. Substitution: Manicotti can be used instead, just adjust cooking times.

For the Meat Sauce

  • Olive Oil – Enhances flavor and helps in browning the meat. Substitution: Avocado oil or butter are great alternatives.
  • Ground Beef – The star of the dish, offering rich flavor and heartiness. Substitution: Ground turkey or Italian sausage for varied taste.
  • Onion – Adds sweetness and complexity to the sauce. Substitution: Shallots or leeks can be fabulous replacements.
  • Garlic – Elevates the overall flavor profile. Substitution: Garlic powder works in a pinch if fresh isn’t available.
  • Marinara Sauce – A savory base that binds everything together. Substitution: Store-bought can save time, but homemade always wins in flavor.

For the Ricotta Filling

  • Ricotta Cheese – Creamy and rich, it’s the essence of the stuffing. Substitution: Cottage cheese for a lighter filling option.
  • Large Egg – Helps bind the ricotta mix for better texture. Note: Skip for a dairy-free version using non-dairy ricotta.
  • Parmesan Cheese – Adds a salty, nutty dimension. Substitution: Pecorino Romano can give you a sharper flavor.
  • Fresh Basil – Brightens the filling with fresh herbal notes. Substitution: Other fresh herbs like parsley or oregano also work well.

For the Topping

  • Mozzarella Cheese – Melts beautifully, creating a gooey topping. Substitution: Provolone or Monterey Jack can be used for a different melting experience.

Step‑by‑Step Instructions for Stuffed Shells with Ground Beef

Step 1: Cook the Pasta
Begin by boiling a large pot of salted water. Add the jumbo shells and cook according to the package instructions, typically about 9-11 minutes, until al dente. Once cooked, drain the shells and rinse them under cold water to stop the cooking process. Set them aside to cool while you prepare the meat sauce and filling.

Step 2: Brown the Meat
In a large skillet, heat 2 tablespoons of olive oil over medium heat. Once hot, add 1 pound of ground beef, seasoning it lightly with salt and pepper. Cook for 7-10 minutes, breaking up the meat with a wooden spoon until browned and cooked through. Ensure the beef is no longer pink before proceeding to the next step, as this will be the heart of your Stuffed Shells with Ground Beef.

Step 3: Sauté Vegetables
Add 1 chopped onion and 2 minced garlic cloves to the skillet with the browned beef. Sauté for 3-5 minutes until the onion is softened and translucent, stirring occasionally to prevent sticking. Drain any excess fat from the skillet to keep the final dish lighter and allow the flavors to meld beautifully in the next step.

Step 4: Simmer the Sauce
Pour in 2 cups of marinara sauce and stir everything together. Increase the heat until the sauce comes to a gentle boil. Then lower the heat to a simmer and let it cook uncovered for 15 minutes. This will enhance the flavor and thicken the sauce slightly, creating a hearty base for your Stuffed Shells with Ground Beef.

Step 5: Prepare the Ricotta Filling
In a mixing bowl, combine 15 ounces of ricotta cheese, 1 large egg, 1/2 cup of grated Parmesan cheese, and 1/4 cup of chopped fresh basil. Mix until all the ingredients are well incorporated and have a creamy texture. This flavorful ricotta mixture will be the luscious filling that makes your stuffed shells irresistible.

Step 6: Prepare the Baking Dish
Preheat your oven to 350°F (175°C). Grease a 9×13-inch baking dish with cooking spray or olive oil to prevent sticking. Spoon half of the prepared meat sauce evenly across the bottom of the dish, creating a flavorful base for your stuffed shells once they are filled and assembled.

Step 7: Stuff the Shells
Using a spoon, fill each cooled jumbo shell with the ricotta mixture, packing it gently. Arrange the stuffed shells on top of the meat sauce in your baking dish until the bottom is completely covered. Once all shells are placed, pour the remaining meat sauce over the top, ensuring they are thoroughly coated with flavor and moisture.

Step 8: Add the Topping
Sprinkle 1-2 cups of shredded mozzarella cheese evenly over the top of the assembled shells. This melty layer will create a delicious, gooey topping that everyone loves. Cover the baking dish with aluminum foil to prevent the cheese from burning during the initial baking phase.

Step 9: Bake the Dish
Place the covered baking dish into the preheated oven and bake for 15 minutes. After this time, carefully remove the foil and allow the Stuffed Shells with Ground Beef to bake uncovered for an additional 10-15 minutes. You’ll know they’re done when the cheese is bubbling and lightly golden on top.

Step 10: Serve and Enjoy
Once baked, remove the dish from the oven and let it cool for about 5-10 minutes. This cooling period allows the filling to set slightly for easier serving. Garnish with extra fresh basil if desired, then serve warm, ready to be enjoyed by family and friends at the dinner table.

How to Store and Freeze Stuffed Shells with Ground Beef

Fridge: Keep assembled Stuffed Shells with Ground Beef in an airtight container in the refrigerator for up to 3 days. Simply reheat in the oven or microwave when ready to enjoy.

Freezer: Freeze stuffed shells in a single layer on a baking sheet for about 1-2 hours, then transfer to a freezer-safe bag or container. They can be stored for up to 3 months.

Reheating: If frozen, bake directly from the freezer at 350°F (175°C) for 45-50 minutes, adding a bit of marinara sauce if needed to rehydrate. For refrigerated shells, reheat at 350°F (175°C) for 20-25 minutes until warmed through.

Covering: Always cover your baking dish with foil while reheating to prevent the cheese from burning, ensuring a perfect dish every time!

Stuffed Shells with Ground Beef Variations

Feel free to get creative and personalize these delightful stuffed shells to suit your taste and dietary needs!

  • Ground Turkey: Swap ground beef for ground turkey for a leaner but still flavorful option.
  • Italian Sausage: Using Italian sausage instead of beef adds a lovely depth of flavor; just savor the added spices!
  • Spinach Addition: Mix fresh or frozen spinach into the ricotta filling to boost nutrition and flavor, making it vibrant in both taste and color.
  • Dairy-Free: Use cashew or almond ricotta in place of regular ricotta for a creamy, dairy-free alternative that’s still oh-so-delicious.
  • Herb Variations: Instead of basil, try using fresh parsley, oregano, or even thyme for a unique twist to the filling. Each herb brings its own personality!
  • Spicy Kick: Add red pepper flakes to the meat sauce or ricotta filling for a touch of heat that’s wonderfully balanced by the creamy cheese.
  • Vegetable Medley: Toss in finely chopped bell peppers or mushrooms into the meat mixture for an added crunch and flavor boost; it’s a delicious way to pack in the veggies.
  • Food Storage Tips: For extra convenience, consider preparing a batch of stuffed shells in advance and freezing them. Just follow the baking instructions from frozen whenever you need a comforting meal!

These variations can turn your basic Stuffed Shells with Ground Beef into a personalized dish that tells your culinary story. Enjoy experimenting and make this family favorite truly your own!

What to Serve with Hearty Stuffed Shells with Ground Beef

Gather your loved ones around the table as the comforting aromas of your meal fill the air, inviting everyone to enjoy a hearty conversation.

  • Garlic Bread: Perfect for soaking up the delicious marinara, this crispy, buttery delight adds a crunchy contrast to the creamy stuffed shells. Each bite complements the meal with an irresistible aroma.

  • Caesar Salad: Crisp romaine lettuce, zesty dressing, and crunchy croutons provide a fresh and vibrant balance to the rich stuffed shells. The coolness of the salad brightens up every hearty bite.

  • Steamed Broccoli: This vibrant green veggie adds a slight crunch and is a nutritious side to round out the meal, balancing richness with a touch of earthiness. Drizzle with lemon juice for added brightness!

  • Roasted Vegetables: A mix of seasonal veggies like carrots, bell peppers, and zucchini caramelize beautifully in the oven, offering a sweet and savory contrast to the hearty shells—perfect for your veggie lovers!

  • Italian Wine: A glass of Chianti or a light Pinot Grigio can elevate your dining experience. The wine’s acidity pairs beautifully with the richness of the stuffed shells for an enjoyable feast.

  • Tiramisu: End your meal on a sweet note! This classic Italian dessert, with its coffee-soaked layers and creamy mascarpone, is the perfect finale after savoring your stuffed shells. Each bite will leave you wanting more!

Make Ahead Options

These Hearty Stuffed Shells with Ground Beef are a meal prep dream come true, perfect for busy weeknights! You can assemble the entire dish up to 24 hours in advance by filling the shells and layering them in the baking dish, ensuring they’re covered tightly with foil to keep them fresh. For longer storage, you can freeze the stuffed shells for up to 3 months—just make sure they’re wrapped well to prevent freezer burn. When you’re ready to bake, simply preheat the oven and pop them in frozen, adding an extra 15-20 minutes to the cooking time. This way, you’ll have a comforting, home-cooked meal ready to enjoy with minimal effort!

Expert Tips for the Best Stuffed Shells

  • Easy Stuffing: Use a zip-top bag to pipe the ricotta mixture into the shells, making stuffing a breeze without messy hands.

  • Prevent Burning: Cover your baking dish with foil during the first half of baking to prevent the mozzarella cheese from burning while the shells cook thoroughly.

  • Flavor Booster: Don’t skimp on seasoning! Season your ground beef and marinara sauce well, as this enhances the overall flavor of your Stuffed Shells with Ground Beef.

  • Make Ahead: Assemble your dish up to a day in advance and refrigerate it; it saves time on busy evenings and allows the flavors to meld beautifully.

  • Cooking from Frozen: If you prepare a batch for freezing, bake them straight from the freezer but add an extra 15-20 minutes to the cooking time for even heat distribution.

Stuffed Shells with Ground Beef Recipe FAQs

How do I choose the best jumbo shells?
Absolutely! When picking jumbo shells, look for ones that are intact and free of cracks. Ensure they are uniform in size to cook evenly, and check the packaging date to ensure freshness. I often prefer shells that are a bit thicker, as they hold up beautifully during baking.

What’s the best way to store leftover stuffed shells?
For fridge storage, place the leftover Stuffed Shells with Ground Beef in an airtight container and refrigerate them for up to 3 days. When you’re ready to eat them, just reheat in the oven at 350°F (175°C) for 20-25 minutes until warmed through. It’s so easy to enjoy leftovers!

Can I freeze stuffed shells?
Very! To freeze, first assemble the stuffed shells without baking them. Place them in a single layer on a baking sheet and freeze for about 1-2 hours until firm, then transfer them to a freezer-safe bag or container. They can be stored for up to 3 months. When ready to enjoy, bake directly from the freezer at 350°F (175°C) for 45-50 minutes, adding a splash of marinara sauce if needed to rehydrate.

What if my shells are overcooked or fall apart?
No worries! If your shells are overcooked, they may be more delicate and prone to breaking during stuffing. I recommend cooking them just until al dente to keep them firm enough for filling. If you still find them breaking, try using smaller pasta shapes like conchiglie which can be just as delectable.

Are there any dietary considerations?
Certainly! If you’re accommodating allergies, make sure to check that the ricotta, marinara, and other ingredients are free from dairy or gluten as needed. Additionally, if you’re making this dish for pets, be careful to avoid any ingredients like onions and garlic, which are harmful to them. For a dairy-free version, try substituting a non-dairy ricotta made from nuts or tofu.

Can I add vegetables to the filling?
Absolutely! Adding spinach or finely diced zucchini to the ricotta filling can enhance the dish’s nutrition and flavor without compromising the texture. Just sauté them lightly before mixing them into the ricotta for a delightful twist to your Stuffed Shells with Ground Beef!

Stuffed Shells with Ground Beef

Irresistible Stuffed Shells with Ground Beef You'll Love

A delightful family-friendly dish featuring jumbo shells filled with ricotta and ground beef in a savory marinara sauce.
Prep Time 30 minutes
Cook Time 40 minutes
Cooling Time 10 minutes
Total Time 1 hour 20 minutes
Servings: 6 servings
Course: Pasta
Cuisine: Italian
Calories: 450

Ingredients
  

For the Pasta
  • 12 pieces Jumbo Shells Substitution: Manicotti can be used instead, just adjust cooking times.
For the Meat Sauce
  • 2 tablespoons Olive Oil Substitution: Avocado oil or butter are great alternatives.
  • 1 pound Ground Beef Substitution: Ground turkey or Italian sausage for varied taste.
  • 1 piece Onion Substitution: Shallots or leeks can be fabulous replacements.
  • 2 cloves Garlic Substitution: Garlic powder works in a pinch if fresh isn't available.
  • 2 cups Marinara Sauce Substitution: Store-bought can save time, but homemade always wins in flavor.
For the Ricotta Filling
  • 15 ounces Ricotta Cheese Substitution: Cottage cheese for a lighter filling option.
  • 1 piece Large Egg Note: Skip for a dairy-free version using non-dairy ricotta.
  • 1/2 cup Parmesan Cheese Substitution: Pecorino Romano can give you a sharper flavor.
  • 1/4 cup Fresh Basil Substitution: Other fresh herbs like parsley or oregano also work well.
For the Topping
  • 1-2 cups Mozzarella Cheese Substitution: Provolone or Monterey Jack can be used for a different melting experience.

Equipment

  • Large pot
  • Skillet
  • Mixing Bowl
  • baking dish

Method
 

Cooking Instructions
  1. Begin by boiling a large pot of salted water. Add the jumbo shells and cook according to the package instructions, typically about 9-11 minutes, until al dente. Once cooked, drain the shells and rinse them under cold water to stop the cooking process. Set them aside to cool while you prepare the meat sauce and filling.
  2. In a large skillet, heat 2 tablespoons of olive oil over medium heat. Once hot, add 1 pound of ground beef, seasoning it lightly with salt and pepper. Cook for 7-10 minutes, breaking up the meat with a wooden spoon until browned and cooked through.
  3. Add 1 chopped onion and 2 minced garlic cloves to the skillet with the browned beef. Sauté for 3-5 minutes until the onion is softened and translucent.
  4. Pour in 2 cups of marinara sauce and stir everything together. Increase the heat until the sauce comes to a gentle boil. Then lower the heat to a simmer and let it cook uncovered for 15 minutes.
  5. In a mixing bowl, combine 15 ounces of ricotta cheese, 1 large egg, 1/2 cup of grated Parmesan cheese, and 1/4 cup of chopped fresh basil. Mix until all the ingredients are well incorporated and have a creamy texture.
  6. Preheat your oven to 350°F (175°C). Grease a 9x13-inch baking dish with cooking spray or olive oil. Spoon half of the prepared meat sauce evenly across the bottom of the dish.
  7. Using a spoon, fill each cooled jumbo shell with the ricotta mixture, packing it gently. Arrange the stuffed shells on top of the meat sauce in your baking dish.
  8. Sprinkle 1-2 cups of shredded mozzarella cheese evenly over the top of the assembled shells. Cover the baking dish with aluminum foil.
  9. Place the covered baking dish into the preheated oven and bake for 15 minutes. Carefully remove the foil and allow the Stuffed Shells with Ground Beef to bake uncovered for an additional 10-15 minutes.
  10. Once baked, remove the dish from the oven and let it cool for about 5-10 minutes. Garnish with extra fresh basil if desired, then serve warm.

Nutrition

Serving: 1servingCalories: 450kcalCarbohydrates: 40gProtein: 25gFat: 20gSaturated Fat: 10gPolyunsaturated Fat: 2gMonounsaturated Fat: 8gCholesterol: 90mgSodium: 700mgPotassium: 600mgFiber: 3gSugar: 5gVitamin A: 500IUVitamin C: 3mgCalcium: 250mgIron: 3mg

Notes

You can prep these stuffed shells ahead of time and refrigerate them, then bake when ready. They freeze well too for future meals.

Tried this recipe?

Let us know how it was!

Stay Connected

Get recipes via email: