Deliciously Easy Tofu Tikka Masala for Ultimate Comfort Food

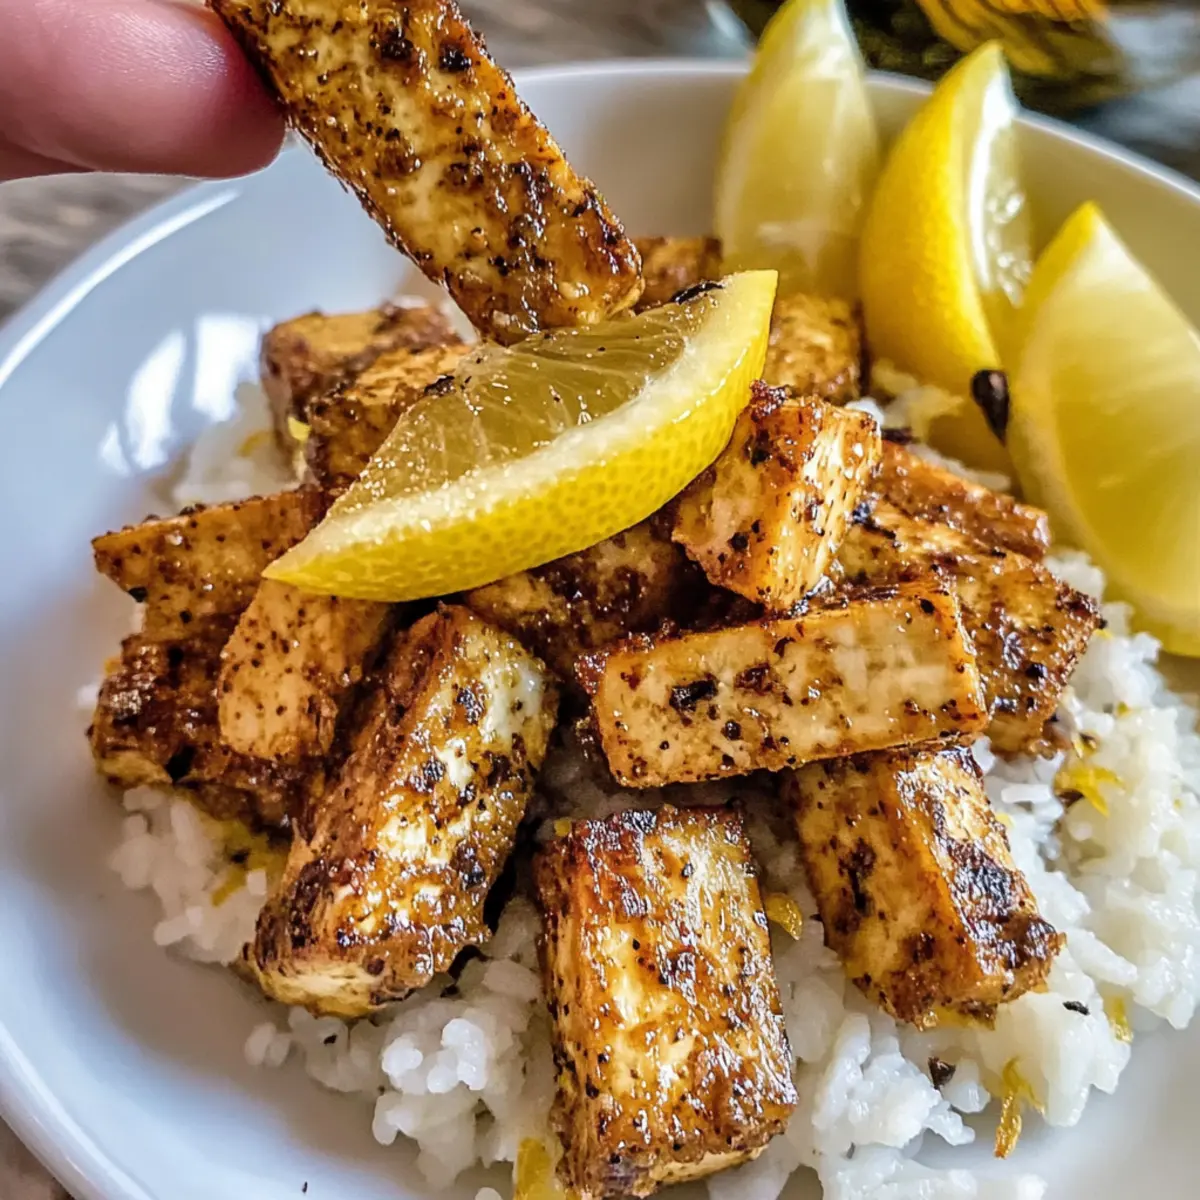
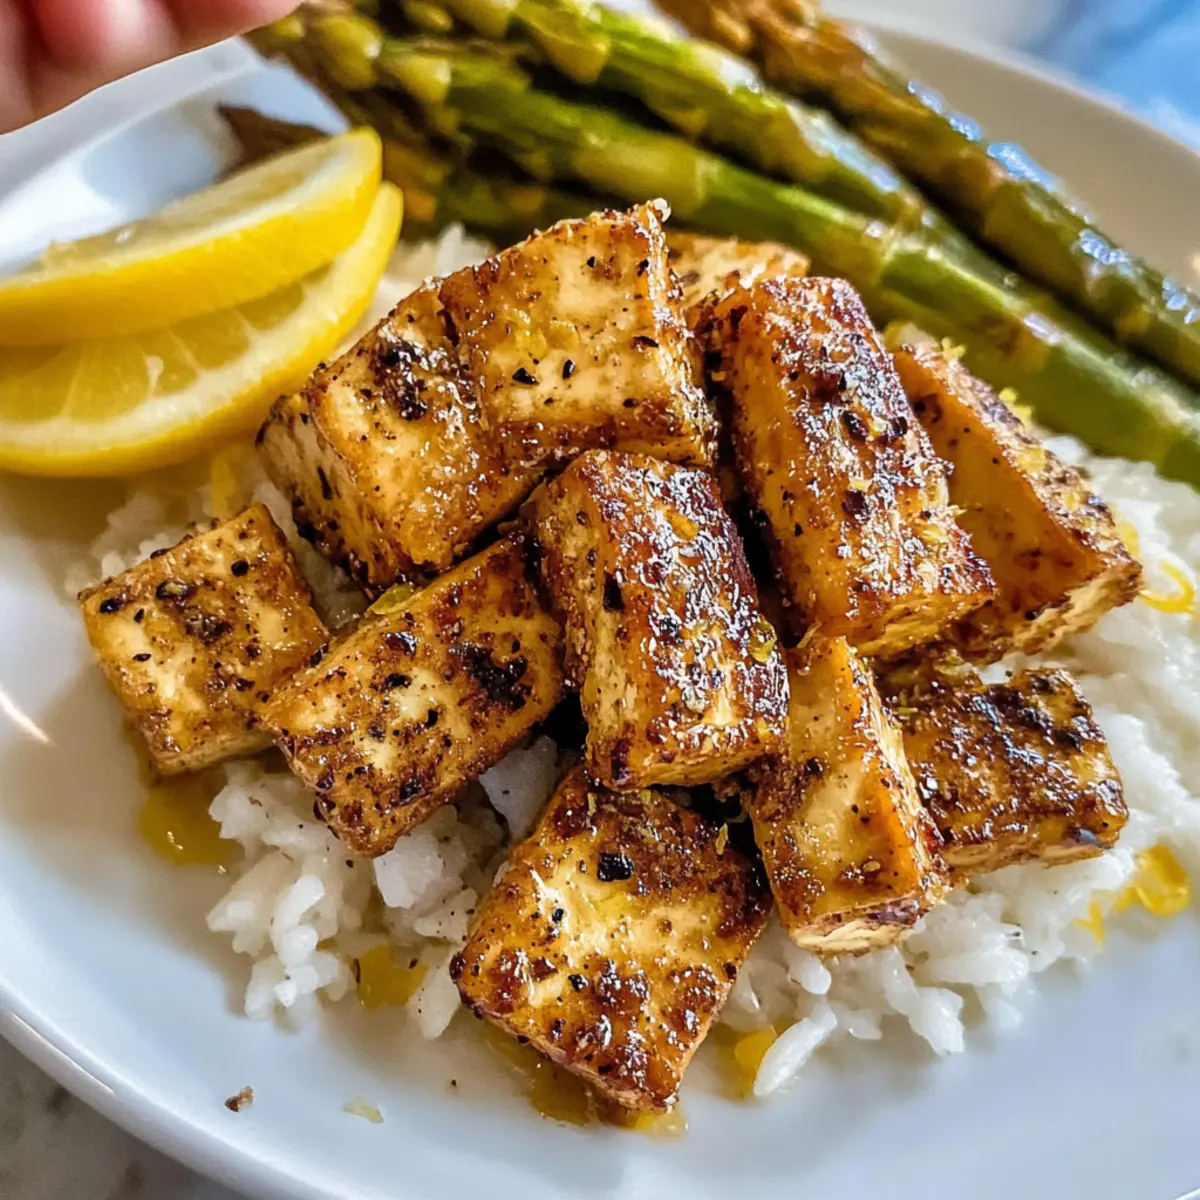
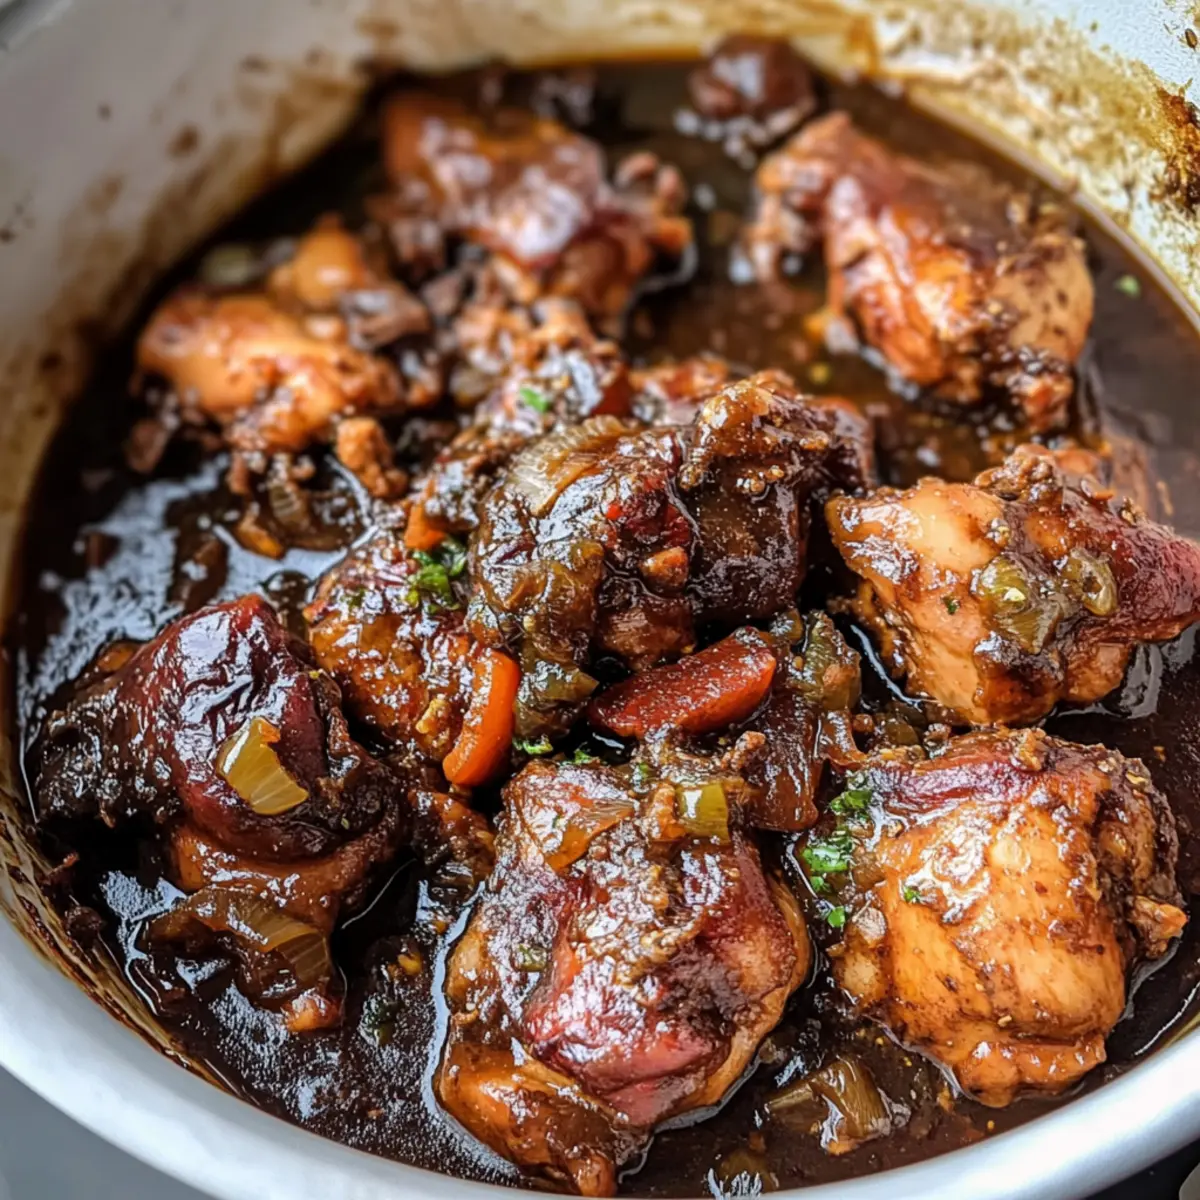
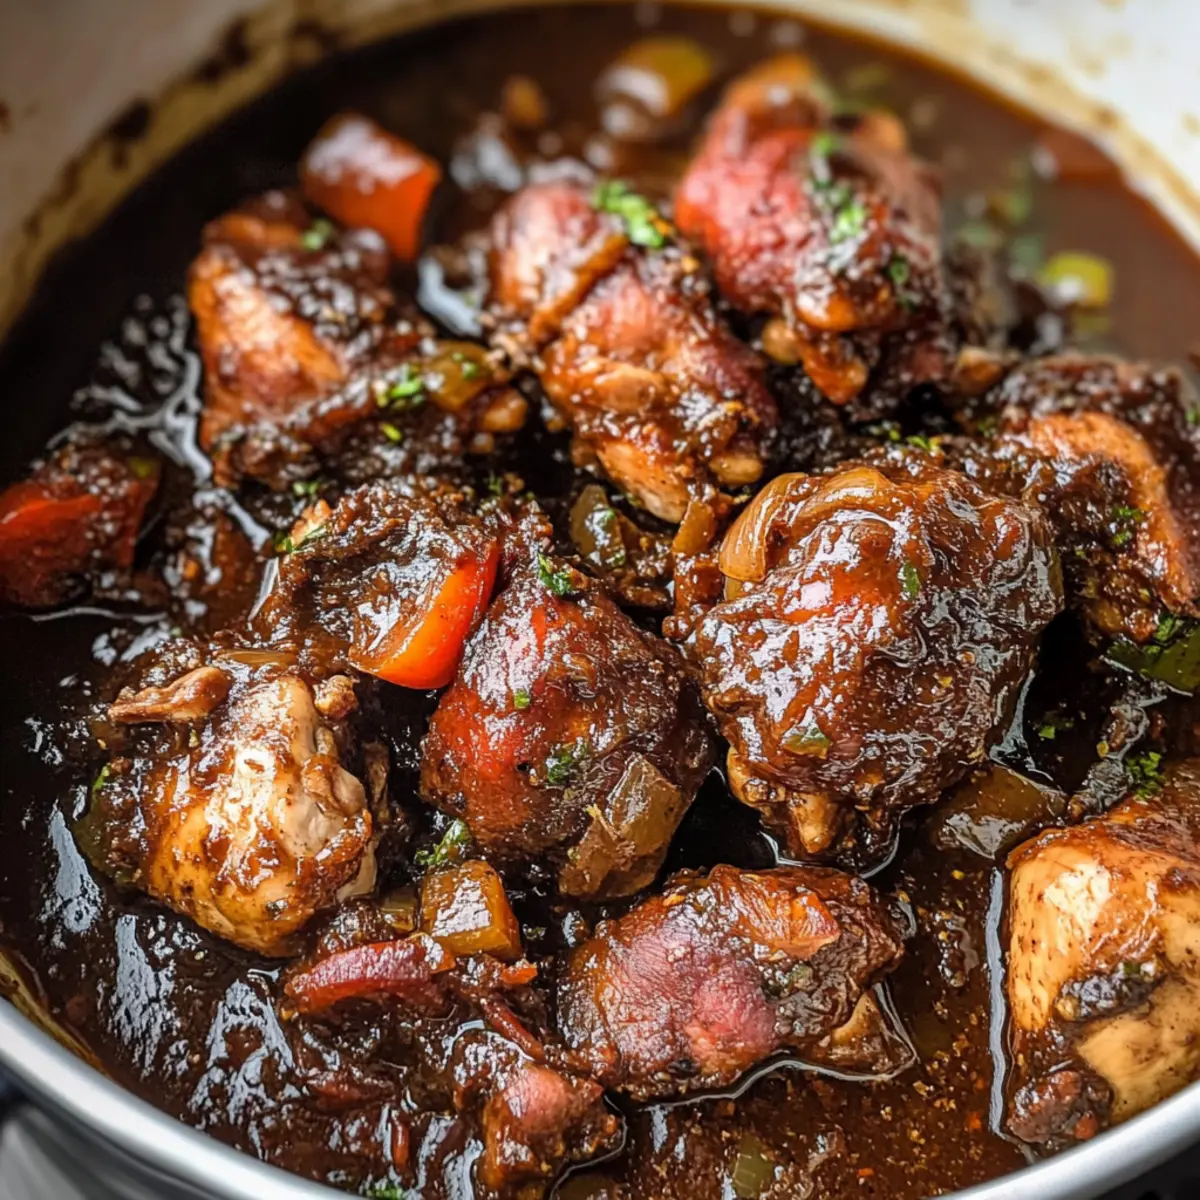
Walking into my kitchen, the aroma of spices instantly transported me to a bustling Indian market, where vibrant colors and lively energy ignited my senses. Today, I’m sharing a comforting dish that captures all that warmth and excitement: Quick and Easy Tofu Tikka Masala. This vegetarian delight swaps out traditional proteins for firm tofu, making it light yet satisfying—perfect for those cozy dinners. Not only is it quick to prepare, but it’s also wonderfully freezer-friendly, ensuring you have a delicious meal ready to go for your busy week. As you savor each bite of creamy tomato sauce and aromatic spices, you’ll feel like you’ve indulged without the guilt. Curious about how to re-create this flavorful masterpiece at home? Let’s dive in!

Why Is Tofu Tikka Masala a Must-Try?

Comforting, this Tofu Tikka Masala brings warm flavors to your table, making it the perfect dish for any night of the week. Quick to prepare, you can whip it up in under 30 minutes! Versatile, you can easily customize it with your favorite veggies or alternative proteins. Healthy yet hearty, it’s a guilt-free indulgence that keeps you feeling satisfied. Plus, leftovers are a breeze, perfect for meal prep; just check out my tips on storing Tofu Tikka Masala! You’re sure to love the comforting embrace of this delightful dish!

Tofu Tikka Masala Ingredients

For the Marinade

  • Firm Tofu – The star of this dish; make sure to press it well for a perfect texture.
  • 2% Greek Yogurt – Adds a creamy texture and tanginess; use non-dairy yogurt for a vegan option.
  • Fresh Ginger – Infuses warmth and aroma; ground ginger can be used, but opt for less (1 teaspoon).
  • Garlic – Enhances flavor; fresh garlic is best, but garlic powder (1 teaspoon) works in a pinch.
  • Ground Coriander – Offers a sweet, citrusy note; cumin can substitute if needed.
  • Garam Masala – This essential spice blend gives the Tikka Masala its characteristic flavor; homemade or store-bought will do.
  • Ground Cumin – Complements the garam masala; can be replaced with ground coriander.
  • Kosher Salt – Essential for overall flavor; sea salt is a great alternative.

For the Curry Sauce

  • Coconut Oil/Canola Oil – Ideal for sautéing the onions and spices; olive oil can also be used.
  • Yellow Onion – Adds sweetness and depth; shallots can substitute for a milder flavor.
  • Tomato Paste – Provides concentrated tomato flavor; crushed tomatoes work if you adjust the liquid.
  • Crushed Tomatoes – The base for the sauce, adding acidity; fresh tomatoes can be used but require more cooking time.
  • Cayenne Pepper – Introduces mild heat; adjust according to your spice preference or omit for less heat.
  • Vegetable or Chicken Broth – Enhances flavor in the sauce; water can be a last resort, but it dilutes taste.
  • Frozen Peas – Adds a pop of sweetness and color; feel free to use fresh peas or green beans.

For the Finish

  • Fresh Cilantro – A lovely garnish that adds freshness; can be substituted with parsley if desired.
  • Additional Yogurt – For garnishing, adding a creamy touch to your dish; dairy-free yogurt is perfect for vegans.

This Tofu Tikka Masala, with its aromatic spices and creamy texture, is sure to become a comforting favorite in your home!

Step‑by‑Step Instructions for Quick and Easy Tofu Tikka Masala

Step 1: Prepare Tofu
Start by pressing the firm tofu to remove excess moisture—this helps in achieving a better texture. Cut the pressed tofu into bite-sized cubes and place it in a bowl. Marinate the tofu with Greek yogurt, freshly grated ginger, minced garlic, ground coriander, ground cumin, salt, and a splash of water. Allow this to sit for at least 15 minutes to let the flavors deepen.

Step 2: Bake Tofu
Preheat your oven to 425°F (220°C). Arrange the marinated tofu cubes on a lined baking sheet, ensuring they are spread out evenly. Bake the tofu for about 25–30 minutes, flipping halfway through, until it turns golden brown and slightly crispy. The aroma of the spices will set the stage for the delightful Tofu Tikka Masala.

Step 3: Cook Aromatics
While the tofu is baking, heat a tablespoon of coconut or canola oil in a large skillet over medium heat. Sauté chopped yellow onion, minced garlic, and ginger for about 5-7 minutes, stirring frequently, until the onions are soft and translucent. This step is crucial for building a rich base flavor for your Tofu Tikka Masala.

Step 4: Make Sauce
Once the onions are ready, add tomato paste to the skillet and cook for another 2 minutes, allowing it to caramelize slightly. Stir in crushed tomatoes, along with garam masala, ground cumin, and cayenne pepper. Pour in vegetable broth, adjusting the consistency to your preference. Let the sauce simmer for 10-15 minutes, stirring occasionally, until it thickens beautifully.

Step 5: Combine
Now it’s time to mix in the baked tofu cubes and frozen peas into the simmering sauce. Stir gently to coat the tofu evenly with the rich tomato curry sauce. Cook for an additional 3-5 minutes until everything is heated through and the peas are bright green. This final step ensures your Quick and Easy Tofu Tikka Masala bursts with flavor.

Step 6: Serve
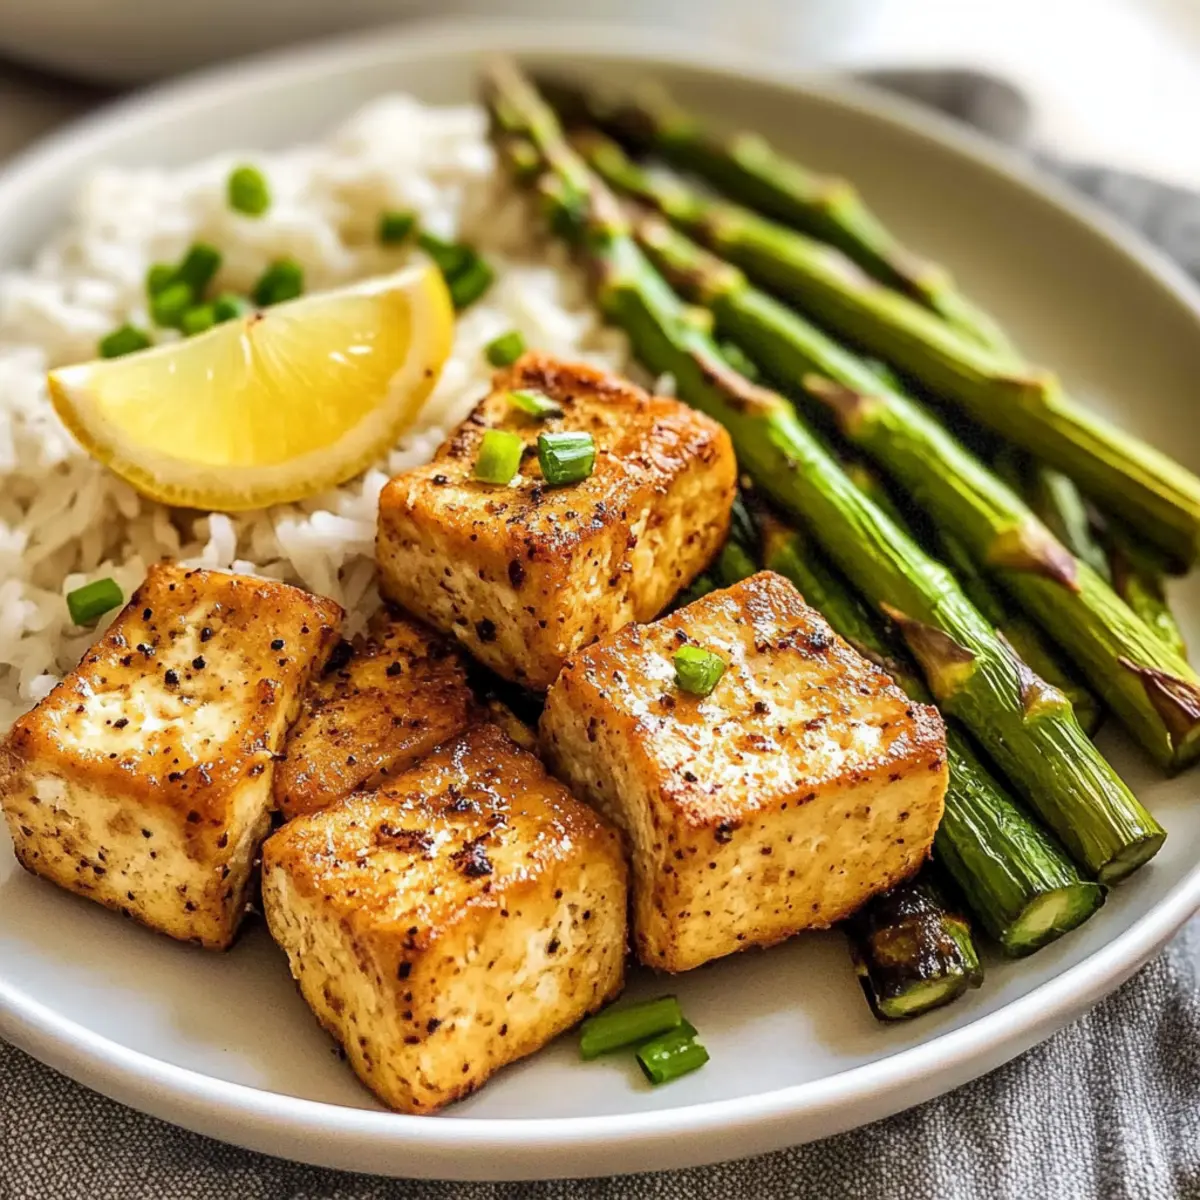
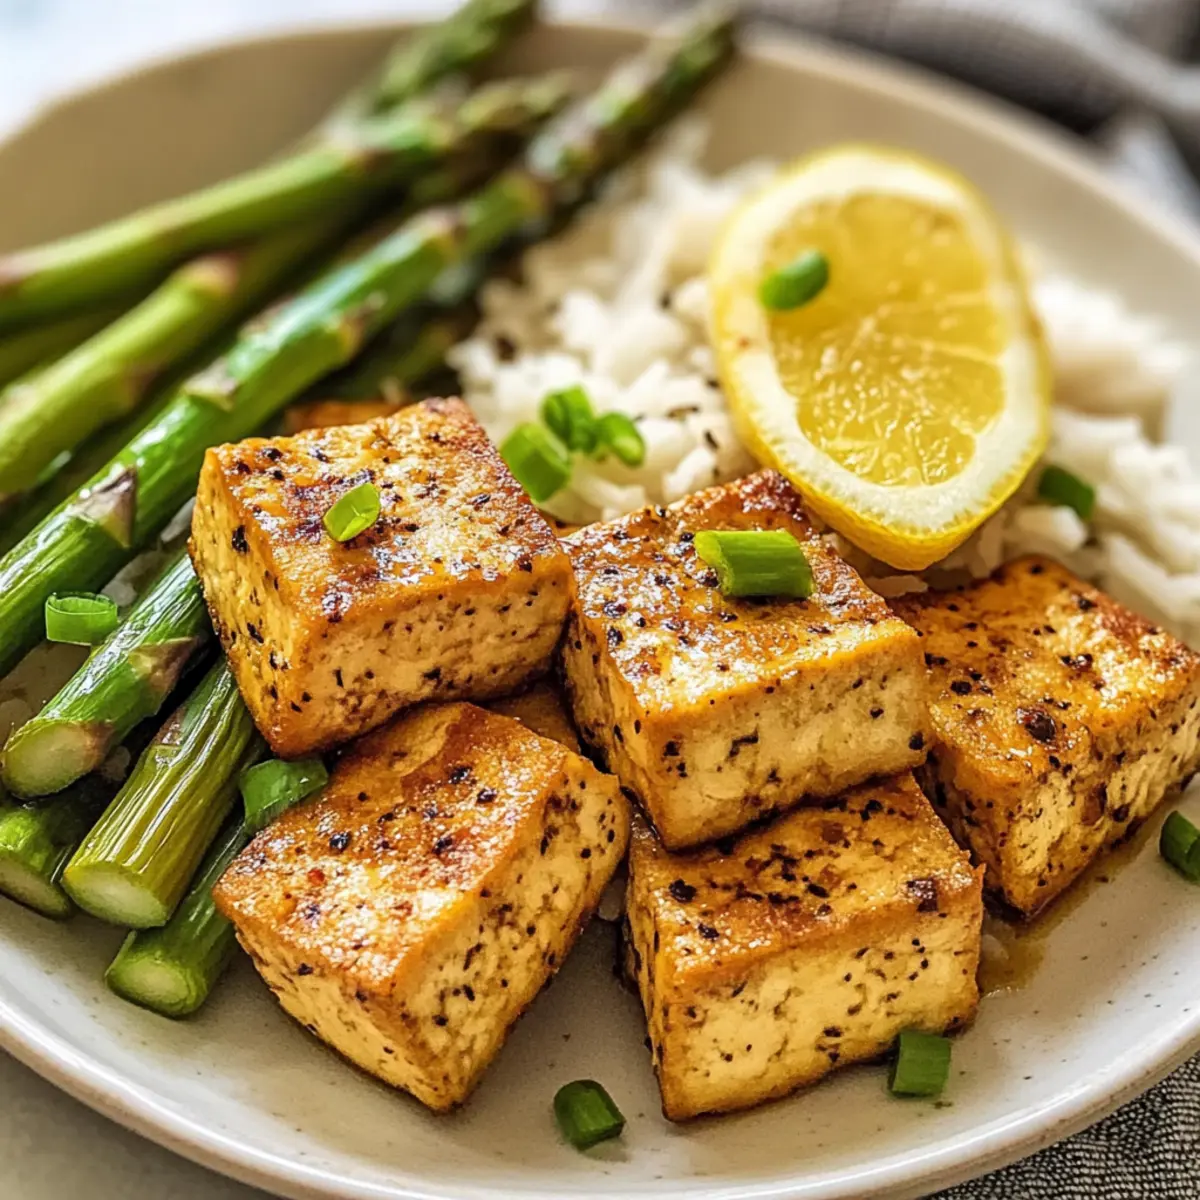
Serve your comforting Tofu Tikka Masala hot, garnished with a dollop of yogurt and fresh cilantro. Pair it with warm naan or fluffy basmati rice for a complete meal that’s both satisfying and delicious. Each spoonful will bring a taste of home-cooked goodness to your table, perfect for any occasion!

Expert Tips for Tofu Tikka Masala

  • Press Tofu Well: Make sure to press the firm tofu thoroughly to eliminate excess moisture; this ensures the best texture and flavor absorption in your Tofu Tikka Masala.

  • Adjust the Spice Levels: For a milder dish, you can reduce or omit the cayenne pepper, allowing the rich flavors of the garam masala to shine without overpowering heat.

  • Perfect Marinade Time: Marinating the tofu for at least 15 minutes enhances flavor, but for the best results, let it sit for several hours or overnight in the fridge.

  • Fresh Ingredients Matter: Using fresh ginger and garlic instead of powder makes a noticeable difference, providing a more vibrant flavor profile in your sauce.

  • Customize Your Veggies: Feel free to experiment with adding bell peppers, spinach, or even carrots to your Tofu Tikka Masala for extra nutrition and color without compromising dish integrity.

  • Storage Tips: Store leftovers in an airtight container for up to 4 days; reheating gently will help maintain the creamy texture of your Tofu Tikka Masala.

Make Ahead Options

These Quick and Easy Tofu Tikka Masala is an ideal choice for busy home cooks looking to save time during the week! You can marinate the tofu up to 24 hours in advance, ensuring the flavors penetrate beautifully. Additionally, you can prepare the sauce and refrigerate it for up to 3 days before cooking. To maintain quality, store the marinated tofu and sauce separately in airtight containers. When ready to serve, simply bake the marinated tofu and cook the sauce, then combine them with the frozen peas for a quick finish. With these prep tips, you’ll enjoy a delicious homemade meal without the fuss on a busy night!

Tofu Tikka Masala Variations & Substitutions

Invite your culinary creativity to shine as you customize this delightful Tofu Tikka Masala, making it truly your own!

  • Chickpeas Instead of Tofu: For a different protein, swap tofu with chickpeas for added texture and nutrition.
    This change brings a hearty boost while staying completely plant-based, ensuring every bite is satisfying.

  • Tempeh Twist: Try replacing tofu with tempeh for a nuttier flavor profile.
    This hearty alternative will give your dish a unique depth, making it even more delicious!

  • Veggie Medley: Add bell peppers or spinach to the dish for extra color and nutrition.
    These vibrant veggies not only enhance the visual appeal but also contribute additional layers of flavor.

  • Coconut Milk Boost: For added creaminess, stir in some coconut milk into the sauce.
    This will create an even richer sauce, elevating the dish to a luxurious comfort food you won’t forget.

  • Spicy Kick: Increase the cayenne pepper for a spicier experience or add fresh chilies for an authentic touch.
    Adjusting spice levels ensures you enjoy a dish that matches your heat preference perfectly!

  • Herb Infusion: Experiment with fresh herbs like mint or basil for a fresh twist on flavor.
    These aromatic additions will provide a refreshing lift alongside the warm spices already present.

  • Naan or Rice Alternatives: Pair with cauliflower rice or gluten-free naan to accommodate dietary needs.
    Not only do these alternatives fit neatly into gluten-free diets, but they also provide a light base for the delicious sauce.

  • Tomato Varieties: Use heirloom tomatoes in place of canned crushed tomatoes for a fresh, seasonal twist.
    This substitution allows you to harness the juiciness and flavor of these beautiful tomatoes, enhancing your Tikka Masala.

Embrace the magic of versatility in the kitchen—these variations will help keep your meals exciting, flavorful, and tailored to your taste! Looking for more ideas? Check out my tips for storing Tofu Tikka Masala for future meals!

How to Store and Freeze Tofu Tikka Masala

Fridge: Store leftovers in an airtight container for up to 4 days to maintain freshness and flavor.

Freezer: This Tofu Tikka Masala can be frozen for up to 2 months. Be aware that the texture may change upon thawing, but the flavors will remain delightful.

Reheating: When ready to enjoy again, reheat gently on the stovetop over low heat, adding a splash of vegetable broth if needed to restore creaminess.

Airtight Packaging: For best results, ensure your container is airtight to prevent freezer burn, preserving the vibrant taste of your homemade dish.

What to Serve with Quick and Easy Tofu Tikka Masala

Explore delightful sides that will elevate your homemade feast with vibrant flavors and satisfying textures.

  • Fluffy Basmati Rice: The ideal companion to soak up the rich sauce, adding a fragrant note that complements the spices perfectly.
  • Warm Naan Bread: Perfect for scooping up the Tikka Masala, this soft, pillowy bread adds a lovely contrast to the dish’s robust flavors.
  • Cucumber Raita: A cooling, tangy yogurt dip with diced cucumbers and fresh mint that balances the heat of the curry beautifully.
  • Spicy Chickpea Salad: A refreshing, protein-packed salad with bold spices that echoes the Tikka Masala’s flavor while adding a crunchy texture.
  • Sauteed Spinach: Lightly sautéed with garlic, this dish adds a vibrant green touch and extra nutrients, complementing the meal’s earthy tones.
  • Chickpea Pilaf: The nutty goodness of chickpeas and fragrant spices in this pilaf pairs wonderfully with the creamy sauce, making every bite delightful.
  • Peach Chutney: A sweet and tangy condiment that provides an adventurous contrast, enhancing the overall experience with a burst of fruity flavor.
  • Lemonade or Iced Tea: Refreshing drinks that cleanse your palate between bites, making your meal even more enjoyable and complete.
  • Mango Lassi: This creamy yogurt drink with sweet mango notes cools down the spice while adding a delightful fruity flavor that lingers.

Tofu Tikka Masala Recipe FAQs

What type of tofu should I use for Tofu Tikka Masala?
I recommend using firm tofu, as it holds its shape better during cooking and absorbs flavors beautifully. Make sure to press it well to remove excess moisture before marinating. If you’re looking for a nuttier flavor, tempeh can be a delightful alternative!

How long can I store Tofu Tikka Masala in the refrigerator?
You can store leftovers in an airtight container for up to 4 days. This makes it perfect for meal prep! Just be sure to reheat it gently to maintain that creamy texture we all love.

Can I freeze Tofu Tikka Masala? How should I do it?
Absolutely! You can freeze your Tofu Tikka Masala for up to 2 months. To freeze, allow the dish to cool completely, then transfer it to an airtight container or freezer-safe bag. When you’re ready to enjoy it, thaw it overnight in the fridge and reheat gently on the stovetop, adding a splash of vegetable broth if needed to refresh the creaminess.

What should I do if the sauce is too thick or too thin?
If your sauce is too thick, simply add a little more broth or water during cooking until you reach your desired consistency. On the other hand, if it’s too thin, allow it to simmer uncovered for a few more minutes until it thickens up! Stir occasionally to prevent sticking.

Are there any common allergies to consider with this recipe?
Yes! The main allergens in this Tofu Tikka Masala are soy (from the tofu), and dairy (from the Greek yogurt). If you’re preparing this for someone with allergies, you can always swap out the yogurt for a non-dairy alternative. Be sure to check labels on any pre-made ingredients, such as broth or store-bought spices, for hidden allergens.

How can I make the spice level milder in Tofu Tikka Masala?
If you prefer a milder dish, you can adjust the cayenne pepper down or even omit it altogether. The garam masala provides plenty of flavor without too much heat. You can also balance spice levels by adding a tablespoon of sugar if you want to cut the acidity from the tomatoes!

undefined

Deliciously Easy Tofu Tikka Masala for Ultimate Comfort Food

Tofu Tikka Masala is a quick and comforting vegetarian dish packed with aromatic spices and creamy tomato sauce.
Prep Time 15 minutes
Cook Time 30 minutes
Marinating Time 15 minutes
Total Time 1 hour
Servings: 4 servings
Course: Dinner
Cuisine: Indian
Calories: 330

Ingredients
  

For the Marinade
  • 1 block Firm Tofu Press to remove moisture
  • 1/2 cup 2% Greek Yogurt Use non-dairy yogurt for vegan option
  • 1 tablespoon Fresh Ginger Grated
  • 2 cloves Garlic Minced
  • 1 teaspoon Ground Coriander
  • 1 teaspoon Garam Masala
  • 1 teaspoon Ground Cumin
  • 1 teaspoon Kosher Salt
For the Curry Sauce
  • 1 tablespoon Coconut Oil/Canola Oil For sautéing
  • 1 large Yellow Onion Chopped
  • 2 tablespoons Tomato Paste
  • 14 oz Crushed Tomatoes
  • 1/2 teaspoon Cayenne Pepper Adjust to spice preference
  • 1 cup Vegetable or Chicken Broth
  • 1 cup Frozen Peas
For the Finish
  • 1/4 cup Fresh Cilantro Chopped
  • 1/2 cup Additional Yogurt For garnishing

Equipment

  • Oven
  • Skillet
  • Baking Sheet
  • Mixing Bowl

Method
 

Step-by-Step Instructions
  1. Prepare the tofu by pressing it to remove excess moisture and cut it into bite-sized cubes.
  2. Marinate the tofu with Greek yogurt, ginger, garlic, coriander, cumin, salt, and a splash of water for at least 15 minutes.
  3. Preheat your oven to 425°F (220°C) and arrange marinated tofu on a lined baking sheet. Bake for 25-30 minutes until golden.
  4. Heat oil in a skillet, sauté onion, garlic, and ginger for 5-7 minutes until translucent.
  5. Add tomato paste and cook for 2 minutes. Stir in crushed tomatoes, garam masala, cumin, and cayenne pepper, then add broth and simmer for 10-15 minutes.
  6. Stir in baked tofu and peas, cook for another 3-5 minutes until heated through.
  7. Serve hot, garnished with yogurt and cilantro.

Nutrition

Serving: 1bowlCalories: 330kcalCarbohydrates: 30gProtein: 15gFat: 18gSaturated Fat: 10gPolyunsaturated Fat: 2gMonounsaturated Fat: 4gCholesterol: 5mgSodium: 800mgPotassium: 750mgFiber: 6gSugar: 5gVitamin A: 500IUVitamin C: 10mgCalcium: 200mgIron: 3mg

Notes

Store leftovers in an airtight container for up to 4 days. Can be frozen for up to 2 months. Reheat gently on stovetop.

Tried this recipe?

Let us know how it was!

Crispy Vegan Tofu and Vegetable Patties for Every Snack Attack

In a bustling kitchen filled with the inviting aroma of sautéed vegetables, I knew I had stumbled upon a culinary gem. These Vegan Tofu and Vegetable Patties are not just delicious; they’re your answer to a quick, healthy snack that transforms leftover vegetables into a crowd-pleasing delight. With their crispy exterior and soft interior, each bite offers a satisfying crunch that’s perfect for dipping or enjoying on their own. What makes these patties even more enticing is their versatility; you can customize the ingredients based on what you have on hand. Plus, they’re a fantastic option for anyone seeking a gluten-free treat! Ready to elevate your snacking game? Let’s dive into this tasty adventure!

Why are these patties a must-try?

Quick preparation means you can whip up these delicious Vegan Tofu and Vegetable Patties in no time, perfect for busy weeknights! Nutritious ingredients ensure you’re getting a healthy dose of protein and fiber in a fun, finger-food format. Endless variations let you adjust the recipe to your family’s favorites or whatever veggies are left in the fridge. Crispy outside, soft inside creates a satisfying texture that appeals to both kids and adults alike. Crowd-pleaser vibes make them ideal for gatherings, game days, or just your family’s snack time! Enjoy them with a dipping sauce like sweet chili for an extra burst of flavor.

Tofu and Vegetable Patties Ingredients

Add your favorite veggies for a personal touch!

For the Patties
Extra Firm Tofu – Provides the necessary base and structure. Ensure it’s well-pressed for the best texture.
Carrot – Adds a natural sweetness and crunch; grate or shred for quick prep. Substitute with zucchini for a lower-carb option.
Cabbage – Contributes essential moisture and texture; any leafy green, like kale, can work in a pinch.
Garlic (2 cloves, minced) – Brings a robust flavor; fresh garlic is preferred, but garlic powder can suffice.
Onion (1/2 medium, diced) – Introduces sweetness and depth; shallots can provide a milder taste.
All-Purpose Flour (3 tbsp) – Acts as a binder; choose chickpea flour for a gluten-free alternative.
Corn Starch (1 tbsp) – Enhances the crispiness of the patties; extra flour can substitute if cornstarch is lacking.
Vegetarian Oyster Sauce (1 tbsp) – Infuses umami flavor; soy sauce is a good alternative for accessibility.
Salt & Pepper – To taste; adjust according to preference.
Neutral Cooking Oil – Essential for frying, but consider olive oil for a healthier choice.

For Serving
Dipping Sauce – Sweet chili sauce or your preferred dipping delight; soy sauce or homemade aioli work beautifully too.

This recipe is an ideal way to create flavorful Vegan Tofu and Vegetable Patties that not only satisfy but also keep things healthy!

Step-by-Step Instructions for Vegan Tofu and Vegetable Patties

Step 1: Prepare Tofu
Begin by draining the extra firm tofu and wrapping it in paper towels. Use a heavy object to press it for about 10 minutes, allowing moisture to drain away for a firmer texture. This step is crucial for creating crispy Vegan Tofu and Vegetable Patties, as excess moisture can prevent them from browning properly.

Step 2: Mix Vegetables
In a mixing bowl, combine the grated carrot and sliced cabbage. Sprinkle a pinch of salt over the mixture and let it sit for 8-10 minutes. This process draws out excess moisture from the vegetables, enhancing the flavor of the patties. Afterward, squeeze the mixture gently to remove any remaining liquid for a better texture.

Step 3: Combine Ingredients
Transfer the pressed tofu to a large bowl and crumble it with your hands. Add the minced garlic, diced onion, drained carrot, and cabbage mixture, along with the all-purpose flour, cornstarch, vegetarian oyster sauce, salt, and pepper. Mix everything thoroughly, ensuring a cohesive mixture that will hold well together when forming your patties.

Step 4: Form Patties
With clean hands, shape the tofu and vegetable mixture into small patties or your desired shape, about 2-3 inches in diameter. Place the formed patties on a plate or cutting board, making sure to leave some space between them to prevent sticking. This step sets the stage for the cooking process that will yield golden brown Vegan Tofu and Vegetable Patties.

Step 5: Cook Patties
Heat a generous amount of neutral cooking oil in a non-stick frying pan over medium-high heat. Once the oil is shimmering, carefully place the patties into the pan, cooking them for about 3-4 minutes on each side. They should turn a beautiful golden brown and develop a crispy exterior. Adjust the temperature as needed to prevent burning.

Step 6: Serve
Once cooked, transfer the patties to a paper towel-lined plate to absorb excess oil and keep them crispy. Serve hot with a side of sweet chili sauce or your preferred dipping sauce to elevate your Vegan Tofu and Vegetable Patties experience. These delicious snacks are perfect for sharing or enjoying as a light meal.

Make Ahead Options

These Vegan Tofu and Vegetable Patties are perfect for meal prep enthusiasts! You can prepare the mixed tofu and vegetable base up to 24 hours in advance, storing it in an airtight container in the refrigerator. Just remember to keep your patties uncooked until you’re ready to enjoy them; this helps maintain that crispy texture. When you’re ready to serve, simply form the patties and cook them in a hot pan for about 3-4 minutes on each side until golden brown. For longer storage, freeze the shaped patties for up to 3 months and cook them directly from frozen—just add an extra minute or two in the cooking time for perfectly crispy results. Enjoy the convenience of having a nutritious snack on hand with minimal effort!

Tofu and Vegetable Patties Variations

Dive into a world of flavor by customizing these delightful patties to suit your taste and dietary needs!

  • Vegetable Medley: Add chopped bell peppers or zucchini for extra nutrition and a vibrant color boost that warms your heart.
  • Chickpea Twist: Swap the tofu for mashed chickpeas for a heartier texture. This twist also introduces a nutty flavor that’s simply delightful.
  • Herb Infusion: Stir in fresh herbs like cilantro or parsley for a bright, fresh flavor that enhances every bite. A sprinkle of fresh herbs can transform your patties.
  • Spicy Kick: Mix in some diced jalapeños or a pinch of cayenne pepper for a fiery touch that will keep your palate dancing.
  • Nutty Delight: Incorporate chopped walnuts or sunflower seeds to add unexpected crunch. These options not only give texture but also healthy fats!
  • Global Flavors: Try adding curry powder or smoked paprika for a bold flavor palate that transforms your meal into an international feast.
  • Gluten-Free Bliss: Substitute regular flour with almond or coconut flour for a gluten-free version that feels just as satisfying.
  • Sweet Dip: Pair with different sauces like honey mustard or spicy garlic for a change in flavor profile that enhances the overall experience.

Remember, the beauty of these patties lies in their versatility—play around with different ingredients and flavors to find your perfect match! If you enjoy healthy snacks, try serving them with a refreshing side salad or check out some thoughtful alterations in other vegetarian recipes like vegan lentil burgers or sweet potato fritters that are just as easy to make and equally delicious!

How to Store and Freeze Vegan Tofu and Vegetable Patties

Fridge: Store the patties in an airtight container for up to 3 days. Make sure to separate layers with parchment paper to keep them from sticking.

Freezer: Freeze patties laid out on a baking sheet for 1-2 hours until solid, then transfer to a freezer-safe bag or container. They are good for up to a month.

Reheating: For the best texture, reheat patties in an air fryer or oven until crispy. You can also pan-fry them on medium heat until warmed through.

Thawing: When ready to enjoy your stored Vegan Tofu and Vegetable Patties, thaw them overnight in the fridge before reheating, or use the microwave if you’re in a hurry!

What to Serve with Vegan Tofu and Vegetable Patties

These flavorful patties truly shine alongside fresh and vibrant accompaniments, creating a delightful meal experience for your taste buds.

  • Crispy Sweet Potato Fries: Their natural sweetness and crispiness make them a perfect complementary side, adding texture and heartiness to your snack.
  • Refreshing Cabbage Slaw: A crunchy slaw with a tangy vinaigrette brings brightness and freshness, balancing the savory flavors of the patties beautifully.
  • Quinoa Salad: Load it up with diced vegetables and herbs for a nutritious, protein-packed pairing that adds different textures and flavors.
  • Chickpea Hummus: Smooth and creamy, this dip introduces a richer layer of flavor that pairs wonderfully with the crispy patties and adds a protein punch.
  • Zesty Mango Salsa: Its tropical sweetness and slight acidity create a delightful contrast to the savory patties, making each bite exciting and fresh.
  • Herbed Yogurt Sauce: This cooling dip complements the spicy notes in the patties, providing a refreshing element that enhances the overall taste experience.
  • Lightly Steamed Broccoli: Adds a nutritious green element with a tender-crisp texture, balancing out the rich flavors of the patties while contributing essential nutrients.
  • Spicy Pickles: For a tangy crunch, serve spicy pickles on the side. Their acidity can cut through the richness and is a delightful contrast.
  • A Glass of Lemonade: The bright citrus flavor refreshes your palate and adds a zesty note that ties all the flavors together beautifully.

Expert Tips for Vegan Tofu and Vegetable Patties

  • Press Tofu Thoroughly: Ensure the tofu is well-drained and pressed to prevent sogginess, which can affect the overall crispiness of your patties.

  • Moisture Management: Remember to salt your vegetable mixture and let it sit before squeezing out excess liquid; this improves flavor and texture, essential for perfect Vegan Tofu and Vegetable Patties.

  • Binding Balance: Adjust the flour and cornstarch if your mixture feels too crumbly or too wet; it should hold together well but still be slightly moist for great texture.

  • Versatile Cooking Methods: For a healthier option, try baking or air-frying the patties instead of frying them, brushing them lightly with oil before cooking.

  • Spice It Up: Don’t hesitate to add your favorite spices or herbs to boost flavor; cumin or paprika can elevate the taste of the Vegan Tofu and Vegetable Patties wonderfully.

Vegan Tofu and Vegetable Patties Recipe FAQs

How do I choose the right tofu for this recipe?
Absolutely! For these patties, using extra firm tofu is essential. It provides the best structure and helps achieve that crispy exterior. When you’re at the store, look for tofu that feels dense and firm, without dark spots or excess moisture in the packaging.

What’s the best way to store leftover patties?
After cooking, allow the Vegan Tofu and Vegetable Patties to cool completely. Store them in an airtight container in the fridge for up to 3 days. I recommend layering parchment paper between them, which helps prevent sticking and keeps them crispy.

Can I freeze the patties for later?
Very! To freeze, place uncooked patties on a lined baking sheet and freeze for 1-2 hours until solid. Then, transfer them to a freezer-safe bag or container. You can keep them in the freezer for up to a month! It’s a wonderful way to have these yummy snacks ready whenever you need them.

What should I do if my patties are too dry or too wet?
Don’t worry; it happens to the best of us! If your mixture feels too dry, add a splash of plant-based milk or a touch more sauce to create a moister consistency. Conversely, if it’s too wet, gradually add more flour or cornstarch until the texture is right – it should hold together nicely but not be overly sticky!

Are there any allergy considerations I need to keep in mind?
Absolutely! Always check for allergies, especially since these patties contain tofu, an allergen for some people, and could also have gluten if you use regular all-purpose flour. For a gluten-free option, swap in chickpea flour, and make sure the vegetarian oyster sauce is also gluten-free if needed. Enjoy these delicious Vegan Tofu and Vegetable Patties safely!

How can I spice up the flavor of my patties?
The more the merrier! You can experiment with various spices and herbs such as paprika, cumin, or fresh herbs like cilantro or green onions. Adding a bit of chili powder or even a dash of soy sauce during mixing can also amp up the flavor profile beautifully!

undefined

Crispy Vegan Tofu and Vegetable Patties for Every Snack Attack

Delicious Vegan Tofu and Vegetable Patties that are perfect for a quick, healthy snack.
Prep Time 20 minutes
Cook Time 15 minutes
Resting Time 10 minutes
Total Time 45 minutes
Servings: 4 patties
Course: Appetizers
Cuisine: Vegan
Calories: 150

Ingredients
  

For the Patties
  • 1 block Extra Firm Tofu well-pressed
  • 1 medium Carrot grated or shredded
  • 1 cup Cabbage can substitute with leafy greens
  • 2 cloves Garlic minced
  • 1/2 medium Onion diced
  • 3 tbsp All-Purpose Flour gluten-free alternative: chickpea flour
  • 1 tbsp Corn Starch for crispiness
  • 1 tbsp Vegetarian Oyster Sauce or soy sauce
  • Salt & Pepper to taste
  • Neutral Cooking Oil for frying
For Serving
  • Dipping Sauce Sweet chili sauce or your preferred option

Equipment

  • Non-stick frying pan
  • Mixing Bowl
  • paper towels

Method
 

Step-by-Step Instructions
  1. Begin by draining the extra firm tofu and wrapping it in paper towels. Use a heavy object to press it for about 10 minutes, allowing moisture to drain away for a firmer texture.
  2. In a mixing bowl, combine the grated carrot and sliced cabbage. Sprinkle a pinch of salt over the mixture and let it sit for 8-10 minutes. Squeeze the mixture gently to remove any remaining liquid.
  3. Transfer the pressed tofu to a large bowl and crumble it. Add minced garlic, diced onion, drained carrot, and cabbage mixture, along with flour, cornstarch, vegetarian oyster sauce, salt, and pepper. Mix thoroughly.
  4. Shape the tofu and vegetable mixture into small patties about 2-3 inches in diameter, placing them on a plate.
  5. Heat neutral cooking oil in a non-stick frying pan over medium-high heat. Cook the patties for about 3-4 minutes on each side until golden brown.
  6. Transfer the cooked patties to a paper towel-lined plate to absorb excess oil. Serve hot with a side of dipping sauce.

Nutrition

Serving: 1pattyCalories: 150kcalCarbohydrates: 12gProtein: 10gFat: 8gSaturated Fat: 1gPolyunsaturated Fat: 1gMonounsaturated Fat: 5gSodium: 300mgPotassium: 300mgFiber: 3gSugar: 2gVitamin A: 180IUVitamin C: 15mgCalcium: 100mgIron: 2mg

Notes

Press tofu thoroughly to ensure it doesn't retain moisture. Adjust flour and cornstarch for the desired texture. Can be baked or air-fried for a healthier option.

Tried this recipe?

Let us know how it was!

One-Pot Thai Coconut Curry Ramen Ready in Just 30 Minutes

“Curry on the stove, noodles boiling—this is the kind of comforting chaos I embrace after a long day. My One-Pot Thai Coconut Curry Ramen is not just a meal; it’s a heartwarming embrace in a bowl. In just 30 minutes, you’ll be spooning into a luscious, creamy broth enriched with tender ramen and topped with soft-boiled eggs. What I truly love about this recipe is its flexibility; feel free to customize it with your favorite toppings or proteins, making it a deliciously personal creation every time. Perfect for weeknights, this dish brings the comfort of homemade food without the hassle. Are you ready to dive into a delightful culinary adventure that brings the vibrant flavors of Thailand right to your kitchen?”

Why Is This Ramen So Special?

Comforting Simplicity: This One-Pot Thai Coconut Curry Ramen is effortlessly easy to make—perfect for busy weeknights or when you’re looking to whip up a quick lunch.

Rich Flavor Explosion: A creamy coconut broth infused with aromatic red curry paste takes your taste buds on a delightful journey, making every bite feel like a warm hug.

Customization Galore: Feel free to mix and match toppings like fresh cilantro, chili, or even your favorite proteins—making it as personal and unique as you are.

Quick to Prepare: In just 30 minutes, you’re ready to enjoy a wholesome meal, beating the hassle of fast-food runs while still packing in great flavors.

Crowd-Pleasing Appeal: Whether it’s a cozy dinner for two or a gathering with friends, this ramen is sure to impress and satisfy everyone at the table!

Thai Coconut Curry Ramen Ingredients

For the Broth

  • Coconut Milk – provides a creamy richness that’s essential for a luxurious broth.
  • Chicken Stock – gives the base a savory depth; feel free to swap with vegetable stock for a vegetarian twist.
  • Red Curry Paste – the heart of the flavor; don’t skip this key ingredient to achieve that authentic taste.
  • Tomato Paste – enhances the broth’s richness; omit if you prefer a simpler flavor.
  • Fresh Ginger – adds warmth and a touch of spice; ground ginger can be used in a pinch.
  • Garlic – layers aromatic goodness into the broth; fresh minced garlic is best for optimal flavor.
  • Shallots – contributes a mild sweetness; can be substituted with onions if needed.

For the Noodles and Protein

  • Instant Ramen Noodles – the perfect backbone for this dish; discard the flavor packets to enhance the overall taste.
  • Ground Pork – adds hearty flavor and texture; consider swapping with shrimp, chicken, turkey, or tofu for different protein options.

For the Toppings

  • Fresno Chili – adds a kick of heat; replace with a mild chili or omit if you prefer no spice.
  • Fish Sauce – delivers umami and a salty note; soy sauce is a great alternative for a vegetarian option.
  • Fresh Cilantro – brings a bright pop of color and freshness; can substitute with green onions or skip if you prefer.
  • Green Onions – offers a mild onion flavor and beautiful garnish; chives work well too.
  • Soft-Boiled Eggs – provide richness and protein; cook to a runny yolk for the best results.
  • Toasted Sesame Oil – imparts a delightful nutty flavor; regular sesame oil can be used if necessary.
  • Toasted Sesame Seeds – adds texture and visual flair; can be omitted if you don’t have them on hand.

Seasonings

  • Kosher Salt and Pepper – adjust according to your taste preferences for perfect seasoning.

Dive into this comforting dish that perfectly captures the essence of Thai Coconut Curry Ramen!

Step-by-Step Instructions for One-Pot Thai Coconut Curry Ramen

Step 1: Cook the Ramen Noodles
Begin by bringing a large pot of water to a boil over high heat. Once boiling, add the instant ramen noodles and cook for about 2-3 minutes, or until tender. Drain the noodles in a colander and rinse them under cold water to stop the cooking process. Set the noodles aside, ready to mix with the luscious broth later.

Step 2: Sauté the Shallots
In a large stockpot or Dutch oven, heat 2 tablespoons of canola oil over medium heat, swirling to coat the bottom. Add the diced shallots and sauté them for about 3 minutes, or until they turn soft and translucent. The shallots will start to release their sweet aroma, creating a flavorful base for your One-Pot Thai Coconut Curry Ramen.

Step 3: Add Aromatics and Curry Paste
Stir in 3 tablespoons of red curry paste, 1 tablespoon of tomato paste, minced garlic, and freshly grated ginger. Cook the mixture for about 2 minutes, or until it becomes fragrant and the ingredients are well combined. This step is essential to infuse the broth with the vibrant flavors characteristic of a great Thai coconut curry.

Step 4: Create the Coconut Broth
Pour in 1 can of coconut milk and 4 cups of chicken stock, stirring to incorporate all the ingredients. Increase the heat and bring the mixture to a gentle boil. Once boiling, reduce the heat to low and let it simmer for 8-10 minutes, allowing the flavors to meld beautifully. The broth should become creamy and aromatic, perfect for the ramen.

Step 5: Cook the Ground Pork
In a large cast-iron skillet, heat 1 tablespoon of toasted sesame oil over medium-high heat. Add the ground pork along with minced garlic and diced Fresno chili. Cook the pork for about 3-5 minutes until browned and fully cooked, breaking it apart with a spatula. Stir in a splash of fish sauce and season with kosher salt and pepper to taste.

Step 6: Assemble the Ramen Bowls
To serve, place a portion of the cooked ramen noodles into each bowl. Pour the rich coconut broth over the noodles, ensuring they are well submerged in this creamy goodness. Top each bowl with the sautéed ground pork, soft-boiled eggs, chopped cilantro, sliced green onions, and a sprinkle of toasted sesame seeds for an extra touch.

Thai Coconut Curry Ramen Variations

Feel free to mix things up and make this dish your own with these delectable twists!

  • Protein Swap: Try using shrimp or tofu instead of ground pork for a new protein profile. It’s a beautiful way to cater to different tastes while still enjoying similar flavors.

  • Veggie Boost: Add bok choy, zucchini, or mushrooms for a nutritious texture variety. Each veggie will bring its unique flavor, elevating the overall dish.

  • Spice It Up: Adjust the heat by using less curry paste or opting for the milder Thai Kitchen brand for a gentler spice level. Customize based on your spice preference!

  • Noodle Choices: Switch out instant ramen for soba or udon noodles to change the dish’s texture while retaining that comforting vibe. Each type of noodle brings its delightful twist!

  • Coconut-Free Option: For a lighter broth, substitute coconut milk with almond or cashew milk. The result will still be creamy but with a distinct nutty flavor—who says you have to stay traditional?

  • Umami Alternative: Instead of fish sauce, use soy sauce or tamari for a vegetarian upgrade, ensuring you keep that essential umami kick in your broth!

  • Top It Off: Get creative with toppings like roasted peanuts, lime wedges, or sliced avocado for an exciting garnish and flavor contrast. These add texture and brightness to every bowl!

  • Herb Variations: If cilantro isn’t your favorite, opt for fresh basil or mint to introduce an aromatic flair that complements the curry perfectly. These herbs provide a refreshing balance to the dish.

Whatever variation you choose, know that the heart of this recipe remains a comforting, soul-satisfying bowl of love! Want even more inspiration? Check out our guide on creating customizable ramen or dive into the world of quick meal prepping. Your kitchen is your playground—enjoy it!

What to Serve with One-Pot Thai Coconut Curry Ramen

Dive into a complete dining experience with delightful sides that elevate your meal to a culinary celebration.

  • Crispy Vegetable Potstickers: These bite-sized delights offer a crispy crunch and a satisfying contrast to the creamy ramen broth, making them the perfect addition to any bowl.

  • Garlic Ginger Chicken Potstickers: Packed with juicy chicken and aromatic garlic and ginger, these potstickers harmonize beautifully with the flavors of your ramen.

  • Cucumber Salad: A refreshing cucumber salad adds a light and zesty crunch, cutting through the richness of the coconut broth and bringing balance to your meal.

  • Pickled Vegetables: Tart and tangy pickled veggies provide a vibrant pop and a hint of acidity, complementing the creaminess of the ramen wonderfully.

  • Fresh Spring Rolls: These rice paper rolls filled with colorful vegetables and herbs create a refreshing palate cleanser, enhancing your overall dining experience.

  • Chili Lime Edamame: Lightly salted edamame tossed with chili and lime brings a bright, spicy kick that pairs well with your comforting ramen dish.

  • Thai Iced Tea: Finished with sweetened condensed milk, this creamy, chilled beverage perfectly balances the spicy notes of the ramen while providing a sweet contrast.

  • Mango Sticky Rice: End your meal on a high note with this decadent dessert; its sweetness and rich coconut flavor echo the ramen’s essence, creating a delightful conclusion.

Make Ahead Options

These One-Pot Thai Coconut Curry Ramen are perfect for meal prep, allowing you to savor this comforting dish on busy weeknights! You can prepare the broth and refrigerate it for up to 3 days. Just sauté the shallots, add the aromatic curry paste, and stir in the coconut milk and chicken stock as directed; let it cool completely before storing it in an airtight container. Additionally, you can soft-boil the eggs and refrigerate them overnight for quick assembly. When you’re ready to enjoy your ramen, simply reheat the broth on the stove, cook the noodles (which can be done in minutes), and assemble everything together for a delicious and satisfying meal just as comforting as if it were made fresh!

How to Store and Freeze Thai Coconut Curry Ramen

Fridge: Store leftover broth and noodles in separate airtight containers for up to 2 days. This helps maintain the texture of the noodles while keeping the broth fresh and delicious.

Freezer: Freeze the broth in an airtight container for up to 3 months. When ready to enjoy, thaw overnight in the fridge and reheat gently on the stove.

Reheating: Reheat the broth on the stove until hot, then add previously cooked noodles just until warmed through. This will help avoid overcooking the noodles and keep them tender.

Tips: Consider portioning out servings before storing; it’ll make it easier to enjoy quick meals on busy days while savoring that comforting flavor of Thai Coconut Curry Ramen.

Expert Tips for Thai Coconut Curry Ramen

  • Optimal Coconut Milk: Use full-fat coconut milk for a rich, creamy broth that enhances the overall flavor of theThai Coconut Curry Ramen.
  • Customize Protein: For a tasty twist, swap ground pork for shrimp, chicken, or tofu, allowing personal preference to shine through in this comforting dish.
  • Aromatics Matter: Don’t rush the sautéing of shallots and garlic; allowing them to caramelize will deepen the flavors of your broth.
  • Control the Heat: Taste your broth as you add the red curry paste; adjust the quantity to match your spice tolerance for a personalized kick.
  • Store Smart: To keep your leftovers fresh, store the broth and noodles separately in airtight containers; this prevents the noodles from getting soggy.

One-Pot Thai Coconut Curry Ramen Recipe FAQs

How do I select the right coconut milk for the best broth?
Selecting full-fat coconut milk will provide the richest and creamiest texture for your broth. Look for brands that specify “full-fat” on the label, as “light” varieties may compromise the thickness and flavor. Shake the can before opening; if it’s sloshy instead of thick, it might be a sign it’s not the best quality.

How should I store leftovers?
For optimal freshness, store the leftover broth and noodles in separate airtight containers in the fridge. This separation keeps the noodles from becoming soggy. They can be stored this way for up to 2 days. Just remember to keep your toppings, like cilantro and green onions, separately as well to maintain their freshness.

Can I freeze this dish for later?
Yes, you can freeze the broth! Store it in an airtight container for up to 3 months. Allow some space at the top of the container for expansion as it freezes. When you’re ready to enjoy it, simply thaw the broth overnight in the fridge, and reheat gently on the stove before adding freshly cooked noodles.

What should I do if the broth is too salty?
If your broth turns out too salty, there are a few ways to balance it. You can add a little coconut milk or a splash of water to dilute the saltiness. Another option is to add more fresh ingredients, like diced vegetables or tofu, to soak up some of that saltiness and create a more balanced flavor.

Can I modify this recipe for dietary restrictions?
Absolutely! If you’re following a vegetarian or vegan diet, you can substitute the ground pork with tofu or tempeh. Replace fish sauce with soy sauce or a mushroom-based sauce for umami without animal products. You can also use vegetable stock instead of chicken stock to keep it vegetarian-friendly.

undefined

One-Pot Thai Coconut Curry Ramen Ready in Just 30 Minutes

This One-Pot Thai Coconut Curry Ramen is a comforting, creamy, and customizable dish perfect for quick dinners.
Prep Time 10 minutes
Cook Time 20 minutes
Total Time 30 minutes
Servings: 4 bowls
Course: Dinner
Cuisine: Thai
Calories: 450

Ingredients
  

For the Broth
  • 1 can Coconut Milk full-fat for richness
  • 4 cups Chicken Stock or vegetable stock for vegetarian option
  • 3 tablespoons Red Curry Paste key ingredient for flavor
  • 1 tablespoon Tomato Paste omit if desired
  • 1 inch Fresh Ginger grated
  • 3 cloves Garlic minced
  • 2 tablespoons Shallots diced; can substitute with onions
For the Noodles and Protein
  • 2 packets Instant Ramen Noodles discard flavor packets
  • 1 pound Ground Pork or substitute with other proteins
For the Toppings
  • 1 piece Fresno Chili sliced; replace with mild chili or omit
  • 1 tablespoon Fish Sauce or soy sauce for vegetarian option
  • 1 bunch Fresh Cilantro chopped; can substitute with green onions
  • 2 stalks Green Onions sliced
  • 2 pieces Soft-Boiled Eggs cooked to runny yolk
  • 1 tablespoon Toasted Sesame Oil or regular sesame oil
  • 1 tablespoon Toasted Sesame Seeds optional
Seasonings
  • to taste Kosher Salt
  • to taste Pepper

Equipment

  • Large pot
  • Colander
  • Stockpot or Dutch oven
  • large cast-iron skillet

Method
 

Step-by-Step Instructions
  1. Begin by bringing a large pot of water to a boil over high heat. Once boiling, add the instant ramen noodles and cook for about 2-3 minutes, or until tender. Drain the noodles in a colander and rinse them under cold water to stop the cooking process. Set the noodles aside.
  2. In a large stockpot or Dutch oven, heat 2 tablespoons of canola oil over medium heat. Add the diced shallots and sauté for about 3 minutes, until they turn soft and translucent.
  3. Stir in 3 tablespoons of red curry paste, 1 tablespoon of tomato paste, minced garlic, and freshly grated ginger. Cook for about 2 minutes until fragrant.
  4. Pour in 1 can of coconut milk and 4 cups of chicken stock, stirring to incorporate. Bring to a gentle boil, then reduce heat to low and let simmer for 8-10 minutes.
  5. In a large cast-iron skillet, heat 1 tablespoon of toasted sesame oil over medium-high heat. Add the ground pork with minced garlic and diced Fresno chili. Cook for 3-5 minutes until browned.
  6. To serve, place a portion of the cooked ramen noodles into each bowl. Pour the coconut broth over the noodles. Top with sautéed ground pork, soft-boiled eggs, cilantro, green onions, and sesame seeds.

Nutrition

Serving: 1bowlCalories: 450kcalCarbohydrates: 40gProtein: 25gFat: 25gSaturated Fat: 15gPolyunsaturated Fat: 3gMonounsaturated Fat: 6gCholesterol: 180mgSodium: 1500mgPotassium: 600mgFiber: 3gSugar: 5gVitamin A: 500IUVitamin C: 3mgCalcium: 60mgIron: 3mg

Notes

Store leftover broth and noodles separately in airtight containers for up to 2 days. To reheat, warm the broth and then add the cooked noodles.

Tried this recipe?

Let us know how it was!

Creamy Vegan Butter Chicken with Chickpeas in 15 Minutes

As I stood in my kitchen, the aroma of spices wafting through the air, I couldn’t help but smile at the thought of this Easy Vegan Butter Chicken with Chickpeas taking shape. In just 15 minutes, I can whip up a dish that’s not only bursting with warmth and richness but also perfectly aligns with my vegan lifestyle. The creamy tomato sauce, enhanced by savory peanut butter, offers a unique and wholesome twist on the classic Indian dish we all love. Not only is this recipe a quick and easy weeknight dinner option, but it also packs a nutritious punch without any animal products. Whether you’re vegan or just looking to make a healthy switch, this delightful meal is sure to satisfy your cravings. Want to transform your dinner routine with this comforting dish? Let’s dive in!

Why is This Recipe a Must-Try?

Quick & Easy: This vegan butter chicken can be ready in just 15 minutes, making it the perfect weeknight meal when you’re short on time.

Satisfyingly Creamy: The unique blend of peanut butter and coconut milk creates a luxurious sauce that rivals traditional recipes, giving you that satisfying richness without any animal products.

Flavor Explosion: With a combination of spices like turmeric and paprika, every bite is packed with bold flavors that will leave your taste buds dancing.

Versatile & Customizable: Feel free to switch the chickpeas for lentils or even tofu, making it easy to adjust to your preferred taste and texture.

Crowd-Pleaser Appeal: Perfect for both vegan aficionados and those who typically choose meat, this dish has something for everyone, ensuring your family will enjoy it!

If you’re looking for more quick and easy ideas, check out our delicious collection of plant-based recipes.

Vegan Butter Chicken Ingredients

For the Sauce

  • Medium Onion – Adds sweetness and depth to the dish; substitute with shallots for a milder flavor.
  • Cherry Tomatoes – Provides freshness and natural sweetness; can be replaced with canned diced tomatoes if needed.
  • Canned Diced Tomatoes – Enhances flavor and provides moisture; fire-roasted varieties add extra depth.
  • Turmeric – Adds warmth and color; can be omitted for a milder flavor.
  • Onion Granules – Boosts overall onion flavor; use garlic powder as an alternative.
  • Paprika – Provides a mild smoky flavor; adjust to taste or use smoked paprika for more depth.
  • Curry Powder – Infuses aromatic spices; adjust spice level based on personal preference. Alternatively, use vegan curry paste.
  • Tomato Paste – Intensifies the tomato flavor; other tomato products may be used in lesser amounts.
  • Coconut Milk – Adds creaminess; use full-fat for richer texture or light coconut milk for fewer calories.
  • Smooth Peanut Butter – Creates creaminess and richness; substitute with almond or cashew butter if preferred.
  • Tamari – Provides umami flavor; can swap with soy sauce for non-restricted diets.

For the Protein

  • Chickpeas – The main protein source, offering texture; substitute with butter beans or tofu for variation.

Feel inspired to whip up this delightful Vegan Butter Chicken? Enjoy a comforting dish that’s quick, easy, and packed with flavor!

Step‑by‑Step Instructions for Easy Vegan Butter Chicken with Chickpeas

Step 1: Sauté the Onions
Heat a non-stick frying pan over medium heat, adding a drizzle of oil. Once hot, add the chopped medium onion and sauté for 1-2 minutes, stirring frequently until it becomes translucent and fragrant, signaling the perfect base for your Easy Vegan Butter Chicken with Chickpeas.

Step 2: Add Cherry Tomatoes
Next, incorporate the halved cherry tomatoes into the pan. Stir and allow them to cook for about 2 minutes until they soften and release their juices, creating a fresh and flavorful backdrop for the dish’s rich sauce.

Step 3: Mix in the Chickpeas and Spices
Add the drained chickpeas, canned diced tomatoes, turmeric, onion granules, paprika, and curry powder to the pan. Stir the mixture well and cook for an additional 2 minutes until fragrant, allowing the spices to combine and infuse their aromatic essence into the Easy Vegan Butter Chicken.

Step 4: Create the Creamy Sauce
Pour in the coconut milk, tomato paste, and smooth peanut butter, stirring to blend everything together. Bring the mixture to a gentle simmer over medium heat for about 7-8 minutes, stirring frequently to prevent sticking, until the sauce thickens to a creamy consistency, adjusting with more coconut milk if desired.

Step 5: Final Touches Before Serving
Just before serving, stir in the tamari for an umami kick. Allow the sauce to heat through for a minute or two; then, serve your Easy Vegan Butter Chicken with Chickpeas immediately, paired with rice, quinoa, or naan to soak up that delicious, rich sauce.

Expert Tips for Easy Vegan Butter Chicken

  • Smooth Peanut Butter: Always use smooth peanut butter for the best texture; chunky varieties can disrupt the creamy consistency of the sauce.

  • Stirring Matters: Stir constantly while simmering to prevent the sauce from sticking to the pan and burning—this is key for a perfect vegan butter chicken.

  • Adjust Thickness: If the sauce becomes too thick during cooking, don’t hesitate to add a splash of water or more coconut milk to reach your desired consistency.

  • Spice Control: Customize the curry powder level based on your taste preferences—more heat can be added by increasing chili powder or adding red pepper flakes.

  • Cooking Time: Keep an eye on the cooking time; overcooking can make the chickpeas too soft. Aim for that perfect tender bite for your dish.

  • Flavor Enhancers: For an extra flavor boost, consider adding a squeeze of fresh lemon or lime juice just before serving; it brightens the vegan butter chicken beautifully.

How to Store and Freeze Vegan Butter Chicken

Fridge: Store leftover vegan butter chicken in an airtight container for up to 3 days. When ready to enjoy, gently reheat on the stovetop over low heat, adding a splash of coconut milk if needed.

Freezer: For longer storage, freeze portions of the vegan butter chicken in freezer-safe containers for up to 3 months. Thaw in the refrigerator overnight before reheating.

Reheating: Reheat the thawed dish on the stovetop over medium heat, stirring frequently to restore its creamy texture. If the sauce appears too thick, add a splash of water or coconut milk.

Serving Suggestion: This dish is best served fresh, but keeping it stored properly ensures you can enjoy the rich flavors of your vegan butter chicken whenever you crave it!

Make Ahead Options

These Easy Vegan Butter Chickens are perfect for meal prep enthusiasts! You can chop the onions and halve the cherry tomatoes up to 24 hours in advance, refrigerating them in airtight containers to preserve freshness. Additionally, you can mix the spices and even combine the chickpeas with canned diced tomatoes, storing them together for up to 3 days. When you’re ready to serve, simply sauté the prepped ingredients, add the creamy sauce components as directed, and allow to simmer until warmed through. This way, you’ll enjoy a nutritious and delicious weeknight dinner with minimal effort, just as comforting and creamy as if made from scratch right before serving!

What to Serve with Easy Vegan Butter Chicken with Chickpeas

Imagine a delightful table filled with vibrant colors and flavors, perfectly complementing your creamy creation.

  • Fluffy Basmati Rice: The tender grains soak up the rich sauce, providing the perfect backdrop for this savory dish. A classic pairing that ensures every bite is flavorful.

  • Warm Garlic Naan: Soft and pillowy, this Indian flatbread is ideal for scooping up the creamy sauce, making each meal a hands-on experience filled with warmth.

  • Crispy Roasted Vegetables: A medley of seasonal veggies gives a satisfying crunch and enhances the meal’s nutritional value, creating a delightful contrast to the silky chickpeas.

  • Refreshing Cucumber Salad: A light and zesty salad with herbs and tangy yogurt balances the richness of the butter chicken, cleansing the palate beautifully.

  • Quinoa Pilaf: This protein-packed option enhances the meal, offering a nutty flavor and fluffy texture that pairs well with the creamy sauce.

  • Mango Lassi: A creamy, sweet yogurt drink that cools the heat from spices, providing a refreshing element that pairs perfectly with spicy dishes.

  • Chocó Coconut Bliss Balls: For a sweet finish, these dessert bites offer a rich, chocolaty flavor that echoes the creaminess of the main dish, making it a unique way to close the meal.

These pairings will transform your Easy Vegan Butter Chicken with Chickpeas into a delightful feast, making for an evocative dining experience that satisfies all palates.

Variations & Substitutions for Vegan Butter Chicken

Feel free to get creative and personalize this recipe to suit your taste buds!

  • Protein Swap: Replace chickpeas with lentils or tofu for a different texture and flavor, perfect for experimenting with heartiness.

  • Creamy Alternatives: Use almond or cashew butter instead of peanut butter for a subtle shift in flavor, giving you a nutty twist in your sauce.

  • Veggie Boost: Stir in fresh spinach or peas to add brighter colors and extra nutrients, making your dish even more wholesome.

  • Heat it Up: Add chili flakes or fresh jalapeños for a spicy kick; crank up the heat to tantalize your taste buds and elevate flavor.

  • Tomato Variations: Opt for fire-roasted canned tomatoes for an added depth of flavor that mimics the taste of wood-smoked cuisine.

  • Coconut Cream: For richer texture, switch light coconut milk to full-fat coconut milk to create a lavish and more indulgent sauce.

  • Herbal Infusion: Incorporate fresh herbs like cilantro or mint as a garnish; they will brighten up the dish and add aromatic freshness.

  • Sour Twist: Squeeze a bit of lemon or lime juice right before serving; it adds a zesty note that beautifully brightens the dish.

Looking for more delightful twists in your cooking? Explore our collection of plant-based recipes for even more inspiration!

Easy Vegan Butter Chicken with Chickpeas Recipe FAQs

What should I look for when selecting onions?
Absolutely! When choosing medium onions, look for ones that are firm and heavy for their size. Avoid onions with soft spots or dark spots all over, indicating spoilage. If you prefer a milder flavor, shallots are a great alternative and can easily be swapped in.

How long can I store leftovers in the fridge?
Very! Leftover vegan butter chicken can be stored in an airtight container in the fridge for up to 3 days. Make sure to let it cool completely before sealing it to maintain its freshness.

Can I freeze vegan butter chicken?
Yes, you can! For longer storage, freeze portions of the vegan butter chicken in freezer-safe containers for up to 3 months. To thaw, simply place them in the refrigerator overnight, then reheat on the stovetop over medium heat. Add a splash of coconut milk to restore creaminess if needed.

What if my sauce is too thick?
No worries! If your sauce becomes too thick during cooking or after refrigeration, you can easily adjust it. Just add a splash of water or additional coconut milk while reheating, stirring frequently until the desired consistency is reached. This ensures a luxurious texture in every bite.

Are there any dietary considerations I should keep in mind?
Absolutely! This vegan butter chicken recipe is gluten-free when you use tamari. For those with nut allergies, substitute smooth peanut butter with sunflower seed butter. Always check the labels for hidden allergens in canned ingredients like coconut milk and diced tomatoes.

undefined

Creamy Vegan Butter Chicken with Chickpeas in 15 Minutes

This creamy vegan butter chicken is a quick 15-minute dish bursting with flavors and aligns perfectly with a vegan lifestyle.
Prep Time 5 minutes
Cook Time 10 minutes
Total Time 15 minutes
Servings: 4 servings
Course: Dinner
Cuisine: Indian
Calories: 350

Ingredients
  

For the Sauce
  • 1 medium Onion Adds sweetness and depth; substitute with shallots for a milder flavor.
  • 1 cup Cherry Tomatoes Provides freshness; can be replaced with canned diced tomatoes if needed.
  • 1 can Canned Diced Tomatoes Enhances flavor; fire-roasted varieties add extra depth.
  • 1 teaspoon Turmeric Adds warmth and color; can be omitted.
  • 1 teaspoon Onion Granules Boosts onion flavor; use garlic powder as an alternative.
  • 1 teaspoon Paprika Provides a mild smoky flavor; adjust to taste.
  • 1 teaspoon Curry Powder Infuses aromatic spices; adjust spice level based on personal preference.
  • 2 tablespoons Tomato Paste Intensifies tomato flavor; use other tomato products in lesser amounts.
  • 1 cup Coconut Milk Adds creaminess; use full-fat for richer texture.
  • 2 tablespoons Smooth Peanut Butter Creates creaminess; substitute with almond or cashew butter if preferred.
  • 2 tablespoons Tamari Provides umami flavor; can swap with soy sauce.
For the Protein
  • 1 can Chickpeas The main protein source; substitute with butter beans or tofu for variation.

Equipment

  • Non-stick frying pan

Method
 

Directions
  1. Heat a non-stick frying pan over medium heat and add a drizzle of oil. Sauté the chopped medium onion for 1-2 minutes until translucent.
  2. Incorporate the halved cherry tomatoes and cook for about 2 minutes until softened.
  3. Add the drained chickpeas, canned diced tomatoes, turmeric, onion granules, paprika, and curry powder. Stir and cook for an additional 2 minutes.
  4. Pour in the coconut milk, tomato paste, and smooth peanut butter. Simmer over medium heat for 7-8 minutes, stirring frequently.
  5. Just before serving, stir in the tamari and heat through. Serve immediately paired with rice, quinoa, or naan.

Nutrition

Serving: 1servingCalories: 350kcalCarbohydrates: 40gProtein: 12gFat: 18gSaturated Fat: 8gPolyunsaturated Fat: 3gMonounsaturated Fat: 6gSodium: 600mgPotassium: 700mgFiber: 10gSugar: 6gVitamin A: 1000IUVitamin C: 20mgCalcium: 50mgIron: 3mg

Notes

For the best texture, always use smooth peanut butter. Stir constantly to prevent the sauce from sticking, and adjust the thickness as necessary with water or coconut milk.

Tried this recipe?

Let us know how it was!

Crispy Lemon Pepper Tofu that Transforms Dinner Time

In the hustle of everyday life, finding time to whip up something delicious can feel like a mini crisis. That’s where my Crispy Lemon Pepper Tofu comes to the rescue! This vegan delight isn’t just a quick fix—it’s a flavor-packed, high-protein dish that transforms your weeknight dinners into something memorable. With its tantalizing zesty lemon pepper sauce and a perfectly crispy texture, you’ll never look at tofu the same way again. Plus, it’s perfect for those evenings when you want to avoid fast food and embrace homemade goodness. Curious to see how easy it is to elevate this humble ingredient into a culinary triumph? Let’s dive into the recipe!

Why Is This Tofu Recipe a Game Changer?

Flavor Explosion: The bright, zesty lemon pepper sauce takes this dish to new heights, ensuring each bite is packed with vibrant flavors that will awaken your senses.

Vegan Delight: This recipe is a wonderful option for those on a plant-based diet, offering a protein punch that satisfies while keeping it healthy.

Quick and Easy: Prep and cook in under 30 minutes, making it perfect for busy weeknights. You can rely on this recipe when you’re short on time but still want something special.

Crispy Perfection: With a simple technique using cornstarch, you’ll achieve that desired crunch that makes tofu irresistible, resembling your favorite crispy snacks.

Endless Versatility: Pair it with rice, quinoa, or a fresh salad for a balanced meal that fits any culinary preference. Try it in a stir-fry or as a filling for tacos to keep it exciting!

Get ready to elevate your dinner game with this delightful dish, and don’t hesitate to check out my guide on cooking tofu to perfection for tips and tricks!

Lemon Pepper Tofu Ingredients

For the Tofu
Extra Firm Tofu – This is the star of the dish, offering a hearty texture that holds up during cooking; remember to press well to remove excess moisture.

For the Coating
Cornstarch – This creates a deliciously crispy coating when fried; you can substitute with arrowroot powder for a gluten-free alternative.

For the Sauce
Lemon Juice – Provides tanginess that brightens the dish; freshly squeezed juice is recommended for the best flavor.
Lemon Zest – Enhances the citrus flavor and aromatic quality; if unavailable, lime zest can be a suitable alternative, but keep in mind it changes the overall taste.
Black Pepper – Adds a kick of spiciness; adjust the quantity to match your heat preference, and freshly cracked is best for flavor.

Transform your weeknight dinners with this Lemon Pepper Tofu, a vegan delight that isn’t just fast but also full of flavor!

Step‑by‑Step Instructions for Crispy Lemon Pepper Tofu

Step 1: Prepare Tofu
Start by pressing the extra firm tofu to eliminate excess moisture, which is crucial for achieving the perfect crispy result. Wrap the tofu block in a clean kitchen towel and place a heavy object on top for about 15 minutes. Once pressed, cut the tofu into bite-sized cubes, ensuring even sizes for uniform cooking.

Step 2: Bread Tofu
In a shallow dish, add cornstarch and coat each tofu cube evenly, making sure all sides are covered. This coating is essential for creating that delightful crunch in your Crispy Lemon Pepper Tofu. Shake off any excess cornstarch gently to avoid clumping, and set the coated tofu aside while you heat the oil.

Step 3: Fry Tofu
Heat a generous amount of oil in a large frying pan over medium-high heat, approximately 350°F (175°C). Once hot, carefully place the cornstarch-coated tofu cubes in a single layer, ensuring not to overcrowd the pan. Fry them for about 5-7 minutes on each side, turning when golden brown and crisp to achieve a perfect texture.

Step 4: Make Sauce
While the tofu is frying, prepare the tantalizing lemon pepper sauce. In a medium bowl, whisk together freshly squeezed lemon juice, lemon zest, and cracked black pepper to taste. The combination of these ingredients will create a bright and zesty sauce that elevates the flavor of your Crispy Lemon Pepper Tofu.

Step 5: Coat Tofu
Once the tofu cubes are golden and crispy, pour the lemon pepper sauce directly into the pan. Gently stir the crispy tofu to ensure each piece is evenly coated with the vibrant sauce. Allow it to sit for an additional 1-2 minutes in the pan to absorb the flavors while maintaining that crispy exterior.

Step 6: Serve
Transfer the coated Crispy Lemon Pepper Tofu to a serving plate, and if desired, garnish with additional lemon zest for an extra pop of freshness. Serve immediately while it’s still hot, enjoying this delightful dish alongside steamed vegetables or over a bed of rice for a wholesome vegan meal.

Lemon Pepper Tofu Customization Ideas

Feel free to explore exciting twists to make this recipe even more delightful and tailored to your taste buds!

  • Garlic Lovers: Add garlic powder to the cornstarch for an aromatic kick. It pairs beautifully with the lemony flavor, enhancing that savory depth.

  • Sweet Heat: Stir in a touch of maple syrup or agave nectar to the sauce for a sweet and spicy twist. This can create a delightful balance with the zesty lemon flavor!

  • Herb Flavored: Mix in dried herbs, like oregano or thyme, into the cornstarch coating. This adds earthy notes and transforms the flavor profile into something more herby and aromatic.

  • Spicy Kick: For those who enjoy heat, incorporate red pepper flakes into the lemon sauce. This adds a fiery touch that brings life to your tofu dish—perfect if you like it hot!

  • Double the Citrus: Blend in some orange juice or zest along with the lemon for a refreshing citrus medley. The delightful sweetness of the orange complements the tartness of the lemon beautifully!

  • Vegetable Boost: Toss in your favorite stir-fried vegetables like bell peppers or snap peas during the last few moments of frying. It adds color, crunch, and more nutrition to the dish—a wholesome addition!

  • Tofu Texture: For an even crispier texture, try using panko breadcrumbs instead of cornstarch. This can add an extra crunch that’s truly irresistible!

  • Quinoa Base: Serve your lemon pepper tofu over a bed of fluffy quinoa instead of rice, for a protein-packed dish! The nutty flavor of quinoa pairs excellently with the zesty tofu.

Once you start experimenting with these variations, you’ll find the perfect combination that excites your palate! For more tips on how to enjoy delicious tofu in different ways, check out my guide on all things tofu.

How to Store and Freeze Lemon Pepper Tofu

Fridge: Store leftover lemon pepper tofu in an airtight container for up to 3 days. This helps retain its flavor and keeps it fresh for your next meal.

Freezer: For long-term storage, freeze the tofu in a single layer on a baking sheet until solid, then transfer to a freezer-safe bag. It can be stored for up to 3 months.

Reheating: To maintain its crispy texture, reheat the tofu in an oven or air fryer at 350°F (175°C) for about 10-15 minutes. Avoid microwaving as it may make the tofu soggy.

Thawing: When ready to enjoy frozen lemon pepper tofu, thaw it in the fridge overnight before reheating for the best results.

What to Serve with Crispy Lemon Pepper Tofu

Transform your meal into a delightful feast by pairing it with these exciting accompaniments that will enhance your dining experience.

  • Steamed Broccoli: The tender, vibrant green of broccoli not only adds color but also brings a healthy crunch that complements the tofu’s crispy texture beautifully.

  • Quinoa: This nutty grain is a fantastic base that absorbs the zesty flavors of the lemon pepper tofu, providing a wholesome, fiber-rich foundation for your meal.

  • Crispy Sweet Potato Fries: The sweetness of the fries offers a perfect contrast to the lemony zing of the tofu, creating a delightful balance of flavors and textures.

  • Garlicky Green Beans: Fresh, sautéed green beans with a touch of garlic add a savory depth that pairs well, brightening each forkful with additional freshness.

  • Mixed Greens Salad: A refreshing salad with a zesty vinaigrette will cleanse the palate between bites, allowing the vibrant flavors of the tofu to shine through.

  • Chilled Cucumber Lemonade: For a drink, this revitalizing beverage echoes the flavors of the dish while keeping you cool and refreshed during a hearty meal.

  • Coconut Rice: The creaminess of coconut flavor in rice adds a tropical twist, beautifully harmonizing with the citrus notes of the lemon pepper tofu.

Each of these sides brings its own unique charm, ensuring your meal is balanced, satisfying, and bursting with flavor!

Make Ahead Options

These Crispy Lemon Pepper Tofu cubes are perfect for meal prep, allowing you to enjoy a homemade vegan dinner even on the busiest nights! You can press and cube the tofu up to 24 hours in advance, storing it in an airtight container in the refrigerator. Additionally, the cornstarch coating can also be prepared ahead of time; simply coat the tofu cubes and refrigerate them until ready to fry. When you’re ready to serve, fry the tofu for about 5-7 minutes per side until golden and crispy, then toss in the lemon pepper sauce for a quick finish. This way, you keep the tofu just as delicious and maintain its crunchy texture while saving valuable time!

Expert Tips for Crispy Lemon Pepper Tofu

Press Tofu Well: Ensure to press the extra firm tofu thoroughly to remove excess moisture, which is key for achieving that crispy texture.

Avoid Overcrowding: Fry the tofu in batches if necessary to prevent overcrowding the pan; this helps maintain its crunchiness by allowing even cooking.

Taste the Sauce: Before coating the tofu, taste and adjust the lemon pepper sauce to your liking; too much black pepper can easily overpower the dish.

Use Fresh Ingredients: Freshly squeezed lemon juice and zest greatly enhance the flavors; avoid bottled lemon juice for an authentic taste.

Garnish for Appeal: Add a sprinkle of additional lemon zest before serving to elevate the presentation and flavor of your meal, ensuring your Crispy Lemon Pepper Tofu looks as good as it tastes!

Lemon Pepper Tofu Recipe FAQs

What type of tofu is best for this recipe?
Absolutely! Extra firm tofu is the best choice for this recipe. It has a hearty texture that holds up beautifully during cooking. Make sure to press it well to remove excess moisture; this step is crucial to achieving that crispy finish you’ll love.

How should I store leftover Lemon Pepper Tofu?
You can store leftover lemon pepper tofu in an airtight container in the fridge for up to 3 days. This keeps it fresh and flavorful for your next meal. If you prefer to enjoy it later, I recommend reheating it in the oven or air fryer for the best crispiness instead of the microwave, which can make it soggy.

Can I freeze Lemon Pepper Tofu?
Of course! To freeze lemon pepper tofu, lay the cooked tofu in a single layer on a baking sheet and place it in the freezer until solid. Once frozen, transfer the tofu to a freezer-safe bag. It can be kept for up to 3 months. When you’re ready to eat it, thaw it overnight in the fridge and reheat in the oven or air fryer for that delightful crunch again.

What if my tofu isn’t crispy enough?
If your tofu isn’t crispy, there may be a couple of reasons. First, ensure that you’ve pressed it well to remove moisture before coating it with cornstarch. Second, avoid overcrowding the pan while frying, as it can create steam rather than a crisp texture. Fry in batches as needed, and maintain a high cooking temperature (about 350°F/175°C) to achieve the perfect crunch.

Can I adjust the spice level in the sauce?
Very much! You can definitely adjust the amount of black pepper according to your spice preference. Start with a smaller amount and taste the sauce before pouring it over the tofu. This way, you can tailor the zing and heat to match your palate – the more, the merrier! Just remember, it’s easier to add more pepper than to take it away, so go gradually.

Is this recipe suitable for people with allergies?
Yes, this lemon pepper tofu is vegan and pack with protein, making it a great option for plant-based diets! However, it does contain cornstarch, so if you have a corn allergy, consider using arrowroot powder instead for the crispy coating. Always check your ingredients to ensure they align with your dietary needs.

undefined

Crispy Lemon Pepper Tofu that Transforms Dinner Time

This Crispy Lemon Pepper Tofu is a flavor-packed vegan dish that transforms your weeknight dinners into something memorable.
Prep Time 15 minutes
Cook Time 15 minutes
Total Time 30 minutes
Servings: 4 servings
Course: Dinner
Cuisine: Vegan
Calories: 180

Ingredients
  

For the Tofu
  • 1 block Extra Firm Tofu Press well to remove excess moisture.
For the Coating
  • 1 cup Cornstarch Can substitute with arrowroot powder for gluten-free.
For the Sauce
  • 1/4 cup Lemon Juice Freshly squeezed is recommended.
  • 1 tablespoon Lemon Zest Lime zest can be an alternative.
  • 1/2 teaspoon Black Pepper Adjust to your heat preference.

Equipment

  • Frying pan
  • Kitchen Towel
  • shallow dish
  • medium bowl

Method
 

Step-by-Step Instructions
  1. Prepare Tofu: Press the extra firm tofu to eliminate excess moisture for crispy results. Cut into bite-sized cubes.
  2. Bread Tofu: Coat each tofu cube with cornstarch in a shallow dish.
  3. Fry Tofu: Heat oil in a frying pan and fry the coated tofu cubes until golden brown, about 5-7 minutes per side.
  4. Make Sauce: Whisk together lemon juice, lemon zest, and black pepper in a medium bowl.
  5. Coat Tofu: Pour sauce over fried tofu and stir to coat evenly; let sit in the pan for 1-2 minutes.
  6. Serve: Transfer to a serving plate and garnish with lemon zest if desired.

Nutrition

Serving: 1servingCalories: 180kcalCarbohydrates: 20gProtein: 12gFat: 8gSaturated Fat: 1gPolyunsaturated Fat: 2gMonounsaturated Fat: 3gSodium: 400mgPotassium: 400mgFiber: 2gSugar: 1gVitamin C: 15mgCalcium: 10mgIron: 10mg

Notes

Press tofu well and use fresh ingredients for the best flavor. Avoid overcrowding when frying to maintain crispiness.

Tried this recipe?

Let us know how it was!

Irresistible Soy Garlic Tofu Balls That Wow Every Bite

As the sizzle of garlic fills my kitchen, I can’t help but feel a rush of excitement knowing that something delicious is just moments away. Today, I’m whipping up a batch of Soy Garlic Tofu Balls with Sweet & Savory Sauce, and trust me, they’re about to become your new go-to for a quick meal! These vegan delights not only come together in a flash, but they’re also a fantastic way to nourish your body without sacrificing flavor. The crispy exterior envelops a tender center, while the sauce adds that irresistible zing, making them perfect for satisfying busy weeknights or impressing at gatherings. Are you ready to elevate your dinner game with a healthy twist? Let’s dive into this scrumptious journey together!

Why Are These Tofu Balls Irresistible?

Deliciously Flavorful: Each bite is filled with the robust taste of freshly minced garlic and umami-rich sauces that create a perfect harmony of sweet and savory.

Easy to Prepare: These tofu balls come together effortlessly, making them ideal for busy weeknights or last-minute entertaining. Plus, they’re a breeze to adapt — swap in your favorite veggies or plant-based proteins for a personal touch!

Versatile Delight: Serve them as a main with steamed rice or tossed in a salad; these tofu balls shine in any setting.

Crowd-Pleasing: Whether you’re cooking for vegan friends or omnivores, these Tofu Balls are sure to impress with their satisfying taste and friendly nutrition stats.

Meal Prep Friendly: Whip up a batch ahead of time and enjoy them throughout the week; you’ll have healthy meals ready to go! For more plant-based inspiration, check out our guide on quick meal prep ideas.

Soy Garlic Tofu Balls Ingredients

• Here’s what you need for these scrumptious Soy Garlic Tofu Balls!

For the Tofu Balls

  • Tofu – 10 pieces; the main protein source that gives these balls their structure. Can substitute with other plant-based meatballs of your choice.

For the Sauce

  • Garlic – 3 cloves, minced; adds an intense savory flavor; fresh garlic is preferred for maximum taste.
  • Chinese Black Vinegar or Rice Vinegar – 1 tbsp; provides acidity; can substitute with apple cider vinegar for a milder flavor.
  • Soy Sauce – 1/2 tbsp; contributes umami and saltiness; use tamari for a gluten-free option.
  • Vegetarian Oyster Sauce – 1 tbsp; adds richness and depth; hoisin sauce can be an alternative.
  • Sugar – 2 tbsp; balances the saltiness and enhances the sauce’s flavor; maple syrup works for a vegan option.
  • Room Temperature Water – 1 tbsp; helps in adjusting sauce consistency.
  • Corn Starch – 1/2 tbsp; thickens the sauce beautifully; arrowroot powder can be a great substitute.
  • Neutral Oil – 1 tbsp; essential for sautéing; vegetable or canola oil works perfectly here.

For the Vegetables

  • Scallion – 1, chopped (green and white parts separated); provides a fresh and mild onion flavor.
  • Shallot or Red Onion – 1/2 small, diced; adds sweetness and depth; yellow onion is another fine choice.
  • Red Bell Pepper – 1/2, seeded and diced; brings color and sweetness to the mix; zucchini can be a delightful substitute.

Feel free to mix and match your ingredients to suit your taste!

Step-by-Step Instructions for Soy Garlic Tofu Balls with Sweet & Savory Sauce

Step 1: Prepare the Sauce
In a medium bowl, whisk together 3 minced garlic cloves, 1 tablespoon of vinegar, ½ tablespoon of soy sauce, 1 tablespoon of vegetarian oyster sauce, and 2 tablespoons of sugar. Gradually add 1 tablespoon of room temperature water and ½ tablespoon of corn starch until fully combined. The mixture should be smooth, with no lumps, as you set it aside to let the flavors meld while you cook the vegetables.

Step 2: Cook Vegetables
Heat 1 tablespoon of neutral oil in a large pan or wok over medium heat. Once the oil shimmers, add the chopped white part of the scallion and sauté for about 1 minute, just until fragrant. Next, toss in ½ diced shallot or red onion, along with ½ diced red bell pepper, cooking them for 4-5 minutes until the pepper is tender and the onions are translucent, stirring occasionally.

Step 3: Simmer the Sauce
Give your sauce mixture a quick stir to ensure the corn starch is well combined, then pour it into the pan with the sautéed vegetables. Raise the heat to medium, allowing the sauce to come to a gentle simmer. Stir occasionally and watch for it to thicken, which should take about 3-4 minutes. The sauce will take on a glossy sheen, indicating it’s ready for the tofu balls.

Step 4: Add Tofu Balls
Carefully add the 10 tofu balls to the simmering sauce, ensuring they are evenly coated. Gently toss the tofu balls in the sauce and allow them to cook for an additional 2-3 minutes. This will warm the tofu through while ensuring they absorb the rich flavors of the soy garlic sauce, creating that irresistible taste.

Step 5: Serve
Once the tofu balls have heated through, turn off the heat and sprinkle the chopped green part of the scallion on top for a fresh crunch. Serve the Soy Garlic Tofu Balls hot on a bed of rice, alongside noodles, or wrapped in crisp lettuce leaves for a delightful meal that is both satisfying and nutritious.

Soy Garlic Tofu Balls Variations

Feel free to get creative with these delightful tofu balls and make them your own!

  • Chickpea Swap: Substitute tofu with mashed chickpeas for a different flavor and texture.

  • Lentil Delight: Use cooked lentils in place of tofu for a hearty twist that packs in protein and fiber.

  • Vegetable Medley: Add diced zucchini, grated carrots, or snap peas to the mixture for extra crunch and nutrition.

  • Gluten-Free Option: Swap regular soy sauce for tamari to keep the flavor while making it gluten-free for those who need it.

  • Sweet and Spicy: Kick things up a notch by adding a teaspoon of chili paste or a pinch of red pepper flakes to the sauce for extra heat. Adjust according to your taste — it’s a fantastic way to customize the dish!

  • Nutty Flavor: Toss in some chopped peanuts or cashews just before serving for a delightful crunch and an irresistible nutty flavor.

  • Herb Infusion: Mix fresh herbs like cilantro or basil into the tofu ball mixture for an aromatic twist that brightens the overall flavor.

  • Serve on Salads: These tofu balls are perfect as a protein-packed topping for your favorite salads or grain bowls. Try drizzling a bit of your favorite vinaigrette on top to complement the flavors beautifully.

Ready to experiment? There’s no shortage of ways to enjoy these tasty tofu balls! For additional inspiration, consider checking out our article on plant-based protein options to explore even more delicious alternatives.

Expert Tips for Soy Garlic Tofu Balls

  • Choose the Right Tofu: Use firm or extra-firm tofu for the best texture in these tofu balls. Silken tofu will be too soft and won’t hold its shape.

  • Fresh Garlic Matters: Opt for fresh garlic over pre-minced options. Freshly minced garlic provides a more vibrant and fragrant flavor in your sauce.

  • Mix & Match Veggies: Don’t hesitate to incorporate different vegetables! Zucchini, carrots, or snap peas can elevate the dish while still adding that crunch you’re looking for.

  • Thicken Properly: Always stir your sauce well after adding corn starch to evenly distribute it. This prevents lumps and ensures a smooth, glossy finish.

  • For Extra Crispiness: If you love a crispy exterior, consider air frying your tofu balls before adding them to the sauce. This technique enhances their flavor and texture.

  • Taste As You Go: Adjust the sweetness and saltiness of the sauce based on your personal preference. Remember, the goal is to create an irresistible flavor that you enjoy!

Make Ahead Options

These Soy Garlic Tofu Balls are perfect for meal prep enthusiasts! You can prepare the sauce up to 24 hours in advance by mixing the garlic, vinegar, soy sauce, oyster sauce, sugar, water, and corn starch, and store it in an airtight container in the refrigerator. The tofu balls can also be formed and refrigerated for up to 3 days; just ensure to cover them to prevent drying. When ready to serve, simply sauté your vegetables, simmer the prepped sauce, and add the refrigerated tofu balls for a quick finish. This way, you can enjoy delicious, homemade Soy Garlic Tofu Balls with minimal effort—ideal for busy weeknights!

What to Serve with Soy Garlic Tofu Balls

Dive into a vibrant, mouthwatering experience that transforms your meal into a culinary celebration for friends and family alike.

  • Steamed Jasmine Rice: Its floral notes and sticky texture perfectly balance the savory sauce, making each bite harmonious and satisfying. This comforting staple is always a crowd-pleaser.

  • Garlicky Sautéed Greens: Choose bok choy or spinach, lightly sautéed with garlic. Their earthy flavors harmonize beautifully with the soy garlic sauce, adding a fresh, vibrant touch.

  • Crispy Quinoa Salad: A nutty quinoa salad topped with fresh veggies and a light dressing brings a delightful crunch and complements the soft tofu balls, adding nutritional benefits to your meal.

  • Chili-Lime Noodles: Tossed with a splash of lime, these noodles offer a zesty kick that contrasts perfectly with the rich sauce of the tofu balls, creating a delightful flavor balance.

  • Cucumber Salad: A refreshing salad with sliced cucumbers, sesame oil, and rice vinegar adds a cool, crunchy element. It cleanses the palate, making for a light and refreshing side.

  • Mango Coconut Sticky Rice: Indulge in a sweet treat that pairs beautifully with the savory tofu balls. The creamy coconut flavors create a luxurious end to your meal.

  • Green Tea or Ginger Ale: Pair with a soothing cup of green tea to enhance the flavors of the dish or serve a chilled ginger ale for a fizzy, refreshing contrast.

How to Store and Freeze Soy Garlic Tofu Balls

Fridge: Store cooked tofu balls in an airtight container for up to 3 days. Be sure to let them cool completely before sealing to maintain freshness.

Freezer: You can freeze these tofu balls before or after cooking. To freeze, lay them out on a baking sheet to prevent sticking, then transfer to a freezer bag for up to 3 months.

Reheating: For the best texture, reheat frozen tofu balls in an air fryer or oven at 375°F (190°C) for about 10-15 minutes. This will keep them crispy and delicious!

Note: If reheating from the fridge, simply warm them in the same way or in a microwave. Enjoy the flavorful delight of soy garlic tofu balls anytime!

Soy Garlic Tofu Balls Recipe FAQs

What type of tofu should I use for the best results?
Absolutely! For these Soy Garlic Tofu Balls, I recommend using firm or extra-firm tofu. These types provide the right texture to hold their shape during cooking. Silken tofu, while creamy, is too soft and won’t work well for this recipe.

How long can I store the cooked tofu balls in the fridge?
You can store your cooked tofu balls in an airtight container in the fridge for up to 3 days. Just make sure they are completely cooled before sealing the container to maintain their freshness and avoid sogginess.

Can I freeze Soy Garlic Tofu Balls?
Very much yes! You can freeze these tofu balls both before and after cooking. To freeze, arrange the tofu balls on a baking sheet in a single layer and place them in the freezer until solid. Afterward, transfer them to a freezer bag and store for up to 3 months. They’ll be ready when you need a quick meal!

What is the best way to reheat frozen tofu balls?
For the best texture, reheat your frozen tofu balls in an air fryer or oven at 375°F (190°C) for about 10-15 minutes. This method will help keep them crispy and delicious. If they’re cooked and in the fridge, simply warm them in the air fryer or microwave. You’ll love how good they taste reheated!

Are there any dietary considerations for these tofu balls?
Definitely! These Soy Garlic Tofu Balls are naturally vegan and can be easily made gluten-free by substituting soy sauce with tamari. Be mindful if you or your guests have allergies, particularly to soy, as tofu is a soy product.

Can I modify the vegetable ingredients based on what I have at home?
Absolutely! Feel free to mix and match veggies as you please. Broccoli, carrots, or even snap peas can work wonderfully in this recipe. The more, the merrier—experiment to find your favorite combinations!

undefined

Irresistible Soy Garlic Tofu Balls That Wow Every Bite

These Soy Garlic Tofu Balls are a quick, flavorful, and nourishing vegan option for dinner.
Prep Time 15 minutes
Cook Time 30 minutes
Total Time 45 minutes
Servings: 4 balls
Course: Dinner
Cuisine: Vegan
Calories: 200

Ingredients
  

For the Tofu Balls
  • 10 pieces Tofu the main protein source that gives these balls their structure.
For the Sauce
  • 3 cloves Garlic minced; adds an intense savory flavor; fresh garlic is preferred.
  • 1 tbsp Chinese Black Vinegar or Rice Vinegar provides acidity; can substitute with apple cider vinegar.
  • 1/2 tbsp Soy Sauce contributes umami and saltiness; use tamari for a gluten-free option.
  • 1 tbsp Vegetarian Oyster Sauce adds richness and depth; hoisin sauce can be an alternative.
  • 2 tbsp Sugar balances the saltiness and enhances the sauce’s flavor; maple syrup works for a vegan option.
  • 1 tbsp Room Temperature Water helps in adjusting sauce consistency.
  • 1/2 tbsp Corn Starch thickens the sauce beautifully; arrowroot powder can be a substitute.
  • 1 tbsp Neutral Oil essential for sautéing; vegetable or canola oil works.
For the Vegetables
  • 1 Scallion (chopped; green and white parts separated).
  • 1/2 small Shallot or Red Onion diced; adds sweetness and depth.
  • 1/2 Red Bell Pepper (seeded and diced; brings color and sweetness to the mix).

Equipment

  • medium bowl
  • large pan or wok

Method
 

Step-by-Step Instructions
  1. In a medium bowl, whisk together garlic, vinegar, soy sauce, vegetarian oyster sauce, and sugar. Gradually add water and corn starch until fully combined.
  2. Heat neutral oil in a large pan over medium heat. Add chopped white part of the scallion and sauté for about 1 minute. Then add shallot and red bell pepper, cooking for 4-5 minutes.
  3. Stir the sauce mixture and pour it into the pan with the sautéed vegetables. Allow the sauce to simmer until it thickens, about 3-4 minutes.
  4. Carefully add the tofu balls to the sauce, ensuring they are coated. Cook for another 2-3 minutes.
  5. Sprinkle chopped green part of the scallion on top and serve hot with rice or noodles.

Nutrition

Serving: 2ballsCalories: 200kcalCarbohydrates: 25gProtein: 10gFat: 8gSaturated Fat: 1gPolyunsaturated Fat: 2gMonounsaturated Fat: 3gSodium: 600mgPotassium: 300mgFiber: 3gSugar: 4gVitamin A: 500IUVitamin C: 20mgCalcium: 80mgIron: 2mg

Notes

Use firm or extra-firm tofu for the best texture. Fresh garlic provides a more vibrant flavor. Feel free to mix in different vegetables to suit your taste.

Tried this recipe?

Let us know how it was!

Creamy African Peanut Stew to Warm Your Soul

As I stirred the pot, a warm, nutty aroma enveloped my kitchen, transporting me to the heart of West Africa. This Creamy African Peanut Stew with Sweet Potatoes is not just a hearty dish; it’s a comforting hug in a bowl that effortlessly combines rich flavors and wholesome nutrition. Perfect for busy weeknights or a cozy gathering with friends, this stew is both gluten-free and dairy-free, ensuring it caters to a variety of dietary needs without compromising on taste. The creamy blend of peanut butter and sweet potatoes creates a satisfying texture, while the vibrant greens add a pop of color and essential nutrients. Are you ready to dive into a culinary experience that will awaken your senses and leave you wanting more?

What Makes This Stew Irresistible?

Comforting, every spoonful feels like a warm embrace, perfect for chilly evenings. Versatile, whether you prefer a meat-based dish or plant-based options, this stew is adaptable for everyone. Rich in flavor, the combination of creamy peanut butter, aromatic spices, and hearty sweet potatoes create an unforgettable taste experience. Quick to prepare, it easily transitions from stovetop to Instant Pot, making it a time-saver for busy cooks. Nutrient-dense, filled with fiber and healthy fats, it’s a meal that fuels both body and soul—ideal for those looking to ditch fast food. Experience a delightful escape with our African Peanut Stew and transform your dinner routine!

African Peanut Stew Ingredients

For the Stew

  • Tomato Sauce – Provides acidity and moisture; substitute with canned diced tomatoes for a tangy flavor.
  • Creamy Peanut Butter (natural, no-stir) – Adds richness, flavor, and healthy fats; sunflower seed butter can be used for nut-free options.
  • Smoked Paprika – Imparts a warm, smoky flavor; use regular paprika if unavailable.
  • Ground Coriander – Offers citrusy notes and warmth; ground cumin can be substituted in equal amounts.
  • Kosher Salt & Black Pepper – Enhances overall flavor; adjust to taste.
  • Cayenne Pepper (optional) – Adds heat; omit for a milder dish.
  • Cooking Oil (neutral) – Essential for sautéing; avocado or vegetable oil are good options.
  • Protein (optional) – Chicken, turkey, or chickpeas for a meat-free version; adjust cooking time based on the protein used.
  • Chicken or Vegetable Broth – Provides depth of flavor and liquid for the stew; use low-sodium options if preferred.
  • Chopped Onion – Adds sweetness and depth when caramelized.
  • Sweet Potatoes – Provides sweetness and texture; regular potatoes can be substituted.
  • Spinach (or other greens) – Adds nutrition and color; kale or chard can be used instead.
  • Minced Garlic & Fresh Ginger – Aromatics that provide essential flavor; ground ginger can substitute if fresh is not available.

Embrace the comforting and hearty flavors of this African Peanut Stew, and let it become a family favorite that brings everyone to the table!

Step-by-Step Instructions for Creamy African Peanut Stew with Sweet Potatoes

Step 1: Make the Sauce
In a blender, combine the tomato sauce, creamy peanut butter, smoked paprika, ground coriander, kosher salt, black pepper, and cayenne pepper (if using). Blend until smooth and silky, ensuring all ingredients are well incorporated. This vibrant sauce will form the rich base of your Creamy African Peanut Stew, so take your time to achieve a buttery texture.

Step 2: Sauté Aromatics
Heat 2 tablespoons of cooking oil in a large pot over medium heat. Once the oil is shimmering, add the minced garlic and ginger, sautéing for about 1-2 minutes until fragrant. Then, add the chopped onion, cooking for an additional 5-7 minutes until the onions are translucent and soft, releasing their sweetness into the stew.

Step 3: Combine and Cook
Stir in the diced sweet potatoes and carrots to the pot, coating them with the aromatic mixture. Pour in the prepared sauce and add 4 cups of chicken or vegetable broth, stirring to combine everything well. The broth will help to meld the flavors together while providing a deliciously creamy consistency.

Step 4: Simmer
Cover the pot and reduce the heat to low, allowing the stew to simmer gently for 40-60 minutes. Stir occasionally, ensuring the vegetables don’t stick to the bottom. You’ll know it’s ready when the sweet potatoes are tender enough to be pierced easily with a fork and the flavors have melded beautifully.

Step 5: Add Greens
Once the sweet potatoes are tender, add in the spinach (or other greens of your choice) and stir until wilted, about 3-5 minutes. This final addition of greens brightens up your Creamy African Peanut Stew, adding essential nutrients and a beautiful pop of color to the dish.

Step 6: Serve
Ladle the delicious stew into bowls and garnish with chopped peanuts, fresh cilantro, and optional chili for added spice. Serve your hearty Creamy African Peanut Stew over rice, quinoa, or cauliflower rice for a balanced and satisfying meal that will warm your soul on any occasion.

How to Store and Freeze African Peanut Stew

Fridge: Store leftovers in an airtight container for up to 4 days. It’s perfect for quick lunch options or cozy dinners during the week.

Freezer: Freeze the stew in portions using freezer-safe containers for up to 3 months. Make sure to leave some space in the container, as the stew may expand when frozen.

Reheating: To reheat, thaw in the fridge overnight or use the microwave. Add a splash of broth while reheating to achieve your desired consistency and maintain the creamy texture.

Make-Ahead: This African Peanut Stew can be made ahead of time for easy meal prep. Just store in the fridge or freezer for convenient access when needed.

Expert Tips for Creamy African Peanut Stew

  • Perfect Sauce Texture: Blend the sauce until completely smooth. This ensures a velvety finish to your Creamy African Peanut Stew, avoiding any chunkiness in the sauce.

  • Adjust Cooking Time: If using chicken, roast or sauté it first before adding it to the stew. Cooked meat will integrate more flavor, while adjusting cooking times helps ensure everything is perfectly tender.

  • Watch the Heat: If you enjoy spice, add cayenne pepper or fresh chilies! Start with a small amount and adjust to taste, keeping in mind that you can always add but can’t take away.

  • Thicken It Up: If you find your stew too soupy, simmer uncovered for the last 10 minutes. This will let excess liquid evaporate and give your stew a thicker consistency.

  • Explore Variations: Experiment with different proteins like lentils for a vegetarian twist, or butternut squash instead of sweet potatoes to mix up the flavor profile of your Creamy African Peanut Stew.

What to Serve with Creamy African Peanut Stew with Sweet Potatoes

A cozy meal deserves some delightful companions to elevate your dining experience!

  • Fluffy Rice: Perfect for soaking up the creamy stew’s richness, rice provides a comforting base and pairs beautifully with the nutty flavors.
  • Warm Crusty Bread: The ideal accompaniment to scoop up every last drop of your stew, it adds a delightful crisp texture and warmth to your meal.
  • Quinoa: This nutty, protein-packed grain not only complements the stew’s flavors but also adds a slightly crunchy texture, enhancing each bite.
  • Zesty Side Salad: A fresh salad with citrus dressing offers a bright contrast, balancing the richness of the stew with refreshing crunch.
  • Roasted Vegetables: Caramelized veggies bring depth and sweetness that harmonize with the flavors in the stew, adding variety and nutrition to your meal.
  • Chilled Cucumber Raita: The cool creaminess of this yogurt-based sauce helps to balance the warm spices in the stew, enhancing the overall flavor experience.
  • Sparkling Water: A bubbly drink can cleanse your palate between bites, making it a refreshing option to sip alongside your warm bowl of stew.
  • Dark Chocolate: For dessert, a piece of dark chocolate offers a touch of richness and a delightful finish that mirrors the stew’s comforting essence.

Make Ahead Options

These Creamy African Peanut Stew with Sweet Potatoes are perfect for busy meal prep enthusiasts! You can prepare the sauce and chop the vegetables up to 24 hours in advance, allowing the flavors to meld beautifully while keeping the sweetness of the sweet potatoes intact. Store the sauce in an airtight container in the fridge and refrigerate the chopped veggies separately. When you’re ready to serve, simply sauté the aromatics and add the prepped ingredients to the pot along with the broth. This way, you’ll enjoy just as delicious results with minimal effort, letting you savor precious time with your loved ones while still enjoying a hearty, home-cooked meal.

African Peanut Stew Variations to Try

Feel free to get creative with this delightful stew and make it your own!

  • Meat Lovers: For added protein, incorporate chunks of chicken, turkey, or beef to complement the rich peanut flavor and make it even heartier.

  • Vegetarian Delight: Replace meat with cooked lentils or kidney beans for a nutritious, meat-free version that’s just as filling and delicious.

  • Sweet Swap: Swap sweet potatoes for diced butternut squash for a slightly different flavor that maintains the stew’s comforting nature. It brings a lovely sweetness and unique texture.

  • Green Goodness: Use kale, collard greens, or bok choy instead of spinach for a boost in nutrients and a change in texture. Each offers its unique earthy flavor.

  • Spice It Up: Enhance the heat by adding more cayenne pepper or fresh chili peppers, if you’re craving an extra kick. Adjust gradually to find your perfect balance!

  • Creamy Alternatives: If you want to try a different creamy base, use tahini instead of peanut butter for a nut-free or unique twist that’s equally delicious.

  • Herbaceous Twist: Introduce fresh herbs like cilantro or basil towards the end of cooking for a fresh burst of flavor that elevates your stew to a whole new level!

  • Culinary Journey: For a touch of international flair, add a splash of coconut milk for added creaminess and a hint of tropical flavor that beautifully complements the spices.

Remember, cooking is all about experimenting and finding your unique preferences. Dive into the world of flavors with your African Peanut Stew and enjoy turning this beloved recipe into something truly special!

Creamy African Peanut Stew with Sweet Potatoes Recipe FAQs

How do I select ripe sweet potatoes?
When choosing sweet potatoes, look for ones that are firm and smooth. Avoid those with dark spots or soft areas, as these can indicate spoilage. Ideally, they should have a uniform color and feel heavy for their size.

What is the best way to store leftovers of the stew?
Store any leftovers in an airtight container in the fridge for up to 4 days. This makes it easily accessible for quick lunches. To keep the flavors fresh, ensure the container is well-sealed and store it away from strong-smelling foods.

Can I freeze the Creamy African Peanut Stew?
Absolutely! To freeze the stew, pour it into freezer-safe containers, leaving some space at the top for expansion. It can be frozen for up to 3 months. When you’re ready to enjoy it, thaw it in the fridge overnight before reheating.

How can I prevent my stew from being too watery?
If your stew turns out watery, you can simmer it uncovered for the last 10 minutes of cooking. This helps the excess liquid evaporate and thickens the stew to that creamy, hearty texture everyone loves. Stir occasionally to prevent sticking.

Is this recipe pet-friendly?
This stew isn’t suitable for pets due to the presence of garlic and onion, which can be toxic to dogs and cats. Always check the ingredients before sharing any human food with your furry friends.

How can I adjust the spiciness of the stew?
To adjust the heat level, you can start with a small amount of cayenne pepper and taste as you cook. If you desire more heat, consider adding fresh chilies or more cayenne. Remember, it’s easier to add more spice than to mellow it out if it’s too hot!

This Creamy African Peanut Stew recipe is perfect for cozy evenings, offering warmth and flavor that will tantalize your taste buds!

undefined

Creamy African Peanut Stew to Warm Your Soul

This Creamy African Peanut Stew combines rich flavors with wholesome nutrition, making it a comforting gluten-free and dairy-free meal ideal for any occasion.
Prep Time 15 minutes
Cook Time 1 hour
Total Time 1 hour 15 minutes
Servings: 4 bowls
Course: Dinner
Cuisine: African
Calories: 350

Ingredients
  

For the Stew
  • 1 can Tomato Sauce or canned diced tomatoes for tangy flavor
  • 1/2 cup Creamy Peanut Butter (natural, no-stir) or sunflower seed butter for nut-free options
  • 1 tsp Smoked Paprika or regular paprika if unavailable
  • 1 tsp Ground Coriander or ground cumin in equal amounts
  • 1 tsp Kosher Salt adjust to taste
  • 1/2 tsp Black Pepper adjust to taste
  • 1/4 tsp Cayenne Pepper optional for heat
  • 2 tbsp Cooking Oil (neutral) avocado or vegetable oil preferred
  • 1 cup Protein (optional) Chicken, turkey, or chickpeas
  • 4 cups Chicken or Vegetable Broth low-sodium options recommended
  • 1 small Chopped Onion adds sweetness and depth
  • 2 medium Sweet Potatoes can substitute regular potatoes
  • 2 cups Spinach or other greens like kale or chard
  • 2 cloves Minced Garlic
  • 1 tbsp Fresh Ginger or ground ginger as substitute

Equipment

  • blender
  • Large pot

Method
 

Step-by-Step Instructions for Creamy African Peanut Stew
  1. In a blender, combine the tomato sauce, creamy peanut butter, smoked paprika, ground coriander, kosher salt, black pepper, and cayenne pepper (if using). Blend until smooth and silky.
  2. Heat 2 tablespoons of cooking oil in a large pot over medium heat. Add the minced garlic and ginger, sauté for 1-2 minutes until fragrant, then add the chopped onion and cook until translucent.
  3. Stir in the diced sweet potatoes and protein, then pour in the prepared sauce and 4 cups of broth. Stir well to combine.
  4. Cover and reduce heat to low, simmering for 40-60 minutes until sweet potatoes are tender.
  5. Add the spinach and stir until wilted, about 3-5 minutes.
  6. Serve in bowls, garnished with chopped peanuts, fresh cilantro, and optional chili.

Nutrition

Serving: 1bowlCalories: 350kcalCarbohydrates: 45gProtein: 12gFat: 14gSaturated Fat: 3gPolyunsaturated Fat: 2gMonounsaturated Fat: 8gSodium: 800mgPotassium: 900mgFiber: 8gSugar: 8gVitamin A: 12000IUVitamin C: 30mgCalcium: 80mgIron: 3mg

Notes

Store leftovers in an airtight container for up to 4 days, or freeze for up to 3 months. Reheat with a splash of broth to maintain texture.

Tried this recipe?

Let us know how it was!

Irresistibly Flavorful Jamaican Brown Stew Chicken Recipe

As I stood in my kitchen, the tantalizing aroma of marinated chicken began to waft through the air, whisking me away to sun-soaked Caribbean shores. This Authentic Jamaican Brown Stew Chicken is that perfect blend of tender, savory goodness that can transform any weeknight dinner into a festive feast. With its rich spices and quick prep time, it fits seamlessly into our busy lives while still delivering comfort and warmth to the table. Easy to make and irresistibly flavorful, this dish is about to become your new favorite family staple. Curious about how to make this delightful meal? Let’s dive in!

Why is Jamaican Brown Stew Chicken amazing?

Authentic Flavors: Experience the bold taste of the Caribbean! This dish combines aromatic spices and fresh ingredients for an unforgettable meal.

Effortless Cooking: With just a few simple steps, you can create a gourmet dish without spending hours in the kitchen, making it perfect for busy evenings.

Versatile Dish: Not only is it delicious, but you can also customize it! Substitute proteins or add your favorite veggies to make it truly your own.

Crowd-Pleaser: Whether you’re serving family or guests, this dish is sure to impress everyone at the table, turning any meal into a special occasion.

Healthy Choice: Enjoy a flavor-packed meal that’s also nutritious. Serve it with a side of steamed veggies to round out your meal beautifully.

Make sure to check out our serving suggestions for pairing ideas, including Jamaican Rice and Peas for that authentic culinary experience!

Jamaican Brown Stew Chicken Ingredients

• Dive into this mouthwatering Authentic Jamaican Brown Stew Chicken with these key ingredients!

For the Chicken

  • Chicken – Use a whole chicken or preferred cuts; bone-in is recommended for richer flavor.
  • Salt and Black Pepper – Essential for flavor enhancement; adjust according to your taste preferences.
  • Browning – This adds color and flavor depth; you can create your own from burnt sugar or caramel.

For the Marinade

  • Onion – Sweet or yellow varieties provide a lovely depth of flavor.
  • Garlic – Fresh is best; minced or grated will give an aromatic boost.
  • Escallion (Green Onion) – Offers mild peppery notes; finely chop for better incorporation.
  • Fresh Thyme – A key herb for authentic flavor; always opt for fresh when possible.
  • Bay Leaves – Optional, but they lend a subtle aroma to the dish.
  • Scotch Bonnet Pepper – It brings heat and flavor; adjust based on your spice tolerance, or substitute with Habanero.
  • Pimento Seeds (Allspice Berries) – Adds warm, aromatic notes to the dish; these can be crushed or left whole.
  • Dark Brown Sugar – It balances the savory elements of the dish with a touch of sweetness.

For Braising and Flavor

  • Low Sodium Chicken Stock – Used for simmering, it preserves flavor without adding too much salt.
  • Red and Green Bell Pepper – Adds color and sweetness; julienned or diced for a nice texture.
  • Ketchup – Provides a rich taste and helps thicken the gravy.
  • Soy Sauce – Optional, but it adds a depth of umami richness.
  • Olive Oil – Great for browning the chicken; can be replaced with any neutral oil.

Feel free to explore ingredient variations to make this Authentic Jamaican Brown Stew Chicken uniquely yours!

Step‑by‑Step Instructions for Authentic Jamaican Brown Stew Chicken

Step 1: Prep Chicken
Start by preparing your chicken. Remove the skin, trim any excess fat, and wash the pieces thoroughly with vinegar to ensure cleanliness. Pat the chicken dry with paper towels, then chop it into even pieces, which will help in marinating and cooking evenly. Ensure you’re ready for marination, as this step is crucial for developing rich flavors in your Jamaican Brown Stew Chicken.

Step 2: Marinate Chicken
In a large mixing bowl, combine the chicken with diced onions, chopped escallion, minced garlic, fresh thyme, bay leaves, browning sauce, dark brown sugar, crushed pimento seeds, paprika, salt, black pepper, and the chopped scotch bonnet pepper. Stir everything together until the chicken is fully coated in the spices. For optimal flavor infusion, let it marinate for at least 1 hour, although overnight in the refrigerator is best for deeper tastes.

Step 3: Brown Chicken
Heat a generous amount of olive oil in a Dutch oven over medium-high heat. Once the oil is shimmering, carefully remove the chicken from the marinade, reserving the marinade for later. Add the chicken to the pot in a single layer and brown it on all sides for about 5-10 minutes, ensuring a beautiful golden color develops. This step creates a rich base for the flavors of your Jamaican Brown Stew Chicken.

Step 4: Simmer Chicken
After browning, add the reserved marinade and low sodium chicken stock to the pot, stirring to combine. Bring the mixture to a boil over high heat, then reduce the temperature to low and cover the pot. Allow the chicken to simmer for about 30 minutes or until it becomes tender and the flavors meld beautifully. Stir in ketchup toward the end of cooking to enhance the gravy’s thickness and taste.

Step 5: Serve
Once the chicken is tender, carefully remove the bay leaves, scotch bonnet, and any herb sprigs from the pot. Your Authentic Jamaican Brown Stew Chicken is now ready to be enjoyed! Serve it hot alongside traditional sides like Jamaican Rice and Peas or steamed vegetables for a complete meal that delights every palate.

How to Store and Freeze Jamaican Brown Stew Chicken

Fridge: Store leftovers in an airtight container for up to 3 days. This method keeps your Jamaican Brown Stew Chicken fresh and flavorful, allowing the spices to deepen.

Freezer: For longer storage, freeze in portions for up to 2-3 months. Make sure to use freezer-safe containers to prevent freezer burn and preserve taste.

Reheating: When ready to enjoy, reheat your Jamaican Brown Stew Chicken on medium-low heat on the stove or in the microwave, stirring occasionally until warmed through.

Thawing: If frozen, thaw overnight in the fridge for the best flavor and texture before reheating.

What to Serve with Authentic Jamaican Brown Stew Chicken

Elevate your dining experience with vibrant sides that enhance the rich, comforting flavors of this Caribbean classic.

  • Jamaican Rice and Peas: This traditional side offers a delightful mix of coconut flavor and herbs, harmonizing beautifully with the savory chicken.
  • Steamed Cabbage: Light and tender, steamed cabbage provides a refreshing crunch and balances the flavors of the stew. Serve it with a sprinkle of salt for extra zest.
  • Fried Plantains: Sweet and caramelized, fried plantains add a delightful contrast, offering bursts of sweetness that pair wonderfully with the savory chicken.
  • Cornmeal Dumplings: These fluffy dumplings soak up the gravy, making them a hearty addition that adds a comforting touch to your meal.
  • Grilled Vegetables: Colorful, smoky, and slightly charred vegetables bring an exciting freshness, complementing the depth of the stew. Think bell peppers, zucchini, and eggplant for extra flavor.
  • Beverage Pairing – Ginger Beer: This refreshing, spicy drink enhances the aromatic experience of the meal, making it a classic Caribbean combination.
  • Coconut Flan for Dessert: End on a sweet note with this creamy dessert that embodies tropical flavors, providing a lovely finish after the bold stew.

Jamaican Brown Stew Chicken Variations

Feel free to get creative with your Jamaican Brown Stew Chicken and make it uniquely yours with these exciting variations!

  • Vegetable Boost: Add chopped carrots or diced tomatoes for extra nutrients and a pop of color in your stew. The sweetness of the carrots beautifully complements the savory chicken.

  • Alternate Proteins: Substitute chicken with fish or pork for a different flavor experience. Each protein will add its own touch, making the dish versatile and fun to explore.

  • Herb Twist: Consider adding fresh parsley or cilantro for a refreshing twist. This brightens the dish and enhances the Caribbean feel.

  • Spicy Adjustment: If you’re a fan of heat, feel free to include additional scotch bonnet or jalapeño. Alternatively, for less spice, use bell peppers instead for a milder flavor.

  • Creamy Addition: Stir in coconut milk toward the end of cooking for a creamy, tropical finish. This will make the sauce rich and luscious, perfect for soaking up with rice.

  • Flavorful Marinades: Experiment with different marinades, like citrus juice or a dash of Jamaican jerk seasoning, to create exciting new profiles. These variations can transform the dish into something completely different!

  • Root Veggies: Toss in diced sweet potatoes or yams during simmering for a heartier texture. They absorb the delicious flavors beautifully and add soul to the meal.

Make sure to check out some delectable sides like Jamaican Rice and Peas or enjoy it alongside steamed vegetables to elevate your meal experience!

Expert Tips for Jamaican Brown Stew Chicken

  • Marinate Well: Allow your chicken to marinate for at least one hour, but overnight is best. This ensures the spices penetrate deeply for enhanced flavor in your Jamaican Brown Stew Chicken.

  • Browning Technique: Brown the chicken thoroughly before simmering. A good sear adds texture and depth of flavor, so don’t rush this step!

  • Vegetable Variations: For a heartier dish, consider adding root vegetables like potatoes or carrots during the simmering stage. They absorb the delicious sauce and add nutritional value.

  • Taste as You Go: Always taste and adjust your seasonings before serving. This final check guarantees a perfectly balanced flavor in your Jamaican Brown Stew Chicken.

  • Gravy Thickness: If you prefer a thicker gravy, mix a tablespoon of cornstarch with cold water and stir it into the sauce during the last few minutes of simmering.

Make Ahead Options

These Authentic Jamaican Brown Stew Chicken preparations are perfect for meal prep enthusiasts! You can marinate the chicken up to 24 hours in advance, allowing the flavors to deeply penetrate for a more robust taste. Simply combine the chicken with all the marinade ingredients and store it in an airtight container in the refrigerator. On the day you plan to cook, just brown the chicken as instructed, add the reserved marinade and chicken stock, and simmer until tender. The dish will be just as delicious and save you valuable cooking time on busy weeknights. Enjoy the convenience while delighting your family with this flavorful meal!

Jamaican Brown Stew Chicken Recipe FAQs

What type of chicken is best for Jamaican Brown Stew Chicken?
Absolutely! For the best flavor, I recommend using a whole chicken or bone-in cuts. Bone-in pieces add rich flavor during braising, resulting in tender, juicy meat. If you prefer, you can also use skinless chicken thighs or drumsticks for a more affordable option.

How should I store Jamaican Brown Stew Chicken leftovers?
For optimal freshness, store leftovers in an airtight container in the refrigerator for up to 3 days. When using this storage method, the spices may even deepen in flavor, making your next meal even more delightful!

Can I freeze Jamaican Brown Stew Chicken, and how?
Very! To freeze, first allow the dish to cool completely. Then, transfer it to a freezer-safe container or heavy-duty freezer bags. Seal tightly, removing as much air as possible, and store for up to 2-3 months. When ready to enjoy, simply thaw in the fridge overnight and reheat on medium-low heat for the best results.

What can I do if my stew isn’t thick enough?
If you find your gravy is too thin, no worries! Mix one tablespoon of cornstarch with two tablespoons of cold water to create a slurry. Stir this mixture into your simmering stew, then let it cook for a few more minutes until thickened to your liking. This method works wonderfully to achieve that luscious, velvety sauce you desire.

Is Jamaican Brown Stew Chicken suitable for special diets?
Absolutely! If you’re watching your sodium intake, use low-sodium chicken stock and adjust the added salt accordingly. For a gluten-free version, simply skip the soy sauce or use a gluten-free alternative. Additionally, always make sure to check and consider any allergies related to ingredients like the Scotch bonnet pepper or allspice. Enjoy adapting it to meet your dietary needs!

undefined

Irresistibly Flavorful Jamaican Brown Stew Chicken Recipe

This Authentic Jamaican Brown Stew Chicken is a blend of tender goodness with rich spices, perfect for busy weeknight dinners.
Prep Time 1 hour
Cook Time 40 minutes
Total Time 1 hour 40 minutes
Servings: 4 servings
Course: Dinner
Cuisine: Caribbean
Calories: 450

Ingredients
  

For the Chicken
  • 1 whole Chicken Bone-in cuts recommended for flavor
  • 1 tsp Salt Adjust to taste
  • 1 tsp Black Pepper Adjust to taste
  • 2 tbsp Browning Adds color and flavor depth
For the Marinade
  • 1 large Onion Sweet or yellow varieties
  • 4 cloves Garlic Minced or grated
  • 3 stalks Escallion (Green Onion) Finely chopped
  • 2 tbsp Fresh Thyme Preferably fresh
  • 2 leaves Bay Leaves Optional
  • 1 medium Scotch Bonnet Pepper Adjust for spice tolerance
  • 1 tsp Pimento Seeds (Allspice Berries) Can be crushed or left whole
  • 1 tbsp Dark Brown Sugar Balances savory elements
For Braising and Flavor
  • 2 cups Low Sodium Chicken Stock For simmering
  • 1 medium Red Bell Pepper Julienned or diced
  • 1 medium Green Bell Pepper Julienned or diced
  • 1 tbsp Ketchup For thickening the gravy
  • 1 tbsp Soy Sauce Optional, adds umami
  • 3 tbsp Olive Oil For browning the chicken

Equipment

  • Dutch oven
  • Mixing Bowl
  • Cutting board
  • Knife

Method
 

Step-by-Step Instructions
  1. Start by preparing your chicken. Remove the skin, trim any excess fat, and wash the pieces thoroughly with vinegar. Pat dry and chop into even pieces.
  2. In a large mixing bowl, combine chicken with diced onions, chopped escallion, minced garlic, fresh thyme, bay leaves, browning sauce, dark brown sugar, crushed pimento seeds, paprika, salt, black pepper, and the chopped scotch bonnet pepper. Stir until fully coated and let marinate for at least 1 hour.
  3. Heat olive oil in a Dutch oven over medium-high heat. Remove chicken from marinade, add to the pot in a single layer, and brown on all sides for about 5-10 minutes.
  4. Add reserved marinade and low sodium chicken stock to the pot, bring to a boil, then reduce to low heat and cover. Simmer for about 30 minutes.
  5. Remove bay leaves, scotch bonnet, and herb sprigs before serving your Jamaican Brown Stew Chicken hot with sides like Jamaican Rice and Peas or steamed vegetables.

Nutrition

Serving: 1plateCalories: 450kcalCarbohydrates: 20gProtein: 30gFat: 25gSaturated Fat: 7gPolyunsaturated Fat: 5gMonounsaturated Fat: 12gCholesterol: 80mgSodium: 600mgPotassium: 700mgFiber: 2gSugar: 5gVitamin A: 800IUVitamin C: 50mgCalcium: 50mgIron: 2mg

Notes

Allow chicken to marinate overnight for deeper flavor. Taste and adjust seasonings before serving.

Tried this recipe?

Let us know how it was!

Lemon Pepper Tofu with Asparagus: A Vibrant Vegan Delight

The first time I embraced tofu, it felt like a culinary adventure I wasn’t quite ready for, but that all changed when I discovered the perfect balance of flavors in Lemon Pepper Tofu with Roasted Asparagus. This dish transforms simple ingredients into a zesty delight that’s not only a feast for the senses but also just what you need for a quick and nourishing meal. Whipping it up takes less than 30 minutes, making it an ideal solution for those busy weeknights when you’re craving something comforting yet healthy. Plus, it’s budget-friendly and jam-packed with protein, ready to fuel your passion for homemade food. Are you ready to dive into a vibrant plate of plant-based goodness that will leave you eager for seconds?

Why is this recipe a must-try?

Quick and Easy: With just 30 minutes to plate, this Lemon Pepper Tofu recipe is perfect for busy nights.

Crispy Perfection: Enjoy golden, crunchy tofu coated with zesty lemon and pepper, bringing delightful textures to your meal.

Packed with Flavor: The combination of bright lemon juice and rich nutritional yeast gives a flavor punch that even non-vegans will crave!

Versatile Ingredients: Swap asparagus for your favorite veggies like broccoli or bell peppers, tailoring the dish to your tastes.

Nutritional Boost: This dish is a high-protein powerhouse that supports your dietary needs while keeping your meals exciting.

Try serving it over quinoa for added protein and a wholesome finish. Prepare to be amazed!

Lemon Pepper Tofu Ingredients

For the Tofu
Tofu – Select super firm or extra firm for the best texture; pressing or freezing beforehand enhances chewiness.
Cornstarch – Creates a crispy coating for tofu; it’s optional but highly recommended for that perfect crunch.

For the Asparagus
Asparagus – Fresh asparagus provides vibrant color and fiber; feel free to substitute with broccoli or carrots if desired.
Olive Oil – Essential for roasting asparagus and frying tofu; avocado oil makes a fine substitute.
Salt and Pepper – Crucial for seasoning; adjust to your personal taste preference.

For the Sauce
Lemon Juice – Adds acidity to brighten flavors; using fresh lemon juice is preferred for maximum zest.
Lemon Zest – Intensifies the lemon flavor; ensure you use fresh zest for the best aroma.
Nutritional Yeast – Offers an umami flavor boost; though optional, it enhances the deliciousness of the dish.
Red Pepper Flakes – Adds a touch of heat; adjust to your spice tolerance for the perfect kick.
Garlic – Fresh minced garlic enhances flavor depth; it’s best to avoid pre-minced options for freshness.

This vibrant Lemon Pepper Tofu recipe is not only quick and easy but packed with protein, making it a fantastic choice for a satisfying vegan meal!

Step‑by‑Step Instructions for Lemon Pepper Tofu with Roasted Asparagus

Step 1: Preheat the Oven
Begin by preheating your oven to 400°F (200°C). This step is crucial for achieving perfectly roasted asparagus that is tender yet slightly crispy. While waiting for the oven to heat, gather your baking sheet and parchment paper for easy cleanup.

Step 2: Prep Asparagus
Trim the woody ends off the asparagus and place the spears in a mixing bowl. Drizzle with olive oil, then sprinkle nutritional yeast, salt, pepper, lemon juice, and lemon zest on top. Toss well to evenly coat the asparagus, then spread them out in a single layer on the prepared baking sheet. Roast for 15-20 minutes, or until they’re tender and slightly charred.

Step 3: Dredge Tofu
Slice your pressed tofu into bite-sized blocks, making sure to press out any excess moisture for a firmer texture. In a shallow dish, coat the tofu pieces in a light layer of cornstarch, ensuring all sides are covered for that crispy finish. Heat a non-stick skillet over medium heat with a splash of oil, adding the tofu once hot. Fry for 5-7 minutes, until golden and crispy on both sides.

Step 4: Make Sauce
In the same skillet where you fried the tofu, add minced garlic and red pepper flakes. Sauté for about a minute until fragrant, being careful not to let the garlic burn. Next, whisk in additional lemon juice and zest, along with any extra seasonings you desire. Allow the sauce to simmer for a couple of minutes until it slightly reduces and thickens.

Step 5: Combine
Carefully return the crispy tofu to the skillet filled with the lemon sauce. Toss gently so each piece of tofu is coated in the zesty goodness. Cook for an additional minute, allowing the flavors to meld beautifully. This step ensures your Lemon Pepper Tofu has that delightful citrus kick.

Step 6: Serve
Transfer the savory tofu and roasted asparagus to your serving plates. For an added pop of flavor, garnish with a touch of extra lemon zest. This vibrant presentation not only pleases the palate but makes for a visually appealing meal ready to impress family and friends!

Expert Tips for Lemon Pepper Tofu

Press Your Tofu: Ensure you press the tofu thoroughly before cooking to remove moisture, preventing it from becoming soggy and ensuring crispy results.

Coating Crispy Tofu: For the best texture, generously coat your tofu in cornstarch. This will create that desirable crunch when frying.

Fresh Ingredients Matter: Use fresh lemon juice and zest for maximum flavor impact; this enhances the overall taste of the lemon pepper sauce and tofu.

Customize Your Veggies: Feel free to swap out asparagus for your favorite seasonal vegetables like broccoli or bell peppers, ensuring your Lemon Pepper Tofu stays exciting every time.

Serve Immediately: This dish is best enjoyed right after cooking to maintain its crispy texture; if preparing ahead, store in an airtight container and reheat in a skillet to revive crispiness.

Lemon Pepper Tofu Variations & Substitutions

Feel free to get creative with this recipe and make it your own! Each twist will add a unique spin to your dish, elevating the flavors and textures.

  • Dairy-Free: Use coconut yogurt or cashew cream instead of any dairy-style sauce for a creamy texture.
  • Gluten-Free: Swap cornstarch for a gluten-free flour blend when dredging tofu to maintain crispiness without the gluten.
  • Spicy Twist: Add a teaspoon of sriracha to the lemon sauce for a fiery touch that will excite your taste buds.
  • Herb-Infused: Experiment with fresh herbs such as thyme or rosemary to brighten up the dish; they pair beautifully with lemon.
  • Protein Boost: Toss in some chickpeas or edamame during the cooking process to amp up the protein content even more.
  • Veggie Variety: Substitute asparagus with seasonal vegetables like zucchini or snap peas for a colorful mix. Each offers a delightful crunch that complements the tofu.
  • Soy Sauce Swap: For depth, incorporate a tablespoon of tamari or soy sauce into the marinade for a savory sheen that enriches the dish.
  • Zesty Couscous Base: Serve the tofu and asparagus atop lemon-infused couscous or quinoa to soak up all the delicious sauce, creating a hearty meal.

With these variations in mind, feel free to explore different flavor profiles that excite you! For more ideas on plant-based creativity, check out my post on delicious vegan swaps and flavor-boosting cooking tips. Enjoy your culinary adventure!

What to Serve with Lemon Pepper Tofu with Roasted Asparagus

Elevate your dinner experience by pairing this vibrant dish with delightful sides that complement its fresh flavors.

  • Fluffy Quinoa: Adds a nutty flavor and extra protein, perfect for soaking up the zesty sauce. A great base for a complete meal!
  • Crispy Sweet Potato Fries: These create a satisfying contrast with their sweetness and texture, making for a comforting side.
  • Garlic Herb Rice: Infused with fragrant herbs and rich garlic, this rice serves as a tasty backdrop to enhance the tofu’s citrusy notes.
  • Sautéed Kale: The slight bitterness of kale balances well with the lemon zing, offering a nutritious and colorful addition to your plate. Sauté until just wilted for that perfect bite.
  • Creamy Avocado Salad: A refreshing side that cools the palate with creamy textures and healthy fats, pairing beautifully with the lemon flavor.
  • Chilled Green Tea: Antioxidant-rich and refreshing, this drink complements the meal’s flavors while providing a soothing finish.

These pairings will create a balanced, wholesome meal that leaves you feeling satisfied and energized. Enjoy your culinary adventure!

How to Store and Freeze Lemon Pepper Tofu

Fridge: Store leftover Lemon Pepper Tofu in an airtight container for up to 4 days, ensuring it stays fresh and flavorful.

Freezer: You can freeze the cooked tofu for up to 3 months. Freeze it in a single layer on a baking sheet before transferring to an airtight container.

Reheating: For best results, reheat in a skillet over medium heat, adding a splash of water or broth to maintain moisture. This keeps the tofu crispy and delicious.

Meal Prep Tip: If you’re making this dish for meal prep, keep the tofu and asparagus separate until ready to serve to retain the texture and taste of the Lemon Pepper Tofu.

Make Ahead Options

These Lemon Pepper Tofu with Roasted Asparagus are perfect for meal prep enthusiasts looking to save time during busy weeknights! You can prepare the tofu by pressing and slicing it up to 24 hours in advance, storing it in an airtight container. The asparagus can be prepped and tossed with olive oil and seasoning a day before, keeping it fresh in the fridge. When it’s time to serve, simply fry the tofu and roast the asparagus, and then combine with the sauce for a fresh, zesty finish. This way, you’ll have a delicious, vibrant meal ready with minimal effort and just as delectable as if made from scratch!

Lemon Pepper Tofu with Roasted Asparagus Recipe FAQs

How do I select the best tofu?
You’ll want to choose super firm or extra firm tofu for the best texture in this recipe. Look for blocks that feel heavy and have minimal excess liquid. Checking the expiration date and ensuring there are no dark spots or discoloration can also help guarantee freshness.

How should I store leftover Lemon Pepper Tofu?
To keep your Lemon Pepper Tofu fresh, store any leftovers in an airtight container in the fridge for up to 4 days. This will help maintain the flavor and texture. When you’re ready to enjoy it again, simply reheat it in a skillet to revive some of that initial crispiness.

Can I freeze Lemon Pepper Tofu?
Absolutely! You can freeze the cooked tofu for up to 3 months, which is a great way to have a quick meal ready for busy days. To do this, spread the cooked tofu in a single layer on a baking sheet and freeze until solid. Once frozen, transfer the tofu into an airtight container or a freezer-safe bag to prevent freezer burn.

What should I do if my tofu is soggy?
If your tofu turns out soggy, there are a couple of fixes. First, always press your tofu before cooking to remove excess moisture. If it’s already cooked, you can try baking it in the oven on a rack to crisp it up for about 15-20 minutes at 400°F (200°C).

Is this dish safe for pets or those with allergies?
While this Lemon Pepper Tofu dish is generally plant-based and vegan-friendly, it’s important to keep in mind that allergies can vary. Ensure there are no allergens like garlic or specific spices that might affect you or your guests. Always check with a veterinarian if you plan to share any human food with pets, as some ingredients, especially garlic, can be harmful to them.

Can I make this recipe gluten-free?
Yes, you can easily make this Lemon Pepper Tofu gluten-free! Just ensure that any sauces or alternative ingredients you use, like soy sauce, are labeled gluten-free. Additionally, you can replace cornstarch with gluten-free breadcrumbs or another suitable substitute while ensuring the rest of the ingredients remain free from gluten contamination.

undefined

Lemon Pepper Tofu with Asparagus: A Vibrant Vegan Delight

Experience a zesty Lemon Pepper Tofu dish that’s a quick vegan delight, perfect for busy weeknights.
Prep Time 15 minutes
Cook Time 15 minutes
Total Time 30 minutes
Servings: 4 servings
Course: Dinner
Cuisine: Vegan
Calories: 250

Ingredients
  

For the Tofu
  • 1 block Tofu Select super firm or extra firm for best texture
  • 2 tablespoons Cornstarch Creates a crispy coating; optional but recommended
For the Asparagus
  • 1 bunch Asparagus Fresh provides vibrant color and fiber
  • 2 tablespoons Olive Oil Essential for roasting asparagus
  • to taste Salt Adjust to personal taste
  • to taste Pepper Adjust to personal taste
For the Sauce
  • 2 tablespoons Lemon Juice Fresh is preferred for maximum zest
  • 1 teaspoon Lemon Zest Use fresh zest for best aroma
  • 3 tablespoons Nutritional Yeast Optional, enhances flavor
  • 1/4 teaspoon Red Pepper Flakes Adjust to your spice tolerance
  • 2 cloves Garlic Fresh minced for best flavor

Equipment

  • Non-stick skillet
  • Baking Sheet
  • Parchment Paper

Method
 

Step-by-Step Instructions
  1. Preheat your oven to 400°F (200°C).
  2. Prepare the asparagus by trimming the ends, coating with olive oil, nutritional yeast, salt, pepper, lemon juice, and lemon zest. Roast for 15-20 minutes.
  3. Dredge the pressed tofu in cornstarch and fry in a skillet over medium heat for 5-7 minutes until crispy.
  4. Make the sauce by sautéing garlic and red pepper flakes, then whisk in additional lemon juice and zest, simmering until thickened.
  5. Combine the crispy tofu with the sauce, tossing to coat. Cook for an additional minute.
  6. Serve the tofu and asparagus with a garnish of extra lemon zest.

Nutrition

Serving: 1servingCalories: 250kcalCarbohydrates: 20gProtein: 18gFat: 12gSaturated Fat: 2gPolyunsaturated Fat: 4gMonounsaturated Fat: 6gSodium: 300mgPotassium: 600mgFiber: 6gSugar: 2gVitamin A: 700IUVitamin C: 30mgCalcium: 200mgIron: 3mg

Notes

Press tofu thoroughly to remove moisture for ideal texture. Fresh ingredients enhance flavor. Store leftovers properly to maintain quality.

Tried this recipe?

Let us know how it was!

Crispy BBQ Tofu That Will Change Your Vegan Game

The moment I took my first bite of crispy BBQ tofu, I was transported to a backyard barbecue on a warm summer evening, the aroma of sweet and smoky sauce dancing through the air. This mouthwatering dish is not only a fantastic way to enjoy tofu but also a game-changer for those looking for a hearty vegan appetizer that’s both gluten-free and effortlessly quick to whip up. With its delightful crunch wrapping around a tender interior, it’s perfect for serving at parties, casual dinners, or even as a tasty addition to weeknight meals. Whether paired with creamy vegan mashed potatoes or a fresh salad, this crispy BBQ tofu will surely satisfy your cravings for something delicious and wholesome. What flavor twist will you add to make it your own?

Why Will You Love This Recipe?

Addictive Crunch: Each bite features a delightful crunchy coating that perfectly contrasts with the soft, flavorful interior of the tofu.

Vegan & Gluten-Free: Perfect for everyone! Enjoy this dish as a guilt-free snack or appetizer that fits various dietary needs.

Quick & Easy: Whip it up in just 30 minutes! This dish is ideal for busy weeknights or spontaneous gatherings.

Versatile Pairing: Serve it alongside vegan mashed potatoes or fried rice for a hearty meal, or enjoy it on its own as an irresistible appetizer.

Flavor Explosion: Smothered in rich BBQ sauce, this tofu offers a taste that’s truly out of this world. Feel free to experiment with different BBQ sauce flavors or add a sprinkle of smoked paprika for a smoky kick!

Crispy BBQ Tofu Ingredients

• Get ready to create a mouthwatering delight!

For the Tofu

  • Firm Tofu – Make sure to press it well to remove excess moisture for the best texture.
  • Soy Milk – Used for the batter; can swap with any creamy non-dairy milk like cashew or oat milk.
  • All Purpose Flour – Provides structure; use gluten-free flour for a gluten-free option.
  • Cornstarch – Essential for achieving extra crispiness; no direct substitute recommended.

For the Seasoning

  • Garlic Powder – Adds depth of flavor; substitute with fresh garlic for a stronger kick.
  • Onion Powder – Complements the garlic; fresh onions can be added, but cooking time may need adjustment.
  • Salt & Ground Black Pepper – Enhances overall flavor; adjust to taste.
  • Cayenne Pepper – Adds a touch of heat; adjust or omit based on your spice preference.

For the Coating

  • Panko Breadcrumbs – The key to a crunchy exterior; opt for authentic panko for optimal results.

For the Flavor

  • Vegan BBQ Sauce – Essential for that rich, smoky flavor; use your favorite brand or make your own!

Step‑by‑Step Instructions for Crispy BBQ Tofu

Step 1: Press the Tofu
Start by pressing the firm tofu for 30 minutes to remove excess moisture, which is crucial for achieving a crispy texture. Use a tofu press or place the tofu between two plates with heavy objects on top. When you finish, the tofu should feel firmer and the excess liquid will be drained away.

Step 2: Preheat the Oven
Preheat your oven to 400°F (200°C) while the tofu is pressing. This temperature is perfect for getting that beautiful golden crust on your crispy BBQ tofu. Prepare a baking sheet by lining it with parchment paper to ensure easy cleanup later and prevent sticking.

Step 3: Prepare Tofu
Once pressed, cut the tofu into triangles or your preferred shapes. Aim for a thickness of about half an inch, which will help the tofu cook evenly. You should see a smooth, firm texture that’s ready to soak up all the flavors in this crispy BBQ tofu recipe.

Step 4: Make the Batter
In a mixing bowl, whisk together the soy milk, all-purpose flour, cornstarch, garlic powder, onion powder, salt, and black pepper until smooth. The mixture should be thick enough to coat the tofu well but not overly heavy. This batter is essential for achieving that addictive crunch on each piece!

Step 5: Coat in Breadcrumbs
Dip each tofu piece into the batter, ensuring they’re fully coated. Then, roll them in panko breadcrumbs for that signature crunch. Lay the coated tofu on the prepared baking sheet, allowing space between each piece for optimal crispiness. You should see a nice, even coating of breadcrumbs on each slice.

Step 6: Bake
Place the coated tofu in the preheated oven and bake for 20 minutes. Keep an eye on them; they should turn golden brown and make your kitchen smell incredible. At the halfway mark, consider flipping the pieces for an even crunch throughout.

Step 7: Add BBQ Sauce
After 20 minutes, remove the tofu from the oven. In a large mixing bowl, toss the baked tofu with your favorite vegan BBQ sauce to coat them thoroughly. The sauce should cling to each piece beautifully, ensuring a burst of flavor in every bite of your crispy BBQ tofu.

Step 8: Final Bake
Return the coated tofu to the oven and bake for an additional 10 minutes. This allows the BBQ sauce to caramelize slightly, enhancing the flavor and creating a lovely sticky exterior. Keep an eye out for a shiny glaze and a delightful crispy texture.

Step 9: Serve
Remove the tofu from the oven and brush with a little extra BBQ sauce if desired. Serve your crispy BBQ tofu hot, either as an appetizer or alongside your favorite vegan sides, like mashed potatoes or a fresh salad. The combination of crispy exterior and tender interior promises a satisfying experience!

Expert Tips for Crispy BBQ Tofu

Press Thoroughly: Make sure to press the tofu for at least 30 minutes. This step is crucial to remove excess moisture, ensuring your crispy BBQ tofu has the perfect crunch.

Use Authentic Panko: Opt for high-quality panko breadcrumbs for an unbeatable crunch! Regular breadcrumbs won’t give you the same texture.

Watch the Oven: Keep an eye on the tofu while baking. Ovens can vary, and you want to pull them out when they’re golden brown and crispy—don’t let them burn!

Flavor Variations: Experiment with different BBQ sauces or add smoked paprika to custom tailor the flavor of your crispy BBQ tofu to suit your taste.

Serve Fresh: For the best texture, serve your crispy BBQ tofu immediately after removing it from the oven. Enjoy the delightful contrast of tenderness and crunch!

Make Ahead Options

These Crispy BBQ Tofu pieces are perfect for meal prep enthusiasts! You can press and cut the tofu up to 24 hours in advance, storing it in an airtight container in the fridge to maintain its freshness and flavor. Additionally, you can prepare the batter (soy milk, flour, cornstarch, and seasonings) and refrigerate it for up to 2 days ahead, reducing your cooking time when you’re ready to bake. On the day of serving, simply coat the tofu in the batter and panko breadcrumbs before baking. Toss in the BBQ sauce and bake as instructed, ensuring your tofu remains crispy and delicious—the ideal, time-saving solution for busy weeknights!

How to Store and Freeze Crispy BBQ Tofu

Fridge: Store leftovers in an airtight container in the fridge for up to 3-4 days. This helps keep the flavors intact while preventing spoilage.

Freezer: For longer storage, freeze crispy BBQ tofu in a single layer on a baking sheet before transferring to an airtight container. It can last for up to 2 months.

Reheating: Reheat in the oven for best results to maintain the crispy texture. Bake at 375°F (190°C) for about 10-15 minutes until heated through, avoiding the microwave as it may soften the tofu.

Leftovers: Enjoy the flavorful crispy BBQ tofu as a topping for salads, wraps, or bowls to reduce waste and savor the delicious flavors even days later!

What to Serve with Crispy BBQ Tofu

Elevate your meal with delightful sides that complement the rich, smoky flavors of this crispy delight.

  • Creamy Vegan Mashed Potatoes: The smooth and buttery texture pairs perfectly, balancing the crispy tofu’s crunch for a satisfying meal.
  • Zesty Coleslaw: Fresh, crunchy slaw adds a vibrant tang and delightful contrast, brightening each bite of savory tofu.
  • Quinoa Pilaf: Protein-packed quinoa seasoned with herbs provides a wholesome side that’s light yet filling, enhancing the overall dining experience.
  • Roasted Vegetables: A medley of colorful seasonal veggies brings warmth and earthy flavors, creating a beautiful plate alongside your crispy BBQ tofu.
  • Chickpea Salad: This refreshing salad offers a nutty twist and protein boost, adding freshness and variety that perfectly complements the dish.
  • Savory Fried Rice: A hearty serving of fried rice, bursting with vegetables and umami flavors, makes for a complete and delicious meal.
  • Basil Lemonade: A refreshing basil-infused lemonade brightens the palate and cools off the heat, enhancing the overall flavor harmony.
  • Dark Chocolate Avocado Mousse: End on a sweet note! This rich dessert is creamy and indulgent, perfectly contrasting with the savory tofu.

Crispy BBQ Tofu Variations & Substitutions

Feel free to get creative and customize this crispy BBQ tofu recipe to suit your taste buds!

  • Extra Firm Tofu: Swap firm tofu for extra firm for a denser texture, perfect for heartier bites.
  • Smoky Flavor: Stir in some smoked paprika to your batter for an irresistible smoky kick that enhances the BBQ taste.
  • Various BBQ Sauces: Experiment with different flavors of BBQ sauce, like sweet and tangy or spicy chipotle, to keep things exciting.
  • Herb Infusion: Add fresh herbs like rosemary or thyme to the batter for a fresh flavor twist that brightens each bite.
  • Spicy Kick: Increase the cayenne pepper or add a splash of hot sauce to the batter for those who love a spicy finish.
  • Buffalo Style: After baking, toss the tofu in buffalo sauce instead of BBQ for a fiery alternative—great with celery sticks!
  • Gluten-Free Options: Use gluten-free flour and breadcrumbs to ensure everyone can enjoy this crispy delight without worry.
  • Crispy Coating: For even more crunch, try adding crushed nuts like almonds or pecans to the panko before coating your tofu.

Explore these variations to personalize your crispy BBQ tofu experience! You might also enjoy it alongside some delectable vegan mashed potatoes for a truly satisfying meal, or try jazzing up a fresh salad with these tasty tofu bites for a delightful and wholesome dish!

Crispy BBQ Tofu Recipe FAQs

How do I choose the right tofu for this recipe?
Absolutely! For the best results, you should select firm tofu. This ensures that it holds its shape when cooked and provides the perfect texture. Look for tofu that feels dense and doesn’t have dark spots all over; this indicates freshness. If you prefer a denser texture, you might also opt for extra firm tofu.

How should I store leftover crispy BBQ tofu?
Very! You can store any leftovers in an airtight container in the fridge for 3-4 days. Just ensure they’re completely cooled first. When you’re ready to enjoy them again, a quick reheat in the oven at 375°F (190°C) for about 10-15 minutes will help revive their crispy exterior.

Can I freeze crispy BBQ tofu?
Definitely! To freeze, arrange the crispy BBQ tofu in a single layer on a baking sheet and place it in the freezer for about 1-2 hours. Once frozen, transfer the pieces to an airtight container or a heavy-duty freezer bag. They will last up to 2 months. When you’re ready to eat, simply reheat them directly in the oven to regain that delightful crunch!

What should I do if my tofu isn’t crispy enough?
Not to worry! If your tofu lacks crunch, it may need more moisture removal or longer baking time. Ensure you press it thoroughly for at least 30 minutes before coating and baking. Also, consider using high-quality panko breadcrumbs as they provide that essential crunch factor. If it’s baked but still soft, extend the baking time by 5 additional minutes or until it’s golden brown and crispy.

Is there a gluten-free alternative for the flour and breadcrumbs?
Absolutely! You can substitute all-purpose flour with gluten-free flour blends easily available in stores. For the breadcrumbs, look for gluten-free panko varieties – they will help maintain the crunchiness of your crispy BBQ tofu, although it may not be as crispy as the regular panko.

Are there any dietary considerations for serving this dish?
Very! Since this recipe uses tofu and is coated with vegan-friendly BBQ sauce, it’s suitable for vegans and vegetarians. However, if serving to guests with allergies, ensure they’re not allergic to soy or any specific ingredients in your BBQ sauce. For pets, it’s best to avoid sharing tofu, as some animals can have difficulty digesting soy.

undefined

Crispy BBQ Tofu That Will Change Your Vegan Game

Experience an addictive crunch with our crispy BBQ tofu - a vegan and gluten-free delight that's quick to prepare.
Prep Time 30 minutes
Cook Time 30 minutes
Total Time 1 hour
Servings: 4 servings
Course: Appetizers
Cuisine: Vegan
Calories: 210

Ingredients
  

For the Tofu
  • 1 block Firm Tofu Press well to remove excess moisture
  • 1/2 cup Soy Milk Can substitute with any creamy non-dairy milk
  • 1/4 cup All Purpose Flour Use gluten-free flour for a gluten-free option
  • 1/4 cup Cornstarch Essential for crispiness
For the Seasoning
  • 1 teaspoon Garlic Powder Substitute with fresh garlic for a stronger taste
  • 1 teaspoon Onion Powder Fresh onions can be adjusted as needed
  • 1 teaspoon Salt Adjust to taste
  • 1 teaspoon Ground Black Pepper Adjust to taste
  • 1/2 teaspoon Cayenne Pepper Adjust or omit based on spice preference
For the Coating
  • 1 cup Panko Breadcrumbs Use authentic for optimal crunch
For the Flavor
  • 1 cup Vegan BBQ Sauce Use your favorite brand or make your own

Equipment

  • Baking Sheet
  • Tofu press
  • Mixing Bowl

Method
 

Preparation
  1. Press the tofu for 30 minutes to remove excess moisture.
  2. Preheat your oven to 400°F (200°C) and prepare a baking sheet.
  3. Cut the pressed tofu into triangles about half an inch thick.
Batter and Coating
  1. In a bowl, whisk soy milk, flour, cornstarch, garlic powder, onion powder, salt, and black pepper until smooth.
  2. Dip each tofu piece in the batter and coat in panko breadcrumbs.
Cooking
  1. Bake the tofu for 20 minutes until golden brown, flipping halfway through.
  2. Toss baked tofu with BBQ sauce in a bowl to coat.
  3. Return the coated tofu to the oven and bake for an additional 10 minutes.
  4. Serve hot, optionally brushing with more BBQ sauce.

Nutrition

Serving: 1servingCalories: 210kcalCarbohydrates: 28gProtein: 10gFat: 8gSaturated Fat: 1gPolyunsaturated Fat: 2gMonounsaturated Fat: 5gSodium: 700mgPotassium: 300mgFiber: 3gSugar: 5gCalcium: 200mgIron: 2mg

Notes

Serve immediately for the best texture and enjoy with your favorite vegan sides.

Tried this recipe?

Let us know how it was!