Get my cookbooks

Colorful Easy Monster Cake Recipe for a Spook-tacular Halloween

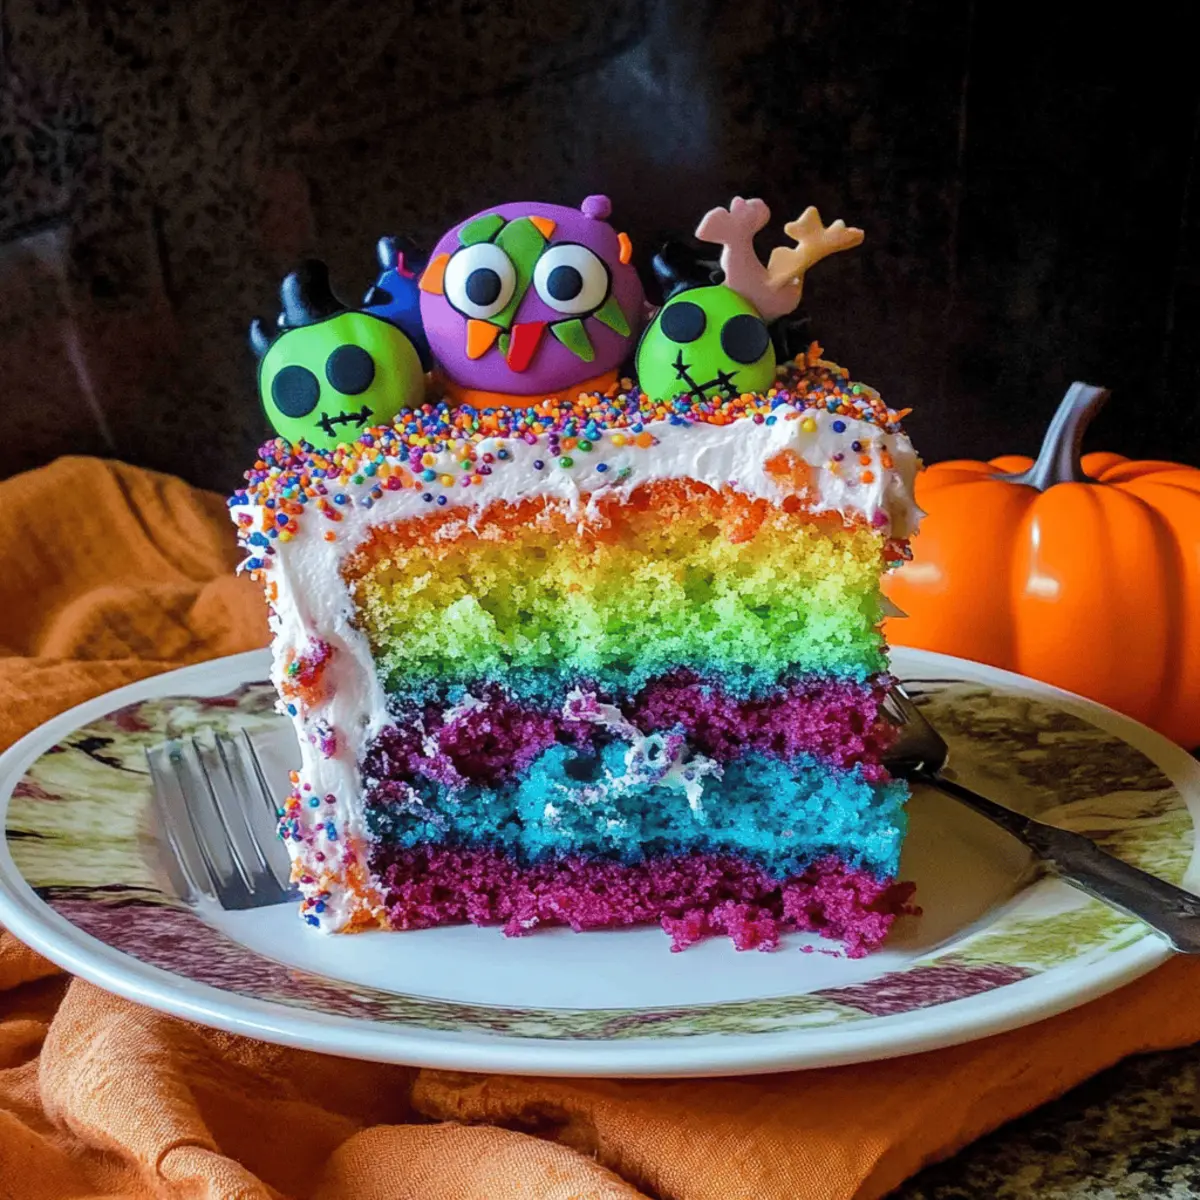
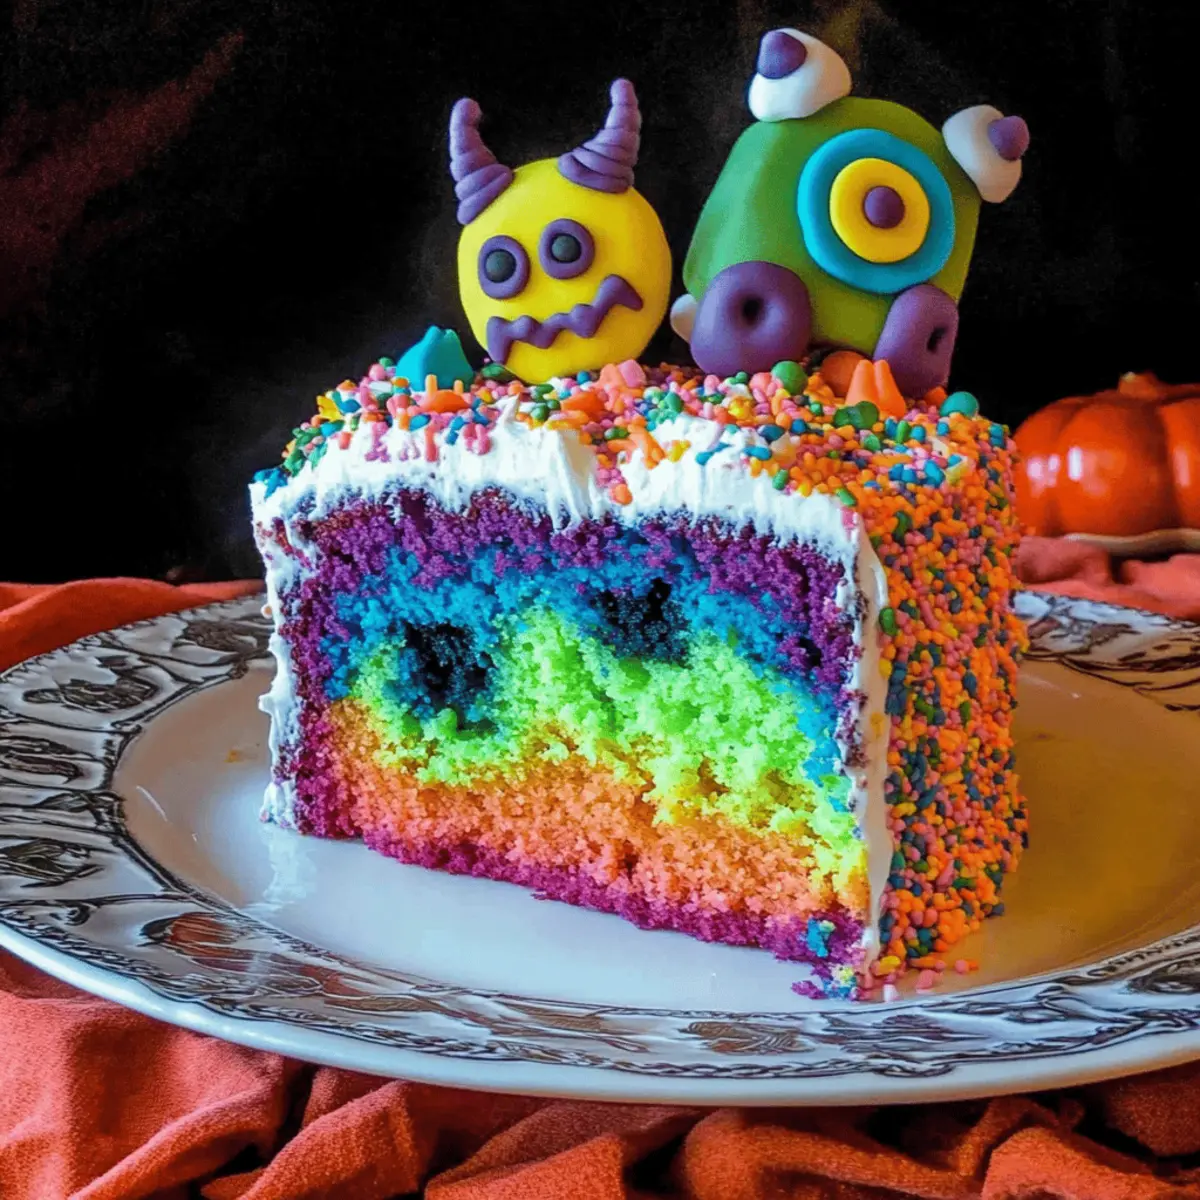
As I stood in my kitchen, a dazzling array of colors caught my eye, ready to transform into something magical. This Easy Monster Cake Recipe is a fantastic way to indulge in the Halloween spirit while keeping things simple and fun. With its marbled hues and whimsical monster decorations, this cake is not just a treat; it’s an experience that brings smiles to both kids and adults alike. It allows you to channel your inner child without the stress of complicated baking techniques—perfect for busy home chefs! Using a boxed mix or your favorite scratch recipe means you can dive right into the fun without getting overwhelmed. Are you ready to create a cake that’s not only delicious but also a stunning centerpiece for your Halloween festivities? Let’s unleash your creativity!

Why is This Cake a Halloween Must-Make?

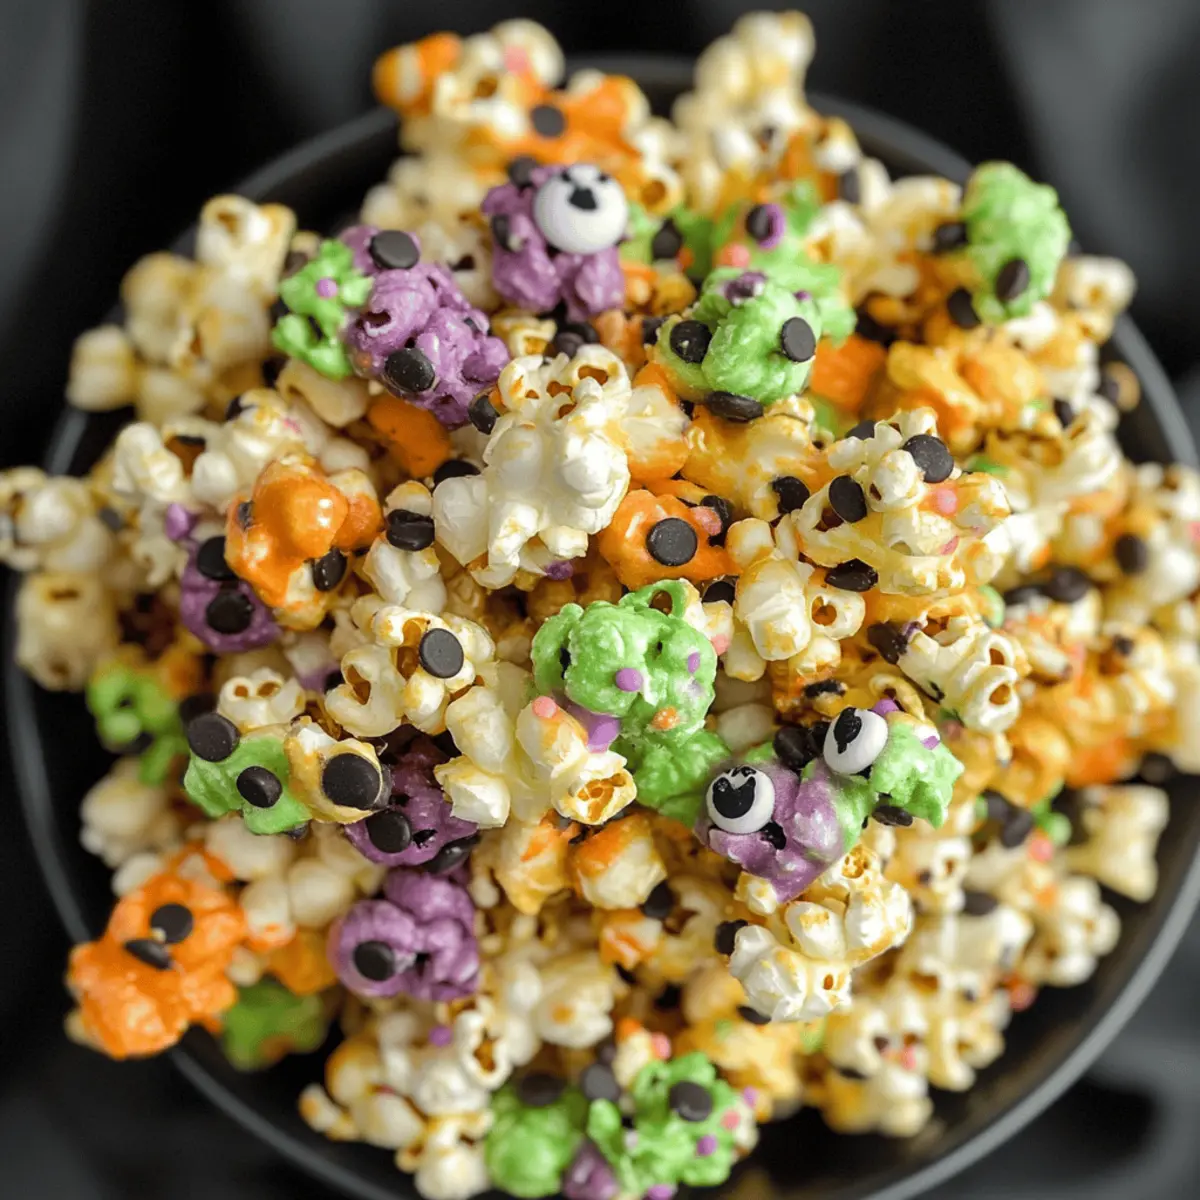
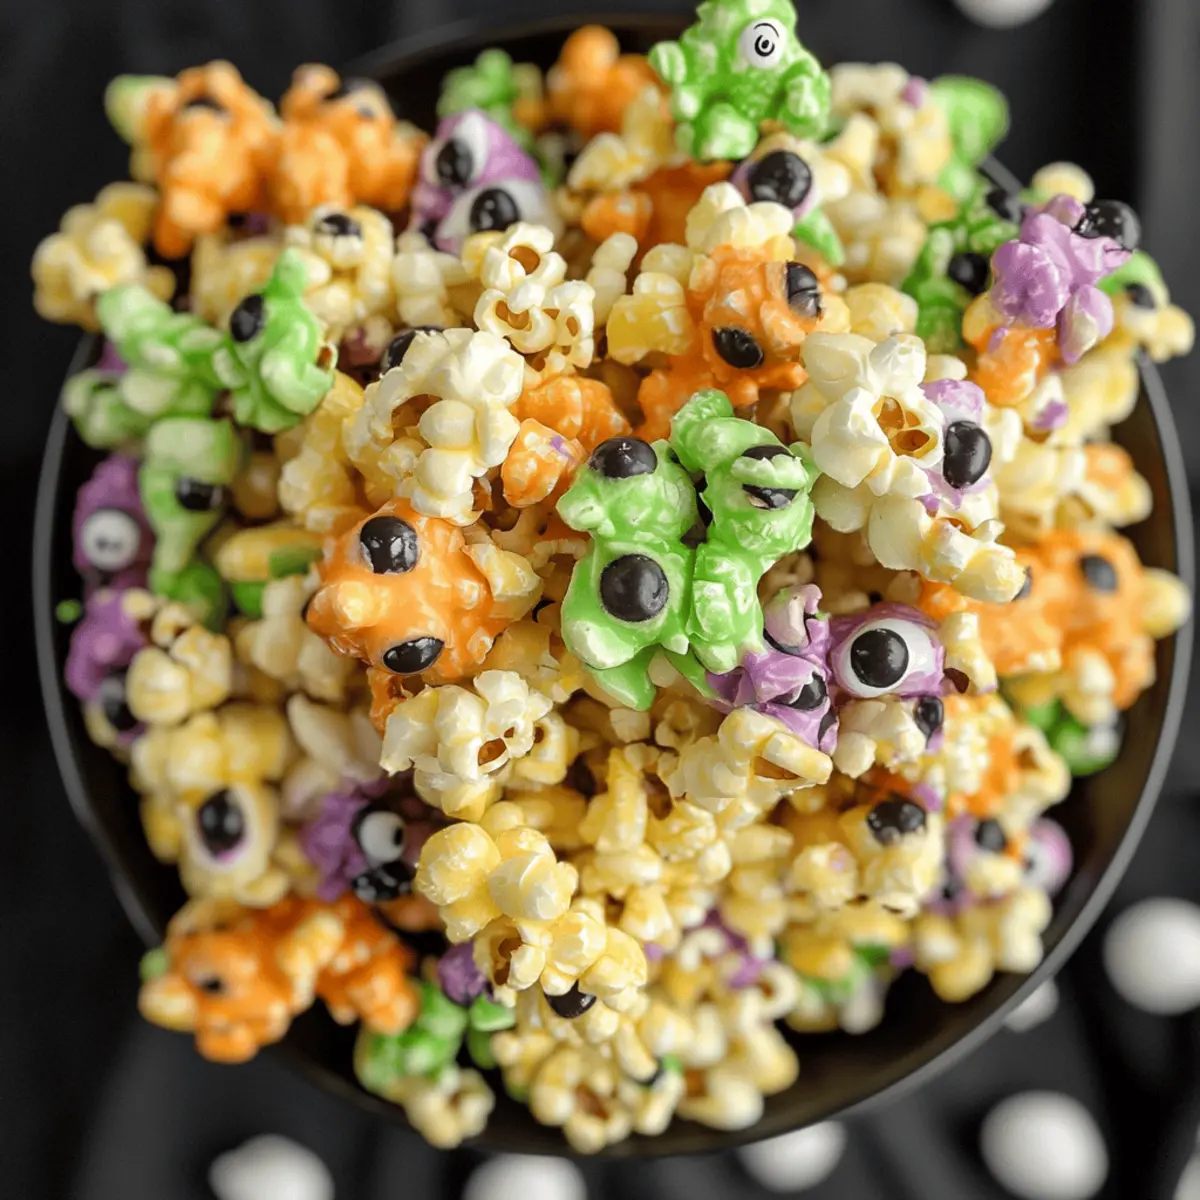
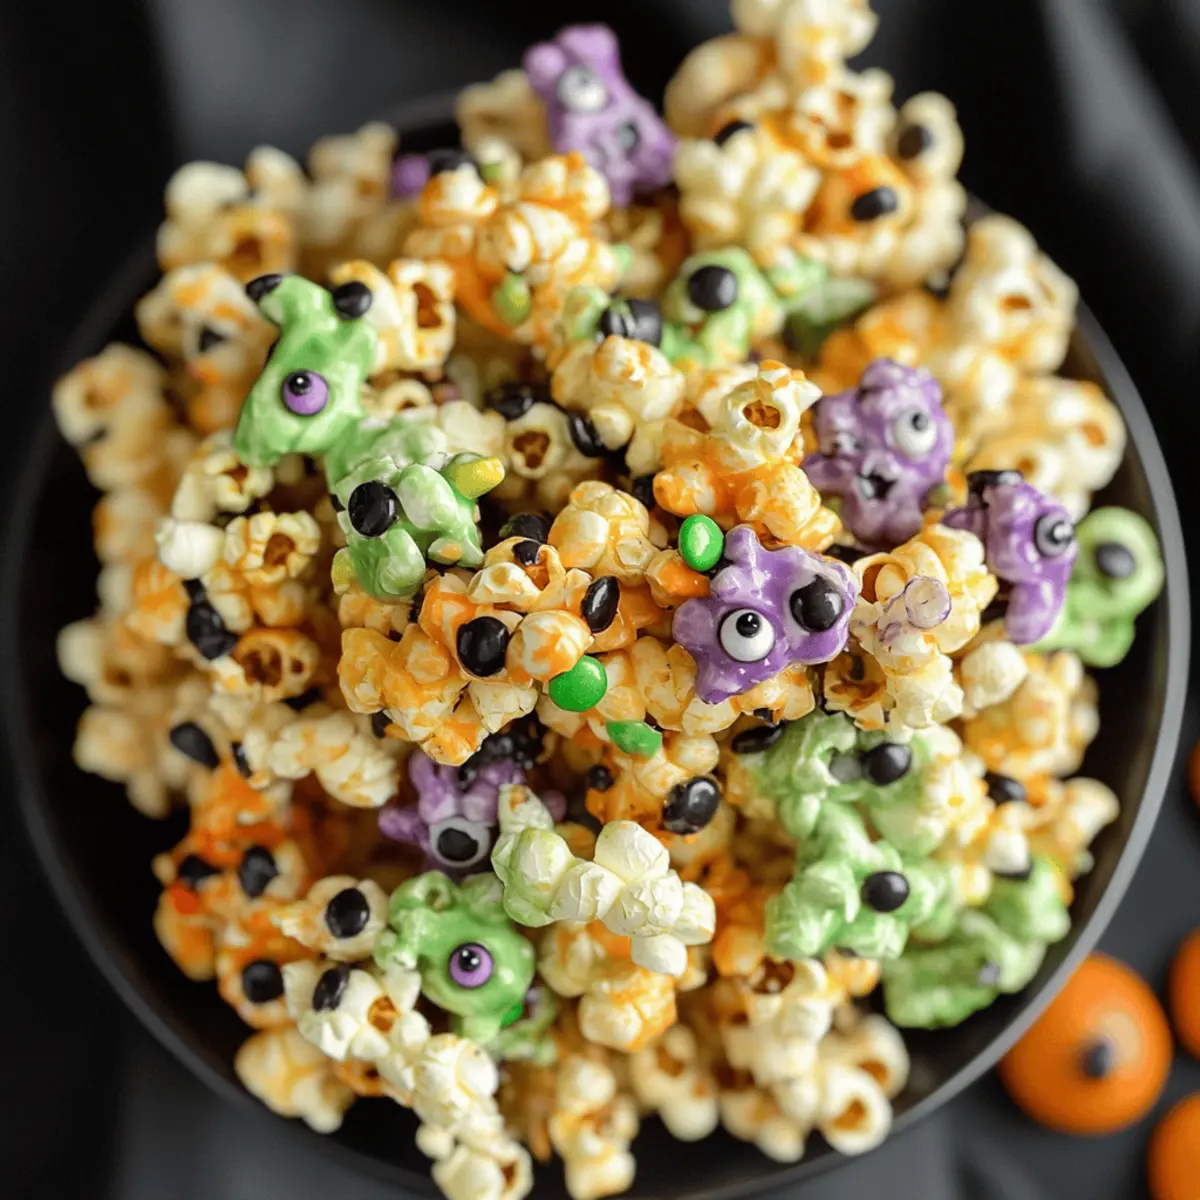
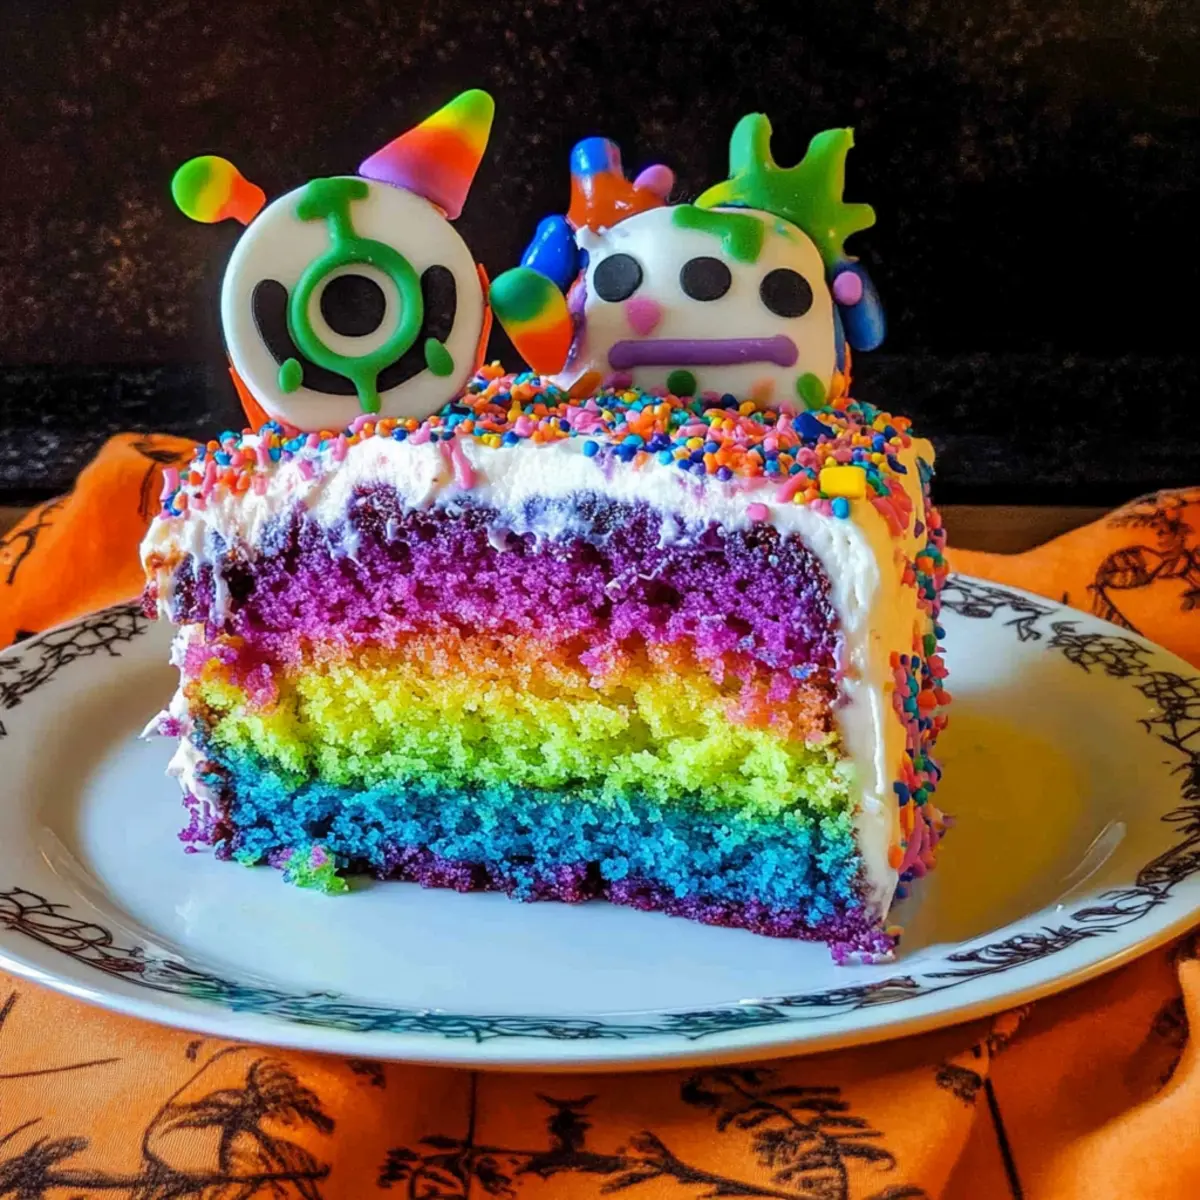
Vibrant Colors: The marbled hues created with food coloring make this cake a feast for the eyes, perfect for any Halloween celebration!

Simplicity: Using a boxed cake mix not only saves time but also eliminates the stress of baking from scratch—allowing anyone to whip up a fun treat!

Kid-Friendly Fun: This Easy Monster Cake is an interactive experience where kids can help decorate, making it a fantastic weekend activity for families.

Versatile Variations: Feel free to swap in your favorite flavors or dietary options, from gluten-free to vegan mixes, ensuring everyone can enjoy a slice of the festive fun.

Crowd-Pleasing Delight: Whether it’s a birthday party or a Halloween gathering, this cake is destined to become the star of the dessert table, delighting both young and old.

For more delightful treats, check out my Strawberry Cheesecake Dump or indulge in a classic Chocolate Chip Pancakes recipe!

Easy Monster Cake Ingredients

Here’s what you’ll need to conjure up this spook-tacular treat!

For the Cake

  • Boxed Cake Mix – Use a white mix for vibrant marbling that makes the Easy Monster Cake visually stunning.
  • Food Coloring – Gel colors yield brighter results, while liquid food coloring is a good substitute if necessary.

For the Frosting

  • Frosting (3 cups) – Whether using store-bought or homemade, select your favorite flavor to complement the cake’s sweetness.

For Decoration

  • Halloween-themed Sprinkles (½ cup) – Sprinkle these fun decorations on top for an added burst of excitement or swap with any festive sprinkles you adore.
  • Monster Cupcake Toppers or Rings – These playful decorations are optional but will definitely enhance the whimsical aspect of your Easy Monster Cake!

With these colorful ingredients at your fingertips, you’re all set to create a delightful Halloween masterpiece!

Step‑by‑Step Instructions for Easy Monster Cake Recipe

Step 1: Prepare the Cake Pan
Start by preheating your oven to 350°F (175°C). Line a 9” x 13” cake pan with parchment paper, allowing some overhang for easy removal later. This will ensure your Easy Monster Cake lifts out smoothly after baking, leaving you with a perfectly shaped cake ready for all its vibrant decorations.

Step 2: Make the Batter
In a large mixing bowl, prepare the boxed cake mix according to the package instructions. This typically involves combining the mix with water, oil, and eggs. Mix until just combined, aiming for a smooth and fluffy batter. This step ensures a moist and delightful base for your Easy Monster Cake, setting the stage for the colorful fun to come!

Step 3: Color the Batter
Divide the batter evenly into separate bowls, depending on how many colors you want to use. Add a few drops of gel food coloring to each bowl, using a toothpick to mix until you achieve vibrant shades. Remember, gel colors provide a brighter result and prevent the batter from becoming too runny, keeping your Easy Monster Cake light and airy.

Step 4: Layer and Swirl Colors
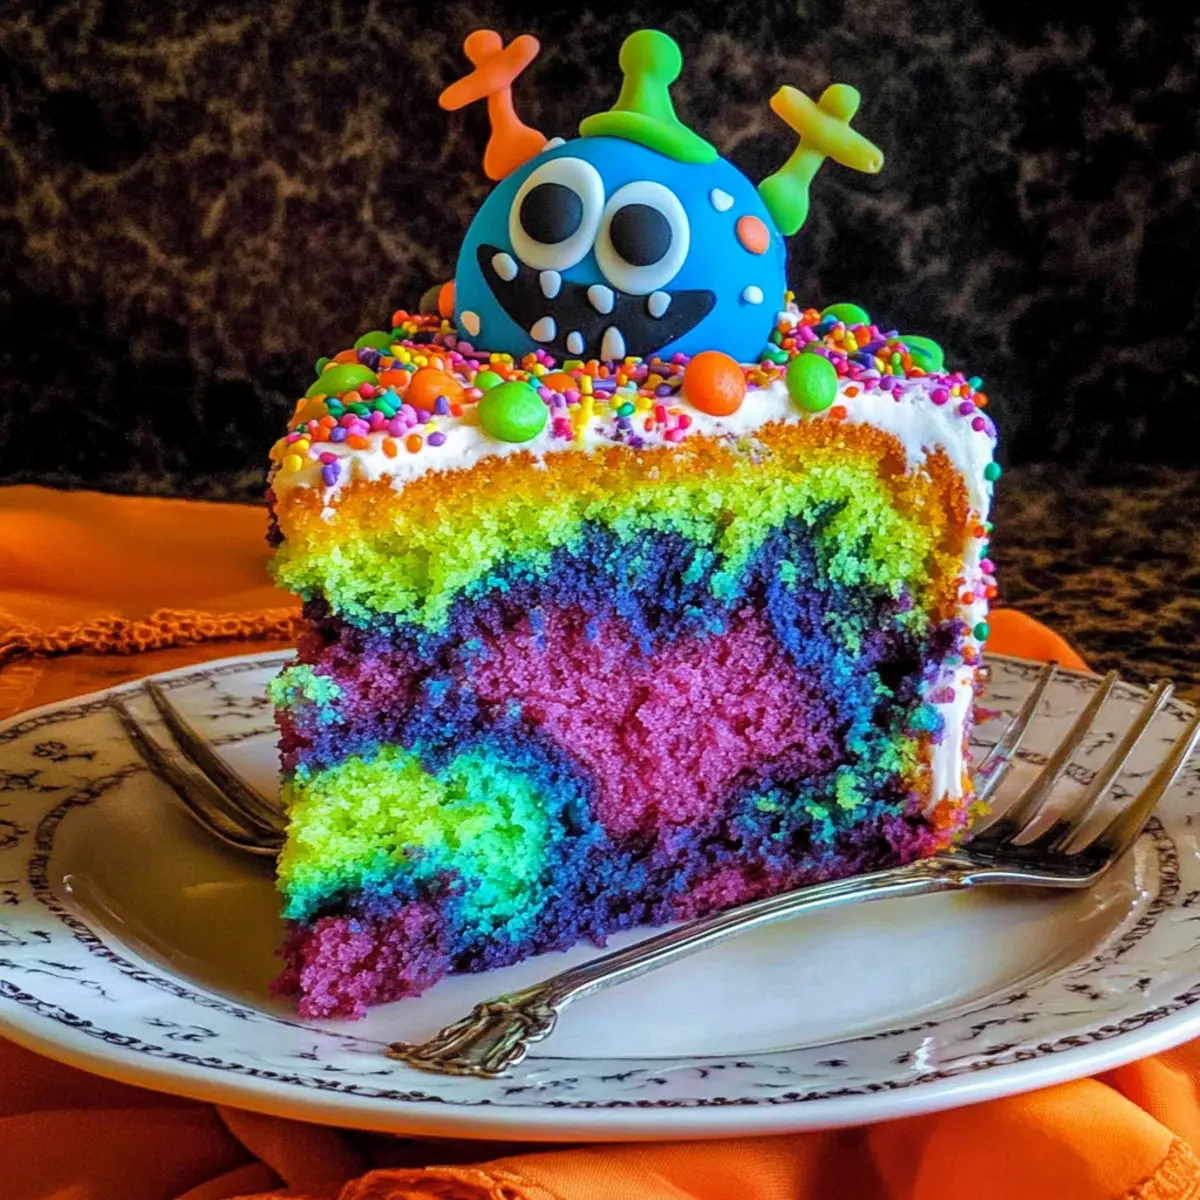
Spoon alternating dollops of the colored batter into the prepared cake pan, forming layers of color. Use a knife to gently swirl the colors together, creating a marbled effect—be careful not to overmix! You want to maintain those beautiful swirls when your Easy Monster Cake bakes, resulting in a playful presentation that’s sure to excite everyone.

Step 5: Bake the Cake
Carefully place the cake pan in your preheated oven and bake for approximately 30 minutes. Keep an eye on it, and check for doneness by inserting a toothpick into the center; it should come out clean. The aroma of your Easy Monster Cake will fill the kitchen, adding to the anticipation of the delicious masterpiece taking shape.

Step 6: Cool the Cake
Once baked, remove the cake from the oven and let it cool in the pan for about 20 minutes. This cooling period helps the cake set properly. After that, carefully lift it out of the pan using the parchment paper, transferring it to a cooling rack. Allow it to cool completely before frosting, ensuring a smooth and easy application.

Step 7: Frost and Decorate
After your cake has cooled completely, spread a generous layer of frosting over the top. Use a spatula to create swirls or peaks for added texture. Next, sprinkle an abundant amount of Halloween-themed sprinkles over the frosting, letting your creativity shine. Finally, adorn each slice with fun monster toppers or rings for that delightful finishing touch on your Easy Monster Cake!

Easy Monster Cake Recipe Variations

Feel free to personalize your Easy Monster Cake with these delightful twists that will awaken your culinary creativity!

  • Homemade Base: Swap the boxed cake mix for your favorite homemade cake recipe to create a truly personalized flavor. This way, you can control every ingredient and add a special touch.

  • Flavored Frostings: Instead of traditional vanilla frosting, try chocolate or cream cheese frosting for a festive twist. The rich variations will enhance the overall flavor while still looking great with monster decorations.

  • Color Themes: Experiment with different color schemes to fit your event. Using orange and black can create a classic Halloween look, while shades of green and purple can make your cake pop as a unique monster creation.

  • Gluten-Free Option: Use a gluten-free cake mix to ensure everyone can enjoy this tasty treat. Many gluten-free mixes yield fantastic results without sacrificing flavor or texture.

  • Vegan Friendly: Substitute eggs and dairy products in the recipe using vegan alternatives, such as flaxseed for eggs and almond milk or coconut cream for a plant-based frosting. Your cake can still be moist and delicious!

  • Extra Crunch: Add chopped nuts or crushed cookies to the batter for a delightful surprise of texture. The added crunch will complement the moist cake beautifully, making each slice exciting.

  • Spicy Kick: Incorporate a dash of cinnamon or pumpkin spice into the batter for a seasonal flair that works beautifully for Halloween. These warm spices will elevate the flavors and create a cozy atmosphere!

  • Decorative Sprinkles: Swap out Halloween-themed sprinkles for colored edible glitter or themed candies. These swaps can bring a fresh and lively twist to your festive cake, captivating all your guests!

Feel free to dive into these variations and let your creativity shine! And if you’re in the mood for more festive treats, check out my delightful Easter Poke Cake or indulge in the rich flavors of Chocolate Fudge Cupcakes!

Storage Tips for Easy Monster Cake

  • Room Temperature: Store the cake in an airtight container at room temperature for up to 3-4 days to maintain its moist texture and vibrant colors.

  • Fridge: If you prefer longer freshness, place the cake in the refrigerator for up to a week. Make sure it’s covered to prevent drying out or absorbing odors.

  • Freezer: For extended storage, freeze slices of the Easy Monster Cake in an airtight container or wrap in plastic wrap and aluminum foil for up to 3 months.

  • Reheating: To enjoy thawed slices, let them sit at room temperature for about 30 minutes or gently microwave for 10-15 seconds to warm them up.

What to Serve With Easy Monster Cake

As you prepare to delight your guests with this charming treat, think about what could elevate the occasion even further.

  • Creepy Cocktails: Serve vibrant, themed drinks like a green apple punch or some fizzy mocktails for an extra festive atmosphere.
  • G spooky Fruit Skewers: Thread together colorful fruit like grapes, melon, and strawberries for a refreshing, healthy side that contrasts beautifully with the sweet cake.
  • Savory Witch’s Broomsticks: Offer cheese straws or pretzel sticks artfully arranged to resemble broomsticks, adding a playful savory option to balance the sweetness.
  • Chocolate Mousse: A rich and velvety chocolate mousse will entice chocolate lovers and give a luxurious finish to your meal.
  • Pumpkin Spice Latte: Brew up some warm, spiced lattes for your guests to sip while they enjoy their cake, cozying up to the Halloween spirit.
  • Ghostly Cupcakes: Bake mini cupcakes frosted with white icing and ghostly faces to complement the monster theme and provide a variety of treats.
  • Gummy Worms and Dirt Cup: Create a simple dessert by layering chocolate pudding with crushed cookies, adding gummy worms for a fun presentation that kids will love.
  • Hot Apple Cider: Offer warm, spiced apple cider for a comforting drink that pairs perfectly with the sweetness of your Easy Monster Cake.
  • Chocolates and Treat Bags: Create little party favor bags filled with candy corn or themed chocolates that guests can take home as a sweet reminder of the festivities.

Make Ahead Options

These Easy Monster Cake Recipe preparations are ideal for busy home cooks looking to save time during the Halloween rush! You can prepare the cake layers up to 24 hours in advance. Simply bake the cake as instructed, allow it to cool completely, then wrap it tightly in plastic wrap to prevent any drying out. Store at room temperature before frosting. The frosting can be made ahead as well and stored in the refrigerator for up to 3 days; just remember to allow it to soften at room temperature before spreading. When you’re ready to serve, frost the cake, add your colorful sprinkles, and top with whimsical monster decorations. This method not only saves precious time but ensures your cake is just as delicious and festive!

Expert Tips for the Best Easy Monster Cake

  • Choose Your Mix Wisely: Use a white boxed cake mix for the most vibrant colors. A yellow mix may dull the marbling effect, so stick to white!

  • Perfect Your Swirls: Avoid overmixing the colored batter. A light hand while swirling helps maintain defined colors for a true monster look.

  • Experiment with Colors: Don’t hesitate to mix different colors! Just remember that gel food coloring provides the brightest and most vivid results for your Easy Monster Cake.

  • Storage Wisdom: Keep your cake covered at room temperature for 3-4 days. While refrigeration isn’t necessary, it helps maintain the moist texture.

  • Allergy Adjustments: Feel free to use gluten-free or vegan boxed mixes. This ensures everyone at your celebration can enjoy a slice of this festive treat!

Easy Monster Cake Recipe FAQs

What type of boxed cake mix should I use for the Easy Monster Cake?
I recommend using a white cake mix for the best results. It creates a vibrant marbling effect with the food coloring, making your Easy Monster Cake visually stunning. Yellow mixes tend to dull the colors, so stick to white for a bright and festive treat!

How should I store the Easy Monster Cake once it’s baked?
To keep your Easy Monster Cake deliciously moist, store it in an airtight container at room temperature for up to 3-4 days. If you prefer longer freshness, you can refrigerate it for up to a week. Just make sure it’s covered to avoid drying out or absorbing unwanted odors from the fridge.

Can I freeze the Easy Monster Cake?
Absolutely! For longer storage, you can freeze the Easy Monster Cake. Slice it into pieces, then wrap each slice tightly in plastic wrap followed by aluminum foil. This will protect it from freezer burn. The cake can be stored this way for up to 3 months. When you’re ready to enjoy, let the slices thaw at room temperature for about 30 minutes.

What should I do if my cake isn’t rising correctly?
If your Easy Monster Cake doesn’t rise as expected, it could be due to expired baking powder or not mixing the batter well enough. Always check your leavening agents’ expiration dates and ensure you’re mixing until just combined. Avoid overmixing after adding food coloring, as this can affect the texture.

Are there any dietary considerations I should keep in mind?
Yes! If you’re accommodating dietary restrictions, feel free to use gluten-free or vegan cake mixes. This ensures that everyone still gets to indulge in the spooktacular goodness of your Easy Monster Cake. Always check the labels for allergens and consider using allergy-friendly sprinkles and frosting as needed.

Can I make the Easy Monster Cake in advance?
Certainly! If you plan to make the cake in advance, bake it, allow it to cool completely, and then wrap it tightly in plastic wrap. Store it at room temperature for up to 3-4 days, or refrigerate it if you wish to keep it longer prior to frosting and decorating. Frost the cake the day you plan to serve it for the freshest taste.

Easy Monster Cake Recipe

Colorful Easy Monster Cake Recipe for a Spook-tacular Halloween

This Easy Monster Cake Recipe is a colorful and fun dessert that's perfect for Halloween celebrations.
Prep Time 20 minutes
Cook Time 30 minutes
Cooling Time 20 minutes
Total Time 1 hour 10 minutes
Servings: 12 slices
Course: Dessert
Cuisine: American
Calories: 320

Ingredients
  

Cake Ingredients
  • 1 box Boxed Cake Mix Use a white mix for vibrant marbling.
  • 3 cups Frosting Use your favorite flavor.
  • ½ cup Halloween-themed Sprinkles For decoration.
  • Food Coloring Gel colors or liquid food coloring can be used.
  • Monster Cupcake Toppers or Rings Optional decoration.

Equipment

  • 9" x 13" cake pan
  • Mixing Bowl
  • spatula
  • Toothpick
  • Parchment Paper
  • Oven

Method
 

Baking Instructions
  1. Preheat your oven to 350°F (175°C). Line a 9” x 13” cake pan with parchment paper.
  2. Prepare the boxed cake mix according to the package instructions.
  3. Divide the batter evenly into separate bowls and add gel food coloring to achieve vibrant colors.
  4. Spoon alternating dollops of colored batter into the prepared cake pan and gently swirl with a knife.
  5. Bake in the preheated oven for approximately 30 minutes, checking for doneness.
  6. Let the cake cool in the pan for about 20 minutes before transferring to a cooling rack.
  7. Once cooled, frost the cake and decorate with Halloween-themed sprinkles and monster toppers.

Nutrition

Serving: 1sliceCalories: 320kcalCarbohydrates: 45gProtein: 3gFat: 15gSaturated Fat: 5gPolyunsaturated Fat: 2gMonounsaturated Fat: 8gCholesterol: 30mgSodium: 250mgPotassium: 120mgFiber: 1gSugar: 25gVitamin A: 5IUCalcium: 2mgIron: 6mg

Notes

Use a white boxed cake mix for the most vibrant colors. Store in an airtight container at room temperature for up to 3-4 days.

Tried this recipe?

Let us know how it was!

Harry Potter Butterbeer Cupcakes to Enchant Your Taste Buds

As I stood in my kitchen, the enticing aroma of butterscotch wafted through the air, instantly transporting me to the heart of Hogwarts. The recipe for Harry Potter Butterbeer Cupcakes captures the whimsy and magic of the wizarding world, delivering soft, fluffy cupcakes that are perfect for any celebration. This delightful treat features a rich butterscotch frosting, making it not only a crowd-pleaser but also a fantastic option for movie nights or themed gatherings. Plus, they can be made alcohol-free for family fun or dressed up with a splash of butterscotch schnapps for an adult twist. Are you ready to bring a touch of enchantment into your kitchen? Let’s get baking!

Why are these cupcakes a must-try?

Magical Flavor: Each bite of these Harry Potter Butterbeer Cupcakes transports you to the wizarding world with their delightful butterscotch flavor.

Crowd-Pleasing Treat: Perfect for gatherings, these cupcakes are sure to impress both kids and adults alike, making them a hit at any party.

Super Simple: With straightforward ingredients and easy steps, baking magic in your kitchen has never been simpler!

Versatile Options: Go alcohol-free for family fun or add a splash of butterscotch schnapps for an adult-only soirée.

Decadent Frosting: The rich butterscotch frosting on top offers a creamy finish that elevates these cupcakes to a whole new level of indulgence.

For another delightful dessert, check out these Chocolate Fudge Cupcakes that are equally magical!

Harry Potter Butterbeer Cupcake Ingredients

• Here’s everything you need to create these enchanting cupcakes!

For the Cupcakes

  • White Cake Mix – Provides the base for your fluffy cupcakes; feel free to use yellow cake mix as a substitute for a slight variation.
  • Butterscotch Instant Pudding – Adds a rich flavor and moisture to the cupcakes, but you can switch to vanilla pudding for a lighter taste.
  • Eggs – Essential for binding the ingredients and adding richness; consider using applesauce for an egg-free version if needed.
  • Water – Hydrates the dry ingredients; for extra flavor, you can replace it with milk.
  • Vegetable Oil – Keeps the cupcakes moist; melted butter can be a delicious alternative.

For the Frosting

  • Powdered Sugar – Sweetens and thickens the frosting; granulated sugar can replace it, although the texture will change slightly.
  • Cold Milk – Helps achieve the right consistency; non-dairy milk makes a great substitute for a dairy-free option.
  • Whipped Topping – Provides a light, creamy texture; heavy cream whipped to soft peaks can be used if you prefer.
  • Butterscotch Topping – Perfect for drizzling and adding sweetness to your finished cupcakes, enhancing the overall flavor experience.

Let the magic begin in your kitchen with these Harry Potter Butterbeer Cupcakes!

Step‑by‑Step Instructions for Harry Potter Butterbeer Cupcakes

Step 1: Preheat and Prepare
Begin by preheating your oven to 350°F (175°C), ensuring it reaches the right temperature for even baking. While the oven warms up, line your cupcake pans with colorful liners to make your Harry Potter Butterbeer Cupcakes visually enchanting.

Step 2: Mix Dry Ingredients
In a large mixing bowl, combine the white cake mix and butterscotch pudding mix, whisking them together until fully blended. This dry mixture forms the flavorful foundation of your cupcakes, so take a moment to ensure there are no lumps before proceeding to the next step.

Step 3: Incorporate Wet Ingredients
Add the eggs, water, and vegetable oil to the dry mixture, and mix until everything is well combined. Be thorough to ensure no dry patches remain. The batter should be smooth and slightly thick, inviting that rich butterscotch flavor to shine through.

Step 4: Bake the Cupcakes
Distribute the batter evenly into the prepared cupcake tins, filling each liner about two-thirds full. Bake your cupcakes in the preheated oven for about 25 minutes, or until a toothpick inserted into the center comes out clean. This step marks the transformation of the batter into fluffy, magical treats.

Step 5: Cool Completely
Once baked, carefully remove the cupcake pans from the oven and let them cool for about 10 minutes. Then, transfer the cupcakes to wire racks to cool completely before frosting. This critical step prevents your frosting from melting and assures a beautifully finished Harry Potter Butterbeer Cupcakes.

Step 6: Prepare the Frosting
For the frosting, beat together the powdered sugar, cold milk, and butterscotch pudding in a medium bowl. Allow the mixture to rest for around 5 minutes to thicken slightly. This resting time will enhance the frosting’s texture, making it perfectly creamy and lush.

Step 7: Frost the Cupcakes
Gently fold in the thawed whipped topping into the thickened frosting mixture until it’s well blended. Use a spatula or piping bag to generously frost each cooled cupcake. The rich butterscotch frosting is the magical touch that elevates your cupcakes to perfection.

Step 8: Add Finishing Touches
To finish your Harry Potter Butterbeer Cupcakes, drizzle some butterscotch topping over the frosted cupcakes for an extra layer of sweetness and visual appeal. This final touch not only enhances the flavor but also makes your magical desserts look enchanting and irresistible.

How to Store and Freeze Harry Potter Butterbeer Cupcakes

Room Temperature: Cupcakes can be stored at room temperature for up to 2 days in an airtight container, keeping them fresh and delicious.

Fridge: For longer storage, place the cupcakes in the refrigerator in an airtight container, where they will stay delightful for up to 1 week.

Freezer: Freeze un-frosted Harry Potter Butterbeer Cupcakes for up to 3 months. Wrap each cupcake tightly in plastic wrap and then place them in a freezer-safe bag.

Reheating: To enjoy, let frozen cupcakes thaw in the refrigerator overnight before frosting and serving, or warm them in the microwave for a few seconds if desired.

What to Serve with Harry Potter Butterbeer Cupcakes

Create the perfect setting to enjoy a magical treat that will enchant your taste buds and delight your guests!

  • Creamy Vanilla Ice Cream: A scoop of vanilla ice cream adds a creamy, cool element that perfectly balances the rich butterscotch flavors of the cupcakes.

  • Caramel Sauce Drizzle: Drizzling warm caramel sauce enhances the sweetness and complements the butterscotch frosting, making each bite irresistible.

  • Fun-Themed Beverages: Serve with sparkling apple cider or butterbeer-inspired drinks to transport everyone to the wizarding world while they indulge in these scrumptious cupcakes.

  • Chocolate-Covered Pretzels: The salty crunch of pretzels pairs brilliantly with the sweetness of the cupcakes, bringing a delightful contrast of flavor and texture.

  • Fruit Salad: A refreshing fruit salad adds a burst of freshness and acidity that cuts through the richness of the cupcakes, making each bite lighter.

  • Mini Cheesecakes: Offering mini cheesecakes with a hint of lemon or vanilla introduces a creamy dessert that complements the butterscotch theme beautifully.

  • Magical Party Favors: Presenting each guest with themed candies or chocolate wands creates a whimsical end to the gathering, keeping the magic alive!

  • Hot Chocolate Bar: Set up a hot chocolate station to add warmth and coziness, especially during colder months, allowing guests to customize their drinks with toppings.

Harry Potter Butterbeer Cupcakes Variations

Feel free to add your own twist to these delightful cupcakes to suit your taste!

  • Boozy Option: Incorporate butterscotch schnapps into the batter and frosting for an adult-only version. Just be mindful of the added kick!

  • Flavored Pudding Swap: Use chocolate or vanilla pudding mix instead of butterscotch for a different flavor profile. This can create a whole new cupcake experience!

  • Cake Mix Alternative: For a fun twist, try using a lemon or spice cake mix to give your cupcakes a unique flavor twist. Each option will surprise your taste buds!

  • Milk Magic: Substitute water with milk in the batter for creamier, richer cupcakes. This small change can make a big impact on flavor and texture!

  • Extra Toppings: Don’t hold back! Top with caramel drizzle or crushed candy for a more festive look. It’s amazing how a little garnish can elevate your dessert.

  • Dairy-Free Delight: Use non-dairy milk and a non-dairy whipped topping to create a vegan-friendly version that’s just as delicious. Everyone deserves a magical treat!

  • Sweet & Salty: Sprinkle a bit of sea salt on top of the frosting for a sweet and salty contrast. This unexpected twist adds depth to the flavor!

If you’re on the lookout for another magical treat, be sure to check out these delicious Chocolate Fudge Cupcakes. They’re sure to charm your guests!

Expert Tips for Harry Potter Butterbeer Cupcakes

  • Cool Completely: Be sure to let your cupcakes cool completely before frosting; frosting on warm cupcakes can result in a gooey mess instead of a smooth finish.
  • Mix In Some Crunch: Consider adding butterscotch chips to the batter for an extra burst of flavor and delightful texture in your Harry Potter Butterbeer Cupcakes.
  • Check Baking Time: Keep an eye on baking time; smaller mini cupcakes cook faster than regular-sized ones, so adjust your timer accordingly to avoid dryness.
  • Perfect Frosting: To achieve the ideal frosting consistency, allow your frosting mixture to rest for 5 minutes after beating—this ensures the creamy texture you desire!
  • Go for Flavor: If using milk instead of water in the batter, this adds a lovely richness to the cupcakes; don’t skip this tip for enhanced flavor!

Make Ahead Options

These Harry Potter Butterbeer Cupcakes are perfect for busy home cooks looking to save time! You can prepare the cupcake batter and store it in the refrigerator for up to 24 hours before baking. Additionally, baked cupcakes can be kept in an airtight container for up to 3 days, ensuring they remain fresh and moist. When you’re ready to enjoy, simply frost the cooled cupcakes and drizzle with butterscotch topping just before serving. To maintain quality, make sure to allow the cupcakes to cool completely before frosting, as this prevents any melting. With this make-ahead strategy, you’ll have these magical treats ready with minimal effort on the day you need them!

Harry Potter Butterbeer Cupcakes Recipe FAQs

How do I choose the right cake mix for my cupcakes?
Use a white cake mix for a fluffy base; it provides the best texture for your Harry Potter Butterbeer Cupcakes. If you prefer a slightly richer flavor, yellow cake mix is a great alternative.

What’s the best way to store leftover cupcakes?
Store your cupcakes in the refrigerator in an airtight container for up to one week. This keeps them fresh and moist, allowing you to enjoy the magical flavors well after baking.

Can I freeze my cupcakes?
Absolutely! Freeze un-frosted Harry Potter Butterbeer Cupcakes for up to 3 months. Wrap each cupcake tightly in plastic wrap, then place them in a freezer-safe bag. When you’re ready to enjoy them, thaw in the fridge overnight before frosting.

What should I do if my cupcakes are dry?
If your cupcakes turn out dry, it might be due to overbaking. Always use a toothpick test to ensure they are done, and if they are still dry, you can drizzle some butterscotch sauce over them for added moisture and flavor.

Are these cupcakes safe for kids?
Yes! These cupcakes can be made alcohol-free, making them perfect for family gatherings. Just leave out the butterscotch schnapps, and you’ll have a delightful treat loved by children and adults alike.

How do I achieve the perfect frosting consistency?
To get a fluffy and creamy frosting, beat together the powdered sugar, milk, and butterscotch pudding, then let it rest for about 5 minutes. This allows the mixture to thicken up properly before folding in thawed whipped topping for that irresistible creamy finish!

Harry Potter Butterbeer Cupcakes

Harry Potter Butterbeer Cupcakes to Enchant Your Taste Buds

Delight in the whimsical flavors of Harry Potter Butterbeer Cupcakes, perfectly crafted for magical gatherings.
Prep Time 15 minutes
Cook Time 25 minutes
Cooling Time 10 minutes
Total Time 50 minutes
Servings: 12 cupcakes
Course: Dessert
Cuisine: British
Calories: 250

Ingredients
  

For the Cupcakes
  • 1 box White Cake Mix Yellow cake mix can be substituted.
  • 1 small box Butterscotch Instant Pudding Can substitute with vanilla pudding.
  • 3 large Eggs Use applesauce for an egg-free version.
  • 1 cup Water Milk can be used for extra flavor.
  • 1/2 cup Vegetable Oil Melted butter can be a delicious alternative.
For the Frosting
  • 2 cups Powdered Sugar Granulated sugar can replace it.
  • 1/2 cup Cold Milk Non-dairy milk can be used.
  • 1 cup Whipped Topping Heavy cream can be whipped to soft peaks.
  • 1/2 cup Butterscotch Topping For drizzling over cupcakes.

Equipment

  • Oven
  • Cupcake pans
  • Mixing bowls
  • whisk
  • spatula

Method
 

Step-by-Step Instructions
  1. Preheat your oven to 350°F (175°C) and line your cupcake pans with colorful liners.
  2. Combine the white cake mix and butterscotch pudding mix in a large mixing bowl, whisking until blended.
  3. Add eggs, water, and vegetable oil to the dry mixture and mix until smooth.
  4. Fill each cupcake liner about two-thirds full with batter and bake for 25 minutes.
  5. Let the baked cupcakes cool for about 10 minutes before transferring to wire racks to cool completely.
  6. For the frosting, beat powdered sugar, cold milk, and butterscotch pudding in a medium bowl and let it rest for 5 minutes.
  7. Fold in thawed whipped topping until well blended, then frost each cooled cupcake.
  8. Drizzle butterscotch topping over the frosted cupcakes for an extra layer of sweetness.

Nutrition

Serving: 1cupcakeCalories: 250kcalCarbohydrates: 30gProtein: 2gFat: 12gSaturated Fat: 5gPolyunsaturated Fat: 2gMonounsaturated Fat: 3gCholesterol: 50mgSodium: 200mgPotassium: 100mgFiber: 1gSugar: 20gVitamin A: 200IUCalcium: 20mgIron: 1mg

Notes

Let cupcakes cool completely before frosting to avoid a gooey mess. Consider adding butterscotch chips for added texture.

Tried this recipe?

Let us know how it was!

Irresistibly Moist Pumpkin Coffee Cake to Brighten Your Fall

As the leaves turn golden and the air grows crisp, there’s something utterly satisfying about transforming those iconic fall flavors into a delightful treat. This Moist Pumpkin Coffee Cake with Layered Streusel does just that, blending the comforts of home-baked goodness with the warmth of seasonal spices. Among its many charms, this cake stands out for its quick prep time and the delightful crunch of its layered streusel, making it an ideal companion for cozy brunches or festive gatherings. Plus, it’s perfect for those moments when you need a sweet pick-me-up without sacrificing quality home cooking. Are you ready to fill your kitchen with the irresistible aroma of cinnamon and pumpkin? Let’s dive into this delightful recipe!

Why is Pumpkin Coffee Cake So Irresistible?

Moist Texture: This Pumpkin Coffee Cake is incredibly tender and fluffy, making each bite a pure joy.

Crunchy Streusel: The layered streusel topping adds a delightful crunch, transforming the cake into a layered masterpiece.

Quick to Prepare: With a straightforward recipe, you can whip this up in no time, perfect for spontaneous brunch gatherings.

Versatile Treat: Great for breakfast, dessert, or as a coffee companion, this cake shines in any season.

Fall Flavors Galore: Bursting with the essence of pumpkin and warm spices, it captures the cozy spirit of fall brilliantly.

Want to explore more seasonal delights? Check out our Honeybun Carrot Cake or savor the comforting taste of Joumou Haitian Pumpkin Soup!

Pumpkin Coffee Cake Ingredients

Note: Gather these essential ingredients to create a moist and flavorful Pumpkin Coffee Cake.

For the Cake

  • All-Purpose Flour – Provides structure and texture; remember to spoon and level for accuracy.
  • Brown Sugar – Adds moisture and a deep caramel flavor; white sugar can be used as a substitute if needed.
  • Granulated Sugar – Sweetens the cake without overwhelming the pumpkin flavor.
  • Kosher Salt – Enhances sweetness and helps balance all the flavors.
  • Cinnamon – Brings essential warmth and spice to the cake’s flavor profile.
  • Pumpkin Pie Spice – This blend of spices gives the cake its cozy, autumnal character.
  • Butter (Melted) – Combines with dry ingredients for a chunky streusel texture.
  • Butter (Softened) – Provides richness and moisture to ensure a soft cake.
  • Pumpkin Puree – The central flavor and moisture component; avoid using sweetened pumpkin pie filling.
  • Large Eggs – Contributes leavening and moisture, essential for a fluffy cake.
  • Vegetable Oil – Keeps the cake wonderfully moist; light-flavor olive oil can be used as a substitute.
  • Vanilla Extract – Enhances the overall flavor of the cake.

For the Icing

  • Milk – Used in the icing for a smooth consistency; adjust as needed for thickness.
  • Powdered Sugar – Creates a sweet glaze that perfectly complements the Pumpkin Coffee Cake.

Now that you have your ingredients ready, it’s time to bring this seasonal delight to life!

Step‑by‑Step Instructions for Pumpkin Coffee Cake

Step 1: Preheat the Oven
Begin by preheating your oven to 350°F (175°C). While the oven warms up, grease a 9×13-inch baking pan to prevent the cake from sticking and ensure an easy release. You want to achieve a smooth surface that allows your delicious Pumpkin Coffee Cake to bake evenly and beautifully.

Step 2: Make the Streusel
In a mixing bowl, whisk together the all-purpose flour, brown sugar, granulated sugar, kosher salt, cinnamon, and pumpkin pie spice. Then, drizzle in the melted butter and mix until you achieve a crumbly texture. This streusel will provide a delightful crunch on top of your Pumpkin Coffee Cake. Once combined, refrigerate the streusel mixture to keep it firm.

Step 3: Prepare the Cake Batter
In a separate large bowl, whisk together the all-purpose flour, remaining sugars, baking powder, baking soda, and a pinch of salt. Add the softened butter and half of the pumpkin puree, mixing until the mixture is crumbly. This step ensures that your cake has a rich flavor base that will pair beautifully with the streusel topping.

Step 4: Combine Wet Ingredients
In another bowl, mix together the remaining pumpkin puree, large eggs, vegetable oil, and vanilla extract until well combined. Gradually pour this mixture into the dry ingredients, folding gently until just combined. Take care not to over-mix, as this will help keep your Pumpkin Coffee Cake tender and moist.

Step 5: Layer the Batter and Streusel
Spread about half of the cake batter into the prepared pan, smoothing out the top for an even layer. Sprinkle a generous amount of the chilled streusel over this layer, then repeat with the remaining batter and streusel. Finish with a final layer of batter and top with the remaining streusel, creating a beautiful layered effect that will make your Pumpkin Coffee Cake irresistible.

Step 6: Bake the Cake
Place the pan into the preheated oven and bake for 35 minutes. After this initial baking time, carefully remove the cake and add any remaining streusel on top. Return the cake to the oven for an additional 10-15 minutes or until a toothpick inserted in the center comes out clean. Your home will soon fill with the delightful aroma of spiced pumpkin baking.

Step 7: Cool Before Serving
Once baked to perfection, remove the Pumpkin Coffee Cake from the oven and allow it to cool in the pan for at least 15-20 minutes. This cooling period helps the flavors meld and ensures the cake sets properly, making it easier to slice and serve later.

Step 8: Make the Icing
In a small bowl, combine softened butter, vanilla extract, a pinch of salt, milk, and powdered sugar. Mix until you achieve a smooth glaze consistency, adjusting the milk as needed for thickness. Once your cake is completely cooled, drizzle this sweet icing over the top to add a delightful finishing touch to your Pumpkin Coffee Cake.

What to Serve with Moist Pumpkin Coffee Cake

As the sweet aroma of Pumpkin Coffee Cake fills your kitchen, it’s the perfect opportunity to create a delightful dining experience with these charming pairings.

  • Warm Apple Cider: A steaming mug of this spiced drink complements the cake’s warmth, enhancing that cozy, autumn feel.
  • Candied Pecans: Their crunchy sweetness adds an unexpected twist, providing a delightful contrast to the cake’s soft texture.
  • Whipped Cream: Silky and light, a dollop of freshly whipped cream enhances the flavors, giving your dessert an indulgent touch.
  • Vanilla Ice Cream: Add a scoop of smooth vanilla ice cream for a delightful cold contrast against the warm, spiced cake.
  • Pumpkin Spice Latte: Elevate your coffee experience by pairing it with this seasonal favorite—it’s a match made in fall heaven!
  • Caramel Drizzle: A sweet swirl of caramel can elevate this dessert to new heights, bringing an added layer of richness and flavor.
  • Autumn Salad: A flavorful salad with roasted squash and goat cheese introduces freshness and balances the sweetness of the cake.
  • Hot Chocolate: Rich, creamy hot cocoa provides a cozy companion on chilly days, making dessert time even more special.
  • Fresh Fruit Salad: Bright, tangy fruits offer a refreshing contrast to the dense cake, cutting through the sweetness beautifully.

These pairings will enhance your Pumpkin Coffee Cake experience, ensuring every bite is a joyful celebration of fall flavors!

Expert Tips for Pumpkin Coffee Cake

Perfect Temperature: Ensure your butter is at the right temperature; too soft can lead to a greasy batter, affecting the cake’s texture.

Don’t Over-Mix: Mix the batter gently just until combined; over-mixing can lead to a dense cake, so keep it light and fluffy.

Layer Wisely: When layering the streusel, do it in intervals to prevent it from weighing down the cake. This keeps your Pumpkin Coffee Cake light and airy.

Substitutions Made Easy: If you’re out of an ingredient, like vegetable oil, light-flavored olive oil works as a great substitute to maintain moisture.

Cool Before Icing: Make sure the cake has completely cooled before drizzling with icing; this ensures it adheres nicely and doesn’t melt away.

Extra Flavor: For added flavor depth, consider incorporating nuts or additional spices like nutmeg into the streusel for a delightful twist.

How to Store and Freeze Pumpkin Coffee Cake

Room Temperature: Store your Pumpkin Coffee Cake in an airtight container at room temperature for up to 2-3 days for optimal freshness.

Fridge: If you prefer to keep it longer, refrigerate the cake for up to a week, ensuring it’s wrapped tightly to prevent drying out.

Freezer: For extended storage, freeze slices of Pumpkin Coffee Cake wrapped in plastic wrap and foil for up to 2-3 months. Thaw overnight in the fridge before enjoying.

Reheating: To reheat, warm individual slices in the microwave for about 10-15 seconds or in the oven at 350°F until warmed through, enhancing the spices’ aroma.

Make Ahead Options

These Pumpkin Coffee Cakes are perfect for busy home cooks looking to save time during hectic weeks! You can prepare the streusel topping up to 24 hours in advance by mixing all the dry ingredients and incorporating melted butter; just refrigerate it until you’re ready to bake. Additionally, you can mix the pumpkin batter and refrigerate it for up to 3 days before layering, which keeps it fresh and ensures all the flavors meld beautifully. When you’re ready to serve, simply layer the chilled batter with the prepared streusel, bake, and enjoy a warm, homemade treat just as delicious as if made from scratch that day!

Pumpkin Coffee Cake Variations & Substitutions

Feel free to get creative and customize this delightful Pumpkin Coffee Cake to suit your tastes and dietary preferences!

  • Dairy-Free: Substitute butter with coconut oil or plant-based butter, and use almond or oat milk in the icing for a dairy-free delight.
  • Gluten-Free: Swap all-purpose flour with a gluten-free blend to cater to gluten sensitivities while maintaining delicious flavors.
  • Nutty Crunch: Add chopped pecans or walnuts to the streusel for a delightful nutty crunch that complements the pumpkin perfectly.
  • Spiced Up: Enhance the flavor profile by adding a pinch of nutmeg or allspice to the batter for a deeper autumn taste.
  • Sweet Potato Twist: Replace pumpkin puree with sweet potato puree for a slightly different flavor profile that’s equally comforting.
  • Maple Glaze: Instead of powdered sugar icing, drizzle a warm maple syrup glaze over the cooled cake for a sweet, natural finish.
  • Chocolate Lovers: Incorporate chocolate chips into the batter or streusel for a decadent chocolate and pumpkin combination that’s hard to resist.
  • Cinnamon Swirl: Swirl in a mixture of cinnamon and sugar into the batter before adding on the streusel for an extra burst of warmth.

By experimenting with these variations, your Pumpkin Coffee Cake can become a personalized masterpiece! And if you’re in the mood for more seasonal delights, don’t forget to check out our heavenly Strawberry Cheesecake Dump Cake or the vibrant flavors of Easter Poke Cake.

Pumpkin Coffee Cake Recipe FAQs

What is the best way to select ripe pumpkins for puree?
Absolutely! When choosing pumpkins for making puree, look for those that are firm, heavy for their size, and have a smooth skin free of blemishes. Small to medium-sized pumpkins are often sweeter. Avoid any with soft spots or discoloration, as this indicates overripeness.

How should I store leftover Pumpkin Coffee Cake?
You can keep your Pumpkin Coffee Cake in an airtight container at room temperature for 2-3 days. If you want it to last longer, feel free to refrigerate it, where it will stay fresh for up to a week. Just make sure it’s tightly wrapped to avoid drying out.

Can I freeze Pumpkin Coffee Cake? How?
Absolutely! Freezing is a great option for preserving your delicious Pumpkin Coffee Cake. Wrap individual slices tightly in plastic wrap, then in aluminum foil, and place them in a freezer-safe bag. They can be stored for up to 2-3 months. When you’re ready to enjoy, simply thaw in the fridge overnight, or warm slices in the microwave for 10-15 seconds.

What should I do if my cake comes out dense?
Very! If your Pumpkin Coffee Cake is dense, it might be due to over-mixing the batter or using too much flour. To prevent this, mix just until ingredients are combined and spoon and level the flour instead of scooping directly from the bag. If the butter was too soft or you added too many wet ingredients by mistake, consider adjusting the ratios next time to balance it out.

Are there any allergies I should be mindful of with this recipe?
The ingredients typically include common allergens like eggs and dairy (butter and milk). For a dairy-free option, you could use non-dairy milk and substitute eggs with applesauce or a flax egg. Always check with those you’re serving if they have any nut allergies, especially if you decide to add nuts to the streusel!

What’s the ideal temperature to serve Pumpkin Coffee Cake?
The more the merrier! Pumpkin Coffee Cake is delightful served warm or at room temperature. For an extra touch, consider warming individual slices slightly before serving, which enhances the flavors and makes it even more inviting.

Pumpkin Coffee Cake

Irresistibly Moist Pumpkin Coffee Cake to Brighten Your Fall

This Pumpkin Coffee Cake offers a delightful blend of flavors, perfect for cozy gatherings and seasonal festivities.
Prep Time 20 minutes
Cook Time 45 minutes
Cooling Time 20 minutes
Total Time 1 hour 25 minutes
Servings: 12 slices
Course: Dessert
Cuisine: American
Calories: 270

Ingredients
  

For the Cake
  • 2 cups All-Purpose Flour Remember to spoon and level for accuracy.
  • 1 cup Brown Sugar Adds moisture and a deep caramel flavor.
  • 1 cup Granulated Sugar Sweetens the cake without overwhelming the pumpkin flavor.
  • 1 teaspoon Kosher Salt Enhances sweetness and helps balance all the flavors.
  • 1 teaspoon Cinnamon Brings warmth and spice to the flavor profile.
  • 1 teaspoon Pumpkin Pie Spice Gives the cake its cozy, autumnal character.
  • 1/2 cup Butter (Melted) For a chunky streusel texture.
  • 1/2 cup Butter (Softened) Provides richness and moisture.
  • 1 cup Pumpkin Puree Avoid using sweetened pumpkin pie filling.
  • 2 large Eggs Essential for a fluffy cake.
  • 1/2 cup Vegetable Oil Keeps the cake moist.
  • 1 teaspoon Vanilla Extract Enhances overall flavor.
For the Icing
  • 2 tablespoons Milk Adjust as needed for thickness.
  • 1 cup Powdered Sugar Creates a sweet glaze.

Equipment

  • 9x13-inch baking pan
  • Mixing bowls
  • whisk

Method
 

Step‑by‑Step Instructions
  1. Preheat your oven to 350°F (175°C). Grease a 9x13-inch baking pan.
  2. In a mixing bowl, whisk together the all-purpose flour, brown sugar, granulated sugar, kosher salt, cinnamon, and pumpkin pie spice. Drizzle in the melted butter and mix until crumbly. Refrigerate the streusel mixture.
  3. In a separate bowl, whisk together the all-purpose flour, remaining sugars, baking powder, baking soda, and a pinch of salt. Add the softened butter and half of the pumpkin puree, mixing until crumbly.
  4. Mix the remaining pumpkin puree, eggs, vegetable oil, and vanilla extract in another bowl. Gradually pour into the dry ingredients, folding gently until just combined.
  5. Spread half the batter into the prepared pan, smooth the top, and sprinkle with streusel. Repeat with remaining batter and streusel.
  6. Bake for 35 minutes, add remaining streusel on top, and bake for an additional 10-15 minutes or until a toothpick comes out clean.
  7. Allow the cake to cool in the pan for at least 15-20 minutes.
  8. In a small bowl, combine softened butter, vanilla extract, a pinch of salt, milk, and powdered sugar to make icing. Drizzle over cake once cooled.

Nutrition

Serving: 1sliceCalories: 270kcalCarbohydrates: 38gProtein: 3gFat: 12gSaturated Fat: 7gPolyunsaturated Fat: 1gMonounsaturated Fat: 3gCholesterol: 30mgSodium: 200mgPotassium: 180mgFiber: 1gSugar: 15gVitamin A: 400IUVitamin C: 1mgCalcium: 40mgIron: 1mg

Notes

For best results, ensure butter is the right temperature, do not over-mix, and layer streusel wisely for a light cake.

Tried this recipe?

Let us know how it was!

Vampire Bite Halloween Cupcakes: Sinfully Sweet & Spooky Treats

As the sun sets on a chilly October evening, the thrill of Halloween comes alive in my kitchen. I can still feel the excitement bubbling over as I dive into making these Vampire Bite Halloween Cupcakes—a treat that combines the rich, velvety allure of red velvet cake with a spooky twist. With each creamy-filled bite eliciting gasps of delight, these visually striking cupcakes are not only a blast to create but also a guaranteed crowd-pleaser at any Halloween gathering. Perfect for both kids and the young at heart, you’ll love how easy they are to whip up, leaving ample room for creativity in decoration. Are you ready to sink your teeth into this charmingly eerie recipe? Let’s get started!

Why are these cupcakes a must-try?

Eerie Aesthetics: The striking visual of these Vampire Bite Halloween Cupcakes makes them a standout centerpiece for any spooky celebration. Creamy and Velvety: You’ll love the moist, rich red velvet flavor paired with a delightfully oozy filling that evokes the perfect Halloween vibe. Endless Customization: Feel free to experiment with decorations—add gummy worms or chocolate spiders for a personal touch! Quick and Simple: With straightforward steps, they’re easy to whip up, even for novice bakers. Serve alongside themed drinks like blood-red punch for an immersive experience that’s sure to delight guests!

Vampire Bite Halloween Cupcake Ingredients

For the Cupcake Batter

  • All-purpose flour – Structure of the cupcakes; can substitute with gluten-free flour if needed.
  • Granulated sugar – Adds sweetness; no substitutions suggested for best flavor.
  • Unsalted butter (softened) – Adds richness and moisture; can replace with margarine for a dairy-free option.
  • Large eggs – Provides moisture and binding; no substitutes for fluffiness.
  • Buttermilk – Adds tanginess and moisture; substitute with milk and a splash of vinegar.
  • Cocoa powder – Enhances the chocolate flavor; dark cocoa can be used for a richer taste.
  • Red food coloring (gel-based) – Provides the striking deep red color; liquid food coloring can be used but may affect texture.
  • Vanilla extract – Adds depth of flavor; no substitutions suggested.
  • Baking soda – Acts as a leavening agent; baking powder can be used if needed.
  • White vinegar – Activates baking soda for rise; can omit if using baking powder.
  • Salt – Enhances flavor; no substitutions suggested.

For the Creamy Filling

  • Sweetened condensed milk – Creates a luscious creamy filling; evaporated milk may be a substitute.
  • Additional unsalted butter – Smooths out the cream filling for a delightful texture.
  • Red velvet cake crumbs – Adds texture; make from baking the cupcakes in advance and removing the centers.

For the Frosting

  • Powdered sugar – Ensures sweetness for the buttercream; no specific substitutions suggested for best consistency.
  • Milk or heavy cream – Adjusts the consistency of frosting; non-dairy milk can be used.
  • Ivory or peach food coloring – Adjusts the frosting to a skin tone; no specific substitutes suggested.

For Decoration

  • Candy fangs/red gelatin – Fun decorative elements; fondant or chocolate can be used for similar effects.
  • Red syrup/edible red gel – Adds “blood” drips; homemade fruit syrup can serve as an alternative.
  • Straws (non-edible) – Use for decoration; consider using edible alternatives like Fruit Roll-Ups.

These Vampire Bite Halloween Cupcakes are sure to be a hit, combining delicious flavors with a spine-chilling presentation that will excite any Halloween gathering!

Step‑by‑Step Instructions for Vampire Bite Halloween Cupcakes

Step 1: Prepare Cupcake Batter
Begin by preheating your oven to 350°F (175°C) and lining a muffin tin with cupcake liners. In a large mixing bowl, cream together ½ cup of softened unsalted butter and 1 cup of granulated sugar until light and fluffy, about 3 minutes. Incorporate 2 large eggs, one at a time, mixing well after each. Then, add 1 cup of buttermilk, 2 tablespoons of cocoa powder, 2–3 teaspoons of red gel food coloring, 1 teaspoon of vanilla extract, ½ teaspoon of baking soda, 1 tablespoon of white vinegar, and ½ teaspoon of salt, blending until smooth. Gradually fold in 2 cups of all-purpose flour until just combined.

Step 2: Bake Cupcakes
Spoon the red velvet batter into the lined muffin tin, filling each cup about two-thirds full. Bake in the preheated oven for 18-20 minutes, or until a toothpick inserted in the center comes out clean. Once baked, remove the cupcakes from the oven and allow them to cool in the pan for 5 minutes before transferring them to a wire rack. Let the cupcakes cool completely to ensure they maintain their structure when hollowed.

Step 3: Hollow Centers
Once the cupcakes have completely cooled, it’s time to create space for the delicious creamy filling. Take a small knife or a melon baller and carefully cut out the centers of each cupcake, leaving a small border around the edges to create a cavity. Set aside the removed cupcake tops, as they will be used later to make red velvet cake crumbs for decoration. This step adds a fun surprise to your Vampire Bite Halloween Cupcakes!

Step 4: Make Filling
In a medium bowl, combine ½ cup of sweetened condensed milk with 2 tablespoons of softened unsalted butter and a few drops of red food coloring to enhance that oozy effect. Mix until smooth and creamy. Use a piping bag or a small spoon to fill each hollow center of the cupcakes with this luscious filling, allowing it to slightly overflow. This delightful cream will create the perfect “bite” effect when your guests take a bite of the Vampire Bite Halloween Cupcakes.

Step 5: Prepare Frosting
For the frosting, beat together 1 cup of softened unsalted butter and 3-4 cups of powdered sugar in a large bowl until creamy. Gradually add 2 tablespoons of milk and a splash of vanilla extract, mixing until combined. Check the consistency and add more milk if needed to achieve a smooth, spreadable texture. Incorporate a touch of ivory or peach food coloring to create a skin-toned hue, perfect for topping these spooky treats.

Step 6: Frost Cupcakes
Once your frosting is ready, use a spatula or piping bag fitted with your favorite tip to generously frost the tops of each filled cupcake. Aim for a smooth, even layer, allowing the buttercream to create a slight dome. The pale frosting will contrast beautifully with the rich red filling inside, making your Vampire Bite Halloween Cupcakes look even more tempting and festive.

Step 7: Decorate
Now comes the fun part—decorating! Drizzle red syrup or edible red gel on top of the frosted cupcakes for that chilling blood drip effect. Place candy fangs or gummy worms strategically on top to symbolize those spooky bites. Feel free to get creative with additional decorations, making each cupcake uniquely eerie. This finishing touch will mesmerize your guests at any Halloween party!

Step 8: Serve
When ready to serve your Vampire Bite Halloween Cupcakes, present them on a dark platter surrounded by fun Halloween-themed decorations. This eerie display will offer an inviting yet spooky atmosphere, enhancing the bite-sized treats’ appeal. Sit back, watch the delighted faces of your guests, and enjoy the delightful flavors that come with each delicious bite!

Make Ahead Options

These Vampire Bite Halloween Cupcakes are perfect for meal prep, allowing you to enjoy the festivities without the last-minute rush. You can bake the cupcakes up to 24 hours in advance; simply cool them completely and store them in an airtight container at room temperature. The creamy filling can also be made ahead and stored in the refrigerator for up to 3 days—just give it a quick stir before using. When it’s time to serve, hollow the centers, fill them with the creamy mixture, frost, and decorate just before your guests arrive to ensure they’re as fresh and delightful as possible. Enjoy the ease of preparation while still impressing your Halloween party-goers with these show-stopping treats!

Storage Tips for Vampire Bite Halloween Cupcakes

Room Temperature: Store decorated cupcakes at room temperature for up to 2 days in a cool, dry place to maintain freshness.

Fridge: If you need to keep them longer, refrigerate the cupcakes for up to 5 days. Allow them to come to room temperature before serving for the best taste and texture.

Freezer: Unfrosted cupcakes can be frozen for up to 3 months. Wrap them tightly in plastic wrap and then place them in an airtight container to prevent freezer burn.

Reheating: For a warm treat, gently microwave the cupcakes for about 10-15 seconds before serving, ensuring neither the cupcake nor the frosting overheats. Enjoy your Vampire Bite Halloween Cupcakes at their best!

What to Serve with Vampire Bite Halloween Cupcakes

Elevate your spooky gathering with delightful accompaniments that harmonize with the rich flavors and visual charm of these hauntingly scrumptious cupcakes.

  • Blood-Red Punch: This fruity drink captures the Halloween spirit, offering a vibrant visual and sweet taste that thrills the senses.

  • Dark Chocolate Beverages: Rich, velvety hot cocoa or a chocolate-infused cocktail can beautifully complement the red velvet flavor. The contrasting tastes create a satisfying indulgence.

  • Creepy Cheese Board: Include an assortment of cheeses and crackers, adding some spooky fruits like blackberries or plums for an eerie yet gourmet touch. Each bite serves as a delightful contrast to the sweetness of the cupcakes.

  • Gummy Worms: Scatter these creepy candies on your serving platter or use them as a playful topping. They add an element of fun and whimsy that perfectly aligns with the Halloween theme.

  • Ghostly Meringues: Light and airy, these delicate treats not only complement the cupcake’s richness but also form an enchanting display beside your Vampire Bite Halloween Cupcakes.

  • Pumpkin Spice Cookies: These soft, spiced treats can provide a comforting warmth and flavor that gently balances the sweetness of the cupcakes, creating a delightful dessert spread.

  • Eerie Fruit Kabobs: Thread spooky fruits like strawberries, bananas, and blueberries onto skewers for a colorful and fresh contrast. This playful twist adds a refreshing element that guests will love.

  • Trick-or-Treat Brownies: These fudgy delights can provide a textural contrast while remaining within the theme, appealing to both chocolate lovers and cupcake enthusiasts alike.

  • Witch’s Brew Mocktail: A fizzy blend of green soda and lime juice, this refreshing drink adds a fun twist while harmonizing perfectly with the sweet richness of the Vampire Bite Halloween Cupcakes.

Vampire Bite Halloween Cupcakes Variations

Feel free to get creative and customize your spooky treats with these fun twists!

  • Almond Flavor: Substitute almond extract for vanilla to add a deliciously nutty note to your cupcakes.

  • Green Witch’s Brew: Experiment with green food coloring in your creamy filling for a thrilling “witch’s brew” surprise!

  • Chocolate Spiders: Decorate with chocolate spiders for an extra creepy touch—perfect for those mini monster enthusiasts!

  • Gummy Worms: Poke gummy worms into the frosting for a whimsical twist that adds a playful element to your cupcakes.

  • Spicy Twists: Add a pinch of cayenne pepper to the frosting for a subtle, surprising heat that contrasts with the sweetness.

  • Red Velvet Crust: Blend crushed red velvet cake crumbs into your frosting for added texture and a more intense red color.

  • Creamy Coconut: Swap out sweetened condensed milk for coconut cream for a luscious tropical flair that surprises the senses.

  • Mock Blood Drips: Use raspberry puree instead of syrup for a fresher, fruitier “blood” effect—it’s not only pretty but delicious too!

Explore these creative variations to make your Vampire Bite Halloween Cupcakes even more memorable! Pair them with homemade Chocolate Fudge Cupcakes or serve alongside comforting Potato Bacon Bites for a delightful Halloween spread!

Expert Tips for Vampire Bite Halloween Cupcakes

  • Smooth Buttercream: Ensure your buttercream is well-mixed for a silky finish. Lumps in the frosting can dampen the cupcake’s spooky aesthetic.

  • Oozy Filling: For the best “blood” effect, make your filling runnier. This helps create a dramatic ooze when bitten into, perfect for the Vampire Bite Halloween Cupcakes.

  • Use Gel Coloring: Stick to gel food coloring for a deep, vivid hue without adjusting the batter consistency. Liquid coloring can lead to unexpected texture issues.

  • Edible Decorations: Consider using edible straws or Fruit Roll-Ups instead of non-edible straws. They lighten the playful presentation while still aligning with the Halloween theme.

  • Make-Ahead Options: Bake the cupcakes and prepare the filling a day in advance, but wait to frost until just before serving for the freshest look and best texture.

  • Storage Tips: Keep decorated cupcakes at room temperature for up to 2 days or refrigerate for up to 5 days. Let them return to room temperature before serving for optimal flavor.

Vampire Bite Halloween Cupcakes Recipe FAQs

What’s the best way to select ripe ingredients for these cupcakes?
Absolutely! When choosing ingredients, opt for fresh, high-quality items. Look for unsalted butter that’s soft but not melted, and eggs should be at room temperature for better incorporation. When selecting red food coloring, gel-based options provide the best results, delivering vibrant color without altering the batter’s consistency.

How should I store my Vampire Bite Halloween Cupcakes and how long will they last?
You can store your decorated cupcakes at room temperature for up to 2 days in a cool, dry area. If you want to keep them longer, refrigerate them for up to 5 days. Just remember to let them come back to room temperature before serving to ensure that delectable creamy filling shines!

Can I freeze my Vampire Bite Halloween Cupcakes?
Definitely! If you’ve baked too many or want to save some for later, unfrosted cupcakes can be frozen for up to 3 months. To freeze, wrap each cupcake tightly in plastic wrap and place them in an airtight container to prevent freezer burn. When you’re ready to enjoy them, simply thaw at room temperature and frost just before serving.

What should I do if my cupcakes sink in the middle after baking?
That’s a common concern! If your cupcakes sink, it may be due to overmixing the batter, which can lead to excess air. Ensuring accurate oven temperature is also crucial—an oven thermometer can help! Bake the cupcakes until just a toothpick comes out clean. If you find they are still sinking, it’s worthwhile to check your baking soda’s freshness, as old leavening agents can impact rise.

Are these cupcakes safe for pets or those with allergies?
When it comes to dietary considerations, these cupcakes contain common allergens, including gluten, dairy, and eggs. If you’re making them for someone with allergies, consider gluten-free flour and dairy substitutes, like almond or oat milk. As for pets, keep them away from these treats! Chocolate (from cocoa powder) and excessive sugar are harmful to pets. Always prioritize safety!

Vampire Bite Halloween Cupcakes

Vampire Bite Halloween Cupcakes: Sinfully Sweet & Spooky Treats

Enjoy spooky and delicious Vampire Bite Halloween Cupcakes that are rich in flavor and visually striking.
Prep Time 30 minutes
Cook Time 20 minutes
Cooling Time 15 minutes
Total Time 1 hour 5 minutes
Servings: 12 cupcakes
Course: Dessert
Cuisine: American
Calories: 300

Ingredients
  

Cupcake Batter
  • 2 cups all-purpose flour can substitute with gluten-free flour if needed
  • 1 cup granulated sugar no substitutions suggested for best flavor
  • ½ cup unsalted butter (softened) can replace with margarine for a dairy-free option
  • 2 large eggs no substitutes for fluffiness
  • 1 cup buttermilk substitute with milk and a splash of vinegar
  • 2 tablespoons cocoa powder dark cocoa can be used for a richer taste
  • 2-3 teaspoons red food coloring (gel-based) liquid food coloring can be used but may affect texture
  • 1 teaspoon vanilla extract no substitutions suggested
  • ½ teaspoon baking soda baking powder can be used if needed
  • 1 tablespoon white vinegar can omit if using baking powder
  • ½ teaspoon salt no substitutions suggested
Creamy Filling
  • ½ cup sweetened condensed milk evaporated milk may be a substitute
  • 2 tablespoons unsalted butter for a delightful texture
  • 1 cup red velvet cake crumbs made from baking cupcakes in advance and removing the centers
Frosting
  • 3-4 cups powdered sugar no specific substitutions suggested for best consistency
  • 2 tablespoons milk or heavy cream non-dairy milk can be used
  • 1 drop ivory or peach food coloring no specific substitutes suggested
Decoration
  • as needed candy fangs/red gelatin fondant or chocolate can be used for similar effects
  • as needed red syrup/edible red gel homemade fruit syrup can serve as an alternative
  • as needed non-edible straws consider using edible alternatives like Fruit Roll-Ups

Equipment

  • Muffin Tin
  • Mixing Bowl
  • Piping Bag
  • spatula
  • Knife

Method
 

Cupcake Preparation
  1. Preheat your oven to 350°F (175°C) and line a muffin tin with cupcake liners.
  2. Cream together ½ cup of softened unsalted butter and 1 cup of granulated sugar until light and fluffy, about 3 minutes.
  3. Incorporate 2 large eggs one at a time, mixing well after each.
  4. Add 1 cup of buttermilk, 2 tablespoons of cocoa powder, 2-3 teaspoons of red gel food coloring, 1 teaspoon of vanilla extract, ½ teaspoon of baking soda, 1 tablespoon of white vinegar, and ½ teaspoon of salt, blending until smooth.
  5. Gradually fold in 2 cups of all-purpose flour until just combined.
Baking
  1. Spoon the red velvet batter into the lined muffin tin, filling each cup about two-thirds full.
  2. Bake for 18-20 minutes, or until a toothpick inserted in the center comes out clean.
  3. Remove from the oven and cool in the pan for 5 minutes before transferring to a wire rack. Let cool completely.
Hollowing Centers
  1. Carefully cut out the centers of each cupcake, leaving a small border around the edges to create a cavity.
  2. Set aside the removed cupcake tops to make red velvet cake crumbs for decoration.
Filling Preparation
  1. In a medium bowl, mix ½ cup of sweetened condensed milk with 2 tablespoons of softened unsalted butter and a few drops of red food coloring until smooth and creamy.
  2. Fill each hollow center with this luscious filling, allowing it to slightly overflow.
Frosting Preparation
  1. Beat together 1 cup of softened unsalted butter and 3-4 cups of powdered sugar until creamy.
  2. Gradually add 2 tablespoons of milk and a splash of vanilla extract, mixing until combined.
  3. Add more milk if needed to achieve a smooth, spreadable texture, then incorporate ivory or peach food coloring.
Frosting and Decorating
  1. Generously frost the tops of each filled cupcake with the prepared frosting.
  2. Drizzle red syrup or edible red gel on top for a chilling blood drip effect.
  3. Place candy fangs or gummy worms: feel free to get creative!
Serving
  1. Present the cupcakes on a dark platter surrounded by Halloween-themed decorations.

Nutrition

Serving: 1cupcakeCalories: 300kcalCarbohydrates: 45gProtein: 3gFat: 13gSaturated Fat: 8gPolyunsaturated Fat: 0.5gMonounsaturated Fat: 4gCholesterol: 40mgSodium: 180mgPotassium: 60mgFiber: 1gSugar: 25gVitamin A: 200IUCalcium: 20mgIron: 1mg

Notes

For best results, ensure buttercream is well-mixed for a silky finish. Bake and prepare filling a day in advance if desired. Store decorated cupcakes at room temperature for up to 2 days or refrigerate for up to 5 days.

Tried this recipe?

Let us know how it was!

Hocus Pocus Halloween Popcorn that’s Spooktacularly Sweet

As the leaves begin to swirl and the air turns crisp, a wave of excitement for Halloween sweeps through my kitchen. This year, I took a time-honored favorite and transformed it into the enchanting Hocus Pocus Halloween Popcorn. Picture salty popcorn lovingly coated in vibrant white chocolate, dressed to impress with a delightful array of mix-ins that beckon to be nibbled on at any spooky gathering. It’s the ideal Halloween snack, striking a perfect balance between fun and customization; whether catered for a party or as a whimsical treat for your little ghouls, this recipe shines. Plus, with vegan options available, it’s a treat everyone can enjoy! Are you ready to conjure up some festive magic and take a bite out of this Halloween delight?

Why is This Halloween Snack a Hit?

Versatile Mix-Ins: You can easily customize this popcorn to suit your taste buds, whether you prefer classic Halloween treats like candy corn or adventurous additions like dried fruits.

Vibrant Colors: The colorful white chocolate and mix-ins create a visually stunning snack that’s perfect for festive gatherings or classroom treats.

Quick & Easy: With simple instructions and a short prep time, you can whip up this delicious popcorn in no time. For a faster version, consider using microwave popcorn!

Crowd-Pleasing Appeal: This treat is bound to be a hit at any Halloween party, delighting both kids and adults with its charm and taste.

Vegan-Friendly Options: With substitutions available, everyone can indulge in this spooky snack without compromising their dietary preferences.

Ready to make this fun treat shine at your next gathering? Serve it in mini cauldrons or Halloween-themed bags to elevate the festive spirit!

Hocus Pocus Halloween Popcorn Ingredients

For the Popcorn Base

  • Popcorn kernels – Provides the perfect crunchy base for our Halloween snack. Use microwave popcorn for quicker prep!
  • Coconut oil – Adds a rich, buttery flavor; substitute with vegetable oil if you prefer.
  • Popcorn salt – Enhances the flavor; adjust to taste or omit for less saltiness.

For the Coating

  • White chocolate chips – The sweet, creamy coating that makes this popcorn irresistible; vegan white chocolate can be used for a dairy-free version.

For the Color

  • Food coloring (orange, green, purple) – These colors bring a festive flair to your treat; gel or liquid food coloring works well!

For the Festive Touch

  • Halloween sprinkles – Bring extra fun and decoration; feel free to substitute with any colorful sprinkles for the occasion.
  • Mini chocolate chips – Add delightful texture and a pop of flavor; choose seasonal colors for that holiday spirit.
  • Small candy eyes – A whimsical addition that enhances the Halloween theme; they can be omitted for a simpler look.

For Extra Sweetness

  • Candy corn & M&Ms – Alluring sweet elements to amp up the fun; select colors that match the Halloween theme!
  • Reese’s Pieces – For an extra chocolatey kick; peanut butter candies can make a great alternative.

Embrace the spirit of Halloween with this Hocus Pocus Halloween Popcorn recipe—perfect for every festive gathering!

Step‑by‑Step Instructions for Hocus Pocus Halloween Popcorn

Step 1: Prepare Your Baking Sheets
Preheat your oven to 200°F (93°C) and gather three baking sheets. Line each sheet with parchment paper, ensuring they are ready for the colorful popcorn to come. This preparation step is vital for creating the perfect Hocus Pocus Halloween Popcorn, as it will help keep the chocolate-coated pieces from sticking.

Step 2: Pop the Popcorn
In a large pot, heat 2 tablespoons of coconut oil over medium heat. Add a few popcorn kernels to test the temperature; when they pop, the oil is ready! Carefully add the remaining popcorn kernels, cover with a lid, and shake the pot gently until popping slows to about two seconds between pops, which should take around 3-5 minutes. Once done, transfer the popcorn to a large bowl to cool.

Step 3: Divide the Popcorn
Once your popcorn has cooled, divide it evenly into three large bowls. This will be helpful when you coat each batch with melted white chocolate. As you separate the popcorn, make sure to maintain the fluffy texture, as it adds to the delightful crunch of the Hocus Pocus Halloween Popcorn.

Step 4: Melt the White Chocolate
In microwave-safe bowls, combine your white chocolate chips and a teaspoon of coconut oil for added richness. Microwave in 30-second intervals, stirring frequently until completely melted, which usually takes about 1-2 minutes. This melted chocolate will form a sweet coating for your Hocus Pocus popcorn, so be cautious not to burn it.

Step 5: Add Food Coloring
Once your white chocolate is melted, it’s time to add the fun! Incorporate drops of food coloring into each bowl of chocolate, mixing until you achieve vibrant hues of orange, green, and purple. Aim for a festive look to enhance the magic of your Hocus Pocus Halloween Popcorn, and feel free to experiment with different shades!

Step 6: Coat the Popcorn
Drizzle the colored white chocolate over each bowl of popcorn gradually, using spatulas to gently fold and coat the popcorn evenly. This process will take about 2-3 minutes per bowl. Spread the popcorn in a thin layer across your prepared baking sheets, ensuring that the colorful chocolate covers every piece.

Step 7: Add Fun Mix-Ins
While the chocolate is still warm, sprinkle your chosen Halloween-themed mix-ins over the popcorn. Consider using mini chocolate chips, Halloween sprinkles, and small candy eyes for added texture and excitement. This step takes about 1-2 minutes and makes your Hocus Pocus Halloween Popcorn even more festive and appealing.

Step 8: Let It Set
Allow the popcorn to dry at room temperature for about 5 minutes, letting the chocolate harden slightly. Once firm, you can break apart the popcorn into clusters or pieces as desired. Your Hocus Pocus Halloween Popcorn is now ready to be served in mini cauldrons or Halloween-themed bags for that extra festive spirit!

Make Ahead Options

These Hocus Pocus Halloween Popcorn treats are fantastic for busy cooks looking to streamline their Halloween festivities! You can pop the popcorn and store it in an airtight container for up to 3 days in advance, ensuring it stays fresh and crunchy. Additionally, the melted white chocolate can be prepared and colored, then refrigerated for up to 24 hours. When ready to serve, simply reheat the chocolate in the microwave for 15-30 seconds until it’s melted and easy to drizzle. Finally, coat the popcorn, sprinkle on your mix-ins, and let it set as directed. With this make-ahead method, you’ll enjoy less kitchen chaos and more time for hauntingly fun celebrations!

Hocus Pocus Halloween Popcorn Variations

Feel free to unleash your creativity with this delightful Halloween treat, inviting all kinds of fun twists to make it uniquely yours!

  • Dairy-Free: Substitute white chocolate chips with vegan white chocolate to make this treat perfect for dairy-free friends.
  • Chocolaty Delight: Use dark or milk chocolate for the coating instead of white chocolate, adding a rich flavor that pairs delightfully with the popcorn’s saltiness.
  • Fall-Inspired: Incorporate dried cranberries or apples to add a lovely autumnal flavor and chewy texture to your popcorn concoction.
  • Crunchy Pretzel Twist: Mix in broken pretzel pieces for a salty crunch that complements the sweet chocolate beautifully. The balance is just divine!
  • Spiced Up: Add a sprinkle of cinnamon or pumpkin spice to the coating for a warm flavor that evokes the essence of fall and Halloween.
  • Sweet & Salty: Toss in some salted peanuts or cashews. The savory nuts provide a satisfying contrast to the sweet chocolate-covered popcorn!
  • Garish Glow: For a fun twist, try glow-in-the-dark sprinkles to give your Hocus Pocus popcorn a whimsical touch that will wow little trick-or-treaters.
  • Adjust the Heat: Feeling adventurous? Incorporate a pinch of cayenne pepper or chili powder into the white chocolate while melting for a spicy surprise in every bite!

With these variations, every batch can become an exciting new creation to share! Don’t forget, if you’re looking for more spooky delights, check out our spooky Halloween treats for even more inspiration.

What to Serve with Hocus Pocus Halloween Popcorn?

As the festivities are in full swing, pair your enchanting treat with delightful accompaniments that bring out the magic of Halloween.

  • Spooky Fruit Cups: Fresh fruit like oranges and grapes can be a light and refreshing contrast to the sweetness of popcorn. These vibrant colors add a healthy touch to your Halloween spread.

  • Pumpkin Spice Hot Chocolate: Indulge in this warm, cozy drink full of fall flavors. Its creamy, sweet profile complements the crunchy, sweet popcorn perfectly — ideal for sips between munching!

  • Witch’s Brew Punch: A fizzy, green punch with lemon-lime soda mixed with lime sherbet will enhance your Halloween vibe. It’s fun, lively, and full of freshness to balance the sweetness of the popcorn.

  • Creepy Mummy Dogs: These flaky, crescent-wrapped hot dogs make the perfect finger food. Their savory flavor pairs wonderfully with the sweet and salty mixture of your delightful popcorn.

  • Gingerbread Goblins: Create adorable gingerbread cookies to add a spiced sweetness that harmonizes beautifully with the treat. Their chewiness and warmth strike a balance with Hocus Pocus popcorn’s crunch.

  • Chocolate-Dipped Pretzels: The salty crunch of pretzels dipped in dark chocolate adds a delightful combination of flavors and textures that enhance the popcorn’s sweetness. Sweet and salty never tasted so good together!

  • Halloween-Themed Cheese Platter: A selection of cheeses with crackers and festive-themed shapes makes a sophisticated accompaniment. Cuts of cheese can provide a savory contrast to the sweet popcorn.

Elevate your Halloween gathering with these delicious pairings, and let your guests enjoy a feast that is both whimsical and satisfying!

Tips for the Best Hocus Pocus Halloween Popcorn

  • Dry Equipment Is Key: Ensure all bowls and spatulas are completely dry. Moisture causes the chocolate to seize, ruining your coating.

  • Color Play: Experiment with different shades of food coloring for a unique look! Mixing colors can result in beautiful Halloween-themed hues.

  • Mind the Melting: Melt the white chocolate in short bursts, stirring frequently to prevent burning. Overheated chocolate is hard to work with.

  • Layer Wisely: Spread the coated popcorn in a thin layer on baking sheets for even drying. Thick layers can trap heat and moisture, leading to soggy popcorn.

  • Make Ahead: Store your Hocus Pocus Halloween Popcorn in airtight containers to keep it fresh for up to a week. This is great for pre-party prep!

Storage Tips for Hocus Pocus Halloween Popcorn

Room Temperature: Store the popcorn in an airtight container to maintain its crunchiness for up to 1 week; keep it away from direct sunlight.

Fridge: If you prefer a cooler treat, you can refrigerate the popcorn; however, it may lose some of its crunchy texture.

Freezer: For longer-term storage, freeze the popcorn in a sealed freezer bag. It will stay fresh for up to 3 months; allow it to thaw at room temperature before enjoying.

Reheating: If you want to refresh the texture, simply pop the popcorn in the oven on low heat for about 5 minutes before serving. Enjoy the delightful Hocus Pocus Halloween Popcorn as it was meant to be!

Hocus Pocus Halloween Popcorn Recipe FAQs

What type of popcorn should I use?
Absolutely! You can use either regular popcorn kernels for popping on the stove or opt for microwave popcorn for a quicker preparation. I often prefer using my stovetop version, as it yields light and fluffy popcorn, but microwave popcorn is an efficient substitute when you’re pressed for time.

How should I store my Hocus Pocus Halloween Popcorn?
For the best texture, store the popcorn in an airtight container at room temperature. This will keep it fresh and crunchy for up to a week. If there’s any chance you won’t finish it in time, you can also refrigerate it, but be aware that it might lose a bit of its delightful crispness!

Can I freeze the popcorn? How?
Definitely! For longer storage, you can freeze the Hocus Pocus Halloween Popcorn in a sealed freezer bag. Just be sure to remove as much air as possible to prevent freezer burn. It will stay fresh for up to 3 months. When you’re ready to enjoy it, let it thaw at room temperature for the best texture!

What should I do if my chocolate seizes?
Oh no, it happens sometimes! If your chocolate seizes up, don’t panic! You can try adding a teaspoon of coconut oil or vegetable oil to the mixture and gently reheating it in short bursts, stirring constantly until it becomes smooth again. This can help restore the creamy consistency you need for coating your popcorn.

Can I make this recipe vegan-friendly?
Very much so! To make your Hocus Pocus Halloween Popcorn vegan, simply substitute regular white chocolate chips with vegan white chocolate chips. Additionally, ensure that any mix-ins like candies are dairy-free. This way, everyone can enjoy this spooky snack without compromise!

What if my popcorn turns out soggy?
If your popcorn ends up soggy, it can sometimes be due to spreading it too thickly or not allowing enough drying time. To rescue it, you can preheat your oven to a low temperature (around 200°F or 93°C) and spread the popcorn on a baking sheet. Heat for about 5-10 minutes, watching closely, until it becomes crisp again. Enjoy your revived treat!

Hocus Pocus Halloween Popcorn

Hocus Pocus Halloween Popcorn that's Spooktacularly Sweet

Delight in this Hocus Pocus Halloween Popcorn, a spooktacularly sweet treat perfect for festive gatherings.
Prep Time 10 minutes
Cook Time 5 minutes
Cooling Time 5 minutes
Total Time 20 minutes
Servings: 8 cups
Course: Dessert
Cuisine: American
Calories: 200

Ingredients
  

For the Popcorn Base
  • 1 cup Popcorn kernels Use microwave popcorn for quicker prep
  • 2 tablespoons Coconut oil Can substitute with vegetable oil
  • to taste Popcorn salt Adjust or omit for less saltiness
For the Coating
  • 1 cup White chocolate chips Vegan white chocolate can be used
For the Color
  • a few drops Food coloring (orange, green, purple) Gel or liquid works well
For the Festive Touch
  • 1 cup Halloween sprinkles Can substitute with colorful sprinkles
  • 1/2 cup Mini chocolate chips Choose seasonal colors
  • 1/4 cup Small candy eyes Can be omitted for simplicity
For Extra Sweetness
  • 1/2 cup Candy corn Select colors that match the Halloween theme
  • 1/2 cup M&Ms
  • 1/2 cup Reese's Pieces Peanut butter candies can be used as an alternative

Equipment

  • Large pot
  • Baking Sheets
  • Microwave-safe bowls
  • Spatulas

Method
 

Step-by-Step Instructions
  1. Preheat your oven to 200°F (93°C) and prepare three baking sheets lined with parchment paper.
  2. In a large pot, heat 2 tablespoons of coconut oil. Test with a few kernels, then add remaining kernels. Once popping slows, transfer popcorn to a bowl.
  3. Divide cooled popcorn into three bowls for coating.
  4. Melt white chocolate with a teaspoon of coconut oil in microwave-safe bowls in 30-second intervals.
  5. Add food coloring into melted chocolate, mixing until you achieve vibrant colors.
  6. Drizzle chocolate over popcorn and gently fold to coat, then spread on prepared baking sheets.
  7. While warm, sprinkle Halloween-themed mix-ins over popcorn.
  8. Let popcorn dry at room temperature for about 5 minutes, then break into clusters.

Nutrition

Serving: 1cupCalories: 200kcalCarbohydrates: 30gProtein: 2gFat: 9gSaturated Fat: 5gPolyunsaturated Fat: 1gMonounsaturated Fat: 3gSodium: 50mgPotassium: 110mgFiber: 1gSugar: 15gVitamin A: 2IUCalcium: 2mgIron: 4mg

Notes

Ensure all equipment is dry to prevent chocolate from seizing. Can be stored in airtight containers for up to a week.

Tried this recipe?

Let us know how it was!

Spooky Vegetarian Halloween Spaghetti with Eyeballs Delight

“Is it just me, or is there something thrilling about turning dinner into a playful adventure?” This Halloween, let’s elevate your mealtime with an eye-catching delight: Halloween Spaghetti with Mozzarella Eyeballs. This recipe combines al dente spaghetti with a rich, homemade tomato sauce infused with roasted garlic and fresh basil, putting a fun spin on your regular spaghetti nights. Plus, the whimsical mozzarella eyeballs not only add a festive flair but make this dish a hit among kids and adults alike! Whether you’re hosting a spooky gathering or simply looking to add some holiday spirit to your dinner table, this easy recipe is sure to become a family favorite. Are you ready to make your meal not just tasty, but also a bewitching experience?

Why Make Halloween Spaghetti?

Playful Presentation: This dish transforms your regular spaghetti into a whimsical experience with mozzarella eyeballs that are sure to make your whole family smile.

Homemade Goodness: The rich, tangy sauce features fresh ingredients that are simple to prepare, making this meal a heartwarming choice.

Versatile: Easily adaptable, you can switch the pasta type or add veggies based on your preference. Feeling adventurous? Try out some of our other easy vegan pasta recipes.

Crowd-Pleaser: Perfect for parties or casual dinners, it appeals to both kids and adults, ensuring everyone will enjoy a plateful!

Time-Saving: With a straightforward cooking process, you can whip this up in no time, allowing more moments for spooky fun with your loved ones.

Halloween Spaghetti Ingredients

For the Sauce

  • Olive Oil – Adds richness and is essential for sautéing aromatics; feel free to substitute with vegetable oil.
  • White Onion – Provides sweetness and depth to the sauce; shallots can be a suitable alternative.
  • Garlic – Infuses the sauce with flavor; fresh garlic is best, but garlic powder works in a pinch (1/8 teaspoon = 1 clove).
  • Tomato Paste – Concentrates flavor and thickens the sauce; additional crushed tomatoes can lighten the taste.
  • Dark Brown Sugar – Balances the acidity of the tomatoes; light brown sugar or granulated sugar can be swapped in.
  • Balsamic Vinegar – Adds acidity and depth; red wine vinegar can serve as a great alternative.
  • Crushed Tomatoes – The main base for the sauce, providing a fresh tomato flavor; canned diced tomatoes can be used as a substitute.
  • Italian Seasoning – A blend of aromatic herbs for flavor; mix together oregano, basil, and thyme if you’re out.
  • Fresh Basil – Brightens up the sauce with herby notes; use dried basil if fresh isn’t available, but reduce the amount.
  • Parmesan Cheese – Adds savory richness; nutritional yeast is a great vegan alternative.

For the Pasta & Eyeballs

  • Pasta Noodles (Spaghetti) – The heart of the dish; feel free to use any long pasta variety if desired.
  • Fresh Mozzarella (ciliegine) – Form the fun eyeballs; bocconcini or regular mozzarella balls can be used in a pinch.
  • Black Olives – Create the pupils of the eyeballs; green olives can work for a different flavor if you prefer.
  • Extra Virgin Olive Oil – For drizzling over the mozzarella balls to enhance flavor and presentation.

Step‑by‑Step Instructions for Spooky Halloween Spaghetti with Mozzarella Eyeballs

Step 1: Sauté Aromatics
In a large pot, heat 2 tablespoons of olive oil over medium heat until shimmering. Add 1 finely chopped white onion and 3 minced garlic cloves, sautéing for about 3-4 minutes until the onion is translucent and fragrant. Stir occasionally to prevent burning, ensuring they turn a lovely golden color that enhances the flavor of your Halloween Spaghetti.

Step 2: Build Sauce
Next, stir in 2 tablespoons of tomato paste, 1 tablespoon of dark brown sugar, and 1 tablespoon of balsamic vinegar, sautéing for an additional 2 minutes. This will deepen the flavors of the sauce. Then, add 28 ounces of crushed tomatoes along with 1 teaspoon of Italian seasoning, bringing the mixture to a gentle simmer. Allow it to bubble for about 10 minutes, stirring occasionally.

Step 3: Add Fresh Ingredients
Once your sauce is simmering, mix in a handful of fresh basil leaves and ¼ cup of grated Parmesan cheese. Cover the pot and continue to simmer for another 10-15 minutes, stirring every few minutes until the sauce thickens slightly. The vibrant colors and aroma of your Halloween Spaghetti will surely fill the kitchen, making this dish even more delightful!

Step 4: Make Mozzarella Eyeballs
While the sauce simmers, prepare the mozzarella eyeballs. Drain 8 ounces of ciliegine mozzarella and use a straw to carefully create indentations on each ball. Then, cut 8 black olives into small circles for the pupils. Assemble your spooky creation by pressing an olive piece into each mozzarella ball, captivating your family’s attention.

Step 5: Serve
Now it’s time to plate your Halloween Spaghetti! Create playful nests of spaghetti on each plate, generously topping them with your luscious tomato sauce. Gently place the mozzarella eyeballs on top, giving your dish a fun, spooky flair. Finish off by drizzling a touch of extra virgin olive oil over the mozzarella balls to elevate the flavors. Serve warm and let the festivities begin!

How to Store and Freeze Halloween Spaghetti

Fridge: Store any leftover Halloween Spaghetti in an airtight container in the fridge for up to 3 days. To keep the mozzarella eyeballs fresh, consider separating them from the pasta and sauce.

Freezer: For longer storage, freeze spaghetti with the sauce for up to 2 months. When freezing, use a freezer-safe container and allow the sauce to cool completely before sealing.

Reheating: To reheat, thaw overnight in the fridge if frozen. Heat in a pot over medium heat, stirring until warmed through. Add a touch of water or olive oil if the sauce is too thick.

Tip: Enjoy fresh Halloween Spaghetti by making small batches if you’re unsure about leftovers, as the mozzarella eyeballs are best served fresh!

Expert Tips for Halloween Spaghetti

  • Choose Fresh Ingredients: Using fresh garlic and basil truly enhances the flavor of your Halloween Spaghetti. Dried herbs can work, but fresh makes a noticeable difference.

  • Avoid Overcooking: Be careful not to overcook your spaghetti; it should be al dente for the best texture paired with the rich sauce.

  • Mozzarella Eyeballs Tips: When making eyeballs, use just enough pressure with the straw to create indentations without piercing through. This keeps them intact.

  • Layer Flavors: Don’t rush the simmering process with the sauce; allowing it to develop flavors for the full 10-15 minutes will elevate your dish.

  • Fun Additions: Feel free to add colorful veggies into your sauce or sprinkle more cheese on top for an extra festive touch, enhancing both nutrition and excitement.

  • Storage Reminder: Leftovers are best when mozzarella is kept separate from pasta and sauce to keep textures fresh for the next spooky meal!

Make Ahead Options

These Spooky Halloween Spaghetti with Mozzarella Eyeballs are perfect for meal prep, making your Halloween gathering much easier! You can prepare the homemade sauce up to 3 days in advance; simply store it in an airtight container in the refrigerator. For best results, slightly undercook the spaghetti if you’re preparing it ahead of time, as it will continue to cook when reheated. The mozzarella eyeballs can be assembled a day before, keeping them in the fridge until ready to serve. On the day of your celebration, just cook the spaghetti, reheat the sauce, and add the mozzarella eyeballs right before serving for a dish that’s just as delicious and fun as if freshly made!

Halloween Spaghetti Variations & Substitutions

Inviting a little flexibility into your culinary creation can lead to delightful surprises on the dinner table!

  • Gluten-Free Pasta: Swap out spaghetti for gluten-free pasta to cater to dietary needs without sacrificing flavor.
  • Veggie Boost: Stir in chopped bell peppers, zucchini, or spinach for an added nutritional punch and vibrant color.
  • Spicy Twist: Add a pinch of red pepper flakes or a splash of hot sauce to the sauce for a fun kick that even the adults will love.
  • Cheesy Delight: For an extra gooey experience, mix in some shredded mozzarella into the sauce as it simmers. The creaminess will be irresistible!
  • Vegan Modification: Substitute mozzarella with vegan cheese and Parmesan with nutritional yeast to create a compassionate version of this spooky delight.
  • Hearty Additions: Incorporate cooked lentils or bean medley into the sauce for added texture and heartiness, making it a satisfying family meal.
  • Sauce Variation: Try a roasted garlic tomato sauce for a more fragrant and sweet flavor profile that becomes even more magical when topped with those mozzarella eyeballs.

As you explore these variations, don’t hesitate to check out our delicious easy vegan pasta recipes and other fun food ideas that can spark even more creativity in your kitchen!

What to Serve with Spooky Halloween Spaghetti with Mozzarella Eyeballs

Gather your loved ones around the table for a spine-tingling feast that will delight all your senses and elevate your Halloween festivities!

  • Garlic Bread: This classic side adds a crispy, buttery element that perfectly balances the savory richness of the spaghetti sauce.
  • Roasted Veggies: Seasonal roasted veggies, like Brussels sprouts or butternut squash, bring earthy flavors that create a delightful contrast to the dish.
  • Caesar Salad: A crisp Caesar salad provides a refreshing, tangy accompaniment that cuts through the richness of the sauce, keeping the meal light and vibrant.
  • Pumpkin Spice Muffins: For an extra festive touch, serve warm pumpkin spice muffins that blend sweetness with spices, creating a delightful end to your meal.
  • Spooky Mocktails: Whip up some spooky mocktails using black grape juice and sparkling water, garnished with eyeball-themed ice cubes for added fun!
  • Chocolate Mousse: Indulge in a velvety chocolate mousse for dessert—its rich texture and sweetness will be a hit, leaving everyone satisfied.

These delicious pairings will create an unforgettable Halloween meal that your family will eagerly anticipate each year!

Halloween Spaghetti with Mozzarella Eyeballs Recipe FAQs

How do I choose ripe tomatoes for the sauce?
Absolutely! When selecting tomatoes, look for ones that are firm but slightly yielding to the touch. They should be bright in color and free of blemishes or dark spots. If possible, opt for vine-ripened tomatoes as they’re typically sweeter and more flavorful, perfect for your homemade sauce!

What’s the best way to store leftover spaghetti?
Very! Store any leftover Halloween Spaghetti in an airtight container in the fridge for up to 3 days. To maintain texture, I recommend separating the mozzarella eyeballs from the pasta and sauce. This way, you’ll preserve the delightful creaminess of the mozzarella for your next spooky meal.

Can I freeze Halloween Spaghetti?
Definitely! To freeze your delicious Halloween Spaghetti, let the sauce cool completely and then transfer it to a freezer-safe container. It can be stored for up to 2 months. When you’re ready to enjoy, thaw it overnight in the fridge, then reheat in a pot over medium heat, adding a splash of water or olive oil if it becomes too thick.

What if my sauce turns out too thick?
No worries! If your sauce is thicker than you’d like, simply add a bit of water or vegetable broth while reheating and stir to achieve your desired consistency. This will help loosen the sauce and ensure that it pairs perfectly with the spaghetti for a delightful bite.

Is this recipe suitable for vegetarians?
Yes, woot! This Halloween Spaghetti is completely vegetarian, making it a fantastic option for plant-based eaters. If you need it to be vegan, simply swap out the Parmesan cheese with nutritional yeast or your favorite vegan cheese alternative, and you’re good to go.

Can pets eat any of the ingredients?
Good question! While some ingredients like plain cooked pasta are usually safe for pets, the garlic and onions in this recipe can be toxic. It’s best to keep your furry friends away from this dish to ensure their safety. Always consult your veterinarian for dietary questions concerning your pets!

Halloween Spaghetti (Vegetarian)

Spooky Vegetarian Halloween Spaghetti with Eyeballs Delight

Delight in this Halloween Spaghetti recipe with mozzarella eyeballs for a fun and spooky meal experience.
Prep Time 15 minutes
Cook Time 30 minutes
Total Time 45 minutes
Servings: 4 servings
Course: Pasta
Cuisine: Italian
Calories: 400

Ingredients
  

For the Sauce
  • 2 tablespoons Olive Oil Feel free to substitute with vegetable oil.
  • 1 medium White Onion Finely chopped.
  • 3 cloves Garlic Minced, fresh is best.
  • 2 tablespoons Tomato Paste Can be lightened with additional crushed tomatoes.
  • 1 tablespoon Dark Brown Sugar Light brown sugar can be swapped.
  • 1 tablespoon Balsamic Vinegar Red wine vinegar is a good alternative.
  • 28 ounces Crushed Tomatoes The main base for the sauce.
  • 1 teaspoon Italian Seasoning Can be homemade with oregano, basil, and thyme.
  • 1 handful Fresh Basil Can substitute with dried, reduce amount.
  • 1/4 cup Parmesan Cheese Grated, can substitute with nutritional yeast.
For the Pasta & Eyeballs
  • 8 ounces Pasta Noodles (Spaghetti) Any long pasta can be used.
  • 8 ounces Fresh Mozzarella (ciliegine) Can use bocconcini as a substitute.
  • 8 pieces Black Olives Cut into small circles for pupils.
  • 1 tablespoon Extra Virgin Olive Oil For drizzling over mozzarella.

Equipment

  • Large pot
  • Straw
  • Cutting board
  • Knife

Method
 

Cooking Steps
  1. In a large pot, heat olive oil over medium heat until shimmering. Add chopped onion and minced garlic, sauté for 3-4 minutes.
  2. Stir in tomato paste, dark brown sugar, and balsamic vinegar, sautéing for an additional 2 minutes.
  3. Add crushed tomatoes and Italian seasoning, bring to simmer for about 10 minutes.
  4. Mix in fresh basil leaves and grated Parmesan cheese, cover and simmer for another 10-15 minutes.
  5. Prepare mozzarella eyeballs by draining the ciliegine and using a straw to create indentations, adding olive pieces as pupils.
  6. Plate the spaghetti with sauce and top with mozzarella eyeballs. Drizzle with extra virgin olive oil before serving.

Nutrition

Serving: 1servingCalories: 400kcalCarbohydrates: 60gProtein: 15gFat: 15gSaturated Fat: 5gPolyunsaturated Fat: 1gMonounsaturated Fat: 10gCholesterol: 15mgSodium: 800mgPotassium: 700mgFiber: 5gSugar: 8gVitamin A: 800IUVitamin C: 7mgCalcium: 250mgIron: 2mg

Notes

Consider storing mozzarella separately from pasta and sauce to maintain texture. Fresh ingredients enhance flavor significantly.

Tried this recipe?

Let us know how it was!

Chocolate Dirt Cake: A No-Bake Delight for Summer Fun

On a sweltering summer afternoon, nothing captures the essence of nostalgia quite like digging into a slice of Chocolate Dirt Cake. This playful dessert combines layers of crushed Oreos with luscious chocolate pudding, creating an eye-catching “dirt” effect that can enchant both kids and adults alike. What I adore about this no-bake Chocolate Dirt Cake is its effortless preparation and the joy it brings to gatherings—it’s the perfect last-minute treat that feels indulgent yet is surprisingly simple to whip up. Plus, you can customize it with your favorite flavors or toppings, making it a versatile favorite for any occasion. Ready to create a delightful dessert that’s bound to impress? Let’s dive in!

Why is Chocolate Dirt Cake a must-try?

Decadent Layers: This no-bake Chocolate Dirt Cake features rich, creamy chocolate pudding nestled between layers of crunchy Oreo crumbs, creating an irresistible treat that’s delightful to the palate.

Effortless Preparation: With simple ingredients and no baking required, you’ll spend less time in the kitchen and more time enjoying the summer sun with friends and family.

Customizable Options: Satisfy every sweet tooth by adding colorful gummy worms or themed decorations like flowers for parties, making it perfect for any occasion.

Perfect for All Ages: Kids and adults alike rave about the nostalgic appeal of this dessert. It’s a true crowd-pleaser that guarantees seconds!

Serve with Flair: For a stunning presentation, consider individual servings in cups or jars—perfect for gatherings! Pair it with fresh fruits, or even a scoop of vanilla ice cream, and you have a complete indulgence.

Make Ahead Win: Not only does this dessert improve after a day in the fridge, but you can also freeze portions for convenient treats that satisfy sweet cravings anytime. 🎉 If you love easy desserts, don’t miss my take on Chocolate Chip Pancakes for another fantastic recipe!

Chocolate Dirt Cake Ingredients

For the Cake Base
Oreos – These delicious cookies provide the perfect crunchy texture; feel free to substitute with any chocolate sandwich cookie for a fun twist.
Milk – Essential for activating the instant pudding mix; choose between dairy or non-dairy alternatives based on your preference.

For the Pudding Filling
Instant Chocolate Pudding Mix – Creates that fluffy, rich filling; you can switch it up with other flavors like vanilla or butterscotch for a different taste experience.
Cream Cheese – This adds richness and stability to the pudding layer; make sure it’s softened for easier blending.
Butter – Helps to achieve a smooth cream cheese mixture; coconut oil or margarine are great dairy-free alternatives.
Powdered Sugar – Sweetens the cream cheese mixture wonderfully; if you opt for granulated sugar, expect a slight change in texture.
Whipped Topping (like Cool Whip) – Adds a light, airy touch to the pudding; consider non-dairy whipped topping or homemade whipped cream if preferred.

For the Topping
Reserved Oreo Crumbs – Use half of the crushed Oreos for that delightful finish; this adds texture and completes the signature “dirt” look!

With these ingredients on hand, you’re just moments away from indulging in a delightful Chocolate Dirt Cake. Trust me, this no-bake dessert will impress everyone at your summer gatherings!

Step‑by‑Step Instructions for Chocolate Dirt Cake

Step 1: Crush the Oreos
Begin by crushing 24 Oreos into fine crumbs using a food processor or by placing them in a zip-top bag and rolling over them with a rolling pin. Ensure the texture is similar to sand, which will serve as the base for your Chocolate Dirt Cake. Set aside half of the crushed Oreos for topping later.

Step 2: Prepare the Pudding
In a mixing bowl, combine 2 cups of milk with one package of instant chocolate pudding mix. Whisk the mixture vigorously for about 2 minutes until it thickens. Let it chill in the refrigerator for about 5 minutes, ensuring it sets perfectly and becomes fluffy for your cake layers.

Step 3: Blend the Cream Cheese Mixture
While the pudding is chilling, in another large bowl, beat together 8 ounces of softened cream cheese and ½ cup of butter until smooth and creamy. Once combined, gradually add 1 cup of powdered sugar, mixing well until you achieve a sweet, creamy consistency that will complement the chocolate pudding beautifully.

Step 4: Combine the Mixtures
Next, gently fold the prepared chocolate pudding into the cream cheese mixture using a spatula. Be careful not to deflate the fluffy texture. Once incorporated, delicately fold in 8 ounces of whipped topping until everything is well blended, creating a luscious filling for your Chocolate Dirt Cake.

Step 5: Layer in the Pan
In a 9×13-inch baking dish, spread half of the reserved Oreo crumbs evenly across the bottom. Pour the creamy pudding mixture over the crumbs, smoothing it out with a spatula. This first layer of the Chocolate Dirt Cake will create a delicious contrast with the crunchy base.

Step 6: Top and Chill
After spreading the pudding mixture, sprinkle the remaining Oreo crumbs evenly over the top layer to create the signature “dirt” effect. Cover the dish with plastic wrap or a lid and place it in the refrigerator. Allow the Chocolate Dirt Cake to chill for at least 2 hours, or preferably overnight for the best flavor and texture.

Storage Tips for Chocolate Dirt Cake

Fridge: Store your Chocolate Dirt Cake tightly covered in the refrigerator for up to 5 days to maintain its creamy texture and flavor.

Freezer: For longer storage, freeze individual portions in airtight containers, allowing you to enjoy a delicious treat anytime. It lasts up to 3 months in the freezer.

Thawing: When ready to enjoy, thaw the frozen portions in the fridge overnight for the best results.

Reheating: There’s no need to heat this dessert; simply serve it chilled for the ultimate indulgence!

Expert Tips for Chocolate Dirt Cake

  • Chill Overnight: For the best texture and flavor, make sure to chill your Chocolate Dirt Cake overnight—it’s worth the wait!
  • Substitution Flexibility: Don’t hesitate to experiment! Different Oreo flavors and pudding varieties can transform the taste of your cake.
  • Presentation Matters: Use clear containers or trifle bowls to showcase the beautiful layers, especially during gatherings where aesthetic counts!
  • Avoid Sogginess: To prevent the Oreo crust from becoming soggy, layer the crumbs just before serving if making in advance.
  • Serving Size: Consider portioning the dessert into small cups or jars for easy serving and a fun, individual twist.

Make Ahead Options

These no-bake Chocolate Dirt Cake layers are perfect for meal prep, allowing you to save time on busy days! You can crush the Oreos and prepare the pudding mixture up to 24 hours in advance. Simply store the crumb layer in an airtight container to keep them fresh, and refrigerate the pudding mix in a covered bowl. When you’re ready to assemble, layer the reserved Oreo crumbs with the pudding mixture, and top with the remaining crumbs. Cover and chill for at least 2 hours or overnight for the best flavor and texture. By prepping ahead, you’ll have a spectacular dessert ready to impress with minimal last-minute effort!

Chocolate Dirt Cake Variations

Don’t hesitate to make this dessert your own with these fun and delicious twists!

  • Dairy-Free: Swap out the cream cheese and whipped topping with non-dairy alternatives for a creamy texture without dairy.

  • Flavor Infusion: Substitute instant chocolate pudding for butterscotch or vanilla pudding; this adds a whole new flavor experience. Just imagine the delightful surprise!

  • Oreo Alternatives: Use mint or peanut butter Oreos instead for a unique flavor twist that stands out.

  • Texture Play: Incorporate crushed nuts like pecans or walnuts between the layers for a delightful crunch that contrasts beautifully with the creamy pudding.

  • Gummy Worms: Add gummy worms on top to create a whimsical look, perfect for kids’ parties or as a nostalgic nod for adults!

  • Individual Servings: Layer the ingredients in jars or cups for cute, personalized servings that are perfect for gatherings. Plus, they’re easy to grab!

  • Extra Toppings: Drizzle with chocolate or caramel sauce and sprinkle with extra crushed Oreos for an indulgent finish. Each bite is a tasty adventure!

  • Pairing Suggestions: Serve alongside a scoop of vanilla ice cream or fresh berries for a balance of flavors that will elevate your dessert experience. If you love sweet indulgences, don’t miss my take on Chocolate Granola Cups!

What to Serve with No-Bake Chocolate Dirt Cake

Pairing your delightful dessert with complementary flavors will transform a simple sweet into a memorable meal experience.

  • Fresh Berries: Juicy strawberries or raspberries provide a tart contrast that balances the rich sweetness of the dirt cake beautifully.
  • Vanilla Ice Cream: A scoop of creamy vanilla ice cream on the side creates a decadent pairing; the coldness melts into the cake for an indulgent treat.
  • Whipped Cream: Light, fluffy whipped cream enhances texture and creaminess, making every bite of the dirt cake even more heavenly.
  • Chocolate Dipped Pretzels: These salty-sweet snacks add a fun crunch that contrasts with the cake’s soft layers, perfect for a whimsical dessert platter.
  • Mint Leaves: Fresh mint sprigs not only brighten up presentation but also lend a refreshing hint to each bite of the rich chocolate dessert.
  • Iced Coffee or Milk: Pouring a glass of chilled milk or a refreshing iced coffee makes for the perfect drink pairing; both enhance the cake’s chocolate flavors.
  • Seasonal Fruit Salad: A colorful array of seasonal fruits adds a light and refreshing touch, allowing the flavors of the dirt cake to shine through without overwhelming the palate.
  • Chocolate Sauce Drizzle: A rich chocolate drizzle over each serving can enhance the indulgent experience, making it even more irresistible and appealing.
  • Mini Cupcakes: Serve an array of mini cupcakes alongside for a delightful assortment of sweet options, ensuring there’s something for everyone at the gathering.

Chocolate Dirt Cake Recipe FAQs

What type of Oreos should I use for the Chocolate Dirt Cake?
Absolutely! While traditional Oreos create the classic flavor, feel free to experiment with any chocolate sandwich cookie of your choice. Whether it’s mint, peanut butter, or even gluten-free versions, changing the Oreo can add a fun twist to your Chocolate Dirt Cake.

How should I store leftover Chocolate Dirt Cake?
To keep your Chocolate Dirt Cake fresh, store it tightly covered in the refrigerator for up to 5 days. Ensure it’s sealed well to prevent it from absorbing any odors from your fridge. The creamy layers will retain their deliciousness, making it a perfect dessert to enjoy throughout the week!

Can I freeze Chocolate Dirt Cake?
Yes! You can freeze individual portions of the Chocolate Dirt Cake for a sweet treat at a later date. Just store them in airtight containers, and they will last up to 3 months in the freezer. When you’re ready to indulge, simply thaw the portions in the refrigerator overnight for the best texture and flavor.

Why is my pudding layer not setting properly?
If your pudding layer isn’t setting, it could be due to not whisking the instant pudding mix with milk long enough. Make sure to whisk it vigorously for about 2 minutes. Also, chilling the pudding for at least 5 minutes is crucial. If it’s still too runny, try adding a bit more pudding mix to thicken it up. Don’t worry; it will still taste delicious!

Can pets eat Chocolate Dirt Cake?
It’s best to keep Chocolate Dirt Cake away from pets. Ingredients like chocolate, cream cheese, and sugar can be harmful to dogs and cats. Instead, save this delightful dessert for the family, as it’s designed to be a whole lot of fun and indulgence for humans!

What’s the best way to serve Chocolate Dirt Cake?
For a beautiful presentation, consider layering your Chocolate Dirt Cake in a clear trifle bowl or individual cups. This allows everyone to see the lovely layers of crushed Oreos and creamy pudding. Serving with fresh fruits or a scoop of vanilla ice cream can enhance the experience. Enjoy the love that goes into each bite!

Chocolate Dirt Cake

Chocolate Dirt Cake: A No-Bake Delight for Summer Fun

Chocolate Dirt Cake is a nostalgic no-bake dessert with layers of crushed Oreos and chocolate pudding, perfect for summer gatherings.
Prep Time 20 minutes
Chilling Time 2 hours
Total Time 2 hours 20 minutes
Servings: 12 slices
Course: Dessert
Cuisine: American
Calories: 350

Ingredients
  

Cake Base
  • 24 cookies Oreos or any chocolate sandwich cookie
  • 2 cups Milk dairy or non-dairy alternatives
Pudding Filling
  • 1 package Instant Chocolate Pudding Mix can substitute with other flavors
  • 8 ounces Cream Cheese softened
  • ½ cup Butter or coconut oil/margarine for dairy-free
  • 1 cup Powdered Sugar granulated sugar can change texture
  • 8 ounces Whipped Topping like Cool Whip; non-dairy or homemade options available
Topping
  • ½ cups Reserved Oreo Crumbs

Equipment

  • Food Processor
  • Mixing Bowl
  • spatula
  • 9x13 inch baking dish
  • Zip-top Bag

Method
 

Chocolate Dirt Cake Instructions
  1. Crush the Oreos into fine crumbs. Set aside half of the crushed Oreos for topping.
  2. Combine 2 cups of milk with one package of instant chocolate pudding mix. Whisk for 2 minutes until thickened, then chill for 5 minutes.
  3. In another bowl, beat together 8 ounces of softened cream cheese and ½ cup of butter until smooth. Gradually add 1 cup of powdered sugar.
  4. Fold the chocolate pudding into the cream cheese mixture. Then fold in 8 ounces of whipped topping.
  5. In a 9x13-inch dish, layer half of the reserved Oreo crumbs on the bottom. Pour the pudding mixture over the crumbs and smooth it.
  6. Sprinkle remaining Oreo crumbs on top, cover, and chill for at least 2 hours, preferably overnight.

Nutrition

Serving: 1sliceCalories: 350kcalCarbohydrates: 45gProtein: 4gFat: 18gSaturated Fat: 10gPolyunsaturated Fat: 1gMonounsaturated Fat: 7gCholesterol: 40mgSodium: 200mgPotassium: 150mgFiber: 2gSugar: 25gVitamin A: 500IUCalcium: 100mgIron: 1mg

Notes

Chill the cake overnight for best results. Customize by using different Oreo flavors or pudding varieties.

Tried this recipe?

Let us know how it was!

Spooky-Savory Halloween Buffalo Chicken Dip to Thrill Guests

As I rifled through my pantry one chilly October afternoon, I stumbled upon a creature of culinary delight: the Halloween Buffalo Chicken Dip, or as I like to call it, Booffalo Dip. This spooktacular dish takes the beloved buffalo chicken dip and transforms it into a festive sensation perfect for any Halloween bash. With creamy, savory goodness and a delightful kick of spice, it’s the ultimate crowd-pleaser that not only satisfies cravings but also doubles as a playful centerpiece with its adorable cheese ghosts. Plus, it comes together in no time, making it an easy appetizer for any gathering. So, are you ready to whip up this hauntingly delicious dip and impress your guests?

Why Should You Make Booffalo Dip?

Easy to Prepare: This dip comes together in minutes, letting you spend more time with your guests and less time in the kitchen.

Fun Presentation: The adorable cheese ghosts add a playful twist, making your dip a spooky centerpiece at any Halloween gathering.

Heat Level Options: Customize the spice with buffalo sauce for those who crave a kick or opt for BBQ sauce if you prefer something milder.

Crowd Favorite: With its creamy texture and bold flavors, this dip is a guaranteed hit, perfect for pairing with nachos, veggies, or even alongside a BLT Chicken Salad.

Versatile Ingredients: Feel free to swap out the chicken or cheese, making it easy to adapt to different tastes or dietary needs.

Get ready to make a splash at your Halloween party with this delightful appetizer!

Halloween Buffalo Chicken Dip Ingredients

For the Dip Base
Shredded Chicken – Use rotisserie chicken for a quick option, or cook your own for a more homemade touch.
Cream Cheese – Ensure it’s softened to blend easily, creating that luscious, creamy texture.
Buffalo Sauce – Adjust the amount based on your preferred heat level; BBQ sauce works for a milder taste.
Ranch Dressing – Adds a refreshing contrast to the spiciness and should be drizzled on top without mixing.

For the Ghostly Topping
Mozzarella Cheese – Opt for sliced cheese to create ghastly shapes that hold up beautifully in the oven.
Writing Gel (Black) – Perfect for adding eyes and mouths to your cheese ghosts for a spooky finish.

Step‑by‑Step Instructions for Halloween Buffalo Chicken Dip

Step 1: Preheat the Oven
Begin by preheating your oven to 350°F (175°C). This temperature ensures that your Halloween Buffalo Chicken Dip bakes evenly, creating a bubbling, gooey goodness by the time it’s ready. While the oven is heating, gather your ingredients and prepare your baking dish for assembly.

Step 2: Mix the Chicken and Sauce
In a large resealable plastic bag, combine your shredded chicken with the buffalo sauce. Seal the bag and shake it gently to ensure every piece of chicken is well coated. This should only take about a minute. The vibrant orange color of the sauce will tell you when it’s perfectly mixed and ready for layering.

Step 3: Spread the Cream Cheese
Take your softened cream cheese and spread it evenly across the bottom of a 9×13 baking dish. Use a spatula or the back of a spoon for a smooth application. The cream cheese layer serves as a rich base for your Halloween Buffalo Chicken Dip, providing a creamy contrast to the spicy chicken.

Step 4: Layer the Chicken Mixture
Carefully layer the buffalo chicken mixture over the cream cheese, spreading it out evenly. The chicken should cover the entire surface, creating a delicious foundation for the rest of your dip. Visualize the vibrant chicken shining through as you layer, a clear sign your dip is coming together beautifully.

Step 5: Drizzle with Ranch Dressing
Now it’s time to drizzle ranch dressing over the top of the chicken layer. Be generous, but avoid mixing it in for a delightful contrast in flavors. The ranch not only adds a delicious tang but also enhances the creamy texture of your Halloween Buffalo Chicken Dip.

Step 6: Create Cheese Ghosts
Using your mozzarella cheese, cut out fun ghost shapes with a cookie cutter. Place these cheese ghosts on top of the ranch layer, arranging them playfully. This step is where your dish transforms into a spooky centerpiece, perfectly aligning with the Halloween theme!

Step 7: Bake Until Bubbling
Transfer the baking dish into your preheated oven and let it bake for 15-20 minutes. You’ll know it’s ready when the cheese is fully melted and bubbly, enticing everyone with its delicious aroma. Keep an eye on it, as you want that lovely golden brown hue on top.

Step 8: Decorate with Writing Gel
Once the dip is out of the oven, let it cool for a minute before using the black writing gel to add eyes and mouths to your cheese ghosts. This whimsical step makes your Halloween Buffalo Chicken Dip not just a treat for the taste buds but a feast for the eyes, perfect for your spooky gathering.

What to Serve with Halloween Buffalo Chicken Dip

Gather your friends and family around for a deliciously spooky spread that complements the rich and spicy flavors of this festive dip!

  • Crunchy Tortilla Chips: Perfectly designed for scooping, they provide a satisfying crunch that contrasts beautifully with the creamy dip. Their corn essence adds a delightful depth of flavor.

  • Veggie Platter: Fresh-cut carrots, celery, and bell peppers offer a bright, crunchy alternative to chips. They cool the spicy kick while adding a healthy touch to your spread. Pair with a ranch or yogurt dip for extra flavor!

  • Garlic Breadsticks: These warm, soft breadsticks offer a comforting, chewy base that carries the flavors of the dip splendidly. Drizzle them lightly with garlic oil, and they’ll be the perfect accompaniment!

  • Savory Mini Quiches: Bite-sized and packed with flavor, these quiches can be made with various fillings to suit everyone’s taste. Their flaky crust and fluffy filling contrast nicely with the richness of the Buffalo Chicken Dip.

  • Crispy Potato Wedges: Seasoned and baked to perfection, these wedges provide a lovely, soft interior and crispy exterior, enhancing the overall texture of your meal. Serve with a side of sour cream for dipping!

  • Craft Beer: A light, hoppy brew balances the rich and spicy flavors of the dip wonderfully. Opt for a pale ale or a crisp lager to refresh your palate between bites.

  • Pumpkin Pie Bites: For a sweet finish, these adorable desserts tie in the Halloween theme while offering a sweet, spiced contrast to the savory dip. It’s the perfect way to round out your spooky gathering!

Halloween Buffalo Chicken Dip Variations

Feel free to explore these variations that will make your Booffalo Dip uniquely delightful!

  • BBQ Swap: Replace buffalo sauce with BBQ sauce for a sweeter, smokier flavor. This twist is perfect for those who prefer milder dips.

  • Cheese Variety: Use pepper jack cheese for an extra kick or try a combination of cheddar and mozzarella for a flavor explosion. Mixing cheeses can enhance the taste and texture in fun ways.

  • Veggie Boost: Add sautéed bell peppers or finely chopped jalapeños to the chicken mixture for added texture and flavor. They lend a delicious crunch that complements the creamy aspect beautifully.

  • Vegan Version: Substitute shredded chicken with shredded jackfruit or chickpeas and use vegan cream cheese for a plant-based option. This makes the dip accessible for all your guests.

  • Heat Level: If you love heat, toss in diced fresh chilies or extra buffalo sauce. This variation lets you control the spice while keeping everyone excited and engaged!

  • Different Dippers: Swap out tortilla chips for pita chips or even veggie sticks. This not only offers a healthier approach but also adds a fresh touch to your serving options.

  • Ghostly Toppings: Use sliced black olives to create eyes for your cheese ghosts, making them even more amusing for your guests. It’s a simple yet effective way to elevate the festive spirit.

For even more crowd-pleasing flavors, consider pairing this spooky dip with dishes like Crispy Chilli Chicken or Sizzling Chicken Pepper Stir Fry. Get creative and enjoy the festivities!

How to Store and Freeze Halloween Buffalo Chicken Dip

Fridge: Store leftover Halloween Buffalo Chicken Dip in an airtight container for up to 7 days. Gently reheat in the microwave or oven until warmed through.

Freezer: For longer storage, freeze the dip in an airtight container for up to 3 months. Thaw overnight in the fridge and reheat before serving for the best texture.

Reheating: Reheat gently in the microwave or oven, covering with foil to prevent drying out. Stir halfway through to ensure even warming.

Prepare Ahead: You can assemble the dip ahead of time and store it in the fridge, baking right before your gathering for a freshly melted treat!

Make Ahead Options

These Halloween Buffalo Chicken Dip (Booffalo Dip) options are perfect for busy cooks seeking to save time during the spookiest season! You can prepare the dip up to 24 hours in advance by fully assembling it and refrigerating it before baking. Simply layer the cream cheese, buffalo chicken mixture, and ranch dressing, then top with cheese ghosts, but skip the baking step until you’re ready to party. This way, you’ll keep the dip fresh and delicious, ensuring the cream cheese remains smooth (to prevent browning). When it’s time to serve, bake the dip for an extra 2-5 minutes for a bubbly, enticing result that will thrill your guests!

Expert Tips for Halloween Buffalo Chicken Dip

  • Chicken Texture: Shred the chicken finely to ensure an even distribution and better texture in your Halloween Buffalo Chicken Dip.

  • Stand Mixer Magic: Using a stand mixer to shred chicken can save you time and effort—just be cautious to avoid over-shredding.

  • Storage Savvy: Store any leftovers in an airtight container in the fridge for up to a week; reheat gently to maintain texture.

  • Make-Ahead Option: If you’re preparing ahead, assemble the dip but refrigerate it before baking, adding a few extra minutes to the baking time.

  • Adapting Spice Levels: Adjust the amount of buffalo sauce to cater to your guests’ heat preferences, ensuring everyone enjoys this festive appetizer!

Halloween Buffalo Chicken Dip Recipe FAQs

What kind of chicken is best for this dip?
Absolutely! I recommend using shredded rotisserie chicken for convenience and flavor, but if you’re feeling adventurous, you can cook and shred your own chicken. Just ensure it’s fully cooked and cooled before shredding, as this will make mixing it with the buffalo sauce much easier.

How should I store leftover Halloween Buffalo Chicken Dip?
You can store any leftovers in an airtight container in the fridge for up to 7 days. Just be sure to reheat it gently in the microwave or oven. If you opt for the oven, cover it with foil to prevent it from drying out; stir halfway through to ensure even warming.

Can I freeze Halloween Buffalo Chicken Dip?
Yes, you can freeze this dip for up to 3 months! To freeze, place it in an airtight container and ensure it’s well-sealed. When you’re ready to enjoy, thaw it overnight in the fridge, then reheat gently until warm and bubbly. It’s a great make-ahead option for busy holidays!

What should I do if my dip comes out too thick?
If you find your Halloween Buffalo Chicken Dip is too thick after baking, that’s a common issue! Simply add a splash of milk or extra ranch dressing to loosen it up before serving. Mix gently and you should have a creamier texture that’s perfect for dipping.

Is this dip suitable for people with allergies?
If anyone has specific food allergies, you might want to check your ingredients before serving. This dip contains cream cheese and ranch dressing, which may have dairy or gluten. For a dairy-free version, you can swap the cream cheese for a plant-based alternative and make sure your buffalo sauce and ranch dressing are also dairy-free. Always look for gluten-free labels if that is a concern too.

How do I ensure my cheese ghosts hold their shape during baking?
To help your mozzarella cheese ghosts keep their shape while baking, I recommend using sliced cheese instead of shredded. Sliced cheese tends to hold up better when melted, creating adorable ghost shapes that won’t collapse into your dip. Place them on top of the ranch layer, and they’ll bake into spooky perfection!

Halloween Buffalo Chicken Dip

Spooky-Savory Halloween Buffalo Chicken Dip to Thrill Guests

A festive Halloween Buffalo Chicken Dip that combines creamy, spicy flavors with adorable cheese ghosts, making it a perfect appetizer for any gathering.
Prep Time 10 minutes
Cook Time 20 minutes
Total Time 30 minutes
Servings: 8 servings
Course: Appetizers
Cuisine: American
Calories: 250

Ingredients
  

For the Dip Base
  • 2 cups Shredded Chicken Use rotisserie chicken for a quick option.
  • 8 oz Cream Cheese Ensure it's softened to blend easily.
  • 1/2 cup Buffalo Sauce Adjust based on preferred heat level.
  • 1/2 cup Ranch Dressing Should be drizzled on top without mixing.
For the Ghostly Topping
  • 1 cup Mozzarella Cheese Opt for sliced cheese to create ghost shapes.
  • 1 tube Writing Gel (Black) For adding eyes and mouths to cheese ghosts.

Equipment

  • 9x13 baking dish
  • large resealable plastic bag
  • spatula
  • Cookie cutter

Method
 

Step-by-Step Instructions for Halloween Buffalo Chicken Dip
  1. Preheat your oven to 350°F (175°C). While the oven heats, gather your ingredients.
  2. In a large resealable plastic bag, combine your shredded chicken with the buffalo sauce and shake gently.
  3. Spread soften cream cheese evenly across the bottom of a 9x13 baking dish.
  4. Layer the buffalo chicken mixture over the cream cheese, spreading it evenly.
  5. Drizzle ranch dressing generously over the top of the chicken layer.
  6. Cut fun ghost shapes from mozzarella cheese and place them on top of the ranch layer.
  7. Bake in the preheated oven for 15-20 minutes until the cheese is melted and bubbly.
  8. Cool slightly before using black writing gel to add eyes and mouths to your cheese ghosts.

Nutrition

Serving: 1servingCalories: 250kcalCarbohydrates: 10gProtein: 20gFat: 15gSaturated Fat: 7gPolyunsaturated Fat: 1gMonounsaturated Fat: 4gCholesterol: 60mgSodium: 800mgPotassium: 200mgFiber: 1gSugar: 2gVitamin A: 300IUVitamin C: 2mgCalcium: 200mgIron: 1mg

Notes

Store leftovers in an airtight container for up to 7 days; can be frozen for up to 3 months.

Tried this recipe?

Let us know how it was!

Easy Mummy Dogs Recipe: Fun Halloween Snacks for Everyone

As the Halloween season creeps in, every kitchen starts to stir with whispers of delightful treats. Enter the Mummy Dogs recipe – a whimsical combination of savory sausages shrouded in golden crescent roll dough that will elevate any spooky gathering. Not only are these Mummy Dogs incredibly easy to prepare, but they also make for a playful centerpiece that everyone, from toddlers to grandparents, will adore. Plus, with their customizable nature, you can personalize them to suit your family’s tastes, ensuring a delicious bite for every palate. Ready to conjure up some fun in the kitchen? Let’s unwrap this spooky delight!

Why Will You Love Mummy Dogs?

Family-friendly fun: Mummy Dogs are the perfect treat that will have kids giggling with delight while they help wrap the ‘mummies.’

Easy to prepare: With just a few simple ingredients, this recipe can be whipped up in no time, making it a fantastic choice for busy schedules.

Customizable options: Feel free to swap out sausages for your favorites—chicken, turkey, or even plant-based alternatives can make this dish suit everyone’s tastes.

Creative presentation: Their spooky look not only makes them a hit at Halloween parties but also brings a touch of creativity to any meal, much like my Mexican Taco Soup.

Crowd-pleaser guaranteed: These little mummies will disappear fast at gatherings, leaving your guests raving about their unique and tasty charm!

Mummy Dogs Recipe Ingredients

• To conjure up these delightful treats, gather the following ingredients!

For the Mummy Dogs

  • Sausages – Choose any fully cooked variety like beef, turkey, chicken, or vegetarian options for a tasty base.
  • Crescent Roll Dough – This flaky outer wrap is essential; feel free to use alternative doughs like puff pastry or even homemade options.
  • Cooking Spray (optional) – A light mist will prevent sticking; however, parchment paper can eliminate the need for it.

For Dipping Sauces

  • Ketchup – A classic choice that adds a sweet and tangy flavor; perfect for those little mummified morsels!
  • Mustard – For a zesty kick, mustard complements the savory sausages beautifully—experiment with different varieties!

Gather these ingredients and get ready to delight your hungry guests with this fun Mummy Dogs recipe!

Step‑by‑Step Instructions for Mummy Dogs Recipe

Step 1: Preheat Your Oven
Begin your culinary adventure by preheating your oven to 375°F (190°C). This temperature is crucial for achieving that perfect golden-brown color on our charming Mummy Dogs. Make sure to set your timer so that your oven is ready when you are!

Step 2: Prepare the Dough
While the oven heats up, carefully unroll your crescent roll dough onto a clean surface. Use a sharp knife or pizza cutter to slice it into thin strips, each about half an inch wide. These strips will serve as the “bandages” for your Mummy Dogs, so aim for even cuts to ensure consistent wrapping.

Step 3: Wrap the Sausages
Take each sausage and begin wrapping the dough strips around it, leaving small gaps to create the mummy effect. Start at one end and overlap the dough slightly as you go along, making sure it’s snug but not overly tight. This will allow the dough to expand during baking, creating that delightful mummy appearance.

Step 4: Arrange on Baking Sheet
Once all the sausages are wrapped, get a baking sheet lined with parchment paper or lightly greased, if necessary. Carefully place each wrapped sausage on the sheet, ensuring they are spaced apart to allow for even baking. This step is essential for keeping the Mummy Dogs from sticking together as they bake.

Step 5: Bake to Perfection
Slide the baking sheet into the preheated oven and bake the Mummy Dogs for about 13-15 minutes. Keep an eye on them as they bake; you want to achieve a lovely golden brown color on the dough. When they’re perfectly baked, the delightful aroma will fill your kitchen and your guests will be eagerly awaiting their treat!

Step 6: Add Finishing Touches
Once baked, remove the Mummy Dogs from the oven and let them cool slightly. Using a toothpick or a small spoon, dab little dots of ketchup or mustard to create “eyes” on each mummy. This playful detail not only enhances their spooky appearance but also adds a burst of flavor, making your Mummy Dogs irresistible!

Step 7: Serve and Enjoy
Serve your beautiful Mummy Dogs warm for the best taste and texture. Arrange them on a festive platter, perhaps alongside some Halloween-themed sides or dipping sauces. These delightful treats are not just a feast for the taste buds; they’re also a cheerful addition to your Halloween festivities!

Expert Tips for Mummy Dogs

  • Cooking Spray Caution: Avoid using too much cooking spray, as it can make the dough overly greasy. A light mist is all you need for a nonstick surface.

  • Dough Thickness Consistency: Make sure your dough strips are evenly cut; uneven thickness can lead to some mummies being undercooked while others get too brown.

  • Sausage Variations: Experiment with different sausages to keep things exciting! Just ensure they are fully cooked, especially if using turkey or chicken options in your Mummy Dogs recipe.

  • Gaps for Eyes: Don’t forget to leave gaps when wrapping the sausages. These small openings will create an adorable mummy look and allow for delicious dipping sauce eyes!

  • Make-Ahead Tips: If time is short, prep the Mummy Dogs in advance and store them in the refrigerator; just bake them fresh when guests arrive for maximum enjoyment!

Make Ahead Options

These Mummy Dogs are perfect for busy home cooks looking to save time on Halloween party prep! You can assemble the Mummy Dogs up to 24 hours in advance. After wrapping the sausages in dough, simply place them on a parchment-lined baking sheet and cover tightly with plastic wrap before refrigerating. This keeps the dough fresh and prevents it from drying out. When you’re ready to bake, preheat your oven and bake the Mummy Dogs right from the fridge for about 13-15 minutes, achieving that golden-brown finish with minimal effort. Enjoy the convenience of this make-ahead option while still serving up delicious, festive treats!

What to Serve with Spooky Mummy Dogs

The perfect accompaniments will elevate your Halloween gathering, creating a memorable feast filled with delightful flavors and textures.

  • Crispy Sweet Potato Fries: These sweet, crispy fries add a delightful contrast to the savory Mummy Dogs, making every bite a flavorful celebration.

  • Spooky Salad: Toss together mixed greens with black olives and mandarin oranges to create a fresh, festive dish that’s as fun to make as it is to eat.

  • Garlicky Green Beans: Sautéed with olive oil and garlic, these vibrant green beans add a fresh crunch, balancing the comforting flavors of the Mummy Dogs seamlessly.

  • Pumpkin Soup Shooters: Serve up warm pumpkin soup in small cups for a cozy, seasonal starter that’s both creamy and gently spiced—ideal for warming up everyone’s spirits!

  • Cranberry Lemonade Spritzers: This refreshing drink, with its tart cranberry and zingy lemon, is a thirst-quencher that complements the richness of the Mummy Dogs perfectly.

  • Chocolate-Covered Pretzel Bites: These sweet and salty delights make for a fun dessert, giving a hint of whimsy to your Halloween spread with every crunchy bite.

  • Cheesy Monster Dip: Serve this hot cheesy dip warm with tortilla chips—its gooey texture and cheesy goodness make it an irresistible option next to Mummy Dogs.

  • Mini Pumpkin Pies: End the meal on a sweet note with these adorable little pies, bringing a nostalgic fall flavor that’s sure to please everyone’s palate.

These pairings not only enhance the flavors of your Spooky Mummy Dogs but also create a festive atmosphere that your guests will love!

How to Store and Freeze Mummy Dogs

Fridge: Store leftover Mummy Dogs in an airtight container for up to 3 days. This keeps them fresh and ready for quick snacks or lunches.

Freezer: Freeze Mummy Dogs individually wrapped in plastic wrap, then place them in a freezer bag for up to 1-2 months. This is a great option for meal prepping!

Reheating: To reheat, bake frozen Mummy Dogs at 375°F (190°C) for 15-20 minutes, or until heated through. This restores their crispy texture perfectly!

Make-Ahead: You can also assemble the Mummy Dogs ahead of time and keep them in the fridge until you’re ready to bake, making it easy to enjoy this fun treat at a moment’s notice!

Mummy Dogs Recipe: Fun Variations

Feel free to sprinkle your own magic on these Mummy Dogs and make them uniquely yours!

  • Dairy-Free: Use dairy-free crescent roll dough and omit cheese for a tasty alternative. It’s perfect for lactose-intolerant family members who still want to join in the fun.

  • Spicy Twist: Consider using spicy sausages or adding jalapeño slices inside for a kick. This adds a delightful heat that’s sure to excite those who love a little extra flair.

  • Cheesy Delight: Place cheese stick slices inside the sausage before wrapping it up. This gooey addition melts beautifully and fills each bite with a warm, cheesy surprise.

  • Puff Pastry Option: Swap out crescent roll dough for puff pastry to give the Mummy Dogs a flakier texture. This twists up the classic recipe and adds a delightful crunch, making them harder to resist!

  • Vegetarian Version: Opt for plant-based sausages like those made from lentils or chickpeas. It’s a fantastic choice that ensures everyone can enjoy this spooky snack!

  • Sweet and Savory: Brush the dough with a bit of honey or maple syrup before baking. This sweet glaze caramelizes during baking, creating a delicious contrast to the savory sausage.

  • Halloween-Themed Dips: Instead of ketchup and mustard, provide some spooky dips like a green avocado sauce or a ghostly white ranch dressing. Fun dips can enhance the whole presentation and entice both kids and adults alike!

For a delightful feast that pairs perfectly with Mummy Dogs, you might also want to consider serving them alongside my Cheesy Hamburger Food or a bowl of Cozy Broccoli Cheddar Soup. The possibilities are endless, making each gathering a unique experience!

Mummy Dogs Recipe FAQs

What type of sausages should I use for Mummy Dogs?
Absolutely! You can use any fully cooked sausages like beef, turkey, chicken, or even vegetarian options. Just make sure they’re precooked to guarantee a delicious end product. Personally, I love a mix of turkey and cheese sausages for added flavor!

How should I store leftover Mummy Dogs?
Leftover Mummy Dogs can be stored in an airtight container in the refrigerator for up to 3 days. This simple storage solution helps maintain their taste and texture, making them perfect for snacks or quick lunches.

Can I freeze Mummy Dogs?
Yes, you can! To freeze Mummy Dogs, wrap each one individually in plastic wrap and then place them in a freezer bag. They can be frozen for up to 1-2 months. When you’re ready to enjoy them, just bake from frozen at 375°F (190°C) for about 15-20 minutes until warmed through—this method keeps them nice and crispy!

What should I do if the crescent roll dough is hard to work with?
Very! If you find the dough difficult to work with, it might help to let it sit at room temperature for a few minutes. This softens the dough and makes it easier to roll out and cut into strips. Also, ensure your work surface is lightly floured, as this will help prevent sticking and tearing.

Are there any allergy considerations for this Mummy Dogs recipe?
Definitely! If you’re making these for guests with allergies, be sure to choose gluten-free crescent roll dough and check the ingredient list on your sausages. This way, everyone can join in the Halloween fun, including those with special dietary needs.

mummy dogs recipe

Easy Mummy Dogs Recipe: Fun Halloween Snacks for Everyone

This mummy dogs recipe is a fun and easy Halloween treat featuring savory sausages wrapped in flaky dough, perfect for any spooky gathering.
Prep Time 15 minutes
Cook Time 15 minutes
Total Time 30 minutes
Servings: 6 mummy dogs
Course: Appetizers
Cuisine: American
Calories: 250

Ingredients
  

For the Mummy Dogs
  • 6 pieces Sausages Fully cooked variety like beef, turkey, chicken, or vegetarian options.
  • 1 roll Crescent Roll Dough Can use alternative doughs like puff pastry or homemade.
  • 1 spray Cooking Spray Optional; can use parchment paper instead.
For Dipping Sauces
  • 0.25 cup Ketchup Classic choice for dipping.
  • 0.25 cup Mustard Adds a zesty kick; can experiment with varieties.

Equipment

  • Oven
  • Baking Sheet
  • Parchment Paper
  • Knife or pizza cutter
  • Toothpick

Method
 

Step-by-Step Instructions for Mummy Dogs Recipe
  1. Preheat your oven to 375°F (190°C).
  2. Unroll the crescent roll dough onto a clean surface and slice it into thin strips, about half an inch wide.
  3. Wrap the dough strips around each sausage, leaving small gaps to create the mummy effect.
  4. Place the wrapped sausages on a baking sheet lined with parchment paper, spaced apart for even baking.
  5. Bake in the preheated oven for about 13-15 minutes until golden brown.
  6. Remove the Mummy Dogs from the oven and let them cool slightly. Dab dots of ketchup or mustard on each to create 'eyes'.
  7. Serve warm on a festive platter alongside dipping sauces.

Nutrition

Serving: 1mummy dogCalories: 250kcalCarbohydrates: 20gProtein: 10gFat: 15gSaturated Fat: 5gPolyunsaturated Fat: 1gMonounsaturated Fat: 5gCholesterol: 30mgSodium: 600mgPotassium: 200mgFiber: 1gSugar: 1gVitamin A: 5IUVitamin C: 2mgCalcium: 2mgIron: 6mg

Notes

These mummy dogs can be customized with different sausages and dipping sauces to suit personal tastes. Perfect for Halloween parties and gatherings.

Tried this recipe?

Let us know how it was!

Loaded Reese’s Peanut Butter Cup Bark: Your Dream No-Bake Dessert

“Did you hear about the new no-bake dessert sensation?” A friend whispered excitedly as I savored a piece of my latest creation. The answer was no—until now. Let me introduce you to the Loaded Reese’s Peanut Butter Cup Bark, a delightful treat that takes just minutes to whip up. This easy recipe balances the creamy richness of peanut butter with the smooth sweetness of chocolate, making it a true crowd-pleaser for any occasion. Whether you’re impressing guests at a gathering or treating yourself to a little indulgence, it pairs convenience with nostalgia in every bite. Plus, with no baking required, you can avoid any oven mishaps while creating a stunning dessert everyone will adore. Are you ready to dive into a world of chocolatey goodness? Let’s get started!

Why Is This Bark So Irresistible?

Easy Preparation: This Loaded Reese’s Peanut Butter Cup Bark requires no baking, making it an effortless treat for both beginner cooks and seasoned chefs.

Decadent Layers: With rich chocolate and creamy peanut butter, each bite delivers a delightful balance of flavors that will have everyone asking for seconds.

Crowd-Pleaser: Perfect for parties, family gatherings, or simply indulging solo, this dessert is sure to impress any crowd.

Customizable: Feel free to swap ingredients like using dark chocolate or nut-free spreads, making it versatile for various dietary needs.

Quick to Set: You’ll have a delicious dessert ready in no time, simplifying your dessert prep while maximizing flavor.

Perfect Gift Idea: Pack it up as a delightful dessert gift in a decorative box; it’s a sweet gesture that friends and family will love! For more quick and easy no-bake options, check out this Garlic Butter Baked Chicken for meal ideas that save you preparation time!

Loaded Reese’s Peanut Butter Cup Bark Ingredients

For the Chocolate Layer:

  • Chocolate Chips – Use milk chocolate for a sweeter taste; it beautifully coats the bark.
  • Butter – Softened, it enriches the chocolate layer; for less salt, choose unsalted butter.

For the Peanut Butter Layer:

  • Creamy Peanut Butter – Provides rich, nutty flavor; JIF is recommended for smooth consistency.
  • Powdered Sugar – Adds sweetness and binds the mixture; adjustments can alter the sweetness level.

For the Topping:

  • Reese’s Pieces – Adds a crunchy texture and enhances the peanut butter flavor; completely optional but highly recommended!

Enjoy making your Loaded Reese’s Peanut Butter Cup Bark, a no-bake dessert that brings joy with every delectable bite!

Step‑by‑Step Instructions for Loaded Reese’s Peanut Butter Cup Bark

Step 1: Prepare the Pan
Begin by lining a 10×15 inch baking pan with wax paper, allowing some overhang for easy removal later. This step is essential for preventing sticking, so ensure that the paper is well-fitted. The lined pan will serve as the foundation for the delicious Loaded Reese’s Peanut Butter Cup Bark.

Step 2: Melt Chocolate
In a microwave-safe bowl, combine 1.5 cups of chocolate chips and melt them in the microwave in 30-second intervals, stirring between each until smooth. Once melted, pour the chocolate into the lined pan and spread it evenly using a spatula. Refrigerate for about 15-20 minutes or until firm to the touch, creating a solid base for your bark.

Step 3: Mix Peanut Butter Layer
In a separate bowl, thoroughly mix together 1 cup of creamy peanut butter, 1 cup of powdered sugar, and ½ cup of softened butter. To ensure a smooth consistency, you may microwave the mixture for 10-15 seconds before mixing. Once combined, this rich mixture will provide the perfect creamy layer for your Loaded Reese’s Peanut Butter Cup Bark.

Step 4: Spread Peanut Butter Mixture
Take the chilled chocolate layer from the refrigerator and evenly spread the peanut butter mixture over the hardened chocolate using an offset spatula. Smooth it out gently to create an even layer, ensuring that the edges are well covered. Once this layer is spread out, return the pan to the refrigerator for another 15-20 minutes to allow it to set completely.

Step 5: Top with More Chocolate
After the peanut butter layer is firm, melt the remaining 2 cups of chocolate chips in the microwave in the same fashion as before—using 30-second intervals and stirring until completely melted. Pour and spread this chocolate layer over the set peanut butter layer, ensuring complete coverage. For added crunch, sprinkle the top with Reese’s Pieces before returning it to the fridge.

Step 6: Final Chill
Let your Loaded Reese’s Peanut Butter Cup Bark chill in the refrigerator for at least 30 minutes or until it is completely set and firm. Once set, carefully remove the bark from the pan using the wax paper overhang and place it on a cutting board. Cut into desired shapes and sizes, then store in an airtight container in the refrigerator to maintain freshness.

Make Ahead Options

Making Loaded Reese’s Peanut Butter Cup Bark ahead of time is a perfect way to save effort on busy days! You can prepare the chocolate layer and peanut butter mixture up to 24 hours in advance. Simply follow the recipe until you have spread the peanut butter mixture over the chocolate, then refrigerate it until you’re ready to add the final chocolate topping. Keep everything stored in an airtight container to maintain freshness. When ready to finish, just melt the remaining chocolate, pour it over, and sprinkle with Reese’s Pieces before letting it chill until set. With these prep-in-advance steps, you’ll have a delectable dessert ready to impress with minimal effort!

What to Serve with Loaded Reese’s Peanut Butter Cup Bark?

This decadent treat pairs beautifully with a variety of delightful accompaniments, making your dessert spread truly unforgettable.

  • Vanilla Ice Cream: The creaminess of vanilla ice cream complements the rich bark, creating a deliciously smooth contrast.

  • Fresh Berries: Juicy strawberries and raspberries bring a burst of freshness, offsetting the sweetness of the bark beautifully.

  • Coffee: A warm cup of coffee enhances the chocolaty flavors, allowing you to savor each bite in a delightful way.

  • Salted Caramel Sauce: Drizzling salted caramel on top adds an extra layer of indulgence, balancing sweetness with a hint of salt.

  • Whipped Cream: Light and airy whipped cream provides a perfect lightness to counteract the rich layers of chocolate and peanut butter.

  • Milk: A classic pairing, a glass of cold milk is perfect for dipping the bark, enhancing every chocolatey, nutty bite.

  • Chocolate-Covered Pretzels: For a fun twist, serve crunchy pretzels alongside for a sweet and salty flavor explosion.

  • Nutty Granola: Sprinkle some nutty granola for added crunch and texture—this mix of flavors will complement the bark’s creamy richness.

  • Mint Tea: A refreshing cup of mint tea will cleanse your palate and create a delightful, uplifting finish to the indulgent treat.

Storage Tips for Loaded Reese’s Peanut Butter Cup Bark

Room Temperature: Store at room temperature for a maximum of 3 days if your home is cool; otherwise, refrigeration is preferred to maintain freshness.

Fridge: Keep your Loaded Reese’s Peanut Butter Cup Bark in an airtight container in the refrigerator to ensure it stays fresh and delicious for up to 2 weeks.

Freezer: For longer storage, freeze the bark in individual pieces wrapped in plastic wrap and stored in a freezer-safe container for up to 3 months.

Reheating: Allow to thaw in the fridge or at room temperature before enjoying; no reheating is necessary as it’s best served cold!

Expert Tips for Loaded Reese’s Peanut Butter Cup Bark

Layer Order Matters: Ensure the chocolate layer is fully set before spreading the peanut butter mixture to prevent mixing, achieving that perfect bark texture.

Perfect Texture: To achieve a creamier peanut butter layer, microwave the peanut butter mixture briefly for about 10-15 seconds—this makes it easier to spread without lumps.

Sweetness Adjustment: If you prefer less sweetness, reduce the amount of powdered sugar in the peanut butter layer, keeping the balance just right for your taste buds.

Mixing Oils: If using natural peanut butter, stir well to mix any separated oils; this helps maintain a consistent texture throughout the Loaded Reese’s Peanut Butter Cup Bark.

Design Variations: Feel free to add a pinch of sea salt on top for a delightful contrast that enhances the flavors—this small touch can elevate your bark to the next level!

Loaded Reese’s Peanut Butter Cup Bark Variations

Customize your Loaded Reese’s Peanut Butter Cup Bark to suit your taste buds with these delightful twists and swaps!

  • Dark Chocolate: Swap out milk chocolate for dark chocolate for a richer taste that balances beautifully with the peanut butter.
  • Nut-Free Swap: Use almond butter or sunflower butter in place of peanut butter for a deliciously nut-free version without sacrificing flavor.
  • Texture Boost: Add mini marshmallows or chopped nuts for extra texture and a delightful surprise in every bite. Try mixing in some chopped pecans for added crunch!
  • Flavor Twist: Incorporate a splash of vanilla extract or a sprinkle of sea salt into the peanut butter layer for an extra pop of flavor that elevates the entire bark.
  • Add Some Heat: For a spicy kick, mix in a pinch of cayenne pepper to the chocolate layer; the heat will surprise and delight your palate!
  • Candy Crush: Get creative by adding crushed up candies, such as M&M’s or crushed Oreos, to the top before the final chill for some playful decoration and variety in flavor.
  • Festive Toppings: During holidays, sprinkle festive colored sprinkles or edible glitter for a fun touch that kids (and adults!) will adore.
  • Drizzle Perfection: Dress your bark up with a drizzle of white chocolate over the top for a beautiful presentation; it adds a sweet contrast too!

Feel inspired? For more sweet indulgences, check out these Granola Cups Peanut for a lively twist on dessert!

Loaded Reese’s Peanut Butter Cup Bark Recipe FAQs

How do I choose the best chocolate chips for this recipe?
For the best results, I recommend using high-quality milk chocolate chips, as they provide a sweeter, creamier taste that nicely balances the peanut butter. If you’re looking for a richer flavor, dark chocolate is an excellent alternative. Just make sure to melt it carefully to avoid burning.

What’s the best way to store Loaded Reese’s Peanut Butter Cup Bark?
Store your Loaded Reese’s Peanut Butter Cup Bark in an airtight container to keep it fresh. It will last in the refrigerator for up to 2 weeks. If you’re planning to keep it longer, consider freezing it!

Can I freeze Loaded Reese’s Peanut Butter Cup Bark?
Absolutely! To freeze your bark, wrap individual pieces in plastic wrap and place them in a freezer-safe container. It will last for up to 3 months in the freezer. When you’re ready to enjoy, simply thaw it in the fridge overnight or at room temperature for a quick treat.

What should I do if my chocolate layer isn’t setting properly?
If you find that your chocolate layer isn’t setting, it could be due to overheating during the melting process. Be sure to melt it in 30-second intervals, stirring well in between. If it has already been spread in the pan, simply return it to the refrigerator for an additional 10-15 minutes to ensure it firms up before layering with the peanut butter mixture.

Is it safe for pets?
No, the ingredients used in Loaded Reese’s Peanut Butter Cup Bark, especially chocolate and certain nut butters, can be harmful to pets, particularly dogs. Be sure to keep this delicious treat out of reach!

Can I adjust the sweetness of the peanut butter layer?
Yes! If you prefer a less sweet treat, feel free to reduce the amount of powdered sugar in the peanut butter layer. Start by reducing it by a quarter cup and taste as you go; this way, you can find the perfect balance that suits your palate.

Loaded Reese’s Peanut Butter Cup Bark

Loaded Reese’s Peanut Butter Cup Bark: Your Dream No-Bake Dessert

Loaded Reese’s Peanut Butter Cup Bark is a quick, no-bake dessert that blends creamy peanut butter with chocolate for an irresistible treat.
Prep Time 15 minutes
Chilling Time 1 hour
Total Time 1 hour 15 minutes
Servings: 8 pieces
Course: Dessert
Cuisine: American
Calories: 210

Ingredients
  

For the Chocolate Layer
  • 1.5 cups chocolate chips Use milk chocolate for sweetness.
  • 0.5 cups butter Softened, unsalted for less salt.
For the Peanut Butter Layer
  • 1 cups creamy peanut butter JIF recommended for smoothness.
  • 1 cups powdered sugar Adjust for sweetness preference.
For the Topping
  • 1 cups Reese's Pieces Optional, adds crunch.

Equipment

  • 10x15 inch baking pan
  • microwave-safe bowl
  • spatula
  • offset spatula

Method
 

Step-by-Step Instructions
  1. Begin by lining a 10x15 inch baking pan with wax paper, allowing some overhang for easy removal later.
  2. In a microwave-safe bowl, combine 1.5 cups of chocolate chips and melt them in the microwave in 30-second intervals, stirring between each until smooth. Pour the chocolate into the lined pan and spread it evenly. Refrigerate for 15-20 minutes until firm.
  3. In a separate bowl, mix together 1 cup of creamy peanut butter, 1 cup of powdered sugar, and 0.5 cups of softened butter. Microwave briefly for 10-15 seconds if needed to ensure a smooth consistency.
  4. Spread the peanut butter mixture evenly over the hardened chocolate layer and return to the refrigerator for 15-20 minutes.
  5. Melt the remaining 2 cups of chocolate chips in the microwave and pour over the set peanut butter layer. Sprinkle with Reese's Pieces before refrigerating.
  6. Let chill for at least 30 minutes until completely set. Remove using wax paper overhang, cut into desired shapes, and store in an airtight container.

Nutrition

Serving: 1pieceCalories: 210kcalCarbohydrates: 25gProtein: 4gFat: 11gSaturated Fat: 6gMonounsaturated Fat: 4gCholesterol: 15mgSodium: 80mgPotassium: 120mgFiber: 1gSugar: 18gVitamin A: 5IUCalcium: 2mgIron: 6mg

Notes

Ensure the chocolate layer is fully set before spreading the peanut butter mixture for the best texture. Adjust sweetness by modifying powdered sugar, if necessary.

Tried this recipe?

Let us know how it was!

Stay Connected

Get recipes via email: