Get my cookbooks

Creamy High Protein Pasta Salad for a Fresh Meal Prep Win

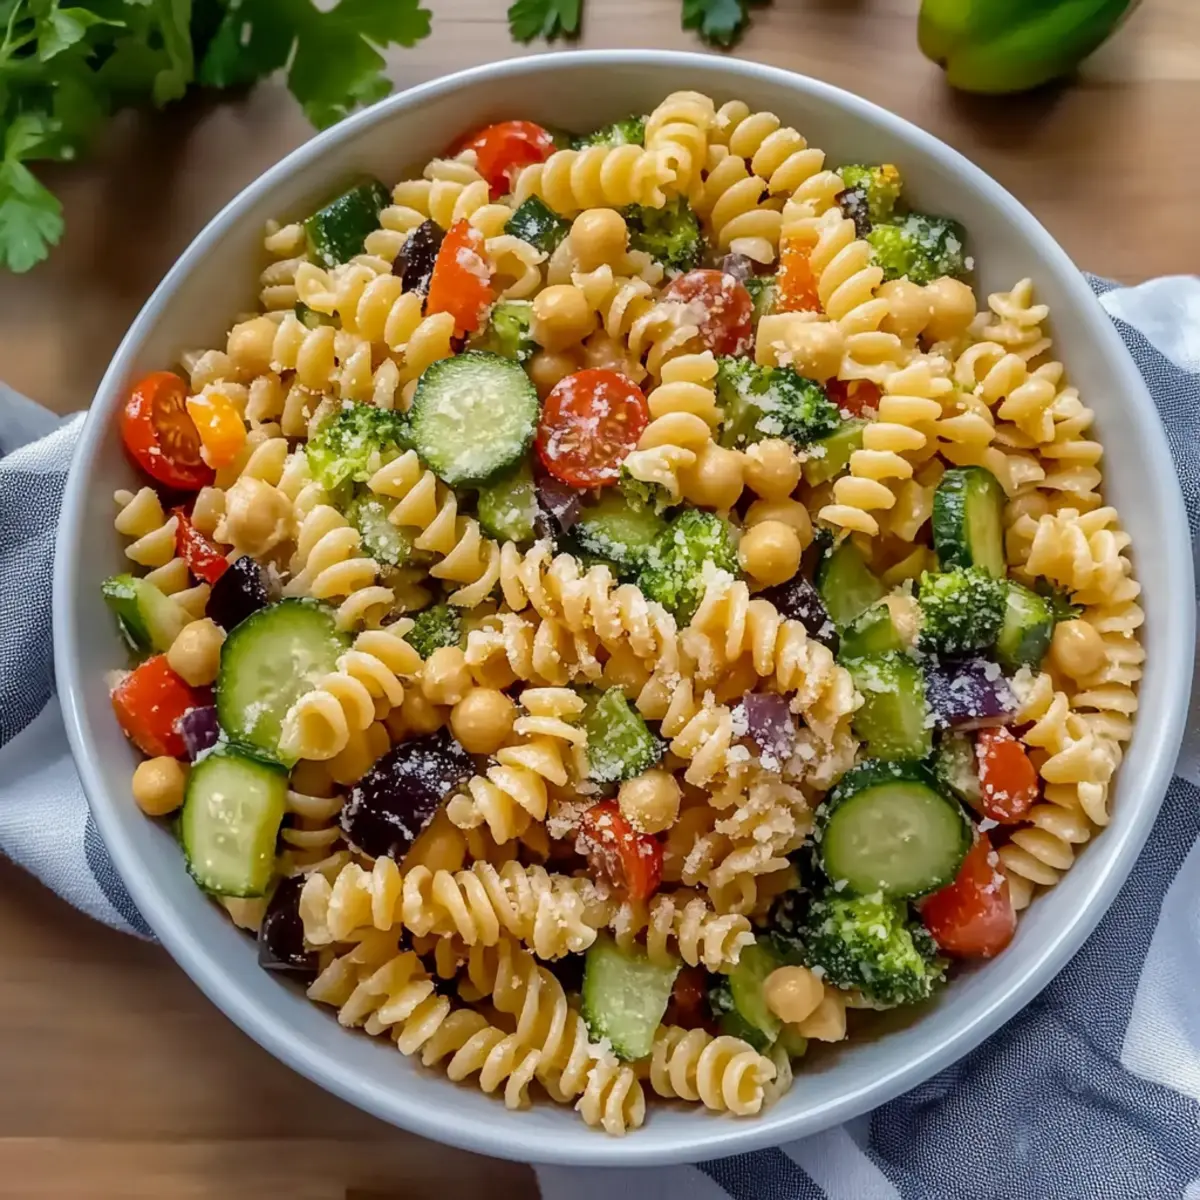
As I tossed the colorful ingredients into the bowl, the vibrant scents of fresh vegetables and zesty dressing danced around the kitchen, igniting a wave of excitement. This Creamy High Protein Pasta Salad is my go-to meal prep secret, and it’s a true game-changer for those of us craving homemade, nutritious meals without the fuss. By using chickpea pasta, not only does this dish boast a satisfying protein boost, but it also allows for endless customization—perfect for picky eaters or adventurous palettes alike! Whether you’re prepping for a busy week or looking to impress your family with a fresh, bright dish, this salad fits the bill. Are you ready to whip up something deliciously wholesome? Let’s dive in!

Why Is This Pasta Salad a Must-Try?

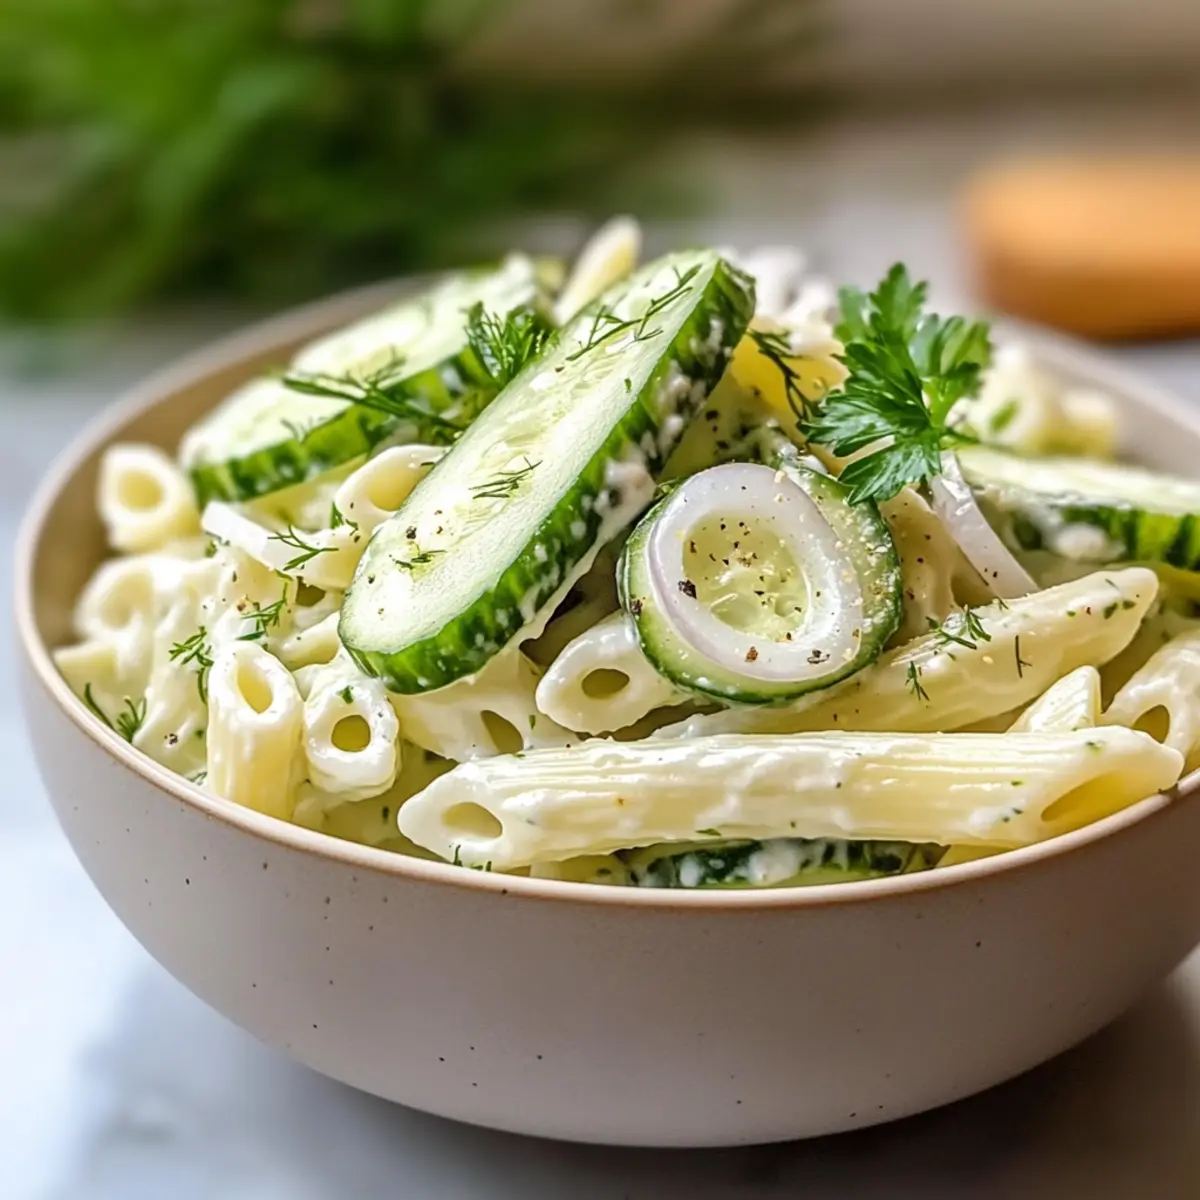
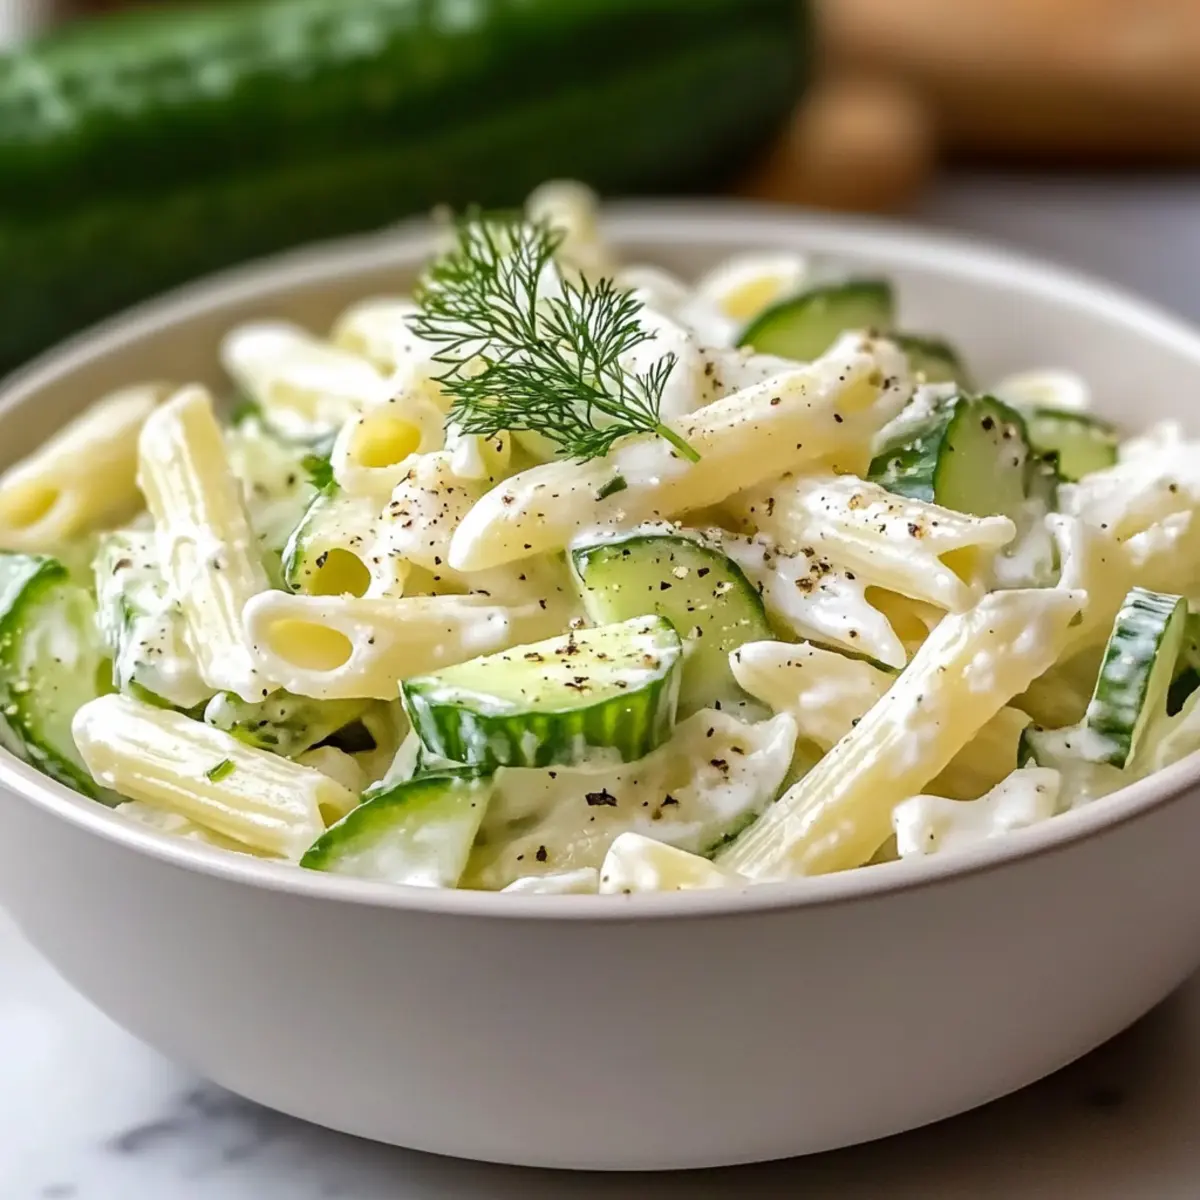
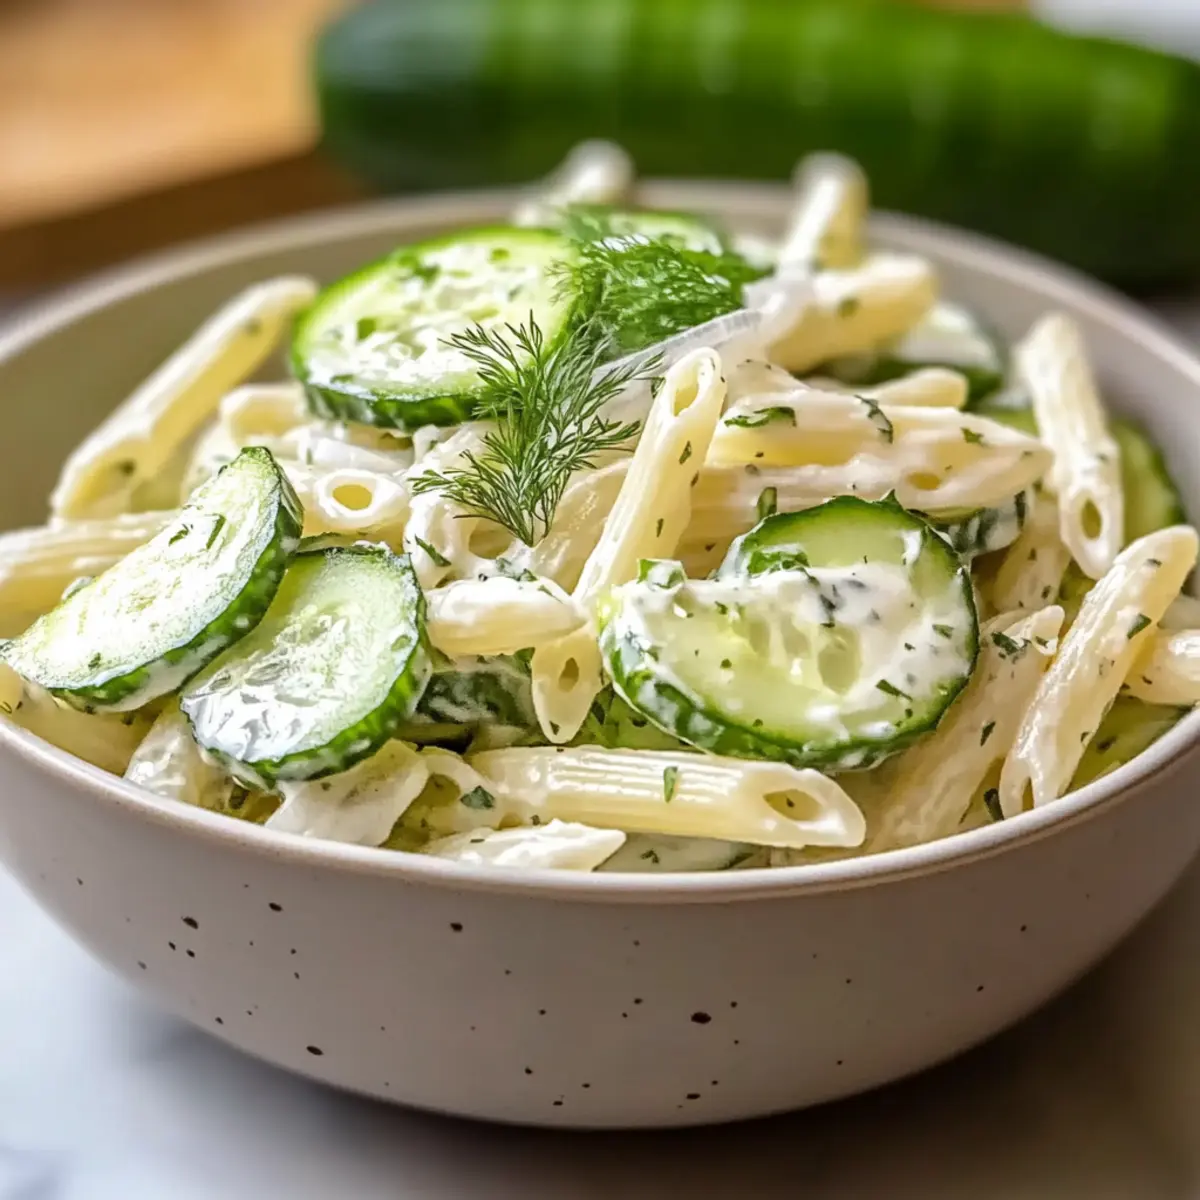
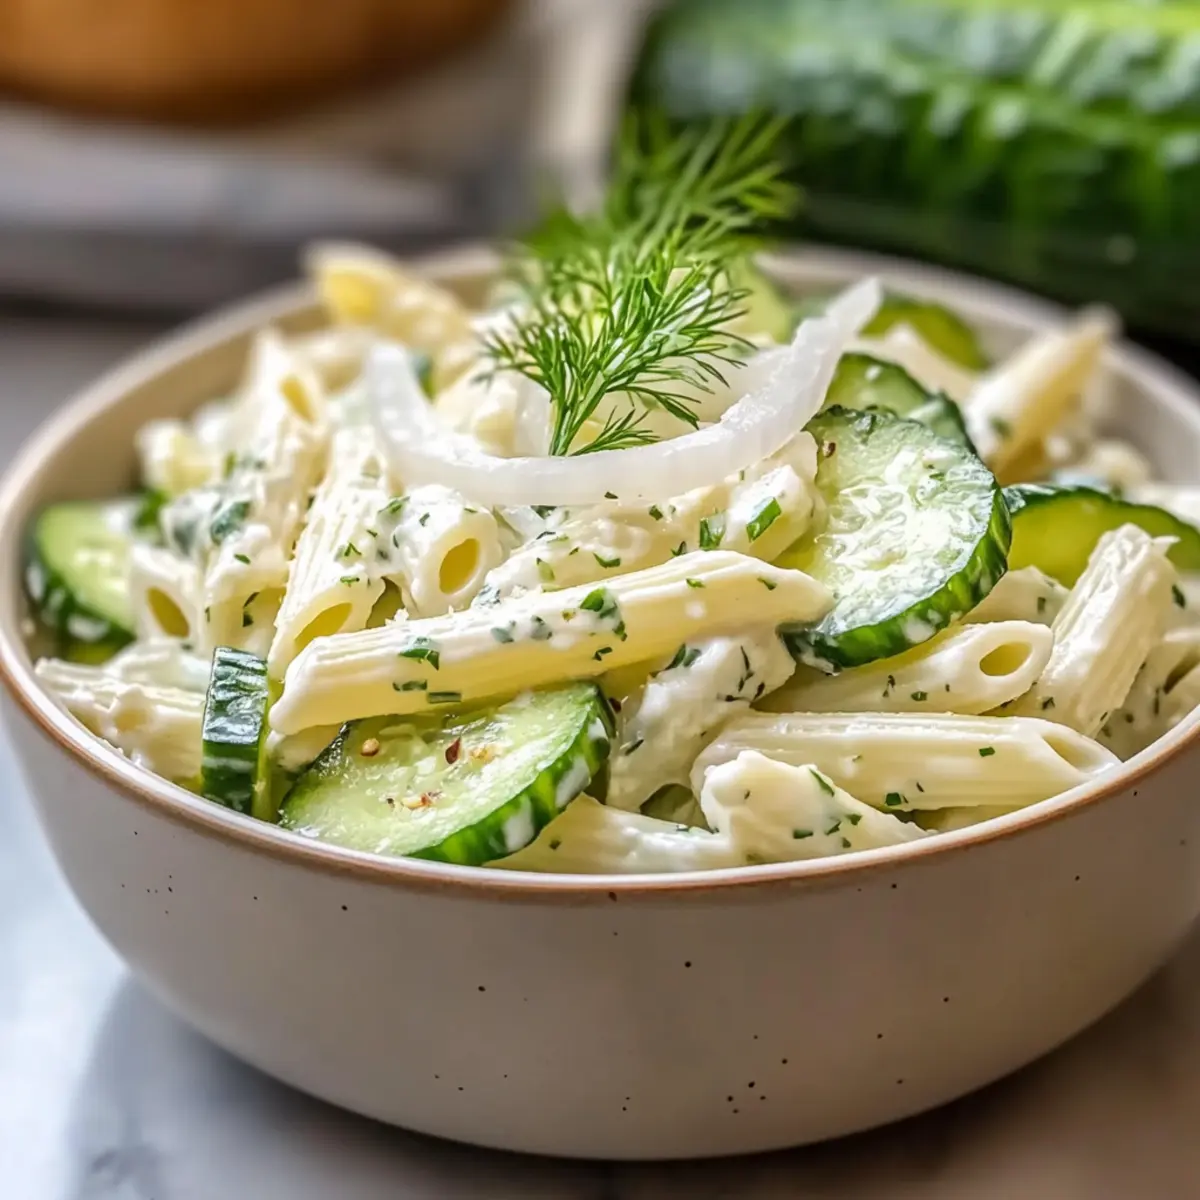
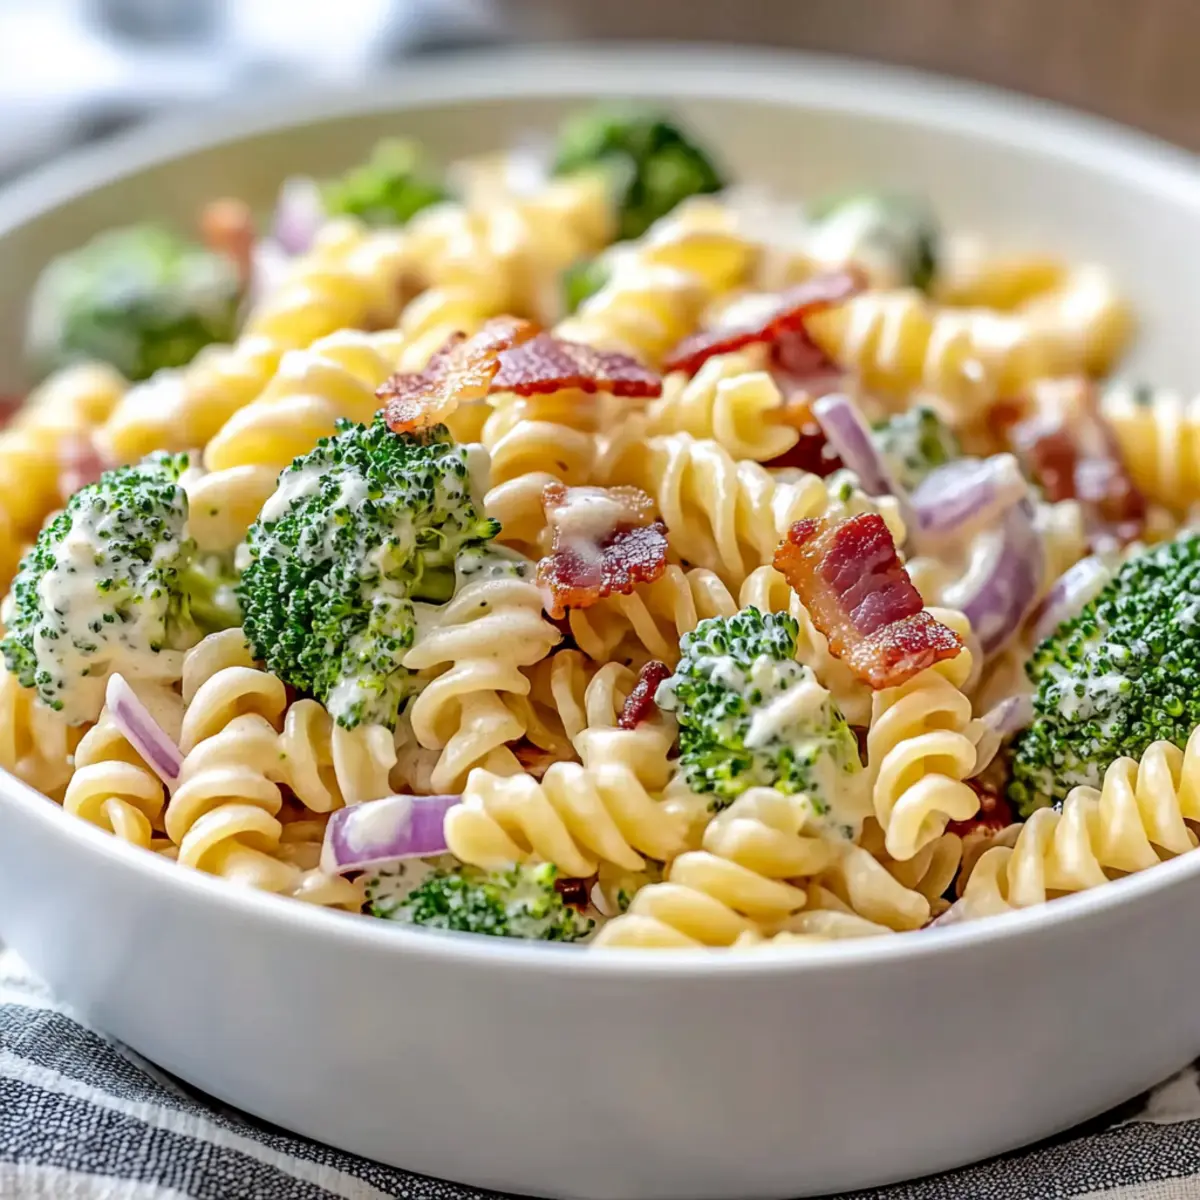
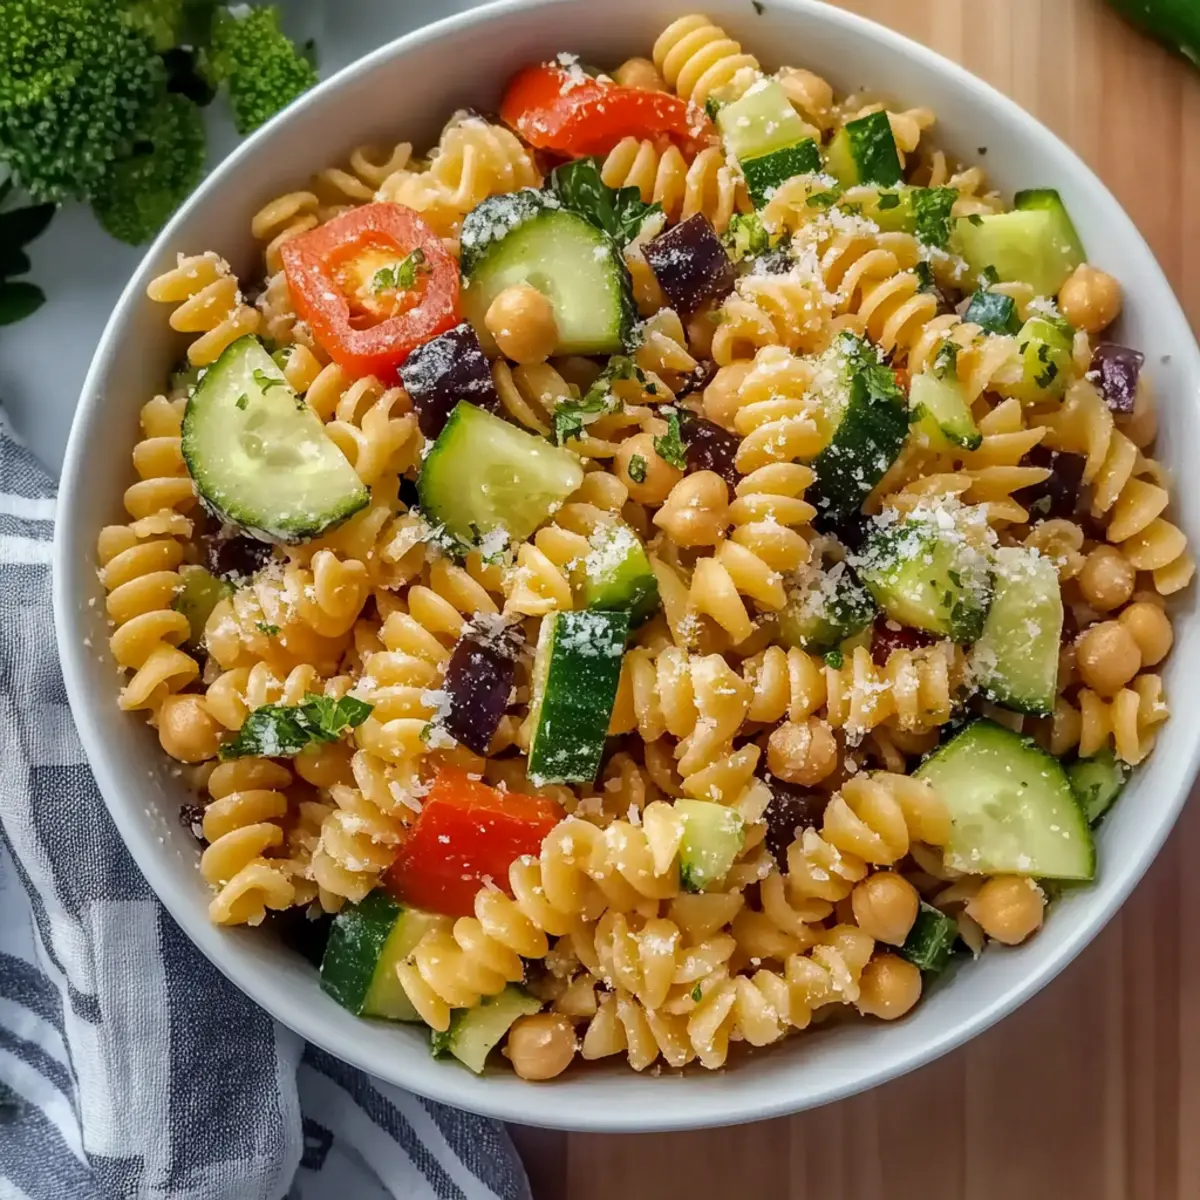
Creamy Delight: This pasta salad features a rich dressing that enhances the firm chickpea pasta, bringing comforting creaminess to each bite.
High Protein Boost: Packed with protein from chickpea pasta, it keeps you energized—a perfect partner for those busy days!
Kid-Friendly: With its vibrant colors and crunchy vegetables, even the pickiest eaters will love this dish.
Meal Prep Hero: Ideal for meal prepping, it’s easy to stack and store, making your weeknight dinners a breeze!
Customizable: Personalize with your favorite veggies or proteins—it’s your salad, your way! If you’re looking for more meal prep inspiration, check out my Cheesy Protein Egg Bake for another great option!

Creamy High Protein Pasta Salad Ingredients

• Create your own delicious version!

For the Pasta

  • Chickpea Pasta – A protein-rich base that adds fiber to your meal; brands like Banza or Barilla work great!

For the Dressing

  • Olive Oil – Adds healthy fats and gives richness to the dressing.
  • Red Wine Vinegar – Provides acidity and brightness to the salad.
  • Dijon Mustard – Adds a tangy depth that’s sure to enhance flavor.
  • Minced Garlic – Offers aromatic flavor and a delightful kick; don’t skip it!
  • Salt & Pepper – Essential for seasoning and balancing the entire dish.

For the Salad

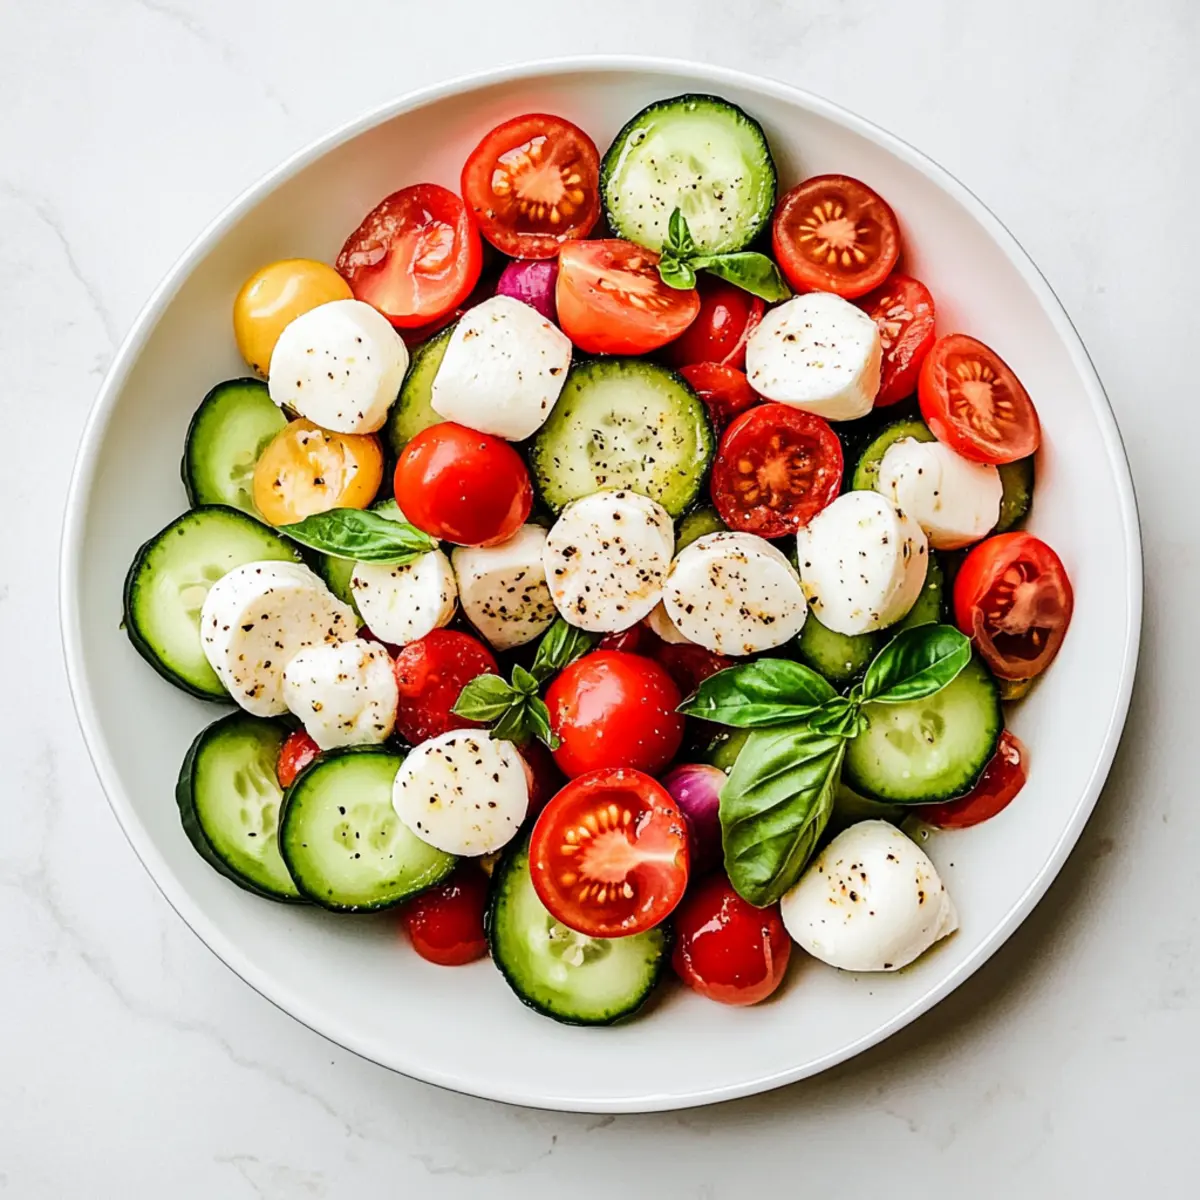
  • Fresh Chopped Vegetables (like bell peppers, cucumbers, etc.) – Adds crunch and nutrition; feel free to mix and match your favorites!
  • Fresh Herbs (like parsley or basil) – Enhances freshness and flavor; fresh is always best!
  • Cheese (optional, like feta or mozzarella) – Adds creaminess and extra protein; for a vegan twist, substitute with vegan cheese.

This Creamy High Protein Pasta Salad is the ideal canvas for your culinary creativity!

Step‑by‑Step Instructions for Creamy High Protein Pasta Salad

Step 1: Cook the Pasta
Begin by bringing a large pot of salted water to a rolling boil. Add the chickpea pasta and cook according to the package instructions, typically around 7-10 minutes. Check for doneness 1-2 minutes early to avoid mushiness. Once cooked, drain the pasta and rinse it under cold water to stop the cooking process and cool it down.

Step 2: Prepare the Dressing
In a spacious mixing bowl, combine 1/4 cup olive oil, 2 tablespoons red wine vinegar, 1 tablespoon Dijon mustard, and 1 clove of minced garlic. Season with salt and pepper to taste. Whisk these ingredients together vigorously for about 30 seconds until the dressing is well emulsified and smooth in texture, inviting those vibrant flavors to meld beautifully.

Step 3: Mix the Salad Ingredients
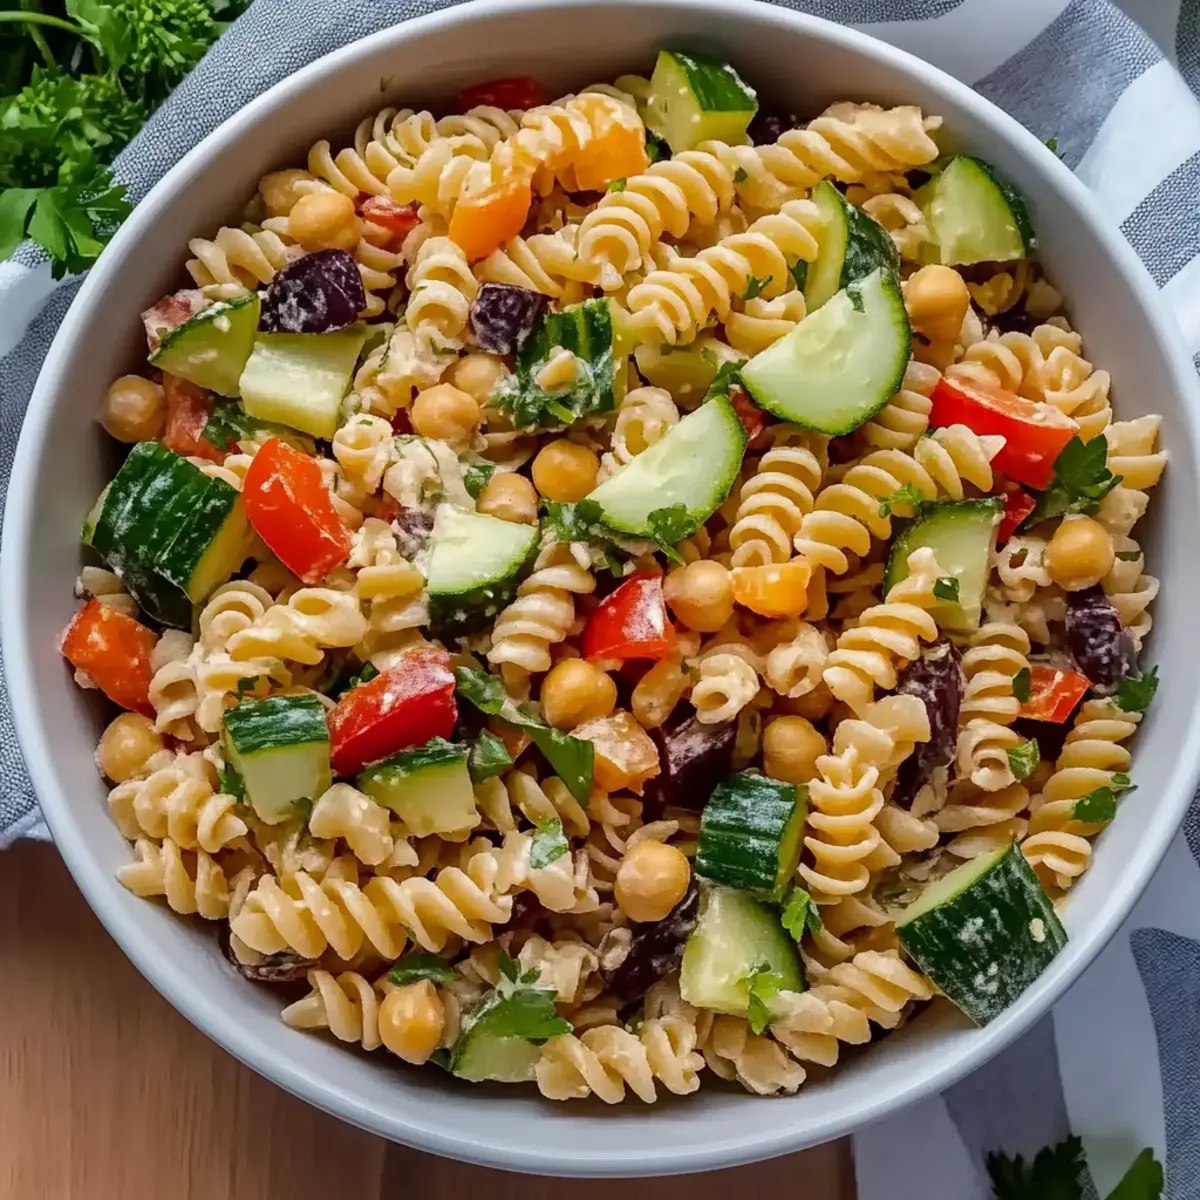
Once the chickpea pasta has cooled, add it to the mixing bowl with the dressing. Then, chop your choice of fresh vegetables—bell peppers and cucumbers work beautifully—and add about 1-2 cups of them to the bowl. Toss in a handful of freshly chopped herbs like parsley or basil for an added burst of flavor, making this Creamy High Protein Pasta Salad colorful and nutritious.

Step 4: Combine and Coat
Gently pour the prepared dressing over the pasta and vegetable mixture. Using a spatula or large spoon, fold everything together carefully, making sure each piece of pasta and vegetable is beautifully coated in the creamy dressing. Aim for a cohesive mixture — the pasta should glisten with flavor and the veggies should stay vibrant and fresh.

Step 5: Chill the Salad
Transfer the pasta salad to an airtight container or cover the mixing bowl with plastic wrap, then place it in the refrigerator. Allow it to chill for at least 30 minutes; this resting period will let the flavors meld and enhance the overall taste of your Creamy High Protein Pasta Salad, making it even more delightful.

Step 6: Serve and Enjoy
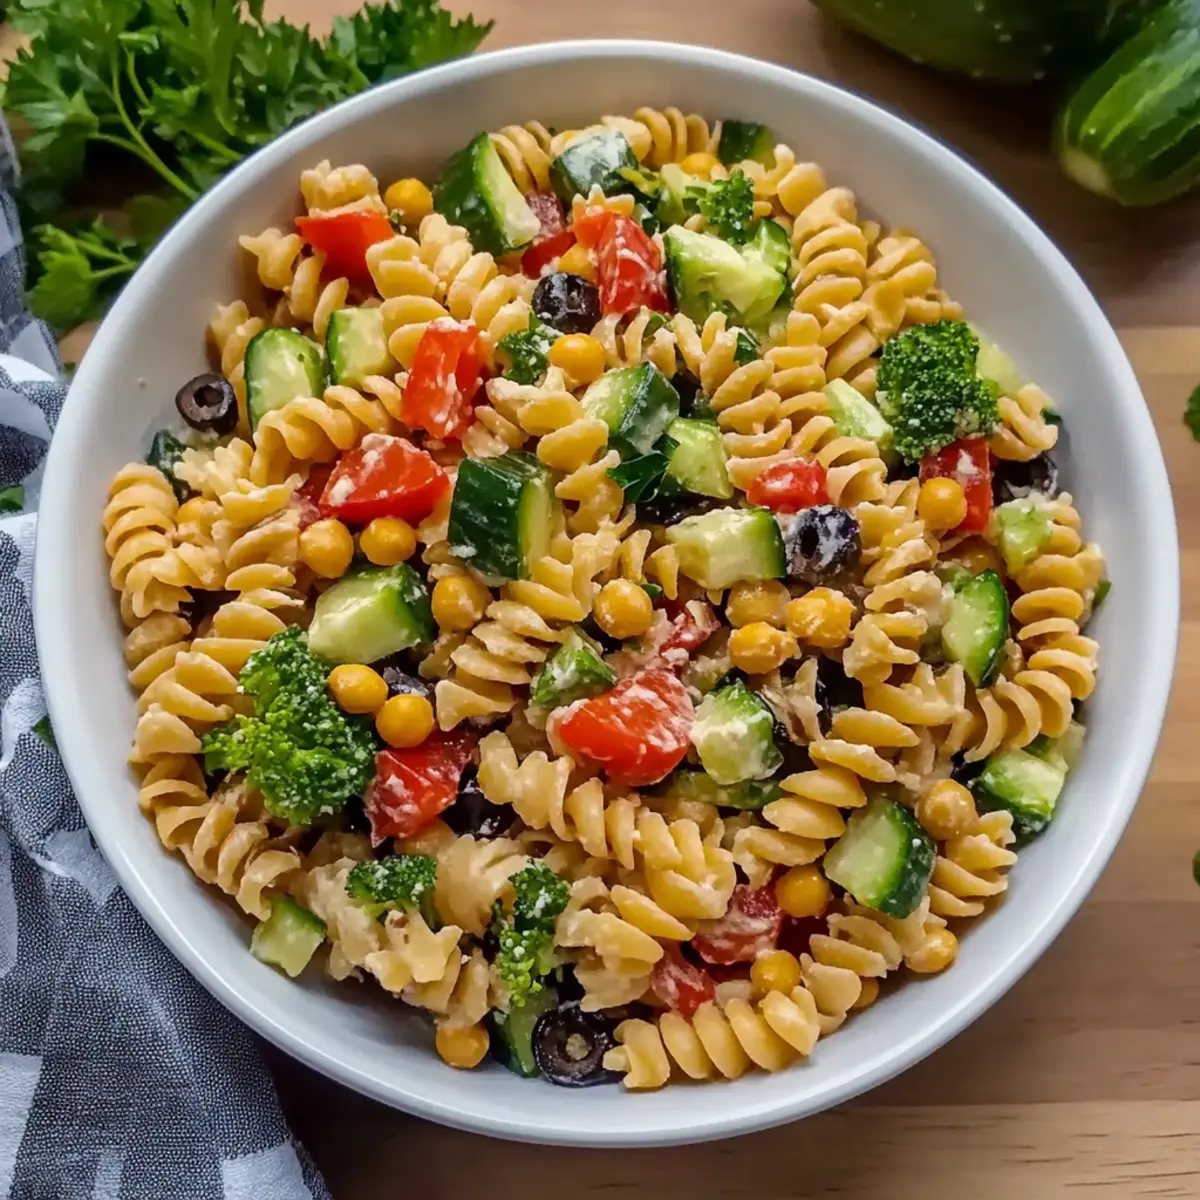
When ready to serve, give the creamy salad a good stir to refresh it. If desired, sprinkle extra fresh herbs or additional cheese on top for presentation. Dish it out as a hearty meal, a side, or a perfect lunch option, and experience a bright, nutritious explosion of flavors with every satisfying bite!

Make Ahead Options

These Creamy High Protein Pasta Salad preparations are a lifesaver for busy home cooks! You can prepare the chickpea pasta up to 24 hours in advance while keeping the components separate to maintain their quality. Cook the pasta, cool it completely, and store it in an airtight container in the refrigerator. Chop your vegetables and herbs ahead of time, storing them in separate containers for optimal crispness when ready to serve. When it’s time to enjoy, simply combine everything with the dressing and give it a good stir. This way, you’ll have a delicious, satisfying meal ready without the fuss, perfect for busy weeknights!

What to Serve with Creamy High Protein Pasta Salad

As you prepare to serve up a delightful meal, consider these fantastic pairings that will elevate your dining experience and create wonderful harmony on your plate.

  • Grilled Lemon Chicken: Juicy, citrus-infused chicken complements the salad’s creaminess, adding a zesty element that’s hard to resist.
  • Garlic Breadsticks: Soft and warm, these garlic-infused breadsticks provide a perfect vehicle for scooping up every last bite of pasta salad.
  • Tossed Green Salad: A fresh green salad adds a crisp contrast in both texture and flavor, enhancing the overall dining experience with its lightness.
  • Roasted Vegetable Medley: Seasonal roasted veggies bring warmth and a depth of flavor, perfectly balancing the creamy notes of the pasta salad.
  • Fruit Salad: A chilled fruit salad lends a refreshing sweetness that brightens the meal and serves as a wholesome dessert option.
  • Sparkling Lemonade: Bubbly and bright, sparkling lemonade offers a refreshing sip that enhances the flavors of the salad, making it a fantastic drink choice.
  • Chilled White Wine: A crisp, chilled white wine, like Sauvignon Blanc, pairs beautifully with the flavors in the salad, enhancing the whole experience.

Expert Tips for Creamy High Protein Pasta Salad

  • Cool Your Pasta: Let the chickpea pasta cool completely before adding the dressing to prevent sogginess. This ensures it stays firm and enjoyable!

  • Vegetable Preparation: Add fresh chopped vegetables just before serving if you’re meal prepping. This keeps them crisp and bursting with flavor in your Creamy High Protein Pasta Salad.

  • Uniform Dice: Dice your vegetables into similar sizes for balanced flavor in every bite. It not only looks appealing but also enhances the salad’s texture.

  • Rinse Immediately: Rinse the chickpea pasta under cold water right after cooking. This halts the cooking process, keeping your pasta from becoming mushy and limp.

  • Make It Your Own: Feel free to customize! Swap in different proteins or seasonal veggies to suit your taste—there’s no wrong way to enjoy this Creamy High Protein Pasta Salad!

How to Store and Freeze Creamy High Protein Pasta Salad

  • Fridge: Store your creamy pasta salad in an airtight container for up to 5 days. This helps preserve its fresh flavors and prevents sogginess.
  • Freezer: For longer storage, freeze the pasta salad for up to 2 months, but note that the texture may change once thawed.
  • Keep Separate: To ensure maximum freshness, keep the dressing and salad components separate until you’re ready to serve. This will maintain the crispness of the vegetables.
  • Reheating: If serving leftovers, enjoy them cold or let them sit at room temperature for about 30 minutes. For a warm version, gently reheat in the microwave, but avoid overheating to keep the textures just right.

Creamy High Protein Pasta Salad Variations

Feel free to make this delightful salad your own with these fun twists and substitutions!

  • Gluten-Free: Swap chickpea pasta for quinoa or lentil pasta, keeping all the delicious flavor while maintaining a gluten-free dish.

  • Extra Protein: Add grilled chicken or roasted shrimp for a protein punch, making this salad even more satisfying.

  • Veggie Medley: Incorporate seasonal vegetables like arugula or cherry tomatoes; they not only add flavor but also a pop of color and freshness.

  • Herb Explosion: Experiment with fresh herbs like dill or cilantro instead of parsley or basil. Each brings a unique flair to this tasty dish.

  • Cheese Choices: For a creamier texture, use a dollop of Greek yogurt or cottage cheese in place of ordinary cheese. It makes your salad even richer!

  • Spicy Kick: Add crushed red pepper flakes or chopped jalapeños to heat things up. Spice lovers will enjoy this surprising twist!

  • Nutty Crunch: Toss in a handful of toasted walnuts or sliced almonds for that perfect crunch and an added layer of flavor.

  • Zesty Variants: Jazz it up with a splash of lemon juice or citrus zest. This simple addition brightens up the flavors beautifully!

These variations not only offer fun changes but align perfectly with your taste and dietary needs. If you’re looking for more ideas, my Mexican Soup is another great way to incorporate delicious flavors into your meal prep!

Creamy High Protein Pasta Salad Recipe FAQs

How do I choose the right chickpea pasta?
Absolutely! When selecting chickpea pasta, look for brands that use 100% chickpeas as the main ingredient. I often recommend Banza or Barilla, as they have great textures and flavors. Check the package for certifications, and avoid those with excessive additives for the best nutritional benefits.

How should I store leftover pasta salad?
For optimal freshness, store your creamy high protein pasta salad in an airtight container in the refrigerator for up to 5 days. If you made the salad ahead of time, keeping the dressing and salad components separate until you’re ready to serve will help maintain the crunchiness of the vegetables and prevent them from becoming soggy.

Can I freeze creamy pasta salad?
While you can freeze creamy pasta salad for up to 2 months, I recommend caution as the texture may change once thawed. To freeze, place the salad in a freezer-safe container, leaving space for expansion. When you’re ready to enjoy it, thaw in the refrigerator overnight and give it a good stir to revive the flavors before serving.

What if the pasta turns mushy?
Very! To avoid this issue, you can cook the chickpea pasta for 1-2 minutes less than the package directions suggest. I also advise rinsing the pasta under cold water immediately after cooking, as this halts the cooking process and helps keep the pasta firm and delightful.

Is this recipe safe for dietary restrictions?
Absolutely! This creamy high protein pasta salad is gluten-free if you use chickpea pasta. For those with dairy allergies, you can easily swap out cheese for a dairy-free cheese alternative or simply omit it. Always check the ingredient list of your pasta and dressing components to ensure they align with your dietary needs.

Creamy High Protein Pasta Salad

Creamy High Protein Pasta Salad for a Fresh Meal Prep Win

This Creamy High Protein Pasta Salad is nutritious and customizable, featuring chickpea pasta and vibrant veggies for a satisfying meal prep option.
Prep Time 15 minutes
Cook Time 10 minutes
Chilling Time 30 minutes
Total Time 55 minutes
Servings: 4 servings
Course: Pasta
Cuisine: Mediterranean
Calories: 300

Ingredients
  

For the Pasta
  • 8 oz Chickpea Pasta Brands like Banza or Barilla work great.
For the Dressing
  • 1/4 cup Olive Oil Adds healthy fats.
  • 2 tbsp Red Wine Vinegar Provides acidity.
  • 1 tbsp Dijon Mustard For tangy depth.
  • 1 clove Minced Garlic Offers aromatic flavor.
  • to taste Salt For seasoning.
  • to taste Pepper For seasoning.
For the Salad
  • 1-2 cups Fresh Chopped Vegetables (like bell peppers, cucumbers, etc.) Mix and match your favorites.
  • 1 handful Fresh Herbs (like parsley or basil) Fresh is best.
  • optional Cheese (like feta or mozzarella) For creaminess and extra protein.

Equipment

  • Large pot
  • Mixing Bowl
  • spatula
  • airtight container

Method
 

Step-by-Step Instructions
  1. Bring a large pot of salted water to a boil. Add chickpea pasta and cook for 7-10 minutes. Drain and rinse under cold water.
  2. In a mixing bowl, combine olive oil, red wine vinegar, Dijon mustard, minced garlic, salt, and pepper. Whisk until emulsified.
  3. Add cooled chickpea pasta to the bowl. Chop and add fresh vegetables, and toss in chopped herbs.
  4. Pour the dressing over the pasta and vegetables. Fold gently until everything is coated.
  5. Transfer the salad to an airtight container or cover the bowl. Chill for at least 30 minutes.
  6. Stir before serving. Add extra herbs or cheese if desired.

Nutrition

Serving: 1servingCalories: 300kcalCarbohydrates: 45gProtein: 15gFat: 10gSaturated Fat: 1gPolyunsaturated Fat: 3gMonounsaturated Fat: 6gSodium: 200mgPotassium: 400mgFiber: 10gSugar: 2gVitamin A: 500IUVitamin C: 30mgCalcium: 50mgIron: 3mg

Notes

Let pasta cool completely before adding dressing. Add fresh vegetables just before serving for maximum crispness.

Tried this recipe?

Let us know how it was!

Zesty Orange Glazed Salmon for a Quick Weeknight Delight

The vibrant scent of fresh oranges always takes me back to sun-drenched summer days, where every meal felt like a celebration of flavor. Today, I’m sharing a delightful recipe for Orange Glazed Salmon that beautifully marries sweet and tangy elements, transforming a simple dinner into an extraordinary experience! This dish is not only beginner-friendly but also a quick weeknight meal, requiring under 35 minutes of your time. Imagine flaky salmon fillets, perfectly glazed and bursting with citrus goodness, ready to please even the pickiest of eaters. As you indulge in this mouthwatering creation, you’ll appreciate how easy it is to elevate your cooking game without sacrificing your evenings to elaborate prep. Ready to tantalize your taste buds and brighten your dinner table? Let’s dive into this irresistible recipe together!

Why is Orange Glazed Salmon a Must-Try?

Quick and Easy: This Orange Glazed Salmon comes together in just under 35 minutes, making it the perfect solution for hectic weeknights when time is limited.

Flavor Explosion: The combination of sweet honey, zesty orange, and savory soy sauce creates a glaze that infuses your salmon with mouthwatering flavor that’s sure to impress.

Beginner-Friendly: Even novice cooks can master this recipe, ensuring everyone can enjoy a gourmet experience without the fuss.

Nutrient-Rich: Packed with omega-3 fatty acids and essential vitamins, this dish supports a healthy lifestyle while tasting incredible.

Versatile Pairings: Serve it alongside steamed veggies or flavorful quinoa for a balanced meal that pleases both family and guests. Check out how well it complements sides like Honey Garlic Salmon or Mediterranean Herb Crusted Salmon for a delightful culinary journey!

Orange Glazed Salmon Ingredients

For the Salmon
Salmon Fillets – Fresh, high-quality salmon ensures the best flavor and moisture.
Salt and Pepper – Basic seasoning that enhances the overall taste of the salmon.
Olive Oil – Aids in cooking and helps achieve that beautiful golden crust.

For the Glaze
Fresh Orange Juice – Forms the heart of the glaze, providing a vibrant and refreshing citrus taste.
Honey – Adds a touch of sweetness and contributes to the glaze’s sticky texture.
Soy Sauce – Introduces umami depth that beautifully balances the sweetness of the honey.
Orange Zest – Infuses the glaze with aromatic oils, enhancing the citrus flavor profile.
Garlic (minced) – Introduces savory warmth and depth, perfecting the glaze.
Ginger (grated) – Offers a gentle heat that complements the sweetness nicely.
Cornstarch (mixed with water) – Essential for thickening the glaze; ensure it’s well mixed before use.

For Garnish
Green Onions – Adds a pop of color and a fresh crunch when sprinkled on top.
Orange Slices – Provides an appealing presentation enhancing both look and flavor.

Get ready to create this delightful Orange Glazed Salmon that’s as impressive to your family and friends as it is easy to prepare!

Step‑by‑Step Instructions for Orange Glazed Salmon

Step 1: Prepare the Salmon
Begin by patting the salmon fillets dry with paper towels to remove excess moisture. This helps achieve a beautiful crust. Season each fillet generously with salt and pepper on both sides, ensuring the flavors penetrate deeply. Set the seasoned salmon aside while you prepare the cooking surface.

Step 2: Heat the Olive Oil
In a large non-stick pan, heat 2 tablespoons of olive oil over medium-high heat. Wait for about 2 minutes until the oil shimmers but does not smoke. This temperature is crucial for creating a crisp skin on the salmon. Once ready, gently place the fillets skin-side down, being careful to avoid splatters.

Step 3: Cook the Salmon
Allow the salmon to cook for 4-5 minutes without moving it, letting the skin achieve a golden, crispy texture. Carefully flip each fillet and cook for an additional 4-5 minutes, or until the salmon flakes easily with a fork. Once perfectly cooked, remove the salmon from the pan and set it aside on a plate.

Step 4: Make the Glaze
In the same pan, reduce the heat to medium and add 1/2 cup of fresh orange juice, 3 tablespoons of honey, and 2 tablespoons of soy sauce. Stir in the grated zest of one orange, 2 minced garlic cloves, and 1 tablespoon of grated ginger. Allow this mixture to simmer for about 3-4 minutes, scraping the browned bits from the bottom of the pan to deglaze.

Step 5: Thicken the Sauce
In a small bowl, mix 1 tablespoon of cornstarch with 2 tablespoons of water until fully combined. Slowly pour this slurry into the simmering sauce, stirring continuously for a minute. Let the glaze cook until it slightly thickens and becomes glossy, about 2-3 minutes. This step is key for creating the perfect viscosity in your Orange Glazed Salmon.

Step 6: Glaze the Salmon
Return the cooked salmon fillets to the pan, gently spooning the luscious glaze over the top of each piece. Warm the salmon for an additional 2-3 minutes, allowing the flavors to meld beautifully. You’ll notice the glaze will begin to cling to the salmon, creating a mouthwatering finish.

Step 7: Serve and Garnish
Transfer the Orange Glazed Salmon fillets onto serving plates. For an extra touch, garnish with sliced green onions and fresh orange slices. This not only enhances the presentation but also adds a delightful pop of flavor to each bite. Enjoy your beautiful, vibrant dinner!

How to Store and Freeze Orange Glazed Salmon

Fridge: Store any leftover Orange Glazed Salmon in an airtight container for up to 2 days. This helps maintain its moist texture and delicious flavor.

Freezer: For longer storage, wrap the salmon tightly in plastic wrap and then in aluminum foil, freezing for up to 2 months. Label with the date for easy tracking.

Reheating: To reheat, thaw in the fridge overnight, then warm gently in a skillet on low heat for about 5-7 minutes, adding a splash of water or broth to help retain moisture.

Make Ahead Options

These Orange Glazed Salmon fillets are perfect for meal prep, saving you time on busy weeknights! You can season the salmon with salt and pepper and refrigerate it up to 24 hours in advance. Additionally, prepare the glaze by mixing the fresh orange juice, honey, soy sauce, zest, garlic, and ginger up to 3 days beforehand and store it in an airtight container in the fridge. To maintain the salmon’s quality, keep it well covered and ensure it doesn’t touch any other ingredients to avoid cross-contamination. When ready to serve, simply cook the salmon in the pan and add the pre-prepared glaze during the last moments of cooking to keep it just as delicious and flavorful!

What to Serve With Orange Glazed Salmon

Elevate your dinner experience by pairing this Orange Glazed Salmon with vibrant sides that complement its bold flavors.

  • Creamy Mashed Potatoes: Their rich, velvety texture balances the tangy glaze, creating a comforting contrast.

  • Roasted Asparagus: The slight bitterness of asparagus enhances the sweetness of the salmon, adding an elegant touch to your plate.

  • Citrus Quinoa Salad: A refreshing, nutty salad with zesty dressing brings out the orange notes, intensifying the meal’s flavor profile.

  • Stir-Fried Broccoli: Crisp-tender broccoli adds a satisfying crunch and boosts colors and nutrients, making for a well-rounded dish.

  • Coconut Rice: The subtle sweetness of coconut rice pairs harmoniously with the zesty glaze, transporting your taste buds to tropical realms.

  • Sparkling White Wine: A chilled glass of sparkling wine cleanses the palate and adds celebratory flair to your evening.

  • Dark Chocolate Mousse: End the meal on a rich note; the bittersweet chocolate contrasts beautifully with the sweet citrus glaze, creating a perfect dessert harmony.

Expert Tips for Orange Glazed Salmon

  • Dry the Salmon: Pat the salmon fillets dry before seasoning to ensure a nice crust forms while cooking. This prevents them from steaming instead of searing.

  • Consistent Heat: Keep the pan at medium-high heat throughout the cooking process. This helps achieve an even cook and a beautifully golden skin.

  • Perfect Glaze Thickness: Ensure the cornstarch slurry is well mixed before adding it to the sauce; simmering it properly will give you a luscious, thick glaze that clings to the salmon perfectly.

  • Garlic and Ginger Timing: Add garlic and ginger to the sauce after deglazing. This helps retain their flavors without burning, ensuring a fragrant, balanced glaze.

  • Serving Fresh: Serve the Orange Glazed Salmon immediately after glazing to enjoy the best texture and flavor. Leftover salmon can lose its delightful juiciness.

Orange Glazed Salmon Variations & Substitutions

Dive into a world of flavors and customize this easy Orange Glazed Salmon recipe to fit your taste buds perfectly!

  • Honey Alternative: Swap honey for maple syrup for a unique, earthy sweetness that complements the citrus beautifully.

  • Citrus Switch-Up: Use lemon or lime juice if oranges are unavailable. This maintains the zesty kick while offering a refreshing twist.

  • Heat It Up: Add a pinch of red pepper flakes to the glaze for a kick of heat that balances the sweetness and adds excitement.

  • Ginger-Free Option: If you’re not a fan of ginger, you can omit it entirely or replace it with a touch of ground coriander for a different flavor dimension.

  • Teriyaki Fusion: Mix in a splash of teriyaki sauce for a sweet and savory blend that pairs remarkably well with the citrus notes.

  • Vegetarian Twist: Substitute salmon for tofu, marinating it in the glaze before sautéing to create a delightful plant-based version.

  • Herb Enhancer: Sprinkle some fresh thyme or basil into the glaze while cooking for herby undertones that elevate the dish to new heights.

Exploring these delightful substitutions not only keeps your meals exciting but opens up a culinary adventure worth savoring. Pair this vibrant dish with sides like Ginger Soy Glazed or Herb Crusted Salmon for an unforgettable experience!

Orange Glazed Salmon Recipe FAQs

How do I choose the best salmon fillets?
Absolutely! When selecting salmon fillets, look for vibrant color and firm texture. The flesh should be moist but not slimy, with no dark spots or discoloration. Fresh salmon should also have a mild, ocean-like scent—instead of a strong fishy odor, which indicates it’s past its prime.

What is the best way to store leftovers?
Very! Store any leftover Orange Glazed Salmon in an airtight container in the refrigerator for up to 2 days. Ensure that the container is sealed properly to prevent moisture loss and preserve the dish’s signature flavors. If you think you won’t eat it within that timeframe, consider freezing it.

Can I freeze Orange Glazed Salmon?
Absolutely! To freeze, wrap the cooked salmon tightly in plastic wrap and then in aluminum foil. Make sure to label it with the date and use it within 2 months for the best quality. When you’re ready to enjoy it, thaw it in the refrigerator overnight, and gently reheat it in a skillet over low heat for about 5-7 minutes, adding a splash of water or broth to retain moisture.

What if my glaze isn’t thick enough?
No problem! If you find that your glaze isn’t thickening as desired, return it to a simmer. Create a cornstarch slurry by mixing equal parts cornstarch and cold water until smooth, then gradually stir it into the simmering glaze. Keep stirring while it cooks for another 1-2 minutes until it reaches the desired thickness. This should give you that luscious, sticky texture perfect for coating your salmon.

Are there any dietary considerations with this recipe?
Very! The Orange Glazed Salmon is naturally gluten-free when using gluten-free soy sauce. However, if you have allergies to soy, consider substituting with tamari or coconut aminos. Always double-check all ingredient labels for any hidden allergens, especially if serving to guests or family members with dietary restrictions.

How can I enhance the flavor even further?
You’ve got it! For added flavor, consider marinating the salmon in the glaze for about 30 minutes before cooking. This allows the flavors to really penetrate the fish. Additionally, feel free to add a pinch of red pepper flakes to the glaze for a bit of heat or a splash of orange liqueur for an upscale twist. Enjoy experimenting with your Orange Glazed Salmon!

Orange Glazed Salmon

Zesty Orange Glazed Salmon for a Quick Weeknight Delight

This Orange Glazed Salmon recipe offers a sweet and tangy flavor profile, perfect for a quick dinner.
Prep Time 10 minutes
Cook Time 25 minutes
Total Time 35 minutes
Servings: 4 fillets
Course: Dinner
Cuisine: American
Calories: 320

Ingredients
  

For the Salmon
  • 4 fillets Salmon Fresh, high-quality salmon ensures the best flavor and moisture.
  • to taste Salt Basic seasoning that enhances the overall taste of the salmon.
  • to taste Pepper Basic seasoning that enhances the overall taste of the salmon.
  • 2 tablespoons Olive Oil Aids in cooking and helps achieve that beautiful golden crust.
For the Glaze
  • 1/2 cup Fresh Orange Juice Forms the heart of the glaze, providing a vibrant and refreshing citrus taste.
  • 3 tablespoons Honey Adds a touch of sweetness and contributes to the glaze's sticky texture.
  • 2 tablespoons Soy Sauce Introduces umami depth that beautifully balances the sweetness of the honey.
  • 1 tablespoon Orange Zest Infuses the glaze with aromatic oils, enhancing the citrus flavor profile.
  • 2 cloves Garlic (minced) Introduces savory warmth and depth, perfecting the glaze.
  • 1 tablespoon Ginger (grated) Offers a gentle heat that complements the sweetness nicely.
  • 1 tablespoon Cornstarch (mixed with water) Essential for thickening the glaze; ensure it's well mixed before use.
For Garnish
  • to taste Green Onions Adds a pop of color and a fresh crunch when sprinkled on top.
  • to taste Orange Slices Provides an appealing presentation enhancing both look and flavor.

Equipment

  • large non-stick pan

Method
 

Step‑by‑Step Instructions
  1. Begin by patting the salmon fillets dry with paper towels to remove excess moisture. Season each fillet generously with salt and pepper on both sides.
  2. In a large non-stick pan, heat olive oil over medium-high heat. Place the fillets skin-side down once the oil shimmers.
  3. Cook salmon for 4-5 minutes, then flip and cook for another 4-5 minutes until flakes easily.
  4. In the same pan, reduce heat to medium and add orange juice, honey, soy sauce, orange zest, garlic, and ginger. Simmer for 3-4 minutes.
  5. Mix cornstarch with water and slowly add to the sauce. Stir until slightly thickened, about 2-3 minutes.
  6. Return salmon to the pan, glazing it and warming for an additional 2-3 minutes.
  7. Transfer salmon to plates and garnish with green onions and orange slices before serving.

Nutrition

Serving: 1filletCalories: 320kcalCarbohydrates: 22gProtein: 25gFat: 15gSaturated Fat: 2gPolyunsaturated Fat: 4gMonounsaturated Fat: 8gCholesterol: 70mgSodium: 600mgPotassium: 700mgSugar: 15gVitamin A: 500IUVitamin C: 35mgCalcium: 40mgIron: 1.5mg

Notes

Pat the salmon fillets dry before seasoning to ensure a nice crust forms while cooking. Serve immediately for best texture and flavor.

Tried this recipe?

Let us know how it was!

Fresh Cucumber Pasta Salad That’s Light, Bright, and Delicious

As the sun dances through my kitchen window, I can’t help but feel the excitement that only summer brings. There’s something undeniably refreshing about a vibrant Fresh Cucumber Pasta Salad, perfectly suited for those warm afternoons. This dish is a celebration of crisp textures and creamy goodness that effortlessly transforms ordinary meals into light and delightful experiences. Not only is it a breeze to whip up, but the best part is that it’s a make-ahead wonder—allowing those refreshing flavors to meld beautifully overnight. Whether you’re hosting a picnic or just craving something nutritious, this salad is sure to become a staple in your summer repertoire. What colorful twist will you add to your version?

Why is Cucumber Pasta Salad So Refreshing?

Crisp, Refreshing Delight: This Fresh Cucumber Pasta Salad combines the cool crunch of cucumbers and the satisfying bite of pasta for a perfect warm-weather dish.
Versatility at Its Finest: Tailor it to your taste by swapping in different pastas or adding proteins like grilled chicken for a hearty meal.
Make-Ahead Magic: Prep it in advance! Allowing the flavors to meld overnight ensures a deliciously refreshing dish at mealtime.
Healthful Ingredients: Packed with hydrating cucumbers, this salad is not only low in calories but also bursting with nutrition, making it a guilt-free summer favorite.
Crowd-Pleasing Appeal: Perfect for gatherings, it pairs beautifully with grilled meats or can stand alone as a light lunch option, much like a BLT Chicken Salad or Cajun Sausage Pasta!

Fresh Cucumber Pasta Salad Ingredients

• Let’s gather everything you need for this refreshing dish!

For the Pasta

  • Pasta – Choose your favorite type, but be sure to cook al dente to maintain a nice bite.

For the Vegetables

  • English Cucumber – Opt for this variety for its crispness and fewer seeds; feel free to use garden or Persian cucumbers too!
  • Onion – Thinly slice and soak in cold water to mellow out the sharpness.

For the Dressing

  • Greek Yogurt – Provides a creamy base with a tangy kick that complements the fresh flavors beautifully.
  • Lemon Juice – Brightens the dish up with a splash of acidity that enhances the cucumber’s taste.
  • Dijon Mustard – Adds a hint of zest and depth to the dressing, making it delightfully complex.
  • Honey – A touch of sweetness that balances the tanginess of the dressing perfectly.
  • Salt and Pepper – Essential for seasoning and bringing out the flavors of the salad.

This delightful Fresh Cucumber Pasta Salad is not just easy to make, but it’s also flexible and adaptable for any gathering or meal!

Step‑by‑Step Instructions for Fresh Cucumber Pasta Salad

Step 1: Make the Creamy Dressing
In a small bowl, combine Greek yogurt, lemon juice, Dijon mustard, honey, salt, and pepper. Whisk until smooth and well-blended, ensuring there are no lumps. Allow the dressing to sit for about 10 minutes to let the flavors meld together beautifully. This creamy dressing will elevate your Fresh Cucumber Pasta Salad with a tangy and sweet kick.

Step 2: Soak the Onions
While the dressing is resting, thinly slice the onion and place the slices in a bowl of cold water. Soaking for 10 to 15 minutes will help mellow the onion’s sharpness, making it more palatable and perfect for your salad. After soaking, drain and gently pat dry with a paper towel to remove excess moisture.

Step 3: Cook the Pasta
Bring a large pot of salted water to a boil. Add your choice of pasta and cook it al dente according to the package instructions, usually 8 to 10 minutes. Once cooked, quickly drain the pasta in a colander and rinse it under cold water for a minute to stop the cooking process, ensuring it stays firm for the Fresh Cucumber Pasta Salad.

Step 4: Prepare the Cucumbers
Select your English cucumber and slice it in half lengthwise. Use a spoon to scoop out the seeds gently, then slice the cucumber thinly for a satisfying crunch. The fresh, crisp texture of the cucumbers will add a delightful contrast to the creamy elements of your Fresh Cucumber Pasta Salad.

Step 5: Combine Salad Ingredients
In a large mixing bowl, combine the cooked pasta, drained onion slices, and the prepared cucumber slices. Pour the creamy dressing over the top, and using a spoon, toss everything together gently until all ingredients are well-coated in the rich dressing. This ensures that every bite of your Fresh Cucumber Pasta Salad is filled with flavor.

Step 6: Let Stand for Flavor
Cover the bowl with plastic wrap and let your salad rest for at least 40 minutes, or ideally in the refrigerator for a couple of hours. This resting time allows the flavors to meld perfectly together, enhancing the overall taste of your Fresh Cucumber Pasta Salad and ensuring each ingredient shines in every bite.

Fresh Cucumber Pasta Salad Variations

Feel free to personalize your Fresh Cucumber Pasta Salad with these delightful twists that will elevate your dish!

  • Gluten-Free Pasta: Swap traditional pasta for gluten-free options like quinoa or brown rice pasta for a lighter alternative. These options still provide that satisfying texture without compromising flavor.

  • Protein Boost: Add grilled chicken, shrimp, or chickpeas to transform this salad into a heartier meal. The protein will keep you fuller for longer, making it perfect for a weeknight dinner.

  • Herb Infusion: Mix in fresh herbs like dill or basil for a burst of flavor that screams summer. The herbs will add a fragrant note, enhancing the freshness of the cucumbers beautifully.

  • Flavorful Peppers: Toss in some diced bell peppers or jalapeños for an added crunch and kick. The sweet and spicy combination will bring extra layers of flavor to your salad.

  • Creamy Avocado: Incorporate diced avocado for a creamy addition that takes this salad over the top. It not only adds richness but also infuses the dish with healthy fats.

  • Zesty Citrus: Squeeze some lime juice along with the lemon for an extra citrusy zing. This twist will brighten the flavors even more and complement the cucumbers perfectly.

  • Nutty Crunch: Sprinkle in toasted almonds or walnuts for an unexpected crunch that pairs wonderfully with the creamy dressing. The nuts will also add a delightful roastiness to your salad.

  • Spicy Kick: If you enjoy heat, consider adding diced jalapeños or a dash of red pepper flakes into the mix. This will provide a fun fiery twist that chili lovers won’t resist!

Feel free to explore these variations, and for more delicious meal ideas, check out this Cajun Sausage Pasta or enjoy a filling BLT Chicken Salad for your next gathering!

What to Serve with Fresh Cucumber Pasta Salad?

Elevate your summer meal by pairing this delightful salad with complementary dishes that enhance those refreshing flavors.

  • Grilled Chicken Skewers: Juicy and smoky, these skewers add protein and make for a satisfying balance against the light salad.
  • Corn on the Cob: Sweet and tender, this classic summer side pairs beautifully with the creamy elements of the salad.
  • Tomato Bruschetta: Bursting with fresh tomatoes and herbs, this appetizer brings a vibrant contrast that highlights the salad’s crispness.
  • Feta Cheese Crumbles: Sprinkling some on top adds a savory, tangy flavor that enriches the overall dish.
  • Iced Lemonade: This refreshing drink beautifully complements the lightness of your Fresh Cucumber Pasta Salad, enhancing its bright flavors.
  • Watermelon Feta Salad: Sweet and salty, this side brings a refreshing twist, matching well with the creamy cucumber and offering a delightful blend.

These pairings create a harmonious meal that brings out the best of your Fresh Cucumber Pasta Salad, ensuring every bite remains memorable!

Expert Tips for Fresh Cucumber Pasta Salad

  • Crisp Cucumbers: Salt cucumber slices and let them drain to avoid excess moisture, ensuring your Fresh Cucumber Pasta Salad remains crisp.
  • Mix at the Right Time: Combine all ingredients no more than 2 hours before serving to maintain the salad’s refreshing texture.
  • Chill the Dressing: Keep the creamy dressing in the fridge for at least 10 minutes—it helps enhance the flavors for your salad.
  • Customize Ingredients: Feel free to swap pastas or add proteins like grilled chicken or chickpeas for a heartier version of this salad.
  • Proper Storage: Store any leftovers in an airtight container in the refrigerator for up to 3 days; stir before serving if necessary.

Make Ahead Options

These Fresh Cucumber Pasta Salad is perfect for busy cooks looking to save time! You can prepare the creamy dressing and the pasta up to 3 days in advance. Simply store them separately in airtight containers in the refrigerator to maintain their texture and moisture. The cucumbers and onions should be sliced and salted to drain excess water up to 24 hours prior to serving, ensuring they stay crisp. When you’re ready to enjoy, combine all components in a large bowl, toss gently, and let the salad rest for at least 40 minutes to allow those wonderful flavors to meld together. This prep-ahead approach not only saves you time but ensures a deliciously refreshing dish whenever you need it!

How to Store and Freeze Fresh Cucumber Pasta Salad

Refrigerator: Store your Fresh Cucumber Pasta Salad in an airtight container for up to 3 days. This will keep the flavors fresh while maintaining crispness. Stir well before serving.

Room Temperature: It’s best to avoid leaving the salad out for more than 2 hours, especially on warm days, to prevent sogginess and maintain the quality of the ingredients.

Freezer: Freezing is not recommended for this salad as cucumbers lose their crunch and texture once thawed. Enjoy it fresh for the best experience!

Make-Ahead Tip: You can prepare the components a day in advance. Store the pasta and veggies separately before combining just before serving to keep everything crisp and delightful.

Fresh Cucumber Pasta Salad Recipe FAQs

What type of cucumbers should I use for the salad?
Absolutely! For the best flavor and texture, I recommend using English cucumbers due to their crispness and fewer seeds. However, you can also use garden or Persian cucumbers if they are readily available. Just ensure they are fresh, with smooth skin, to achieve that delightful crunch.

How should I store leftover cucumber pasta salad?
Very simply! Store your Fresh Cucumber Pasta Salad in an airtight container in the refrigerator for up to 3 days. This will help retain the crispness of the ingredients. Before serving, give it a good stir to redistribute the dressing and flavors. If you notice any excess moisture forms, just mix it again—it’ll taste just as fresh!

Can I freeze cucumber pasta salad for later?
Unfortunately, I don’t recommend freezing this salad. The cucumbers will lose their delightful crunch once thawed, making it less enjoyable. Instead, make it fresh! If you want to prepare it ahead of time, you can prep the components one day in advance, but wait to mix everything until just before serving.

Why is my cucumber pasta salad watery?
Commonly, this happens when cucumbers are overwatered or not drained properly. To prevent this, slice the cucumbers, sprinkle them with salt to draw out moisture, and let them drain for about 30 minutes before mixing them into your salad. This little trick keeps your Fresh Cucumber Pasta Salad from becoming soggy!

Is this salad suitable for those with dietary restrictions?
Yes! This salad is quite adaptable. If you follow a gluten-free diet, feel free to swap out the pasta for a gluten-free alternative. Additionally, you can easily remove or replace the honey in the dressing for a vegan version, opting for maple syrup or agave instead. Always check for allergies with specific ingredients used!

How long can I let the salad sit before serving?
It’s best to let your Fresh Cucumber Pasta Salad rest for at least 40 minutes after mixing. This resting period allows the flavors to meld beautifully together, enhancing the taste. However, you can store it in the refrigerator for up to 2 hours before serving if you need a slightly longer wait. Just remember: the longer it sits, the more flavorful it becomes!

Fresh Cucumber Pasta Salad

Fresh Cucumber Pasta Salad That's Light, Bright, and Delicious

A vibrant Fresh Cucumber Pasta Salad, perfectly suited for warm afternoons, celebrating crisp textures and creamy goodness.
Prep Time 15 minutes
Cook Time 10 minutes
Resting Time 40 minutes
Total Time 1 hour 5 minutes
Servings: 4 servings
Course: Salad
Cuisine: American
Calories: 250

Ingredients
  

For the Pasta
  • 8 ounces Pasta Cook al dente.
For the Vegetables
  • 1 large English Cucumber Use for crispness.
  • 1 small Onion Thinly sliced, soaked in cold water.
For the Dressing
  • 1 cup Greek Yogurt Creamy base.
  • 2 tablespoons Lemon Juice For acidity.
  • 1 tablespoon Dijon Mustard Adds zest.
  • 1 teaspoon Honey Balances tanginess.
  • 1 teaspoon Salt
  • 1 teaspoon Pepper

Equipment

  • Large pot
  • Mixing Bowl
  • whisk
  • Colander

Method
 

Preparation Steps
  1. In a small bowl, combine Greek yogurt, lemon juice, Dijon mustard, honey, salt, and pepper. Whisk until smooth and let sit for 10 minutes.
  2. Thinly slice the onion and soak in cold water for 10-15 minutes, then drain and pat dry.
  3. Bring salted water to a boil, add pasta and cook al dente, about 8-10 minutes. Drain and rinse under cold water.
  4. Slice the cucumber in half, scoop out seeds, and then slice it thinly.
  5. In a large bowl, combine cooked pasta, drained onion, and cucumber slices. Pour dressing and toss.
  6. Cover with plastic wrap and let rest for at least 40 minutes before serving.

Nutrition

Serving: 1bowlCalories: 250kcalCarbohydrates: 38gProtein: 10gFat: 7gSaturated Fat: 2gMonounsaturated Fat: 2gCholesterol: 5mgSodium: 300mgPotassium: 400mgFiber: 3gSugar: 5gVitamin A: 500IUVitamin C: 10mgCalcium: 100mgIron: 1mg

Notes

Store leftovers in an airtight container for up to 3 days.

Tried this recipe?

Let us know how it was!

Garlic Parmesan Chicken and Potatoes One-Pan Wonder

As the aroma of roasting garlic fills the kitchen, it suddenly dawns on me—dinner doesn’t have to be complicated to be extraordinary. Picture this: One-Pan Garlic Parmesan Chicken and Potatoes, a dish that takes simple ingredients and transforms them into a delightful meal that your family will rave about. This recipe is a game-changer for busy weeknights, offering easy preparation and minimal cleanup, so you can spend more time enjoying dinner at the table rather than slaving away in the kitchen. Plus, the best part? You’ll have the freedom to customize it to suit your family’s preferences, adding veggies or switching up the cheese for an exciting twist. Curious about how to create this comforting yet elegant dish? Let’s dive in!

Why is this recipe a must-try?

Simplicity at its finest: One-Pan Garlic Parmesan Chicken and Potatoes allows you to whip up a restaurant-quality meal with minimal fuss. Rich flavors infuse every bite, making it a dish both kids and adults will adore. Versatile options let you use whatever veggies or cheese you have on hand, creating endless meal variations. Time-saving preparation means you can savor precious moments with loved ones instead of being stuck in the kitchen. With its crowd-pleasing appeal, this dish is perfect for gathering around the family table. For more flavor-packed chicken recipes, try my Garlic Parmesan Chicken or Cheesy Garlic Chicken.

Garlic Parmesan Chicken and Potatoes Ingredients

For the Chicken

  • Chicken Breast – The main protein source providing tenderness; substitute with boneless thighs or bone-in pieces, adjusting cooking time as necessary.
  • Garlic – Adds aromatic flavor; using fresh garlic provides more potency than powder and enhances the dish’s richness.
  • Olive Oil – Used for roasting and flavor; feel free to use avocado oil as a healthy alternative.

For the Potatoes

  • Potatoes – Offers starchy comfort and texture; Yukon Gold or Russet varieties are ideal for achieving that crispy texture.
  • Parmesan Cheese – Enhances flavor and adds a crispy topping; can be substituted with Pecorino for a sharper taste.
  • Salt & Pepper – Essential for seasoning; adjust according to your dietary needs for the perfect flavor balance.

For Garnish

  • Fresh Parsley – Adds a touch of freshness; optional, feel free to skip if you don’t have any on hand.

Transform ordinary ingredients into your delicious Garlic Parmesan Chicken and Potatoes masterpiece!

Step‑by‑Step Instructions for Garlic Parmesan Chicken and Potatoes

Step 1: Preheat the Oven
Begin by preheating your oven to 400°F (200°C). While the oven heats up, prepare a large baking sheet by lining it with parchment paper. This will make cleanup effortless and prevent sticking. You’ll know the oven is ready when it reaches the desired temperature, making it perfect for roasting your Garlic Parmesan Chicken and Potatoes.

Step 2: Season the Chicken
Take your chicken breasts and place them on one side of the prepared baking sheet. Drizzle a couple of tablespoons of olive oil over the chicken and generously season it with salt, pepper, and minced garlic. Make sure each piece is well coated, as this will enhance the flavors as they roast.

Step 3: Prepare the Potatoes
Next, wash and cut your potatoes into even-sized pieces—this ensures they cook uniformly. On the opposite side of the baking sheet, arrange the potato pieces in a single layer, making sure not to overcrowd them. Drizzle olive oil over the potatoes and season with salt, pepper, and some Parmesan cheese for that extra flavor.

Step 4: Roast in the Oven
Carefully place the baking sheet in your preheated oven and roast everything for about 25-30 minutes. Halfway through cooking, use a spatula to gently flip the potatoes to ensure they crisp up on all sides. Keep an eye on the chicken; it should be golden brown and fragrant, signaling that the Garlic Parmesan Chicken and Potatoes are nearly ready.

Step 5: Check Doneness
To ensure the chicken is cooked perfectly, use a meat thermometer to check its internal temperature. It should register at 165°F (74°C) for optimal safety and flavor. If the chicken isn’t quite there yet, let it cook for a few more minutes. The potatoes should be golden and crispy, making for a delightful texture.

Step 6: Broil for a Golden Finish
In the last 5 minutes of cooking, sprinkle extra Parmesan cheese over both the chicken and the potatoes. Switch your oven setting to broil and watch them closely as they begin to bubble and turn a lovely golden brown. This step adds an irresistible crispy topping that your family will love.

Step 7: Garnish and Serve
Once done, remove the baking sheet from the oven and let it rest for a couple of minutes. For a fresh touch, sprinkle chopped parsley over your Garlic Parmesan Chicken and Potatoes just before serving. This not only adds color but also a burst of freshness that elevates the dish, making it even more inviting.

Expert Tips for Garlic Parmesan Chicken and Potatoes

  • Crispy Potatoes: Spread them out evenly on the baking sheet to ensure maximum crispiness. Avoid overcrowding to get that perfect golden texture.

  • Chicken Substitutes: If using bone-in chicken, adjust the cooking time accordingly. Ensure it cooks thoroughly while keeping the potatoes tender.

  • Ingredient Prep: Prepping your ingredients in advance saves time. Just remember that cooking times can vary slightly based on your oven.

  • Cheesy Delight: For an even richer flavor, sprinkle additional Parmesan on both the chicken and potatoes in the last few minutes of cooking.

  • Season to Taste: Adjust salt and pepper based on personal preference and dietary needs, ensuring that your Garlic Parmesan Chicken and Potatoes are perfectly seasoned.

Make Ahead Options

These Garlic Parmesan Chicken and Potatoes are perfect for meal prep enthusiasts! You can season the chicken and cut the potatoes up to 24 hours in advance, storing them in an airtight container in the refrigerator to maintain their freshness. Just remember to refrigerate seasoned ingredients separately to prevent any flavor absorption. When you’re ready to cook, simply preheat your oven and place the chicken and potatoes on the baking sheet as outlined in the recipe. This make-ahead method not only saves you time when dinnertime rolls around but ensures that every bite remains just as delicious and satisfying as if you made it fresh!

Storage Tips for Garlic Parmesan Chicken and Potatoes

  • Fridge: Store leftovers in an airtight container in the refrigerator for up to 3 days. This keeps your Garlic Parmesan Chicken and Potatoes fresh, ready for a quick meal.

  • Freezer: For longer storage, freeze the dish in a freezer-safe container for up to 3 months. Ensure it’s tightly sealed to prevent freezer burn and keep that delicious flavor intact.

  • Reheating: To maintain crispiness, reheat in the oven at 350°F (175°C) for about 10-15 minutes. Avoid the microwave, as it can make the potatoes soggy.

  • Make-Ahead: Prepped but uncooked ingredients can be stored in the fridge for up to 24 hours. Just assemble and bake when you’re ready for an easy dinner!

What to Serve with Garlic Parmesan Chicken and Potatoes

As you savor each bite of this flavorful dish, consider how simple sides can elevate your meal experience.

  • Crispy Green Salad: A fresh, crunchy salad complements the richness of the chicken and potatoes, bringing a vibrant mix of textures to your plate. Toss in some cherry tomatoes, cucumbers, and a light vinaigrette for a refreshing touch.

  • Steamed Broccoli: The bright green florets add color and health benefits, providing a contrasting texture to the crispy potatoes. A sprinkle of lemon juice enhances the flavors beautifully, rounding out the meal.

  • Roasted Asparagus: The slight sweetness of roasted asparagus pairs perfectly with the savory garlic and Parmesan flavors, while keeping the dish light and seasonal.

  • Garlic Bread: For a cozy night in, serve warm garlic bread. This complements the dish’s garlic notes and soaks up the delicious juices from the chicken, making every bite irresistible.

  • Creamy Coleslaw: The tangy, creamy coleslaw offers a delightful contrast to the savory chicken and potatoes; it adds a comforting crunch while balancing the meal’s richness.

  • Chardonnay: A glass of chilled Chardonnay brings out the dish’s Parmesan flavors and complements the roasted garlic. Its crisp acidity will refresh your palate beautifully.

  • Tiramisu: To finish off your meal, a slice of rich tiramisu provides a sweet, coffee-infused ending that resonates with Italian roots. Its light creaminess contrasts nicely with the savory main course.

These pairing ideas will elevate your Garlic Parmesan Chicken and Potatoes into a memorable feast, inviting you to relish each moment around the dinner table!

Garlic Parmesan Chicken and Potatoes Variations

Feel free to sprinkle your creativity into this dish—there’s no limit to how you can make it your own!

  • Vegetable Boost: Toss in seasonal veggies like broccoli, bell peppers, or carrots for nutrition and vibrant color, making each bite even more delightful.
  • Cheesy Twist: Swap Parmesan for mozzarella or gouda to elevate the cheese factor—a delightful surprise your family won’t see coming!
  • Herb Infusion: Add herbs like rosemary or thyme for aromatic depth that brings a hearty, rustic flavor to the dish. Just a sprinkle can transform the profile!
  • Spicy Kick: Introduce red pepper flakes or a dash of hot sauce to elevate the heat level, appealing to those who crave a little extra spice in their meals.
  • Vegan Adaptation: Use tempeh or tofu instead of chicken, and swap nutritional yeast for cheese for a vegan version that doesn’t skimp on flavor. Your plant-based friends will love it!
  • Crispy Crispy: For added texture, finish the dish with a breadcrumb topping mixed with olive oil and herbs before broiling. This gives an irresistible crunch that’s sure to impress.
  • Flavorful Marinade: Marinate the chicken in a mixture of lemon juice, olive oil, and garlic for at least 30 minutes before roasting—it’s a game changer in taste!
  • Savory Sauce: Drizzle with a balsamic glaze once served, adding a sweet tang that contrasts beautifully with the savory elements of the dish.

Don’t forget to explore more delicious chicken ideas like Garlic Chicken Gnocchi or the comforting flavors of Garlic Parmesan Roasted Shrimp!

Garlic Parmesan Chicken and Potatoes Recipe FAQs

How do I select the best chicken for this recipe?
Absolutely! When choosing chicken breast, look for pieces that are plump and pale in color, avoiding any that have dark spots or a slimy texture. If you prefer a richer flavor, boneless thighs also work brilliantly. Just remember to adjust the cooking time slightly if using bone-in pieces.

What’s the best way to store leftovers?
For best results, store any leftover Garlic Parmesan Chicken and Potatoes in an airtight container in the refrigerator for up to 3 days. This keeps your dish fresh and flavorful. When you’re ready to enjoy it again, simply reheat in the oven to retain the delicious crispy texture.

Can I freeze Garlic Parmesan Chicken and Potatoes?
Absolutely! To freeze, let the dish cool completely, then transfer it to a freezer-safe container. It can be frozen for up to 3 months. Make sure to seal it tightly to prevent freezer burn. When you’re ready to eat, thaw in the refrigerator overnight and reheat in the oven for that crispy finish.

What should I do if my potatoes aren’t crispy?
Very! If your potatoes turn out soggy, it might be due to overcrowding on the baking sheet. Always spread them out in a single layer to achieve maximum crispiness. Also, consider using a higher oven temperature or broiling for the last few minutes to give them that lovely golden crunch.

Are there any allergy considerations with this recipe?
When it comes to allergies, it’s key to check your ingredient labels closely. The Parmesan cheese contains dairy, so for lactose intolerance or dairy allergies, you might want to use a dairy-free cheese alternative. Additionally, be mindful of using fresh garlic for those allergic to it; onion powder can be a good substitute.

How can I add more veggies to this dish?
If you want to incorporate more vegetables, I recommend adding seasonal options like broccoli or bell peppers. Simply chop them into bite-sized pieces and toss them in with the potatoes. They should roast beautifully alongside the chicken, adding color, nutrition, and flavor!

Garlic Parmesan Chicken and Potatoes

Garlic Parmesan Chicken and Potatoes One-Pan Wonder

Discover the simplicity of Garlic Parmesan Chicken and Potatoes, a dish that transforms basic ingredients into an extraordinary dining experience for your family.
Prep Time 10 minutes
Cook Time 30 minutes
Resting Time 5 minutes
Total Time 45 minutes
Servings: 4 servings
Course: Dinner
Cuisine: American
Calories: 450

Ingredients
  

For the Chicken
  • 4 pieces Chicken Breast can substitute with boneless thighs or bone-in pieces
  • 3 cloves Garlic minced
  • 2 tablespoons Olive Oil or avocado oil
For the Potatoes
  • 2 pounds Potatoes Yukon Gold or Russet
  • 0.5 cup Parmesan Cheese can substitute with Pecorino
  • 1 teaspoon Salt adjust to taste
  • 1 teaspoon Pepper adjust to taste
For Garnish
  • 0.25 cup Fresh Parsley optional

Equipment

  • Oven
  • Baking Sheet
  • Parchment Paper
  • meat thermometer

Method
 

Cooking Instructions
  1. Preheat the oven to 400°F (200°C) and prepare a large baking sheet with parchment paper.
  2. Season the chicken breasts with olive oil, salt, pepper, and minced garlic, placing them on one side of the baking sheet.
  3. Wash and cut the potatoes into even-sized pieces and arrange them on the opposite side of the baking sheet. Drizzle with olive oil, salt, pepper, and Parmesan cheese.
  4. Roast the chicken and potatoes in the oven for 25-30 minutes, flipping the potatoes halfway through.
  5. Check the chicken’s internal temperature, which should be at 165°F (74°C), and ensure the potatoes are golden and crispy.
  6. In the last 5 minutes, sprinkle extra Parmesan on the chicken and potatoes and switch to broil until golden brown.
  7. Remove from the oven, let rest for a couple of minutes, and garnish with fresh parsley before serving.

Nutrition

Serving: 1plateCalories: 450kcalCarbohydrates: 30gProtein: 35gFat: 20gSaturated Fat: 5gPolyunsaturated Fat: 2gMonounsaturated Fat: 10gCholesterol: 100mgSodium: 600mgPotassium: 900mgFiber: 4gSugar: 2gVitamin A: 200IUVitamin C: 30mgCalcium: 150mgIron: 2mg

Notes

This dish is versatile; feel free to customize with your choice of vegetables or cheese for a unique twist.

Tried this recipe?

Let us know how it was!

Blueberry Crisp Cheesecake Bars That Will Wow Your Taste Buds

As I was plucking fresh blueberries straight from the bush, I realized there’s nothing quite like summer’s bounty—especially when it inspires a treat that beautifully showcases its flavors. These Blueberry Crisp Cheesecake Bars capture the essence of this vibrant season, marrying the creamy goodness of cheesecake with a crunchy oat topping that provides just the right amount of texture. They’re easy to make, giving you no excuse to reach for fast food when dessert can be this delightful. Plus, with their luscious fruitiness and satisfying crunch, you’ll find they’re a crowd-pleaser for any gathering. Who could resist a slice of these irresistible bars? I can’t wait for you to experience the joy of baking—and indulging—in this scrumptious recipe! Ready to dive in and create some magic in your kitchen?

Why Are Blueberry Crisp Cheesecake Bars Irresistible?

Flavor Explosion: The vibrant blueberries pair perfectly with the rich cheesecake, bringing a fresh burst that dances on your palate.

Perfect Crunch: The oat topping creates a delightful contrast to the smooth creaminess, giving each bite a satisfying texture.

Easy to Make: Simplistic yet impressive, this recipe allows everyone to become a kitchen star, requiring minimal effort for maximum taste.

Seasonal Treat: With fresh blueberries at your fingertips, these bars are the ultimate way to celebrate summer.

Crowd-Pleasing: Whether for a casual get-together or a festive gathering, these bars are sure to wow everyone at the table—perfect next to Strawberry Cheesecake or as a sweet finale after a hearty meal.

Dive into this enchanting recipe, and you’ll discover why it’s a must-have in your dessert repertoire!

Blueberry Crisp Cheesecake Bars Ingredients

For the Crust and Topping

  • Old fashioned rolled oats – Provides texture and crunch; do not use quick oats as they will result in a softer topping and crust.
  • All-purpose flour – Acts as a binding agent for the crust and filling.
  • Light brown sugar – Adds sweetness with a hint of caramel flavor.
  • Unsalted butter (melted) – Provides richness and helps bind the crust.
  • Ground cinnamon – Enhances flavor with warmth.
  • Salt – Balances sweetness and enhances overall flavor.

For the Cheesecake Layer

  • Cream cheese – Forms the creamy cheesecake layer; should be at room temperature to avoid lumps.
  • Granulated sugar – Sweetens the cheesecake layer.
  • Vanilla extract – Adds depth of flavor.
  • Egg – Binds the cheesecake filling for a smooth texture.

For the Blueberry Filling

  • Fresh blueberries – Primary fruit component that provides juiciness and flavor.
  • Freshly squeezed lemon juice – Enhances blueberry flavor and adds brightness.
  • Sugar (for blueberries) – Sweetens the filling.
  • Cornstarch – Thickens the blueberry filling and helps prevent it from becoming watery.

Dive in and gather these ingredients to create your own delectable Blueberry Crisp Cheesecake Bars!

Step‑by‑Step Instructions for Blueberry Crisp Cheesecake Bars

Step 1: Preheat Oven and Prepare Pan
Preheat your oven to 350°F (175°C) and grab an 8×8 inch or 9×9 inch baking pan. Line the bottom and sides with parchment paper, allowing some overhang for easy removal later. This initial preparation sets the stage for your Blueberry Crisp Cheesecake Bars, making it easier to lift them out once they’re baked.

Step 2: Make Crust and Topping
In a large mixing bowl, combine old-fashioned rolled oats, all-purpose flour, ground cinnamon, salt, light brown sugar, and melted butter. Stir until the mixture resembles a crumbly texture. Press half of this crust mixture firmly into the bottom of your prepared pan to form a sturdy base. Set aside the remaining half to use as the topping for your cheesecake bars.

Step 3: Prepare Cheesecake Layer
In another bowl, beat room-temperature cream cheese with an electric mixer until smooth and creamy. Gradually add flour, granulated sugar, vanilla extract, and one egg, mixing just until combined. Be careful not to overmix, as this could lead to air bubbles. Spread the creamy cheesecake filling evenly over the crust you pressed into the pan.

Step 4: Prepare Blueberry Filling
In a separate bowl, gently toss fresh blueberries with freshly squeezed lemon juice, flour, granulated sugar, and cornstarch until the blueberries are well coated. This filling will add a burst of juiciness to your Blueberry Crisp Cheesecake Bars. Carefully spoon the blueberry mixture over the cheesecake layer, ensuring an even distribution before moving to the next step.

Step 5: Bake
Place the pan in your preheated oven and bake for 55-60 minutes. Look for the topping to turn a beautiful golden brown, while the center should be slightly jiggly but not liquid. This visual cue means your dessert is perfectly baked and ready to be cooled.

Step 6: Cool and Chill
After baking, remove the pan from the oven and allow it to cool at room temperature for about 2 hours. This cooling phase is crucial for setting up the layers. Once cooled, transfer the pan to the refrigerator and chill for at least 4 hours or overnight. This will enhance the flavor and make cutting into perfect squares much easier when it’s time to serve your Blueberry Crisp Cheesecake Bars.

Make Ahead Options

These Blueberry Crisp Cheesecake Bars are fantastic for meal prep, allowing you to savor homemade dessert with ease! You can prepare the crust and topping up to 24 hours in advance by combining the oats, flour, cinnamon, salt, brown sugar, and melted butter, then refrigerating the mix. Furthermore, the cheesecake layer can be made and spread over the crust the night before serving, ensuring it sets perfectly overnight. When you’re ready to bake, simply top with the blueberry filling and crumble mixture, then bake for 55-60 minutes. To maintain their deliciousness, ensure they cool completely before refrigerating, and enjoy your homemade dessert without the last-minute rush!

How to Store and Freeze Blueberry Crisp Cheesecake Bars

  • Fridge: Store your Blueberry Crisp Cheesecake Bars in an airtight container in the refrigerator for up to 5 days to maintain their freshness and flavor.

  • Freezer: For longer storage, freeze the bars after cutting them into squares, placing parchment paper between layers to prevent sticking; they can last up to 3 months.

  • Thawing: When ready to enjoy, simply transfer frozen bars to the fridge for a few hours or overnight to thaw, and they will retain their delicious texture.

  • Reheating: If you prefer a warm treat, gently reheat in the microwave for 10-15 seconds before serving, ensuring they remain delightful and creamy.

Expert Tips for Blueberry Crisp Cheesecake Bars

  • Room Temperature Ingredients: Ensure your cream cheese and egg are at room temperature for easier mixing, resulting in a smoother cheesecake filling without lumps.

  • Avoid Overmixing: Be careful not to overbeat the cheesecake layer. Excess air can cause holes in your bars, compromising the creamy texture of the filling.

  • Cooling is Key: Let your Blueberry Crisp Cheesecake Bars cool completely at room temperature before refrigerating. This step helps maintain their texture and prevents sogginess.

  • Storage Instructions: Store your bars in the refrigerator for 3-5 days in an airtight container. You can also freeze them, separating layers with parchment paper to avoid sticking.

  • Choosing Blueberries: Utilize fresh blueberries at their peak season for the best flavor. If you can’t find fresh, opt for frozen, but make sure they are fully thawed and drained to prevent excess moisture.

Blueberry Crisp Cheesecake Bars Variations

Feel free to explore these delightful variations that can elevate your Blueberry Crisp Cheesecake Bars and cater to your unique tastes!

  • Berry Medley: Replace blueberries with a mix of raspberries and blackberries for a vibrant twist. This mixed berry option brings a delightful tartness that beautifully complements the creamy cheesecake.

  • Nutty Oat Topping: Add chopped walnuts or pecans to the topping mixture for a crunchy surprise. The nutty flavor pairs well with the sweetness of the blueberries, enhancing the overall texture and taste.

  • Chocolate Lovers: Drizzle melted chocolate over the top before chilling for an indulgent chocolate-covered experience. The rich chocolate adds extra decadence to each slice, making it a favorite among chocolate enthusiasts.

  • Gluten-Free: Use almond flour instead of all-purpose flour to create a gluten-free crust and topping. This swap keeps the bars delicious while being accessible for those with dietary restrictions.

  • Citrus Zing: Add a tablespoon of freshly grated lemon zest to the cheesecake layer for a refreshing citrus kick. The zesty flavor beautifully brightens the overall taste, enhancing the blueberry essence.

  • Pumpkin Spice: During the fall season, incorporate pumpkin puree into the cheesecake layer and add pumpkin spice to the topping. This seasonal variant adds warmth and flavor that’s perfect for autumn gatherings.

  • Creamy Coconut: Fold shredded coconut into the cheesecake layer for a tropical flair. The coconut’s chewy texture works delightfully with the smooth creaminess of the cheesecake and the burst of blueberries.

Explore these variations and get creative in the kitchen! If you’re in the mood for more dessert ideas, don’t miss out on our Strawberry Cheesecake Dump or the delightful Lemon Blueberry Summery desserts!

What to Serve with Blueberry Crisp Cheesecake Bars

Elevate your dessert experience by pairing these delightful bars with charming accompaniments that enhance their flavors.

  • Whipped Cream: A dollop of freshly whipped cream adds a light and airy touch, complementing the creamy cheesecake perfectly.

  • Vanilla Ice Cream: The richness of vanilla ice cream harmonizes beautifully with the tartness of the blueberries, creating a luscious contrast.

  • Mint Leaves: A sprinkle of fresh mint adds a pop of color and a refreshing contrast, brightening the dessert and palate.

  • Lemon Zest Glaze: A drizzle of lemon glaze brings a zesty zing, enhancing the blueberry’s natural sweetness while adding a luscious sheen.

  • Brewed Tea: A warm cup of chamomile or Earl Grey tea provides a soothing accompaniment that balances the sweetness of the bars.

  • Chocolate Drizzle: A rich chocolate drizzle adds a modern twist, pairing decadently with the creamy and fruity layers for an indulgent taste experience.

Serve them chilled, and let the flavors sing together at your next gathering or cozy evening in!

Blueberry Crisp Cheesecake Bars Recipe FAQs

What type of blueberries should I use?
Absolutely! Fresh blueberries are the best choice, especially when in season, as they provide the most flavor. If fresh ones aren’t available, you can use frozen blueberries, but make sure they are fully thawed and drained to avoid excess moisture in your filling.

How should I store Blueberry Crisp Cheesecake Bars?
I recommend storing your Blueberry Crisp Cheesecake Bars in an airtight container in the fridge, where they will stay fresh for about 3 to 5 days. To keep them at their best, ensure they’re cool before sealing them up.

Can I freeze these bars? If so, how?
Yes, you can freeze your Blueberry Crisp Cheesecake Bars! After cutting them into squares, place parchment paper between the layers in a freezer-safe container. They can be stored in the freezer for up to 3 months. When you’re ready to enjoy them, simply transfer them to the fridge to thaw overnight.

What if my cheesecake filling has lumps?
If you find lumps in your cheesecake filling, it’s usually because the cream cheese wasn’t at room temperature. To avoid this, always let your cream cheese sit out for about 30 minutes before starting. For any existing lumps, try gently mixing more, but avoid overmixing to prevent air bubbles.

Can I make this recipe gluten-free?
Very much! You can substitute the all-purpose flour with a gluten-free flour blend. Additionally, ensure that the oats used are labeled gluten-free. This way, you can still enjoy these wonderful bars without worrying about gluten.

How can I enhance the flavors further?
For an extra burst of flavor, consider adding a tablespoon of lemon zest to the cheesecake filling, or mixing in some chopped nuts into the topping for additional crunch. The more, the merrier!

Blueberry Crisp Cheesecake Bars

Blueberry Crisp Cheesecake Bars That Will Wow Your Taste Buds

Blueberry Crisp Cheesecake Bars combine creamy cheesecake with a crunchy oat topping for a delicious summer dessert.
Prep Time 30 minutes
Cook Time 1 hour
Cooling Time 2 hours
Total Time 3 hours 30 minutes
Servings: 12 bars
Course: Dessert
Cuisine: American
Calories: 250

Ingredients
  

For the Crust and Topping
  • 2 cups old fashioned rolled oats do not use quick oats as they will result in a softer topping and crust.
  • 1 cup all-purpose flour Acts as a binding agent.
  • 3/4 cup light brown sugar Adds sweetness with a hint of caramel.
  • 1/2 cup unsalted butter (melted) Provides richness and helps bind.
  • 1 teaspoon ground cinnamon Enhances flavor.
  • 1/4 teaspoon salt Balances sweetness.
For the Cheesecake Layer
  • 16 ounces cream cheese Should be at room temperature.
  • 3/4 cup granulated sugar Sweetens the cheesecake.
  • 1 teaspoon vanilla extract Adds depth of flavor.
  • 1 large egg Binds the cheesecake filling.
For the Blueberry Filling
  • 2 cups fresh blueberries Primary fruit component.
  • 1 tablespoon freshly squeezed lemon juice Enhances flavor.
  • 1/4 cup sugar (for blueberries) Sweetens the filling.
  • 2 tablespoons cornstarch Thickens the filling.

Equipment

  • 8x8 or 9x9 inch baking pan
  • Mixing bowls
  • Electric mixer

Method
 

Step-by-Step Instructions
  1. Preheat your oven to 350°F (175°C) and line your baking pan with parchment paper.
  2. In a large mixing bowl, combine oats, flour, cinnamon, salt, brown sugar, and melted butter. Press half into the pan and set the rest aside.
  3. Beat cream cheese until smooth, add flour, sugar, vanilla, and egg. Mix until combined and spread over crust.
  4. Toss blueberries with lemon juice, flour, sugar, and cornstarch. Spoon over cheesecake layer.
  5. Bake for 55-60 minutes until golden brown. Cool for 2 hours, then refrigerate for at least 4 hours.

Nutrition

Serving: 1barCalories: 250kcalCarbohydrates: 36gProtein: 4gFat: 10gSaturated Fat: 6gPolyunsaturated Fat: 0.5gMonounsaturated Fat: 3gCholesterol: 30mgSodium: 180mgPotassium: 80mgFiber: 2gSugar: 14gVitamin A: 400IUVitamin C: 5mgCalcium: 50mgIron: 1mg

Notes

For best results, ensure ingredients are at room temperature. Allow to cool completely before refrigerating to maintain texture.

Tried this recipe?

Let us know how it was!

Mouthwatering Crack Burger Recipe for Ultimate Flavor Lovers

As I stood at the grill, the enticing aroma of sizzling beef and crispy bacon filled the air, instantly drawing my family to the backyard. The star of this culinary show? My irresistible Crack Burger! This juicy delight combines perfectly seasoned ground beef with savory ranch dressing, creamy cheddar, and crunchy bacon, crafting a burger that’s as satisfying as it is unforgettable. Whether you’re hosting a summer barbecue or treating yourself to a cozy family dinner, this Crack Burger is not just a meal—it’s a celebration of flavor that brings everyone together. Plus, it’s simple to prepare, making it an easy favorite for those hectic weeknights. So, are you ready to take your burgers to the next level?

Why is the Crack Burger a must-try?

Juiciness at Its Best: Each bite of the Crack Burger bursts with succulent flavor, thanks to the ideal ground beef blend and mouthwatering ranch dressing.
Bacon Goodness: Crispy bacon crumbled into the mix adds a smoky crunch, elevating each patty to burger perfection.
Cheesy Delight: Topped with melted cheddar, these burgers are rich and gooey, creating a comforting experience you won’t forget!
Versatile Toppings: Customize with your favorite toppings—from fresh veggies to spicy jalapeños—making it a crowd-pleaser for everyone.
Quick and Easy: With straightforward instructions, you’ll have these mouthwatering burgers on the grill in no time, perfect for busy weeknights or backyard barbecues.
Pair it Perfectly: Serve alongside sweet potato fries or a refreshing salad, and you have a complete meal that’s sure to impress your family and friends! For more delicious ideas, check out our Cheeseburger Soup Comforting or Crack Chicken Noodle recipes for a tasty twist on comfort food.

Crack Burger Ingredients

For the Patties

  • Ground Beef (80/20) – Provides moisture and flavor; use 80/20 for the juiciest Crack Burger.
  • Sour Cream – Adds creaminess and moisture; Greek yogurt is a great substitute if you want a tangy twist.
  • Ranch Dressing Mix – Infuses the beef with savory flavor; alternatively, use homemade ranch seasoning for freshness.
  • Bacon (cooked and crumbled) – Adds crunch and smoky flavor; try crispy turkey bacon for a lighter option.
  • Cheddar Cheese (shredded) – Provides richness and melty texture; swap for pepper jack if you’re craving some heat.
  • Cheddar Cheese (slices) – Used for topping the burger; any melting cheese works beautifully here.
  • Brioche Buns – Soft and slightly sweet, perfect for holding that juicy burger; whole wheat or gluten-free buns are tasty alternatives.

For Toppings

  • Lettuce – Enhances freshness and crunch; use romaine or iceberg for extra crispness.
  • Tomato – Adds juiciness and a burst of flavor; opt for vine-ripened for the best taste.
  • Pickles – Provides tanginess to complement the rich burger; dill or bread-and-butter pickles both work well.
  • Mustard & Mayonnaise – Essential condiments that elevate flavor; try adding a kick with spicy mustard if desired.

Your Crack Burger will be decked out with these fresh ingredients, delivering an unforgettable flavor adventure!

Step‑by‑Step Instructions for Crack Burger

Step 1: Mix the Ingredients
In a large mixing bowl, combine 1 pound of ground beef (80/20), 1/2 cup of sour cream, 1 packet of ranch dressing mix, 1/2 cup of crumbled bacon, and 1/2 cup of shredded cheddar cheese. Using your hands, mix gently until just combined; be careful not to overmix as this can lead to tough patties.

Step 2: Shape the Patties
Divide the mixture into six equal portions and shape each portion into a round patty, about 3/4 inch thick. To prevent puffing while cooking, create a small dimple in the center of each patty. The shaped patties should feel firm yet springy and are ready for cooking.

Step 3: Preheat Your Grill
Preheat your grill or skillet to medium heat, about 350°F (175°C). Ensure the surface is hot enough by sprinkling a drop of water on it; if it dances and evaporates, you’re good to go! This step is crucial to achieving that perfect sear on your Crack Burgers.

Step 4: Cook the Patties
Place the patties on the grill and cook for 4-5 minutes on one side without pressing down on them. When the edges start to brown and juices begin to seep from the top, flip the patties gently. For ideal doneness, use a meat thermometer: medium-rare should read 130-135°F, medium 140-145°F, and well-done 160°F.

Step 5: Add Cheese and Rest
Once done cooking, place a slice of cheddar cheese on each patty and close the grill lid for about 1 minute, allowing the cheese to melt beautifully. After cooking, transfer the patties to a plate and let them rest for 3-5 minutes to ensure the juices redistribute throughout the meat, enhancing the overall flavor of your Crack Burger.

Step 6: Assemble the Burgers
Toast brioche buns on the grill for a minute until golden brown, then place each patty on the bottom half of a bun. Top with fresh lettuce, tomato slices, pickles, and your choice of mustard and mayonnaise. Add any additional toppings that inspire you and cover with the top bun, creating your perfect Crack Burger masterpiece.

How to Store and Freeze Crack Burger

Fridge: Store leftover cooked Crack Burgers in an airtight container for up to 3 days. This keeps them fresh and ready for quick meals.

Freezer: Freeze uncooked patties by placing them in a single layer on a baking sheet. Once frozen solid, transfer them to a freezer-safe bag for up to 3 months.

Reheating: To reheat, thaw frozen patties overnight in the fridge. Cook them on a skillet or grill until fully heated, reaching an internal temperature of 160°F for safety.

Wrap Advice: If you have extras, wrap each patty in plastic wrap before freezing to prevent freezer burn and preserve the juicy goodness of your Crack Burger.

Expert Tips for the Best Crack Burger

  • Mix Wisely: Avoid overmixing the meat mixture; mix just until combined to keep the patties tender and juicy in your Crack Burger.

  • Temperature Matters: Use a meat thermometer to check internal temperatures. This ensures perfect doneness and prevents dry burgers that nobody wants.

  • No Pressing Down: Resist the urge to press down on the patties while cooking. This releases precious juices, leaving you with a dry burger instead of a succulent one.

  • Handy Patty Tips: Wet your hands with cold water when shaping patties to prevent sticking; this makes the process much smoother and enjoyable.

  • Make-Ahead Convenience: You can prepare and shape the patties a day in advance. Just store them in the fridge until you’re ready to cook, making weeknight dinners a breeze.

What to Serve with Juicy Crack Burger with Bacon and Cheddar

Get ready to elevate your dinner table with delightful side dishes that’ll perfectly complement the flavors of your Crack Burger!

  • Sweet Potato Fries: The natural sweetness and crispy texture of sweet potato fries create a delicious contrast to the savory burger, making for a balanced meal. They’re not just tasty; their warm hues add a pop of color to your plate!

  • Fresh Garden Salad: A crisp salad with mixed greens, cherry tomatoes, and a tangy vinaigrette brightens up the meal, while providing refreshing crunch. Add some avocado or nuts for extra nutrients and amazing texture.

  • Coleslaw: Creamy coleslaw adds a delightful crunch and tanginess that pairs wonderfully with the richness of the Crack Burger. Its cool, refreshing nature is a great way to balance the heat of the grill.

  • Grilled Corn on the Cob: Sweet, charred corn on the cob brings summertime joy to your table. Brushed with butter and sprinkled with feta or cilantro, it’s a perfect side with every bite bursting with summertime flavor.

  • Onion Rings: Crispy onion rings deliver a satisfying crunch and zesty flavor that enhance the burger experience. Pair them with a side of tangy dipping sauce to take enjoyment to the next level.

  • Classic Milkshake: For a sweet finish, a cold milkshake perfectly complements the savory goodness of your Crack Burger. Whether it’s chocolate, vanilla, or strawberry, it’s a nostalgic treat that rounds out your meal beautifully.

  • Craft Beer: Consider serving your Crack Burger with an ice-cold craft beer. A hoppy IPA or a smooth lager both enhance the flavors of the burger and keep the spirit of backyard barbecue alive.

Crack Burger Variations & Substitutions

Feel free to personalize your Crack Burger with these fun twists that will elevate your flavor game!

  • Spicy Kick: Add diced jalapeños to the meat mixture for an extra burst of heat that spice lovers will adore. The zing of jalapeño adds a delightful contrast to the rich, creamy elements.

  • Cheese Swap: Substitute cheddar cheese with blue cheese for a bolder flavor. The sharpness of the blue cheese splashes an unforgettable flavor profile that’s sure to excite your taste buds.

  • Low-Carb Option: Use lettuce wraps instead of buns for a fresh, low-carb twist. This simple swap allows all the flavors to shine through without the added carbs—with a crunchy crunch that complements the burger perfectly.

  • Herb Infusion: Mix fresh herbs like chopped parsley or chives into the meat for a burst of freshness. This adds a lovely aromatic quality that transforms your Crack Burger into a gourmet treat.

  • Veggie Boost: Incorporate finely diced mushrooms or shredded zucchini into the beef mixture for added moisture and nutrients. This tiny twist brings an earthy flavor that harmonizes beautifully with the other ingredients.

  • Alternative Protein: Try ground turkey or a plant-based meat alternative for a lighter or vegetarian version. These substitutes offer a fun breakthrough while still delivering all the flavors we love.

  • Sweet Addition: Add a hint of BBQ sauce to the patty mixture for a subtle sweetness. This rich, smoky flavor provides an unexpected delicious depth to your Crack Burger, elevating it to mouthwatering new heights.

For more comforting recipes, consider trying our Cheeseburger Soup Comforting or the flavorful Crack Chicken Noodle. Each option is packed with love and deliciousness that will surely inspire your next meal!

Make Ahead Options

These Crack Burgers are perfect for meal prep enthusiasts! You can mix and shape the burger patties up to 24 hours in advance; just store them in the refrigerator, tightly wrapped to maintain freshness and prevent drying out. Additionally, cook the bacon ahead of time and refrigerate it for up to 3 days. When you’re ready to serve, simply heat your grill or skillet to medium heat and cook the patties for about 4-5 minutes on each side until beautifully seared and juicy. Topping these burgers with melted cheddar will be just as delicious, allowing you to enjoy a quick and stress-free meal on busy weeknights!

Crack Burger Recipe FAQs

What type of ground beef is best for the Crack Burger?
Absolutely! For the juiciest Crack Burger, I recommend using ground beef with an 80/20 fat ratio. This blend strikes the perfect balance, ensuring a moist and flavorful burger. Leaner options can dry out and lead to less satisfying results, so stick with 80/20 or 85/15 for the best experience.

How should I store leftover Crack Burgers?
To keep your leftover Crack Burgers fresh, store them in an airtight container in the fridge for up to 3 days. This way, you can enjoy a quick and delicious meal later in the week. Just pop them into a skillet or microwave to reheat, and they’ll be ready to enjoy once again!

Can I freeze Crack Burger patties?
Yes! To freeze uncooked Crack Burger patties, place shaped patties in a single layer on a baking sheet and freeze until solid. This usually takes about 1 to 2 hours. Once frozen, transfer them to a freezer-safe bag, where they will keep well for up to 3 months. Label your bags with the date for easy organization!

What if my patties are falling apart while cooking?
Very! If your patties are falling apart during cooking, it could be due to overmixing the meat. Be gentle when combining ingredients; you only want to mix until everything is just blended. If you’re still having trouble, consider adding a tablespoon of breadcrumbs or an egg to help bind the mixture together!

Can my family and I enjoy these burgers if we have dietary restrictions?
Yes! The Crack Burger can be customized to fit various dietary needs. For gluten-free diets, simply use gluten-free buns. If you have lactose intolerance or a dairy allergy, substitute the cheese with a dairy-free alternative. Additionally, feel free to tweak any ingredients according to your personal preferences or allergies; the beauty of this recipe is its versatility!

Crack Burger

Mouthwatering Crack Burger Recipe for Ultimate Flavor Lovers

This Crack Burger is a flavor-packed delight featuring juicy beef, crispy bacon, and gooey cheddar. Perfect for a dinner gathering!
Prep Time 15 minutes
Cook Time 20 minutes
Resting Time 5 minutes
Total Time 40 minutes
Servings: 6 burgers
Course: Dinner
Cuisine: American
Calories: 600

Ingredients
  

For the Patties
  • 1 pound ground beef (80/20) Provides moisture and flavor
  • 1/2 cup sour cream Greek yogurt is a great substitute
  • 1 packet ranch dressing mix Infuses the beef with savory flavor
  • 1/2 cup bacon (cooked and crumbled) Adds crunch and smoky flavor
  • 1/2 cup cheddar cheese (shredded) Provides richness and melty texture
  • 6 slices cheddar cheese (slices) Used for topping the burger
  • 6 buns brioche buns Soft and slightly sweet
For Toppings
  • 1 cup lettuce Use romaine or iceberg
  • 1 large tomato Opt for vine-ripened for the best taste
  • 1 cup pickles Dill or bread-and-butter both work well
  • to taste mustard Essential condiment
  • to taste mayonnaise Essential condiment

Equipment

  • Grill
  • Mixing Bowl
  • Skillet
  • meat thermometer

Method
 

Step‑by‑Step Instructions for Crack Burger
  1. In a large mixing bowl, combine ground beef, sour cream, ranch dressing mix, crumbled bacon, and shredded cheddar cheese. Mix gently until just combined.
  2. Divide the mixture into six equal portions and shape each portion into a round patty, about 3/4 inch thick. Create a small dimple in the center of each patty.
  3. Preheat your grill or skillet to medium heat, about 350°F (175°C).
  4. Place the patties on the grill and cook for 4-5 minutes on each side, flipping gently.
  5. Once done cooking, place a slice of cheddar cheese on each patty and close the grill lid for about 1 minute to melt the cheese.
  6. Toast brioche buns on the grill, then assemble the burgers with lettuce, tomato, pickles, mustard, and mayonnaise.

Nutrition

Serving: 1burgerCalories: 600kcalCarbohydrates: 30gProtein: 30gFat: 40gSaturated Fat: 18gPolyunsaturated Fat: 2gMonounsaturated Fat: 15gCholesterol: 100mgSodium: 900mgPotassium: 500mgFiber: 2gSugar: 3gVitamin A: 10IUVitamin C: 5mgCalcium: 20mgIron: 15mg

Notes

Avoid overmixing to keep the patties tender and juicy. Use a meat thermometer for perfect doneness.

Tried this recipe?

Let us know how it was!

Savory Chicken Fried Rice in Just 20 Minutes Flat

As I glanced at the clock, I realized dinner was just 20 minutes away—and that’s when the idea hit me: Chicken Fried Rice! This simple but satisfying meal comes together in a flash, making it the perfect solution for any weeknight hustle. Forget about greasy takeout; you can whip up a delicious blend of seasoned chicken, vibrant veggies, and crispy bacon right at home. Not only is this dish quick to prepare, but it also shines both as a standalone main course or a delightful side. With fluffy grains of rice coated in savory sauce and a touch of freshness from green onions, it’s bound to become a family favorite. What will you add to personalize your Chicken Fried Rice tonight?

Why Is This Chicken Fried Rice Special?

Quick and Easy: Prepare a wholesome meal in just 20 minutes, perfect for busy weeknights or those unexpected cravings.
Flavor Explosion: Each bite is packed with seasoned chicken, crisp vegetables, and smoky bacon, reminiscent of your favorite takeout without the guilt.
Versatile Dish: Whether enjoyed as a standalone meal or a side with dishes like Corn Chicken Rice, this recipe adapts beautifully.
Healthy Freshness: Customize with seasonal veggies or switch proteins, tailoring the dish to your family’s preferences.
Impressive Presentation: Vibrant colors, fluffy rice, and delightful textures make it visually appealing, perfect for impressing guests or family alike!
Embrace homemade goodness with this Chicken Fried Rice, and say goodbye to boring fast food!

Chicken Fried Rice Ingredients

• Everything you need to create this quick and delicious meal.

For the Cooking Base

  • Oil – Cooking medium; consider using peanut, vegetable, or canola for the best flavor.
  • Eggs – Adds fluffiness and richness; whisk lightly before cooking for optimal texture.
  • Chicken Breast – The primary protein; slice finely for quick cooking, or swap for tofu or shrimp if desired.
  • Garlic – Essential flavor base; freshly minced will provide the best taste.
  • Onion – Adds sweetness and depth; chop finely for even distribution in the dish.

For the Flavor Boost

  • Bacon – Brings savory depth; lean it out by trimming excess fat, or use ham as a substitute.
  • Chinese Cooking Wine (Shaoxing) – Infuses rich flavor; can be replaced with Mirin or dry sherry, but don’t skip it!
  • Oyster Sauce – Elevates umami; can substitute with a blend of fish sauce and hoisin if needed.
  • Light Soy Sauce – Adds necessary saltiness; avoid dark soy sauce for this recipe.
  • Sesame Oil – Optional, but it adds an aromatic touch to your dish.
  • White Pepper – Optional; introduces warmth and a hint of spiciness.

For the Vegetables

  • Carrot – Adds color and crunch; peel and dice into small pieces for even cooking.
  • Frozen Corn – Brings sweetness and texture; fresh corn works great too!
  • Frozen Peas – Adds a pop of color and sweet flavor; no cooking prep needed—fresh can be used as well.
  • Green Onions – For freshness and garnish; slice finely to sprinkle on top for a beautiful finish.

For the Main Component

  • Cooked White Rice – The key to this dish’s texture; day-old rice is best as it will be dry and crumbly, preventing mushiness.

Whip up this Chicken Fried Rice and experience the joy of homemade flavor!

Step‑by‑Step Instructions for Chicken Fried Rice

Step 1: Prepare the Sauce
In a small bowl, mix together the oyster sauce, light soy sauce, and Chinese cooking wine to create a flavor-packed sauce. Take part of this mixture and use it to marinate the finely sliced chicken breast for about 10 minutes. This will enhance the meat’s flavor and tenderness, ensuring delicious Chicken Fried Rice.

Step 2: Cook the Eggs
Heat 1 tablespoon of oil in a large skillet or wok over medium-high heat. Pour in the lightly whisked eggs, and scramble them just until they are set, taking about 1-2 minutes. Remove the eggs from the skillet and set them aside to maintain their fluffy texture, which will perfect your Chicken Fried Rice.

Step 3: Sauté the Bacon
Increase the heat to high and add another tablespoon of oil to the skillet. Stir in the bacon pieces, cooking until they are light golden and crispy, roughly 3-4 minutes. The rendered fat will enrich the flavors, making your Chicken Fried Rice irresistibly savory.

Step 4: Add Aromatics
Once the bacon is cooked, toss in the finely chopped onion and minced garlic. Sauté these aromatics for about 1-2 minutes until they become fragrant and the onion turns translucent. This step is key for infusing your Chicken Fried Rice with a wonderful aroma.

Step 5: Incorporate Veggies
Add the diced carrot, frozen corn, and frozen peas into the skillet. Stir-fry the mixture for another 2-3 minutes, allowing the vegetables to heat through and combine with the bacon and aromatics. The colorful veggies will enhance the visual appeal of your Chicken Fried Rice.

Step 6: Add the Chicken
Now, incorporate the marinated chicken into the skillet. Cook for about 4-5 minutes, stirring occasionally, until the chicken is no longer pink and cooked through. This step ensures that the chicken blends well with the other ingredients in your Chicken Fried Rice.

Step 7: Combine Rice and Sauce
Add the day-old cooked rice to the skillet, breaking apart any clumps. Pour in the remaining sauce mixture and stir everything together, cooking for about 1.5 minutes. This allows the rice to soak up the flavors and ensures an even distribution of the delicious sauce in your Chicken Fried Rice.

Step 8: Finish Off
Finally, gently fold the scrambled eggs and finely sliced green onions into the skillet. Toss everything together for another minute to warm through and combine. Your Chicken Fried Rice is now vibrant and ready to serve—a perfect blend of flavors and textures that the whole family will love!

Expert Tips for Chicken Fried Rice

  • Day-Old Rice: Always use day-old, cold rice for the best texture; fresh rice can turn mushy and clump together during cooking.
  • Avoid Overcooking Eggs: Scramble the eggs lightly and remove them before adding other ingredients; this keeps them fluffy for your Chicken Fried Rice.
  • Customized Veggies: Feel free to experiment with seasonal or leftover vegetables; this dish is adaptable and can be tailored to your family’s preferences.
  • Don’t Skip the Sauce: The marinade and sauces are crucial for flavor; skipping or substituting can lead to a bland Chicken Fried Rice.
  • Watch the Heat: Cook on high heat to achieve that lovely “wok hei” flavor; just ensure to stir frequently to avoid burning.

Make Ahead Options

These Chicken Fried Rice are perfect for meal prep enthusiasts! You can chop your vegetables, whisk the eggs, and even marinate the chicken up to 24 hours in advance, storing them in airtight containers in the refrigerator to maintain their flavors. Additionally, keep your day-old rice ready to go; simply refrigerate it, ensuring it remains dry for ideal texture when cooked. When you’re ready to whip up dinner, just sauté the bacon, add the marinated chicken, and combine everything with the prepped ingredients in the skillet. Your Chicken Fried Rice will turn out just as delicious and fresh, minimizing your weeknight cooking time while ensuring a satisfying meal that your family will love!

What to Serve with House Special Chicken Fried Rice?

Get ready to elevate your weeknight dinners with delightful accompaniments that make your meal even more satisfying and memorable!

  • Beef and Broccoli: Tender beef stir-fried with vibrant broccoli in a savory sauce, this classic pairs beautifully for a filling dinner.

  • Egg Rolls: Crispy on the outside and packed with fresh veggies, these make a perfect crunchy bite alongside your Chicken Fried Rice.

  • Hot and Sour Soup: The zesty and spicy flavors of this soup create a refreshing balance, enhancing your dining experience with complementary tastes.

  • Sweet and Sour Chicken: This dish adds a fruity punch to your meal, creating a delightful contrast to the savory chicken fried rice.

  • Sesame Noodles: Cold, tangy sesame noodles sprinkled with sesame seeds offer a unique flavor profile that pairs excellently with your rice.

  • Mango Salad: Fresh and vibrant, a mango salad featuring crispy greens and a zesty dressing adds a lightness to your meal that’s refreshing and satisfying.

  • Chun Wan Tea: A warm cup of this fragrant tea offers a soothing finish, perfect to sip while enjoying the rich flavors of your Chicken Fried Rice.

How to Store and Freeze Chicken Fried Rice

Fridge: Store leftover Chicken Fried Rice in an airtight container for up to 3 days. Ensure it cools completely before sealing to maintain freshness.

Freezer: Freeze portions in airtight freezer bags for up to 2 months. Flatten the bags to save space and allow for quicker thawing.

Reheating: To reheat, thaw overnight in the fridge and warm in a skillet over medium heat, adding a splash of water or soy sauce to restore moisture.

Make-Ahead: This dish is great for meal prep; simply prepare in advance, store, and heat up on busy nights for a quick, satisfying meal.

Chicken Fried Rice Variations to Explore

Feel free to unleash your creativity and customize this delicious Chicken Fried Rice to suit your taste buds and dietary preferences!

  • Protein Swap: Try substituting chicken with shrimp or tofu for a different flavor profile and texture.

  • Bacon Upgrade: Replace bacon with ham or even diced spam for a heartier bite. This change brings a new twist to your dish!

  • Veggie Fusion: Amp up the nutrition by adding bell peppers, broccoli, or even zucchini; these veggies not only add color but also enhance the flavor.

  • Spicy Kick: Mix in a spoonful of chili garlic sauce or Sriracha for those who crave a bit of heat in their meal.

  • Herb Boost: Experiment with fresh herbs like cilantro or basil as a finishing touch; they infuse freshness and vibrant flavors into your Chicken Fried Rice.

  • Nutritional Twist: Go low-carb by swapping rice for cauliflower rice; it’s a fantastic way to lighten up this classic dish while keeping all the flavor.

  • Sweet Touch: Add some pineapple chunks for a touch of tropical sweetness that pairs beautifully with the savory elements.

  • Savory Intensity: Give your sauce a flavor boost with a splash of hoisin sauce or a drizzle of sesame oil, enriching your fried rice with an extra layer of umami.

These variations make it easy to personalize your Chicken Fried Rice and delight everyone around the table! For more thrilling ideas, consider pairing it with something like Crispy Southern Fried Chicken for an indulgent meal or savor it alongside the delightful Oven Chicken Rice for a fulfilling spread. Enjoy your culinary adventure!

Chicken Fried Rice Recipe FAQs

What type of rice should I use for Chicken Fried Rice?
Absolutely! It’s best to use day-old cooked rice; this allows it to dry out a bit, making it less sticky and preventing mushiness when frying. If you don’t have day-old rice, you can spread freshly cooked rice on a baking sheet to cool and dry for about 30 minutes before using it.

How long can I store leftover Chicken Fried Rice in the fridge?
You can store leftover Chicken Fried Rice in an airtight container for up to 3 days. Just make sure to let it cool completely before sealing it to maintain freshness.

Can I freeze Chicken Fried Rice?
Yes, you can freeze Chicken Fried Rice! Portion it out into airtight freezer bags, laying them flat to save space. It will stay good in the freezer for up to 2 months. To reheat, thaw overnight in the fridge and warm in a skillet over medium heat, adding a splash of water or soy sauce to restore moisture.

What if my Chicken Fried Rice is too dry?
If your Chicken Fried Rice turns out too dry, don’t worry! You can add a tablespoon of water, chicken broth, or soy sauce while reheating. Stir everything well to combine, and it should improve the moisture and flavor!

Are there any dietary considerations for Chicken Fried Rice?
Very much! This recipe is not gluten-free due to soy sauce and oyster sauce. For those with dietary restrictions, feel free to swap these for tamari and a homemade substitute, respectively. Additionally, you can easily replace the chicken with tofu for a vegetarian option or shrimp for a seafood variation.

How can I customize my Chicken Fried Rice?
The more the merrier! You can customize your Chicken Fried Rice by adding different veggies, such as bell peppers or broccoli, or even tossing in some chili sauce for a kick! Feel free to experiment with proteins as well; shrimp, pork, or even leftover turkey work beautifully.

Chicken Fried Rice

Savory Chicken Fried Rice in Just 20 Minutes Flat

This Chicken Fried Rice is a quick and delicious meal, packed with flavors and perfect for busy weeknights.
Prep Time 10 minutes
Cook Time 10 minutes
Total Time 20 minutes
Servings: 4 servings
Course: Dinner
Cuisine: Asian
Calories: 450

Ingredients
  

For the Cooking Base
  • 2 tablespoons Oil Consider using peanut, vegetable, or canola for the best flavor.
  • 2 large Eggs Whisk lightly before cooking for optimal texture.
  • 1 pound Chicken Breast Slice finely for quick cooking.
  • 3 cloves Garlic Freshly minced will provide the best taste.
  • 1 medium Onion Chop finely for even distribution.
For the Flavor Boost
  • 4 slices Bacon Lean it out by trimming excess fat.
  • 2 tablespoons Chinese Cooking Wine (Shaoxing) Infuses rich flavor.
  • 1 tablespoon Oyster Sauce Can substitute with a blend of fish sauce and hoisin.
  • 2 tablespoons Light Soy Sauce Avoid dark soy sauce for this recipe.
  • 1 teaspoon Sesame Oil Optional for an aromatic touch.
  • 1/2 teaspoon White Pepper Optional; introduces warmth.
For the Vegetables
  • 1 medium Carrot Peel and dice into small pieces.
  • 1 cup Frozen Corn Fresh corn works great too!
  • 1 cup Frozen Peas No cooking prep needed.
  • 2 stalks Green Onions Slice finely for garnish.
For the Main Component
  • 4 cups Cooked White Rice Day-old rice is best for texture.

Equipment

  • Large skillet
  • wok
  • bowl

Method
 

Step-by-Step Instructions for Chicken Fried Rice
  1. Prepare the sauce by mixing oyster sauce, light soy sauce, and Chinese cooking wine, then marinate the chicken for 10 minutes.
  2. Cook the eggs in a heated skillet with oil until set and then set aside.
  3. Sauté bacon until golden and crispy, then remove.
  4. Add onions and garlic to the skillet, sautéing until fragrant.
  5. Add diced carrot, frozen corn, and peas, stir-frying for 2-3 minutes.
  6. Incorporate marinated chicken and cook until no longer pink.
  7. Add cooked rice and remaining sauce, mixing well for 1.5 minutes.
  8. Fold in scrambled eggs and green onions, tossing to combine and warm through.

Nutrition

Serving: 1servingCalories: 450kcalCarbohydrates: 60gProtein: 25gFat: 15gSaturated Fat: 5gPolyunsaturated Fat: 3gMonounsaturated Fat: 7gCholesterol: 160mgSodium: 900mgPotassium: 600mgFiber: 3gSugar: 2gVitamin A: 200IUVitamin C: 10mgCalcium: 30mgIron: 2mg

Notes

Use day-old rice for the best texture and modify veggies to your liking for a personalized meal.

Tried this recipe?

Let us know how it was!

Heavenly Angel Cake Churro Bites You’ll Crave Again!

As I stood in the kitchen one lazy afternoon, the scent of cinnamon wafted through the air, instantly transporting me to my favorite dessert memories. Enter these delightful Angel Cake Churro Bites, a whimsical twist on the classic churro that combines the airy goodness of angel food cake with a sweet, crisp, cinnamon-sugar coating. This recipe isn’t just easy to whip up; it’s a no-fuss, mess-free method that lets you indulge your sweet tooth without spending hours in the kitchen. These bites are perfect for sharing at parties or enjoying as an after-dinner treat, and they’re sure to impress even the pickiest eaters. Ready to dive into a sweet, cake-inspired adventure? Let’s make these delightful bites together!

Why are Angel Cake Churro Bites so special?

Irresistible Crunch: These bites boast a golden exterior that delivers a satisfying crunch, making them addictive.
Quick and Easy: Forget lengthy prep—this no-fry recipe lets you create delicious treats in just minutes!
Versatile Dipping Options: Pair them with chocolate sauce, caramel, or a tangy fruit dip for a fun twist.
Perfect for Any Occasion: Whether it’s a party, snack time, or an evening treat, they are always a hit! Try them at your next gathering alongside Garlic Salmon Bites or Strawberry Cheesecake Dump Cake for an irresistible dessert spread.
Kids Love Them: Even the pickiest eaters will enjoy this delightful blend of flavors, making your meal memorable!

Angel Cake Churro Bites Ingredients

For the Churro Bites

  • Angel Food Cake – Use fresh, store-bought for a light texture that’s perfect for these bites.
  • Vegetable Oil – This is essential for frying; make sure to maintain it at 350°F for the best results.

For the Cinnamon Sugar Coating

  • Cinnamon Sugar Mixture – Combine granulated sugar with ground cinnamon; this will give your Angel Cake Churro Bites their irresistible sweetness.
  • Powdered Sugar (optional) – Mix it with a splash of milk to create a drizzle that’s perfect for topping!

These sweet bites are simple and quick to make, making them an easy treat for your next gathering!

Step‑by‑Step Instructions for Angel Cake Churro Bites

Step 1: Thaw and Cut the Cake
Begin by ensuring your angel food cake is completely thawed if it was frozen. Carefully cut the cake into 1.5-inch cubes using a serrated knife for clean edges. Keep the pieces uniform to ensure even cooking during frying, and set them aside on a plate while preparing your frying station.

Step 2: Heat the Oil
In a deep skillet or a heavy-bottomed pot, pour enough vegetable oil to submerge the cake cubes, but make sure to leave enough space to prevent splattering. Heat the oil over low-medium heat until it reaches a steady temperature of 350°F. Use a kitchen thermometer to monitor the temperature closely, as maintaining this heat is crucial for crisp, golden bites.

Step 3: Fry the Cake Cubes
Carefully add a batch of the angel cake cubes to the hot oil, ensuring not to overcrowd the pan. Fry them for about 2-3 minutes, turning with a slotted spoon to achieve an even golden brown on all sides. Keep an eye on them, as the cake should puff up slightly and become beautifully crisp.

Step 4: Drain the Fried Bites
Once golden brown, use your slotted spoon to remove the churro bites from the hot oil. Place them on a plate lined with paper towels to drain excess oil—avoid letting them sit too long to keep them from getting soggy. Repeat until all cake cubes are fried and crispy.

Step 5: Coat in Cinnamon Sugar
While the cake bites are still warm, generously toss them in a bowl filled with the cinnamon sugar mixture. Ensure each piece is evenly coated for that delightful sweetness. The warmth from the churro bites will help the sugar adhere perfectly, creating a deliciously sticky coating.

Step 6: Optional Glaze Preparation
If you’d like to add an extra touch, mix powdered sugar with a splash of milk in a small bowl to create a smooth glaze. Drizzle it over the freshly coated angel cake churro bites for added sweetness before serving. Allow the glaze to set slightly before enjoying them to keep the presentation neat and lovely.

Expert Tips for Angel Cake Churro Bites

  • Oil Temperature Check: Use a thermometer to ensure the oil stays at 350°F. This prevents greasy bites and achieves that perfect crispy exterior.

  • Uniform Size Matters: Cut the angel food cake cubes to about 1.5 inches for even frying. Uneven pieces may cook inconsistently, leading to some bites being under or overcooked.

  • Don’t Overcrowd the Pan: Fry in batches to avoid lowering the oil temperature and ensure all sides of the angel cake churro bites get that golden brown finish.

  • Toss Warm: Coat the bites in cinnamon sugar immediately after frying while they’re still warm. This helps the sugar stick better, enhancing the overall flavor.

  • Quick Drain Technique: Drain fried cubes on paper towels promptly without letting them sit too long. This prevents sogginess and keeps your bites crunchy.

How to Store and Freeze Angel Cake Churro Bites

Room Temperature: Store leftover churro bites in an airtight container for up to 2 days to maintain some crispiness; however, they may lose their crunchiness over time.

Fridge: If you want to keep them fresh longer, refrigerate in a sealed container for up to a week. Reheat in the oven to restore a bit of their original texture.

Freezer: For extended storage, freeze churro bites in a single layer on a baking sheet. Once frozen, transfer them to a zip-top bag for up to 3 months.

Reheating: To reheat, bake from frozen at 350°F for about 10-12 minutes or until heated through, making sure they regain their delightful crunch before serving again.

What to Serve with Sweet Angel Cake Churro Bites

These delightful bites are perfect for creating a memorable dessert spread that will delight your guests and family.

  • Chocolate Dipping Sauce: Rich, warm chocolate is the perfect companion, enhancing the sweet cinnamon flavor of the churro bites with every dip.

  • Dulce de Leche Drizzle: This creamy, caramel-like sauce adds a luscious texture that beautifully complements the soft interior of your churro bites.

  • Fresh Berries: Adding a burst of freshness, the tartness of raspberries or strawberries balances the sweetness, making every bite a delight.

  • Vanilla Ice Cream: Creamy vanilla ice cream brings a cool contrast to the warm churro bites, creating a dreamy dessert experience.

  • Mexican Hot Chocolate: Pairing these with a rich, spiced hot chocolate warms the soul and elevates your snack time to cozy evenings wrapped in nostalgia.

  • Fluffy Whipped Cream: Light and airy whipped cream adds a sweet, fluffy note that complements the textures beautifully, making these bites even more indulgent.

  • Cinnamon Tea: Warm up with a cup of this fragrant tea, as its spiced notes harmonize perfectly with the cinnamon sugar-coated treats.

  • Caramel Sauce: Drizzling some caramel adds a sweet, decadent finish, making each bite irresistibly delicious.

  • Sugar Cookies: Surprising guests with sugar cookies alongside the churro bites offers a fun texture contrast and a sweet, nostalgic treat.

Make Ahead Options

These Angel Cake Churro Bites are a dream for busy cooks looking to save time! You can prep the angel food cake by cutting it into 1.5-inch cubes up to 24 hours in advance. Store the cubes in an airtight container at room temperature to maintain their light texture. On the day you plan to serve, simply heat up your vegetable oil and fry the cake cubes until golden brown. Toss them in the cinnamon sugar mixture immediately after frying for an irresistible coating. This approach ensures that the churro bites remain just as delicious and crispy, allowing you to enjoy a delightful treat with minimal effort!

Angel Cake Churro Bites Variations

Feel free to unleash your creativity and customize these delightful churro bites for an even more exciting treat experience!

  • Oil Swap: Substitute canola oil for frying for a lighter flavor that still crisps beautifully. It’s a simple change that most won’t even notice!

  • Flavor Boost: Vanilla Zest: Stir in a teaspoon of vanilla extract or a touch of lemon zest to the cinnamon sugar for an aromatic twist. These little additions make a world of difference, enhancing the overall texture.

  • Spicy Cinnamon: Add Heat: Incorporate a pinch of cayenne pepper or chili powder into the cinnamon sugar for a surprising kick that balances the sweetness beautifully. It’s a fun twist that will surprise and delight anyone who tries them!

  • Nutty Crunch: Chopped Nuts: Toss some chopped pecans or almonds into your cinnamon sugar mixture for an added crunch. The nutty flavor complements the churro bites perfectly, creating a delightful experience.

  • Decadent Dipping: Saucy Fun: Serve with various dipping sauces such as melted chocolate, creamy caramel, or fruity strawberry syrup. Each dip adds a layer of flavor, taking your bites to the next level.

  • Sweet Glaze: Cinnamon Roll: Mix powdered sugar and milk with a dash of cinnamon for a glaze that echoes the flavors of a cinnamon roll. Drizzle this over the warm churro bites just before serving for added sweetness.

  • Chocolate Lovers: Cocoa Twist: Add cocoa powder to the cinnamon sugar for a chocolatey version of the churro bites. This gentle addition creates a rich flavor that chocolate enthusiasts will love, making it a fun twist on the traditional recipe.

Looking for more delectable ideas? You’ll adore pairing these bites with a warm cup of Easter Poke Cake or sampling the delectable flavors found in Nutella Pancakes Blend at your next brunch gathering!

Angel Cake Churro Bites Recipe FAQs

What type of angel food cake should I use?
Absolutely! Fresh, store-bought angel food cake works best for these churro bites. Avoid stale options as they won’t fry as well and may result in a less desirable texture. A light and airy cake is crucial for capturing that perfect bite.

How should I store leftover churro bites?
I often recommend storing your churro bites in an airtight container at room temperature. They will stay fresh for about 2 days; however, they may lose some crispiness over time. If you want to keep them a bit longer, refrigerate them in a sealed container for up to a week.

Can I freeze angel cake churro bites?
Very! To freeze, first arrange the churro bites in a single layer on a baking sheet, ensuring they don’t touch each other. Place the sheet in the freezer until they’re fully frozen, then transfer the bites to a zip-top bag. They can be kept in the freezer for up to 3 months!

What’s the best way to reheat frozen churro bites?
To reheat, preheat your oven to 350°F. Bake the frozen churro bites for about 10-12 minutes or until heated through. This method helps restore their delightful crunch while ensuring they’re warmed right through for a tasty experience.

Can I make these churro bites gluten-free?
Absolutely! To make gluten-free angel cake churro bites, you can use a certified gluten-free angel food cake mix. Just be sure to double check the sugar and cinnamon mixture to ensure all ingredients are compliant.

What should I do if my churro bites aren’t crispy?
If your churro bites lose their crispness, they might not have been drained properly after frying or the oil temperature may not have been high enough. Make sure to maintain the oil at 350°F when frying and immediately place fried bites on paper towels to drain excess oil to achieve that crunchy texture.

Angel Cake Churro Bites

Heavenly Angel Cake Churro Bites You’ll Crave Again!

Delight in these Angel Cake Churro Bites with a cinnamon-sugar coating, a perfect, easy treat for any occasion.
Prep Time 10 minutes
Cook Time 15 minutes
Total Time 25 minutes
Servings: 12 bites
Course: Dessert
Cuisine: American
Calories: 120

Ingredients
  

For the Churro Bites
  • 1 package Angel Food Cake Use fresh, store-bought for a light texture
  • 2 cups Vegetable Oil Maintain at 350°F for frying
For the Cinnamon Sugar Coating
  • 1 cup Cinnamon Sugar Mixture Combine granulated sugar with ground cinnamon
  • 1/2 cup Powdered Sugar Mix with a splash of milk for drizzling

Equipment

  • deep skillet
  • slotted spoon
  • kitchen thermometer
  • Mixing Bowl

Method
 

Step-by-Step Instructions
  1. Thaw and cut the angel food cake into 1.5-inch cubes.
  2. Heat enough vegetable oil in a deep skillet or pot to 350°F.
  3. Fry the cake cubes for 2-3 minutes until golden brown.
  4. Drain the fried bites on paper towels to remove excess oil.
  5. Coat the warm cake bites in the cinnamon sugar mixture.
  6. Prepare a glaze by mixing powdered sugar with milk and drizzle over bites.

Nutrition

Serving: 1biteCalories: 120kcalCarbohydrates: 15gProtein: 1gFat: 7gSaturated Fat: 1gPolyunsaturated Fat: 0.5gMonounsaturated Fat: 5gSodium: 50mgPotassium: 20mgSugar: 9g

Notes

These bites can be stored at room temperature for 2 days, in the fridge for up to a week, or in the freezer for up to 3 months.

Tried this recipe?

Let us know how it was!

Deliciously Fresh Broccoli Pasta Salad for Easy Weeknight Dinners

As I rummaged through my fridge recently, I stumbled upon a vibrant bunch of broccoli, a box of pasta, and a few random veggies waiting to be transformed into something delightful. That’s when I decided to whip up this Fresh & Flavorful Broccoli Pasta Salad—a perfect make-ahead side dish that’s as versatile as it is delicious. Not only does this recipe come together in a snap, but it also allows you to flex your creativity with any fresh produce you have handy. With its creamy dressing and a satisfying crunch from the fresh vegetables, this salad is ideal for those busy weeknights or sunny summer potlucks. So why not make a big bowl of this deliciousness and watch it disappear at your gathering? Trust me, your taste buds will thank you! What colorful additions will you make to your version?

Why is Broccoli Pasta Salad a Must-Make?

Fresh and Vibrant: This Broccoli Pasta Salad bursts with colors and flavors that can brighten up any meal. Quick and Easy: It’s a breeze to prepare, making it perfect for those hectic weeknights. Versatile Ingredients: Feel free to swap in your favorite veggies or experiment with different dressings, creating a unique dish each time. Make-Ahead Magic: Prepare it in advance and let the flavors meld for an even tastier experience. Crowd-Pleasing Delight: This dish is sure to impress family and friends at any gathering, pairing beautifully with grilled meats or light summer fare. You’ll love how easily it comes together—and don’t hesitate to check out our delicious Cajun Sausage Pasta for another satisfying meal option!

Broccoli Pasta Salad Ingredients

For the Pasta
Rotini or Bowtie Pasta – Choose these shapes for optimal mixing and a delightful bite!

For the Salad Base
Fresh Broccoli – Offers freshness and a delightful crunch; if unavailable, use thawed frozen florets.
Red Onion – Adds sharpness to the salad; use in moderation for a milder flavor.
Bacon – Brings a salty, savory element to the dish; swap for turkey bacon if you’re looking for a lighter option.

For the Creamy Dressing
Mayonnaise – Forms the creamy base for this dressing; consider Greek yogurt for a healthier twist.
Red Wine Vinegar – Adds tangy acidity; can be substituted with apple cider vinegar for a different flavor.
Sugar – Balances the dressing’s flavors; feel free to omit for a lower-sugar version.
Salt and Pepper – Essential for seasoning; adjust to your taste preference.

With these ingredients, you’re on your way to creating a delicious Broccoli Pasta Salad that will be the star of any meal!

Step‑by‑Step Instructions for Broccoli Pasta Salad

Step 1: Cook the Pasta
Begin by bringing a large pot of salted water to a boil over high heat. Once boiling, add 8 ounces of rotini or bowtie pasta and cook according to the package instructions until al dente, typically about 8-10 minutes. Drain the pasta in a colander, and immediately rinse it under cold water to stop the cooking process and cool it down. Set aside to allow excess water to drain.

Step 2: Prepare the Vegetables
While the pasta is cooking, chop 2 cups of fresh broccoli into bite-sized florets along with half of a red onion into thin slices. If you’re using bacon, cook 4 slices in a skillet over medium heat until crispy—about 5-7 minutes—then let it cool before chopping into small pieces. Place all the chopped veggies and bacon in a large mixing bowl.

Step 3: Make the Dressing
In a separate medium bowl, combine 1 cup of mayonnaise, 2 tablespoons of red wine vinegar, 1 tablespoon of sugar, and a generous pinch of salt and pepper. Whisk until smooth and well blended. Adjust the seasoning to ensure a perfect balance—tasting for that delightful creamy and tangy flavor you want in your Broccoli Pasta Salad.

Step 4: Combine Ingredients
Pour the cooled pasta into the bowl with your chopped vegetables and bacon. Drizzle the creamy dressing over the mixture, then use a sturdy spatula to gently fold everything together until all ingredients are well coated with the dressing. This colorful combination creates a delightful visual that whets the appetite!

Step 5: Chill and Meld Flavors
Cover the mixed salad with plastic wrap or transfer it to an airtight container, then place it in the refrigerator. Allow it to chill for at least 3 hours; this resting period is essential as it allows all flavors of your Broccoli Pasta Salad to meld together beautifully, enhancing the taste experience at serving time.

Step 6: Add Bacon Before Serving
When you’re ready to serve, gently stir the salad again to redistribute any settled dressing. To keep the bacon crispy, sprinkle the chopped bacon on top just before serving, mixing it in with a light hand. This final touch adds a satisfying crunch that complements the creamy and fresh elements of the salad perfectly.

Expert Tips for Broccoli Pasta Salad

Perfect Pasta: Ensure pasta is cooked al dente; it absorbs dressing as it sits and won’t turn mushy.

Chill Time: Let the salad chill for at least 3 hours; this helps all the flavors of your Broccoli Pasta Salad meld together beautifully.

Prep Ahead: Make this salad up to 24 hours in advance for best flavor, but avoid adding bacon until serving to keep it crispy.

Vegetable Variations: Don’t hesitate to mix in your favorite veggies like bell peppers or carrots for added color and nutrients without losing the essence of the dish.

Creamy Alternatives: Swap mayonnaise for Greek yogurt or a lighter dressing for a healthier twist while still maintaining creaminess.

How to Store and Freeze Broccoli Pasta Salad

Fridge: Store your Broccoli Pasta Salad in an airtight container for up to 4 days. The flavors improve as it sits, making it an excellent make-ahead option.

Freezer: While fresh pasta salad is best enjoyed chilled, it can be frozen if needed. Freeze for up to 2 months in an airtight container, but note that the texture of the veggies may change upon thawing.

Bacon Storage: Keep cooked bacon separate until serving to maintain its crispness. Store any leftover bacon in an airtight container in the fridge for up to 3 days.

Reheating Tips: If you’ve frozen the salad, thaw it overnight in the fridge before enjoying. Add fresh veggies or a splash of dressing after thawing to refresh the flavors of your Broccoli Pasta Salad.

Make Ahead Options

These Broccoli Pasta Salad components make meal prep a breeze! You can chop the broccoli, onion, and bacon up to 3 days in advance, storing them separately in airtight containers in the refrigerator to maintain their crispness. Additionally, prepare the creamy dressing and refrigerate for up to 24 hours; this allows the flavors to meld beautifully. When you’re ready to serve, simply cook the pasta and cool it, then combine everything in a large bowl. Stir in the dressing and, just before serving, fold in the bacon for that satisfying crunch. This strategy not only saves time but ensures your salad is just as delicious and fresh when you’re ready to enjoy it!

What to Serve with Broccoli Pasta Salad

Elevate your meal with complementing side dishes that amplify the fresh and vibrant notes of this delightful salad.

  • Grilled Chicken: The savory flavor and juicy texture of grilled chicken pairs beautifully with the refreshing pasta salad, adding heartiness.

  • Fresh Fruit Salad: Bright, sweet fruit refreshing your palate between bites creates a delightful contrast to the salad’s creamy dressing.

  • Herbed Garlic Bread: Enjoy the crunch of garlic bread as a buttery, herby accompaniment, perfect for mopping up any extra dressing.

  • Caprese Skewers: These simple skewers of fresh mozzarella, basil, and tomatoes add a pop of color and freshness that enhances the salad’s flavor.

  • Lemonade or Iced Tea: A chilled drink with citrus notes balances the richness of the salad, making every bite feel perfectly refreshing.

  • Grilled Veggies: Seasonal grilled vegetables elevate the meal by introducing smoky flavors that echo the crispness of the broccoli pasta salad.

  • Potato Chips: For a little crunch, serve with some crispy potato chips to bring contrasting textures and a bit of saltiness to the table.

  • Cheesy Garlic Biscuits: Fluffy, cheesy biscuits bring warmth and a hint of yeastiness, making them a comforting match for your fresh salad.

  • Chocolate Chip Cookies: For dessert, these classic cookies offer the perfect sweet finale, creating a nostalgic element to the meal.

Broccoli Pasta Salad Variations & Substitutions

Feel free to unleash your creativity and make this Broccoli Pasta Salad your own with these delightful twists!

  • Cauliflower Swap: Replace broccoli with fresh cauliflower florets for a unique crunch and mild flavor.
  • Herbed Dressing Alternative: Experiment with a yogurt-based dressing infused with fresh herbs for a zesty twist.
  • Cheese It Up: Stir in some crumbled feta or shredded cheddar to add a creamy, savory dimension to the salad.
  • Nutty Crunch: Toss in some toasted walnuts or almonds for an extra layer of texture that elevates each bite.
  • Vibrant Veggies: Incorporate colorful bell peppers or cherry tomatoes for a refreshing pop of color and taste.
  • Spicy Kick: Add diced jalapeños or a sprinkle of red pepper flakes to turn up the heat in your salad.
  • Vegan Version: Swap mayonnaise for a vegan mayo or tahini and use crispy chickpeas instead of bacon for depth without the meat.
  • Mini Pasta Shapes: Try using mini pasta shapes like ditalini or orzo for a playful texture variation that makes for easy eating.

Looking for more tasty ideas? Don’t miss our delicious Cozy Broccoli Cheddar for a comforting side or the fresh zing of a Blt Chicken Salad to complete your meal planning!

Broccoli Pasta Salad Recipe FAQs

What kind of broccoli should I use for this salad?
Fresh broccoli is the best choice for its vibrant color and crunchy texture! Look for firm florets without any dark spots or wilting, as these indicate freshness. If fresh broccoli isn’t available, don’t worry—thawed frozen florets work in a pinch, although they may be slightly softer.

How long can I store Broccoli Pasta Salad in the fridge?
You can keep your Broccoli Pasta Salad in an airtight container in the refrigerator for up to 4 days. The flavors actually improve as the salad sits, making it perfect for preparing ahead of time!

Can I freeze Broccoli Pasta Salad?
Yes, while it’s best enjoyed fresh, you can freeze Broccoli Pasta Salad for up to 2 months. Just make sure to store it in an airtight container. Keep in mind that the texture of the veggies may change a bit upon thawing, so I recommend adding fresh veggies or a splash of dressing after thawing to bring it back to life.

What if my pasta gets mushy?
To prevent mushy pasta, ensure that you cook it al dente, as it will continue to absorb dressing as it sits. If you find it’s too soft, a quick rinse with cold water can halt the cooking process. If mushiness happens despite this, try adding extra crispy bacon or some crunchy nuts to add texture back into the salad!

Are there any dietary considerations for this salad?
Absolutely! If you need a gluten-free option, substitute the pasta with gluten-free pasta varieties or use quinoa. For dairy-free needs, Greek yogurt can be swapped with a nut-based yogurt for the dressing. Always keep an eye out for any allergies to ingredients, especially with mayonnaise, as some brands may contain allergens.

Can I customize the veggies in my Broccoli Pasta Salad?
Yes! The beauty of this recipe lies in its versatility. Feel free to substitute broccoli with your favorite combination of vegetables like bell peppers, cucumbers, or cherry tomatoes. You can also experiment with different dressings beyond the creamy base—for an exciting twist, try a light vinaigrette or herb-infused yogurt dressing. Just remember, the more the merrier!

Broccoli Pasta Salad

Deliciously Fresh Broccoli Pasta Salad for Easy Weeknight Dinners

This Broccoli Pasta Salad is a colorful and easy dish perfect for any gathering or weeknight dinner.
Prep Time 15 minutes
Cook Time 10 minutes
Chill Time 3 hours
Total Time 3 hours 25 minutes
Servings: 6 servings
Course: Pasta
Cuisine: American
Calories: 320

Ingredients
  

For the Pasta
  • 8 ounces rotini or bowtie pasta Choose these shapes for optimal mixing and a delightful bite!
For the Salad Base
  • 2 cups fresh broccoli Offers freshness and a delightful crunch.
  • 0.5 cups red onion Adds sharpness; use in moderation for a milder flavor.
  • 4 slices bacon Brings a salty, savory element; use turkey bacon for a lighter option.
For the Creamy Dressing
  • 1 cup mayonnaise Forms the creamy base; consider Greek yogurt for a healthier twist.
  • 2 tablespoons red wine vinegar Adds tangy acidity; can substitute with apple cider vinegar.
  • 1 tablespoon sugar Balances the dressing’s flavors; can be omitted for lower sugar.
  • salt and pepper Essential for seasoning; adjust to taste.

Equipment

  • Large pot
  • Colander
  • Mixing Bowl
  • whisk
  • spatula

Method
 

Steps
  1. Bring a large pot of salted water to a boil. Add pasta and cook until al dente, about 8-10 minutes. Drain and rinse under cold water.
  2. Chop broccoli into florets and thinly slice red onion. Cook bacon in a skillet until crispy, let cool and chop.
  3. In a bowl, mix mayonnaise, red wine vinegar, sugar, salt, and pepper. Whisk until smooth.
  4. Combine pasta, veggies, and bacon in a bowl. Pour dressing over and fold gently.
  5. Cover and chill in the fridge for at least 3 hours.
  6. Before serving, stir salad and sprinkle bacon on top.

Nutrition

Serving: 1servingCalories: 320kcalCarbohydrates: 30gProtein: 10gFat: 20gSaturated Fat: 4gPolyunsaturated Fat: 0.5gMonounsaturated Fat: 9gCholesterol: 30mgSodium: 550mgPotassium: 300mgFiber: 3gSugar: 2gVitamin A: 500IUVitamin C: 60mgCalcium: 40mgIron: 1mg

Notes

Perfect for meal prep; store in the fridge for up to 4 days. For best flavor, prepare up to 24 hours ahead but add bacon before serving.

Tried this recipe?

Let us know how it was!

Fresh Cucumber Caprese Salad for a Bright Summer Feast

A sunny afternoon, the air filled with laughter and the aroma of summer blossoms—that’s the inspiration behind my Fresh Cucumber Caprese Salad. Combining the refreshing crunch of cucumbers with the luscious sweetness of cherry tomatoes and creamy mozzarella, this dish embodies everything I love about warm-weather cooking. What makes it even better? It’s quick to prepare, taking just 10 minutes, and perfect for those balmy evenings when you crave something light yet satisfying. Plus, it’s make-ahead friendly, so you can delight your guests without spending hours in the kitchen. Ready to bring a taste of summer to your table? Let’s dive into this delightful salad that’s sure to impress!

Why is this salad a summer essential?

Freshness, each bite bursts with flavor, thanks to crisp cucumbers and juicy cherry tomatoes. Simplicity, whip it up in just 10 minutes—perfect for busy weeknights. Make-ahead friendly, just prep ingredients in advance and combine before serving. Versatile, you can easily swap in different ingredients, like adding feta or using zucchini. Visual appeal, this salad’s vibrant colors make it a stunning centerpiece at gatherings. Pair it with dishes like Blt Chicken Salad or Shrimp Avocado Salsa for a complete summer feast!

Fresh Cucumber Caprese Salad Ingredients

For the Dressing

  • Olive Oil – Use high-quality extra virgin olive oil to enhance the richness and flavor.
  • Balsamic Vinegar – Adds a sweet acidity; substitute with lemon juice for a lighter twist.
  • Dried Oregano – This aromatic herb enhances the overall depth of the salad; fresh oregano can be used for a more vibrant taste.
  • Dried Basil – A classic Italian flavor booster; adding fresh basil leaves will also elevate its taste and presentation.

For the Salad

  • Cucumber – Provides that essential crisp texture; English cucumbers are best for their thin skin and fewer seeds.
  • Cherry Tomatoes – Offers sweetness and juiciness; feel free to use other small tomato varieties like grape or heirloom.
  • Fresh Mozzarella – Imparts a creamy element; consider using pearls or cutting larger balls into bite-sized pieces for easier serving.
  • Red Onion – Adds a subtle sharpness; omit it for a sweeter profile, or substitute it with green onions for milder flavor.
  • Optional Fresh Basil Leaves – Enhances both flavor and presentation.

With these ingredients in hand, you’re just moments away from enjoying a Fresh Cucumber Caprese Salad that highlights the vibrant flavors of summer!

Step‑by‑Step Instructions for Fresh Cucumber Caprese Salad

Step 1: Whisk the Dressing
In a small bowl, combine 1/4 cup extra virgin olive oil, 2 tablespoons balsamic vinegar, 1 teaspoon dried oregano, and 1 teaspoon dried basil. Use a whisk to blend the ingredients thoroughly until emulsified. This aromatic dressing will add rich flavor to your Fresh Cucumber Caprese Salad, so taste and adjust seasoning with salt and pepper as needed. Set aside.

Step 2: Prepare the Cucumber
Start by rinsing an English cucumber under cold water. Next, use a vegetable peeler to remove the skin if desired. For added texture, gently score the skin with a fork in a zig-zag pattern before slicing it thinly, about 1/4 inch thick. Then, diced the cucumber slices into bite-sized pieces, ensuring a refreshing crispness for the salad.

Step 3: Slice the Tomatoes
Take a handful of cherry tomatoes, rinse them under cold water, and pat dry. Cut each tomato into quarters, ensuring that you maintain their juiciness while creating pieces that are easy to mix with the cucumbers. Add the quartered tomatoes to a medium mixing bowl, where they will soon mingle with the cucumber pieces for the Fresh Cucumber Caprese Salad.

Step 4: Add Red Onion (Optional)
If you enjoy a bit of sharpness in your salad, finely mince a small amount of red onion, about 1/4 of a medium onion. Sprinkle it over the bowl with the cucumber and tomatoes. If you prefer a milder flavor, you may choose to omit the onion or substitute it with chopped green onions instead, ensuring the salad remains light and refreshing.

Step 5: Incorporate the Mozzarella
Now, it’s time to add the creamy element! Depending on your preference, cut fresh mozzarella into small, bite-sized pieces or use mozzarella pearls. Draining excess moisture by patting the mozzarella with paper towels first can prevent the salad from becoming watery. Add the mozzarella to the bowl, inviting it to combine with the crisp cucumbers and juicy tomatoes.

Step 6: Mix in the Dressing
Pour the dressing you prepared earlier over the salad mixture, ensuring all ingredients are well-coated. Gently toss with a large spoon to combine, being careful not to mash the mozzarella. This step will infuse the Fresh Cucumber Caprese Salad with a burst of flavor.

Step 7: Allow Flavors to Meld
Let the salad sit for about 10 minutes at room temperature. This resting time will allow the ingredients to meld, enhancing the overall flavor of your Fresh Cucumber Caprese Salad. Use this moment to set the table or create a lovely serving display for your beautifully vibrant dish.

Step 8: Ready to Serve
After the flavors have melded, give your salad one last gentle toss. Check for final seasoning adjustments based on your preference. Serve the Fresh Cucumber Caprese Salad in a large bowl or individual plates to showcase its vibrant colors and enjoy a refreshing bites of summer!

Fresh Cucumber Caprese Salad Variations

Customize your Fresh Cucumber Caprese Salad with these delightful ideas to elevate your dish! Each variation invites you to explore new flavors and textures.

  • Zucchini Swap: Replace cucumbers with thinly sliced zucchini for a unique twist. The mild flavor will work beautifully with the other ingredients.
  • Feta Cheese Option: Swap fresh mozzarella for tangy feta to introduce a bold flavor profile. Feta brings a delightful saltiness that enhances the freshness of the salad.
  • Lemon Zest Addition: Add a hint of lemon zest for an extra burst of citrus that brightens the entire dish. This will keep your salad feeling light and refreshing.
  • Herb Variations: Try using fresh mint or parsley instead of basil for a refreshing take. Each herb adds its unique flavor, making the salad even more aromatic.
  • Shallot Substitute: For a milder taste, replace red onion with finely sliced shallots. They offer a softer flavor that pairs well with the salad’s other elements.
  • Spicy Kick: Add sliced jalapeños or red pepper flakes for a touch of heat in your salad. Spice up your dish for those who enjoy a little boldness.
  • Grilled Veggie Twist: Toss in some grilled bell peppers or asparagus for a smoky flavor. This variation adds a lovely depth and texture to your Fresh Cucumber Caprese Salad.
  • Add Chickpeas: For extra protein, include canned chickpeas. They complement the fresh ingredients beautifully and turn the salad into a hearty meal!

Get creative, and don’t hesitate to mix and match these ideas. Whether you pair it with a delicious Blt Chicken Salad or some vibrant Shrimp Avocado Salsa, your Fresh Cucumber Caprese Salad is sure to impress!

How to Store and Freeze Fresh Cucumber Caprese Salad

Fridge: Store in an airtight container for up to 2 days. However, note that the salad will gradually become slightly watery over time as the cucumbers release moisture.

Prepping Ahead: For best results, prepare salad ingredients separately and combine just before serving. This keeps the flavors and textures fresh and vibrant in your Fresh Cucumber Caprese Salad.

Room Temperature: If serving at a gathering, keep the salad at room temperature for no more than 1 hour to prevent any spoilage, especially during warm summer days.

Reheating: This salad is best enjoyed cold and doesn’t require reheating; simply serve it fresh to highlight its crisp and refreshing nature.

Make Ahead Options

These Fresh Cucumber Caprese Salad ingredients are wonderful for meal prep enthusiasts! You can slice the cucumbers and tomatoes up to 24 hours in advance, storing them separately in airtight containers in the refrigerator to maintain their crispness. The dressing can be whisked together a day ahead as well; just give it a good shake before using to re-emulsify. When you’re ready to serve, combine the prepared ingredients with mozzarella and toss them with the dressing just before serving. This ensures your salad remains fresh, vibrant, and just as delicious even after being prepped ahead.

Expert Tips for Fresh Cucumber Caprese Salad

Salting Cucumbers: Drain excess moisture by salting cucumber slices and letting them rest for 15–20 minutes. This prevents a soggy salad.

Dry Mozzarella: Pat mozzarella dry with paper towels before adding it to your Fresh Cucumber Caprese Salad. This keeps the dressing from getting watery.

Dress at the Right Time: For optimal flavor and crispness, toss the salad with dressing just before serving, ensuring everything stays fresh.

Taste Test: Be sure to taste your dressing before adding it to the salad. Adjust the olive oil-to-balsamic ratio as flavors can vary greatly between brands.

Storage Tip: If making ahead, store ingredients separately and combine them just before serving to maintain the salad’s freshness and texture.

What to Serve with Fresh Cucumber Caprese Salad

A vibrant meal starts with this refreshing salad, leading you to delightful pairings that complement its fresh flavors.

  • Grilled Chicken: Juicy, tender chicken enhances the lightness of the salad, making for a balanced and satisfying meal. Pair it with a squeeze of lemon for that extra zing.

  • Seafood Skewers: The smoky flavor of grilled shrimp or fish beautifully contrasts with the salad’s freshness, creating a harmonious seafood summer vibe. Serve with a refreshing dip on the side.

  • Crusty Bread & Olive Oil: Rustic bread served with high-quality olive oil for dipping is a classic combo that adds a satisfying crunch and richness, perfect for mopping up any leftover dressing.

  • Zucchini Noodles: For a low-carb option, spiralized zucchini takes the place of pasta, offering a delightful bite alongside the salad that keeps your meal light and refreshing.

  • White Wine Spritzer: This bubbly drink infuses summer vibes into your dining experience while balancing the rich creaminess of mozzarella with refreshing fizz.

  • Fresh Fruit Platter: A colorful array of berries, melons, and citrus fruits provides a sweet finish to your meal, enhancing the overall freshness and lightness of your feast. Including seasonal fruits can make it even more special.

Indulge in these pairings to elevate your Fresh Cucumber Caprese Salad experience to new heights!

Fresh Cucumber Caprese Salad Recipe FAQs

How do I choose ripe cucumbers for the salad?
Absolutely! When selecting cucumbers, look for firm, bright green ones without any dark spots or wrinkles. English cucumbers are ideal due to their thin skin and fewer seeds, enhancing the crispness of your Fresh Cucumber Caprese Salad. If opting for regular cucumbers, consider peeling and seeding them for a better texture.

How should I store leftovers of the Fresh Cucumber Caprese Salad?
To enjoy your salad at its best, store it in an airtight container in the refrigerator for up to 2 days. Keep in mind, as time goes on, the salad may become slightly watery due to the cucumbers releasing moisture. For optimal freshness, prep the ingredients separately and combine them just before serving.

Can I freeze the Fresh Cucumber Caprese Salad?
Freezing this salad isn’t recommended; the cucumbers and tomatoes will lose their texture when thawed, resulting in a mushy salad. Instead, prepare the ingredients in advance and keep them separate in the fridge, combining them right before serving to maintain that delightful crunch.

What if my salad looks too watery after mixing?
Very! If your Fresh Cucumber Caprese Salad appears watery, it’s likely due to excess moisture in the cucumbers or mozzarella. To combat this, be sure to salt the cucumber slices and let them drain for 15–20 minutes before mixing them in. Additionally, pat the mozzarella dry with paper towels to ensure a firmer dressing.

Can I make this salad vegetarian or vegan-friendly?
Of course! This salad is inherently vegetarian since it contains fresh vegetables and mozzarella. To make it vegan, simply substitute the mozzarella with a plant-based cheese alternative or omit it entirely. You’ll still enjoy the fresh flavors of cucumbers and tomatoes shining through in your Fresh Cucumber Caprese Salad.

Are there any allergies I should be aware of?
Absolutely! The primary allergens in this salad come from dairy (mozzarella). If you’re serving guests with allergies, feel free to swap with dairy-free alternatives. Always check ingredient labels for potential allergens, particularly if you’re using pre-packaged ingredients like dressings or cheeses.

Fresh Cucumber Caprese Salad

Fresh Cucumber Caprese Salad for a Bright Summer Feast

A delightful Fresh Cucumber Caprese Salad that's quick to prepare, embodying vibrant summer flavors.
Prep Time 10 minutes
Total Time 10 minutes
Servings: 4 servings
Course: Salad
Cuisine: Italian
Calories: 180

Ingredients
  

For the Dressing
  • 1/4 cup extra virgin olive oil Use high-quality for best flavor.
  • 2 tablespoons balsamic vinegar Can be substituted with lemon juice.
  • 1 teaspoon dried oregano Fresh oregano can be used instead.
  • 1 teaspoon dried basil Fresh basil leaves can enhance flavor.
For the Salad
  • 1 large English cucumber Thin-skinned and few seeds for best texture.
  • 1 cup cherry tomatoes Can use grape or heirloom tomatoes.
  • 8 ounces fresh mozzarella Cut into bite-sized pieces or use pearls.
  • 1/4 medium red onion Optional; can substitute with green onions.
  • fresh basil leaves Optional, for flavor and presentation.

Equipment

  • Mixing Bowl
  • whisk
  • vegetable peeler
  • Knife

Method
 

Step-by-Step Instructions
  1. In a small bowl, combine 1/4 cup extra virgin olive oil, 2 tablespoons balsamic vinegar, 1 teaspoon dried oregano, and 1 teaspoon dried basil. Whisk until emulsified.
  2. Rinse the English cucumber and optionally peel the skin. Score the skin with a fork and slice thinly, then dice into bite-sized pieces.
  3. Rinse the cherry tomatoes, pat dry, and cut each into quarters.
  4. Finely mince the red onion and sprinkle over the cucumber and tomatoes (optional).
  5. Add fresh mozzarella to the bowl and pat dry if necessary.
  6. Pour the dressing over the salad and gently toss to combine.
  7. Let the salad sit for about 10 minutes to meld flavors.
  8. Give the salad a gentle toss again before serving and adjust seasoning as needed.

Nutrition

Serving: 1servingCalories: 180kcalCarbohydrates: 10gProtein: 8gFat: 15gSaturated Fat: 3gPolyunsaturated Fat: 1gMonounsaturated Fat: 10gCholesterol: 20mgSodium: 200mgPotassium: 300mgFiber: 2gSugar: 3gVitamin A: 1500IUVitamin C: 10mgCalcium: 200mgIron: 1mg

Notes

For best freshness, combine ingredients just before serving and store leftovers in an airtight container for up to 2 days.

Tried this recipe?

Let us know how it was!

Stay Connected

Get recipes via email: