Get my cookbooks

Creamy Beef Pasta That Will Wow Your Weeknight Dinner Crew

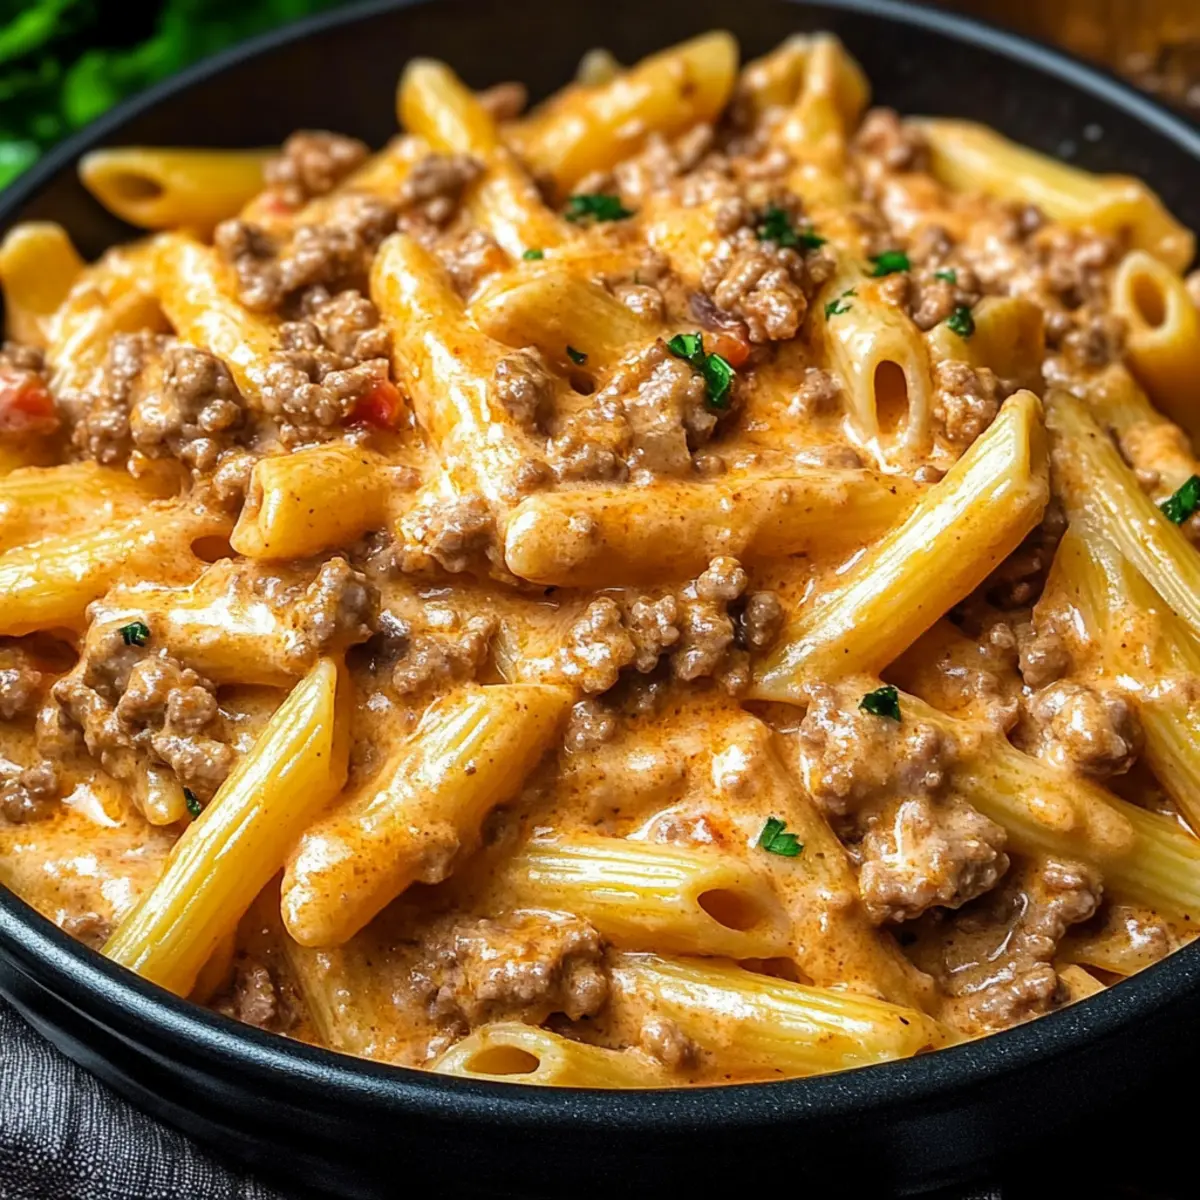
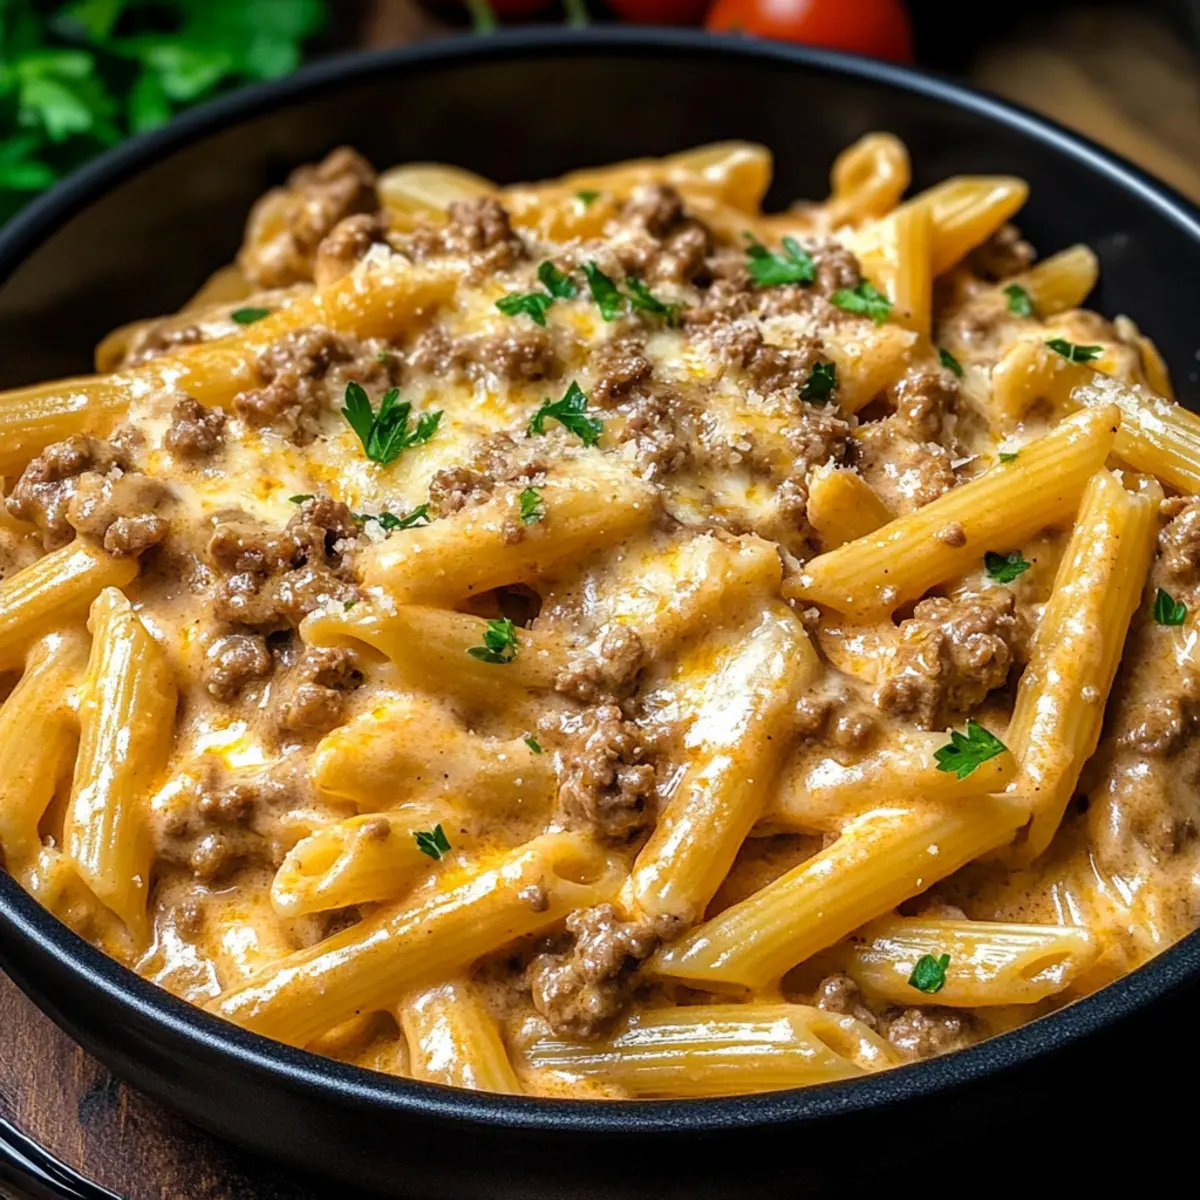
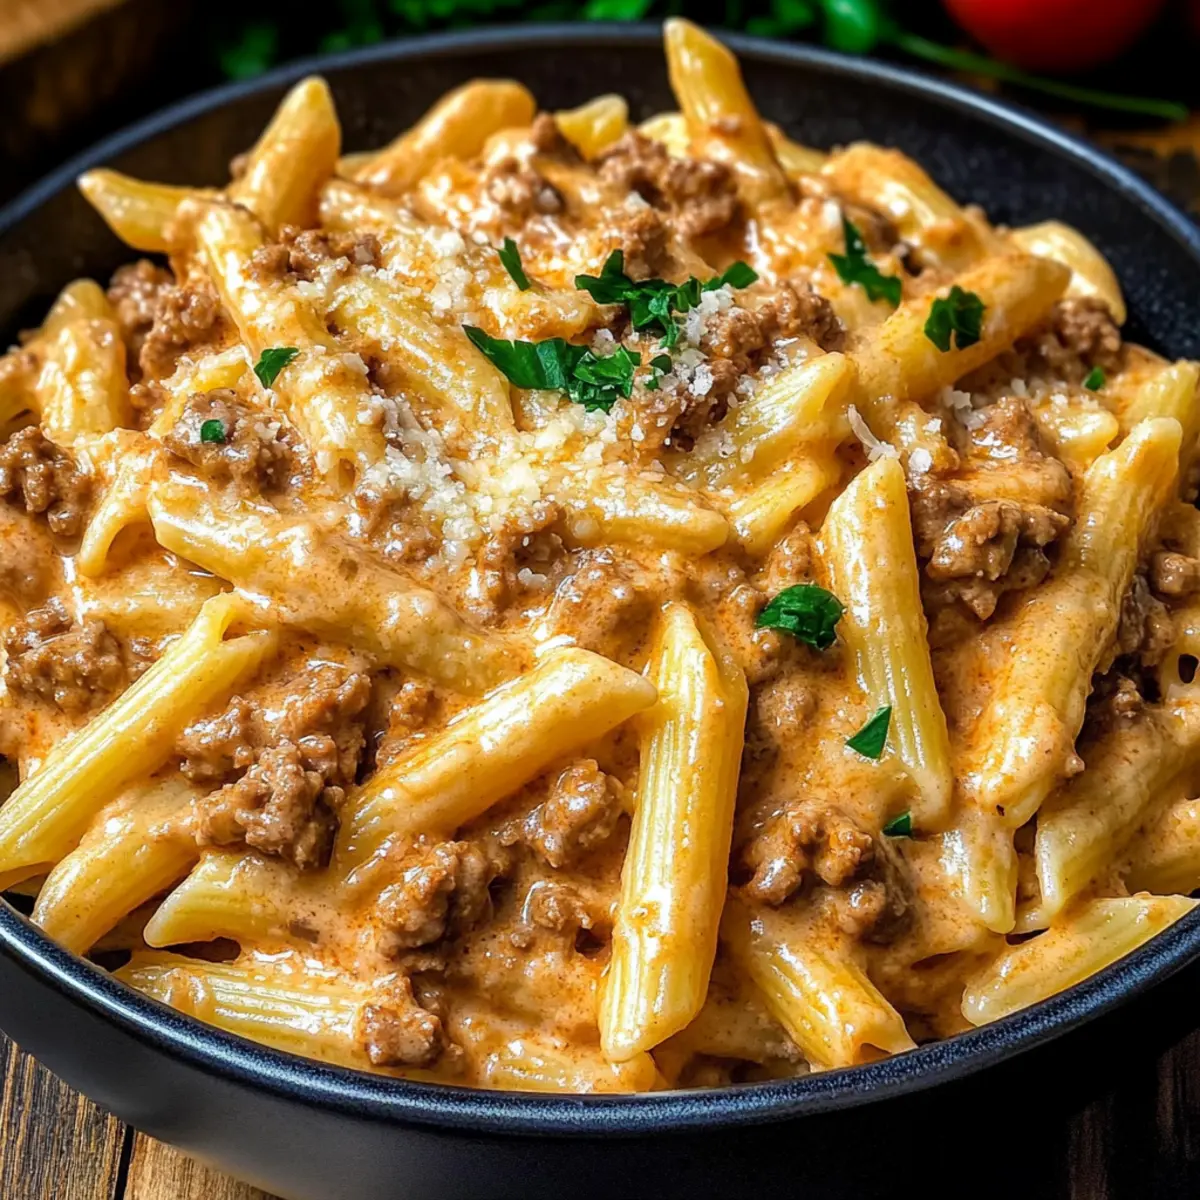
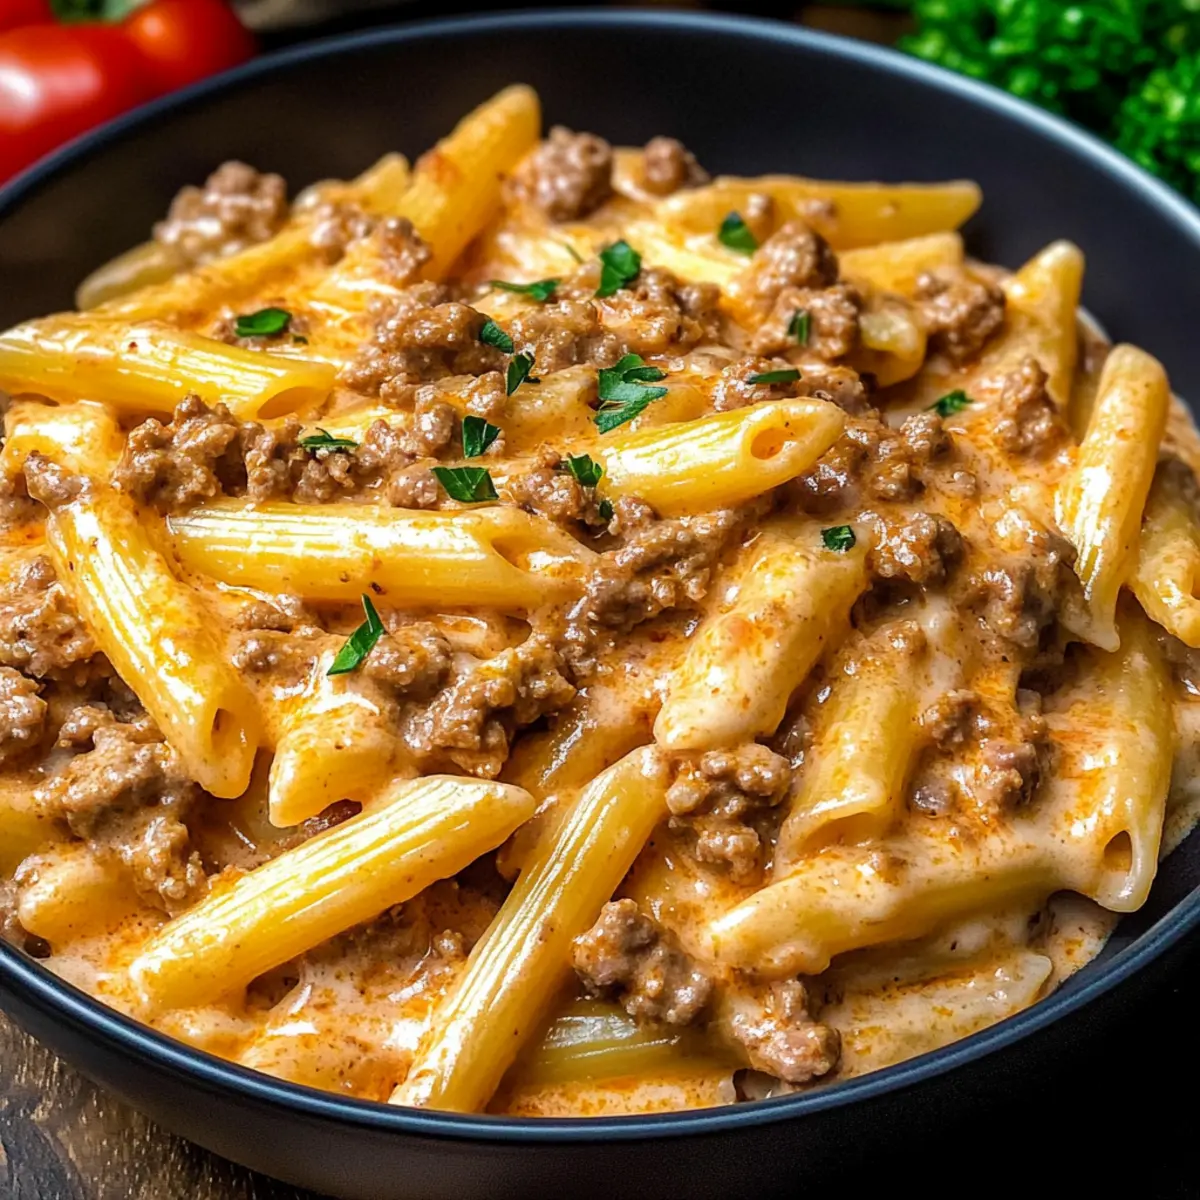
As I stood in my kitchen, the aroma of sautéed garlic and onions enveloped me like a warm hug, instantly reminding me why cooking can be such a delightful escape. Today, I’m thrilled to share my favorite recipe for High Protein Creamy Beef Pasta, a dish that pairs comfort with nutrition and is perfect for those bustling weeknights. With lean ground beef and Greek yogurt coming together, this creamy beef pasta isn’t just a hearty meal; it’s a family-friendly dinner that keeps everyone satisfied without the fuss. Plus, it’s quick to whip up, leaving you more time to unwind with loved ones. So, who’s ready to create a plateful of pure pasta perfection?

Why Will You Adore This Pasta Recipe?

Simplicity, this high protein creamy beef pasta is ready in just 30 minutes, making it a perfect choice for busy weeknights. Rich, creamy flavor comes from a delightful mix of Greek yogurt and lean ground beef, ensuring no one misses the heavy sauces. Versatility shines through, allowing you to swap ingredients — think ground turkey or a veggie-packed version with spinach! Crowd pleaser, it’s a meal that even picky eaters will enjoy, leaving everyone begging for seconds. If you love this, don’t forget to try my Marry Shrimp Pasta or Sticky Beef Noodles.

Creamy Beef Pasta Ingredients

For the Pasta
Pasta (penne or fusilli) – A versatile base; feel free to use gluten-free pasta if needed.

For the Meat Sauce
Lean Ground Beef – The protein powerhouse for this creamy beef pasta; substitute with ground turkey for a lighter option.
Garlic – Fresh garlic adds a punch of flavor; powdered garlic works if you’re in a rush.
Onion – Provides a savory foundation; shallots can give a milder taste if desired.
Diced Tomatoes – Brings moisture and flavor; use fresh tomatoes for a garden-fresh touch.

For the Creaminess
Greek Yogurt – This ingredient brings richness and high protein content; sour cream can be a suitable alternative.
Parmesan Cheese – Adds depth of flavor; grated cheese melts better into the sauce for that creamy texture.

Step‑by‑Step Instructions for Creamy Beef Pasta

Step 1: Cook the Pasta
Begin by bringing a large pot of salted water to a boil over high heat. Once the water is bubbling, add your pasta (penne or fusilli) and cook according to the package instructions, typically around 8–10 minutes, until al dente. You want the pasta to be firm yet tender, so taste a piece before draining. Once cooked, drain the pasta in a colander and set it aside.

Step 2: Brown the Beef
In a large skillet, heat a drizzle of olive oil over medium heat. Add the lean ground beef and cook for about 6–8 minutes, breaking it apart with a wooden spoon as it sizzles. Make sure it’s fully browned with no pink spots remaining, which ensures that your creamy beef pasta will be packed with flavorful goodness. Once browned, drain any excess grease if necessary.

Step 3: Sauté Aromatics
With the beef still in the skillet, toss in the minced garlic and chopped onion. Sauté for about 2–3 minutes, stirring frequently, until the onion becomes translucent and fragrant. The garlic should be just golden but not burnt, as this will enhance the flavor base of your creamy beef pasta, creating a mouthwatering aroma that fills your kitchen.

Step 4: Mix the Sauce
Lower the heat to medium-low and carefully stir in the Greek yogurt and grated Parmesan cheese. Allow these elements to meld together for about 2 minutes, stirring constantly until you achieve a smooth and creamy consistency. As the cheese melts, feel free to add in the diced tomatoes, mixing them thoroughly with the sauce to boost the flavor and moisture of your creamy beef pasta.

Step 5: Combine Everything
Next, incorporate the drained pasta back into the skillet, gently tossing everything together until the pasta is evenly coated in the creamy sauce. Heat everything through for another 2–3 minutes, allowing the flavors to combine beautifully. If the sauce seems too thick, a splash of pasta water can help loosen it up for the perfect creamy beef pasta texture.

Step 6: Serve and Garnish
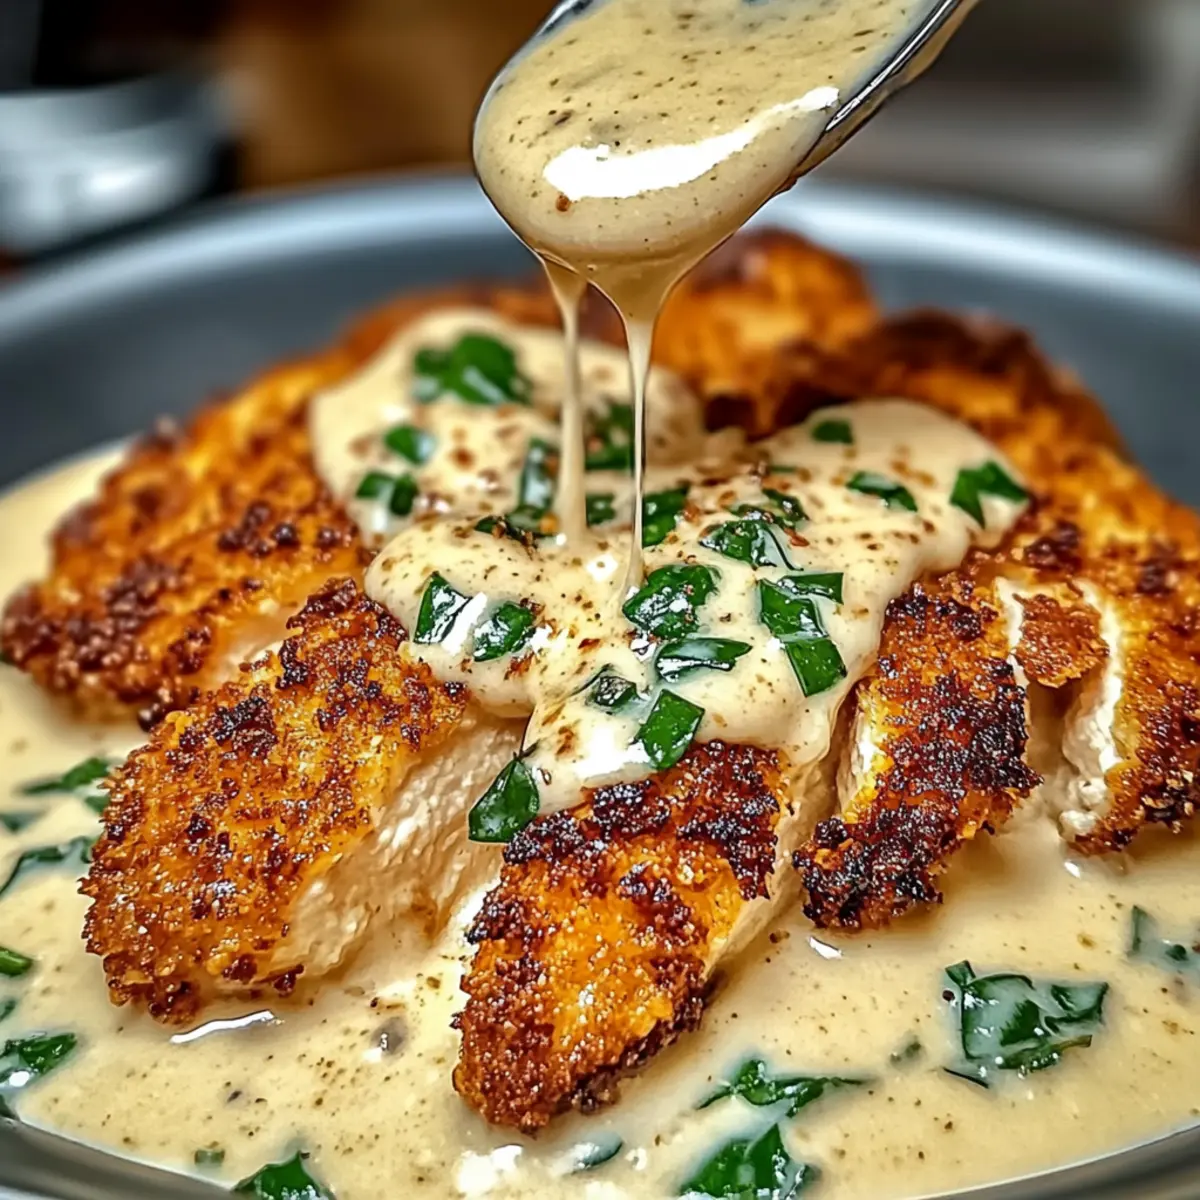
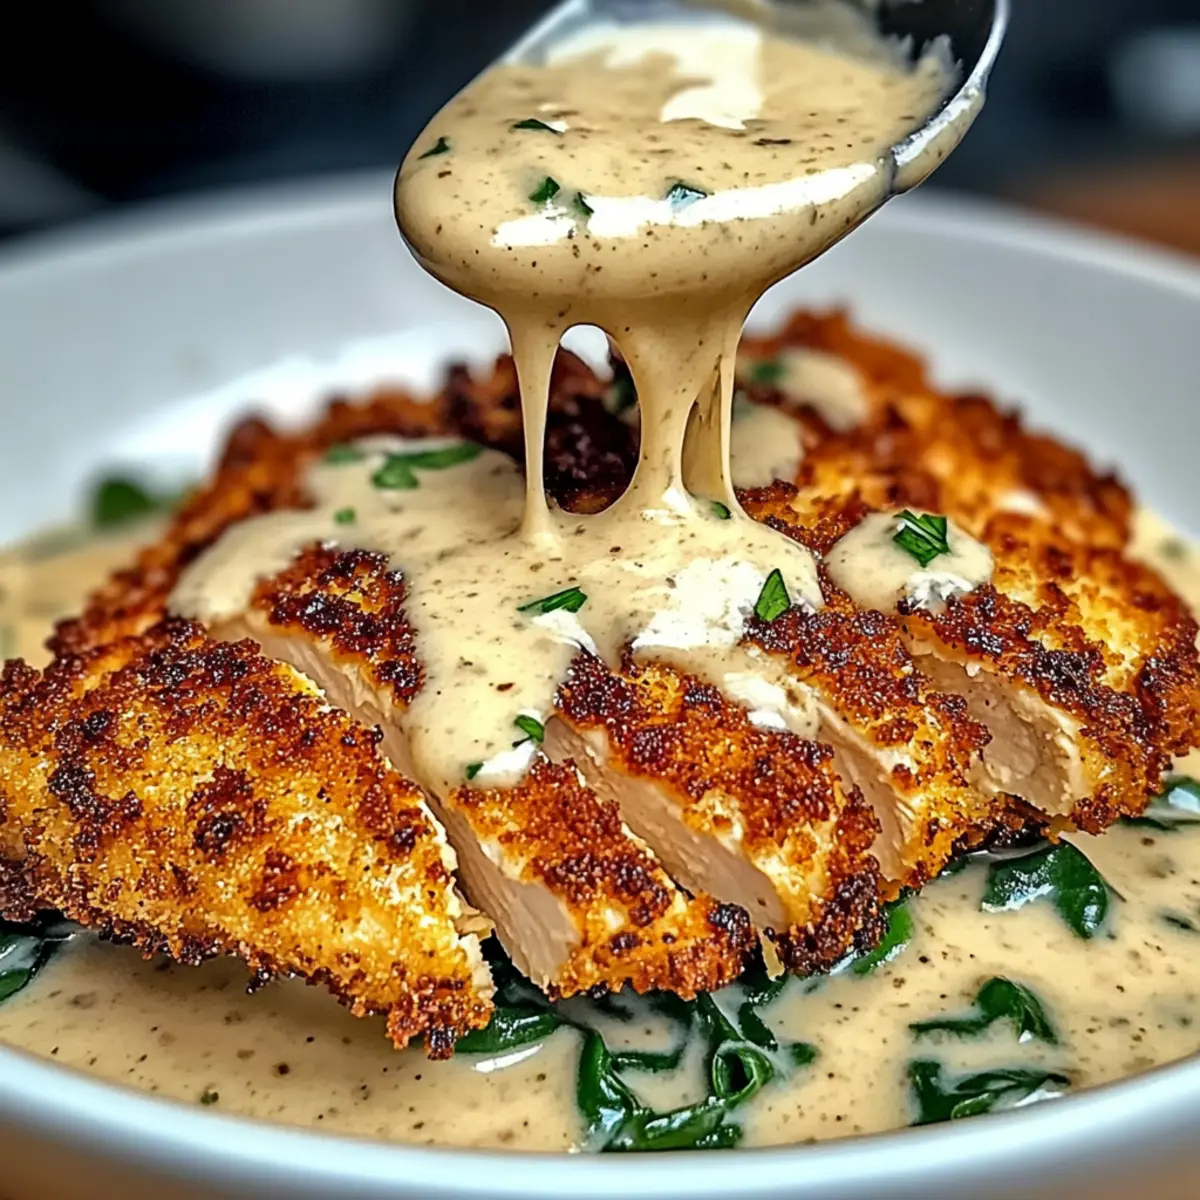
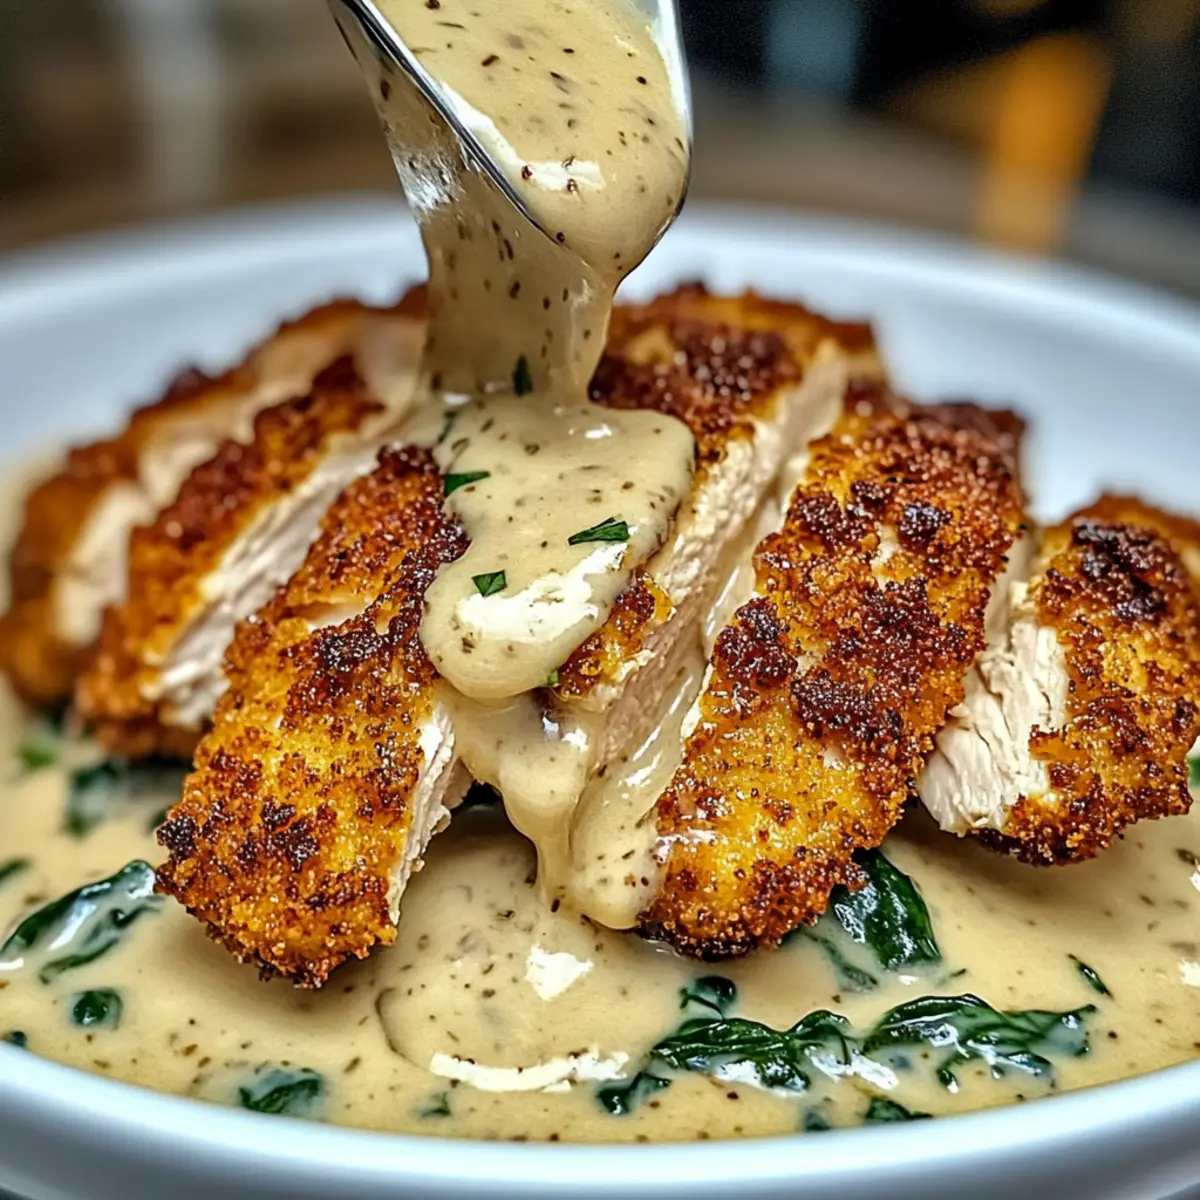
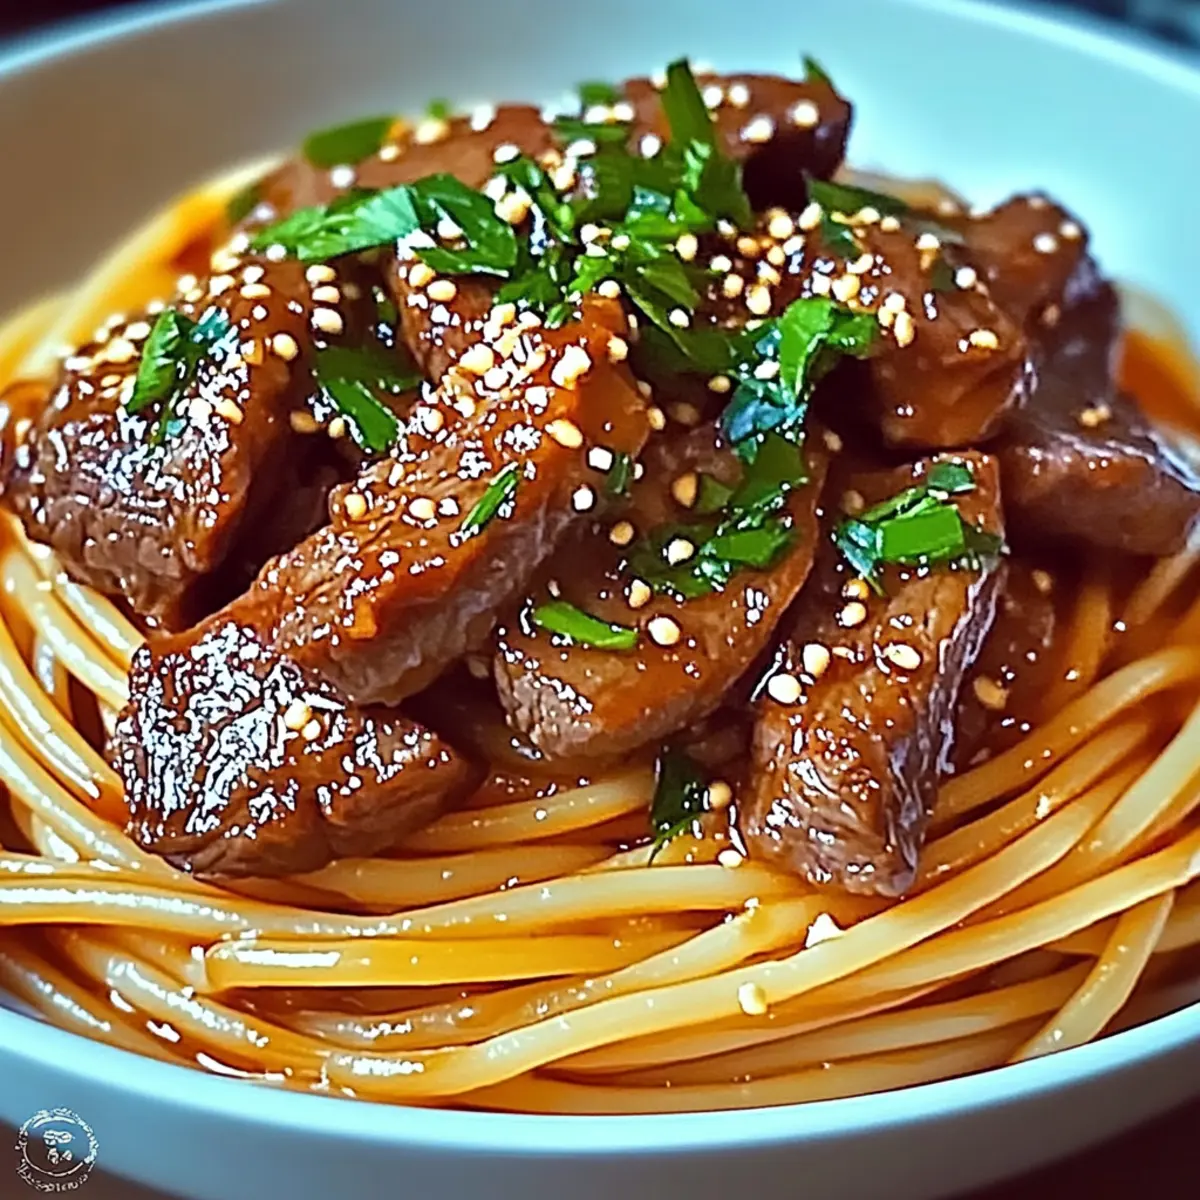
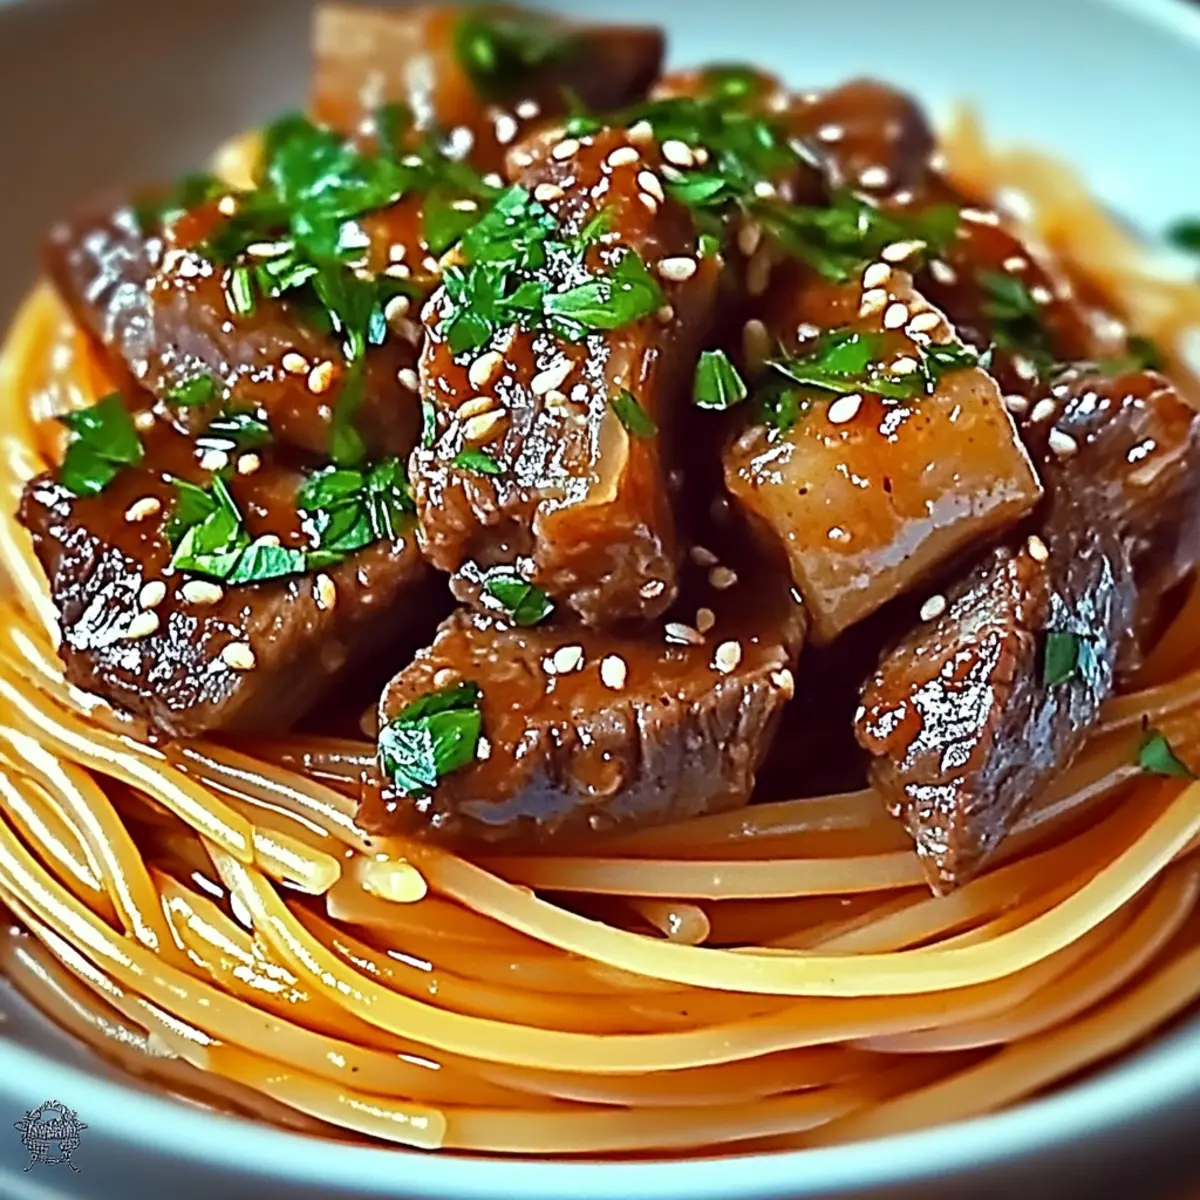
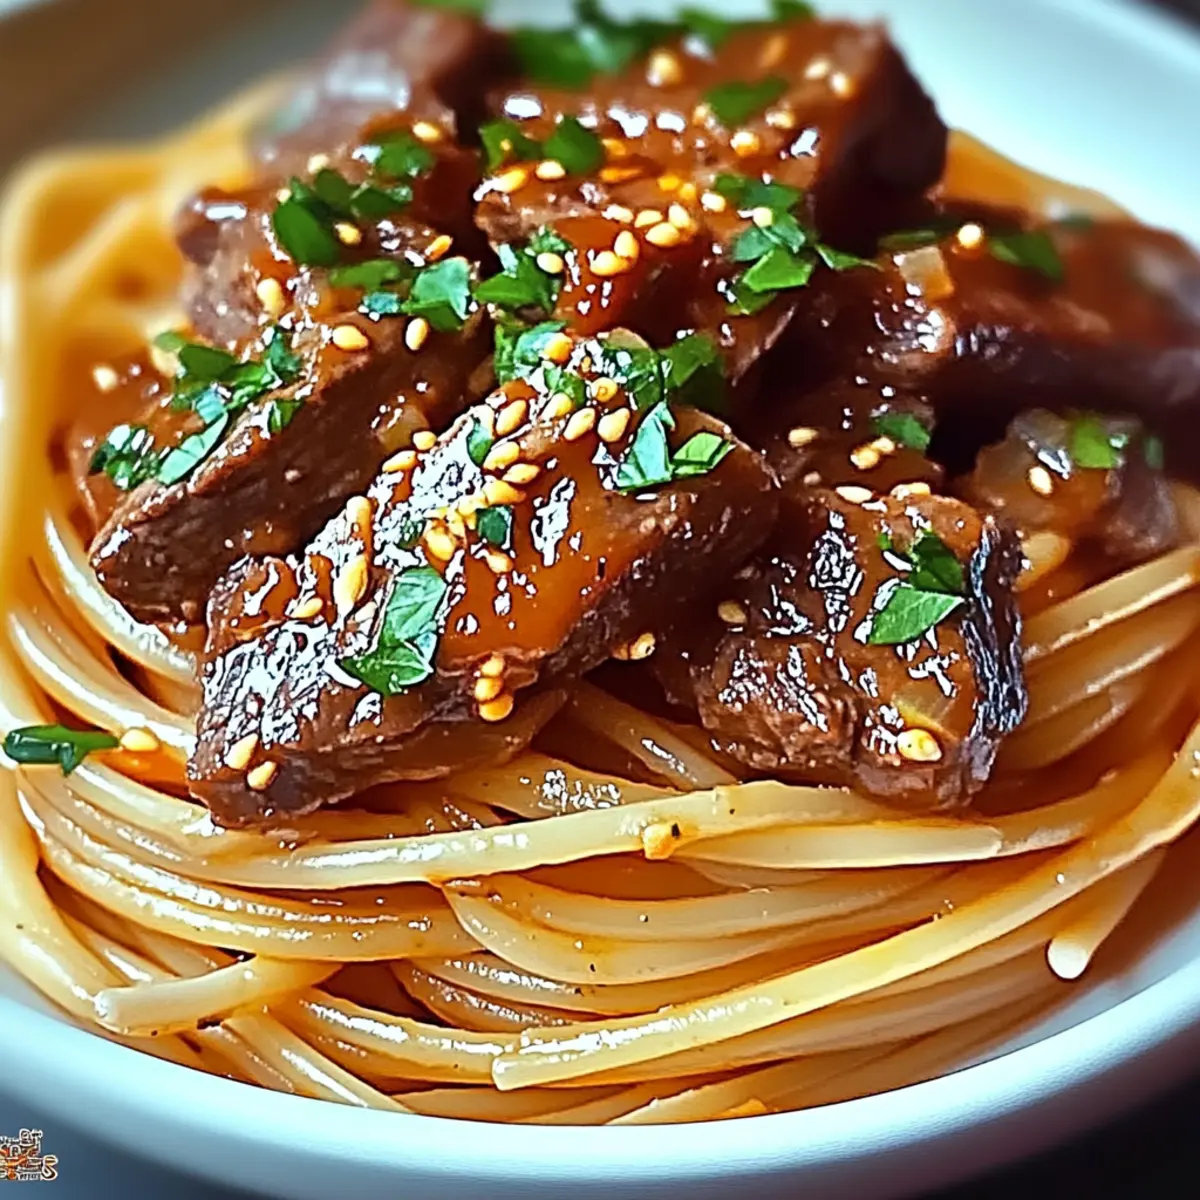
Once everything is well-combined and heated, transfer the creamy beef pasta to serving plates. Add extra grated Parmesan on top for a delightful finish, accompanied by a sprinkle of cracked pepper if you wish. This pasta dish is now ready to wow your weeknight dinner crew, offering a balance of comfort and nutrition everyone will love.

Make Ahead Options

These High Protein Creamy Beef Pasta make-ahead options are a game changer for your busy weeknights! You can prepare the meat sauce by cooking the beef, sautéing the garlic and onion, and mixing in the Greek yogurt and Parmesan up to 24 hours in advance. Just refrigerate the sauce in an airtight container to keep it fresh. The pasta can also be cooked and stored separately for up to 3 days; simply toss it with a bit of olive oil to prevent sticking. When you’re ready to serve, combine the sauce and pasta in a skillet over low heat, adding a splash of water if the sauce has thickened, and warm everything through for a delicious, quick dinner that tastes just as good as when freshly made.

What to Serve with High Protein Creamy Beef Pasta

Creating a delightful weeknight dinner that excites the senses doesn’t stop with just the pasta!

  • Garlic Bread:
    The ultimate comforting side, its crispy exterior paired with melting butter and garlic guarantees a wonderful balance to the creamy pasta.

  • Mixed Green Salad:
    Crisp greens tossed with a light vinaigrette add refreshing crunch, cutting through the richness of the creamy beef pasta.
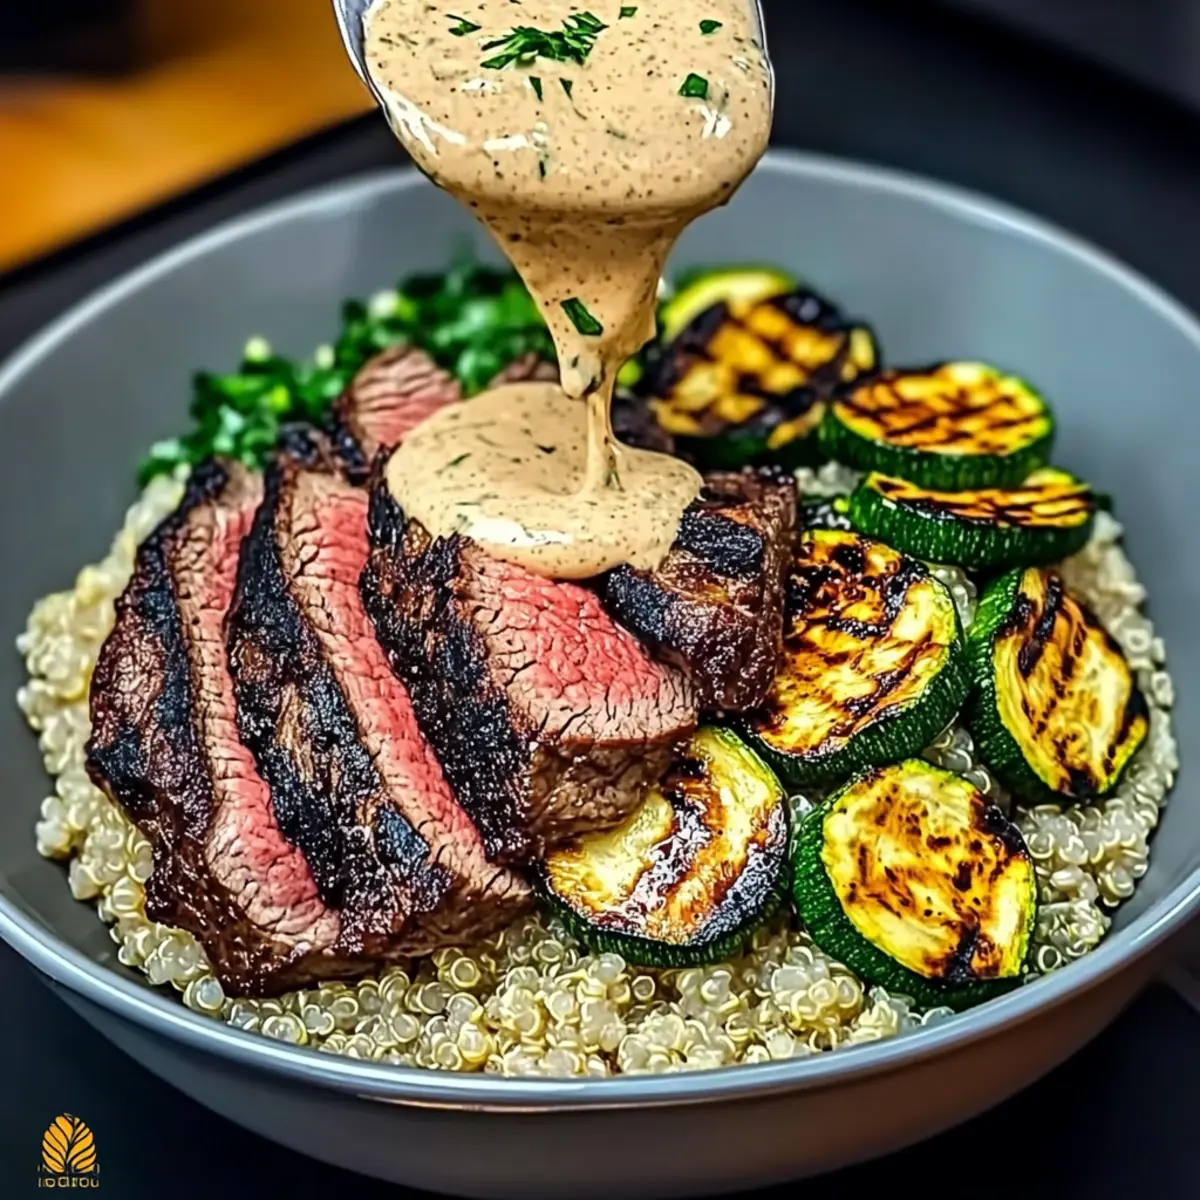
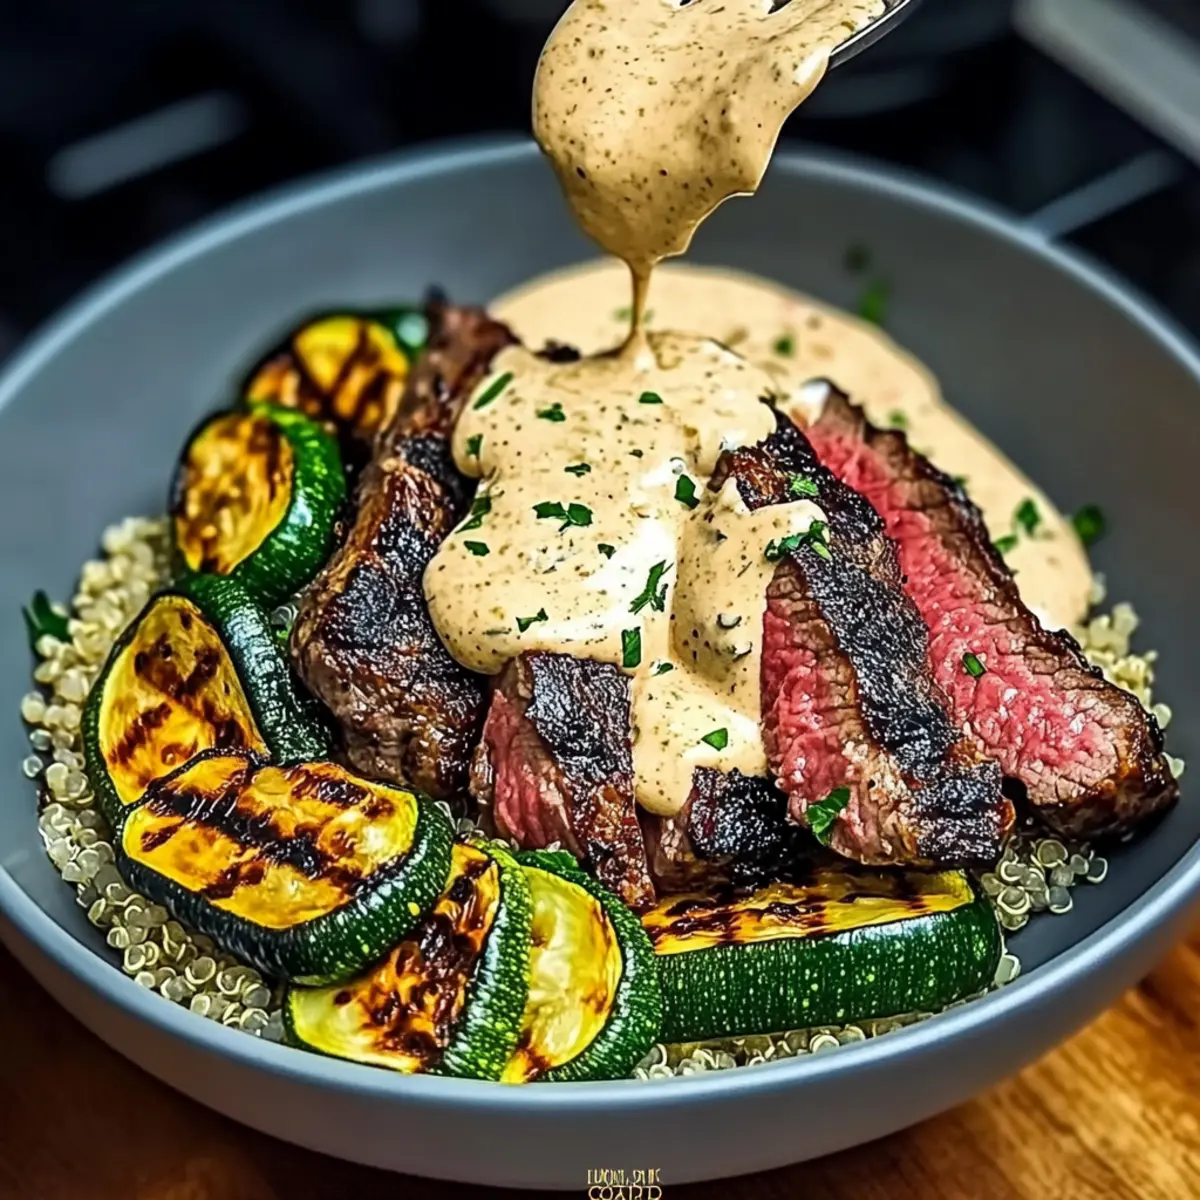
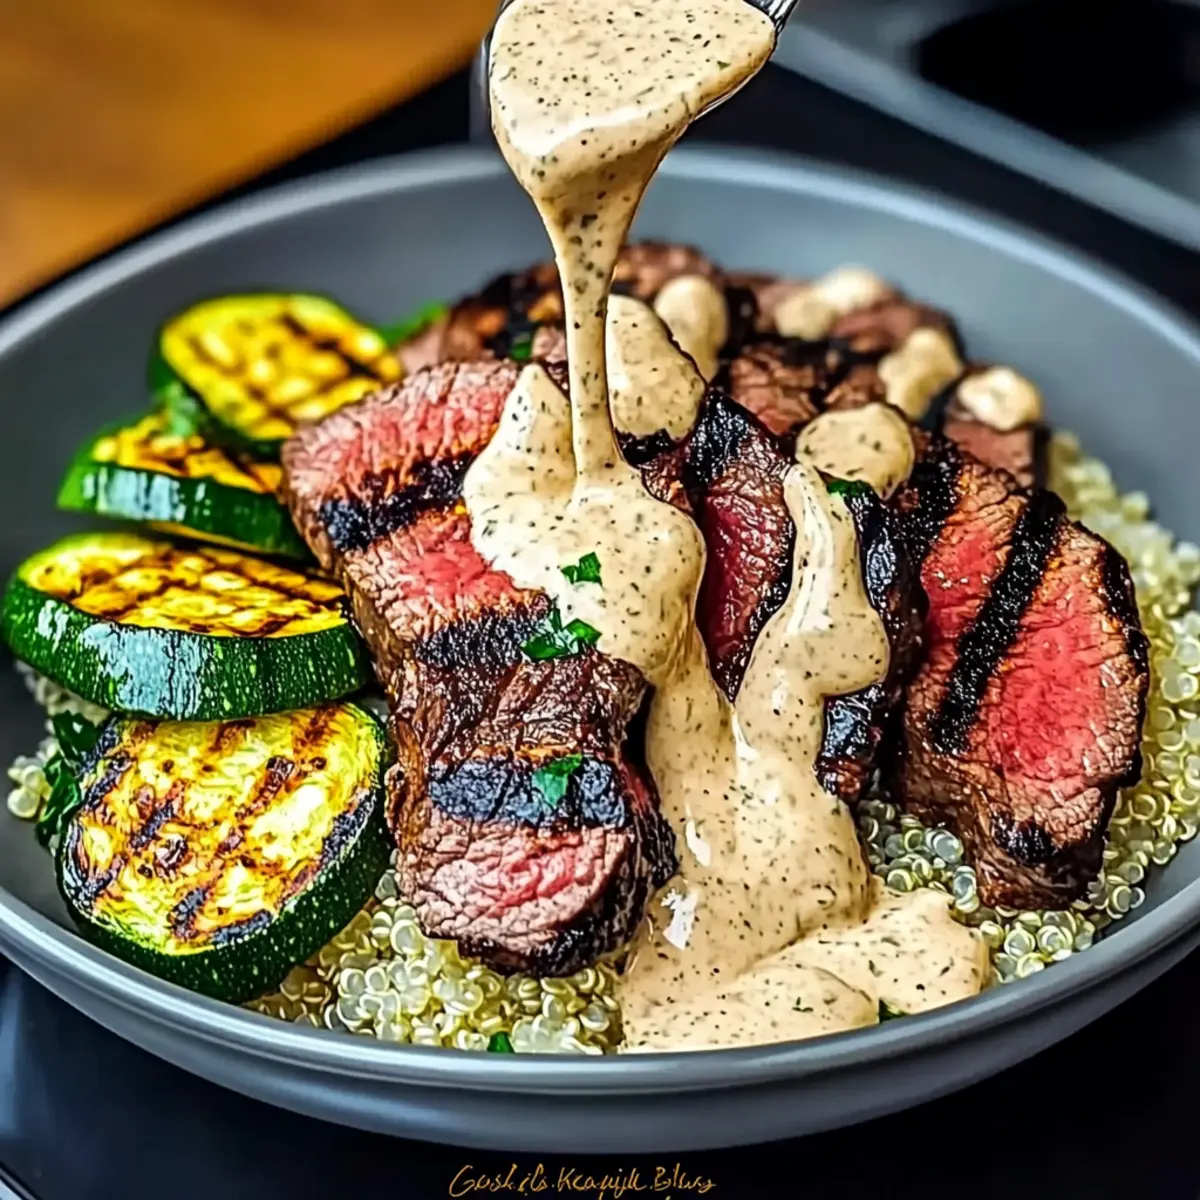
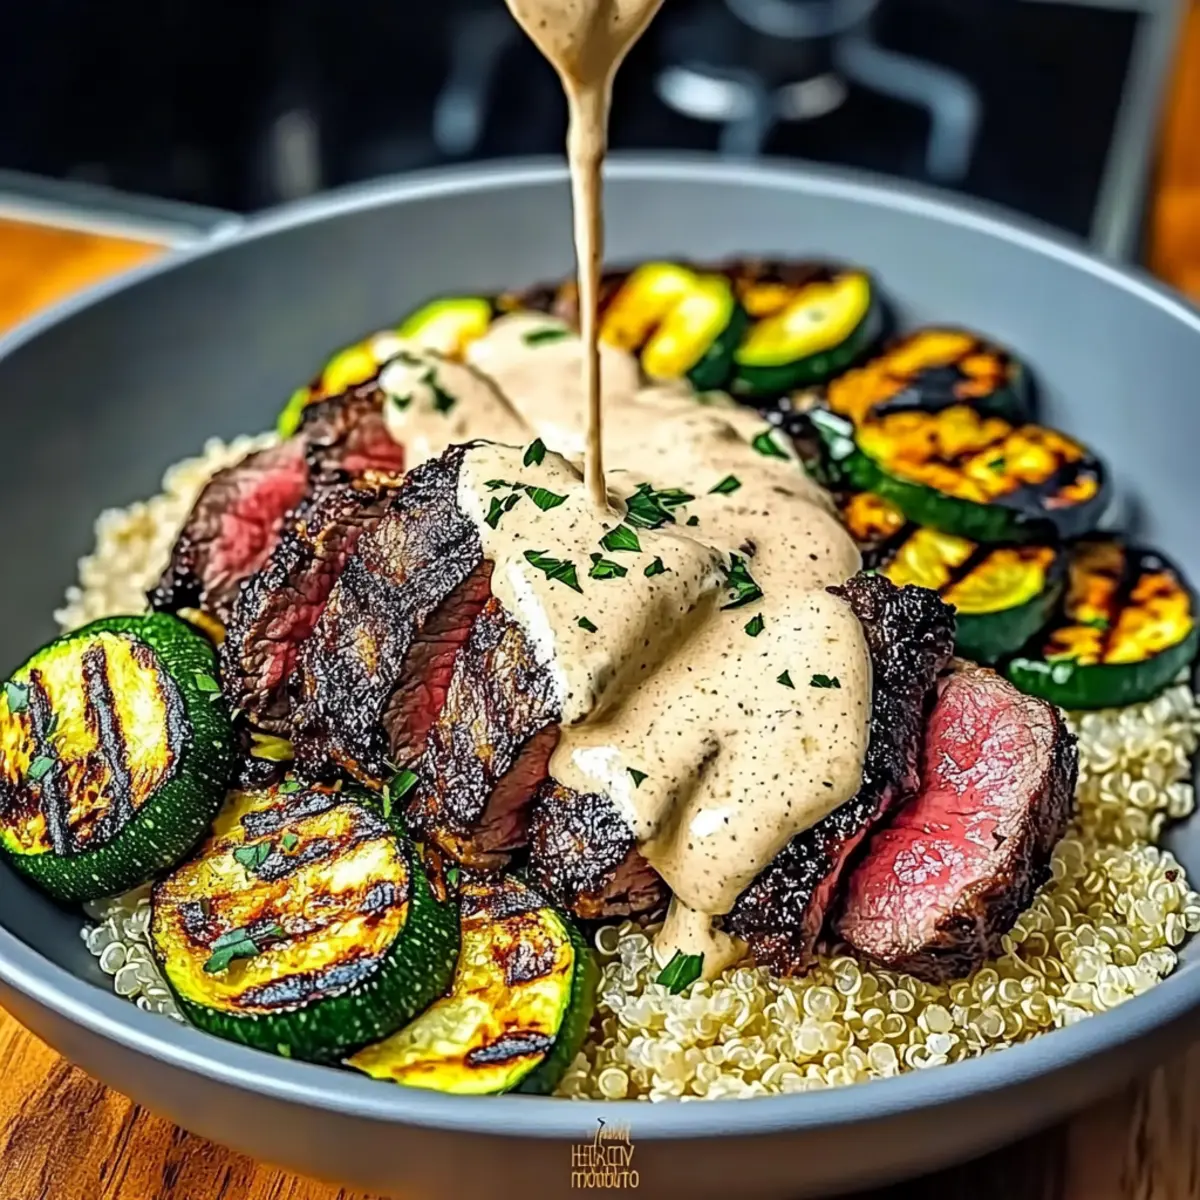
  • Grilled Vegetables:
    Charred veggies such as zucchini and bell peppers introduce smokiness and vibrant colors, making your plate feel complete and wholesome.

  • Roasted Broccoli:
    Tender yet slightly crunchy, this nutritious side brings an earthy flavor that beautifully complements the creamy texture of the pasta.

  • Sautéed Spinach:
    Sautéed with a hint of garlic, the spinach adds a pop of color and a nutrient boost that enhances this dish’s comfort factor.

  • Red Wine:
    A glass of smooth red wine pairs beautifully with the rich flavors, enhancing the overall dining experience while inviting warmth and sophistication.

  • Cheesy Garlic Biscuits:
    Fluffy biscuits fresh from the oven are a powerhouse of comfort foods that bring joy to any meal, perfect for mopping up leftover sauce!

  • Tiramisu:
    End on a sweet note with this classic Italian dessert, offering a luscious coffee-infused finish to your satisfying dinner.

Creamy Beef Pasta Variations

Feel free to customize this creamy beef pasta to suit your taste and dietary needs!

  • Vegetarian Option: Substitute the ground beef with lentils or chopped mushrooms for a hearty meat-free meal. The lentils offer a deliciously earthy flavor that everyone will love.

  • Dairy-Free Delight: Use coconut yogurt and nutritional yeast instead of Greek yogurt and Parmesan. The result is a creamy, plant-based pasta that’s surprisingly satisfying!

  • Extra Veggie Boost: Toss in any seasonal vegetables like bell peppers or zucchini during the sautéing stage. This not only enhances nutrition but also adds vibrant color to your dish.

  • Spicy Kick: For those who enjoy a bit of heat, sprinkle in some red pepper flakes or add diced jalapeños to your sautéed aromatics. This gives the pasta a lovely zing!

  • Mediterranean Twist: Enhance the flavors with sun-dried tomatoes, olives, and fresh basil. This variation transports you to the sunny shores of Italy with every bite.

  • Noodle Switch-Up: Use spiralized zucchini or cauliflower rice instead of traditional pasta for a low-carb version. It’s a fresh and healthy approach that maintains all the flavors you love!

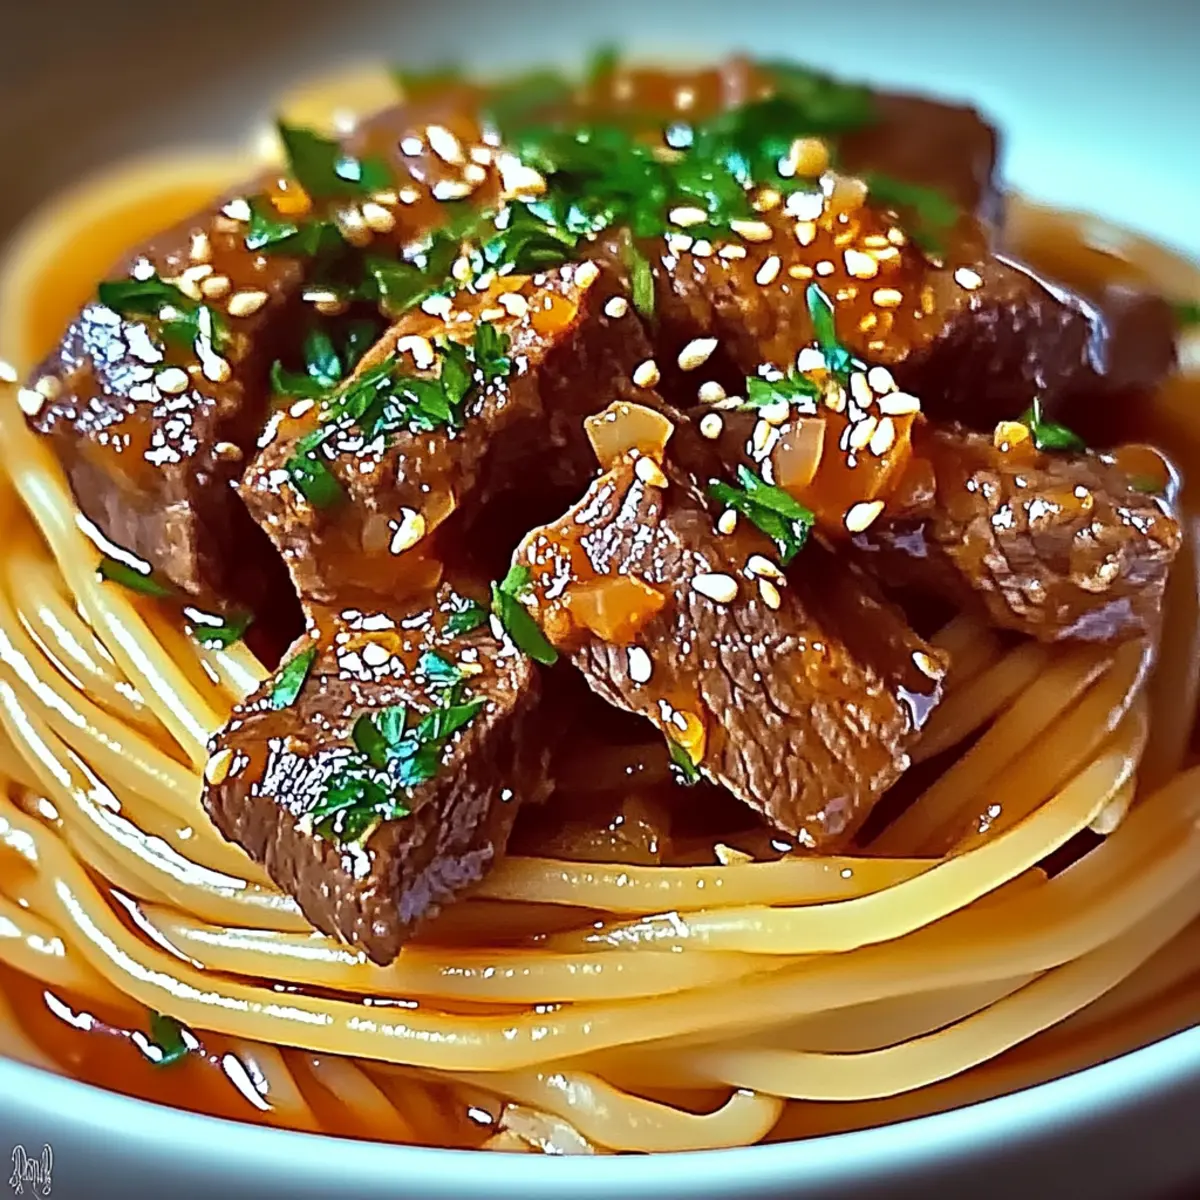
  • Fusion Flavor: Mix in some soy sauce and sesame oil along with the beef for an Asian-inspired creamy beef pasta. The umami flavor adds a delightful twist reminiscent of dishes like Korean Ground Beef!

  • Cheesy Heaven: Amp up the creaminess by using a blend of cheeses like mozzarella and cheddar, perfect for cheese lovers who want that gooey texture in their creamy beef pasta!

Storage Tips for Creamy Beef Pasta

Fridge: Store leftover creamy beef pasta in an airtight container for up to 3 days. Ensure the lid is secure to maintain freshness and prevent odors from mixing.

Freezer: For longer storage, freeze the creamy beef pasta in a freezer-safe container for up to 2 months. Portion it out for easy reheating later.

Reheating: When ready to enjoy, reheat in the microwave or on the stove with a splash of water or broth to regain creaminess. Stir occasionally to heat evenly and prevent sticking.

Thawing: If frozen, thaw the creamy beef pasta in the fridge overnight before reheating for the best texture.

Tips for the Best Creamy Beef Pasta

  • Quality Beef Matters: Use lean ground beef for a healthier option. Check for a higher meat-to-fat ratio to avoid excess grease in your creamy beef pasta.

  • Perfectly Cooked Pasta: Aim for al dente pasta! It holds onto the sauce better and gives a delightful texture, ensuring your creamy beef pasta isn’t mushy.

  • Add Flavor Gradually: When sautéing garlic and onion, keep stirring to avoid burning. This step enhances flavors, creating a delicious base for your creamy beef pasta.

  • Creaminess Control: Mix Greek yogurt into the sauce off the heat. This prevents curdling, ensuring a smooth, creamy texture in your beef pasta.

  • Thickening Tip: If your sauce seems too thin, slowly stir in a tablespoon of flour or cornstarch slurry. This will effortlessly achieve the perfect creamy consistency for your beef pasta.

Creamy Beef Pasta Recipe FAQs

What type of pasta is best for creamy beef pasta?
I recommend using penne or fusilli for this recipe, as their shapes hold the creamy sauce beautifully. You can also opt for gluten-free pasta if you’re avoiding gluten, which works just as well to create a satisfying meal.

How can I tell when the lean ground beef is cooked properly?
It’s important to ensure that the beef is fully browned with no pink spots visible, which typically takes about 6 to 8 minutes over medium heat. This helps deepen the flavors and guarantees that your creamy beef pasta is not only safe to eat but packed with deliciousness.

What are some storage methods and durations for leftover creamy beef pasta?
Store any leftover creamy beef pasta in an airtight container in the refrigerator for up to 3 days. Make sure it cools down before sealing to capture freshness. When ready to eat, just reheat gently on the stove with a splash of water or broth to bring it back to life!

Can I freeze creamy beef pasta? If yes, how?
Absolutely! To freeze, let the pasta cool completely, and then transfer portions into freezer-safe containers. It can be frozen for up to 2 months. When you’re ready to eat, thaw in the refrigerator overnight and reheat on the stovetop; adding a bit of liquid can help regain its creamy texture.

What can I do if the sauce turns out too thin?
If you find your creamy beef pasta sauce isn’t thick enough, whisk in a tablespoon of flour or a cornstarch slurry (mix 1 tablespoon of cornstarch with 2 tablespoons of cold water) while the sauce is simmering on low heat. This will help thicken it to that velvety consistency we all crave!

Are there any dietary considerations for this recipe?
This recipe contains lean beef and dairy products, including Greek yogurt and Parmesan cheese. If you have allergies, consider using ground turkey for the meat and a dairy-free yogurt or nutritional yeast as a substitute for a vegan-friendly option. Always adjust ingredients according to anyone’s dietary needs you’re serving.

Creamy Beef Pasta

Creamy Beef Pasta That Will Wow Your Weeknight Dinner Crew

This creamy beef pasta combines comfort and nutrition, featuring lean ground beef and Greek yogurt for a hearty, family-friendly meal.
Prep Time 10 minutes
Cook Time 20 minutes
Total Time 30 minutes
Servings: 4 servings
Course: Pasta
Cuisine: Italian
Calories: 450

Ingredients
  

For the Pasta
  • 8 ounces Pasta (penne or fusilli) Feel free to use gluten-free pasta if needed.
For the Meat Sauce
  • 1 pound Lean Ground Beef Substitute with ground turkey for a lighter option.
  • 3 cloves Garlic Fresh garlic adds a punch of flavor; powdered garlic works if you're in a rush.
  • 1 medium Onion Shallots can give a milder taste if desired.
  • 14.5 ounces Diced Tomatoes Use fresh tomatoes for a garden-fresh touch.
For the Creaminess
  • 1 cup Greek Yogurt Sour cream can be a suitable alternative.
  • 1/2 cup Parmesan Cheese Grated cheese melts better into the sauce for that creamy texture.

Equipment

  • Large pot
  • Large skillet
  • Colander
  • Wooden spoon

Method
 

Step-by-Step Instructions for Creamy Beef Pasta
  1. Begin by bringing a large pot of salted water to a boil over high heat. Add your pasta (penne or fusilli) and cook according to the package instructions, about 8–10 minutes, until al dente. Drain the pasta.
  2. In a large skillet, heat a drizzle of olive oil over medium heat. Add the lean ground beef and cook for about 6–8 minutes, breaking it apart until fully browned. Drain any excess grease.
  3. With the beef still in the skillet, add the minced garlic and chopped onion. Sauté for about 2–3 minutes, until the onion is translucent.
  4. Lower the heat to medium-low and stir in the Greek yogurt and grated Parmesan cheese for about 2 minutes until smooth. Add in the diced tomatoes and mix thoroughly.
  5. Incorporate the drained pasta back into the skillet, tossing everything together until evenly coated. Heat for another 2–3 minutes.
  6. Transfer the creamy beef pasta to serving plates. Add extra grated Parmesan on top and serve.

Nutrition

Serving: 1servingCalories: 450kcalCarbohydrates: 45gProtein: 30gFat: 15gSaturated Fat: 7gPolyunsaturated Fat: 1gMonounsaturated Fat: 5gCholesterol: 80mgSodium: 600mgPotassium: 700mgFiber: 5gSugar: 5gVitamin A: 500IUVitamin C: 6mgCalcium: 150mgIron: 3mg

Notes

Use lean ground beef for a healthier option and try to cook pasta al dente for the best texture.

Tried this recipe?

Let us know how it was!

Savor the Flavor: Grilled Steak Bowl with Creamy Sauce & Grilled Zucchini

The sound of sizzling steak fills the air as I fire up the grill, and I can hardly contain my excitement for what’s about to unfold. Introducing my favorite Grilled Steak Bowl with Creamy Garlic Sauce & Grilled Zucchini! This dish is not just a meal; it’s an experience brimming with flavor, texture, and heartiness that will leave you feeling satisfied yet wanting more. With the perfect blend of protein, vibrant veggies, and a luscious creamy sauce, it’s a crowd-pleaser for family dinners or casual gatherings. Plus, you can easily customize this recipe to fit any dietary needs—swap the beef for chicken or go vegetarian, and choose your favorite base, whether it’s quinoa, rice, or even cauliflower rice. Are you ready to elevate your next meal? Let’s dive into this mouthwatering journey together!

Why Is This Steak Bowl a Must-Try?

Flavor-Packed Delight: This Grilled Steak Bowl is an explosion of flavors! The juicy steak meets smoky grilled zucchini and a creamy garlic sauce that pulls it all together.

Endless Customization: Whether you’re a meat lover or vegetarian, you can swap proteins and grains effortlessly; try it with chicken, salmon, or even quinoa for a lighter option!

Quick and Easy: Perfect for busy weeknights, this dish can come together in under 30 minutes, making it a fantastic choice when you’re craving homemade goodness.

Nutrient-Rich: Packed with protein and fresh veggies, it strikes the right balance between indulgence and nutrition—ideal for health-conscious foodies.

Crowd-Pleaser: Its vibrant presentation and satisfying flavors make it a hit with family and friends; serve it alongside a light salad or crusty bread for an unforgettable meal.

Meal Prep Friendly: Grill everything ahead of time, allowing you to enjoy fresh flavors throughout the week. Store leftovers easily to keep meal planning effortless; check out Garlic Butter Steak Bites for more ideas!

Grilled Steak Bowl Ingredients

For the Steak
Steak (sirloin or ribeye) – Choose a cut that grills beautifully and can be sliced thinly for the best texture in your Grilled Steak Bowl.

For the Zucchini
Zucchini – Fresh and vibrant, this veggie adds a delightful crunch; feel free to swap it for eggplant or bell peppers for a twist.

For the Grains
Cooked Grains (quinoa, rice, or farro) – Acts as the hearty base for your bowl, soaking up all the creamy sauce; cauliflower rice makes for a great low-carb alternative.

For the Sauce
Sour Cream or Greek Yogurt – Rich and tangy, this forms the creamy heart of your sauce; consider plant-based options if going dairy-free.
Dijon Mustard – Adds a zesty kick to elevate the flavor of your sauce.
Garlic Powder & Smoked Paprika – These spices bring warmth and depth, enhancing the overall taste of your Grilled Steak Bowl.

For Garnishing
Fresh Parsley or Chives – A splash of greenery that not only looks good but enhances the flavor with its fresh herbal notes.

Seasoning
Olive Oil – Essential for achieving that beautiful grill marks and rich flavor on both steak and veggies.
Salt & Black Pepper – Simple yet powerful, these staples highlight the natural flavors of your ingredients.

Step‑by‑Step Instructions for Grilled Steak Bowl with Creamy Sauce & Grilled Zucchini

Step 1: Prepare the Steak
Pat the steak dry with paper towels, then rub it generously with olive oil, salt, pepper, garlic powder, and smoked paprika. Allow the seasoned steak to rest for about 20 minutes at room temperature; this helps enhance its flavor and tenderness, priming it for grilling perfection in your Grilled Steak Bowl.

Step 2: Prep Grill
While the steak is resting, preheat the grill to high heat, aiming for around 450-500°F. This ensures that your steak sears beautifully and develops that mouthwatering char. Ensure the grill grates are clean and lightly oiled to prevent sticking—your masterpiece deserves the best grilling conditions.

Step 3: Grill Zucchini
Cut the zucchini into thick slices, ensuring they are even for consistent cooking. Brush both sides lightly with olive oil and sprinkle with salt. Place the zucchini on the hot grill and cook for 2-3 minutes per side, or until they are charred and tender; they should have nice grill marks and a smoky aroma.

Step 4: Grill Steak
Once the zucchini is done, place the seasoned steak on the grill. Cook for 4-5 minutes per side for medium-rare, aiming for an internal temperature of 130°F. Turn the steak only once to achieve a perfect crust. After grilling, let it rest for at least 5 minutes to retain the juices before slicing it for your bowl.

Step 5: Cook Grains
Prepare your choice of grains—quinoa, rice, or farro—according to package instructions, typically simmering in salted water for about 15-20 minutes. Once cooked, fluff the grains with a fork and set aside; they will serve as the hearty base of your Grilled Steak Bowl, ready to soak up all that creamy sauce.

Step 6: Make Sauce
In a mixing bowl, combine sour cream or Greek yogurt with Dijon mustard, garlic powder, and smoked paprika. Add salt to taste, and if needed, water a little at a time to thin the sauce to your desired consistency. Mix until smooth and creamy, then stir in chopped fresh herbs for added flavor and brightness.

Step 7: Assemble Bowl
To create your Grilled Steak Bowl, start by layering the cooked grains at the bottom of a bowl. Next, arrange the grilled zucchini slices artistically on top, followed by the sliced steak for a satisfying presentation. Drizzle your creamy sauce generously over the bowl; finish by garnishing with additional herbs for a pop of color and flavor.

Expert Tips for Grilled Steak Bowl

Doneness Alert: Use a meat thermometer to ensure your steak reaches the desired doneness; 130°F for medium-rare is ideal.

Resting Time: Always let your steak rest for at least 5 minutes after grilling; this retains its juices and enhances flavor in your Grilled Steak Bowl.

Grain Choices: Experiment with different grains like farro or quinoa to find your favorite texture; both soak up creamy sauces beautifully.

Zucchini Tips: Avoid overcooking zucchini; it should be charred yet tender, providing a delightful crunch in your bowl.

Sauce Consistency: Adjust the creaminess of your sauce by gradually adding water; start with a little to avoid making it too thin.

Meal Prep Friendly: Grill extra steak and veggies ahead of time for easy meal prep throughout the week—great for quick lunches or dinners!

What to Serve with Grilled Steak Bowl with Creamy Sauce & Grilled Zucchini

Elevate your dining experience by pairing this sumptuous steak bowl with delightful side dishes that enhance its rich flavors.

  • Garlicky Breadsticks: The buttery, herby taste complements the savory steak, making every bite more satisfying. Perfect for soaking up any leftover creamy sauce!
  • Crisp Garden Salad: Fresh greens and vibrant veggies add a refreshing crunch, balancing the richness of the creamy sauce and grilled zucchini beautifully.
  • Creamy Coleslaw: A tangy, crunchy side that contrasts the warm steak bowl, providing a delightful texture that complements every element of the dish.
  • Roasted Sweet Potatoes: Their natural sweetness and crispy edges add a contrasting flavor to the savory elements, creating a satisfying, wholesome meal.
  • Refreshing Cucumber Salad: Cool and crisp, this salad brightens the palate, making for a delightful counterpart to the hearty steak and creamy sauce.
  • Chilled White Wine: A glass of light, chilled Sauvignon Blanc enhances the meal with its crisp acidity, beautifully marrying the flavors of the steak and sauce.
  • Chocolate Brownies: Indulge your sweet tooth with a fudgy dessert to end the meal on a high note, balancing out the flavors of the savory bowl.

How to Store and Freeze Grilled Steak Bowl

Fridge: Store leftover grilled steak and vegetables in an airtight container for up to 3 days, ensuring the flavors stay fresh and vibrant.

Freezer: The grilled steak and cooked grains freeze well for up to 3 months; just separate them in individual containers. Remember to thaw overnight in the fridge before reheating!

Reheating: Use the microwave or stovetop to gently reheat the steak and grains, adding a splash of water or broth to prevent drying out.

Sauce Storage: The creamy sauce can be stored in the fridge for up to 4 days; it’s best made fresh, but it holds its flavor well when preserved.

Grilled Steak Bowl Variations & Substitutions

Feel free to get creative with this Grilled Steak Bowl while crafting a meal that suits your taste and dietary needs!

  • Chicken or Salmon: Swap out the steak for juicy grilled chicken thighs or tender salmon for a different protein option. Each brings its own unique flavors while pairing beautifully with the creamy sauce.

  • Vegetarian Delight: Replace meat with grilled portobello mushrooms or marinated chickpeas. These options deliver a satisfying texture and will make any veggie lover rejoice!

  • Cauliflower Rice: For a low-carb swapping option, use cauliflower rice instead of traditional grains. It absorbs the creamy sauce perfectly without the extra carbs.

  • Add Bold Vegetables: Toss in grilled asparagus or bell peppers alongside the zucchini to boost nutrition and flavor. These additions not only enhance the dish but also bring vibrant colors to your bowl.

  • Spicy Kick: Introduce heat with a sprinkle of red pepper flakes or a drizzle of sriracha in the creamy sauce. This simple change invites a delightful warmth that’s sure to please spice lovers!

  • Different Grains: Feel free to use farro or barley instead of quinoa or rice for a nutty flavor and a delightful chewiness. These hearty grains offer a great contrast to the creamy sauce.

  • Creamy Vegan Sauce: Opt for coconut yogurt to create a creamy, dairy-free alternative for the sauce. Adding a dash of lime juice will brighten the flavors.

  • Herb Variations: Switch up your herbs by using cilantro or basil for a fresh twist. This small change can redefine every bite and complement the smoked flavors beautifully.

Looking for even more exciting flavors? Try pairing your Steak Bowl with a delightful side dish like Shrimp Avocado Bowls with Mango Salsa or a Cajun Steak Alfredo for a fun meal combination!

Make Ahead Options

These Grilled Steak Bowls with Creamy Sauce & Grilled Zucchini are fantastic for busy weeknights and ideal for meal prep! You can grill the steak and zucchini up to 3 days in advance. To keep everything fresh, allow the steak to cool completely before slicing, then store it in an airtight container. The grilled zucchini can be refrigerated separately; this helps maintain its texture. You can also prepare the creamy sauce a day ahead, storing it in the fridge to enhance the flavors. When you’re ready to serve, simply reheat the steak and zucchini gently in a skillet, assemble the bowls with cooked grains, and drizzle with sauce for a delicious and satisfying meal.

Grilled Steak Bowl with Creamy Sauce & Grilled Zucchini Recipe FAQs

What kind of steak should I use?
Absolutely! For the best flavor and tenderness, I recommend sirloin or ribeye cuts, as they grill beautifully and can be sliced thinly. Look for steaks that have a nice marbling of fat running through the meat, as this enhances juiciness and flavor.

How long can I store leftovers?
Leftover grilled steak and vegetables can be stored in an airtight container in the fridge for up to 3 days. If you’re meal prepping, make sure to let everything cool down before sealing for maximum freshness!

Can I freeze the Grilled Steak Bowl?
Yes! You can freeze the grilled steak and cooked grains for up to 3 months. Simply separate them into individual freezer-safe containers. When you’re ready to enjoy, thaw overnight in the fridge and gently reheat in the microwave or stovetop, adding a bit of water or broth to maintain moisture.

What if my steak is tough after cooking?
If your steak turns out tough, it may have been overcooked or not rested properly. To prevent this, always use a meat thermometer to check for doneness; aim for 130°F for medium-rare and 140°F for medium. Also, remember to let your steak rest for at least 5 minutes after grilling to allow the juices to redistribute throughout the meat.

How can I make this recipe dairy-free?
Very easily! You can substitute the sour cream or Greek yogurt in the creamy sauce with a plant-based alternative like cashew cream or dairy-free yogurt. You can also use nutritional yeast for a cheesy flavor while keeping it vegan.

Can I add more vegetables to the bowl?
The more the merrier! Feel free to add other vegetables like bell peppers, asparagus, or even corn to enhance and diversify the flavor. Just remember to grill them alongside the zucchini, ensuring they’re cut to similar sizes for even cooking.

Grilled Steak Bowl with Creamy Sauce & Grilled Zucchini Recipe FAQs

Grilled Steak Bowl with Creamy Sauce & Grilled Zucchini

Savor the Flavor: Grilled Steak Bowl with Creamy Sauce & Grilled Zucchini

Experience the delightful Grilled Steak Bowl with Creamy Sauce & Grilled Zucchini, a flavorful meal that's versatile and satisfying.
Prep Time 20 minutes
Cook Time 25 minutes
Resting Time 5 minutes
Total Time 50 minutes
Servings: 4 bowls
Course: Dinner
Cuisine: American
Calories: 600

Ingredients
  

For the Steak
  • 1 pound Steak (sirloin or ribeye) Choose cuts that grill beautifully.
  • 2 tablespoons Olive Oil For seasoning the steak.
  • 1 teaspoon Salt To taste.
  • 1 teaspoon Black Pepper To taste.
  • 1 teaspoon Garlic Powder
  • 1 teaspoon Smoked Paprika
For the Grilled Zucchini
  • 2 medium Zucchini Can substitute with bell peppers or asparagus.
  • 2 tablespoons Olive Oil For coating the zucchini.
  • 1 teaspoon Salt
For the Grains
  • 1 cup Cooked Grains (quinoa, rice, or farro) Can use cauliflower rice for a low-carb option.
For the Creamy Sauce
  • 1 cup Sour Cream or Greek Yogurt This forms the rich base of the sauce.
  • 1 tablespoon Dijon Mustard Adds a zesty kick.
  • 1 teaspoon Garlic Powder
  • 1 teaspoon Smoked Paprika
  • 2 tablespoons Fresh Parsley or Chives For garnish.

Equipment

  • Grill
  • Mixing Bowl
  • Knife
  • Cutting board

Method
 

Step-by-Step Instructions
  1. Start by patting the steak dry with paper towels and rub both sides with olive oil, then season with salt, black pepper, garlic powder, and smoked paprika. Let it sit for 20 minutes.
  2. Preheat your grill to high heat (450°F to 500°F). Ensure the grill grates are clean and lightly oiled.
  3. Slice zucchini into thick rounds, brush with olive oil, and sprinkle with salt. Grill for 2-3 minutes per side until charred and tender.
  4. Place the seasoned steak on the hot grill and cook for 4-5 minutes on each side for medium-rare. Let it rest for at least 5 minutes before slicing.
  5. Prepare grains according to package instructions, usually taking about 15-20 minutes.
  6. Combine sour cream or Greek yogurt with Dijon mustard, garlic powder, smoked paprika, and a pinch of salt. Mix until smooth and fold in fresh herbs.
  7. Assemble the bowl by layering grains, topped with grilled zucchini, slices of steak, and drizzled with creamy sauce.

Nutrition

Serving: 1bowlCalories: 600kcalCarbohydrates: 50gProtein: 40gFat: 30gSaturated Fat: 10gPolyunsaturated Fat: 4gMonounsaturated Fat: 10gCholesterol: 100mgSodium: 800mgPotassium: 800mgFiber: 5gSugar: 4gVitamin A: 500IUVitamin C: 25mgCalcium: 150mgIron: 3mg

Notes

Store leftovers in an airtight container for up to 3 days. Freeze grilled steak and grains for up to 3 months.

Tried this recipe?

Let us know how it was!

Parmesan Crusted Chicken with Creamy Garlic Sauce Delight

As I stood in my kitchen, the aroma of garlic sautéing in olive oil took me back to my grandmother’s cozy home, where meals were a celebration of family and love. This Parmesan Crusted Chicken with Creamy Garlic Sauce encapsulates that same warmth, marrying crispy, cheesy chicken with a luscious, velvety sauce. Not only is this dish a delightful comfort food that satisfies any craving, but it also boasts quick prep techniques that are perfect for busy weeknights or impressing friends at a dinner gathering. Plus, it’s adaptable, allowing you to sneak in some nutritious spinach or favorite greens with ease! Ready to create a dish that’s bound to become a household favorite? Let’s dive in!

Why is This the Ultimate Comfort Dish?

Simplicity and Speed: This Parmesan Crusted Chicken can be whipped up in no time, making it a fantastic choice for those hectic evenings.

Crowd-Pleasing Flavor: The combination of crispy cheese and creamy garlic sauce offers a flavor profile that everyone at the table will love.

Versatile Adaptations: Feel free to customize by adding spinach or swapping in chicken thighs for a juicier bite, as seen in my previous recipes like Garlic Chicken Gnocchi.

Healthy Comfort: Enjoy the satisfaction of comfort food without the guilt, as it caters to low-carb diets while still packing a protein punch.

Heartfelt Tradition: This recipe draws inspiration from Italian-American cooking, bringing a taste of tradition into your home, much like my favorite Cheesy Garlic Chicken dish.

Perfect for Any Occasion: Whether it’s a casual family dinner or a special gathering with friends, this dish is sure to impress!

Parmesan Crusted Chicken Ingredients

For the Chicken

  • Chicken Breasts – Cut into small or medium pieces to ensure even cooking.
  • Salt and Pepper – Sprinkle liberally for flavor; adjust to your taste preference.
  • Olive Oil – Use for sautéing; it helps achieve a beautiful golden crust.

For the Crust

  • Grated Parmesan Cheese – Freshly grated enhances melting and adds flavor to the crust.
  • Panko Breadcrumbs – Provides a delightful crunch; substitute with regular breadcrumbs if needed.

For the Sauce

  • Garlic – Freshly minced adds a fragrant note to the sauce, heightening flavors.
  • Light or Heavy Cream – Adjust based on desired richness for a creamy sauce.
  • Italian Seasoning or Oregano – Adds fragrant herb notes for extra flavor depth.

Optional Add-Ins

  • Spinach – Toss in nutritious and vibrant greens for added color and health benefits; can be omitted if preferred.

This Parmesan Crusted Chicken with Creamy Garlic Sauce is not just a meal; it’s a moment of joy at your dining table!

Step‑by‑Step Instructions for Parmesan Crusted Chicken with Creamy Garlic Sauce

Step 1: Season the Chicken
Begin by generously seasoning the chicken breasts with salt and pepper on both sides. This essential step elevates the flavor of your Parmesan Crusted Chicken with Creamy Garlic Sauce. Allow the seasoned chicken to rest for about 10 minutes to absorb the flavors while you prepare the next steps.

Step 2: Prepare the Crust Mixture
In a shallow dish, combine freshly grated Parmesan cheese and panko breadcrumbs, mixing them well. This mixture will create a delightful crunchy coating for the chicken. After combining, press each chicken breast into the breadcrumb mixture, ensuring both sides are coated evenly. Set aside to allow the crust to adhere.

Step 3: Heat the Skillet
Heat a generous drizzle of olive oil in a large skillet over medium-high heat. It’s the perfect time to let the oil get hot until shimmering, which will help achieve a golden-brown crust when the chicken is added. This step typically takes about 2 minutes.

Step 4: Sear the Chicken
Carefully add the coated chicken breasts to the hot skillet, ensuring they are not overcrowded. Sear each side for 3–4 minutes until they turn a beautiful golden brown and develop a crispy crust. Use tongs to flip the chicken gently, so the crust remains intact.

Step 5: Sauté the Garlic
Once the chicken is seared, reduce the heat to medium-low and add the freshly minced garlic to the skillet. Sauté for about 1 minute, stirring frequently, until the garlic is fragrant but not browned. The delicious aroma will enhance the flavor of your creamy sauce.

Step 6: Create the Creamy Sauce
Pour in the light or heavy cream, followed by the Italian seasoning or oregano. Mix well to combine all ingredients in the skillet, allowing the creamy sauce to embrace that garlicky goodness. Cook for an additional 2–3 minutes, letting the flavors meld beautifully.

Step 7: Add Optional Spinach
If you’re opting to include spinach, now’s the time to toss it into the skillet. Stir gently, allowing the spinach to wilt into the creamy garlic sauce. For an even thicker sauce, sprinkle in some additional grated Parmesan and mix well, enhancing the richness of your dish.

Step 8: Cook Through
Cover the skillet with a lid and continue cooking the chicken for another 8–10 minutes. This ensures that the internal temperature reaches 165°F, resulting in perfectly cooked chicken. During this time, the delicious sauce will thicken, coating the chicken beautifully.

Step 9: Final Touches and Serve
Once cooked, adjust the seasoning of the creamy garlic sauce to your liking. Plate your Parmesan Crusted Chicken with Creamy Garlic Sauce, generously drizzling the sauce atop each piece. Serve hot, and enjoy a comforting meal that feels like a warm hug!

Storage Tips for Parmesan Crusted Chicken

Fridge: Store any leftover Parmesan Crusted Chicken in an airtight container for up to 3 days. To maintain its crispy texture, consider reheating it in an oven rather than a microwave.

Freezer: For longer storage, freeze the cooked chicken in a freezer-safe bag for up to 3 months. Ensure it is well-wrapped to prevent freezer burn.

Reheating: When ready to enjoy again, thaw overnight in the fridge, then reheat in the oven at 350°F until heated through to restore its delightful crunch.

Make-Ahead: This dish can also be prepped in advance; assemble and refrigerate before cooking. Just remember to add a few extra minutes to the cooking time if starting from cold.

Make Ahead Options

Preparing the Parmesan Crusted Chicken with Creamy Garlic Sauce ahead of time is a smart way to simplify your evening meals! You can season the chicken and coat it in the Parmesan-panko mixture up to 24 hours in advance; simply refrigerate it covered. Additionally, the creamy garlic sauce can be made up to 3 days ahead—just store it in an airtight container in the fridge to maintain its luscious texture. When you’re ready to serve, reheat the chicken gently in a skillet over medium heat until it’s warmed through, then pour the prepared sauce over it, letting it heat up without boiling. This ensures that everything retains its delicious quality, making your meal just as delightful as freshly cooked!

What to Serve with Parmesan Crusted Chicken with Creamy Garlic Sauce

Elevate your meal experience with these delightful pairings that complement the crispy chicken and luscious sauce perfectly.

  • Creamy Mashed Potatoes: Their buttery smoothness provides a comforting contrast to the crunchy chicken, making every bite feel luxurious.

  • Garlic Roasted Vegetables: These vibrant veggies add a fresh, caramelized sweetness that enhances the dish’s savory flavors, while bringing both texture and nutrition to your plate.

  • Caesar Salad: Crisp Romaine tossed with Caesar dressing creates a refreshing palate cleanser that balances the richness of the creamy sauce wonderfully.

  • Herbed Rice Pilaf: Fluffy rice mixed with herbs offers a light, aromatic base that absorbs the delicious sauce, turning every grain into a flavor-packed experience.

  • Zucchini Noodles: Low carb and fresh, these noodles provide a delightful texture that compliments the chicken’s crust while keeping the dish light and healthy.

  • Wine Pairing – Chardonnay: A chilled glass of Chardonnay pairs beautifully, accentuating the creaminess of the garlic sauce with its buttery notes.

  • Chocolate Mousse: For dessert, a rich chocolate mousse rounds off your meal perfectly, adding a sweet finish that feels indulgent without being overwhelmingly heavy.

Each of these sides brings its own unique flavor and texture, creating a harmonious dining experience that your family will adore.

Expert Tips for Parmesan Crusted Chicken

  • Fresh Cheese Matters: Using freshly grated Parmesan is key to achieving a rich flavor and smooth melting in your Parmesan Crusted Chicken, avoiding the texture issues of pre-packaged cheese.

  • Don’t Overcrowd the Pan: Cook chicken in batches if necessary. Overcrowding can result in steaming instead of achieving that desired golden-brown crust.

  • Monitor Cooking Time: Chicken breasts typically take around 8–10 minutes to cook through once added to the sauce. Always check with a meat thermometer for perfection!

  • Customize Your Sauce: Feel free to adjust the creaminess of your sauce by using heavy cream for a richer flavor or adding more garlic for an aromatic boost.

  • Keep It Low-Carb: If you’re sticking to low-carb guidelines, ensure your panko breadcrumbs are low carb or simply skip them for health-conscious versions of this delicious dish.

Parmesan Crusted Chicken Variations

Feel free to get creative with this recipe, adding your own twists and flavors to suit your palate!

  • Thighs Instead of Breasts: Swap chicken breasts for thighs for a juicier alternative. Thighs can handle the heat better, offering an extra layer of flavor.

  • Creamy Spinach Addition: Adding spinach not only enhances the dish’s color but also boosts its nutritional value. Just toss it into the sauce to wilt before serving!

  • Mushroom Boost: Mushrooms: Sautéed mushrooms can add an earthy depth to your creamy sauce. Their umami flavor beautifully complements the garlic and cheese!

  • Cheese Variety: Mozzarella: Swap out some Parmesan for mozzarella to introduce a delightful cheesiness and extra stretchiness. Imagine that gooey texture hugging your perfectly cooked chicken!

  • Herb Upgrades: Fresh Herbs: Replace dried Italian seasoning with fresh basil or parsley for a bright, aromatic twist. It adds freshness that enhances deep flavors.

  • Spice Heat: Cayenne Pepper: If you crave a little heat, sprinkle in some cayenne pepper to the seasoning mix. It adds a fantastic kick without overwhelming the other flavors.

  • Low-Carb Breadcrumb Swap: Almond Flour: For a lower-carb option, swap panko breadcrumbs with almond flour. It still offers a crisp texture while keeping your dish healthy!

Explore beyond the classic with variations that speak to your taste! If you’re looking for more chicken inspirations like this one, don’t miss my Garlic Parmesan Chicken or Tuscan Chicken Soup, both based on tradition laced with delicious innovation.

Parmesan Crusted Chicken with Creamy Garlic Sauce Recipe FAQs

How do I select the best chicken breasts for this recipe?
Selecting chicken breasts that are small to medium-sized is key for even cooking. Look for breasts that are plump and have a pink hue without any dark spots. It’s best to avoid any chicken that’s discolored or has a foul smell, which could indicate spoilage.

What’s the best way to store leftovers of Parmesan Crusted Chicken?
Store any leftover Parmesan Crusted Chicken in an airtight container in the fridge for up to 3 days. If you want to preserve its crispy texture, reheat in the oven at 350°F instead of the microwave. This will help maintain that delightful crunch!

Can I freeze Parmesan Crusted Chicken, and if so, how?
Absolutely! To freeze, allow the cooked chicken to cool completely, then wrap it tightly in plastic wrap and place it in a freezer-safe bag. Properly stored, it will last up to 3 months. When ready to eat, thaw it in the fridge overnight and reheat in the oven until heated through, about 20-25 minutes at 350°F.

What should I do if the crust isn’t sticking to the chicken properly?
Very! If your crust isn’t adhering well, here’s a little trick: after seasoning your chicken, allow it to rest for about 10 minutes. This helps the salt penetrate the meat, making it slightly tacky. Press the chicken firmly into the Parmesan and panko mixture, ensuring all sides are well-coated. If needed, use an egg wash before dipping in the crust for better adhesion.

Is there a way to make this dish suitable for someone with gluten allergies?
Of course! To make this dish gluten-free, simply substitute the panko breadcrumbs with gluten-free breadcrumbs or ground almond flour. Just be sure to check your Parmesan cheese for any additives that may contain gluten.

Can I make this recipe dairy-free?
Yes! For a dairy-free version, use nutritional yeast instead of Parmesan for the crust, and substitute the cream with coconut milk or a dairy-free cream alternative. Adjust the seasonings to enhance the flavor, as dairy-free products can sometimes lack the richness of cheese.

Parmesan Crusted Chicken with Creamy Garlic Sauce

Parmesan Crusted Chicken with Creamy Garlic Sauce Delight

This Parmesan Crusted Chicken with Creamy Garlic Sauce is a delightful comfort food perfect for busy weeknights or special gatherings.
Prep Time 15 minutes
Cook Time 25 minutes
Resting Time 10 minutes
Total Time 50 minutes
Servings: 4 pieces
Course: Dinner
Cuisine: Italian-American
Calories: 480

Ingredients
  

For the Chicken
  • 4 pieces Chicken Breasts Cut into small or medium pieces
  • to taste Salt
  • to taste Pepper
  • 2 tablespoons Olive Oil For sautéing
For the Crust
  • 1 cup Grated Parmesan Cheese Freshly grated
  • 1 cup Panko Breadcrumbs Can substitute with regular breadcrumbs
For the Sauce
  • 4 cloves Garlic Freshly minced
  • 1 cup Light or Heavy Cream Adjust based on desired richness
  • 1 teaspoon Italian Seasoning or Oregano
Optional Add-Ins
  • 2 cups Spinach Nutritious greens can be omitted if preferred

Equipment

  • Skillet
  • shallow dish
  • meat thermometer

Method
 

Step-by-Step Instructions
  1. Season the chicken breasts with salt and pepper and allow to rest for 10 minutes.
  2. Combine Parmesan cheese and panko breadcrumbs in a shallow dish. Press each chicken breast into the mixture to coat.
  3. Heat olive oil in a skillet over medium-high heat until shimmering.
  4. Sear the chicken for 3-4 minutes on each side until golden brown.
  5. Reduce heat and add minced garlic, sautéing for about 1 minute.
  6. Pour in the cream and add Italian seasoning, mixing well and cooking for an additional 2-3 minutes.
  7. If using, add spinach and stir until wilted. Optionally, add more grated Parmesan for thickness.
  8. Cover and cook for another 8-10 minutes until chicken is cooked through.
  9. Adjust seasoning and serve the chicken with sauce drizzled over top.

Nutrition

Serving: 1pieceCalories: 480kcalCarbohydrates: 15gProtein: 40gFat: 30gSaturated Fat: 15gPolyunsaturated Fat: 2gMonounsaturated Fat: 10gCholesterol: 130mgSodium: 600mgPotassium: 650mgFiber: 1gSugar: 1gVitamin A: 500IUVitamin C: 5mgCalcium: 300mgIron: 2mg

Notes

Using freshly grated Parmesan is key to achieving a rich flavor. Avoid overcrowding the pan for the best crust.

Tried this recipe?

Let us know how it was!

Sweet and Spicy Garlic Steak Pasta That Will Wow Tonight

As I stood by the stove, the aroma of sizzling steak mingled with the sweet, warm scent of garlic, instantly transporting me to my favorite Italian bistro. My latest creation, Sweet and Spicy Garlic Steak Pasta, captures that enchanting essence, offering a delightful twist on classic flavors right at home. This quick and easy recipe is perfect for those busy weeknights when you crave something impressive yet simple. In just 30 minutes, you can whip up a dish that not only pleases your palate but also wins over guests with its vibrant flavor profile. Plus, feel free to customize the spiciness to your taste or swap in chicken or shrimp for a fresh take! Are you ready to savor a plateful of this delightful goodness?

Why Is This Pasta Recipe Irresistible?

Simplicity: This Sweet and Spicy Garlic Steak Pasta is incredibly easy to make, ensuring that even busy home cooks can create a gourmet-inspired meal in just 30 minutes.

Flavor Explosion: The rich combination of sweet honey, savory garlic, and a hint of heat from red pepper flakes creates a delightful flavor that dances on your palate.

Customizable: Whether you prefer steak, chicken, or shrimp, this recipe can easily adapt to your protein of choice, making it versatile for any taste.

Crowd-Pleasing: Impress family and friends alike with a dish that looks as good as it tastes—perfect for casual dinners or special gatherings.

Make Ahead: With leftovers keeping well in the fridge, enjoy the convenience of a quick meal ready for lunch or dinner in the following days. Why not pair it with some Cheesy Garlic Chicken or Garlic Butter Steak for an even grander spread?

Sweet and Spicy Garlic Steak Pasta Ingredients

For the Pasta
Fettuccine or Spaghetti – Choose pasta that holds sauce well; substituting with gluten-free pasta is a great option for those with dietary needs.

For the Steak
Steak (Sirloin or Ribeye) – Rich and juicy, providing delicious flavor; chicken or shrimp can easily be used as alternatives for a different twist.

For the Sauce
Garlic – Fresh cloves add aromatic depth; feel free to use minced garlic for convenience.
Soy Sauce – Enhances umami flavor; low-sodium versions are a healthier choice.
Honey – Adds natural sweetness to balance the spice; consider maple syrup for a vegan substitute.
Red Pepper Flakes – Imparts heat; adjust according to your personal spice preference.

For Garnish
Parsley or Basil – Fresh herbs add brightness and a visual pop to the dish.

For Cooking
Olive Oil – Extra virgin olive oil elevates flavors during sautéing; always use high-quality oil for best results.

This Sweet and Spicy Garlic Steak Pasta is all about flavors that will make your taste buds dance!

Step‑by‑Step Instructions for Sweet and Spicy Garlic Steak Pasta

Step 1: Cook the Pasta
Begin by bringing a large pot of salted water to a rolling boil. Add your choice of fettuccine or spaghetti and cook according to package instructions, usually around 8-10 minutes, until al dente. Once cooked, drain the pasta and set it aside, making sure to reserve a cup of the pasta water for later.

Step 2: Sear the Steak
In a large skillet, heat 2 tablespoons of olive oil over medium-high heat. While the oil warms, season your sirloin or ribeye steak generously with salt and pepper. Once the oil shimmers, carefully add the steak to the pan and sear for about 4-5 minutes on each side until a deep brown crust forms. The steak should be cooked to medium-rare, around 130°F internal temperature.

Step 3: Add Garlic and Honey
After searing the steak, reduce the heat to medium-low and remove the steak from the skillet to rest on a cutting board for a few minutes. In the same skillet, add 4 minced garlic cloves and 2 tablespoons of honey. Stir constantly for about 1 minute until the garlic is fragrant and just beginning to brown, making sure not to burn it.

Step 4: Incorporate Sauce Ingredients
Next, pour in 2 tablespoons of soy sauce and sprinkle in 1 teaspoon of red pepper flakes, adjusting to your spice preference. Allow the mixture to simmer for about 2 minutes, stirring to combine all the flavors. The sauce should start to thicken and become glossy, enhancing the sweet and spicy garlic flavor.

Step 5: Combine Everything
Slice the rested steak into bite-sized pieces and return it to the skillet along with the drained pasta. Toss everything together in the sauce, ensuring the pasta is evenly coated with the delicious mixture. If the sauce seems too thick, gradually add some reserved pasta water until you reach the desired consistency, allowing the sauce to cling beautifully to the pasta.

Step 6: Garnish and Serve
Once combined, remove the skillet from heat and transfer the Sweet and Spicy Garlic Steak Pasta to serving plates. Garnish generously with chopped fresh parsley or basil for a pop of color and added flavor. Serve immediately to enjoy the vibrant tastes while they are fresh, making it a perfect dish for any dinner occasion.

What to Serve with Sweet and Spicy Garlic Steak Pasta

As you embark on your culinary journey with this dish, consider complementing its vibrant flavors with sides that elevate your meal experience.

  • Garlic Bread: The crispy, buttery garlic bread serves as the perfect vessel for savoring every drop of the saucy goodness left on your plate.

  • Simple Green Salad: A fresh salad with mixed greens, cherry tomatoes, and a light vinaigrette adds a refreshing crunch that balances the pasta’s richness.

  • Roasted Vegetables: Caramelized seasonal vegetables like bell peppers and zucchini not only provide color but enhance the meal with their natural sweetness.

  • Grilled Asparagus: Tender, charred asparagus offers a delightful crunch and a hint of smoky flavor that beautifully contrasts the sweetness of the dish.

  • Creamy Parmesan Risotto: Luxurious and creamy, risotto brings a delightful creaminess that harmonizes wonderfully with the sweet and spicy notes of the pasta.

  • Chilled White Wine: A crisp Chardonnay or Sauvignon Blanc refreshes the palate, making each bite of the Sweet and Spicy Garlic Steak Pasta even more enjoyable.

  • Tiramisu: For dessert, indulge in a classic tiramisu that offers a velvety coffee flavor, effectively ending your meal on a sweet, luxurious note.

Expert Tips for Sweet and Spicy Garlic Steak Pasta

  • Marinate for Flavor: Enhance your steak’s taste by marinating it briefly in soy sauce and a pinch of garlic before cooking.

  • Perfect Pasta Timing: For the best results, cook your pasta while you’re searing the steak. This saves time and keeps everything hot.

  • Spice Adjustment: To cater to different spice tolerances, start with fewer red pepper flakes. You can always add more if desired!

  • Mix Well: Ensure you toss the pasta thoroughly with the sauce and steak to combine flavors, elevating your Sweet and Spicy Garlic Steak Pasta to the next level.

  • Fresh Ingredients: Using fresh garlic and herbs not only improves flavor but adds a beautiful finish that will impress your guests.

  • Leftover Storage: Store any leftovers in an airtight container in the fridge for up to three days, making for a quick and easy meal option later.

Sweet and Spicy Garlic Steak Pasta Variations

Feel free to get creative with this recipe; your kitchen is your canvas, and these variations are here to inspire you!

  • Chicken Swap: Substitute steak with chicken breast to create a leaner option; just adjust cooking time accordingly to ensure it’s tender and juicy.
    Chicken brings a milder flavor that readily absorbs the sweet and spicy sauce. It’s a fantastic alternative for those looking to try something new.

  • Shrimp Delight: Swap in shrimp for a quick-cooking seafood option that adds a lovely sweetness and tenderness to your pasta.
    Simply sauté shrimp for about 2-3 minutes until they turn pink and opaque. This twist transforms the dish into a delightful seafood feast!

  • Pasta Shape: Experiment with different pasta shapes like penne or fusilli for a unique texture and sauce-to-pasta ratio.
    These shapes hold onto the sauce beautifully, ensuring each bite is packed with flavor. Plus, they add a fun visual element to your plate!

  • Veggie Boost: For a heartier dish, toss in your favorite vegetables such as bell peppers, zucchini, or spinach for added texture and nutrients.
    Secretly nutritious, vegetables enhance the dish and bring in fresh colors, elevating both taste and presentation.

  • Heat Level Adjustment: Control the spice by using fewer red pepper flakes or adding a touch of sriracha to the sauce if you prefer a kick.
    Adjusting the heat makes it adaptable for different palates, so everyone at the table can enjoy their meal just the way they like it!

  • Sweetener Alternatives: Swap honey for agave syrup or brown sugar for a different sweet flavor profile that suits your tastes.
    This small change can alter the overall sweetness of your sauce, allowing you to discover your favorite flavor balance.

  • Herb Variations: Experiment with fresh herbs like cilantro or oregano for a unique twist on the traditional parsley or basil garnish.
    Using different herbs can bring out new dimensions in flavor, giving the dish a fresh and inviting aroma.

Ready to mix things up? Consider pairing this dish with a refreshing side salad like a simple green salad or perhaps some warm garlic bread while you explore flavor profiles in your next cooking adventure!

Make Ahead Options

These Sweet and Spicy Garlic Steak Pasta are perfect for busy weeknights, allowing you to save time without sacrificing flavor! You can cook the pasta and sear the steak up to 24 hours in advance, storing them separately in airtight containers in the refrigerator. To maintain quality, toss the cooked pasta with a drizzle of olive oil to prevent sticking and keep the steak covered to retain its moisture. When you’re ready to serve, simply reheat the steak in a skillet over medium heat, add the garlic and sauce ingredients, then combine with the pasta for a delightful meal that feels fresh and just as delicious!

How to Store and Freeze Sweet and Spicy Garlic Steak Pasta

Fridge: Store leftovers in an airtight container for up to 3 days. This keeps your Sweet and Spicy Garlic Steak Pasta fresh and ready for quick meals!

Freezer: For longer storage, freeze in an airtight container for up to 2 months. To prevent freezer burn, ensure there’s minimal air in the container.

Reheating: To reheat, thaw in the fridge overnight and gently warm on the stove with a splash of reserved pasta water. This helps retain the sauce’s flavor and creaminess.

Room Temperature: Avoid leaving the pasta at room temperature for more than 2 hours to ensure food safety and quality.

Sweet and Spicy Garlic Steak Pasta Recipe FAQs

What type of pasta works best for this dish?
I recommend using fettuccine or spaghetti because they hold the sauce beautifully, giving you that luscious, flavorful bite. If you need a gluten-free option, any gluten-free pasta that can withstand a good toss is a perfect substitute!

How should I store leftovers of Sweet and Spicy Garlic Steak Pasta?
Store any leftovers in an airtight container in the fridge for up to 3 days. Just make sure the lid seals well to keep moisture out. Reheat gently on the stove or in the microwave with a splash of water to help refresh the sauce’s texture.

Can I freeze this pasta dish?
Absolutely! You can freeze Sweet and Spicy Garlic Steak Pasta in an airtight container for up to 2 months. Be sure to remove as much air as possible to prevent freezer burn. When you’re ready to enjoy it, simply thaw overnight in the refrigerator and reheat on the stovetop with a touch of reserved pasta water for optimal consistency.

What if my steak turns out tough during cooking?
If your steak is tough, it could be due to overcooking. Always aim for medium-rare, around 130°F internal temperature. To enhance tenderness, slice the steak against the grain before adding it back into the pasta. Also, consider marinating the steak for at least 30 minutes before cooking to boost its juiciness and flavor.

Is there any dietary consideration for this recipe?
Yes! If you’re cooking for someone with dietary restrictions, keep in mind that soy sauce contains gluten. You can substitute it with a gluten-free soy sauce or tamari. For spice levels, feel free to adjust the red pepper flakes or omit them entirely for a milder dish. Just let your guests customize to their liking!

Can I use different proteins instead of steak?
Very! Chicken or shrimp are fantastic alternatives to steak in this Sweet and Spicy Garlic Steak Pasta recipe. If using chicken, cook it thoroughly until it reaches 165°F. For shrimp, they typically cook much quicker—just 2-3 minutes per side until they turn pink and opaque. Enjoy experimenting with your preferred protein!

Sweet and Spicy Garlic Steak Pasta

Sweet and Spicy Garlic Steak Pasta That Will Wow Tonight

This Sweet and Spicy Garlic Steak Pasta is a quick and flavorful dish that brings gourmet dining right to your home.
Prep Time 10 minutes
Cook Time 20 minutes
Total Time 30 minutes
Servings: 4 servings
Course: Pasta
Cuisine: Italian
Calories: 550

Ingredients
  

Pasta
  • 8 ounces Fettuccine or Spaghetti Choose pasta that holds sauce well or substitute with gluten-free pasta if needed.
Steak
  • 1 pound Steak (Sirloin or Ribeye) Rich and juicy; chicken or shrimp can be used as alternatives.
Sauce
  • 4 cloves Garlic Fresh cloves add depth; minced garlic can be used for convenience.
  • 2 tablespoons Soy Sauce Low-sodium versions are healthier.
  • 2 tablespoons Honey Adds sweetness; maple syrup is a vegan substitute.
  • 1 teaspoon Red Pepper Flakes Adjust according to spice preference.
Garnish
  • 1/4 cup Fresh Parsley or Basil Adds brightness and visual appeal.
Cooking
  • 2 tablespoons Olive Oil Use high-quality extra virgin olive oil for best flavor.

Equipment

  • Large pot
  • Skillet
  • Cutting board
  • Knife

Method
 

Cooking Steps
  1. Cook the pasta in a large pot of salted boiling water according to package instructions for about 8-10 minutes until al dente. Drain and reserve a cup of pasta water.
  2. In a skillet, heat 2 tablespoons of olive oil over medium-high heat. Season the steak with salt and pepper, then sear for 4-5 minutes on each side until browned.
  3. Reduce heat to medium-low, remove steak to rest, and add 4 minced garlic cloves and 2 tablespoons of honey to the skillet. Stir for 1 minute until garlic is fragrant.
  4. Pour in 2 tablespoons of soy sauce and 1 teaspoon of red pepper flakes. Simmer for 2 minutes until the sauce thickens.
  5. Slice the rested steak and add it back to the skillet with the drained pasta. Toss together, adding reserved pasta water as needed to achieve desired sauce consistency.
  6. Garnish with chopped fresh parsley or basil and serve immediately.

Nutrition

Serving: 1plateCalories: 550kcalCarbohydrates: 65gProtein: 35gFat: 15gSaturated Fat: 4gPolyunsaturated Fat: 1gMonounsaturated Fat: 10gCholesterol: 80mgSodium: 600mgPotassium: 600mgFiber: 3gSugar: 5gVitamin A: 500IUVitamin C: 3mgCalcium: 30mgIron: 3mg

Notes

Enhance flavor by marinating steak in soy sauce and garlic. Cook pasta while searing steak for efficiency. Store leftovers airtight for up to 3 days.

Tried this recipe?

Let us know how it was!

Garlic Parmesan Chicken Meatloaves for Cozy Weeknight Dinners

The aroma wafting through my kitchen brought back childhood memories of family dinners, where laughter mingled with the scent of garlic and cheese. Today, I’m thrilled to share my take on a timeless classic: Garlic Parmesan Chicken Meatloaves. These delightful little loaves are perfect for quick weeknight dinners or meal prepping, making them an easy choice for any busy home chef. With tender, juicy ground chicken infused with flavors of bold garlic and rich Parmesan, every bite is a comforting hug. Plus, the creamy garlic sauce drizzled on top adds an irresistible finish that’s sure to please even the pickiest eaters. Ready to elevate your dinner routine with this mouthwatering dish? Let’s step into the kitchen together!

Why Are You Going to Love These Meatloaves?

Comforting Meal: These Garlic Parmesan Chicken Meatloaves are a quintessential comfort food that warms your heart and soul.

Easy Preparation: With minimal ingredients and straightforward steps, you’ll have this delightful dish ready in no time.

Crowd-Pleasing Flavor: The bold garlic and savory Parmesan blend perfectly, making them a family favorite, even for picky eaters.

Versatile Serving Options: Whether paired with creamy mashed potatoes or tossed in a fresh salad, they’re incredibly adaptable. You might even want to check out my Garlic Parmesan Chicken for another quick meal idea!

Make-Ahead Friendly: You can prepare these meatloaves in advance, making weeknight dinners a breeze.

Lean Protein Choice: Ground chicken offers a lighter take on the classic meatloaf, while still packing that beloved flavor punch!

Garlic Parmesan Chicken Meatloaves Ingredients

For the Meatloaves

  • Ground Chicken – Forms the base of the meatloaves and keeps them juicy; aim for 90-93% lean to avoid dryness.
  • Fresh Garlic – Adds a bold flavor that infuses both the meat and the creamy sauce.
  • Parmesan Cheese – Provides a salty umami depth and contributes to the meatloaf’s golden crust; swap with Pecorino Romano for a sharper taste.
  • Breadcrumbs – Helps bind and maintain moisture in each meatloaf for a delightful texture.
  • Egg – Acts as a binder to keep the mixture cohesive and shape together perfectly.
  • Onion (grated or finely chopped) – Introduces sweetness and complexity to the flavor profile, enhancing the overall dish.
  • Parsley (fresh or dried) – Adds a pop of color and a fresh herbal note, brightening the dish.

For the Garlic Parmesan Cream Sauce

  • Butter – Adds richness and flavor to the sauce base.
  • Flour – Thickens the sauce to a perfect velvety consistency.
  • Milk – Creates a creamy texture and balances the flavors; use whole milk for best results.
  • Grated Parmesan – Elevates the sauce with an extra layer of creamy, cheesy goodness.

Seasoning

  • Salt, Black Pepper, Italian Seasoning – Essential for enhancing the flavors of your meatloaves, ensuring each bite is perfectly seasoned.

Step‑by‑Step Instructions for Garlic Parmesan Chicken Meatloaves

Step 1: Preheat and Prepare
Begin by preheating your oven to 375°F (190°C). While it’s warming up, line a baking sheet with parchment paper or lightly grease a muffin tin for a fun, mini meatloaf option. This early preparation ensures that the Garlic Parmesan Chicken Meatloaves have a nice, even cooking environment and won’t stick, making cleanup easier!

Step 2: Combine Ingredients
In a large mixing bowl, combine the ground chicken, minced garlic, grated onion, Parmesan cheese, breadcrumbs, egg, parsley, salt, pepper, and Italian seasoning. Using your hands or a spatula, mix gently until just combined—overmixing can lead to a dense texture. This step infuses the meatloaves with delicious flavors and ensures a delightful, juicy bite in every piece.

Step 3: Shape the Meatloaves
Once your mixture is well combined, shape it into small loaves, about the size of a fist, or use the muffin tin for perfectly portioned mini meatloaves. Ensure each meatloaf is uniform in size for even cooking. Arrange them on the prepared baking sheet or place them into the muffin cups, giving them a little space to breathe for proper heat circulation.

Step 4: Bake to Perfection
Slide your baking sheet or muffin tin into the preheated oven and bake the Garlic Parmesan Chicken Meatloaves for 22-25 minutes. They are ready when they’ve turned golden brown and an internal thermometer reads 165°F (74°C) in the center. The enticing aroma filling your kitchen will be an excellent indicator that dinner is on its way!

Step 5: Make the Creamy Sauce
While the meatloaves are baking, prepare the luscious garlic Parmesan cream sauce. In a medium saucepan, melt butter over medium heat. Once melted, add minced garlic and sauté until fragrant—about 1 minute. Whisk in flour to create a roux, then gradually add milk, stirring continuously until the sauce thickens, around 3-5 minutes. Finally, incorporate grated Parmesan until the sauce is smooth and creamy.

Step 6: Serve and Enjoy
Once your meatloaves have finished baking, remove them from the oven and let them sit for a few minutes. Serve them drizzled with the rich garlic Parmesan cream sauce, adding a sprinkle of fresh parsley for a touch of color and flavor. These Garlic Parmesan Chicken Meatloaves pair beautifully with your favorite sides, making your meal complete and comforting!

How to Store and Freeze Garlic Parmesan Chicken Meatloaves

Fridge: Store leftover Garlic Parmesan Chicken Meatloaves in an airtight container in the refrigerator for up to 4 days. This keeps them fresh and ready for quick meals.

Freezer: For longer storage, individually wrap meatloaves in plastic wrap or aluminum foil, then place them in a freezer-safe container. They will last for up to 3 months.

Thawing: When ready to enjoy, thaw in the fridge overnight or use the microwave for quicker results.

Reheating: Reheat in the oven at 350°F (175°C) for about 15-20 minutes, or until warmed through, keeping their delightful moisture intact.

Expert Tips for Garlic Parmesan Chicken Meatloaves

  • Moisture Matters: Choose ground chicken with 10% fat for juicy meatloaves. Leaner meats can lead to dry results.

  • Mix Gently: Avoid overmixing the meatloaf mixture. This ensures that your Garlic Parmesan Chicken Meatloaves remain tender and don’t become tough.

  • Uniform Size: Shape the meatloaves evenly for consistent baking. This way, they’ll cook thoroughly and reduce the chances of undercooked centers.

  • Cool Before Storing: Allow meatloaves to cool completely before refrigerating or freezing. This prevents them from becoming soggy and keeps them tasting fresh.

  • Make-ahead Magic: Prepare the meatloaf mixture up to 24 hours in advance and refrigerate it. Just shape and bake when you’re ready for a quick dinner!

What to Serve with Garlic Parmesan Chicken Meatloaves

Create a memorable meal that elevates your dining experience with exciting side dishes!

  • Creamy Mashed Potatoes: The buttery smoothness of mashed potatoes perfectly balances the hearty meatloaves, making each forkful a symphony of flavors. A drizzle of the garlic cream sauce on top creates delicious harmony.

  • Roasted Vegetables: A medley of roasted carrots, zucchini, and bell peppers adds vibrant color and a crunchy texture, bringing a fresh touch and earthy flavor that complements the savory meatloaves beautifully.

  • Garden Salad: A crisp garden salad with mixed greens, cherry tomatoes, and a light vinaigrette refreshing lifts the rich flavors, providing balance and a nutritious boost alongside the comforting heartiness of the meatloaves.

  • Garlic Bread: Slices of warm, buttery garlic bread serve as an elegant vessel for that creamy sauce, adding a satisfying crunch and aromatic flavor to each bite—perfect for sopping up every last drop!

  • Herb-Infused Rice: Fluffy rice seasoned with fresh herbs like parsley or cilantro enhances the flavor profile, adding subtler notes that meld seamlessly with the meatloaf’s richness.

  • Steamed Asparagus: Tender asparagus with a hint of lemon provides a bright, fresh element, making your plate visually appealing while enhancing the overall flavor synergy.

  • Wine Pairing: A light-bodied white wine like Sauvignon Blanc or a refreshing rosé brings acidity and zest that pairs beautifully with the flavors of ground chicken and cheese.

  • Lemon Sorbet: Finish the meal with a scoop of tangy lemon sorbet. This refreshing dessert cleanses the palate and adds a bright note that echoes the citrus hints in your sides!

Make Ahead Options

These Garlic Parmesan Chicken Meatloaves are fantastic for meal prep, allowing busy home cooks to save time and enjoy delicious meals throughout the week! You can prepare the meat mixture up to 24 hours in advance—just combine the ground chicken, garlic, onion, Parmesan, breadcrumbs, egg, parsley, salt, and seasonings, then cover and refrigerate. If you’re planning to make them even further ahead, consider shaping the meatloaves and freezing them individually; they can be stored this way for up to 3 months. To maintain quality, make sure they are well-wrapped to prevent freezer burn. When you’re ready to serve, simply bake the frozen meatloaves directly from the freezer, extending the cooking time by about 10-15 minutes. Enjoy restaurant-quality flavors with minimal effort!

Garlic Parmesan Chicken Meatloaves Variations

Feel free to explore these delightful twists on the classic garlic Parmesan chicken meatloaves that will enhance your kitchen adventures!

  • Ground Turkey: Swap ground chicken for ground turkey for a similar tender texture and a slightly different flavor profile. Each bite will still be packed with comfort.

  • Cheese Twist: Add in mozzarella for a gooey, cheesy surprise inside or use gouda for a smoky depth. Cheese lovers will adore this delicious enhancement!

  • Herb Boost: Incorporate fresh herbs like thyme or rosemary for an aromatic twist that elevates the meatloaves to gourmet status. The fresh notes truly brighten each bite.

  • Spicy Kick: Mix in diced jalapeños or a dash of hot sauce to the meat mixture for a zesty kick. Spice lovers will appreciate this fiery addition!

  • Zucchini Noodles: Serve the meatloaves over a bed of sautéed zucchini noodles for a light, low-carb alternative. It’s a wholesome way to enjoy this comforting dish.

  • Grain Bowl: Integrate the meatloaves into a grain bowl with quinoa or couscous for a nutritious and filling meal. The combination of flavors works beautifully together!

  • Vegetable Add-ins: Stir in finely chopped spinach or grated carrots for an added nutrition boost. These vegetables blend seamlessly into the mixture, making it even healthier.

For more inspiration, try out my delicious Garlic Chicken Gnocchi Skillet that also embraces bold flavors. These variations will not only enchant your taste buds but make meal time even more exciting!

Garlic Parmesan Chicken Meatloaves Recipe FAQs

How do I choose ripe ingredients for my meatloaf?
Absolutely! For the best flavor and texture, use fresh garlic that feels firm and has no dark spots, as well as onions that are solid and free of blemishes. Opt for Parmesan cheese that’s grated fresh for richer taste, and always check the ground chicken for any unpleasant odor; it should smell fresh and clean.

How should I store leftover meatloaves?
To keep your Garlic Parmesan Chicken Meatloaves fresh, place them in an airtight container and store them in the fridge for up to 4 days. Make sure they’re completely cooled before sealing to prevent any condensation and sogginess. You can easily reheat them in the oven when you’re ready to enjoy!

Can I freeze Garlic Parmesan Chicken Meatloaves?
Very! To freeze, individually wrap each meatloaf in plastic wrap or aluminum foil. Place them in a freezer-safe container or bag, and they’ll last for up to 3 months. When you’re ready to eat, simply thaw in the fridge overnight or use the microwave for a quick thaw.

What if my meatloaves are too dry?
If your meatloaves turn out dry, it often means that the ground chicken was too lean or they were overcooked. I recommend using ground chicken with some fat content for moisture—aim for 90-93% lean. Also, using breadcrumbs soaked in milk or adding a little more egg can help retain moisture. Ensure to check the internal temperature with a meat thermometer—165°F (74°C) is just right!

Are these meatloaves safe for people with allergies?
Absolutely! If you’re serving someone with dietary restrictions, note that these meatloaves contain gluten from breadcrumbs and dairy from Parmesan cheese. You can use gluten-free breadcrumbs and nutritional yeast or a dairy-free cheese alternative for a delicious variation. Always check ingredient labels to ensure they meet your dietary needs.

Garlic Parmesan Chicken Meatloaves

Garlic Parmesan Chicken Meatloaves for Cozy Weeknight Dinners

These Garlic Parmesan Chicken Meatloaves are a comforting and delicious dish perfect for weeknight dinners, made with tender ground chicken and rich flavors.
Prep Time 15 minutes
Cook Time 25 minutes
Resting Time 5 minutes
Total Time 45 minutes
Servings: 4 meatloaves
Course: Dinner
Cuisine: American
Calories: 320

Ingredients
  

For the Meatloaves
  • 1 lb Ground Chicken Aim for 90-93% lean
  • 3 cloves Fresh Garlic Minced
  • 1/2 cup Parmesan Cheese Grated
  • 1/2 cup Breadcrumbs For binding
  • 1 large Egg Acts as a binder
  • 1/2 medium Onion Grated or finely chopped
  • 2 tbsp Parsley Fresh or dried
For the Garlic Parmesan Cream Sauce
  • 2 tbsp Butter For richness
  • 2 tbsp Flour To thicken the sauce
  • 1 cup Milk Whole milk for best results
  • 1/2 cup Grated Parmesan For the sauce
Seasoning
  • 1 tbsp Salt
  • 1/2 tbsp Black Pepper
  • 1 tbsp Italian Seasoning

Equipment

  • Oven
  • Mixing Bowl
  • Baking Sheet
  • Muffin Tin
  • Saucepan

Method
 

Preparation Steps
  1. Preheat your oven to 375°F (190°C) and line a baking sheet with parchment paper or grease a muffin tin.
  2. In a large mixing bowl, combine ground chicken, minced garlic, grated onion, Parmesan cheese, breadcrumbs, egg, parsley, salt, pepper, and Italian seasoning. Mix gently until just combined.
  3. Shape the mixture into small loaves or fill muffin cups, ensuring uniform size for even cooking.
  4. Bake for 22-25 minutes until golden brown and an internal temperature reaches 165°F (74°C).
  5. While baking, melt butter in a saucepan and sauté minced garlic. Add flour to create a roux, then gradually whisk in milk until the sauce thickens. Stir in grated Parmesan until smooth.
  6. Remove meatloaves from the oven, let them rest, then serve with the garlic Parmesan cream sauce drizzled on top and enjoy!

Nutrition

Serving: 1meatloafCalories: 320kcalCarbohydrates: 15gProtein: 25gFat: 18gSaturated Fat: 8gPolyunsaturated Fat: 1gMonounsaturated Fat: 5gCholesterol: 110mgSodium: 600mgPotassium: 400mgFiber: 1gSugar: 1gVitamin A: 500IUVitamin C: 1mgCalcium: 200mgIron: 2mg

Notes

These meatloaves can be prepared in advance for an easier weeknight dinner option. Store leftovers in an airtight container in the fridge for up to 4 days or freeze for up to 3 months.

Tried this recipe?

Let us know how it was!

Garlic Butter Steak Stuffed Baked Potatoes are delicious!

Introduction to Garlic Butter Steak Stuffed Baked Potatoes

There’s something undeniably comforting about a hearty meal that feels like a warm hug. Garlic Butter Steak Stuffed Baked Potatoes are just that—a delicious blend of flavors that can turn any ordinary day into a special occasion.

Whether you’re looking for a quick solution after a long day or a dish to impress your loved ones, this recipe has you covered. The combination of tender steak, rich garlic butter, and fluffy baked potatoes creates a satisfying experience that will leave everyone asking for seconds. Let’s dive into this culinary adventure together!

Why You’ll Love This Garlic Butter Steak Stuffed Baked Potatoes

These Garlic Butter Steak Stuffed Baked Potatoes are a game-changer for busy weeknights.

They come together quickly, making them perfect for those evenings when time is tight.

The rich flavors of garlic butter and juicy steak meld beautifully, creating a dish that’s both satisfying and indulgent.

Plus, they’re customizable! You can easily swap ingredients to suit your taste, ensuring everyone at the table leaves happy.

Ingredients for Garlic Butter Steak Stuffed Baked Potatoes

To create these mouthwatering Garlic Butter Steak Stuffed Baked Potatoes, you’ll need a handful of simple yet flavorful ingredients.

Here’s what you’ll gather:

  • Russet Potatoes: These large potatoes are perfect for baking, with a fluffy interior that holds up well to stuffing.
  • Sirloin Steak: Tender and flavorful, sirloin is a great choice for this dish. You can also use grilled chicken or sautéed mushrooms for a different twist.
  • Unsalted Butter: This adds richness and helps to create that luscious garlic butter sauce.
  • Garlic: Freshly minced garlic brings a robust flavor that elevates the dish. You can use garlic powder in a pinch, but fresh is best!
  • Salt and Black Pepper: Essential seasonings that enhance the flavors of the steak and potatoes.
  • Shredded Cheddar Cheese: Melty cheese on top adds a creamy texture and a savory kick. Feel free to swap it for your favorite cheese.
  • Sour Cream: A dollop of sour cream adds a tangy contrast to the rich flavors.
  • Green Onions: Chopped green onions provide a fresh crunch and a pop of color.
  • Worcestershire Sauce: This adds depth and umami to the steak mixture, making it even more delicious.

For exact measurements, check the bottom of the article where you can find everything available for printing.

Gather these ingredients, and you’re on your way to creating a dish that’s sure to impress!

How to Make Garlic Butter Steak Stuffed Baked Potatoes

Creating these Garlic Butter Steak Stuffed Baked Potatoes is a straightforward process that will have your kitchen smelling divine.

Follow these simple steps, and you’ll be on your way to a delicious meal that impresses everyone at the table.

Step 1: Preheat the Oven

Start by preheating your oven to 400°F.

This ensures even cooking for your potatoes, making them perfectly fluffy inside.

Step 2: Prepare the Potatoes

Next, wash the russet potatoes thoroughly under cold water.

Poke several holes in each potato with a fork.

This allows steam to escape while they bake, preventing any potato explosions!

Step 3: Bake the Potatoes

Place the prepared potatoes directly on the oven rack.

Bake for about 45-60 minutes, or until they’re tender when pierced with a fork.

The aroma wafting through your kitchen will be irresistible!

Step 4: Cook the Steak

While the potatoes are baking, heat a skillet over medium-high heat.

Add the diced sirloin steak, seasoning it with salt and black pepper.

Cook for about 5-7 minutes, stirring occasionally, until the steak is browned and cooked to your liking.

Once done, remove the steak from the skillet and set it aside.

Step 5: Make the Garlic Butter Mixture

In the same skillet, melt the unsalted butter over medium heat.

Add the minced garlic and sauté for about 1 minute until fragrant.

Return the cooked steak to the skillet, add Worcestershire sauce, and stir to combine.

Cook for an additional 2 minutes, then remove from heat.

Step 6: Prepare the Potatoes for Stuffing

Once the potatoes are done baking, carefully slice them open lengthwise.

Fluff the insides with a fork to create a cozy bed for the filling.

Step 7: Stuff the Potatoes

Spoon the garlic butter steak mixture generously into each potato.

Top with shredded cheddar cheese, then return to the oven for an additional 5 minutes, or until the cheese is melted and bubbly.

Step 8: Add Toppings

Finally, remove the potatoes from the oven.

Top each one with a dollop of sour cream and a sprinkle of chopped green onions before serving.

Your Garlic Butter Steak Stuffed Baked Potatoes are now ready to be devoured!

Tips for Success

  • Choose potatoes that are similar in size for even cooking.
  • Don’t skip the fork holes; they prevent potato explosions!
  • Let the steak rest for a few minutes after cooking for juiciness.
  • Experiment with different cheeses for unique flavors.
  • For extra flavor, add herbs like thyme or rosemary to the garlic butter.

Equipment Needed

  • Oven: Essential for baking the potatoes. A toaster oven can work in a pinch.
  • Skillet: A non-stick skillet is ideal for cooking the steak. A cast-iron skillet adds great flavor.
  • Fork: For poking holes in the potatoes and fluffing the insides.
  • Knife: To slice the potatoes open.
  • Measuring Cups: Useful for portioning ingredients, though you can eyeball it too!

Variations of Garlic Butter Steak Stuffed Baked Potatoes

  • Spicy Kick: Add a pinch of red pepper flakes to the garlic butter mixture for a fiery twist.
  • Vegetarian Delight: Substitute the steak with sautéed mushrooms and spinach for a hearty, meat-free option.
  • Loaded Style: Top with crispy bacon bits, jalapeños, and extra cheese for a loaded baked potato experience.
  • Herb Infusion: Mix in fresh herbs like parsley or chives into the garlic butter for a burst of freshness.
  • Cheesy Broccoli: Add steamed broccoli to the stuffing for a veggie boost and extra creaminess.

Serving Suggestions for Garlic Butter Steak Stuffed Baked Potatoes

  • Side Salad: Pair with a crisp Caesar or garden salad for a refreshing contrast.
  • Grilled Vegetables: Serve alongside grilled asparagus or zucchini for a colorful plate.
  • Drink Pairing: Enjoy with a cold beer or a robust red wine to complement the flavors.
  • Presentation: Garnish with extra green onions and a sprinkle of paprika for a pop of color.

FAQs about Garlic Butter Steak Stuffed Baked Potatoes

Can I make Garlic Butter Steak Stuffed Baked Potatoes ahead of time?

Absolutely! You can prepare the steak mixture and bake the potatoes in advance. Just store them separately in the fridge. When you’re ready to serve, reheat the potatoes and stuff them with the steak mixture before adding cheese and toppings.

What can I substitute for sirloin steak?

If sirloin isn’t your thing, feel free to swap it out for grilled chicken or even sautéed mushrooms. Both options will still deliver a delicious flavor profile in your stuffed potatoes.

How do I store leftovers?

Leftover Garlic Butter Steak Stuffed Baked Potatoes can be stored in an airtight container in the fridge for up to three days. Reheat them in the oven or microwave before enjoying again!

Can I freeze these stuffed potatoes?

Yes, you can freeze them! Just make sure to wrap them tightly in plastic wrap and then foil. When you’re ready to eat, thaw them in the fridge overnight and reheat in the oven.

What are some good side dishes to serve with these potatoes?

These stuffed potatoes are hearty on their own, but they pair wonderfully with a fresh side salad or grilled vegetables. A light soup can also complement the meal nicely!

Final Thoughts

Cooking is more than just a task; it’s a way to connect with those we love.

Garlic Butter Steak Stuffed Baked Potatoes embody that spirit, transforming simple ingredients into a comforting meal that warms the heart.

Each bite is a delightful blend of flavors, from the savory steak to the creamy cheese and tangy sour cream.

Whether you’re sharing this dish with family or enjoying it solo after a long day, it’s sure to bring a smile to your face.

So roll up your sleeves, embrace the joy of cooking, and savor every delicious moment!

jhessica

Garlic Butter Steak Stuffed Baked Potatoes are delicious!

Garlic Butter Steak Stuffed Baked Potatoes are a delicious and hearty dish, perfect for a satisfying meal.
Prep Time 15 minutes
Cook Time 1 hour
Total Time 1 hour 15 minutes
Servings: 4 servings
Course: Main Course
Cuisine: American
Calories: 550

Ingredients
  

  • 4 large russet potatoes
  • 1 pound sirloin steak diced
  • 4 tablespoons unsalted butter
  • 4 cloves garlic minced
  • 1 teaspoon salt
  • 1/2 teaspoon black pepper
  • 1 cup shredded cheddar cheese
  • 1/2 cup sour cream
  • 1/4 cup chopped green onions
  • 1 teaspoon Worcestershire sauce

Method
 

  1. Preheat your oven to 400°F.
  2. Wash the russet potatoes thoroughly and poke several holes in each potato with a fork.
  3. Place them directly on the oven rack and bake for about 45-60 minutes, or until tender when pierced with a fork.
  4. While the potatoes are baking, heat a skillet over medium-high heat.
  5. Add the diced sirloin steak and season with salt and black pepper. Cook for about 5-7 minutes, stirring occasionally, until the steak is browned and cooked to your desired doneness. Remove the steak from the skillet and set aside.
  6. In the same skillet, melt the butter over medium heat. Add the minced garlic and sauté for about 1 minute until fragrant.
  7. Return the cooked steak to the skillet, add Worcestershire sauce, and stir to combine. Cook for an additional 2 minutes, then remove from heat.
  8. Once the potatoes are done baking, carefully slice them open lengthwise and fluff the insides with a fork.
  9. Spoon the garlic butter steak mixture into each potato, then top with shredded cheddar cheese and return to the oven for an additional 5 minutes, or until the cheese is melted.
  10. Remove the potatoes from the oven and top with sour cream and chopped green onions before serving.

Nutrition

Serving: 1potatoCalories: 550kcalCarbohydrates: 45gProtein: 32gFat: 30gSaturated Fat: 15gPolyunsaturated Fat: 10gCholesterol: 90mgSodium: 800mgFiber: 5gSugar: 2g

Notes

  • For a spicier kick, add a pinch of red pepper flakes to the steak mixture.
  • You can substitute the sirloin steak with grilled chicken or sautéed mushrooms for a different flavor profile.

Tried this recipe?

Let us know how it was!

Frozen Peach Lemonade: A Refreshing Summer Delight!

Introduction to Frozen Peach Lemonade

Summer days can be sweltering, and nothing beats the heat quite like a refreshing drink. That’s where my Frozen Peach Lemonade comes in! This delightful beverage is not just a quick solution for a busy day; it’s a way to bring a little sunshine into your life. With just a few simple ingredients, you can whip up a fruity treat that’s perfect for backyard barbecues or lazy afternoons on the porch. Trust me, once you take that first sip, you’ll be transported to a sunny peach orchard, feeling the warmth of summer all around you.

Why You’ll Love This Frozen Peach Lemonade

This Frozen Peach Lemonade is a game-changer for hot summer days. It’s incredibly easy to make, taking just 10 minutes from start to finish. The taste? Pure bliss! The sweet, juicy peaches blend perfectly with zesty lemonade, creating a refreshing drink that’s hard to resist. Plus, it’s vegan and can be customized to suit your taste. Whether you’re hosting friends or enjoying a quiet moment, this drink is sure to impress.

Ingredients for Frozen Peach Lemonade

Gathering the right ingredients is the first step to creating your Frozen Peach Lemonade. Here’s what you’ll need:

  • Frozen peaches: These are the star of the show! They provide natural sweetness and a creamy texture. You can buy them pre-frozen or freeze fresh peaches yourself when they’re in season.
  • Lemonade: You can use store-bought lemonade for convenience or whip up a quick homemade version. The tartness of the lemonade balances the sweetness of the peaches beautifully.
  • Water: This helps to blend everything smoothly. Adjust the amount based on how thick or thin you want your drink.
  • Honey or agave syrup (optional): If you like your drinks a bit sweeter, add a touch of honey or agave syrup. It’s all about personal preference!
  • Fresh lemon juice: A splash of fresh lemon juice enhances the flavor, giving it that extra zing. It’s a simple way to elevate your drink.
  • Ice cubes (optional): If you prefer a thicker consistency, toss in some ice cubes. They’ll make your drink even more refreshing.

For exact measurements, check the bottom of the article where you can find everything listed for easy printing. Now that you have your ingredients ready, let’s move on to the fun part—making this delicious drink!

How to Make Frozen Peach Lemonade

Creating your Frozen Peach Lemonade is a breeze! Follow these simple steps, and you’ll have a refreshing drink ready in no time. Let’s dive in!

Step 1: Blend the Ingredients

Start by tossing the frozen peaches, lemonade, water, honey (if you’re using it), and fresh lemon juice into your blender. Make sure the lid is on tight—trust me, you don’t want a peach explosion! Blend on high until everything is smooth and creamy. The vibrant color will make your mouth water!

Step 2: Adjust Consistency

After blending, check the consistency. If you like it thicker, add a handful of ice cubes and blend again. This step is crucial for that slushy texture that screams summer. If you prefer a lighter drink, just stick with the original blend.

Step 3: Taste and Sweeten

Now comes the fun part—tasting! Pour a small amount into a glass and give it a sip. If it needs a little more sweetness, add more honey or agave syrup. Blend again for a few seconds to mix it in. Remember, it’s all about your personal taste!

Step 4: Serve and Garnish

Once you’re happy with the flavor, pour the Frozen Peach Lemonade into glasses. For a touch of flair, garnish with a slice of lemon or a peach wedge on the rim. It’s not just a drink; it’s a summer celebration in a glass!

Tips for Success

  • Use ripe peaches for the best flavor; they’ll make your drink taste like summer.
  • Freeze your own peaches when they’re in season for a fresher taste.
  • Experiment with different sweeteners like maple syrup for a unique twist.
  • Blend in a handful of spinach for a nutrient boost without altering the flavor.
  • Serve immediately for the best texture; it’s best enjoyed fresh!

Equipment Needed

  • Blender: A high-speed blender works best, but any blender will do.
  • Measuring cups: Essential for accurate ingredient portions; you can use any cup if you’re in a pinch.
  • Cutting board and knife: Handy for slicing fresh lemons or peaches.
  • Glasses: Serve your refreshing drink in any glass you have on hand.

Variations of Frozen Peach Lemonade

  • Berry Blast: Swap out some of the frozen peaches for frozen strawberries or blueberries for a mixed berry twist.
  • Mango Madness: Replace the peaches with frozen mango chunks for a tropical vibe that’s equally refreshing.
  • Coconut Peach Lemonade: Add a splash of coconut water or coconut milk for a creamy, hydrating version.
  • Herbal Infusion: Blend in a few fresh mint or basil leaves for a refreshing herbal note that elevates the flavor.
  • Spicy Kick: Add a pinch of cayenne pepper or a slice of jalapeño for a surprising spicy twist that pairs well with the sweetness.

Serving Suggestions for Frozen Peach Lemonade

  • Pair with grilled chicken or fish for a refreshing summer meal.
  • Serve alongside light salads, like a spinach and feta salad, for a balanced lunch.
  • For a fun twist, create a peach lemonade float with a scoop of vanilla ice cream.
  • Use mason jars for a rustic presentation that’s perfect for outdoor gatherings.
  • Offer a variety of garnishes, like fresh mint or edible flowers, to impress your guests.

FAQs about Frozen Peach Lemonade

Got questions about making the perfect Frozen Peach Lemonade? You’re not alone! Here are some common queries that might pop up as you whip up this refreshing drink.

Can I use fresh peaches instead of frozen?

Absolutely! If you have fresh peaches, just slice them up and freeze them for a few hours before blending. This will give you that icy texture we love in a frozen drink.

How can I make this drink less sweet?

If you prefer a less sweet Frozen Peach Lemonade, simply reduce the amount of honey or agave syrup. You can also add more lemonade or water to balance the sweetness.

Can I make this ahead of time?

While it’s best enjoyed fresh, you can prepare the mixture and store it in the fridge for a few hours. Just give it a quick blend before serving to restore that creamy texture.

Is this drink suitable for kids?

Definitely! This Frozen Peach Lemonade is a kid-friendly beverage. It’s fruity, fun, and a great way to keep them hydrated during hot summer days.

What can I do with leftovers?

If you have any leftovers, pour them into ice cube trays and freeze. You can use these peach lemonade ice cubes in future drinks for an extra burst of flavor!

Final Thoughts

Creating this Frozen Peach Lemonade is more than just mixing ingredients; it’s about capturing the essence of summer in a glass. Each sip transports you to sun-drenched orchards, where the sweetness of ripe peaches dances with the tang of fresh lemonade. It’s a drink that brings people together, whether you’re hosting a barbecue or enjoying a quiet afternoon. Plus, the joy of making it yourself adds a personal touch that store-bought drinks simply can’t match. So, grab your blender and let this refreshing delight become a staple in your summer repertoire!

jhessica

Frozen Peach Lemonade: A Refreshing Summer Delight!

A refreshing and fruity frozen peach lemonade perfect for summer days.
Prep Time 10 minutes
Total Time 10 minutes
Servings: 4 servings
Course: Beverage
Cuisine: American
Calories: 120

Ingredients
  

  • 2 cups frozen peaches
  • 1 cup lemonade store-bought or homemade
  • 1 cup water
  • 2 tablespoons honey or agave syrup optional, adjust to taste
  • 1 tablespoon fresh lemon juice
  • Ice cubes optional, for a thicker consistency

Method
 

  1. In a blender, combine the frozen peaches, lemonade, water, honey (if using), and fresh lemon juice.
  2. Blend on high until smooth and creamy. If you prefer a thicker consistency, add a handful of ice cubes and blend again.
  3. Taste the mixture and adjust sweetness if needed by adding more honey or agave syrup.
  4. Pour the frozen peach lemonade into glasses and serve immediately. Garnish with a slice of lemon or a peach wedge if desired.

Nutrition

Serving: 1servingCalories: 120kcalCarbohydrates: 25gProtein: 1gSodium: 5mgFiber: 2gSugar: 20g

Notes

  • For a fun twist, add a splash of coconut water for extra hydration and flavor.
  • Substitute frozen strawberries or mangoes for the peaches to create different fruit variations.

Tried this recipe?

Let us know how it was!

Funfetti Babka: Bake a Colorful Treat That’s Irresistible!

Introduction to Funfetti Babka

There’s something magical about a loaf of Funfetti Babka that brings back memories of childhood celebrations. The vibrant colors of sprinkles dancing in a rich, buttery dough remind me of birthday parties filled with laughter and joy. This delightful treat is not just a feast for the eyes; it’s a quick solution for those busy days when you want to impress your loved ones without spending hours in the kitchen. Whether it’s a cozy brunch or a festive gathering, this Funfetti Babka is sure to steal the show and warm hearts.

Why You’ll Love This Funfetti Babka

This Funfetti Babka is a game-changer for any home cook. It’s incredibly easy to make, even for those who might feel intimidated by baking. The vibrant sprinkles add a burst of color and joy, making it perfect for any occasion. Plus, the rich, buttery flavor will have everyone coming back for seconds. In just a couple of hours, you can create a stunning centerpiece that tastes as good as it looks!

Ingredients for Funfetti Babka

Gathering the right ingredients is the first step to creating your Funfetti Babka masterpiece. Here’s what you’ll need:

  • All-purpose flour: The backbone of your dough, providing structure and chewiness.
  • Active dry yeast: This little powerhouse helps your dough rise, creating that fluffy texture we all love.
  • Whole milk: Warmed to the perfect temperature, it adds richness and moisture to the dough.
  • Granulated sugar: Sweetens the dough and helps activate the yeast for a lovely rise.
  • Salt: A crucial ingredient that enhances flavor and balances the sweetness.
  • Large eggs: They provide richness and help bind the ingredients together.
  • Unsalted butter: Softened to perfection, it adds a luxurious buttery flavor to the dough.
  • Rainbow sprinkles: The star of the show! They bring color and fun to your babka.
  • Vanilla extract: A splash of this adds depth and warmth to the flavor profile.
  • Egg (for egg wash): This gives your babka a beautiful golden finish when baked.

For those looking to get creative, consider adding a cinnamon sugar mixture to the filling for a warm spice kick. If you want to take it up a notch, drizzle a simple glaze made from powdered sugar and milk over the cooled babka for extra sweetness. And for chocolate lovers, swap out half of the sprinkles for mini chocolate chips!

Exact measurements for these ingredients can be found at the bottom of the article, ready for printing.

How to Make Funfetti Babka

Now that you have your ingredients ready, let’s dive into the fun part—making your Funfetti Babka! Follow these simple steps, and you’ll have a colorful, delicious treat that’s sure to impress.

Step 1: Prepare the Yeast Mixture

Start by combining the warm milk, sugar, and active dry yeast in a large mixing bowl. Give it a gentle stir and let it sit for about 5 minutes. You’re looking for a frothy layer on top, which means the yeast is alive and ready to work its magic!

Step 2: Make the Dough

Once your yeast mixture is frothy, it’s time to add the flour, salt, eggs, softened butter, and vanilla extract. Mix everything together until a dough begins to form. Don’t worry if it looks a bit messy at first; it will come together beautifully!

Step 3: Knead the Dough

Transfer the dough to a floured surface and knead it for about 5-7 minutes. You want it to be smooth and elastic. If it’s too sticky, sprinkle a little more flour as you go. This step is crucial for developing that lovely texture!

Step 4: First Rise

Place your kneaded dough in a greased bowl, covering it with plastic wrap. Let it rise in a warm spot for about 1 hour, or until it has doubled in size. This is where the magic happens, so be patient!

Step 5: Roll Out the Dough

Once your dough has risen, punch it down gently to release the air. Roll it out into a rectangle about ¼ inch thick. This is where you’ll create the layers that make your babka so delightful!

Step 6: Add Sprinkles and Roll

Now comes the fun part! Sprinkle the rainbow sprinkles evenly over the rolled-out dough. Starting from one long side, roll the dough tightly into a log. Make sure to keep it snug, as this will help create those beautiful swirls.

Step 7: Twist and Shape

With your log ready, cut it in half lengthwise to expose the colorful layers. Twist the two halves together, creating a beautiful braid. Place this twisted masterpiece into a greased loaf pan, and get ready for the next rise!

Step 8: Second Rise

Cover the loaf pan with plastic wrap and let it rise for another 30 minutes. While it’s rising, preheat your oven to 350°F. This second rise is essential for achieving that perfect fluffy texture.

Step 9: Bake the Babka

Before baking, brush the top of your babka with a beaten egg for a shiny finish. Bake it in the preheated oven for 30-35 minutes, or until it’s golden brown and smells heavenly. Your kitchen will be filled with an irresistible aroma!

Step 10: Cool and Serve

Once baked, let the babka cool in the pan for about 10 minutes. Then, carefully transfer it to a wire rack to cool completely. This is the hardest part—waiting to slice into that colorful loaf!

Tips for Success

  • Ensure your milk is warm, not hot, to activate the yeast properly.
  • Don’t skip the kneading; it develops the dough’s texture.
  • Use a kitchen scale for precise measurements if possible.
  • Let the babka cool completely before slicing for cleaner cuts.
  • Experiment with different sprinkles or fillings for a unique twist!

Equipment Needed

  • Mixing bowl: A large bowl for combining ingredients; any bowl will do.
  • Rolling pin: Essential for rolling out the dough; a wine bottle works in a pinch!
  • Loaf pan: A standard 9×5 inch pan is ideal; use any similar-sized dish.
  • Whisk: Great for mixing; a fork can also get the job done.
  • Plastic wrap: To cover the dough while it rises; a clean kitchen towel works too.

Variations of Funfetti Babka

  • Cinnamon Sugar Swirl: Add a mixture of cinnamon and sugar to the filling for a warm, spiced flavor that complements the sweetness of the sprinkles.
  • Chocolate Chip Funfetti Babka: Replace half of the rainbow sprinkles with mini chocolate chips for a delightful chocolatey twist.
  • Nutty Babka: Incorporate chopped nuts, like walnuts or pecans, into the filling for added crunch and flavor.
  • Gluten-Free Option: Use a gluten-free all-purpose flour blend to make this recipe suitable for those with gluten sensitivities.
  • Vegan Funfetti Babka: Substitute eggs with flaxseed meal and use plant-based butter and milk for a delicious vegan version.

Serving Suggestions for Funfetti Babka

  • Pair slices of Funfetti Babka with a hot cup of coffee or tea for a delightful breakfast treat.
  • Serve it warm with a dollop of whipped cream or a scoop of vanilla ice cream for dessert.
  • For a festive touch, dust with powdered sugar before serving.

FAQs about Funfetti Babka

Can I make Funfetti Babka ahead of time?

Absolutely! You can prepare the dough a day in advance and let it rise in the fridge overnight. Just remember to bring it back to room temperature before rolling and shaping.

What can I do with leftover Funfetti Babka?

If you have any leftovers, slice it up and store it in an airtight container. It makes for a fantastic breakfast toast or a sweet snack. You can even freeze slices for later enjoyment!

Can I use different types of sprinkles?

Of course! While rainbow sprinkles are traditional, feel free to experiment with themed sprinkles for holidays or special occasions. Just make sure they are nonpareils or jimmies for the best results.

How do I know when my Funfetti Babka is done baking?

Your babka is ready when it’s golden brown on top and sounds hollow when tapped on the bottom. A toothpick inserted into the center should come out clean, too!

Can I add fillings to my Funfetti Babka?

Definitely! You can add a layer of chocolate spread, cream cheese, or even fruit preserves before rolling it up. Just be careful not to overfill, or it might ooze out while baking!

Final Thoughts

Baking Funfetti Babka is more than just a recipe; it’s an experience filled with joy and creativity. The vibrant colors and delightful aroma transform your kitchen into a celebration of flavors. Each slice is a reminder of the simple pleasures in life, perfect for sharing with family and friends. Whether it’s a special occasion or just a cozy weekend, this colorful treat brings smiles and warmth to any gathering. So roll up your sleeves, embrace the fun, and let this Funfetti Babka become a cherished part of your baking adventures!

jhessica

Funfetti Babka: Bake a Colorful Treat That's Irresistible!

Funfetti Babka is a colorful and delicious sweet bread that combines the joy of sprinkles with a rich, buttery dough, perfect for any celebration.
Prep Time 20 minutes
Cook Time 35 minutes
Total Time 1 hour 55 minutes
Servings: 8 servings
Course: Dessert
Cuisine: American
Calories: 290

Ingredients
  

  • 2 ½ cups all-purpose flour
  • 1 packet 2 ¼ teaspoons active dry yeast
  • ½ cup whole milk warmed to 110°F
  • ¼ cup granulated sugar
  • ½ teaspoon salt
  • 2 large eggs
  • ½ cup unsalted butter softened
  • ½ cup rainbow sprinkles
  • 1 teaspoon vanilla extract
  • 1 egg for egg wash

Method
 

  1. In a large mixing bowl, combine the warm milk, sugar, and yeast. Let it sit for about 5 minutes until frothy.
  2. Add the flour, salt, eggs, softened butter, and vanilla extract to the yeast mixture. Mix until a dough forms.
  3. Knead the dough on a floured surface for about 5-7 minutes until smooth and elastic.
  4. Place the dough in a greased bowl, cover with plastic wrap, and let it rise in a warm place for about 1 hour or until doubled in size.
  5. Once risen, punch down the dough and roll it out into a rectangle about ¼ inch thick.
  6. Sprinkle the rainbow sprinkles evenly over the dough. Starting from one long side, roll the dough tightly into a log.
  7. Cut the log in half lengthwise to expose the layers. Twist the two halves together and place in a greased loaf pan.
  8. Cover the pan with plastic wrap and let it rise for another 30 minutes. Preheat the oven to 350°F.
  9. Brush the top of the babka with the beaten egg for a shiny finish. Bake for 30-35 minutes or until golden brown.
  10. Let it cool in the pan for 10 minutes before transferring to a wire rack to cool completely.

Nutrition

Serving: 1sliceCalories: 290kcalCarbohydrates: 32gProtein: 5gFat: 14gSaturated Fat: 8gPolyunsaturated Fat: 6gCholesterol: 70mgSodium: 150mgFiber: 1gSugar: 10g

Notes

  • For a richer flavor, consider adding a cinnamon sugar mixture to the filling.
  • You can drizzle a simple glaze made from powdered sugar and milk over the cooled babka for extra sweetness.
  • If you want a chocolate version, replace half of the sprinkles with mini chocolate chips.

Tried this recipe?

Let us know how it was!

Mexican Restaurant-Style Rice: A Flavorful Recipe to Try!

Introduction to Mexican Restaurant-Style Rice

There’s something magical about the aroma of Mexican restaurant-style rice wafting through the kitchen. It takes me back to family dinners, where laughter mingled with the scent of spices. This recipe is a quick solution for those busy weeknights or a delightful side to impress your loved ones. With just a handful of ingredients, you can whip up a dish that’s bursting with flavor. Whether you’re serving it alongside tacos or grilled chicken, this rice will elevate your meal and bring a taste of Mexico right to your table.

Why You’ll Love This Mexican Restaurant-Style Rice

This Mexican restaurant-style rice is a game-changer for your kitchen. It’s incredibly easy to make, taking just 35 minutes from start to finish. The vibrant flavors will transport you straight to your favorite Mexican eatery. Plus, it’s versatile enough to pair with any dish, making it a perfect side for family dinners or casual get-togethers. Trust me, once you try it, you’ll want to make it a regular on your menu!

Ingredients for Mexican Restaurant-Style Rice

Gathering the right ingredients is the first step to creating this delicious Mexican restaurant-style rice. Here’s what you’ll need:

  • Vegetable oil: This is your base for sautéing, adding richness and flavor.
  • Onion: A small, finely chopped onion brings sweetness and depth to the dish.
  • Garlic: Minced garlic adds a fragrant kick that elevates the overall taste.
  • Long-grain white rice: This is the star of the show, providing a fluffy texture.
  • Chicken broth: It infuses the rice with savory goodness. You can swap it for vegetable broth for a vegetarian option.
  • Diced tomatoes with green chilies: These add a zesty flavor and a pop of color. Make sure to use them undrained for extra moisture.
  • Ground cumin: This spice brings warmth and an earthy aroma, essential for authentic flavor.
  • Chili powder: A touch of chili powder adds a mild heat and enhances the overall taste.
  • Salt and black pepper: These basic seasonings are crucial for balancing flavors.
  • Frozen peas (optional): They add a burst of color and sweetness, making the dish even more appealing.
  • Fresh cilantro (for garnish): Chopped cilantro adds a fresh, herbal note that brightens the dish.

For exact quantities, check the bottom of the article where you can find everything listed for easy printing. Happy cooking!

How to Make Mexican Restaurant-Style Rice

Now that you have your ingredients ready, let’s dive into the steps to create this delicious Mexican restaurant-style rice. Each step is simple, and I promise you’ll be rewarded with a dish that’s bursting with flavor!

Step 1: Sauté the Onions

Start by heating the vegetable oil in a large skillet over medium heat. Once the oil is shimmering, toss in the finely chopped onion. Sauté it for about 3-4 minutes until it becomes translucent. This step is crucial; it builds the foundation of flavor for your rice.

Step 2: Add Garlic

Next, stir in the minced garlic. Cook it for just 30 seconds until it becomes fragrant. Be careful not to let it burn, as burnt garlic can turn bitter. This aromatic addition will elevate your rice to new heights!

Step 3: Toast the Rice

Now, it’s time to add the long-grain white rice. Stir it into the skillet, ensuring it gets coated in the oil. Toast the rice for about 2-3 minutes, stirring frequently. This step is essential; toasting the rice enhances its nutty flavor and helps it stay fluffy during cooking.

Step 4: Combine Ingredients

Pour in the chicken broth and add the undrained diced tomatoes with green chilies. Sprinkle in the ground cumin, chili powder, salt, and black pepper. Stir everything together, making sure the rice is evenly distributed. This combination of ingredients is what gives your Mexican restaurant-style rice its signature taste.

Step 5: Simmer

Bring the mixture to a boil, then reduce the heat to low. Cover the skillet and let it simmer for 18-20 minutes. You’ll know the rice is done when it’s tender and the liquid is absorbed. Resist the urge to lift the lid too often; this keeps the steam in, ensuring perfectly cooked rice.

Step 6: Add Peas

If you’re using frozen peas, stir them in during the last 5 minutes of cooking. They’ll add a pop of color and a touch of sweetness to your dish. Plus, who doesn’t love a little extra veggie goodness?

Step 7: Fluff and Garnish

Once the rice is cooked, remove it from the heat and let it sit, covered, for an additional 5 minutes. This resting period allows the flavors to meld. Finally, fluff the rice with a fork and garnish with chopped fresh cilantro. This final touch not only looks beautiful but also adds a fresh burst of flavor!

Tips for Success

  • Always rinse the rice before cooking to remove excess starch, ensuring fluffier grains.
  • Use a heavy-bottomed skillet to prevent uneven cooking and burning.
  • Feel free to adjust spices to your taste; a pinch of cayenne can add a nice kick!
  • Let the rice rest after cooking for better texture and flavor.
  • Experiment with adding other veggies like bell peppers or corn for variety.

Equipment Needed

  • Large skillet: A non-stick skillet works best, but any heavy-bottomed pan will do.
  • Wooden spoon: Perfect for stirring without scratching your skillet.
  • Measuring cups: Essential for accurate ingredient portions.
  • Cutting board and knife: For chopping onions and garlic.

Variations

  • Spicy Mexican Rice: Add diced jalapeños or a pinch of cayenne pepper for an extra kick.
  • Vegetarian Delight: Substitute chicken broth with vegetable broth for a vegetarian-friendly option.
  • Mexican Street Corn Rice: Mix in some canned corn and a sprinkle of cotija cheese for a sweet and savory twist.
  • Herbed Rice: Incorporate fresh herbs like oregano or thyme for a fragrant touch.
  • Cheesy Rice: Stir in some shredded cheese, like cheddar or Monterey Jack, just before serving for a creamy finish.

Serving Suggestions

  • Pair your Mexican restaurant-style rice with grilled chicken or steak for a hearty meal.
  • Serve alongside black beans or refried beans for a complete Mexican feast.
  • Top with avocado slices or a dollop of sour cream for added creaminess.
  • Complement with a refreshing margarita or iced tea.
  • Garnish with lime wedges for a zesty finish.

FAQs about Mexican Restaurant-Style Rice

Can I make Mexican restaurant-style rice ahead of time?

Absolutely! You can prepare the rice a day in advance. Just store it in an airtight container in the fridge. When you’re ready to serve, reheat it on the stovetop with a splash of broth to bring back its fluffy texture.

What can I serve with Mexican rice?

This rice pairs beautifully with a variety of dishes. Think grilled meats, enchiladas, or even a simple salad. It’s a versatile side that complements many flavors!

Can I freeze leftover Mexican restaurant-style rice?

Yes, you can freeze it! Just let the rice cool completely, then transfer it to a freezer-safe container. It will keep well for up to three months. When you’re ready to enjoy it, thaw in the fridge and reheat.

How can I make this rice spicier?

If you love heat, add diced jalapeños or a pinch of cayenne pepper while cooking. You can also serve it with hot salsa on the side for an extra kick!

Is this recipe suitable for vegetarians?

Yes! Simply substitute the chicken broth with vegetable broth, and you have a delicious vegetarian-friendly dish. Enjoy the vibrant flavors without any meat!

Final Thoughts

Cooking this Mexican restaurant-style rice is more than just preparing a side dish; it’s about creating a moment. The vibrant colors and enticing aromas fill your kitchen, inviting everyone to gather around the table. Each fluffy grain is infused with spices that dance on your palate, making every bite a celebration of flavor. Whether it’s a casual weeknight dinner or a festive gathering, this rice brings joy and warmth to your meals. I hope you enjoy making it as much as I do, and that it becomes a cherished recipe in your home, just like it is in mine.

jhessica

Mexican Restaurant-Style Rice: A Flavorful Recipe to Try!

A flavorful and easy-to-make Mexican restaurant-style rice that pairs perfectly with your favorite dishes.
Prep Time 10 minutes
Cook Time 25 minutes
Total Time 35 minutes
Servings: 4 servings
Course: Side Dish
Cuisine: Mexican
Calories: 220

Ingredients
  

  • 2 tablespoons vegetable oil
  • 1 small onion finely chopped
  • 2 cloves garlic minced
  • 1 cup long-grain white rice
  • 2 cups chicken broth
  • 1 14.5-ounce can diced tomatoes with green chilies, undrained
  • 1 teaspoon ground cumin
  • 1 teaspoon chili powder
  • 1/2 teaspoon salt
  • 1/4 teaspoon black pepper
  • 1/4 cup frozen peas optional
  • 1/4 cup chopped fresh cilantro for garnish

Method
 

  1. In a large skillet, heat the vegetable oil over medium heat. Add the chopped onion and sauté until it becomes translucent, about 3-4 minutes.
  2. Stir in the minced garlic and cook for an additional 30 seconds until fragrant.
  3. Add the rice to the skillet and cook, stirring frequently, until the rice is lightly toasted, about 2-3 minutes.
  4. Pour in the chicken broth and add the diced tomatoes with their juices, cumin, chili powder, salt, and black pepper. Stir to combine.
  5. Bring the mixture to a boil, then reduce the heat to low. Cover the skillet and simmer for 18-20 minutes, or until the rice is tender and the liquid is absorbed.
  6. If using, stir in the frozen peas during the last 5 minutes of cooking.
  7. Remove from heat and let the rice sit, covered, for an additional 5 minutes. Fluff with a fork and garnish with chopped cilantro before serving.

Nutrition

Serving: 1servingCalories: 220kcalCarbohydrates: 34gProtein: 4gFat: 5gSaturated Fat: 0.5gPolyunsaturated Fat: 4.5gSodium: 500mgFiber: 2gSugar: 2g

Notes

  • For a spicier version, add diced jalapeños or a pinch of cayenne pepper to the rice while cooking.
  • Substitute vegetable broth for chicken broth to make the dish vegetarian-friendly.

Tried this recipe?

Let us know how it was!

Cottage Cheese Peanut Butter Mousse: Creamy Bliss Awaits!

Introduction to Cottage Cheese Peanut Butter Mousse

There’s something magical about a dessert that feels indulgent yet is packed with nutrition. That’s where Cottage Cheese Peanut Butter Mousse comes in. This creamy delight is not just a treat; it’s a quick solution for those busy days when you crave something sweet but want to keep it healthy. With just a few simple ingredients, you can whip up a mousse that impresses your taste buds and your loved ones. Whether it’s a post-workout snack or a late-night dessert, this mousse is here to satisfy your cravings without the guilt.

Why You’ll Love This Cottage Cheese Peanut Butter Mousse

This Cottage Cheese Peanut Butter Mousse is a game-changer in the dessert world. It’s incredibly easy to make, taking just 10 minutes of your time. The creamy texture and rich peanut butter flavor will have you coming back for more. Plus, it’s a healthier alternative to traditional desserts, so you can indulge without the guilt. Perfect for busy weeknights or a sweet treat after a workout, it’s a win-win!

Ingredients for Cottage Cheese Peanut Butter Mousse

Gathering the right ingredients is the first step to creating this delightful Cottage Cheese Peanut Butter Mousse. Here’s what you’ll need:

  • Cottage Cheese: The star of the show! It provides a creamy base and packs a protein punch.
  • Creamy Peanut Butter: Adds richness and a nutty flavor. Choose your favorite brand for the best taste.
  • Honey or Maple Syrup: Natural sweeteners that enhance the flavor. Use honey for a classic touch or maple syrup for a unique twist.
  • Vanilla Extract: A splash of this elevates the mousse, adding warmth and depth to the flavor.
  • Unsweetened Cocoa Powder (optional): For chocolate lovers, this ingredient transforms the mousse into a decadent treat.
  • Milk (dairy or non-dairy): Helps achieve the perfect creamy consistency. Almond or oat milk works great if you prefer non-dairy.
  • Pinch of Salt: Just a touch to balance the sweetness and enhance the overall flavor.

For those looking to mix things up, consider blending in a ripe banana or some berries for a fruity twist. You can also swap out peanut butter for almond butter or any nut butter of your choice to create a different flavor profile. Exact measurements for these ingredients can be found at the bottom of the article, ready for printing!

How to Make Cottage Cheese Peanut Butter Mousse

Creating this Cottage Cheese Peanut Butter Mousse is as easy as pie—well, easier! Follow these simple steps, and you’ll have a creamy dessert ready in no time. Let’s dive in!

Step 1: Blend the Base

Start by gathering your ingredients. In a blender or food processor, combine the cottage cheese, creamy peanut butter, honey (or maple syrup), vanilla extract, cocoa powder (if you’re feeling chocolatey), milk, and a pinch of salt. Blend everything on high speed until the mixture is smooth and creamy. Scrape down the sides as needed to ensure everything is well mixed. The aroma of peanut butter will fill your kitchen, and trust me, it’s heavenly!

Step 2: Adjust Sweetness

Once you’ve blended the base, it’s time for a taste test. Spoon a little of the mousse into a bowl and give it a try. If you want it sweeter, add a bit more honey or maple syrup. Blend again for a few seconds to mix in the extra sweetness. This is your chance to make it just right for your palate!

Step 3: Transfer and Chill

Now that your mousse is perfectly blended and sweetened, it’s time to transfer it. Pour the mousse into serving bowls or cups. Cover them with plastic wrap or lids, and pop them in the refrigerator. Let them chill for at least 30 minutes. This step allows the flavors to meld beautifully and gives the mousse a chance to set. The anticipation will be worth it!

Step 4: Serve and Garnish

After chilling, it’s time to serve your Cottage Cheese Peanut Butter Mousse. Take it out of the fridge and garnish with your favorite toppings. Chopped nuts, chocolate shavings, or fresh fruit add a delightful crunch and color. Serve it chilled, and watch as everyone digs in with smiles on their faces!

Tips for Success

  • Use full-fat cottage cheese for a creamier texture.
  • Blend until completely smooth; no lumps should remain.
  • Chill the mousse longer for a firmer consistency.
  • Experiment with different nut butters for unique flavors.
  • For added nutrition, toss in a scoop of protein powder.

Equipment Needed

  • Blender or Food Processor: Essential for achieving that smooth mousse. A hand mixer can work in a pinch.
  • Measuring Cups: For accurate ingredient portions. A kitchen scale is a great alternative.
  • Serving Bowls or Cups: Any small bowls will do for serving your delicious mousse.

Variations of Cottage Cheese Peanut Butter Mousse

  • Chocolate Delight: Add an extra tablespoon of cocoa powder for a richer chocolate flavor. Perfect for chocolate lovers!
  • Berry Bliss: Blend in 1/2 cup of fresh or frozen berries like strawberries or blueberries for a fruity twist.
  • Banana Cream: Incorporate a ripe banana into the mix for natural sweetness and a creamy texture.
  • Nutty Swirl: Drizzle in some almond or cashew butter for a different nutty flavor profile.
  • Spiced Pumpkin: Mix in 1/4 cup of pumpkin puree and a dash of cinnamon for a seasonal treat.
  • Vegan Option: Use a plant-based yogurt instead of cottage cheese and maple syrup for sweetness.

Serving Suggestions for Cottage Cheese Peanut Butter Mousse

  • Pair with fresh fruit like sliced bananas or strawberries for a refreshing contrast.
  • Serve alongside a cup of coffee or a glass of almond milk for a delightful afternoon snack.
  • Top with granola for added crunch and texture.
  • Use clear cups to showcase the mousse’s creamy layers for an elegant presentation.

FAQs about Cottage Cheese Peanut Butter Mousse

Can I use low-fat cottage cheese for this mousse?

Absolutely! Low-fat cottage cheese can be used, but keep in mind that it may result in a slightly less creamy texture. If you prefer a lighter option, go for it!

How long can I store the mousse in the fridge?

This Cottage Cheese Peanut Butter Mousse can be stored in the refrigerator for up to three days. Just make sure to cover it well to keep it fresh.

Can I make this mousse vegan?

Yes! To make a vegan version, simply substitute the cottage cheese with a plant-based yogurt and use maple syrup as your sweetener. It will still be delicious!

What can I use instead of peanut butter?

If you have a nut allergy or just want to switch things up, almond butter, sunflower seed butter, or any nut butter of your choice works great in this recipe.

Is this mousse suitable for meal prep?

Definitely! This mousse is perfect for meal prep. Make a batch at the beginning of the week, and you’ll have a healthy dessert or snack ready to go!

Final Thoughts

Creating this Cottage Cheese Peanut Butter Mousse is more than just whipping up a dessert; it’s about embracing a moment of joy in your day. The creamy texture and rich flavor make it a delightful treat that satisfies your sweet tooth without the guilt. Whether you’re enjoying it solo or sharing it with friends and family, this mousse brings smiles all around. Plus, the versatility of ingredients means you can customize it to your liking. So, go ahead, indulge in this creamy bliss, and let it become a staple in your kitchen for those sweet cravings!

jhessica

Cottage Cheese Peanut Butter Mousse: Creamy Bliss Awaits!

A creamy and delicious mousse made with cottage cheese and peanut butter, perfect for a healthy dessert or snack.
Prep Time 10 minutes
Total Time 40 minutes
Servings: 4 servings
Course: Dessert
Cuisine: American
Calories: 210

Ingredients
  

  • 1 cup cottage cheese
  • 1/2 cup creamy peanut butter
  • 1/4 cup honey or maple syrup
  • 1 teaspoon vanilla extract
  • 1/4 cup unsweetened cocoa powder optional for chocolate flavor
  • 1/4 cup milk dairy or non-dairy
  • Pinch of salt

Method
 

  1. In a blender or food processor, combine the cottage cheese, peanut butter, honey (or maple syrup), vanilla extract, cocoa powder (if using), milk, and a pinch of salt.
  2. Blend on high speed until the mixture is smooth and creamy, scraping down the sides as needed.
  3. Taste and adjust sweetness if necessary by adding more honey or maple syrup.
  4. Once blended, transfer the mousse into serving bowls or cups.
  5. Chill in the refrigerator for at least 30 minutes to allow the flavors to meld and the mousse to set.
  6. Serve chilled, garnished with chopped nuts, chocolate shavings, or fresh fruit if desired.

Nutrition

Serving: 1servingCalories: 210kcalCarbohydrates: 10gProtein: 12gFat: 15gSaturated Fat: 3gPolyunsaturated Fat: 10gCholesterol: 10mgSodium: 150mgFiber: 2gSugar: 10g

Notes

  • For a fruitier twist, blend in 1 ripe banana or 1/2 cup of berries before mixing.
  • Substitute almond butter or any nut butter of your choice for a different flavor profile.

Tried this recipe?

Let us know how it was!

Stay Connected

Get recipes via email: