Get my cookbooks

Irresistible Lasagna Recipe for Ultimate Comfort at Home

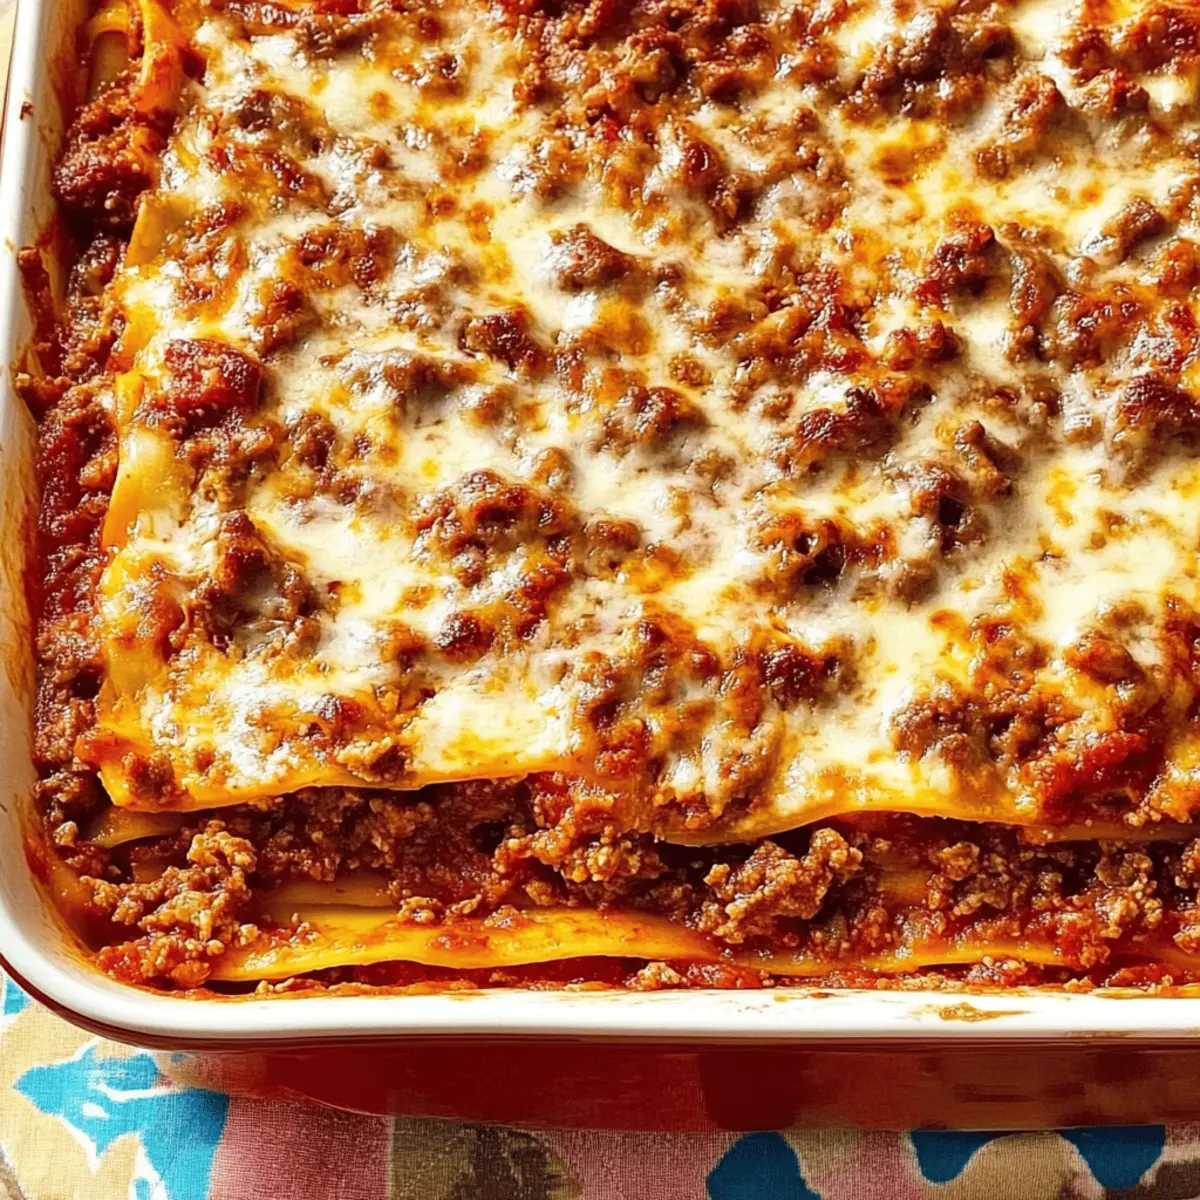
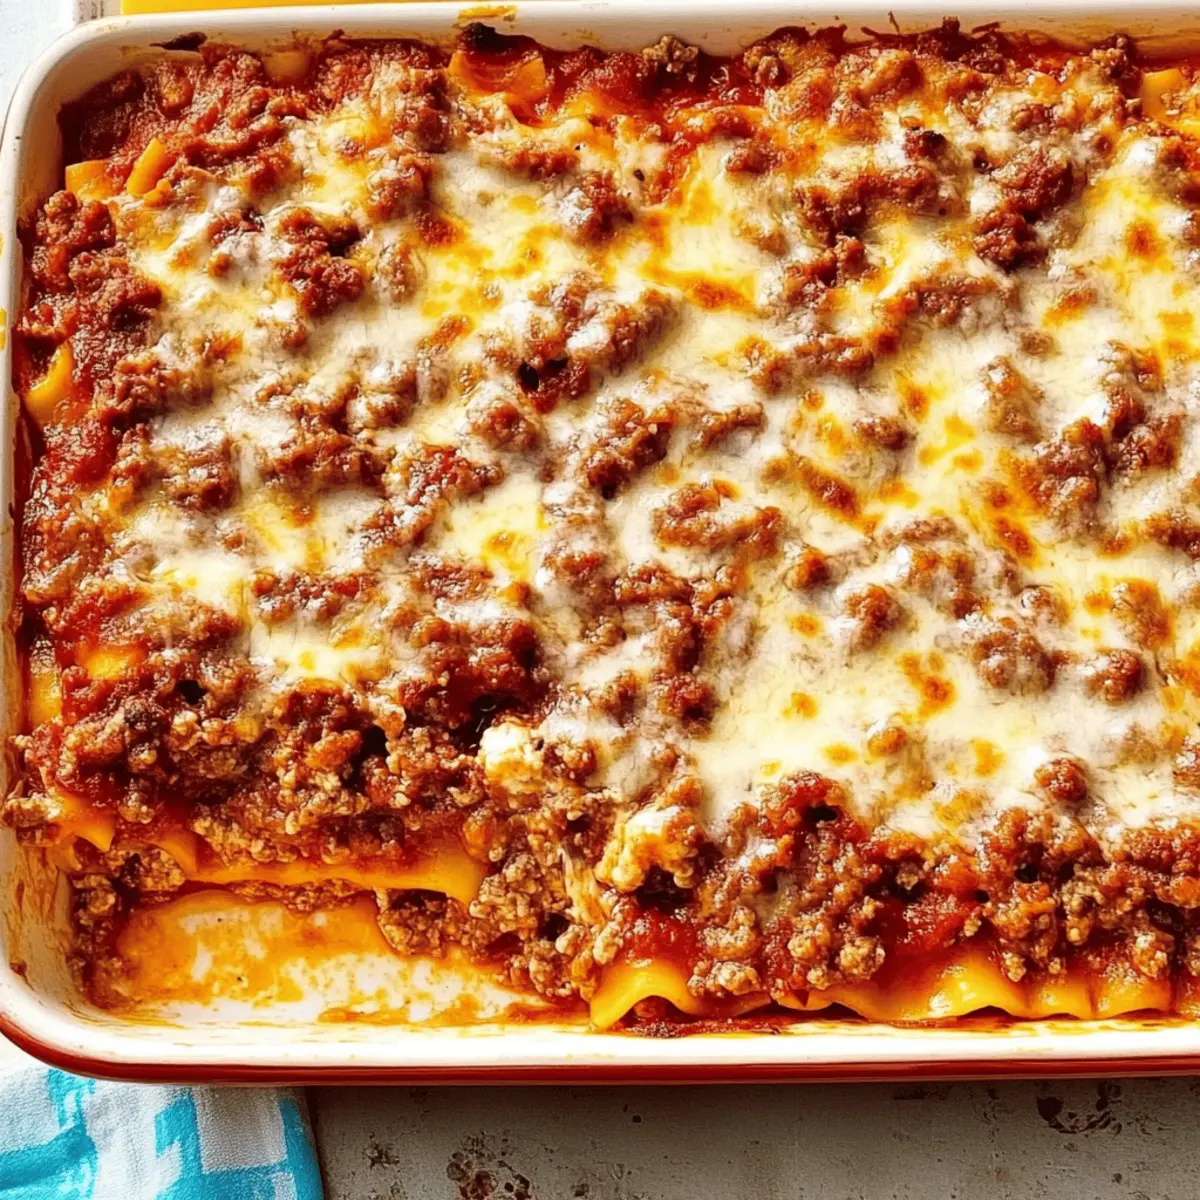
As I stood stirring the simmering pot of tomato sauce, the inviting aroma swept through my kitchen, instantly transporting me to memories of family gatherings filled with laughter and love. It’s in moments like these that I appreciate the beauty of a classic comfort dish: the Best Lasagna Ever. This lasagna recipe is not only incredibly hearty but also incredibly flexible, allowing you to customize it with your favorite ingredients or whatever you have on hand. It’s perfect for busy weeknights or cozy Sunday dinners, requiring just a few simple pantry staples to create layers of rich, savory goodness. With this recipe, you’ll have a crowd-pleaser that warms the heart and fills the belly. Are you ready to dive into this delicious adventure of taste and texture?

What Makes This Lasagna Recipe Irresistible?

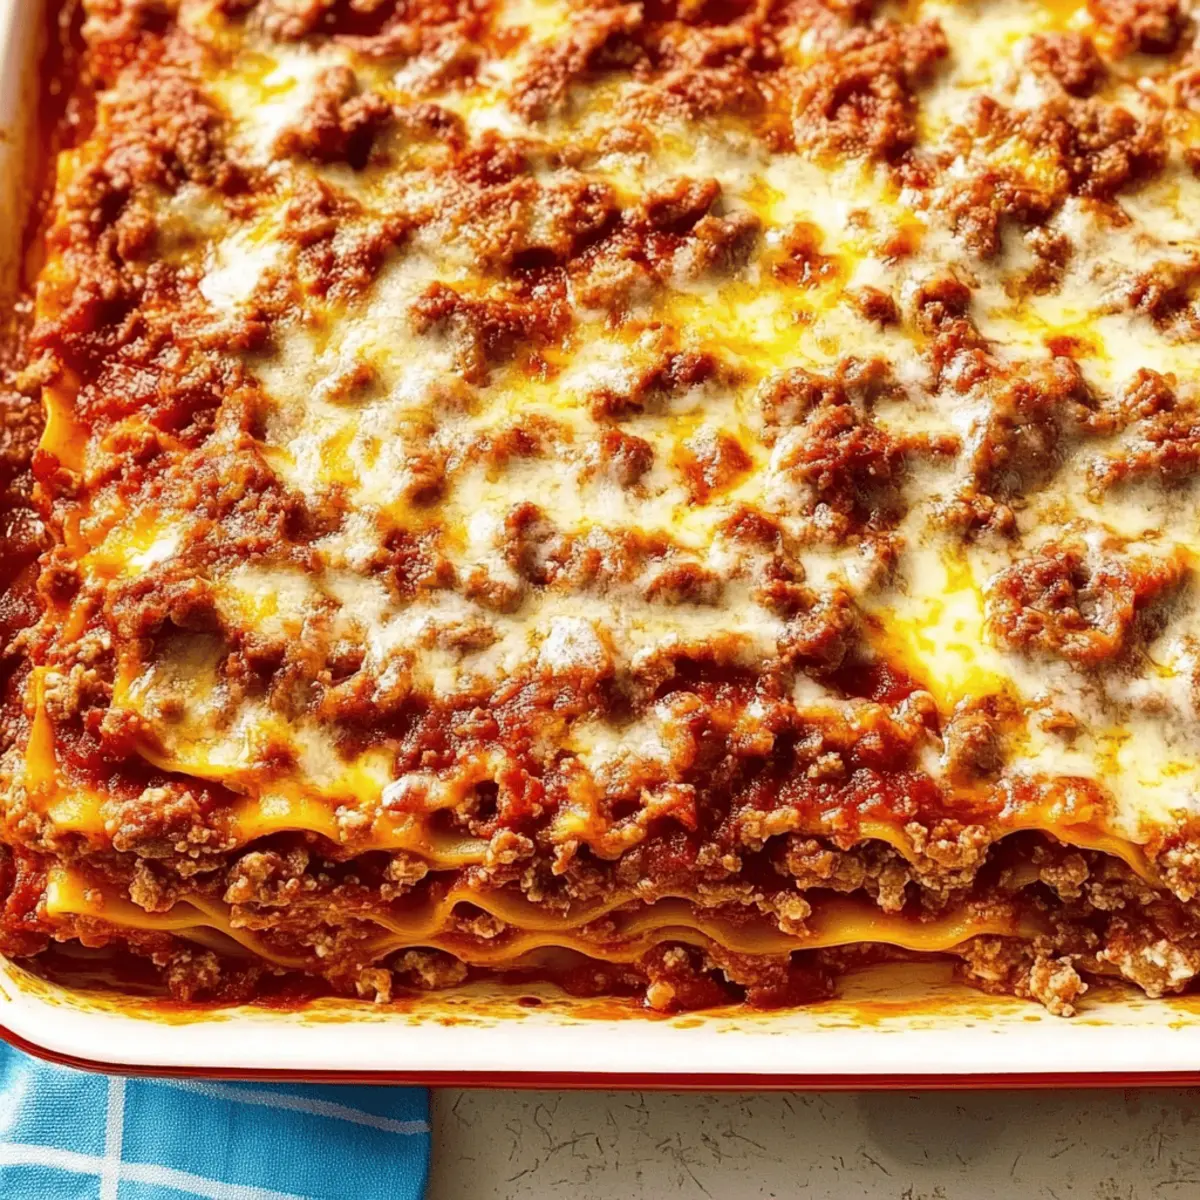
Simplicity, this recipe is designed for everyone—beginner or seasoned chef—with straightforward steps that save time in the kitchen. Flavor-packed layers of meaty goodness, creamy cheeses, and a luscious tomato sauce ensure satisfaction in every bite. Versatility shines through as you can easily swap ingredients, whether you’re craving meat or looking for a vegetarian option. Crowd-pleasing appeal makes this perfect for family gatherings or cozy dinners. For extra inspiration, don’t miss out on my delicious Shepherds Pie Bowl or the comforting Hamburger Potato Soup. Get ready to impress your loved ones with restaurant-quality flavors at home!

Lasagna Recipe Ingredients

For the Meat Sauce

  • Ground Beef – Provides heartiness; opt for lean ground beef to reduce fat.
  • Hot Breakfast Sausage – Adds flavor and spice; feel free to substitute with a milder sausage or ground turkey.
  • Garlic (2 cloves, minced) – Enhances flavor depth; fresh garlic is ideal but powdered can work too.
  • Canned Whole Tomatoes (2 x 14.5-oz cans) – The base for a sweet and tangy meat sauce; crushed or diced tomatoes are great alternatives.
  • Tomato Paste (2 x 6-oz cans) – Intensifies the tomato flavor; using extra fresh tomatoes is also an option.
  • Dried Parsley (4 tablespoons, divided) – Adds fresh herbal notes; you can switch to fresh parsley, using three times the quantity.
  • Dried Basil (2 tablespoons) – Complements tomato sauce perfectly; Italian seasoning can be a quick substitute.
  • Salt (2½ teaspoons) – Balances flavors; adjust according to your taste preferences.

For the Cheese Layer

  • Low-fat Cottage Cheese (3 cups) – Offers creaminess without excess fat; ricotta is a classic replacement for a richer flavor.
  • Eggs (2, beaten) – Binds the cottage cheese mixture together; omit for a dairy-free lasagna.
  • Grated Parmesan Cheese (½ cup) – Adds a salty, umami flavor; freshly grated cheese enhances the taste significantly.

For Assembling

  • Olive Oil (1 tablespoon) – Helps prevent noodles from sticking; a little goes a long way!
  • Lasagna Noodles (1 x 10-oz package) – Provides structure; feel free to use whole wheat or gluten-free noodles depending on your dietary requirements.
  • Sliced Mozzarella Cheese (1 lb) – Delivers a creamy layer in the lasagna; shredded mozzarella can work too.

Gather these ingredients, and you’re on your way to making the ultimate lasagna recipe that will delight your family and friends!

Step‑by‑Step Instructions for The Best Lasagna Ever

Step 1: Cook the Meat
In a large skillet over medium heat, brown 1 pound of ground beef and ½ pound of hot breakfast sausage along with 2 minced garlic cloves. Cook, breaking the meat apart with a spatula, until the meat is no longer pink, about 8-10 minutes. If desired, drain excess fat to keep your lasagna recipe lighter.

Step 2: Make the Sauce
Stir in 2 cans of whole tomatoes, 2 cans of tomato paste, 4 tablespoons of dried parsley, 2 tablespoons of dried basil, and 2½ teaspoons of salt into the skillet. Reduce heat and let the sauce simmer uncovered for about 45 minutes, stirring occasionally. The sauce should thicken and become fragrant, enhancing the rich layers of your lasagna.

Step 3: Boil the Noodles
While the sauce simmers, bring a large pot of salted water to a boil. Add 1 package of lasagna noodles, cooking them until al dente, approximately 8-10 minutes. Drain the noodles and gently rinse with cold water, allowing them to cool slightly while you prepare the cheese mixture.

Step 4: Prepare Cheese Mixture
In a mixing bowl, combine 3 cups of low-fat cottage cheese with 2 beaten eggs, the remaining 2 tablespoons of dried parsley, and ½ cup of grated Parmesan cheese. Mix until fully blended to create a creamy filling that will add richness and flavor to your layers of lasagna.

Step 5: Assemble the Lasagna
Preheat your oven to 350°F. In a deep baking dish, start layering by placing a generous amount of meat sauce on the bottom, followed by a layer of noodles, then half of the cheese mixture, and a layer of sliced mozzarella cheese. Repeat these layers, finishing with a topping of remaining meat sauce and a sprinkle of leftover Parmesan cheese.

Step 6: Bake the Lasagna
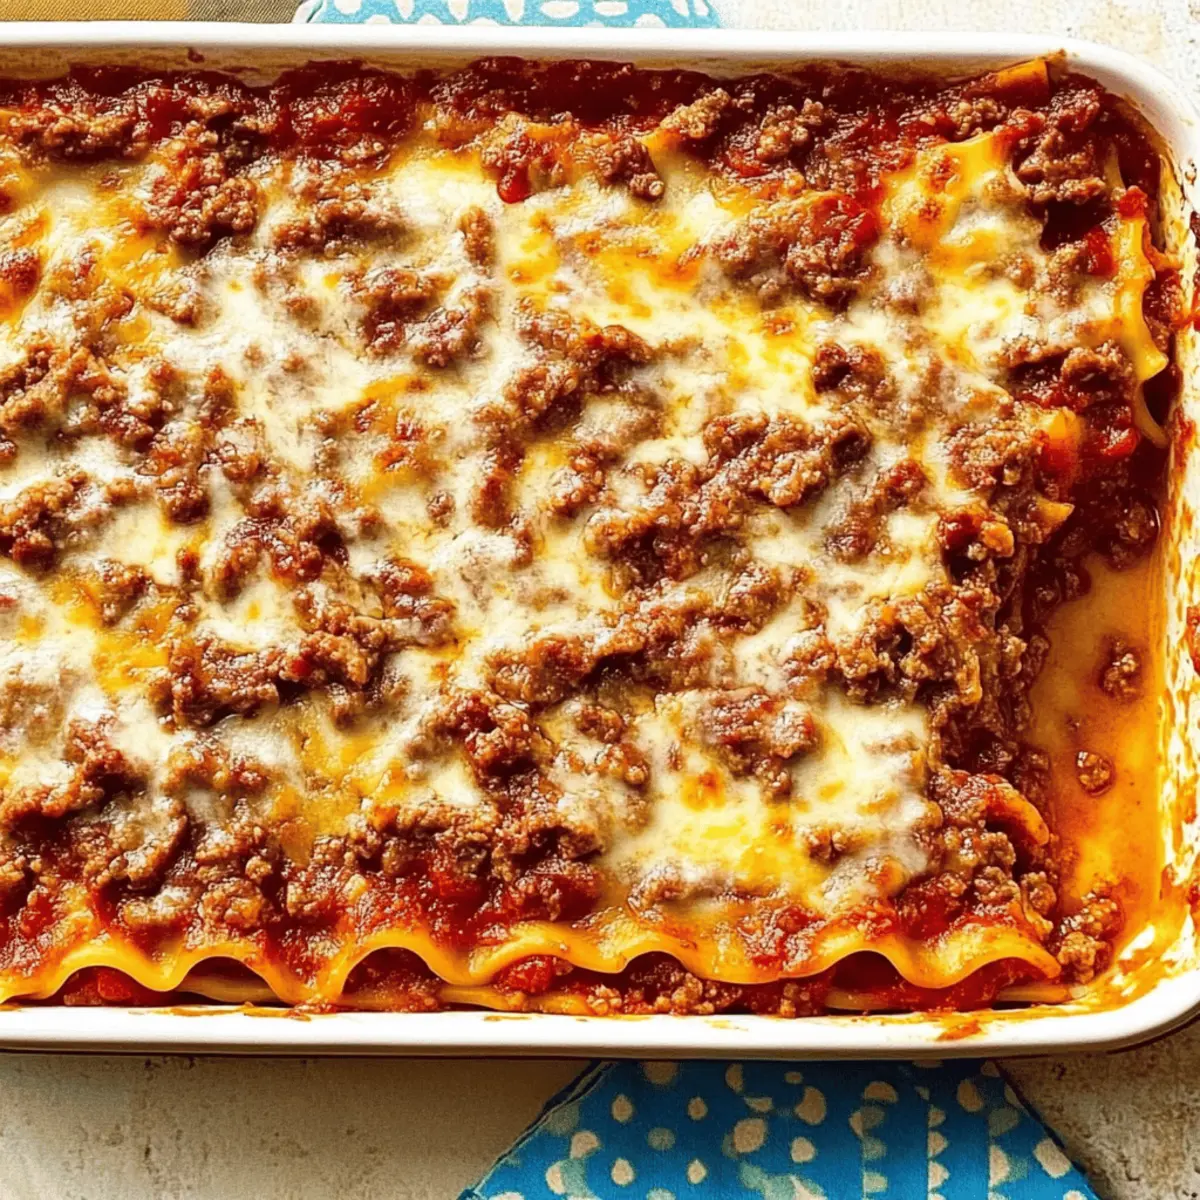
Cover the baking dish with foil and bake in the preheated oven for 20-30 minutes. After the cheese is bubbly and the lasagna is heated through, remove the foil and allow it to bake for an additional 10 minutes to achieve a golden, bubbly top. For best results, let the lasagna sit for a few minutes before slicing and serving.

Lasagna Recipe Variations & Substitutions

Feel free to adapt this delectable lasagna recipe to suit your personal tastes and dietary preferences—let your creativity shine!

  • Turkey or Meatless: Swap ground beef with ground turkey or lentils for a lighter or vegetarian version.

  • Cheesy Delight: Experiment with different cheeses like ricotta, mozzarella, or even vegan cheese for a unique flavor.

  • Vegetable Boost: Layer in fresh spinach, zucchini, or mushrooms to add nutrition and color to your lasagna.

  • Noodle Alternatives: Use whole wheat or gluten-free lasagna noodles to cater to specific dietary needs without sacrificing taste.

  • Extra Heaty: For a kick, add red pepper flakes or diced jalapeños to your meat sauce.

  • Herb Infusion: Fresh herbs like basil, oregano, or thyme can elevate the flavor profile—simply chop and mix them into the sauce for added freshness.

  • Creamy Layers: Substitute the cottage cheese with a blend of cream cheese and Greek yogurt for a richer texture.

  • Tomato Variations: Switch canned tomatoes for a homemade fresh tomato sauce or fire-roasted tomatoes for a smoky essence—especially nice in the winter months!

No matter how you choose to customize, this lasagna will always be a comforting experience. Enjoy exploring other heartwarming recipes like a delightful Easter Chocolate Lasagna or a savory Mexican Taco Soup alongside your culinary adventure!

Make Ahead Options

These Lasagna Recipe components are perfect for busy cooks who want to save time during the week! You can assemble the lasagna up to 24 hours in advance and refrigerate it until you’re ready to bake. Just prepare the meat sauce and cheese mixture ahead of time, layering everything in your baking dish. Cover it tightly with plastic wrap to maintain freshness, which prevents the noodles from drying out. When ready to serve, simply preheat your oven to 350°F and bake for around 20-30 minutes, or until bubbly and golden. This makes enjoying a delicious homemade lasagna easier than ever, ensuring you have time for what matters most!

What to Serve with The Best Lasagna Ever

Diving into a warm, cheesy lasagna opens the door to delightful pairings that will elevate your meal experience.

  • Garlic Bread: The crunchy, buttery goodness of garlic bread is the perfect vehicle to scoop up those last bites of sauce.

  • Caesar Salad: Crisp romaine, crunchy croutons, and tangy dressing create a refreshing contrast to the hearty lasagna.

  • Roasted Vegetables: A medley of seasonal, roasted veggies adds a pop of color and a healthy crunch to balance the richness of the dish.

  • Caprese Salad: Fresh mozzarella, ripe tomatoes, and fragrant basil bring brightness and a lovely freshness that complements the savory layers of lasagna.

  • Red Wine: A bold red like Chianti or a smooth Merlot enhances the beautiful tomato and meat flavors, creating a harmonious dining experience.

  • Tiramisu: For dessert, this luscious coffee-flavored treat provides the perfect sweet ending, making your meal unforgettable.

By pairing these delightful options with your lasagna recipe, you’ll create a feast that feels like a warm hug on a plate!

Expert Tips for the Best Lasagna

  • Layering Technique: Ensure you layer evenly, preventing breakage in the noodles, which can lead to messy servings. A well-structured lasagna makes all the difference.
  • Let it Rest: After assembling your lasagna, allow it to sit for 30 minutes before baking. This helps the layers meld together beautifully, resulting in better texture.
  • Simmer Longer: For a deeper flavor in your sauce, let it simmer for longer, stirring occasionally to avoid sticking. This extra time enhances the overall taste of your lasagna recipe.
  • Cheese Choices: Feel free to experiment with different cheeses like gouda or provolone for unique flavor profiles that can elevate your lasagna experience.
  • Baking Dish Depth: Use a deep baking dish to properly accommodate the layers, ensuring a satisfying and hearty meal.

How to Store and Freeze Lasagna

Fridge: Store your lasagna in an airtight container for up to 3 days after cooking. If you opt not to finish your generous dish, simply cover it well to maintain moisture and flavor.

Freezer: If you want to keep leftovers longer, freeze the lasagna for up to 3 months. Wrap it tightly in plastic wrap or foil, then place it in a freezer-safe bag to ensure freshness.

Reheating: When you’re ready to enjoy your lasagna again, thaw it overnight in the fridge, then bake at 350°F for 25-30 minutes until heated through. You can also microwave individual portions for convenience.

Unbaked Storage: If you prefer to prepare your lasagna in advance, it can be refrigerated unbaked for up to 2 days or frozen straight before baking, ensuring you have a comforting meal ready whenever you need it.

The Best Lasagna Ever Recipe FAQs

How do I select the best tomatoes for my lasagna?
Absolutely! Choose canned whole tomatoes that are packed in juice without any preservatives. Look for quality brands that highlight “San Marzano” tomatoes for the best flavor. If you prefer fresh tomatoes, opt for ripe ones that feel firm to the touch without dark spots or blemishes.

What’s the best way to store leftover lasagna?
Very simple! Store your lasagna in an airtight container in the fridge for up to 3 days. If you’ve got more leftovers than you can manage, wrap it tightly with plastic wrap or aluminum foil to maintain its flavor and moisture.

Can I freeze lasagna, and how do I do it?
Definitely! To freeze, let the lasagna cool completely after baking. Then, wrap it tightly in plastic wrap and again in aluminum foil, or place it in a freezer-safe bag. It can last up to 3 months in the freezer. When you’re ready to eat, thaw it overnight in the fridge and reheat in the oven at 350°F for 25-30 minutes to ensure it’s heated through.

What should I do if my lasagna is watery?
Don’t worry; it’s a common issue if too much liquid isn’t cooked off or if the noodles weren’t pre-cooked sufficiently. To prevent this, ensure your sauce simmers until thickened and consider using a slotted spoon to layer the sauce. If it’s already baked and watery, leave it uncovered in the oven for a few more minutes to help evaporate excess moisture.

Are there any dietary considerations I should keep in mind for this lasagna recipe?
Absolutely! This lasagna can easily be made gluten-free by using gluten-free noodles. If you’re catering to vegetarian guests, substitute the meat with roasted vegetables or a plant-based meat alternative. For dairy-free versions, swap cottage cheese and mozzarella with dairy-free cheese alternatives. Always double-check labels for any potential allergens!

Lasagna Recipe

Irresistible Lasagna Recipe for Ultimate Comfort at Home

This Lasagna Recipe combines hearty layers of meat, cheese, and sauce for ultimate comfort food.
Prep Time 30 minutes
Cook Time 1 hour
Resting Time 30 minutes
Total Time 2 hours
Servings: 8 slices
Course: Pasta
Cuisine: Italian
Calories: 450

Ingredients
  

For the Meat Sauce
  • 1 lb Ground Beef opt for lean ground beef
  • 0.5 lb Hot Breakfast Sausage substitute with a milder sausage or ground turkey
  • 2 cloves Garlic, minced fresh garlic is ideal but powdered can work too
  • 2 14.5-oz cans Canned Whole Tomatoes crushed or diced tomatoes are great alternatives
  • 2 6-oz cans Tomato Paste using extra fresh tomatoes is also an option
  • 4 tablespoons Dried Parsley, divided can switch to fresh parsley
  • 2 tablespoons Dried Basil Italian seasoning can be a substitute
  • 2.5 teaspoons Salt adjust according to your taste
For the Cheese Layer
  • 3 cups Low-fat Cottage Cheese ricotta is a replacement for a richer flavor
  • 2 beaten Eggs omit for a dairy-free lasagna
  • 0.5 cup Grated Parmesan Cheese freshly grated enhances the taste
For Assembling
  • 1 tablespoon Olive Oil helps prevent noodles from sticking
  • 1 10-oz package Lasagna Noodles use whole wheat or gluten-free noodles if needed
  • 1 lb Sliced Mozzarella Cheese shredded mozzarella can work too

Equipment

  • Large skillet
  • Mixing Bowl
  • Pot
  • deep baking dish

Method
 

Cooking Instructions
  1. In a large skillet over medium heat, brown the ground beef and hot breakfast sausage along with minced garlic until no longer pink, about 8-10 minutes.
  2. Stir in tomatoes, tomato paste, parsley, basil, and salt; let sauce simmer uncovered for about 45 minutes.
  3. While the sauce simmers, bring salted water to a boil and cook lasagna noodles until al dente, about 8-10 minutes. Drain and rinse with cold water.
  4. In a mixing bowl, combine cottage cheese with beaten eggs, remaining parsley, and grated Parmesan cheese; mix until blended.
  5. Preheat oven to 350°F. In a deep baking dish, layer meat sauce, noodles, cheese mixture, and mozzarella; repeat layers finishing with meat sauce and Parmesan.
  6. Cover with foil and bake for 20-30 minutes. Remove foil and bake for an additional 10 minutes until the top is golden and bubbly.

Nutrition

Serving: 1sliceCalories: 450kcalCarbohydrates: 35gProtein: 25gFat: 20gSaturated Fat: 10gPolyunsaturated Fat: 1gMonounsaturated Fat: 2gCholesterol: 80mgSodium: 800mgPotassium: 700mgFiber: 3gSugar: 5gVitamin A: 500IUVitamin C: 10mgCalcium: 300mgIron: 3mg

Notes

Allow the lasagna to rest for 30 minutes before serving for better texture and flavor melding.

Tried this recipe?

Let us know how it was!

Cozy Up with Slow Cooker Beef Stew for Ultimate Comfort

There’s something incredibly nostalgic about hearing the gentle gurgle of a slow cooker filling the house with the irresistible aroma of Mom’s Ultimate Slow Cooker Beef Stew. This dish captures the essence of home—rich, comforting, and absolutely mouthwatering. With savory chunks of tender beef mingling with aromatic garlic, earthy thyme, and vibrant vegetables, this hearty comfort food is not just a meal; it’s a hug in a bowl. The best part? It’s family-friendly and offers a simple way to transform dinner into a nourishing experience without enduring hours of prep. You’ll hardly believe how easy it is to create such flavorful magic with minimal effort. So, are you ready to embrace the slow-cooking magic and fill your home with a delicious warmth? Let’s dive into this wonderful recipe together!

Why is this Slow Cooker Beef Stew amazing?

Comforting Warmth: Picture this: a chilly evening, and the rich aroma of beef stew fills your home, wrapping you in warmth and nostalgia.

Simple Preparation: Making this stew is a breeze; just a bit of searing, toss ingredients in your slow cooker, and let it work its magic—all while you relax!

Nourishing Goodness: Packed with protein and fresh vegetables, this dish nourishes the body and soul, making it a hit for both kids and adults.

Versatile Flavor: Feel free to switch things up! Use chicken instead of beef or add mushrooms for an umami blast. It easily adapts to whatever you have on hand!

Time-Saver: If you’re looking for an easy yet impressive meal, this recipe does the trick. Slow cooking allows flavors to deepen while you go about your day.

Family Favorite: There’s a reason beef stew is a timeless classic. It’s loved by everyone, so prepare to see empty bowls and satisfied smiles around the table!

Ready to try this incredible dish? Pair it with some honey cornbread for the ultimate comforting experience!

Slow Cooker Beef Stew Ingredients

• Get ready for a hearty feast!

For the Stew

  • Olive Oil – Perfect for sautéing the beef, enhancing its flavor.
  • Beef Chuck – 3 pounds, trimmed and cubed; this cut provides rich and tender meat for your slow cooker beef stew.
  • Salt and Pepper – To taste; essential for bringing out all the delicious flavors.
  • Beef Broth – 1½ cups; serves as the flavorful base of the stew, but feel free to substitute with bone broth for added richness.
  • Dry Red Wine – 1 cup or extra beef broth; adds depth, and can easily be swapped for a non-alcoholic option.
  • Tomato Paste – 2 tablespoons; thickens the stew and enriches its flavor profile.
  • Worcestershire Sauce – 1 tablespoon; brings a savory umami richness that elevates the dish.
  • Balsamic Vinegar – ½ tablespoon; adds a hint of acidity and sweetness to balance the flavors.
  • Dried Thyme – 1 teaspoon; a delicious herb for flavoring, easily replaceable with fresh thyme if desired.
  • Garlic – 6 cloves, minced; this aromatic powerhouse boosts both aroma and taste.
  • Yellow Onion – 1 large, cut into chunks; contributes sweetness and depth when cooked in the broth.
  • Carrots – 4 large (or 5 medium), sliced; these vegetables provide natural sweetness and color.
  • Yukon Gold Potatoes – 1 pound, diced; adds heartiness and a comforting texture to the stew.
  • All-Purpose Flour – ¼ cup or gluten-free flour; thickens the stew, or can be omitted for a gluten-free option.
  • Frozen Peas – 1 cup; add these towards the end for a pop of color and sweetness.

Embrace this classic slow cooker beef stew—the ultimate comfort food that’s easy to love!

Step‑by‑Step Instructions for Mom’s Ultimate Slow Cooker Beef Stew

Step 1: Sear the Beef
Begin by heating 2 tablespoons of olive oil in a large skillet over medium-high heat. Season 3 pounds of beef chuck cubes with salt and pepper, then add them to the skillet in batches, searing each side for about 5 minutes until they develop a rich, browned crust. This step enhances the flavor of your slow cooker beef stew.

Step 2: Transfer to Slow Cooker
Once all the beef is browned, transfer it to your slow cooker. Pour in 1½ cups of beef broth and 1 cup of dry red wine, followed by 2 tablespoons of tomato paste, 1 tablespoon of Worcestershire sauce, and ½ tablespoon of balsamic vinegar. Add 1 teaspoon of dried thyme, 6 minced garlic cloves, 1 large chopped yellow onion, 4 sliced carrots, and 1 pound of diced Yukon Gold potatoes. Stir well to combine all the ingredients.

Step 3: Set Cooking Time
Cover the slow cooker and set it to cook on low for 7-8 hours or on high for 4-5 hours. This low and slow cooking method allows all the flavors in your slow cooker beef stew to meld beautifully and makes the beef tender. You’ll know it’s ready when the beef is fork-tender and the vegetables are soft.

Step 4: Thicken the Stew
In the last 15 minutes of cooking, whisk ¼ cup of flour with a cup of broth until smooth and creamy. Stir this mixture back into the slow cooker to thicken the stew. Add 1 cup of frozen peas at this point, letting them cook uncovered for about 10-15 minutes until the stew is nice and thick, offering a comforting texture.

Step 5: Serve and Enjoy
Once your Mom’s Ultimate Slow Cooker Beef Stew is ready, ladle it into bowls and serve hot. Pair it with crusty French bread or honey cornbread for a delightful experience that rounds out the meal. Relish the warmth and nourish your loved ones with this hearty dish!

Variations on Slow Cooker Beef Stew

Feel free to get creative with your slow cooker beef stew! Here are some delicious ways to tailor this recipe to your liking.

  • Gluten-Free: Substitute all-purpose flour with gluten-free flour or omit it entirely for a fantastic gluten-free option.
  • Chicken Twist: Swap beef for chicken thighs for a lighter, yet equally comforting version of beef stew. Slow cooking makes it just as tender!
  • Hearty Veggies: Incorporate mushrooms or bell peppers to add depth and an earthy flavor; these vegetables soak up the savory broth beautifully.
  • Spicy Kick: Add chopped jalapeños or a dash of cayenne pepper to introduce some heat; this will give your stew an exciting twist!
  • Herb Variations: Feel free to replace dried thyme with fresh herbs like rosemary or parsley for a vibrant, fresh flavor profile.
  • Sweet Potatoes: Use diced sweet potatoes instead of Yukon Gold for a hint of natural sweetness and vibrant color in your stew.
  • Richness Bump: For added richness, include a splash of heavy cream or coconut milk in the last 15 minutes of cooking for a creamy finish.
  • Umami Boost: Enhance flavor with a spoonful of miso paste or soy sauce stirred in just before serving for an umami explosion.

With all these tasty twists, you’ll never get bored of your slow cooker beef stew! Don’t forget to pair it with some honey cornbread or enjoy a comforting bowl alongside a serving of Sticky Beef Noodles for a heartwarming meal.

Make Ahead Options

These Slow Cooker Beef Stew preparations are perfect for busy home cooks wanting to save time during the week! You can chop and prepare all your vegetables, including the carrots, onion, and Yukon Gold potatoes, up to 24 hours in advance—just store them in an airtight container in the refrigerator, preventing browning. Additionally, you can sear the beef and combine it with the broth and seasonings, storing it in the fridge for up to 3 days. When you’re ready to enjoy your stew, simply combine everything in the slow cooker and cook as directed for a hearty meal that’s just as delicious and comforting as if you had made it fresh!

What to Serve with Mom’s Ultimate Slow Cooker Beef Stew

There’s nothing like filling your table with delightful sides that enhance the warm, savory goodness of a slow-cooked stew.

  • Crusty French Bread: Perfect for soaking up the rich broth, this bread adds a satisfying texture to your meal.

  • Honey Cornbread: Its slight sweetness complements the savory stew, creating a beautiful balance of flavors. A real crowd-pleaser!

  • Garlic Mashed Potatoes: Creamy and comforting, these velvety potatoes enhance the heartiness of the beef stew, making every bite irresistible.

  • Steamed Green Beans: These bright green veggies add a fresh crunch to the table, balancing the richness of the stew.

  • Simple Side Salad: A crisp salad with mixed greens, cherry tomatoes, and a light vinaigrette will refresh your palate and lighten the meal.

  • Red Wine: A glass of dry red wine harmonizes beautifully with the deep flavors of the stew, enhancing the overall dining experience.

  • Chocolate Lava Cake: For a sweet finish, this dessert creates a delightful contrast to the savory stew, leaving everyone satisfied and happy.

Expert Tips for Slow Cooker Beef Stew

  • Trim Fat: Remove excess fat from the beef to ensure a more tender texture in your slow cooker beef stew.

  • Wine Adjustment: Feel free to adjust the amount of red wine according to your taste preferences, or simply use more beef broth for a non-alcoholic version.

  • Proper Filling: Ensure your slow cooker is adequately filled to retain moisture throughout the cooking process for perfect results every time.

  • Thickening Consistency: If you prefer a thicker stew, carefully adjust the flour to broth ratio in the final step to achieve your desired consistency.

  • Veggie Variations: Experiment with different vegetables like mushrooms or bell peppers to enhance flavor and nutrition in your slow cooker beef stew.

  • Leftover Magic: Store leftovers in an airtight container, and enjoy the flavors as they deepen even more overnight in the fridge!

Storage Tips for Slow Cooker Beef Stew

  • Fridge: Store leftovers in an airtight container for up to 3-4 days. This helps keep your slow cooker beef stew fresh and ready for a quick meal.

  • Freezer: For longer storage, freeze cooled stew in a freezer-safe container for up to 3 months. Thaw in the refrigerator overnight before reheating.

  • Reheating: When reheating, warm up in a microwave or on the stove over medium heat until heated through. You might want to add a splash of broth for moisture.

  • Airtight Guidance: Always make sure your container is well-sealed to preserve flavor and prevent freezer burn when storing your delicious slow cooker beef stew.

Slow Cooker Beef Stew Recipe FAQs

What type of beef should I use for the best flavor?
Absolutely! I recommend using beef chuck for its tenderness and rich flavor, which is perfect when slow cooked. It breaks down beautifully, resulting in melt-in-your-mouth bites that enhance the overall taste of your slow cooker beef stew.

How do I store leftovers, and how long do they last?
Store any leftovers in an airtight container in the fridge for up to 3-4 days. This ensures that your delicious slow cooker beef stew stays fresh and safe to eat, making it easy to enjoy as a quick meal during the week.

Can I freeze my slow cooker beef stew?
Yes, you can! For optimal storage, allow the stew to cool completely before transferring it to a freezer-safe container. It can be frozen for up to 3 months. When you’re ready to enjoy it, simply thaw it overnight in the refrigerator and reheat on the stove or in the microwave.

What should I do if my stew is too thin?
If your slow cooker beef stew turns out thinner than you’d like, don’t worry! Substituting half a cup of broth with ¼ cup of cornstarch mixed until smooth can help thicken it. Gradually stir this mixture into the stew during the last 20 minutes of cooking and let it simmer uncovered, allowing it to thicken up nicely.

Are there any dietary considerations I should keep in mind?
Very! If you’re making the stew for someone with gluten sensitivity, simply omit the flour or substitute it with a gluten-free alternative. The stew is also adaptable—use chicken or a plant-based protein to cater to dietary needs while still delivering a nourishing meal for everyone at the table.

How can I tell if my vegetables are fresh enough to use?
When selecting vegetables, look for ones that are firm and vibrant in color. Avoid any that show signs of spoilage, like soft spots or discoloration. For example, carrots should be crunchy, and potatoes should be free from dark spots. Fresh ingredients truly elevate your slow cooker beef stew!

Slow Cooker Beef Stew

Cozy Up with Slow Cooker Beef Stew for Ultimate Comfort

Enjoy a flavorful experience with Slow Cooker Beef Stew, perfect for a comforting family dinner.
Prep Time 15 minutes
Cook Time 8 hours
Thickening Time 15 minutes
Total Time 8 hours 15 minutes
Servings: 6 servings
Course: Dinner
Cuisine: American
Calories: 350

Ingredients
  

For the Stew
  • 3 pounds Beef Chuck trimmed and cubed
  • 1.5 cups Beef Broth or bone broth
  • 1 cup Dry Red Wine or extra beef broth
  • 2 tablespoons Tomato Paste
  • 1 tablespoon Worcestershire Sauce
  • 0.5 tablespoon Balsamic Vinegar
  • 1 teaspoon Dried Thyme
  • 6 cloves Garlic minced
  • 1 large Yellow Onion cut into chunks
  • 4 large Carrots sliced
  • 1 pound Yukon Gold Potatoes diced
  • 0.25 cups All-Purpose Flour or gluten-free option
  • 1 cup Frozen Peas add towards the end
  • 2 tablespoons Olive Oil for sautéing
  • to taste Salt
  • to taste Pepper

Equipment

  • Slow Cooker
  • Skillet

Method
 

Cooking Steps
  1. Sear the Beef: Heat olive oil in a skillet over medium-high heat. Season beef chuck cubes with salt and pepper. Sear each side for about 5 minutes until browned.
  2. Transfer to Slow Cooker: Add the seared beef to the slow cooker. Pour in beef broth, dry red wine, tomato paste, Worcestershire sauce, balsamic vinegar, dried thyme, garlic, onion, carrots, and potatoes. Stir to combine.
  3. Set Cooking Time: Cover and cook on low for 7-8 hours or high for 4-5 hours until the beef is fork-tender.
  4. Thicken the Stew: Whisk flour with a cup of broth until smooth, then stir into the slow cooker. Add frozen peas and cook uncovered for 10-15 minutes until thick.
  5. Serve and Enjoy: Ladle stew into bowls and serve hot, preferably with crusty bread or honey cornbread.

Nutrition

Serving: 1cupCalories: 350kcalCarbohydrates: 35gProtein: 30gFat: 12gSaturated Fat: 4gPolyunsaturated Fat: 1gMonounsaturated Fat: 6gCholesterol: 80mgSodium: 900mgPotassium: 800mgFiber: 4gSugar: 4gVitamin A: 500IUVitamin C: 15mgCalcium: 40mgIron: 3mg

Notes

This stew is perfect for leftovers and tastes even better the next day. Freezes well for up to 3 months.

Tried this recipe?

Let us know how it was!

Comforting Chicken Broccoli Rice Casserole in One Pot

In a whirlwind of flavors and textures, your weeknight dinner just found its hero! This One Pot Cheesy Chicken Broccoli Rice Casserole is a delightful blend of tender chicken, vibrant broccoli, and creamy cheese, all cooked together in a single, easy-to-clean pot. Not only does this dish whip up in just 30 minutes, but it’s also packed with comforting goodness that will satisfy even the pickiest eaters. Plus, it’s perfect for families on the go and can easily be customized with various ingredient swaps to fit your pantry. Ready to bring some warmth to your table? Let’s dive into this cozy classic that will quickly become a beloved staple in your home!

Why is this casserole a weeknight winner?

Simplicity at Its Finest: This One Pot Cheesy Chicken Broccoli Rice Casserole comes together effortlessly, requiring minimal prep and cleanup.

Time-Saving Delight: Ready in just 30 minutes, it’s the perfect solution for busy evenings without sacrificing flavor.

Nutrient-Rich Goodness: Packed with protein, veggies, and creamy cheese, it’s a wholesome meal your family will love.

Versatile Customization: Feel free to swap in ingredients like rotisserie chicken or frozen broccoli for quick prep!

Crowd-Pleasing Comfort: This casserole is a surefire hit with everyone at the table, making it an excellent option for family gatherings or potlucks.

It’s the ultimate blend of convenience and joy, reminiscent of cozy home-cooked meals that make any night feel special!

Chicken Broccoli Rice Casserole Ingredients

For the Casserole
Olive oil – Provides fat for cooking the chicken and vegetables; can use butter if preferred.
Onion – Adds sweetness and depth of flavor; use shallots for a milder taste.
Chicken breasts – Main protein source, cubed for quick cooking; rotisserie chicken can be used for faster prep.
Salt and black pepper – Essential seasonings to enhance overall flavor; adjust to taste.
Garlic – Infuses the dish with aroma and flavor; minced garlic can be replaced with garlic powder if necessary.
Rice – Acts as the base, absorbing flavors and providing bulk; use long-grain white rice as brown rice will require more liquid and longer cooking time.
Cream of chicken soup – Adds creaminess and flavor depth; can replace with cream of mushroom or cream of broccoli soup.
Chicken broth – Adds moisture and intensifies flavor; use low-sodium broth to control saltiness.
Broccoli florets – Provides freshness and nutrition; frozen broccoli can be used with adjusted cooking time.
Cheddar cheese – Melts to create a creamy, cheesy topping; can substitute with mozzarella or gouda.
Parsley – Freshens and garnishes the dish; optional but adds a pop of color and flavor.

Step‑by‑Step Instructions for One Pot Cheesy Chicken Broccoli Rice Casserole

Step 1: Sauté Chicken and Onion
In a large, oven-proof skillet, heat 2 tablespoons of olive oil over medium heat. Add 1 chopped onion and 1 pound of cubed chicken breasts, cooking for about 5 minutes or until the chicken is browned and no longer pink. Stir regularly to prevent sticking and ensure even cooking.

Step 2: Add Garlic
Stir in 2 minced garlic cloves into the skillet with the chicken mixture. Sauté the garlic for about 30 seconds, allowing its fragrant aroma to envelop your kitchen. This step enhances the flavor, preparing the base for your delicious Chicken Broccoli Rice Casserole.

Step 3: Incorporate Rice and Liquids
Add in 1 cup of long-grain white rice, 1 can of cream of chicken soup, and 2 cups of chicken broth. Stir well to combine, ensuring the rice is evenly coated with the soup mixture. Bring this mixture to a gentle boil over medium-high heat, which will set the stage for cooking the rice perfectly.

Step 4: Cook Rice
Once boiling, cover the skillet with a lid and reduce the heat to low. Allow the rice to simmer for about 15 minutes, stirring occasionally. The rice should absorb the broth and become tender, providing a creamy texture that will marry beautifully with the other ingredients.

Step 5: Add Broccoli and Cheese
After the rice has cooked, carefully mix in 2 cups of broccoli florets and half of the shredded cheddar cheese (about 1 cup). Cook for an additional 2 minutes until the broccoli softens slightly but retains its vibrant color. This addition enriches the casserole with nutrition and flavor.

Step 6: Broil
Preheat your oven’s broiler while you sprinkle the remaining cheddar cheese on top of the casserole mixture. Place the skillet under the broiler for 1 to 2 minutes or until the cheese is melted and bubbling, becoming slightly golden. Keep a close eye to prevent burning—it should be perfectly gooey and irresistible!

Step 7: Garnish and Serve
Once broiling is complete, remove the skillet from the oven, and sprinkle freshly chopped parsley on top for a burst of color and flavor. Serve the comforting Chicken Broccoli Rice Casserole immediately, ensuring each scoop brings together that delightful combination of creamy cheese, tender chicken, and fresh broccoli.

Chicken Broccoli Rice Casserole Variations

Feel free to get creative and make this comforting casserole your own with these easy swaps and additions!

  • Dairy-Free: Use coconut milk or a dairy-free cream soup and your favorite dairy-free cheese for a creamy texture without the dairy.

  • Low-Carb Option: Swap out rice for cauliflower rice to reduce carbs while still enjoying a delicious flavor profile. This keeps the dish nutritious and light!

  • Flavor Boost: Add a teaspoon of mustard or a sprinkle of smoked paprika to elevate the savory notes of the casserole.

  • Veggie Lovers: Toss in roasted zucchini, spinach, or even asparagus; these will all complement the dish beautifully and add a vibrant twist. Every additional veggie adds a splash of color and nutrition.

  • Spicy Kick: Mix in some diced jalapeños or a sprinkle of chili powder to awaken your taste buds and get that perfect amount of heat.

  • Hearty Addition: For a more filling meal, incorporate canned beans or lentils for that protein punch; they also bring a lovely creamy texture.

  • One-Pot Wonder Upgrade: If you’re feeling adventurous, try adding a splash of white wine while cooking the chicken for a sophisticated depth of flavor that’ll impress your family and friends.

  • Use Alternatives: Try using quinoa instead of rice. Quinoa will enhance the protein content and provide a nutty flavor that balances wonderfully with the cheese.

Remember, your kitchen is like a canvas—feel free to combine different variations or develop your unique style! And if you’re looking for more delightful one-pot ideas, check out my Corn Chicken Rice or Oven Chicken Rice recipes for more inspiration!

Make Ahead Options

These One Pot Cheesy Chicken Broccoli Rice Casseroles are perfect for busy home cooks looking to save time! You can prep all the ingredients—chop the vegetables, cube the chicken, and mix the rice—up to 24 hours in advance. Store them in separate airtight containers in the refrigerator to maintain their freshness. When you’re ready to cook, simply combine everything in your skillet and follow the recipe as directed. To ensure the casserole remains just as delicious, avoid adding the cheese until you’re about to broil it—this keeps it melty and gooey. With these make-ahead tips, you’ll have a comforting meal on the table with minimal effort!

Storage Tips for Chicken Broccoli Rice Casserole

Fridge: Store leftovers in an airtight container for up to 3 days to maintain freshness and flavor.

Freezer: For longer storage, freeze portions for up to 3 months. Ensure the casserole is fully cooled, and use a freezer-safe container to avoid freezer burn.

Reheating: Reheat in the microwave or oven until heated through—about 2-3 minutes in the microwave or 15-20 minutes in a 350°F oven, adding a splash of broth to keep it creamy.

Serving: When ready to enjoy, let the Chicken Broccoli Rice Casserole rest for a few minutes before serving to enhance the flavors.

What to Serve with One Pot Cheesy Chicken Broccoli Rice Casserole

Elevate your dinner experience with delightful sides and beverages that perfectly complement this comforting dish’s cheesy goodness!

  • Crisp Green Salad: A refreshing salad with mixed greens and a citrus vinaigrette adds a bright contrast to the rich casserole.
  • Garlic Bread: Crunchy, buttery garlic bread not only enhances the meal but also makes it a hit for dipping into the delicious cheesy sauce.
  • Roasted Vegetables: Seasonal roasted veggies provide a crispy texture and extra nutrients, balancing the creamy casserole splendidly.
  • Steamed Asparagus: Vibrant asparagus drizzled with lemon gives a fresh, zesty twist that brightens your plate and palate.
  • Fruit Salad: A light fruit salad with berries and melons offers a sweet finish and a burst of freshness to round out the meal.
  • Ice-Cold Lemonade: A chilled glass of lemonade serves as a thirst quencher, and its tang complements the richness of the casserole beautifully.
  • Chocolate Chip Cookies: Warm cookies for dessert provide a sweet finale, evoking cozy memories and leaving everyone smiling.
  • Sparkling Water: A refreshing and bubbly alternative adds elegance, cleansing the palate between bites of the creamy casserole.
  • Coleslaw: A creamy coleslaw adds a crunchy and tangy element, enhancing the comforting flavors of the chicken broccoli rice casserole.

Tips for the Best Chicken Broccoli Rice Casserole

  • Use Fresh Ingredients: Opt for fresh chicken and broccoli for the best flavor. Frozen ingredients are convenient but may alter texture slightly.
  • Watch the Rice: Always check the rice for doneness; it should be tender but not mushy. You can add more broth if needed.
  • Preheat Broiler: Ensure your broiler is piping hot before placing the casserole under it for that perfect golden cheese topping.
  • Serve Immediately: This Chicken Broccoli Rice Casserole is best enjoyed hot straight from the oven, as it maintains its creamy texture and flavor.
  • Experiment with Cheese: Feel free to mix different cheeses for a unique twist; cheddar, mozzarella, or even pepper jack can add delightful flavors!

One Pot Cheesy Chicken Broccoli Rice Casserole Recipe FAQs

What type of chicken should I use for this casserole?
You can use fresh chicken breasts for the best flavor and texture. If you’re pressed for time, rotisserie chicken is a fantastic shortcut—just shred it and mix it in with the other ingredients!

How long can I store the leftover casserole?
Store leftovers in an airtight container in the refrigerator for up to 3 days. To keep the flavors fresh, ensure it’s cooled completely before sealing it up.

Can I freeze Chicken Broccoli Rice Casserole?
Absolutely! After cooling completely, portion the casserole into freezer-safe containers and freeze for up to 3 months. When you’re ready to enjoy it, let it thaw overnight in the fridge, then reheat in the oven or the microwave until warmed through.

What if my rice is undercooked or too dry?
If you find your rice is undercooked, simply add a little more chicken broth—start with 1/4 cup—and simmer on low while stirring occasionally until the rice is tender. Keeping an eye on the moisture level will help you achieve that creamy texture.

Are there any allergy considerations with this recipe?
Yes! If you’re serving someone with allergies, check that they are okay with chicken and dairy, as this recipe contains both. If dairy is a concern, you can try substituting with dairy-free cheese options or using a creamy sauce that’s lactose-free!

Can I incorporate other vegetables into the casserole?
Very much so! Feel free to add in veggies like bell peppers, peas, or even spinach. Just remember to adjust the cooking time slightly for softer vegetables, ensuring they blend well with the overall texture of the Chicken Broccoli Rice Casserole.

Chicken Broccoli Rice Casserole

Comforting Chicken Broccoli Rice Casserole in One Pot

This Chicken Broccoli Rice Casserole is a delicious, easy-to-make comfort food packed with flavors, perfect for weeknight dinners.
Prep Time 10 minutes
Cook Time 20 minutes
Total Time 30 minutes
Servings: 4 servings
Course: Casserole
Cuisine: American
Calories: 420

Ingredients
  

For the Casserole
  • 2 tablespoons Olive oil Can use butter if preferred.
  • 1 medium Onion Chopped; use shallots for a milder taste.
  • 1 pound Chicken breasts Cubed; rotisserie chicken can be used for faster prep.
  • to taste Salt Essential seasoning to enhance flavor.
  • to taste Black pepper Essential seasoning to enhance flavor.
  • 2 cloves Garlic Minced; can be replaced with garlic powder if necessary.
  • 1 cup Rice Long-grain white rice; brown rice will require more liquid.
  • 1 can Cream of chicken soup Can replace with cream of mushroom or cream of broccoli soup.
  • 2 cups Chicken broth Low-sodium to control saltiness.
  • 2 cups Broccoli florets Frozen broccoli can be used with adjusted cooking time.
  • 2 cups Cheddar cheese Shredded; can substitute with mozzarella or gouda.
  • to taste Parsley Optional; adds a pop of color and flavor.

Equipment

  • Large oven-proof skillet

Method
 

Step-by-Step Instructions for One Pot Cheesy Chicken Broccoli Rice Casserole
  1. In a large, oven-proof skillet, heat 2 tablespoons of olive oil over medium heat. Add 1 chopped onion and 1 pound of cubed chicken breasts, cooking for about 5 minutes until the chicken is browned and no longer pink.
  2. Stir in 2 minced garlic cloves into the skillet with the chicken mixture. Sauté the garlic for about 30 seconds.
  3. Add in 1 cup of long-grain white rice, 1 can of cream of chicken soup, and 2 cups of chicken broth. Stir well and bring to a gentle boil.
  4. Once boiling, cover the skillet with a lid and reduce heat to low. Allow the rice to simmer for about 15 minutes.
  5. After the rice has cooked, mix in 2 cups of broccoli florets and 1 cup of shredded cheddar cheese. Cook for an additional 2 minutes.
  6. Preheat your oven's broiler, then sprinkle the remaining cheddar cheese on top. Broil for 1-2 minutes until melted and slightly golden.
  7. Remove from oven and garnish with freshly chopped parsley. Serve immediately.

Nutrition

Serving: 1servingCalories: 420kcalCarbohydrates: 45gProtein: 30gFat: 15gSaturated Fat: 7gPolyunsaturated Fat: 1gMonounsaturated Fat: 4gCholesterol: 78mgSodium: 680mgPotassium: 600mgFiber: 3gSugar: 2gVitamin A: 500IUVitamin C: 35mgCalcium: 250mgIron: 2mg

Notes

For best results, use fresh ingredients and check the rice for doneness. Serve hot for the best texture and flavor.

Tried this recipe?

Let us know how it was!

Mochi Brownies: Chewy, Chocolatey Bliss You’ll Love

As I discovered the magic of merging flavors, a thought struck me: mochi brownies could change the dessert game forever! These Easy Gluten-Free Mochi Brownies unite the delightful chewiness of Japanese mochi with the fudgy richness of classic brownies, creating a treat that’s not only mouthwatering but incredibly satisfying. Perfect for your next gathering or cozy night in, these brownies also cater to those who must navigate dietary restrictions without compromising taste. With quick prep time and a simple ingredient list, you’ll find yourself craving these irresistible bites again and again. Are you ready to whip up a batch of these chewy chocolate delights that will leave your guests in awe?

Why are Mochi Brownies a Must-Try?

Unique Texture: The chewy, fudgy appeal of these mochi brownies transforms the traditional dessert experience, offering a delightful bite unlike any other.

Gluten-Free Delight: Perfect for gluten-sensitive friends, this recipe uses mochiko flour, ensuring everyone can indulge without worry.

Quick and Easy: With minimal prep and bake time, you’ll have these treats ready to impress in no time—even after a busy day!

Flavor Versatility: Feel free to customize with ingredients like nuts, or experiment with different extracts; the possibilities are endless!

Crowd-Pleasing Appeal: Whether at a gathering or a quiet evening at home, these brownies are sure to be a hit—who can resist chocolatey goodness?

Elevate your dessert game with these Mochi Brownies!

Mochi Brownie Ingredients

• Get ready to dive into deliciousness!

For the Batter

  • Granulated Sugar – Provides sweetness; consider using coconut sugar for a wholesome option.
  • Mochiko Flour – Creates the delightful chewy texture; make sure to use mochiko (sweet rice flour) for the perfect result.
  • Cocoa Powder – Delivers rich chocolate flavor; swap with dark cocoa for an even deeper taste.
  • Baking Soda – Helps the brownies rise; ensure it’s fresh for optimal results.
  • Salt – Balances flavors; just a pinch enhances sweetness without being overpowering.
  • Milk – Moistens the batter; use almond milk or coconut milk for a dairy-free alternative.
  • Unsalted Butter – Adds richness and moisture; substitute with coconut oil for a dairy-free option.
  • Eggs – Binds the ingredients together; whisk until frothy for the best consistency.
  • Vanilla – Introduces a lovely depth of flavor; almond extract gives a unique twist if desired.
  • Chocolate Chips – Optional for an extra chocolatey kick; dust with flour before mixing to prevent sinking.

Prepare these ingredients, and get ready to indulge in some irresistible mochi brownies!

Step‑by‑Step Instructions for Easy Gluten-Free Mochi Brownies

Step 1: Preheat the Oven
Begin by preheating your oven to 350°F (175°C). This ensures that the heat is evenly distributed when you bake your Easy Mochi Brownies. While the oven heats up, gather all your ingredients, as this will streamline your cooking process and keep things organized.

Step 2: Combine Dry Ingredients
In a large mixing bowl, combine granulated sugar, mochiko flour, cocoa powder, baking soda, and salt. Whisk these dry ingredients together thoroughly, ensuring no lumps remain. You are looking for a well-mixed, even texture that will elevate the flavor of your mochi brownies once baked.

Step 3: Mix Wet Ingredients
In a separate bowl, pour in the milk, melted butter, eggs, and vanilla extract. Use a whisk to mix these ingredients until they are perfectly blended and frothy. This step is crucial for creating a smooth batter that binds the flavors together beautifully in your mochi brownies.

Step 4: Combine Wet and Dry Mixes
Next, pour the wet mixture into your dry ingredients. Gently stir them together until just combined; be cautious not to overmix or it could affect the chewy texture of your brownies. The batter will be thick and rich, providing the foundation for that delightful mochi experience.

Step 5: Prepare the Baking Pan
Grease an 8×8 inch baking pan with butter or non-stick spray, ensuring it’s evenly coated to prevent sticking. Pour the rich brownie batter into the pan, smoothing it out with a spatula for even baking. For an optional treat, feel free to sprinkle chocolate chips on top before placing it in the oven.

Step 6: Bake the Brownies
Slide the pan into your preheated oven and bake for 60 minutes. Keep an eye on the brownies during the last few minutes—insert a toothpick into the center, and if it comes out clean or with a few moist crumbs, your Easy Mochi Brownies are ready to come out!

Step 7: Cool and Serve
Once baked, remove the brownies from the oven and let them cool completely in the pan on a wire rack. Patience is key here; allowing them to cool fully ensures a perfect chewy texture. After they’ve cooled, cut them into squares and serve them up to delighted friends and family!

What to Serve with Easy Gluten-Free Mochi Brownies?

Creating a memorable meal experience means pairing complementary flavors and textures that will leave everyone craving more.

  • Vanilla Ice Cream: The creaminess of vanilla ice cream contrasts beautifully with the chewy brownies, making each bite a delightful experience. A scoop on top or a side serving brings a decadent touch everyone will love.

  • Whipped Cream: Light and fluffy, whipped cream adds an airy contrast to the rich, fudgy brownies. Top your mochi brownies with a generous dollop for a simple yet elegant presentation.

  • Fresh Berries: The tartness of fresh strawberries or raspberries cuts through the sweetness of the brownies, offering a refreshing crunch and beautiful color on your plate. Simply tossed or served alongside, they brighten up the dessert.

  • Matcha Tea: This earthy drink, often enjoyed in Japanese culture, complements the mochi brownies’ flavor profile perfectly. It adds a calming balance to the rich chocolate, creating a harmonious experience.

  • Chocolate Sauce: A drizzle of warm chocolate sauce enhances the brownie’s flavor, inviting the chocolate lovers to dig in deeper. It adds a rich, indulgent element that makes each bite even more delightful.

  • Espresso or Coffee: The bold flavor of espresso pairs wonderfully with the sweetness of the brownies, intensifying the chocolatey notes. The warmth of the coffee balances out the chewy dessert beautifully.

  • Coconut Whipped Cream: For a dairy-free twist, top your mochi brownies with whipped coconut cream. Its subtle coconut flavor enhances both texture and taste, providing a tropical feel to your dessert.

Elevate your dessert game and impress your loved ones with these delicious pairings!

Make Ahead Options

These Easy Mochi Brownies are a fantastic option for meal prep enthusiasts! You can prepare the brownie batter up to 24 hours in advance by combining the dry ingredients and the wet ingredients in separate bowls. Store each in airtight containers in the refrigerator to preserve freshness. When you’re ready to bake, simply combine the two mixtures and proceed with the baking instructions—this ensures that you’ll enjoy that chewy goodness just as if they were made fresh! If you have leftover brownies, they can be stored at room temperature for 3-4 days, and may even improve in flavor as they sit. Indulge in the convenience of make-ahead baking, perfect for your busy weeknights!

Mochi Brownies Variations & Substitutions

Feel free to personalize these mochi brownies, enhancing their flavors and making them your own!

  • Dairy-Free: Substitute unsalted butter with coconut oil for a buttery richness without dairy.

  • Nut-Free: Replace any nuts with extra chocolate chips or dried fruits for a delightful chewy texture that everyone can enjoy.

  • Healthier Sweetener: Use coconut sugar instead of granulated sugar to give your brownies a subtle caramel flavor while keeping them guilt-free.

  • Extra Chocolatey: Swap regular cocoa powder with dark cocoa for an even richer chocolate experience. It’s a simple twist that ramps up the decadence!

  • Flavored Extracts: Enhance the flavor profile by trying almond or coconut extract instead of vanilla; each brings a unique character to your brownies.

  • Textural Twist: Add some chopped walnuts or pecans to the batter for crunchy bites amidst the chewy brownie goodness.

  • Spicy Kick: For those who enjoy a little heat, a touch of cayenne or chili powder can elevate the brownies; it’s an unexpected flavor that might surprise you!

  • Fruity Addition: Incorporate mashed bananas or pureed pumpkin for extra moisture and natural sweetness. Not only do they add flavor, but they also make these brownies wonderfully rich!

Dive into these delicious variations and revel in the creative process of making these Mochi Brownies your personal masterpiece!

Expert Tips for Mochi Brownies

  • Watch the Timer: Keep an eye on the baking time, as ovens can vary. It’s better to check at 50 minutes to avoid overbaking your mochi brownies.

  • Check Your Ingredients: Use fresh baking soda for the best rise. Old baking soda could lead to dense brownies instead of the light, chewy texture you desire.

  • Cooling is Key: Allow the brownies to cool completely before cutting. This helps maintain their structure and enhances the chewy texture.

  • Flour the Chips: If adding chocolate chips, toss them in a bit of flour before mixing. This simple step prevents them from sinking to the bottom of the batter.

  • Experiment with Flavors: Don’t hesitate to personalize your mochi brownies! Try adding different extracts or mix-ins like nuts or dried fruits for a unique twist.

How to Store and Freeze Mochi Brownies

Room Temperature: Keep your Mochi Brownies in an airtight container for up to 3 days at room temperature. They’ll stay chewy and delicious, perfect for that spontaneous sweet craving!

Fridge: For extended freshness, store the brownies in the refrigerator for up to a week. Just be sure to let them come to room temperature before enjoying for optimal texture.

Freezer: You can freeze mochi brownies for up to 3 months. Wrap each brownie individually in plastic wrap and then place them in an airtight container. Thaw at room temperature before indulging.

Reheating: If you prefer them warm, pop a brownie in the microwave for about 10-15 seconds. Enjoy the delightful gooeyness with every bite!

Easy Gluten-Free Mochi Brownies Recipe FAQs

How do I choose the right mochiko flour?
Absolutely! When selecting mochiko flour for your mochi brownies, look for a package labeled “sweet rice flour” or “mochiko.” This type of flour is specifically designed to create that chewy texture you’re after. Ensure the flour is fresh and free of any clumps to achieve the best results in your baking.

How should I store leftover mochi brownies?
Storing your mochi brownies is a breeze! Keep them in an airtight container at room temperature for about 3 to 4 days. They’ll maintain their wonderful chewiness, making them a delightful treat whenever you crave something sweet. For a longer shelf life, refrigerate them for up to a week, but remember to let them come to room temperature before enjoying.

Can I freeze my mochi brownies? If so, how?
Of course! Freezing mochi brownies is a fantastic way to extend their deliciousness. Wrap each brownie individually in plastic wrap, then place them in an airtight container or a resealable freezer bag. They can last up to 3 months in the freezer. When you’re ready to indulge, simply thaw them at room temperature or pop them in the microwave for about 10-15 seconds to warm them up and restore that lovely gooey texture.

What should I do if my brownies are too dense?
If your mochi brownies turn out denser than expected, it could be due to overmixing the batter or using too much flour. To fix this, combine the wet and dry ingredients gently until just mixed. Also, ensure that your baking soda is fresh, as old leavening agents can lead to a lack of rise. If they still seem too dense after baking, don’t fret! Serve them warm with a scoop of ice cream; it’s a delicious way to enjoy them regardless!

Are these mochi brownies safe for people with allergies?
Great question! These mochi brownies can be adapted to suit various dietary needs. For gluten-free individuals, make sure to use certified gluten-free ingredients. If you’re concerned about dairy allergies, substitute unsalted butter with coconut oil and choose nut milk like almond or oat milk. Always double-check labels for any potential allergens. Additionally, be mindful of cross-contamination if you’re serving to guests with specific allergies.

Can I use different flavors or add-ins?
Very! One of the beautiful aspects of mochi brownies is their versatility. Feel free to mix in flavors like almond or coconut extract for a unique twist. You can also replace chocolate chips with nuts or dried fruits for added texture and flavor. Just remember to adjust the sweetness accordingly if you’re adding more ingredients! The more the merrier when it comes to creativity in the kitchen.

Mochi Brownies

Mochi Brownies: Chewy, Chocolatey Bliss You’ll Love

Mochi Brownies are a delicious merge of chewiness and fudgy richness, perfect for those with dietary restrictions.
Prep Time 15 minutes
Cook Time 1 hour
Cooling Time 30 minutes
Total Time 1 hour 45 minutes
Servings: 16 slices
Course: Dessert
Cuisine: Japanese
Calories: 150

Ingredients
  

Batter Ingredients
  • 1 cup Granulated Sugar or coconut sugar
  • 1 cup Mochiko Flour sweet rice flour
  • 1/2 cup Cocoa Powder or dark cocoa
  • 1 tsp Baking Soda fresh for best results
  • 1/4 tsp Salt just a pinch
  • 1 cup Milk or almond/coconut milk
  • 1/2 cup Unsalted Butter melted or coconut oil
  • 2 large Eggs whisk until frothy
  • 1 tsp Vanilla Extract or almond extract
  • 1 cup Chocolate Chips optional, dust with flour

Equipment

  • Mixing bowls
  • whisk
  • 8x8 inch baking pan

Method
 

Baking Instructions
  1. Preheat your oven to 350°F (175°C). Gather all ingredients.
  2. In a large bowl, combine sugar, mochiko flour, cocoa powder, baking soda, and salt. Whisk thoroughly.
  3. In another bowl, mix milk, melted butter, eggs, and vanilla. Whisk until blended and frothy.
  4. Pour the wet mixture into the dry ingredients and stir gently until just combined.
  5. Grease an 8x8 inch baking pan and pour in the batter. Optionally sprinkle chocolate chips on top.
  6. Bake for 60 minutes. Check doneness with a toothpick.
  7. Let cool completely in the pan before cutting into squares and serving.

Nutrition

Serving: 1sliceCalories: 150kcalCarbohydrates: 25gProtein: 2gFat: 6gSaturated Fat: 4gPolyunsaturated Fat: 0.5gMonounsaturated Fat: 1.5gCholesterol: 20mgSodium: 150mgPotassium: 150mgFiber: 1gSugar: 10gVitamin A: 100IUCalcium: 50mgIron: 1mg

Notes

These brownies are gluten-free and customizable with various mix-ins and extracts.

Tried this recipe?

Let us know how it was!

Cozy Up with Delicious Apple Cider Pound Cake Today

As the crisp autumn air fills the days, I find myself craving cozy flavors that celebrate the season. Enter my Rich and Moist Apple Cider Pound Cake—a delightful way to harness the essence of fall. Each slice bursts with warm apple notes and buttery goodness, making it perfect for breakfast or an afternoon treat. This easy-to-follow recipe is not just a crowd-pleaser; it’s also a fantastic way to impress your guests without spending hours in the kitchen. Whether you’re sipping coffee on a chilly morning or hosting a brunch, this apple cider pound cake is sure to elevate the occasion. Curious about how to bring the taste of autumn into your home? Let’s dive into the details!

Why is Apple Cider Pound Cake a Must-Try?

Cozy flavors: This apple cider pound cake brings autumn directly to your kitchen, making every bite a warm reminder of the season.
Simple preparation: With its easy, straightforward steps, even beginner bakers can create a delicious dessert without stress.
Versatile enjoyment: Serve it as a sweet breakfast or a delightful dessert; it’s perfect for any occasion!
Impressive results: The rich, buttery texture and aromatic spices are sure to wow your guests, making you the star of the gathering.
Delightfully moist: Thanks to the infusion of fresh apple cider, each slice is refreshingly tender and bursting with flavor, reminiscent of fall harvests.
For more delightful recipes, don’t miss my Strawberry Cheesecake Dump Cake or discover the wonders of a Nutella Pancakes Blend.

Apple Cider Pound Cake Ingredients

For the Cake
Butter – Adds richness and moisture; use softened butter for better incorporation.
Sugar – Sweetens the cake and aids in browning; can substitute with brown sugar for a deeper flavor.
Eggs – Provide structure and moisture; ensure they are at room temperature for better mixing.
Flour – Forms the cake’s base structure; all-purpose flour is recommended for the best texture.
Baking Powder – Helps the cake rise, ensuring a light texture.
Salt – Balances sweetness and enhances flavor with a touch of contrast.
Apple Cider – Infuses apple flavor and moisture into the cake; fresh apple cider yields the best results.

For the Glaze
Powdered Sugar – Used for the glaze, providing a sweet finish to brighten each slice.
Cinnamon – Adds warmth and spice to the glaze, enhancing the overall flavor profile.

With these ingredients, you’ll create a truly delightful apple cider pound cake that’s sure to warm your heart and home!

Step‑by‑Step Instructions for Apple Cider Pound Cake

Step 1: Preheat and Prepare
Begin by preheating your oven to 350°F (175°C). While the oven warms, take a 9×5 inch loaf pan and line it with parchment paper, then lightly spray the parchment and the sides of the pan with non-stick spray. This preparation is essential for the perfect release of your delicious apple cider pound cake once it’s baked.

Step 2: Cream Butter and Sugar
In a stand mixer, add the softened butter and granulated sugar. Beat them together on medium speed until the mixture turns light and fluffy, approximately 3-5 minutes. This creaming process incorporates air into the batter, ensuring your apple cider pound cake has a wonderfully tender texture.

Step 3: Add the Eggs
With the mixer on low speed, add the eggs one at a time to the butter-sugar mixture. Allow each egg to fully incorporate before adding the next, which should take about 30 seconds per egg. This step ensures that each egg is well blended, contributing to the structure and moisture of your cake.

Step 4: Combine Dry Ingredients
In a separate bowl, whisk together the flour, baking powder, salt, and cinnamon. Make sure there are no lumps, as this mixture will be the backbone of your pound cake. Once well combined, set it aside while you prepare the wet ingredients, creating a harmonious blend for your apple cider pound cake.

Step 5: Mix Dry Ingredients with Wet Ingredients
Gradually add the flour mixture and the fresh apple cider to the butter-egg mixture, alternating between the two. Start with the dry ingredients, mixing just until combined, then pour in the apple cider. Continue this process, ensuring not to overmix, as this can affect the cake’s tenderness.

Step 6: Pour and Tap
Once your batter is ready, pour it into the prepared loaf pan. Gently tap the pan on the counter to release any trapped air bubbles. This quick step helps create a even texture in your apple cider pound cake, ensuring each slice is perfect and airy.

Step 7: Bake the Cake
Place the loaf pan in the preheated oven and bake for 40-50 minutes. To check for doneness, insert a butter knife into the center—if it comes out clean, your apple cider pound cake is ready. The top should be a lovely golden brown when done, filling your kitchen with irresistible aromas.

Step 8: Cool and Glaze
Allow your pound cake to cool in the pan for about 10-15 minutes. After cooling, gently remove it from the pan and transfer it to a wire rack. Meanwhile, prepare the glaze by whisking powdered sugar with a bit of apple cider until smooth, then pour it over the cooled cake to finish it beautifully.

Make Ahead Options

These Apple Cider Pound Cakes are perfect for meal prep enthusiasts! You can prepare the batter up to 24 hours in advance. Simply mix all the ingredients as instructed, then cover the bowl tightly with plastic wrap and refrigerate. For optimal freshness and flavor, bake the cake the next day, as it will be just as delicious if not even more aromatic! Additionally, you can glaze the cake ahead of time; simply allow it to cool completely, then drizzle the glaze over it before storing in an airtight container at room temperature for up to 5 days. When you’re ready to serve your apple cider pound cake, just slice and enjoy a delightful taste of fall!

What to Serve with Apple Cider Pound Cake

Indulging in the rich and moist apple cider pound cake is only half the fun—let’s complement it with delightful pairings that elevate your seasonal gatherings.

  • Cinnamon Whipped Cream: A light and fluffy topping that enhances the cake’s warm spices, adding a luxurious feel to each slice.
  • Caramel Sauce: Drizzled over the cake, this sweet treat adds richness and a hint of indulgence that perfectly balances the apple flavors.
  • Fresh Apples: Thinly sliced tart apples offer a refreshing crunch, creating a beautiful contrast to the cake’s soft texture.
  • Vanilla Ice Cream: The creamy coolness of vanilla ice cream pairs beautifully, melting into the warm cake for a delightful experience.
  • Herbed Tea: A warm cup of chamomile or apple spice tea complements the cake’s buttery notes while adding a cozy, aromatic touch.
  • Maple Syrup: Pouring a little maple syrup over a slice intensifies the natural sweetness of the cake, creating a delightful autumnal twist.
  • Cheese Board: Serve with a mix of sharp cheeses like cheddar and creamy brie; the savory notes balance the cake’s sweetness and create an interactive experience.
  • Pecan Topping: Lightly toasted pecans add a satisfying crunch and a nutty flavor that enhances the deliciousness of the apple cider pound cake.

These pairings not only elevate your apple cider pound cake but also inspire warmth and togetherness, creating memories that last well beyond the dessert.

Expert Tips for Apple Cider Pound Cake

  • Room Temperature Ingredients: Ensure all ingredients, especially eggs and butter, are at room temperature for better mixing and texture in your apple cider pound cake.
  • Be Gentle with Flour: Avoid overmixing after adding the dry ingredients; mix just until combined to ensure a tender cake.
  • Cool Before Glazing: Let the cake cool completely before adding the glaze, which will help it stick better and create a beautiful finish.
  • Test for Doneness: Use a toothpick or butter knife to check doneness; it should come out clean but avoid overbaking to prevent a dry cake.
  • Storing Tips: For optimal freshness, store the apple cider pound cake in an airtight container at room temperature for up to 5 days.

How to Store and Freeze Apple Cider Pound Cake

Room Temperature: Store the apple cider pound cake in an airtight container at room temperature for up to 5 days to maintain its moisture and flavor.

Fridge: If you prefer a longer shelf life, refrigerate the cake wrapped in plastic wrap or in an airtight container for up to 1 week; however, this may alter its texture slightly.

Freezer: For longer storage, freeze the cake by wrapping it tightly in plastic wrap and aluminum foil. It can last in the freezer for up to 3 months; thaw in the fridge before serving.

Reheating: To enjoy the cake warm, microwave individual slices for about 10-15 seconds; for a crisp exterior, reheat slices in the oven at 350°F (175°C) for a few minutes.

Apple Cider Pound Cake Variations

Feel free to personalize your apple cider pound cake with these fun and delicious twists. Each idea adds a unique flair to this comforting dessert!

  • Maple Twist: Substitute half the apple cider with maple syrup for a warm, sweet flavor.

  • Nutty Addition: Add 1 cup of chopped walnuts or pecans to the batter for a delightful crunch in each slice. The added texture brings an extra layer of satisfaction to every bite.

  • Spiced Up: Mix in 1 teaspoon of pumpkin pie spice along with the cinnamon for a well-rounded autumn flavor that evokes cozy feelings of the season.

  • Fruit Fusion: Incorporate 1 cup of diced apples or pears for extra moisture and fruity goodness. It not only elevates the flavor but also gives a beautiful visual appeal to the cake.

  • Zesty Harmony: Add the zest of one lemon or orange to the batter for a zesty brightness that balances the sweetness perfectly. This burst of citrus can elevate the entire flavor profile.

  • Gluten-Free Option: Use a gluten-free flour blend in place of all-purpose flour to make this cake gluten-free without sacrificing taste. It still retains that moist and tender texture you crave.

  • Choco-Lover’s Delight: Stir in 1 cup of chocolate chips for a rich, decadent twist. The chocolate complements the warm apple flavors beautifully and makes it irresistible!

  • Whipped Cream Topping: Serve each slice with a dollop of homemade whipped cream or a scoop of vanilla ice cream for an indulgent dessert experience. This delightfully creamy addition turns every slice into a celebration!

For more delightful recipes, don’t forget to try my Easter Poke Cake or indulge in a slice of heavenly Honeybun Carrot Cake with Cheesecake Filling. Let’s create magic together in the kitchen!

Apple Cider Pound Cake Recipe FAQs

How do I choose the best apple cider for the cake?
Absolutely! For making the best apple cider pound cake, opt for fresh apple cider. Look for a cider that is clear and slightly sweet, without any added preservatives. This will enhance the flavor of your cake, giving it that warm, autumnal taste we all love. Stay away from overly processed or shelf-stable ciders, as they may lack the rich flavor needed for this recipe.

How should I store my apple cider pound cake?
Very good question! Store your apple cider pound cake in an airtight container at room temperature for up to 5 days. If you choose to refrigerate it for a longer shelf life, make sure it is wrapped well in plastic wrap or stored in an airtight container; however, bear in mind that the cool environment may change the cake’s texture slightly—keeping it delicious but perhaps a bit denser.

Can I freeze apple cider pound cake?
Absolutely! For longer storage, you can freeze your apple cider pound cake. Wrap it tightly in plastic wrap, followed by a layer of aluminum foil to prevent freezer burn. The cake can last in the freezer for up to 3 months. When you’re ready to enjoy, simply thaw it in the refrigerator overnight before serving. If you want to enjoy it warm, microwave individual slices for about 10-15 seconds or heat in the oven at 350°F (175°C) for a few minutes.

What should I do if my cake is too dense?
If your apple cider pound cake turns out to be too dense, it may be due to overmixing the batter after adding the flour or not incorporating enough air while creaming the butter and sugar. To ensure a lighter texture, beat the butter and sugar until fluffy, around 3-5 minutes, and mix the dry and wet ingredients just until combined. Keep practicing—every cake is a new opportunity to learn!

Are there any dietary considerations for this recipe?
Indeed! If you’re cooking for someone with dietary restrictions, it’s good to know that this apple cider pound cake can be tweaked. For dairy-free options, substitute the butter with a plant-based alternative and use almond or oat milk instead of eggs. You can also opt for gluten-free flour blends to make it gluten-free. Just remember to check any cider brands for added allergens. Enjoy baking with peace of mind!

What should I do if I want to add nuts to my cake?
The more the merrier! If you’d like to add nuts, such as chopped walnuts or pecans, I recommend folding them into the batter with the dry ingredients before mixing. This will help them distribute evenly throughout your apple cider pound cake. Just be mindful of allergies if you’re serving it to others, and feel free to adjust the amount based on your preference—about 1 cup works wonderfully!

Apple Cider Pound Cake

Cozy Up with Delicious Apple Cider Pound Cake Today

Discover the flavors of fall with this Rich and Moist Apple Cider Pound Cake recipe, perfect for any occasion.
Prep Time 15 minutes
Cook Time 50 minutes
Cooling Time 15 minutes
Total Time 1 hour 20 minutes
Servings: 8 slices
Course: Dessert
Cuisine: American
Calories: 250

Ingredients
  

For the Cake
  • 1 cup Butter Softened for better incorporation
  • 1 cup Sugar Granulated, can substitute with brown sugar
  • 3 large Eggs At room temperature
  • 2 cups Flour All-purpose flour recommended
  • 1 tbsp Baking Powder Helps the cake rise
  • 1 tsp Salt Balances sweetness
  • 1 cup Apple Cider Fresh yields the best results
For the Glaze
  • 1 cup Powdered Sugar Used for the glaze
  • 1 tsp Cinnamon Adds warmth to the glaze

Equipment

  • Stand mixer
  • Loaf Pan
  • Mixing Bowl
  • whisk
  • Parchment Paper

Method
 

Step‑by‑Step Instructions
  1. Preheat your oven to 350°F (175°C) and prepare a 9x5 inch loaf pan with parchment paper and non-stick spray.
  2. In a stand mixer, cream together the softened butter and granulated sugar until light and fluffy, about 3-5 minutes.
  3. Add the eggs one at a time, mixing well after each addition.
  4. In a separate bowl, whisk together the flour, baking powder, salt, and cinnamon.
  5. Gradually add the dry ingredients and apple cider to the butter-egg mixture, alternating between the two.
  6. Pour the batter into the prepared loaf pan and gently tap to remove air bubbles.
  7. Bake in the preheated oven for 40-50 minutes, checking doneness with a knife.
  8. Cool in the pan for 10-15 minutes, then glaze with a mixture of powdered sugar and apple cider.

Nutrition

Serving: 1sliceCalories: 250kcalCarbohydrates: 35gProtein: 3gFat: 12gSaturated Fat: 7gCholesterol: 60mgSodium: 150mgPotassium: 100mgFiber: 1gSugar: 20gVitamin A: 400IUCalcium: 10mgIron: 1mg

Notes

For optimal freshness, store in an airtight container at room temperature for up to 5 days. Can be refrigerated or frozen for longer storage.

Tried this recipe?

Let us know how it was!

Cauldron Cookies: Fun Halloween Treats to Make Together

As I lifted the lid on my favorite mixing bowl, a wave of nostalgia washed over me. Halloween is just around the corner, and that means it’s time to get creative in the kitchen! Enter the Easy Cauldron Cookies—these delightful little chocolate cake mix cookie cups are not only fun to make, but they also double as a festive project with the kids. With just a handful of ingredients and a brief prep time, you can whip up these whimsical treats that resemble bubbling potions ready for a witch’s brew. Plus, the best part is their customizable nature—everyone can decorate them in their own spooky style! Who’s ready to bake a batch that will enchant your Halloween gathering?

Why Are Cauldron Cookies So Special?

Fun and Festive: These Easy Cauldron Cookies are perfect for Halloween, making baking a joyful family activity.

Customizable Creations: With vibrant green buttercream and whimsical toppings, they allow everyone to unleash their inner artist.

Quick and Easy: The cake mix base makes these cookies a breeze to whip up—ideal for busy bakers.

Kid-Friendly Fun: Decorating these cookies offers a creative outlet that both kids and adults can enjoy together, making sweet memories.

Crowd-Pleasing Treats: Whether for a Halloween party or just a spooky snack at home, these cookies are sure to impress and delight.

Check out our variation ideas to make them even more memorable, like swapping in a cream cheese frosting for a tangy twist, or trying out our Brownie Base for an indulgent option!

Cauldron Cookies Ingredients

• To get started on these delightful Cauldron Cookies, gather your festive ingredients below!

For the Cookie Cups

  • Devil’s Food cake mix – A rich base providing a chocolatey flavor; can substitute with any chocolate cake mix.
  • Eggs – Essential for binding the dough; no substitutions recommended.
  • Canola or vegetable oil – Adds moisture; melted coconut oil or butter make great alternatives.
  • Black food coloring (optional) – For a spooky hue; totally optional but recommended for a fun look.

For the Buttercream Frosting

  • Unsalted butter – Important for creamy frosting; margarine or dairy-free butter can also be used.
  • Powdered sugar – Sweetens and thickens the frosting; no substitutions recommended.
  • Vanilla extract – Enhances flavor; swap for almond extract if you’re looking for something different.
  • Salt – Balances sweetness in the frosting; no substitution needed.
  • Milk (1-3 tablespoons) – Adjusts frosting consistency; almond or soy milk can be used for dairy-free options.
  • Green food coloring – Gives your buttercream that festive Halloween tint; optional but recommended.

For Toppings

  • Round green sprinkles, Halloween sprinkles, candy eyeballs, pretzel sticks – Fun decorations to make your cookies pop; feel free to use any themed sprinkles or candies!

Step‑by‑Step Instructions for Easy Cauldron Cookies

Step 1: Preheat and Prepare
Preheat your oven to 350°F (175°C) and lightly grease three 12-count mini muffin pans with a non-stick spray. This preparation ensures that your Easy Cauldron Cookies won’t stick, allowing for easy removal later on. Make sure your work surface is clean and ready for some fun baking!

Step 2: Mix the Dough
In a large mixing bowl, combine the Devil’s Food cake mix, eggs, canola oil, and optional black food coloring. Use a whisk or spatula to blend these ingredients until you achieve a smooth and evenly mixed dough. The mixture should be thick and slightly glossy, indicating it’s ready for the next step.

Step 3: Scoop and Shape the Cookies
Using a cookie scoop or a tablespoon, scoop roughly 1/2 tablespoon of dough into each compartment of the prepared muffin pans. Use your fingers to gently flatten the dough into the bottoms of the molds. It’s important to ensure they’re evenly spread for uniform baking and to achieve those charming cups for your cookies.

Step 4: Bake and Indent
Place the muffin pans in the preheated oven and bake for 8-10 minutes. Keep an eye on them; they’re ready when the edges look set, and the tops appear slightly domed. As soon as they come out of the oven, use the back of a tablespoon to press an indentation into each warm cookie to create cavities for the frosting.

Step 5: Cool the Cookies
Carefully remove the pans from the oven, and let the cookies cool in the pans for about 5 minutes. Afterward, gently transfer them to a wire rack to cool completely. It’s important that the cookies are fully cooled before frosting to avoid any melting issues with your delightful buttercream.

Step 6: Make the Buttercream Frosting
In a mixing bowl, beat the unsalted butter until creamy and smooth. Gradually sift in the powdered sugar, and mix until well combined. Add vanilla extract, salt, and milk a tablespoon at a time, mixing continuously until the frosting reaches a fluffy and spreadable consistency. Incorporate green food coloring until you achieve your desired spooky shade!

Step 7: Pipe the Frosting
Once your cookies are completely cooled, use a piping bag fitted with a round tip to pipe the vibrant green buttercream into each cookie cup. Fill them generously, mimicking the look of a bubbling potion for your Easy Cauldron Cookies. This is where the fun begins—let your creativity shine!

Step 8: Decorate Your Cookies
Top off each frosted cookie with your choice of festive round green sprinkles, Halloween-themed sprinkles, or candy eyeballs. To make it even more whimsical, insert a pretzel stick as a “stirring stick” in each cookie cup. Take a moment to enjoy the colorful masterpiece you’ve created!

Step 9: Serve and Enjoy
Once your Easy Cauldron Cookies are beautifully decorated, they’re ready to impress your family and friends! These delightful treats make perfect additions to Halloween parties, kids’ bake sales, or a spooky snack at home. Serve them up on a festive platter, and watch everyone’s eyes light up with excitement!

Make Ahead Options

These Easy Cauldron Cookies are perfect for busy home cooks looking to save time during those hectic Halloween festivities! You can prepare the cookie cups up to 24 hours in advance by baking and cooling them completely, then storing them in an airtight container at room temperature. Alternatively, the buttercream frosting can be made and refrigerated for up to 3 days—just let it sit at room temperature for about 30 minutes before using. When it’s time to serve, simply pipe the chilled frosting into the cooled cookie cups and decorate them as desired. This way, you can enjoy delightful Cauldron Cookies without the last-minute rush, ensuring they turn out just as delicious as if they were made fresh!

Storage Tips for Cauldron Cookies

Room Temperature: Store your Easy Cauldron Cookies in an airtight container at room temperature for up to 3-4 days to keep them soft and fresh.

Fridge: If you want them to last longer, you can refrigerate undecorated cookie cups for up to a week. Make sure they are placed in an airtight container to avoid any moisture.

Freezer: Undecorated cookie cups can be frozen for up to three months. Allow them to cool completely before freezing in an airtight container or freezer bag.

Reheating: When ready to enjoy, thaw the cookies in the fridge or at room temperature. If desired, warm them briefly in the microwave for 10-15 seconds for a freshly baked taste!

What to Serve with Easy Cauldron Cookies

As you prepare these delightful treats, think about what dishes or drinks will create a festive atmosphere for your Halloween gathering!

  • Witch’s Brew Punch: A vibrant, fruity drink that adds a splash of fun and perfectly complements the spooky theme of your cookies.

  • Ghoulish Green Fruit Salad: Blend fresh fruits like kiwi, green grapes, and lime for a refreshing, colorful treat that balances the sweetness.

  • Spooky Cheese Platter: Provide an assortment of cheeses and crackers, including spider-shaped crackers, to offer a savory contrast to the sweet cookies.

  • Pumpkin Spice Hot Chocolate: Warm, cozy, and topped with whipped cream, this seasonal drink enhances the overall festive experience.

  • Ghostly Milkshakes: Whip up creamy vanilla milkshakes with ghost-shaped marshmallows on top, delighting kids and adults alike.

  • Creepy Cupcake Companions: Bake chocolate cupcakes decorated with spooky frosting to create a fun dessert spread that matches the festive theme.

Take time to mix and match these serving suggestions, ensuring each element complements the cheerful nostalgia of your Easy Cauldron Cookies while adding excitement to your Halloween celebration!

Expert Tips for Cauldron Cookies

Cool Completely: Let your cookies cool completely before adding frosting to prevent it from melting and losing that delightful shape.

Mix Gradually: When preparing the buttercream, add milk gradually to reach your desired consistency; too much at once can lead to runny frosting.

Watch the Baking Time: Keep an eye on your cookies as they bake—overbaking can make them dry, while underbaking might affect the structural integrity of your cauldron cups.

Control the Color: If using black food coloring, start with a little; you can always add more, but it’s tough to lighten it once mixed.

Decoration Variations: Feel free to experiment with decorations; any themed sprinkles or candies will enhance the festive look of your cauldron cookies!

Avoid Freezing: To maintain the vibrant look of your decorated cookies, avoid freezing them, as it can cause color bleeding from sprinkles.

Cauldron Cookies: Fun Flavor Twists

As you embark on your baking adventure, remember that these delightful cookies can be customized to suit every taste and preference!

  • Brownie Base: Swap out the cake mix for a fudgy brownie mix for an extra rich treat. These brownie cauldrons will be a chocolate lover’s dream come true!
  • Cream Cheese Frosting: Replace the buttercream with luscious cream cheese frosting for a tangy, delicious alternative. It adds a nice contrast to the sweetness of the cookie!
  • Nutty Surprise: Mix in chopped nuts, like walnuts or pecans, to the cookie dough for a delightful crunch. Even better, try a nut butter in the frosting for a creative twist.
  • Store-bought Frosting: For a quick solution, use a tub of vanilla or white frosting, tint it green, and save a bit of time without compromising flavor. Perfect for those busy days!
  • Pumpkin Spice Addition: Spice things up by adding a teaspoon of pumpkin spice to the cookie dough. This will lend a warm, cozy flavor that’s perfect for fall.
  • White Chocolate Ganache: For a luxurious treat, melt white chocolate with cream, tint it green, and use it as a decadent filling. It brings a sophisticated flair to the cookie!
  • Spicy Kick: Add a dash of cayenne or chili powder to the cookie dough for an unexpected heat. The fusion of sweet and spicy is absolutely enchanting!
  • Fruity Fun: Substitute some of the frosting with fruit preserves or creams, like raspberry or strawberry, blending sweet and tart for a delightful balancing act.

Let your imagination run wild, and don’t be afraid to mix and match ideas! If you’re looking for additional inspiration, check out these Blueberry Breakfast Cookies for a fruity spin or consider adding a touch of that cream cheese frosting for a layer of creamy goodness. Happy baking!

Cauldron Cookies Recipe FAQs

What type of cake mix should I use for Cauldron Cookies?
Absolutely! For these Easy Cauldron Cookies, I recommend using Devil’s Food cake mix for a rich chocolate flavor, but any chocolate cake mix will work just as well. You can even try a gluten-free chocolate cake mix if you’re accommodating dietary preferences!

How should I store my Cauldron Cookies?
For optimal freshness, store your Easy Cauldron Cookies in an airtight container at room temperature for up to 3-4 days. If your cookie cups are undressed, they can last a bit longer—up to a week in the fridge! Just ensure they’re airtight to combat moisture!

Can I freeze my decorated Cauldron Cookies?
It’s best to avoid freezing the decorated cookie cups, as the sprinkles may bleed and lose their vibrancy. However, undecorated cookie cups can be frozen for up to 3 months. To do so, let them cool completely, then place them in an airtight container or freezer bag. Thaw them in the fridge or at room temperature when you’re ready to enjoy!

What should I do if my cookie cups puff up while baking?
If you find your cookie cups puffing up during baking instead of forming a cavity, it could mean they need a moment of gentle pressing right after you take them out of the oven. Use the back of a tablespoon to create the indentation while the cookies are still warm. It’s the most effective way to ensure that lovely cauldron shape!

Are there any allergy considerations for Cauldron Cookies?
Yes! If you’re making these cookies for allergy-sensitive eaters, be mindful of common allergens like eggs and dairy in the ingredients. You can try substituting egg with a flax egg (1 tablespoon ground flaxseed mixed with 2.5 tablespoons water) and use dairy-free butter and milk alternatives. Always check your ingredient labels to ensure that they’re safe for your guests.

What if my frosting is too runny?
If you find your buttercream frosting is too runny, don’t worry! Just add a little more powdered sugar until you achieve a thicker consistency. This is also a great time to add your green food coloring. Aim for a fluffy, spreadable frosting that holds its shape when piped, perfect for those delightful details in your Cauldron Cookies!

Cauldron Cookies

Cauldron Cookies: Fun Halloween Treats to Make Together

Delightful Cauldron Cookies for Halloween are fun to make, festive, and customizable for all ages.
Prep Time 15 minutes
Cook Time 10 minutes
Cooling Time 5 minutes
Total Time 30 minutes
Servings: 24 cookies
Course: Dessert
Cuisine: American
Calories: 150

Ingredients
  

For the Cookie Cups
  • 1 box Devil's Food cake mix Can substitute with any chocolate cake mix.
  • 2 large Eggs Essential for binding the dough; no substitutions recommended.
  • 1/2 cup Canola or vegetable oil Adds moisture; melted coconut oil or butter make great alternatives.
  • 1 teaspoon Black food coloring Optional, recommended for a fun look.
For the Buttercream Frosting
  • 1/2 cup Unsalted butter Can substitute with margarine or dairy-free butter.
  • 3 cups Powdered sugar No substitutions recommended.
  • 1 teaspoon Vanilla extract Can swap for almond extract.
  • 1/4 teaspoon Salt No substitution needed.
  • 1-3 tablespoons Milk Adjusts frosting consistency; can use almond or soy milk.
  • 1 teaspoon Green food coloring Optional, recommended for Halloween tint.
For Toppings
  • Round green sprinkles Feel free to use any themed sprinkles or candies.
  • Halloween sprinkles
  • Candy eyeballs
  • Pretzel sticks

Equipment

  • Mixing Bowl
  • whisk
  • Cookie Scoop
  • Piping Bag
  • Mini muffin pans

Method
 

Directions
  1. Preheat your oven to 350°F (175°C) and lightly grease three 12-count mini muffin pans with non-stick spray.
  2. In a mixing bowl, combine the Devil's Food cake mix, eggs, canola oil, and optional black food coloring. Mix until smooth.
  3. Scoop roughly 1/2 tablespoon of dough into each muffin pan compartment and flatten gently.
  4. Bake for 8-10 minutes until edges look set and tops are slightly domed. Press a spoon into the center to create an indentation.
  5. Cool in pans for 5 minutes then transfer to a wire rack.
  6. In a bowl, beat the unsalted butter, gradually add powdered sugar, then mix in vanilla, salt, and milk until fluffy.
  7. Pipe the green buttercream into each cookie cup.
  8. Decorate with sprinkles, candy eyeballs, and insert a pretzel stick as a stirring stick.
  9. Serve and enjoy your festive treats!

Nutrition

Serving: 1cookieCalories: 150kcalCarbohydrates: 18gProtein: 2gFat: 8gSaturated Fat: 5gCholesterol: 20mgSodium: 150mgPotassium: 50mgSugar: 10gVitamin A: 200IUCalcium: 10mgIron: 1mg

Notes

Allow cookies to cool completely before frosting. Adjust milk in frosting gradually for desired consistency.

Tried this recipe?

Let us know how it was!

Decadent M&M’S Cookie Bars for Your Spooktacular Halloween

As the leaves turn and the air fills with a crisp chill, it’s time to embrace the seasonal spirit with a festive treat that everyone will love. These Loaded Halloween M&M’s Cookie Bars are not just another dessert; they’re a joyous celebration of color and flavor, perfect for parties or cozy nights spent at home. With their easy prep and no-roll, no-scoop method, you can whip these up in no time, making them a delightful addition to your Halloween festivities. Imagine diving into a chewy, chunky cookie bar filled with vibrant M&M’s and melted chocolate—this treat is bound to make your taste buds dance! Ready to make a memorable dessert this spooky season? Let’s get started!

Why are These Cookie Bars Unforgettable?

Simplicity at Its Best: With a no-roll, no-scoop approach, you’ll whip up these treats in no time.

Vibrant Colors: Loaded with festive Halloween M&M’s, these bars add a splash of color to your dessert table.

Chewy & Chunky Texture: Each bite offers a perfect balance of crispy edges and a soft, gooey center that’s simply irresistible.

Perfect for Sharing: Whether at parties or cozy gatherings, these bars are easily sliced and ready to delight a crowd.

Customizable Fun: Swap out M&M’s for your favorite candies, or add nuts for extra texture—endless possibilities await!

You’ll love these Loaded Halloween M&M’s Cookie Bars as much as you’ll enjoy discovering more easy recipes like our Turtle Bars Decadent or the delightful Blueberry Breakfast Cookies.

M&M’s Halloween Cookie Bars Ingredients

For the Cookie Base:
Unsalted Butter – Adds fat for richness and moisture; margarine can be used as a substitute.
Granulated Sugar – Provides sweetness and contributes to a lovely crisp texture.
Golden Brown Sugar – Adds moisture and a subtle caramel flavor; dark brown sugar works for a deeper taste.
Large Eggs – Binds the ingredients together for a cohesive cookie bar; flax eggs can be used for a vegan option.
Pure Vanilla Extract – Enhances the flavor complexity; opt for real vanilla for the best results.
All-Purpose Flour – The main structure of the cookie bars; for gluten-free, use a 1:1 gluten-free flour blend.
Baking Soda – A key leavening agent to help cookie bars rise.
Salt – Balances sweetness and enhances overall flavor.

For the Mix-ins:
Halloween M&M’s – Provide vibrant colors and chocolatey goodness; regular M&M’s can be substituted if needed.
Mini Chocolate Chips – Add extra chocolate richness; feel free to swap for dark chocolate chips for a richer flavor profile.

Step‑by‑Step Instructions for M&M’S Cookie Bars

Step 1: Preheat the Oven and Prepare the Pan
Begin by preheating your oven to 350°F (175°C). While the oven heats up, prepare a 9×13 aluminum baking pan by lining it with foil, letting the edges hang over the sides for easy removal later. To ensure the cookie bars don’t stick, lightly spray the foil-lined pan with nonstick cooking spray.

Step 2: Cream the Sugars and Butter
In a stand mixer, combine 1 cup of unsalted butter, 1 cup of granulated sugar, and 1 cup of golden brown sugar. Beat them together on medium speed until the mixture becomes fluffy and light in color, about 3-4 minutes. This step is crucial for achieving the perfect texture in your M&M’S Cookie Bars.

Step 3: Mix in Eggs and Vanilla
Add in 2 large eggs and 2 teaspoons of pure vanilla extract to the creamed mixture. Continue mixing on medium speed until everything is well incorporated and the mixture is smooth, which should take another 1-2 minutes. This adds richness and flavor, making your cookie bars taste delightful.

Step 4: Combine Dry Ingredients
Gradually add 2 ½ cups of all-purpose flour, 1 teaspoon of baking soda, and ½ teaspoon of salt to the wet mixture. Mix on low speed just until combined. Be careful not to overmix; you want to keep the cookie bars chewy and moist. The dough should come together nicely with no dry flour remaining.

Step 5: Fold in Chocolaty Goodness
Gently fold in 1 cup of Halloween M&M’s and ½ cup of mini chocolate chips using a spatula. Save a handful of M&M’s and chocolate chips for topping the bars later. This will ensure your M&M’S Cookie Bars are loaded with delicious chocolate chunks in every bite, truly festive for Halloween.

Step 6: Spread Dough in the Pan
Transfer the thick cookie dough to your prepared baking pan, spreading it out evenly with a spatula. Press the reserved M&M’s and mini chocolate chips gently into the top of the dough. This adds a delightful visual appeal and extra sweetness to your M&M’S Cookie Bars, making them irresistibly tempting.

Step 7: Bake to Perfection
Place the pan in your preheated oven and bake for 30-35 minutes, or until a toothpick inserted in the center comes out clean or with just a few moist crumbs. Watch closely towards the end of the baking time to avoid overbaking, as you want the edges to be slightly crisp while the center remains chewy.

Step 8: Cool and Slice
Once baked, remove the pan from the oven and allow the cookie bars to cool completely in the pan on a wire rack. Once cooled, use the overhanging foil to lift the cookie bars out of the pan. Cut them into squares and enjoy your delightful M&M’S Cookie Bars, perfect for sharing at any Halloween gathering!

Storage Tips for M&M’s Halloween Cookie Bars

Room Temperature: Store the cookie bars in an airtight container at room temperature for up to 5 days, allowing their chewy texture to remain intact.

Fridge: For extended freshness, keep the cookie bars in the fridge for up to 1 week. Just make sure they’re sealed tightly to avoid drying out.

Freezer: Freeze these delightful bars by wrapping them individually in plastic wrap and placing them in a freezer-safe bag. They can last up to 3 months!

Reheating: Enjoy them warm by microwaving individual bars for 10-15 seconds, reviving that gooey chocolate goodness in every bite of M&M’s Cookie Bars.

Expert Tips for Perfect M&M’s Cookie Bars

  • Avoid Overmixing: Stop mixing as soon as there’s no dry flour left to keep the bars chewy and soft.

  • Use Foil for Easy Removal: Line your pan with foil, allowing overhang, to lift the cookie bars out easily once cooled.

  • Check for Doneness: Keep an eye on your cookie bars in the last few minutes of baking to avoid overbaking; they’ll be best when slightly underdone in the center.

  • Customize to Your Taste: Feel free to swap in different chocolate chips or seasonal candies to make these M&M’s Cookie Bars your own.

  • Storage Tips: Store bars in an airtight container at room temperature for up to a week, perfect for savoring those festive flavors!

Make Ahead Options

These M&M’s Halloween Cookie Bars are a fantastic choice for meal prep, allowing you to enjoy delicious treats without the last-minute rush! You can prepare the dough up to 24 hours in advance—simply mix all the ingredients (excluding the M&M’s and mini chocolate chips), cover tightly, and refrigerate. To maintain their delightful texture, avoid adding the mix-ins until you’re ready to bake; fold them in just before spreading the dough into the pan. When you’re ready to bake, let the chilled dough sit at room temperature for about 15 minutes, then follow the baking instructions as usual for scrumptious cookie bars that are just as delightful as fresh!

What to Serve with Loaded Halloween M&M’s Cookie Bars

As you prepare to delight your guests this Halloween, consider these mouthwatering pairings that will create a memorable feast.

  • Velvety Vanilla Ice Cream: The creamy richness of vanilla ice cream perfectly balances the chewy texture of the cookie bars while amplifying the sweetness.

  • Pumpkin Spice Latte: Enjoy the warm, spicy flavors of this seasonal favorite, which adds cozy vibes to your Halloween treat experience.

  • Chocolate Milkshake: A thick, indulgent milkshake is the ultimate sweet companion, offering a chilling contrast that enhances every bite of cookie richness.

  • Fresh Fruit Salad: A mix of seasonal fruits like apples, pears, and pomegranates provides a refreshing crunch, cutting through the sweetness for a satisfying palate cleanse.

  • Spiced Apple Cider: This warm drink brings comforting autumn flavors to the table, making it a perfect companion for your festive cookie bars on chilly evenings.

  • Marshmallow Fluff Dip: Pair these cookie bars with a sweet, fluffy marshmallow dip for a delightful double dessert experience that encourages sharing.

  • Chocolate Covered Strawberries: The combination of fresh fruit and rich chocolate creates a sensory delight that beautifully complements the candy overload of the cookie bars.

  • Ginger Snap Cookies: Add a twist with these spicy cookies that enhance the flavor scene—each bite brings nostalgia and warmth, perfect for Halloween.

  • Caramel Sauce Drizzle: A velvety caramel drizzle over the cookie bars not only elevates their flavor but also adds a luxurious touch to your dessert spread.

M&M’s Cookie Bars Variations & Substitutions

Feel free to sprinkle your creativity into these cookie bars—there are endless ways to make them uniquely yours!

  • Nutty Delight: Add ½ cup of chopped pecans or walnuts for a delightful crunch. The rich flavor of nuts pairs beautifully with the chocolate, elevating every bite!

  • Vegan Twist: Substitute 2 large eggs with flax eggs (1 tablespoon flaxseed meal + 2.5 tablespoons water per egg), making this treat accessible for everyone, no eggs required!

  • Gluten-Free Option: Swap regular flour for a 1:1 gluten-free flour blend. You can still enjoy these festive treats without gluten!

  • Candy Swap: Replace M&M’s with Reese’s Pieces or seasonal candies for a fun twist. Each variation can bring a new flavor explosion that surprises your taste buds!

  • Flavored Chips: Incorporate butterscotch or white chocolate chips instead of mini chocolate chips for a festive spin on the classic cookie bar.

  • Marshmallow Addition: Mix in 1 cup of mini marshmallows for a gooey, s’mores-like effect that will hug your chocolate goodness.

  • Spicy Kick: Add a pinch of cayenne pepper or a sprinkling of cinnamon for a warm, spicy note that contrasts pleasantly with the sweetness.

  • Chocolate Drizzle: Consider drizzling melted dark chocolate over the top for an eye-catching finish and a double dose of chocolaty goodness.

With these variations, you’re sure to create a personalized touch to your Loaded Halloween M&M’s Cookie Bars that’s just as delightful as the traditional recipe! And if you’re in the mood for more scrumptious ideas, check out our delicious Turtle Bars Decadent or enjoy the wholesome flavors of our Blueberry Breakfast Cookies. Enjoy baking!

M&M’s Halloween Cookie Bars Recipe FAQs

What kind of M&M’s should I use?
Absolutely! For the most vibrant and festive touch, I recommend using Halloween-themed M&M’s. They come in fun, seasonal colors that add a perfect pop to your cookie bars. If Halloween M&M’s are unavailable, regular M&M’s will work just as well—your cookie bars will still be delicious!

How should I store the cookie bars?
You can store the M&M’s Halloween Cookie Bars in an airtight container at room temperature for up to 5 days. This keeps their chewy texture intact. If you’re looking to extend their freshness, transfer them to the fridge where they can stay good for up to a week—just ensure they’re sealed tightly to avoid getting dry.

Can I freeze the cookie bars?
Absolutely! To freeze your M&M’s Halloween Cookie Bars, wrap each individual bar in plastic wrap and place them in a freezer-safe bag. They can last in the freezer for up to 3 months. When you’re ready to enjoy, simply take one out, unwrap it, and microwave it for about 10-15 seconds to revive that gooey chocolate goodness.

What should I do if my cookie bars aren’t chewy enough?
If your M&M’s Halloween Cookie Bars turn out a bit too dry, it’s often a result of overbaking or overmixing the batter. To avoid this, make sure to check them a few minutes before the timer goes off and take them out once a toothpick inserted comes out with a few moist crumbs. For future batches, mix the ingredients just until combined—this helps maintain that lovely chewy texture!

Can I make these cookie bars vegan?
Very! To make the M&M’s Halloween Cookie Bars vegan, simply substitute the large eggs with flax eggs (1 tablespoon ground flaxseed mixed with 2.5 tablespoons of water for each egg) and use a plant-based butter alternative. Your cookie bars will still come out fantastic, ensuring that everyone can enjoy this festive treat!

Are there any allergies I should be aware of?
Great question! These cookie bars contain common allergens like eggs and wheat from the all-purpose flour, as well as dairy if you’re using traditional butter. If you’re making them for guests, it’s always a good idea to check for any dietary restrictions or allergies beforehand, allowing you to adjust the recipe accordingly for a delightful experience!

M&M’S Cookie Bars

Decadent M&M'S Cookie Bars for Your Spooktacular Halloween

Delight in these M&M’S Cookie Bars, a perfect festive treat for Halloween celebrations.
Prep Time 15 minutes
Cook Time 35 minutes
Cooling Time 30 minutes
Total Time 1 hour 20 minutes
Servings: 12 bars
Course: Dessert
Calories: 250

Ingredients
  

For the Cookie Base
  • 1 cup Unsalted Butter Can use margarine as a substitute.
  • 1 cup Granulated Sugar Provides sweetness.
  • 1 cup Golden Brown Sugar Can use dark brown sugar for deeper flavor.
  • 2 large Eggs For binding; use flax eggs for vegan option.
  • 2 teaspoons Pure Vanilla Extract Real vanilla is recommended.
  • 2.5 cups All-Purpose Flour Use a gluten-free blend if needed.
  • 1 teaspoon Baking Soda Leavening agent.
  • 0.5 teaspoon Salt Balances sweetness.
For the Mix-ins
  • 1 cup Halloween M&M's Can use regular M&M's if needed.
  • 0.5 cup Mini Chocolate Chips Dark chocolate chips can be used for richer flavor.

Equipment

  • Stand mixer
  • 9x13 aluminum baking pan
  • spatula

Method
 

Step-by-Step Instructions for M&M'S Cookie Bars
  1. Preheat your oven to 350°F (175°C) and prepare a 9x13 aluminum baking pan by lining it with foil.
  2. In a stand mixer, combine 1 cup of unsalted butter, 1 cup of granulated sugar, and 1 cup of golden brown sugar. Beat until fluffy.
  3. Mix in 2 large eggs and 2 teaspoons of pure vanilla extract until smooth.
  4. Gradually add 2.5 cups of all-purpose flour, 1 teaspoon of baking soda, and 0.5 teaspoon of salt, mixing until just combined.
  5. Fold in 1 cup of Halloween M&M's and 0.5 cup of mini chocolate chips, reserving some for topping.
  6. Spread the dough evenly in the prepared pan and press reserved M&M's and chocolate chips on top.
  7. Bake for 30-35 minutes, until a toothpick comes out clean or with a few moist crumbs.
  8. Allow the cookie bars to cool completely in the pan, then lift out with foil and slice into squares.

Nutrition

Serving: 1barCalories: 250kcalCarbohydrates: 35gProtein: 3gFat: 12gSaturated Fat: 7gPolyunsaturated Fat: 1gMonounsaturated Fat: 3gCholesterol: 30mgSodium: 150mgPotassium: 75mgFiber: 1gSugar: 18gVitamin A: 5IUCalcium: 2mgIron: 4mg

Notes

These cookie bars can be customized with different candies and chocolate chips to suit your taste. Store them in an airtight container for freshness.

Tried this recipe?

Let us know how it was!

Cheesy Mozzarella Cheese Skulls: Fun Halloween Appetizer

As the clock strikes October, a thrilling chill runs down my spine, and my kitchen transforms into a workshop of delightful spookiness. This Halloween, I’m excited to share my recipe for dazzling Mozzarella Cheese Skulls that add a playful twist to any gathering. These fun appetizers are not only easy to whip up but also bring a creamy indulgence that your guests will crave. Whether you’re hosting a festive bash or just looking for a fun charcuterie addition, these ghoulish treats are the ultimate crowd-pleasers. Plus, they can be made in advance, allowing you more time to enjoy the spooky celebrations. Who could resist those little cheese skulls perfect for dipping? Ready to dive into some deliciously haunted kitchen magic? Let’s get started!

Why are Mozzarella Cheese Skulls a must-try?

Festive Fun: These Mozzarella Cheese Skulls are a delightful way to celebrate Halloween, transforming an ordinary cheese appetizer into a spooky masterpiece that will wow your guests at any gathering.

Easy to Make: With just a few simple steps, you’ll create creamy, soft cheese shapes that look as good as they taste—you won’t need to be a master chef to impress!

Perfect for Dipping: Pair these skulls with your favorite dips like pesto or balsamic glaze for an extra flavor boost that enhances the enjoyment of this unique treat.

Crowd Favorites: Kids and adults alike will love these ghoulish bites, making them the ultimate crowd-pleaser at Halloween parties or themed gatherings.

Make Ahead: Save time on party day—these delectable skulls can be prepared in advance and stored in the fridge, ensuring you’ll have more time for fun.

Versatile Shapes: Not limited to just skulls! Get creative and try using other seasonal molds for a variety of spooky shapes, expanding the fun of your Halloween spread.

Add these cheesy delights to your charcuterie board alongside other favorites like Banana Grilled Cheese or Strawberry Cheesecake Dump for a thoroughly enjoyable feast!

Mozzarella Cheese Skulls Ingredients

• Create delicious spooky bites with these ingredients!

For the Skull Bases

  • Mini Mozzarella Balls – Use ciliegine for the perfect skull shape; other small cheese balls can work as substitutes if necessary.
  • Silicone Skull Mold – Essential for shaping the mozzarella; make sure it’s heat-resistant for baking.

For Serving

  • Balsamic Glaze – Perfect for drizzling over the skulls for added flavor and elegance.
  • Pesto – A tasty dip that complements the creamy texture of the mozzarella cheese skulls beautifully.

Step‑by‑Step Instructions for Mozzarella Cheese Skulls

Step 1: Preheat the Oven
Begin by preheating your oven to 350°F (175°C). This temperature is ideal for melting the mozzarella cheese to a perfect gooey consistency. While the oven warms up, gather your mini mozzarella balls and silicone skull mold to ensure everything is ready for a seamless cooking experience.

Step 2: Prepare the Mozzarella Balls
Pat each mini mozzarella ball dry using a paper towel. This step is crucial to remove any excess moisture, which helps the mozzarella melt evenly in the mold without becoming too watery. With each ball prepped, you’ll be ensuring that your Mozzarella Cheese Skulls have the perfect texture when baked.

Step 3: Fill the Skull Mold
Carefully place one mozzarella ball into each cavity of the silicone skull mold. Make sure to arrange them so they sit securely and upright, ready to take their spooky form. This fun mold will shape the cheesiness into adorable skulls, perfect for your Halloween spread.

Step 4: Bake the Mozzarella
Slide the filled mold into the preheated oven and bake for 8-10 minutes. Keep an eye on them—you’re looking for the mozzarella to become soft and slightly bubbly, indicating that it’s ready to be molded. This melting phase is key to achieving your delightful Mozzarella Cheese Skulls.

Step 5: Mold the Cheese Shapes
Once the baking time is complete, remove the mold from the oven and use the back of a spoon to gently press the melted mozzarella into the skull shapes. Ensure you fill the cavities completely, eliminating any air bubbles that could cause uneven forms. The mixture should be smooth and cohesive without losing shape.

Step 6: Remove Excess Moisture
After pressing the cheese, check for any excess moisture that may have collected. Use a clean paper towel to blot and absorb this liquid from the surface of the mold. This step helps prevent your Mozzarella Cheese Skulls from becoming soggy, preserving their delightful form and taste.

Step 7: Chill the Mold
Place the silicone mold into the refrigerator for approximately 10 minutes. This cooling period allows the mozzarella to firm up, making it easier to un-mold the ghoulish shapes. As the cheese sets, you can think about all the fun ways to serve your spooky creations!

Step 8: Unmold and Serve
Finally, carefully remove each Mozzarella Cheese Skull from the mold, taking your time to avoid any breakage. Place them on a serving platter, and consider drizzling them with balsamic glaze or presenting them alongside pesto for dipping. These whimsical bites are now ready to be enjoyed at your Halloween affair!

Make Ahead Options

These Mozzarella Cheese Skulls are perfect for meal prep, allowing you to prepare them up to 24 hours in advance! Simply follow the initial steps and once the mozzarella cheese has been molded into the skull shapes, allow them to cool completely. Then, place the skulls in an airtight container and refrigerate. This helps retain their softness and prevents any drying out. When you’re ready to serve, drizzling them with balsamic glaze or pairing with pesto can be done right before your guests arrive, ensuring your spooky appetizers are just as delicious as when they were freshly made! This simple make-ahead strategy allows for a stress-free Halloween celebration, letting you focus on the festivities!

Expert Tips for Mozzarella Cheese Skulls

  • Watch the Bake Time: Keep a close eye on the mozzarella while it bakes, as overcooking can lead to hard cheese rather than the desired creamy texture.

  • Use Non-Stick Molds: Opt for a non-stick silicone skull mold to ensure easy release of the melted mozzarella shapes without any damage.

  • Gentle Pressure: When pressing the melted mozzarella into the mold, be gentle. Too much force can cause the shapes to break apart.

  • Pat Dry: Always pat the mozzarella balls dry before shaping. Excess moisture can affect the melting process and lead to sogginess.

  • Chill for Best Shape: Don’t skip the chilling step! Refrigerating the molded cheese helps it firm up and maintain its spooky skull form when unmolding.

Mozzarella Cheese Skulls: Unique Twists

Feel free to let your creativity shine as you customize these delightful mozzarella cheese skulls to suit your taste!

  • Herbed Mozzarella: Use herbed or flavored mozzarella balls for an extra flavor punch. The herbal notes blend perfectly with the richness of the cheese.

  • Vegan Version: Swap mozzarella for vegan cheese alternatives, which can deliver a similar creamy texture while catering to plant-based diets. Delight your vegan friends with these spooky bites!

  • Spicy Kick: Sprinkle crushed red pepper flakes or mix in jalapeños with the cheese for a fiery version that will leave your guests wanting more. These bold flavors bring an exciting twist to the classic skull appetizer.

  • Alternative Shapes: Use molds shaped like pumpkins or ghosts for Halloween-themed diversity. The playful shapes add even more fun to your festive spread and broaden your options for entertaining.

  • Incorporate Nuts: Add chopped walnuts or pecans mixed with the mozzarella for a crunchy texture surprise. The nuttiness pairs beautifully with the creaminess of the cheese.

  • Seasonal Flavors: Try adding a hint of pumpkin spice to the cheese before baking for a festive autumn twist. This unexpected flavor note will bring warm, cozy sensations to your skulls.

  • Cheesy Combinations: Combine mozzarella with other cheeses like cheddar or gouda to create a multi-dimensional flavor profile. The fusion of different cheeses keeps every bite exciting and indulgent.

For more delicious inspirations, consider adding these skulls to an enticing charcuterie board alongside a Chicken Grilled Cheese or a delightful Strawberry Cheesecake!

What to Serve with Spooky Mozzarella Cheese Skulls

Elevate your Halloween gathering with delightful pairings that complement the creamy indulgence of these spooky mozzarella cheese skulls!

  • Creamy Pesto Dip: A vibrant, herbal addition that enhances the mozzarella’s mild flavor, making every bite a burst of freshness.

  • Balsamic Glaze Drizzle: This sweet and tangy accompaniment not only adds a sophisticated touch but also elevates the flavor profile of the skulls.

  • Charcuterie Board Essentials: Combine with an assortment of cured meats, crackers, and olives, creating a stunning spread that invites mingling and sharing.

  • Savory Garlic Breadsticks: Their crunchy exterior and soft, buttery inside perfectly balance the soft texture of the mozzarella skulls, offering a delightful contrast.

  • Crunchy Veggie Sticks: Fresh carrots, celery, and bell peppers provide a refreshing crunch, a colorful contrast, and a healthy element alongside your cheesy delights.

  • Spicy Tomato Salsa: This zesty dip brings a lively kick to the mix, adding tantalizing heat that contrasts beautifully with the creamy mozzarella.

  • Chilled White Wine: A crisp Sauvignon Blanc pairs beautifully, its acidity cutting through the creaminess, refreshing your palate with every sip.

  • Pumpkin Spice Dessert: Keep the fall flavors alive with a slice of pumpkin pie—its sweet warmth harmonizes wonderfully with the savory appetizers.

How to Store and Freeze Mozzarella Cheese Skulls

Fridge: Store your Mozzarella Cheese Skulls in an airtight container in the refrigerator for up to 3 days. This keeps them fresh and ready for your next snack or Halloween gathering.

Freezer: If you want to make these ghoulish treats ahead of time, you can freeze the molded cheese for up to 1 month. Just wrap each skull tightly in plastic wrap, then place them in a freezer-safe bag or container.

Thawing: When you’re ready to enjoy the frozen Mozzarella Cheese Skulls, simply transfer them to the fridge to thaw overnight. Allow them to come to room temperature before serving for the best texture.

Reheating: If you’d like to warm them up, bake the thawed skulls at 350°F for about 5-7 minutes until soft. This will help regain their gooey, creamy consistency, perfect for dipping!

Mozzarella Cheese Skulls Recipe FAQs

How do I choose the best mozzarella for this recipe?
Absolutely! When selecting mozzarella, look for mini mozzarella balls known as ciliegine, which are about the size of a cherry tomato. The fresher, the better. Avoid any that have dark spots or a sour smell. If you’d like a twist, other small cheese balls can also work as substitutes, but the creamy texture of mozzarella is truly the star here!

How should I store leftover mozzarella skulls?
Store your Mozzarella Cheese Skulls in an airtight container in the refrigerator for up to 3 days. Placing a piece of parchment paper between layers can help absorb excess moisture and keep them fresh. This way, you’ll have delicious spooky bites ready for your next snack attack!

Can I freeze mozzarella skulls for future use?
Yes, you can! To freeze, wrap each molded skull tightly in plastic wrap, then place them in a freezer-safe bag or container. They can be frozen for up to 1 month. When you want to enjoy them, simply transfer the skulls to the fridge to thaw overnight, allowing them to reach room temperature before serving.

What if my mozzarella doesn’t melt properly?
No worries! If your mozzarella does not melt adequately, it could be due to excess moisture on the balls before baking or not enough bake time. Ensure you pat the mozzarella balls dry before placing them in the mold and keep a close eye on them—8 to 10 minutes should do the trick for a perfect melt. If it hardens after baking, avoid overcooking next time!

Are mozzarella skulls safe for my pets?
Generally, mozzarella cheese in moderation is safe for dogs; however, remember that too much cheese can upset their stomach. Always consult your vet about including new treats in their diet. For other pets, it’s best to avoid sharing human food altogether. Your ghoulish creations are best left for humans’ spooky celebrations!

Mozzarella Cheese Skulls

Cheesy Mozzarella Cheese Skulls: Fun Halloween Appetizer

Try these Mozzarella Cheese Skulls for a fun and creamy Halloween appetizer that will delight your guests.
Prep Time 20 minutes
Cook Time 10 minutes
Chilling Time 10 minutes
Total Time 40 minutes
Servings: 12 skulls
Course: Appetizers
Cuisine: American
Calories: 100

Ingredients
  

For the Skull Bases
  • 12 oz Mini Mozzarella Balls Use ciliegine for the perfect skull shape.
  • 1 Silicone Skull Mold Ensure it’s heat-resistant for baking.
For Serving
  • 1 cup Balsamic Glaze For drizzling over the skulls.
  • 1 cup Pesto For dipping.

Equipment

  • Oven
  • Silicone Skull Mold

Method
 

Step-by-Step Instructions
  1. Preheat your oven to 350°F (175°C). Gather your mini mozzarella balls and silicone skull mold.
  2. Pat each mini mozzarella ball dry using a paper towel to remove excess moisture.
  3. Place one mozzarella ball into each cavity of the silicone skull mold.
  4. Bake for 8-10 minutes until soft and slightly bubbly.
  5. Remove the mold and press the melted mozzarella into the skull shapes.
  6. Check for excess moisture and blot with a clean paper towel.
  7. Chill the mold in the refrigerator for approximately 10 minutes.
  8. Carefully unmold each Mozzarella Cheese Skull and serve with balsamic glaze and pesto.

Nutrition

Serving: 1skullCalories: 100kcalCarbohydrates: 2gProtein: 6gFat: 8gSaturated Fat: 5gPolyunsaturated Fat: 0.5gMonounsaturated Fat: 2gCholesterol: 20mgSodium: 200mgPotassium: 80mgSugar: 1gVitamin A: 2IUCalcium: 20mg

Notes

These skulls can be made in advance and stored in the fridge for up to 3 days. They can also be frozen for up to 1 month.

Tried this recipe?

Let us know how it was!

Creamy Chicken Penne That Will Make Your Taste Buds Dance

In a world where hectic schedules often replace home-cooked meals, I found myself searching for a dish that would evoke warmth and comfort without demanding hours in the kitchen. Enter my Creamy Crack Chicken Penne—a delightful twist on classic chicken penne that captures the essence of home-cooked nostalgia. This recipe, featuring tender penne pasta enveloped in a creamy cheese sauce with savory bits of bacon, is the ultimate comfort food, ready to please everyone at the table. It’s not only a breeze to whip up on busy weeknights, but it also transforms leftovers into a satisfying lunch. Plus, with options for gluten-free and low-fat adaptations, this dish truly accommodates all! Are you ready to dig in and make a meal that feels just like a hug?

Why Is This Chicken Penne Recipe a Winner?

Simplicity at Its Best: The creamy sauce comes together in just minutes, making it a perfect weeknight dinner.
Versatile Ingredients: Easily swap proteins or add veggies to customize the dish to your family’s preferences, just like in my Tuscan Chicken Soup recipe!
Comforting and Hearty: Each bite delivers a satisfying flavor explosion thanks to the rich cheese and crispy bacon.
Crowd-Pleasing Appeal: A dish the whole family loves, making it ideal for dinner gatherings or potlucks.
Health-Conscious Options: Enjoy a gluten-free version without sacrificing taste by using alternative pasta!
Mix it with a fresh green salad and savor the warmth of home-cooked goodness.

Chicken Penne Ingredients

For the Pasta

  • Penne Pasta – The star of the dish, holding all the creamy goodness together; use gluten-free pasta for a gluten-free version!

For the Sauce

  • Cream Cheese – Provides a rich, creamy texture that enhances the overall flavor; for lower fat, opt for reduced-fat cream cheese.
  • Ranch Seasoning Mix – Infuses a refreshing flavor; adjust to your liking as it can be potent.
  • Chicken Broth – Adds depth to the sauce; vegetable broth can be substituted for a vegetarian twist.

For the Protein

  • Cooked Chicken (2 cups, shredded) – Brings heartiness and protein to the meal; leftover rotisserie chicken works beautifully!
  • Cooked Bacon (1/2 cup, crumbled) – Introduces a savory, crispy element; consider turkey bacon for a leaner alternative.

For the Topping

  • Shredded Cheddar Cheese – Melts into the sauce beautifully, adding a delicious layer; sharp cheddar enhances the flavor profile.
  • Chopped Green Onions (1/4 cup) – Brightens up the dish as a garnish with fresh onion flavor.

Feel free to make this Chicken Penne your own by mixing in some sautéed veggies or trying out different cheese varieties!

Step‑by‑Step Instructions for Creamy Chicken Penne

Step 1: Cook the Pasta
Begin by bringing a large pot of salted water to a rolling boil over high heat. Add the penne pasta, cooking it according to package instructions until al dente, typically around 10-12 minutes. Once cooked, drain the pasta in a colander, shaking gently to remove excess water, and set it aside while you prepare the creamy sauce.

Step 2: Prepare the Sauce
In a large skillet, heat over medium heat and add the cream cheese alongside the ranch seasoning mix and chicken broth. Stir the mixture continuously with a wooden spoon until it becomes smooth and creamy, taking about 5 minutes. Keep an eye on the skillet to ensure it does not boil, allowing the flavors of the creamy sauce to meld before introducing the chicken.

Step 3: Combine Chicken and Bacon
Once the sauce is ready, gently fold in the shredded chicken and crumbled bacon into the mixture. Stir well to ensure everything is evenly coated with the creamy sauce, allowing the flavors to combine for about 3-4 minutes. The chicken should be heated through, and the bacon will infuse its savory essence, creating a delightful filling for the Creamy Chicken Penne.

Step 4: Incorporate the Pasta
Now, add the cooked penne pasta to the skillet, tossing it gently into the sauce with tongs or a large spoon. Ensure each piece of pasta is well-coated with the creamy goodness, which should take about 2-3 minutes. This step is essential for achieving that comforting and hearty texture that defines this Creamy Chicken Penne.

Step 5: Add Cheese and Melt
Sprinkle the shredded cheddar cheese evenly over the pasta mixture in the skillet, covering it. Lower the heat to low and cover the skillet with a lid to allow the cheese to melt, which should take about 3-5 minutes. Keep an eye on it, ensuring the cheese melts beautifully without burning, creating a luscious topping for your dish.

Step 6: Garnish and Serve
After the cheese has melted, remove the skillet from heat and sprinkle the chopped green onions on top for a burst of color and flavor. Serve the Creamy Chicken Penne immediately while it’s hot, allowing its warmth to embrace your family at the dinner table. This hearty dish promises to bring smiles and satisfaction with every creamy, cheesy bite.

Make Ahead Options

These Creamy Crack Chicken Penne are perfect for meal prep enthusiasts! You can prepare the sauce (cream cheese, ranch seasoning, and chicken broth) up to 24 hours in advance, storing it in an airtight container in the refrigerator to maintain freshness. Additionally, you can cook the penne pasta and store it separately to avoid it becoming mushy. Just be sure to toss the pasta with a bit of olive oil to prevent sticking. When you’re ready to serve, simply heat the sauce in a skillet, add the chicken and bacon, mix in the cooked pasta, and let it gain warmth before sprinkling the shredded cheddar on top. This way, you’ll enjoy a creamy, comforting meal just as delicious as if it were freshly made!

Expert Tips for Creamy Chicken Penne

  • Taste Adjustment: Start with less ranch seasoning, as too much can overpower the dish. You can always add more for personal taste preferences.
  • Avoid Clumping: Stir the cheese continually as it melts; this prevents clumping and ensures a smooth creamy sauce for your Chicken Penne.
  • Pasta Timing: Make sure to cook the penne al dente; it will absorb flavors from the sauce and prevent mushiness when combined.
  • Leftover Storage: Store any leftover Creamy Chicken Penne in an airtight container in the fridge, consuming within three days for the best flavor and safety.
  • Customization Options: Feel free to swap chicken with turkey or chickpeas for a hearty variation while adhering to your flavor preferences!

How to Store and Freeze Chicken Penne

Fridge: Store leftover Creamy Chicken Penne in an airtight container for up to 3 days. Reheat in the microwave or on the stovetop, adding a splash of chicken broth to keep it creamy.

Freezer: Freeze Chicken Penne in a freezer-safe container for up to 3 months. Thaw overnight in the fridge before reheating for the best texture.

Reheating: When reheating, add a splash of milk or broth to restore the creamy consistency. Heat gently on the stove or microwave until warmed through.

Chicken Penne Variations & Substitutions

Feel free to tweak this recipe and make it sing to your taste buds!

  • Gluten-Free: Use your favorite gluten-free pasta to enjoy this dish without compromising on flavor.
  • Low-Fat: Substitute reduced-fat cream cheese for a lighter yet creamy version that everyone will love.
  • Vegetarian Twist: Swap shredded chicken for chickpeas or lentils to create a satisfying vegetarian version.
  • Cheese Lovers: Mix in mozzarella or a blend of cheeses for a delightful twist on the traditional flavor profile.
  • Spicy Kick: Add a pinch of red pepper flakes or some diced jalapeños to bring a delightful heat to your creamy comfort food.
  • Sautéed Veggies: Include colorful sautéed bell peppers or spinach to enhance both the nutrition and visual appeal of the dish.
  • Herbal Upgrade: Stir in some fresh herbs like basil or parsley towards the end for an aromatic lift that brightens each bite.
  • Bacon Alternatives: Try swapping regular bacon for turkey bacon or even crispy bits of pancetta for a unique savory flavor.

Now that you’ve got all these delicious ideas, it’s time to mix, match, and make this Chilli Chicken Takeout style dish your own! Whether it’s for a family dinner or a potluck, your culinary creativity will surely impress. Don’t forget to check out my Blt Chicken Salad for another delightful dive into flavor!

What to Serve with Creamy Crack Chicken Penne

Imagine a dinner table where comfort and flavor come together, making your meal truly memorable.

  • Simple Green Salad: A fresh, crunchy salad with a tangy vinaigrette cuts through the richness of the creamy Chicken Penne.
  • Garlic Breadsticks: Soft and buttery breadsticks add a delightful crunch, perfect for mopping up that creamy sauce. They’re a family favorite!
  • Roasted Vegetables: Try seasonal veggies like asparagus or broccoli for a nutritious pairing. Their earthy flavors balance the dish beautifully.
  • Steamed Green Beans: Tender green beans add a lovely pop of color and freshness, complementing the hearty pasta.
  • Fruit Salad: A bright, chilled fruit salad provides a refreshing contrast to the warm, cheesy pasta and brings a hint of sweetness to the meal.
  • Chilled White Wine: A light, crisp Sauvignon Blanc offers a refreshing sip that enhances the flavors of the Chicken Penne perfectly.
  • Dessert Option: Top off the meal with a light lemon sorbet for a zesty finish that cleanses the palate after the rich main course.

Creamy Chicken Penne Recipe FAQs

How do I choose the right pasta for my Creamy Chicken Penne?
Absolutely! When selecting penne pasta, look for brands that offer gluten-free options if necessary. Make sure the pasta is firm to the touch and free from any dark spots or cracks, as this indicates freshness. If you’re feeling adventurous, try whole wheat or spinach penne for added flavor and nutrition.

What is the best way to store leftover Creamy Chicken Penne?
To store your leftover Creamy Chicken Penne, place it in an airtight container, and refrigerate it. It should last up to 3 days. When ready to enjoy it again, I recommend reheating it gently on the stovetop with a splash of chicken broth or milk to restore its creamy texture.

Can I freeze Creamy Chicken Penne?
Very! To freeze your Creamy Chicken Penne, first, allow it to cool completely. Then, transfer it to a freezer-safe container or a resealable plastic bag, removing as much air as possible. It can be frozen for up to 3 months. When you’re ready to eat it, thaw it overnight in the refrigerator, then reheat gently on the stove, adding a splash of broth or milk to bring it back to life.

What if my sauce is too thick?
If your sauce ends up being too thick, simply add a little more chicken broth or milk, one tablespoon at a time, while stirring over low heat. This will help loosen it up and ensure that every piece of pasta is beautifully coated in creamy goodness. Don’t be discouraged; cooking is all about adjusting!

Are there any dietary considerations for pets or allergies?
It’s always wise to consider allergies! This Creamy Chicken Penne contains dairy and gluten, making it unsuitable for those with lactose intolerance or gluten sensitivity. Always check the ingredients, especially the ranch seasoning mix, which may contain additives. If you have pets, avoid offering this dish to them, as some ingredients like garlic in ranch seasoning can be harmful to dogs and cats.

Can I make adjustments to the protein in Creamy Chicken Penne?
Absolutely! If you want to switch up the protein, feel free to use shredded turkey instead of chicken, or substitute with a vegetarian option like chickpeas or lentils. For a richer flavor, consider adding sautéed mushrooms or spinach to incorporate more nutrition while keeping the dish satisfying and delicious.

Chicken Penne

Creamy Chicken Penne That Will Make Your Taste Buds Dance

Enjoy the warmth of home with this creamy chicken penne, featuring savory bacon and cheese, perfect for family dinners.
Prep Time 10 minutes
Cook Time 20 minutes
Total Time 30 minutes
Servings: 4 servings
Course: Pasta
Cuisine: Italian
Calories: 580

Ingredients
  

For the Pasta
  • 8 oz Penne Pasta Use gluten-free pasta for a gluten-free version.
For the Sauce
  • 8 oz Cream Cheese Opt for reduced-fat cream cheese for lower fat.
  • 1 packet Ranch Seasoning Mix Adjust to taste as it can be potent.
  • 1 cup Chicken Broth Vegetable broth can be used for vegetarian version.
For the Protein
  • 2 cups Cooked Chicken, shredded Leftover rotisserie chicken works well.
  • 1/2 cup Cooked Bacon, crumbled Consider turkey bacon for a leaner option.
For the Topping
  • 1 cup Shredded Cheddar Cheese Sharp cheddar enhances the flavor.
  • 1/4 cup Chopped Green Onions Adds freshness as a garnish.

Equipment

  • Large pot
  • Colander
  • Large skillet
  • Wooden spoon

Method
 

Step-by-Step Instructions for Creamy Chicken Penne
  1. Bring a large pot of salted water to a boil. Add penne pasta and cook until al dente, about 10-12 minutes. Drain and set aside.
  2. In a large skillet, combine cream cheese, ranch seasoning mix, and chicken broth over medium heat. Stir continuously until smooth, about 5 minutes.
  3. Fold in shredded chicken and crumbled bacon into the sauce. Stir well and heat through for about 3-4 minutes.
  4. Add the cooked penne pasta to the skillet and toss to coat in the sauce, about 2-3 minutes.
  5. Sprinkle shredded cheddar cheese over the mixture and cover the skillet. Reduce heat and allow cheese to melt for 3-5 minutes.
  6. Garnish with chopped green onions and serve immediately.

Nutrition

Serving: 1servingCalories: 580kcalCarbohydrates: 50gProtein: 28gFat: 30gSaturated Fat: 15gCholesterol: 100mgSodium: 800mgPotassium: 500mgFiber: 3gSugar: 2gVitamin A: 300IUVitamin C: 2mgCalcium: 200mgIron: 2mg

Notes

Feel free to customize by adding sautéed veggies or different cheese varieties.

Tried this recipe?

Let us know how it was!

Pumpkin Cottage Cheese Muffins for a Cozy Fall Treat

There’s a certain magic that happens when autumn arrives, and it fills the air with the cozy scent of pumpkins and spices. That’s exactly the feeling I capture with these delightful Pumpkin Cottage Cheese Muffins. They’re not just any muffin; they’re a soft, protein-packed treat that’s incredibly easy to whip up. Perfect for breakfast, a snack, or even a light dessert, these muffins are naturally sweetened and bring a deliciously healthy twist to traditional fall flavors. Imagine enjoying a warm muffin that’s fluffy and rich in protein while knowing you’re nourishing your body, too! Plus, they freeze beautifully, making them a great option for meal prep or sharing with loved ones. Curious how to bring this autumn delight to your kitchen? Let’s dive into the recipe!

Why are Pumpkin Cottage Cheese Muffins a Must-Try?

Fluffiness: These muffins are incredibly light and airy, thanks to the cottage cheese that elevates their texture, making each bite a delight.
Nutritious: Packed with protein and whole wheat goodness, they’re a smart choice for health-conscious bakers.
Versatile Flavors: Enjoy them plain, or enhance the experience by serving warm with a spread of butter or cream cheese.
Seasonal Appeal: The warm spices perfectly capture the essence of fall, making them a favorite for any autumn gathering.
Make Ahead: These muffins freeze well, so you can whip up a batch in advance for those busy mornings, just like you’ll love doing with our Joumou Haitian Pumpkin soup or Strawberry Cheesecake Dump cake.
Treat yourself to these sweet, cozy muffins and share the joy with family and friends!

Pumpkin Cottage Cheese Muffin Ingredients

• Gather your ingredients to create these delightful Pumpkin Cottage Cheese Muffins!

For the Muffin Batter

  • Pumpkin Purée – Use unsweetened pure pumpkin for the best moisture and flavor.
  • Cottage Cheese – Blend for a smoother texture, adding fluffiness and protein to your muffins.
  • Eggs – Essential for binding and adding moisture to your batter.
  • Maple Syrup – A natural sweetener; feel free to adjust the amount for desired sweetness.
  • Vanilla Extract – Enhances all the delicious flavors of the muffins.
  • Whole Wheat Flour – Provides structure; can be substituted with all-purpose flour or gluten-free blend.
  • Baking Soda & Baking Powder – These leavening agents help your muffins rise perfectly.
  • Salt – Balances sweetness; try reducing it to enhance flavor.
  • Cinnamon – Adds warmth that complements the fall flavors beautifully.
  • Pumpkin Spice – Boosts the traditional taste of fall; adjust according to preference.
  • Coconut Oil (or Unsalted Butter) – Contributes moisture and a rich flavor to the muffins.

For Optional Toppings

  • Pumpkin Seeds or Nuts – Sprinkle them on top for added crunch before baking.
  • Chocolate Chips – Add to the batter for a sweet twist if you’re feeling indulgent!

With these ingredients in hand, you’re ready to create delightful Pumpkin Cottage Cheese Muffins that are both tasty and nourishing!

Step‑by‑Step Instructions for Pumpkin Cottage Cheese Muffins

Step 1: Mix Wet Ingredients
In a large mixing bowl, whisk together 1 cup of pumpkin purée, 1 cup of cottage cheese, 2 eggs, 1/3 cup of maple syrup, and 1 teaspoon of vanilla extract until the mixture is smooth and creamy. This will ensure that the flavors are well combined, setting the foundation for your delicious Pumpkin Cottage Cheese Muffins.

Step 2: Combine Dry Ingredients
In a separate medium bowl, sift together 1 ½ cups of whole wheat flour, 1 teaspoon of baking soda, 1 teaspoon of baking powder, ½ teaspoon of salt, 1 teaspoon of ground cinnamon, and 1 teaspoon of pumpkin spice. Stir these dry ingredients until well mixed, which will help promote even distribution of the leavening agents and spices for your muffins.

Step 3: Fold Together
Gently fold the dry ingredient mixture into the wet ingredients using a spatula. Be careful to combine them until just mixed; overmixing can create dense muffins. The goal is to have a slightly lumpy batter for your light and fluffy Pumpkin Cottage Cheese Muffins.

Step 4: Prepare Muffin Tin
Line a 12-count muffin tin with paper liners or lightly spray each muffin cup with nonstick spray. This preparation helps the muffins to release easily after baking and adds convenience when serving your delightful treats.

Step 5: Fill Muffin Cups
Using a scoop or spoon, fill each muffin cup with the batter, ensuring you fill them about ¾ full to allow the muffins room to rise. The batter should be evenly distributed to create uniform and beautiful Pumpkin Cottage Cheese Muffins during baking.

Step 6: Bake
Preheat your oven to 350°F (175°C) and place the muffin tin in the center of the oven. Bake for 18-22 minutes, or until a toothpick inserted into the center of a muffin comes out clean, indicating that they are perfectly cooked and fluffy.

Step 7: Cool
Once baked, allow the muffins to cool in the pan for about 5 minutes before carefully transferring them to a wire rack. This cooling process helps the Pumpkin Cottage Cheese Muffins firm up, making them easier to handle and enjoy as they’re set to be served warm.

What to Serve with Pumpkin Cottage Cheese Muffins

These delightful muffins are just the beginning of a cozy meal that embodies the essence of fall.

  • Warm Butter: A spread of creamy butter melting over a warm muffin enhances the rich, moist texture, creating a comforting bite.
  • Cream Cheese Spread: Try pairing your muffins with a tangy cream cheese spread for a delightful contrast that elevates your treat.
  • Apple Slices with Cinnamon: Crisp, fresh apple slices dusted with cinnamon add a refreshing crunch that complements the muffin’s spiced flavors.
  • Maple Syrup Drizzle: For a touch of sweetness, drizzle warm maple syrup over the muffins, making every bite taste like fall bliss.
  • Fruit Salad: A light fruit salad with seasonal fruits creates a vibrant contrast to the dense muffin; think pears, pomegranates, and oranges.
  • Chai Tea: Brew a cup of spiced chai tea to sip alongside your muffins, enhancing the warm flavors with its fragrant spices.
  • Hot Chocolate: On a chilly day, indulge in a rich hot chocolate for a sweet, comforting pairing that feels like a warm hug in a mug.

Pumpkin Cottage Cheese Muffins Variations

Feel free to get creative and make these muffins your own with delightful twists that enhance flavors and cater to your dietary needs!

  • Sweetener Swap: Substitute maple syrup with honey or coconut sugar. Adjust according to preference for a sweeter bite, inviting different flavor depths.

  • Gluten-Free Delight: Replace whole wheat flour with a 1:1 gluten-free flour blend to cater to gluten sensitivities while still enjoying moist muffins.

  • Dairy-Free Option: Use a dairy-free cottage cheese alternative for a muffin that’s friendly to lactose intolerant or vegan lifestyles, maintaining that fluffy texture.

  • Chocolate Indulgence: Add ½ cup of chocolate chips to the batter for a decadent chocolatey twist—because who doesn’t love a hint of sweetness with their pumpkin spice?

  • Nuts & Seeds: Enhance the texture by tossing in some chopped nuts or pumpkin seeds, giving your muffins a satisfying crunch and boosting the health benefits.

  • Spice It Up: Explore flavors further by increasing the cinnamon or pumpkin spice. You could also add a pinch of nutmeg for that extra fall warmth!

  • Add Fruits: Mix in ½ cup of dried cranberries or apple pieces to bring a tart sweetness, creating a beautiful blend of flavors that’s as pleasing to the palate as it is to the eyes.

  • Mix in Zucchini: For a vegetable twist, fold in some grated zucchini—an excellent way to sneak in more veggies and maintain moisture in the muffins.

Each variation brings its charm and flavor to your Pumpkin Cottage Cheese Muffins, letting you create a unique treat every time! Perfect to enjoy warm or share during family gatherings, just like with our savory Chicken Grilled Cheese or rich Strawberry Cheesecake recipes. Enjoy your baking adventure!

Make Ahead Options

These Pumpkin Cottage Cheese Muffins are perfect for meal prep, making busy mornings a breeze! You can refrigerate the batter for up to 24 hours, allowing the flavors to meld beautifully. Simply mix the wet and dry ingredients, combine, and store in an airtight container in the fridge. You can also bake the muffins completely ahead of time; they freeze exceptionally well for up to 3 months. To do this, let the muffins cool completely and store them in a freezer-safe bag. When you’re ready to enjoy them, simply thaw overnight in the refrigerator and reheat in the oven for a freshly baked taste. You’ll treasure the time saved without compromising on the delightful flavors of these muffins!

How to Store and Freeze Pumpkin Cottage Cheese Muffins

Room Temperature: Keep muffins in an airtight container at room temperature for up to 3 days to preserve their softness.

Fridge: Store in the refrigerator for up to 1 week; be sure to place them in a sealed bag or container to prevent them from drying out.

Freezer: For longer storage, freeze cooled muffins in an airtight bag for up to 3 months. Thaw them in the fridge overnight or at room temperature before enjoying.

Reheating: To reheat, pop the muffins in the microwave for 10-15 seconds or warm them in a toaster oven for a few minutes until heated through, ensuring your Pumpkin Cottage Cheese Muffins taste fresh!

Expert Tips for Pumpkin Cottage Cheese Muffins

  • Smooth Texture: Blend the cottage cheese before adding it to the mix for a creamier consistency. This helps avoid any lumps in your muffins.
  • Pure Pumpkin Only: Always use unsweetened pure pumpkin purée, steering clear of pie filling to ensure your muffins don’t end up overly sweet.
  • Avoid Overmixing: Mix your wet and dry ingredients just until combined—a few lumps are okay. Overmixing will lead to denser Pumpkin Cottage Cheese Muffins.
  • Enhance Flavor: After baking, let your muffins cool for about 10 minutes before serving. This resting time allows rich flavors to develop beautifully.
  • Custom Toppings: Feel free to sprinkle pumpkin seeds or nuts on top before baking for extra crunch, making your muffins even more delightful!

Pumpkin Cottage Cheese Muffins Recipe FAQs

What type of pumpkin purée should I use?
Absolutely! Make sure to use unsweetened pure pumpkin purée and avoid canned pumpkin pie filling, as pie filling contains added sugars and spices that can alter the flavor and texture of your muffins.

How should I store my Pumpkin Cottage Cheese Muffins?
You can keep your muffins in an airtight container at room temperature for about 3 days. If you’re planning to enjoy them over a longer period, refrigerate them for up to 1 week in a sealed bag or container to maintain freshness.

Can I freeze Pumpkin Cottage Cheese Muffins?
Yes, you can freeze your muffins! Once they have cooled completely, place them in an airtight freezer bag. They’ll be good for up to 3 months. To enjoy, simply thaw them overnight in the refrigerator or let them sit at room temperature for a couple of hours.

What should I do if my batter is too thick?
If you find your muffin batter is too thick, add a tablespoon of milk or water at a time until the desired consistency is achieved. Just be careful not to add too much, as the muffins could become dense. Remember, the goal is a slightly lumpy batter for fluffy muffins!

Can my pets eat these muffins?
It’s better to avoid sharing these muffins with pets. The cottage cheese and maple syrup may not be suitable for their diets. Always consult your vet if you’re unsure about what human foods are safe for your furry friends!

Are there any common allergen substitutions for the ingredients?
Certainly! For a gluten-free option, use a 1:1 gluten-free flour blend instead of whole wheat flour. If you’re avoiding dairy, you can swap cottage cheese for a dairy-free alternative. Plus, honey can be substituted for maple syrup if you’re looking for a different sweetener.

Pumpkin Cottage Cheese Muffins

Pumpkin Cottage Cheese Muffins for a Cozy Fall Treat

Pumpkin Cottage Cheese Muffins are a soft, protein-packed treat, perfect for breakfast or snacks, capturing the essence of fall flavors.
Prep Time 10 minutes
Cook Time 22 minutes
Cooling Time 5 minutes
Total Time 37 minutes
Servings: 12 muffins
Course: Breakfast
Cuisine: American
Calories: 150

Ingredients
  

For the Muffin Batter
  • 1 cup pumpkin purée unsweetened pure for best moisture and flavor
  • 1 cup cottage cheese blend for smoother texture
  • 2 large eggs essential for binding
  • 1/3 cup maple syrup natural sweetener
  • 1 teaspoon vanilla extract enhances flavor
  • 1 1/2 cups whole wheat flour can substitute with all-purpose or gluten-free
  • 1 teaspoon baking soda leavening agent
  • 1 teaspoon baking powder leavening agent
  • 1/2 teaspoon salt balances sweetness
  • 1 teaspoon cinnamon adds warmth
  • 1 teaspoon pumpkin spice adjust to preference
  • 1/4 cup coconut oil or unsalted butter for moisture
For Optional Toppings
  • 1/4 cup pumpkin seeds for added crunch
  • 1/2 cup chocolate chips optional sweet twist

Equipment

  • Mixing bowls
  • Muffin Tin
  • whisk
  • spatula
  • Scoop

Method
 

Step-by-Step Instructions
  1. In a large mixing bowl, whisk together pumpkin purée, cottage cheese, eggs, maple syrup, and vanilla until smooth.
  2. In a separate bowl, sift together whole wheat flour, baking soda, baking powder, salt, cinnamon, and pumpkin spice.
  3. Gently fold the dry mixture into the wet ingredients until just combined.
  4. Line a muffin tin with liners or spray with nonstick spray.
  5. Fill each muffin cup about ¾ full with batter.
  6. Preheat oven to 350°F (175°C) and bake for 18-22 minutes.
  7. Allow muffins to cool in the pan for 5 minutes before transferring to a wire rack.

Nutrition

Serving: 1muffinCalories: 150kcalCarbohydrates: 20gProtein: 5gFat: 6gSaturated Fat: 4gMonounsaturated Fat: 2gCholesterol: 35mgSodium: 150mgPotassium: 150mgFiber: 2gSugar: 5gVitamin A: 500IUVitamin C: 1mgCalcium: 50mgIron: 1mg

Notes

Blend cottage cheese for a smoother texture. Use unsweetened pumpkin purée, avoiding pie filling. Do not overmix to keep muffins light and airy. Optional toppings can include pumpkin seeds or nuts for extra crunch.

Tried this recipe?

Let us know how it was!

Stay Connected

Get recipes via email: